
- Wet Filament: Prevention, Symptoms & Drying - July 18, 2024
- Sovol SV08 – Best PrusaSlicer Settings & Profile - June 26, 2024
- Sovol SV08 – Best Orca Slicer Settings & Profile - June 26, 2024
Disclosure: Links marked with * are Affiliate Links. I earn from qualifying purchases if you decide to make a purchase through these links – at no additional cost for you!
The Bambu Lab A1 mini can also be used with Cura as a slicer. I have tested the A1 mini in detail and also created a Cura profile for it. And in this article I’ll show you my Cura settings.
Although Cura has some advantages over Bambu Studio, there are these limitations when using Cura for the A1 mini:
- Only one filament: when using Cura, it is not possible to use the Automated Material System (AMS) for multicolor printing. The printer can only work with one filament at a time.
- Print progress display: The printer screen does not display the progress of the printing process.
The most important settings are summarized here in advance:
| PLA | PETG | |
|---|---|---|
| Print temperature | 220 °C | 255 °C |
| Print bed temperature | 60 °C | 70 °C |
| Speed (outer wall) | 150-200 mm/s | 150-200 mm/s |
| Retraction | 0.8 mm with 30 mm/s | 0.8 mm with 30 mm/s |
| Cooling | 100 % | 50-100 % |
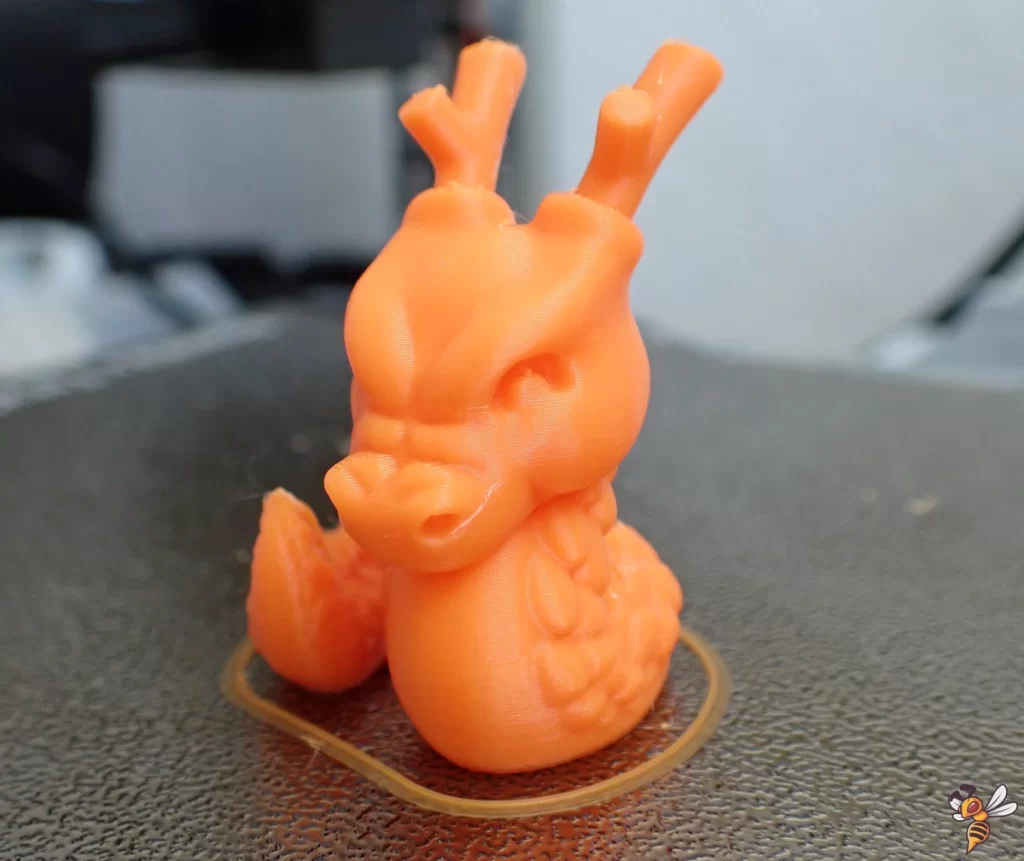
Table of Contents:
How to Create a Cura Profile for the Bambu Lab A1 mini
A 3D printer profile in Cura is essentially a collection of settings that are specifically configured for a particular 3D printer. It contains two main types of settings:
- Machine settings: These relate to the physical and technical properties of the printer such as build volume, print bed type, nozzle temperature and the like. They ensure that the software understands the capabilities and limitations of the printer.
- Print settings: They relate to the parameters of the actual printing process such as layer thickness, infill pattern, print speed and temperature control. These settings have a direct impact on the quality of the finished printed piece, including accuracy, strength and surface finish.
First, we take care of the machine settings. To do this, we need to create an empty profile for the printer and fill it with the correct parameters.
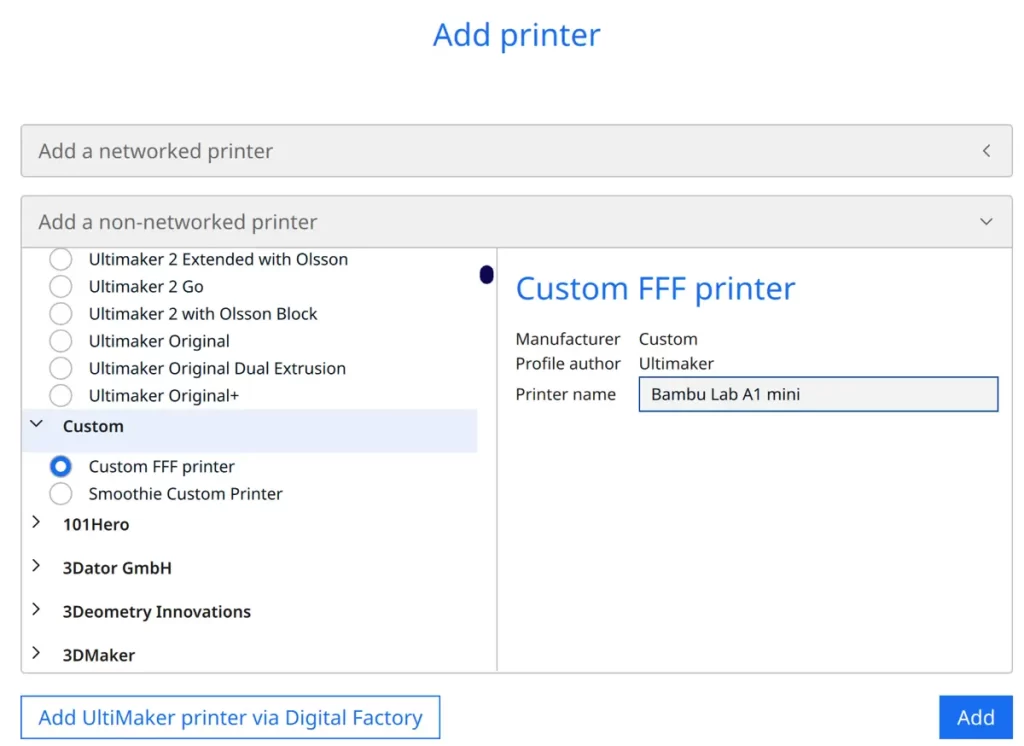
To add a 3D printer in Cura, follow these simple steps:
- Go to ‘Settings’ in Cura.
- Select ‘Printers’.
- Click on ‘Add printer’.
- Select ‘Non-networked printer’.
- Click on ‘Custom’ and then on ‘Custom FFF printer’.
- Enter the name of your printer.
- Click on ‘Add’.
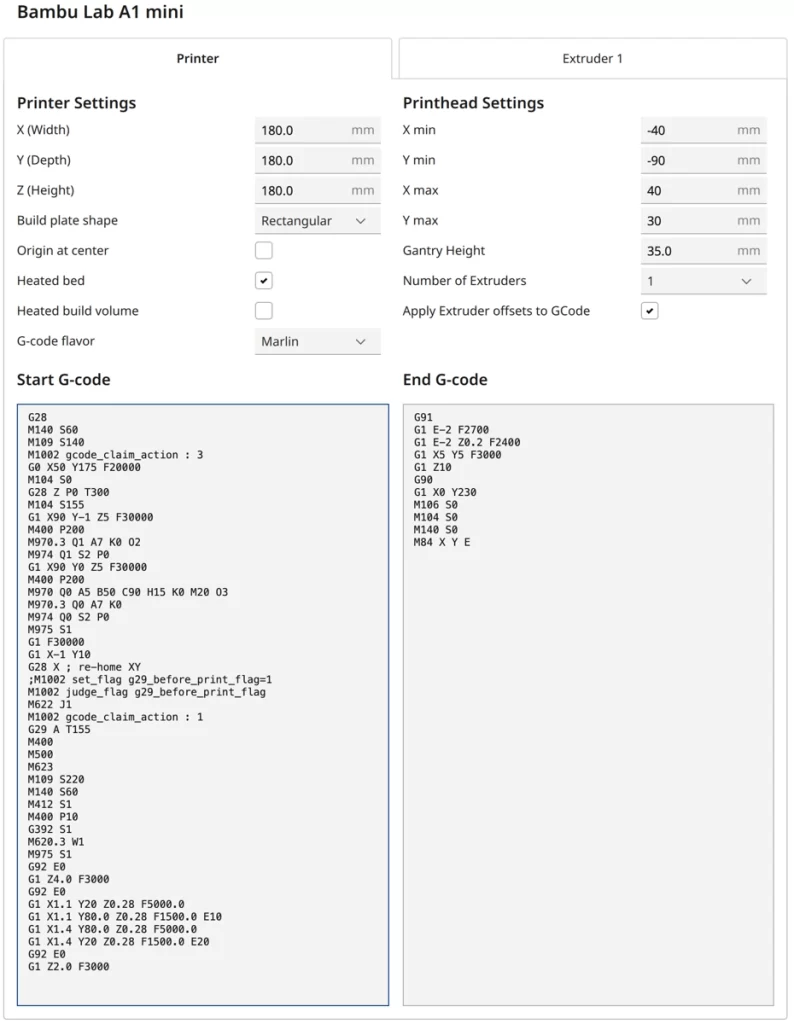
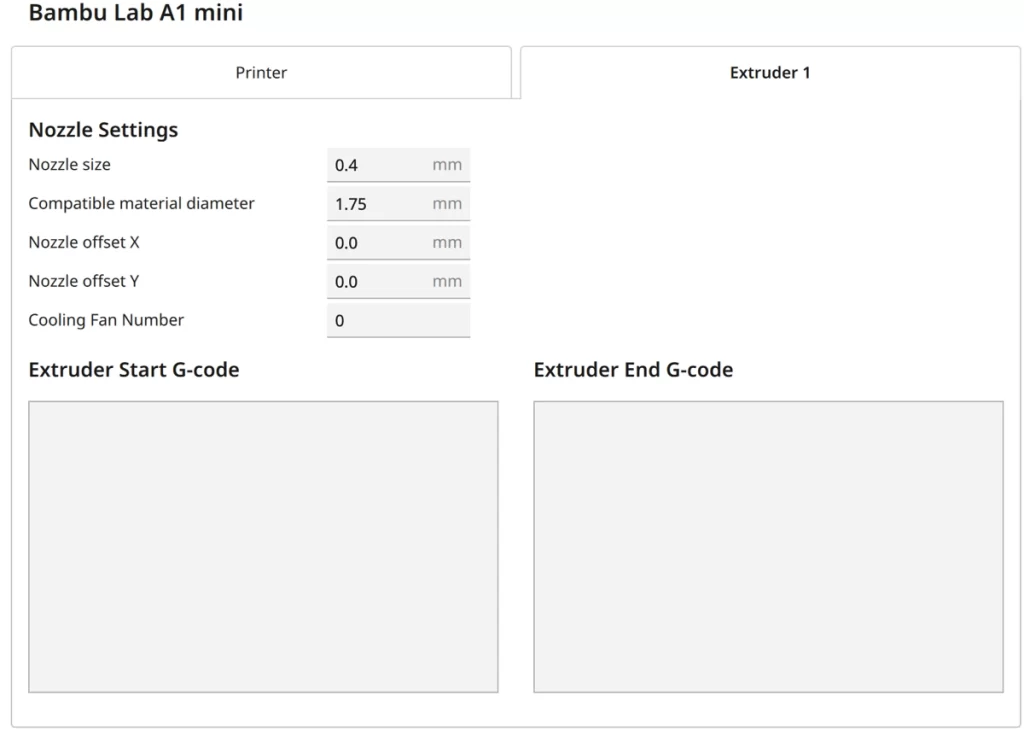
The screenshot above shows the machine settings for the A1 mini. And here the G-code snippets are listed again to make them easier to copy:
Start G-Code:
- G28
- M140 S60
- M109 S140
- M1002 gcode_claim_action : 3
- G0 X50 Y175 F20000
- M104 S0
- G28 Z P0 T300
- M104 S155
- G1 X90 Y-1 Z5 F30000
- M400 P200
- M970.3 Q1 A7 K0 O2
- M974 Q1 S2 P0
- G1 X90 Y0 Z5 F30000
- M400 P200
- M970 Q0 A5 B50 C90 H15 K0 M20 O3
- M970.3 Q0 A7 K0
- M974 Q0 S2 P0
- M975 S1
- G1 F30000
- G1 X-1 Y10
- G28 X
- m1002 set_flag g29_before_print_flag=1
- M1002 judge_flag g29_before_print_flag
- M622 J1
- M1002 gcode_claim_action : 1
- G29 A T155
- M400
- M500
- M623
- M109 S220
- M140 S60
- M412 S1
- M400 P10
- G392 S1
- M620.3 W1
- M975 S1
- G92 E0
- G1 Z4.0 F3000
- G92 E0
- G1 X1.1 Y20 Z0.28 F5000.0
- G1 X1.1 Y80.0 Z0.28 F1500.0 E10
- G1 X1.4 Y80.0 Z0.28 F5000.0
- G1 X1.4 Y20 Z0.28 F1500.0 E20
- G92 E0
- G1 Z2.0 F3000
End G-Code:
- G91
- G1 E-2 F2700
- G1 E-2 Z0.2 F2400
- G1 X5 Y5 F3000
- G1 Z10
- G90
- G1 X0 Y180
- M106 S0
- M104 S0
- M140 S0
- M84 X Y E
The start G-code is quite long, as it also contains the vibration compensation (input shaping) and the print bed leveling. In addition, the A1 mini waits at several points during the start process (for unknown reasons). Therefore, the total time of the startup process is several minutes.
After you have created the print profile for your 3D printer in Cura, the next important step is to adjust the print settings. These settings include factors such as layer thickness, infill density, print speed and temperature.
You can find more information on how to create a 3D printer profile in Cura and what you need to pay attention to in this article: How to Create a Custom 3D Printer Profile in Cura
The Best Cura Settings for the Bambu Lab A1 mini
Now that I have introduced the machine settings for the Bambu Lab A1 mini, let’s move on to the specific print settings.
Based on my experience, this printer needs little or no additional calibration, at most an adjustment of the print temperature and retraction might be necessary – depending on the filament. For detailed instructions on how to adjust the print temperature, you can find a helpful guide here: 3D Printer Calibration: Step-by-Step to Perfect Results
Many of the settings described are printer-independent. However, they are suitable for standard prints. Depending on the purpose of your print object, you may need to adjust them. I have marked the printer-independent and dependent settings.
Quality (printer-independent)
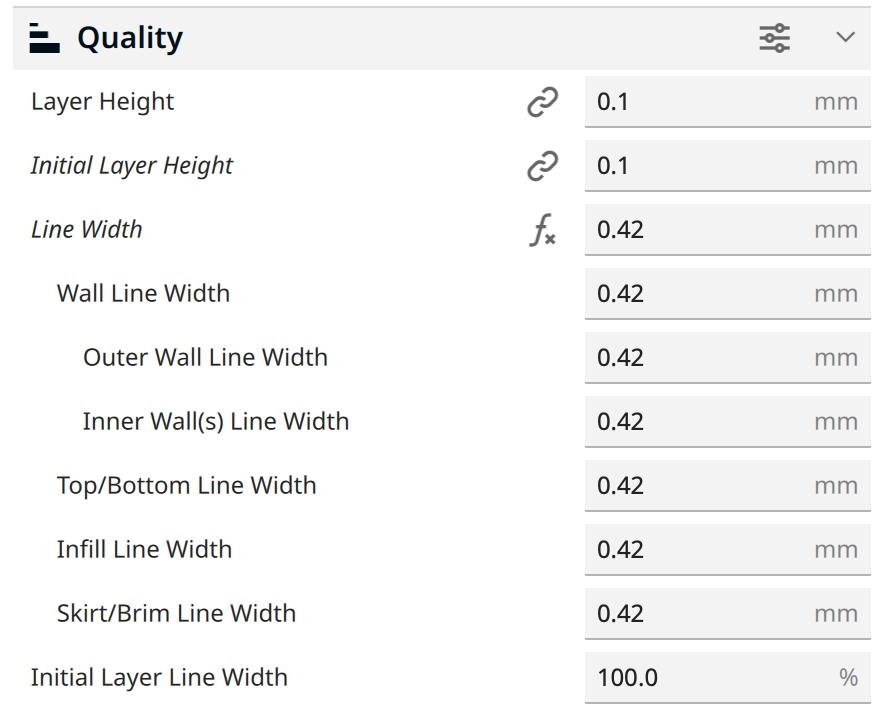
Here are the most important quality settings in Cura for the A1 Mini:
- Layer height: 0.1 mm
- Line width: 0.42 mm
The Bambu Lab A1 Mini masters printing with a layer height of 0.1 mm with flying colors. This setting is ideal for achieving detailed and smooth surfaces, which is particularly advantageous for fine models or complex geometries. The precise layer height of 0.1 mm helps to make the layers almost invisible, resulting in a high-quality result.
Walls (printer-independent)
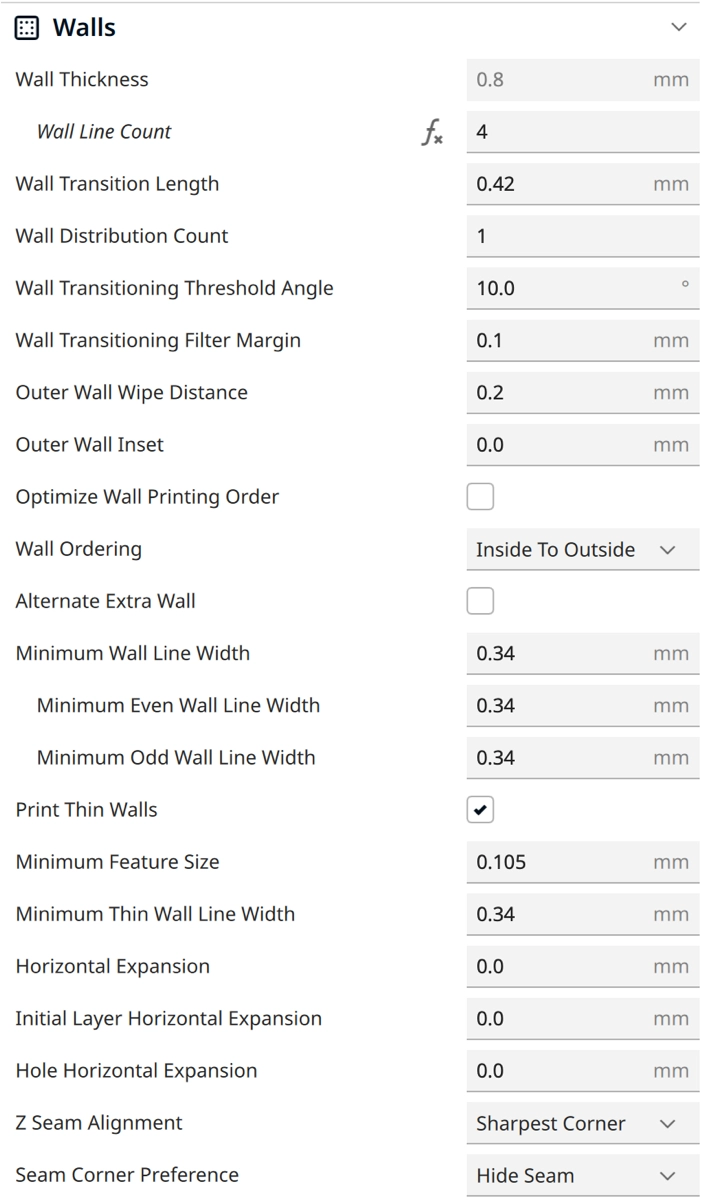
Here are the most important wall settings in Cura for the A1 Mini:
- Number of Walls: 4
- Z-Seam Alignment: Sharpest Corner
I prefer to print with four walls, as this is a solid compromise for most print projects. Four walls provide an excellent balance between durability and material usage without unnecessarily extending the print time. This setting ensures a robust outer structure of the printed object while providing enough stability for functional parts.
Top/Bottom (printer-independent)
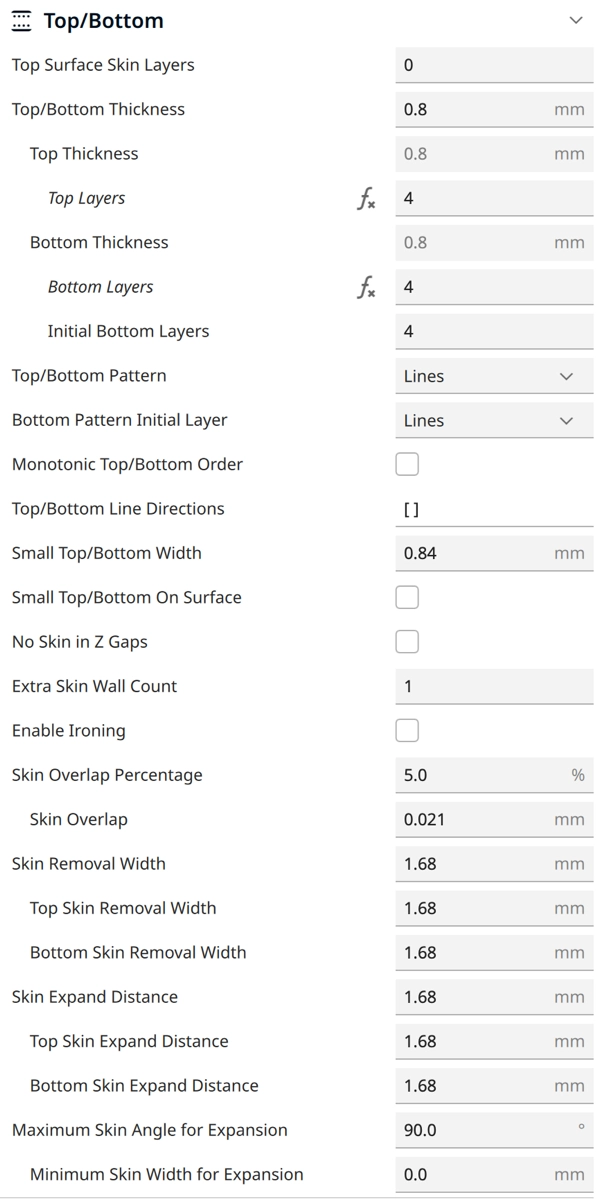
Here are the most important settings for the top and bottom layers in Cura for the A1 Mini:
- Number of Top/Bottom Layers: 4
Again, a compromise between short printing time and enough stability. Of course, just like the number of walls, this is only dependent on your print project and not on the printer itself.
Infill (printer-independent)
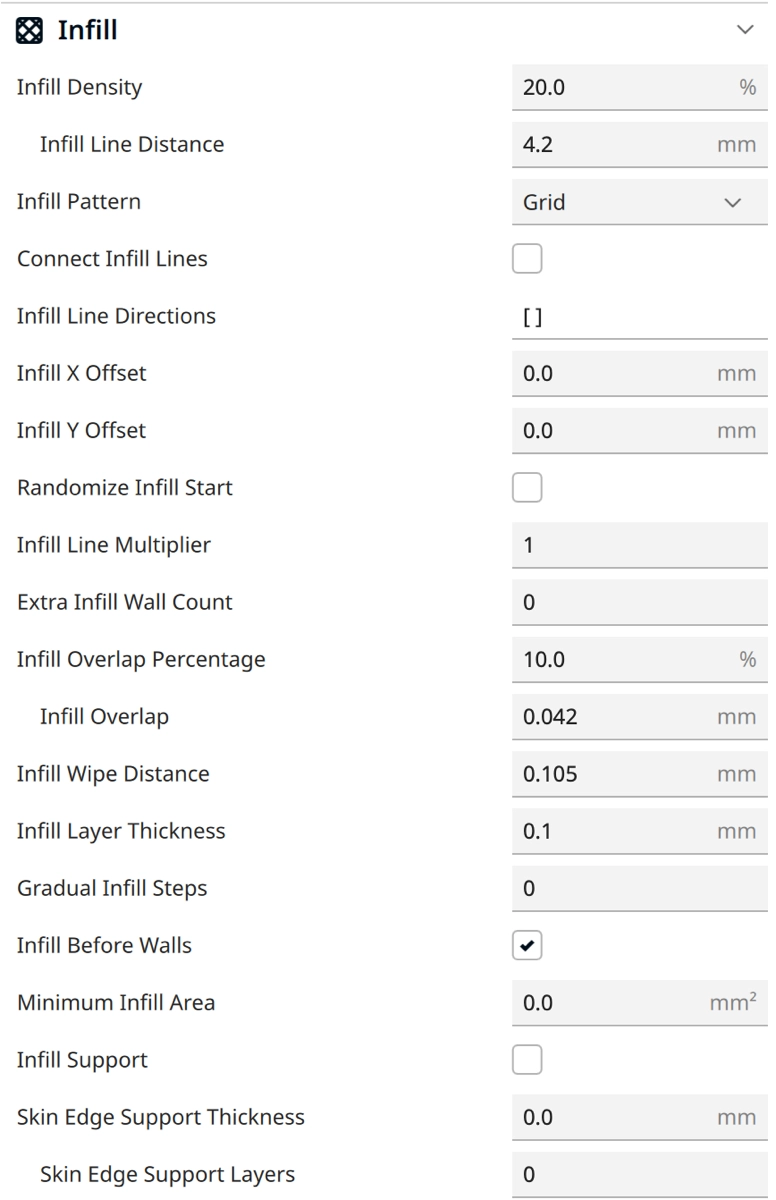
Here are the most important infill settings in Cura for the A1 Mini:
Infill Density:
- Decorative objects: 0-15%
- Standard objects: 15-50%
- Stable objects: 50-100%
Infill Pattern:
- Decorative objects: Lines or Zig Zag – These patterns are quick to print and provide enough support for objects that are mainly decorative.
- Standard objects: Grid or Tri-Hexagon – These offer a good balance between strength and material usage and are well suited for everyday objects.
- Stable objects: Cubic or Gyroid – These patterns are known for their high strength and are ideal for parts that need to withstand mechanical stress.
Material (printer-dependent)
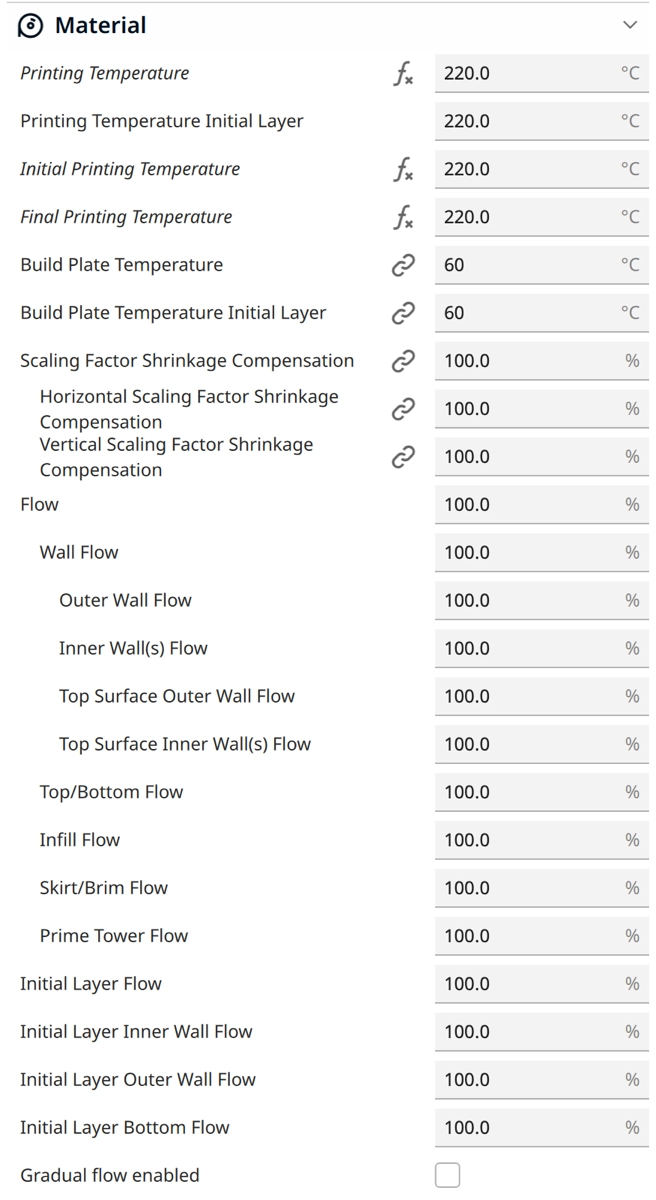
Here are the most important material settings in Cura for the A1 Mini:
- Print temperature: 220 °C (PLA), 255 °C (PETG)
- Print bed temperature: 60 °C (PLA), 70 °C (PETG)
As mentioned above, you may need to calibrate the print temperature for the filament you are using. In my experience, however, this is rarely necessary with the A1 Mini, as the printer is well adapted to different materials and often offers the correct temperature settings from the outset.
This makes the printing process much easier and allows even beginners to start printing quickly and without complicated adjustments.
Speed (printer-dependent)
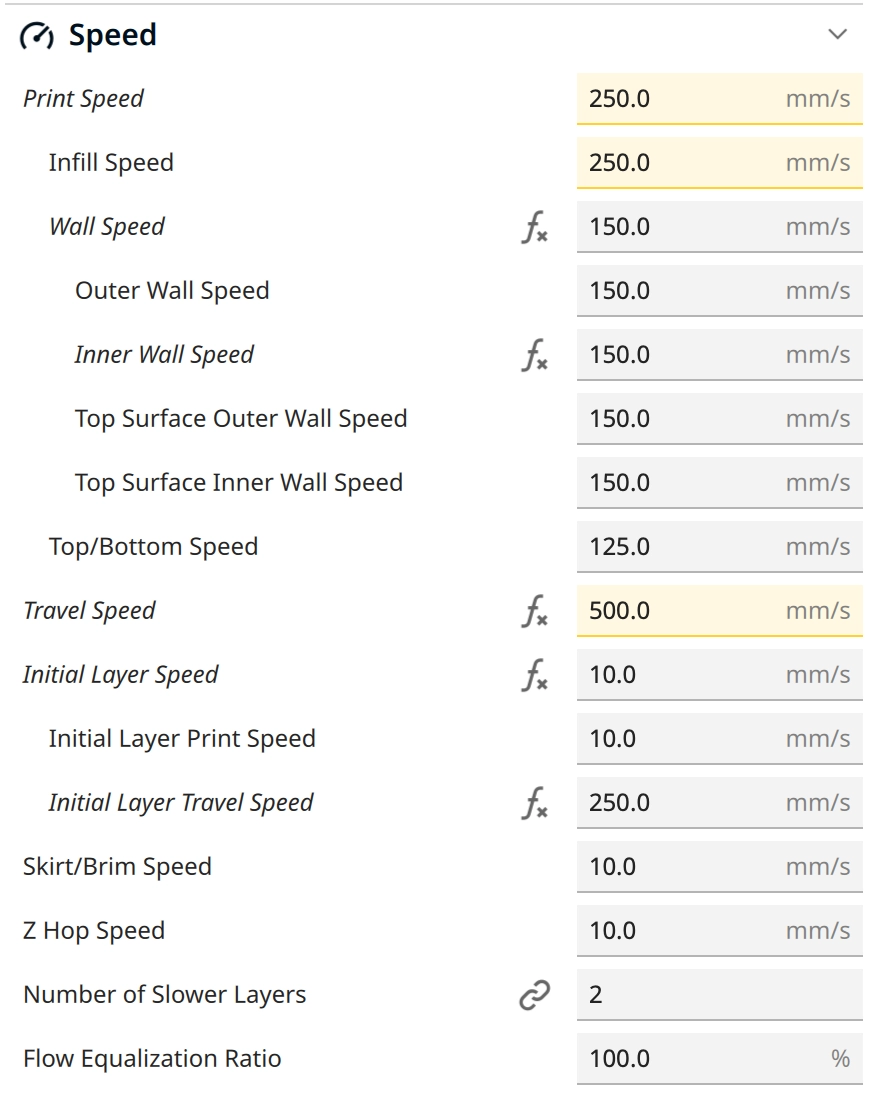
Here are the most important speed settings in Cura for the A1 Mini:
- Print speed: 250 mm/s
- Print speed of the outer walls: 150 mm/s
- Print speed of the first layer: 10 mm/s (improves print bed adhesion)
The Bambu Lab A1 mini can reach very high printing speeds. The speeds given here, which I used in Cura, are by no means the highest it can achieve. However, I have had the best experiences with them.
In addition to these speed settings, there are also important acceleration settings and jerk control.
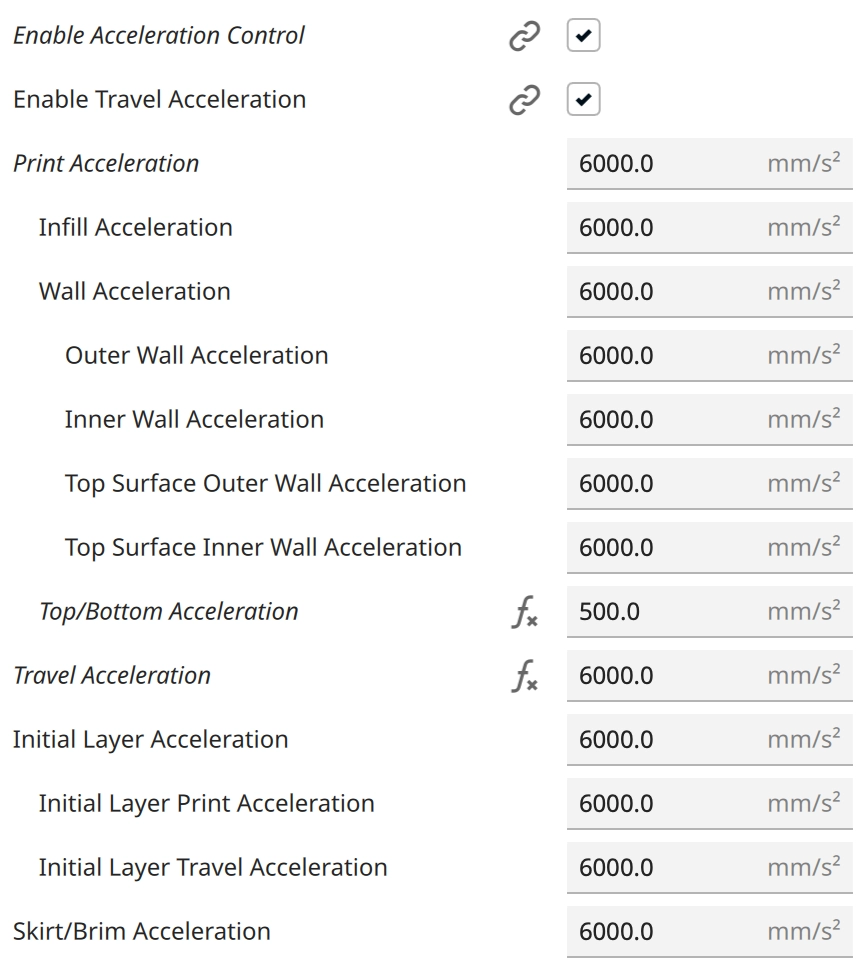
I have set the acceleration to 6000 mm/s² everywhere. I only reduced it to 500 mm/s² for the upper and lower layers.
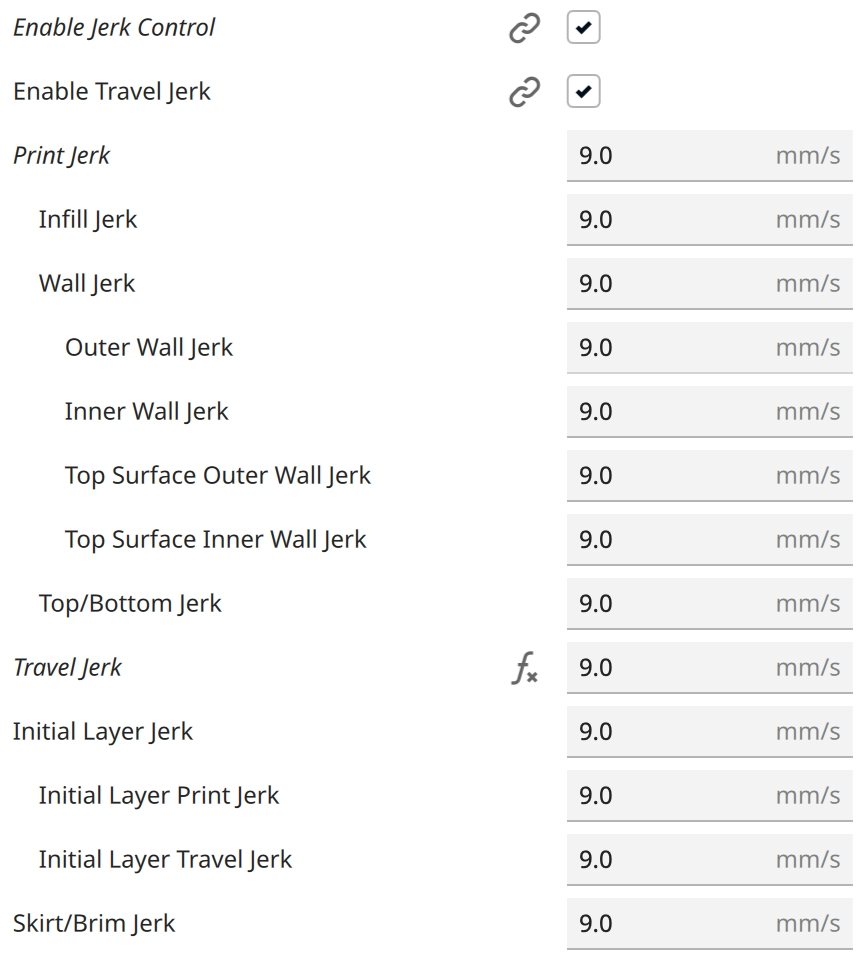
The Jerk Control in Cura determines how fast your 3D printer changes direction at the corners without acceleration. I set it to 9 mm per second to achieve a good balance between print speed and print quality.
Travel (printer-dependent)
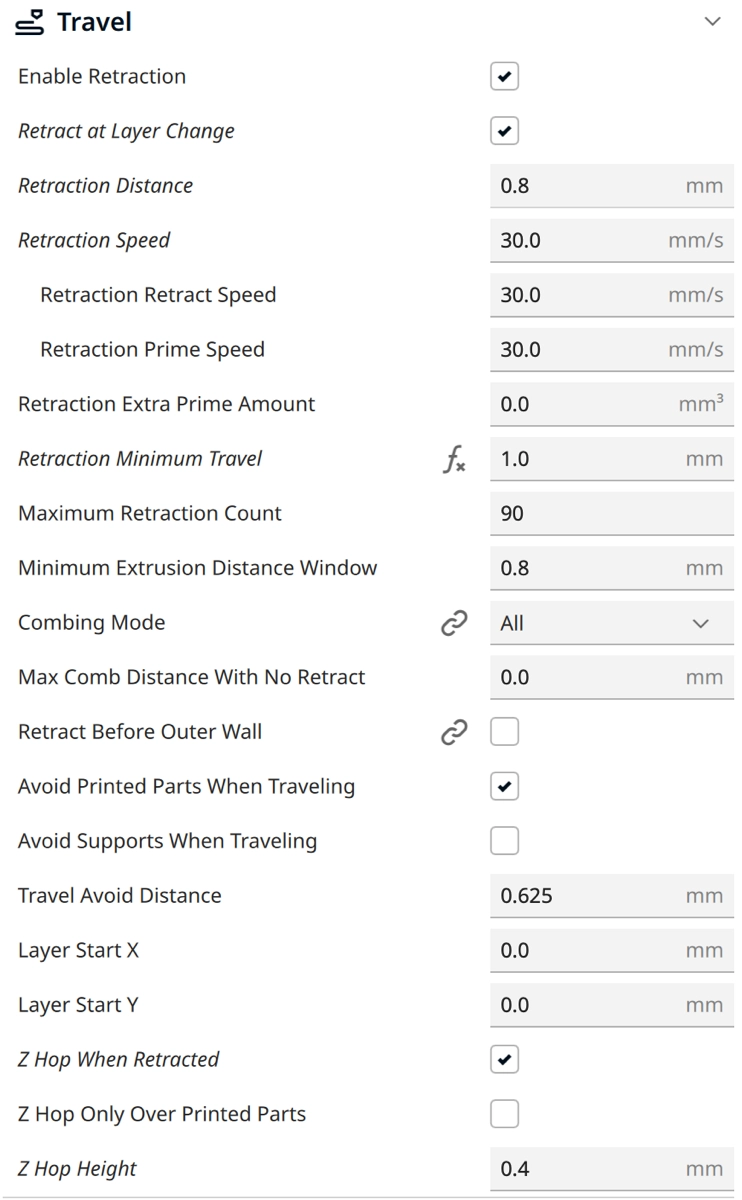
Here are the most important retraction settings in Cura for the A1 Mini:
- Retraction Distance: 0.8 mm
- Retraction Speed: 30 mm/s
Retraction on a 3D printer pulls the filament back briefly to prevent dripping and stringing when changing print positions. It should be carefully calibrated for perfect printing results. However, I have often found that the A1 mini delivers perfect results without additional calibration of the retraction.
Cooling (printer-dependent)
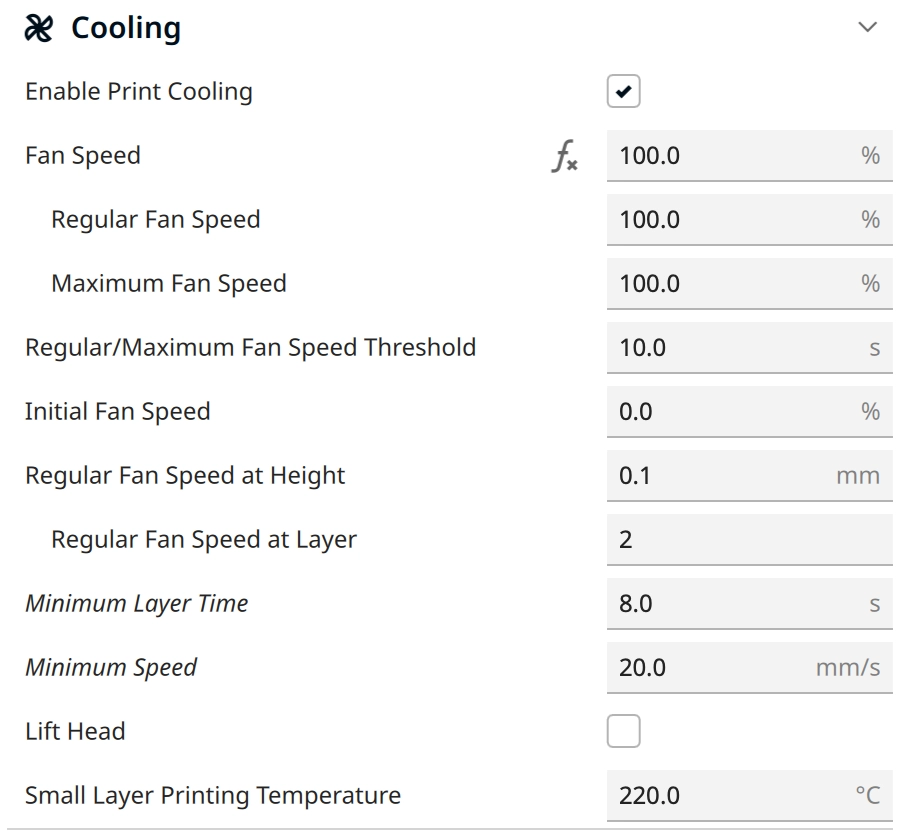
Here are the most important cooling settings in Cura for the A1 mini:
- Fan speed: 100% for PLA and 50-100% for PETG
- Minimum Layer Time: 5-10 s
The minimum layer time in Cura specifies the minimum time that should be spent on a layer during 3D printing to ensure that each layer has enough time to cool down before the next layer is applied. If it is set too low, this can lead to poor print quality as the layers cannot cool down sufficiently and can deform.
With my A1 Mini, I have had good experiences with a setting between 5 and 10 seconds. However, this value also depends on the filament used and the size of the object to be printed.
Other Cura Settings for the A1 mini
- Supports: Situational. I prefer tree supports. In this guide you will find my default settings for this.
- Skirt/Brim/Raft: The print bed of the A1 mini creates good adhesion for most filaments. Therefore, I always use only a Skirt as standard. If you have problems with adhesion, you can try a Brim or Raft.
- “Enable Bridge Settings”: Under the experimental settings, you will find the bridge settings. If you activate these, Cura will use different print settings for overhangs. If the object has overhangs, and you want to try to print it without supports first, I would recommend activating this option.
Conclusion
Even if you can achieve good printing results with the Bambu Lab A1 mini and these Cura settings, I would still always advise you to use the in-house slicer Bambu Studio. This makes it much easier to achieve perfect results.
But maybe you are dependent on a special feature of Cura. If so, I hope this guide with my tested Cura settings for the A1 Mini has helped you!
Disclosure: This website is the property of Martin Lütkemeyer and is operated by Martin Lütkemeyer. Martin Lütkemeyer is a member of the Amazon Services LLC and other Affiliate Programs. These are affiliate advertising programs designed to enable websites to earn advertising revenue through advertising and linking to Amazon.com and others. Links marked with * are affiliate links.
