
- Wet Filament: Prevention, Symptoms & Drying - July 18, 2024
- Sovol SV08 – Best PrusaSlicer Settings & Profile - June 26, 2024
- Sovol SV08 – Best Orca Slicer Settings & Profile - June 26, 2024
Disclosure: Links marked with * are Affiliate Links. I earn from qualifying purchases if you decide to make a purchase through these links – at no additional cost for you!
I have tested the Bambu Lab A1 mini with the AMS Lite* for a few weeks now. In this hands-on review, I show you what you can expect from this 3D printer and if the filament switcher upgrade, the “AMS Lite”, is worth it.
Without being paid to say this, I think that the Bambu Lab A1 mini is a game-changer in the world of affordable 3D printers and the best entry-level 3D printer currently on the market!
One of the standout features of the A1 mini is its ability to print with multiple filaments. This is made possible by the AMS Lite spool holder, which allows for automatic filament switching between four spools during print jobs. This means you can create prints with multiple colors or materials without having to manually change filaments.
How this combined with the self-calibration impacted the print quality and the creative possibilities, you’ll see in this review.
Who should by the Bambu Lab A1 mini?
- Beginners: The A1 mini is very user-friendly and easy to use, making it a great option for those new to 3D printing.
- Multicolor enthusiasts: If you love creating multicolor prints, the AMS Lite functionality on the A1 mini will be a game-changer for you.
- High-quality seekers: With excellent print quality and high-quality components, the A1 mini is a great choice for those who want perfect results.
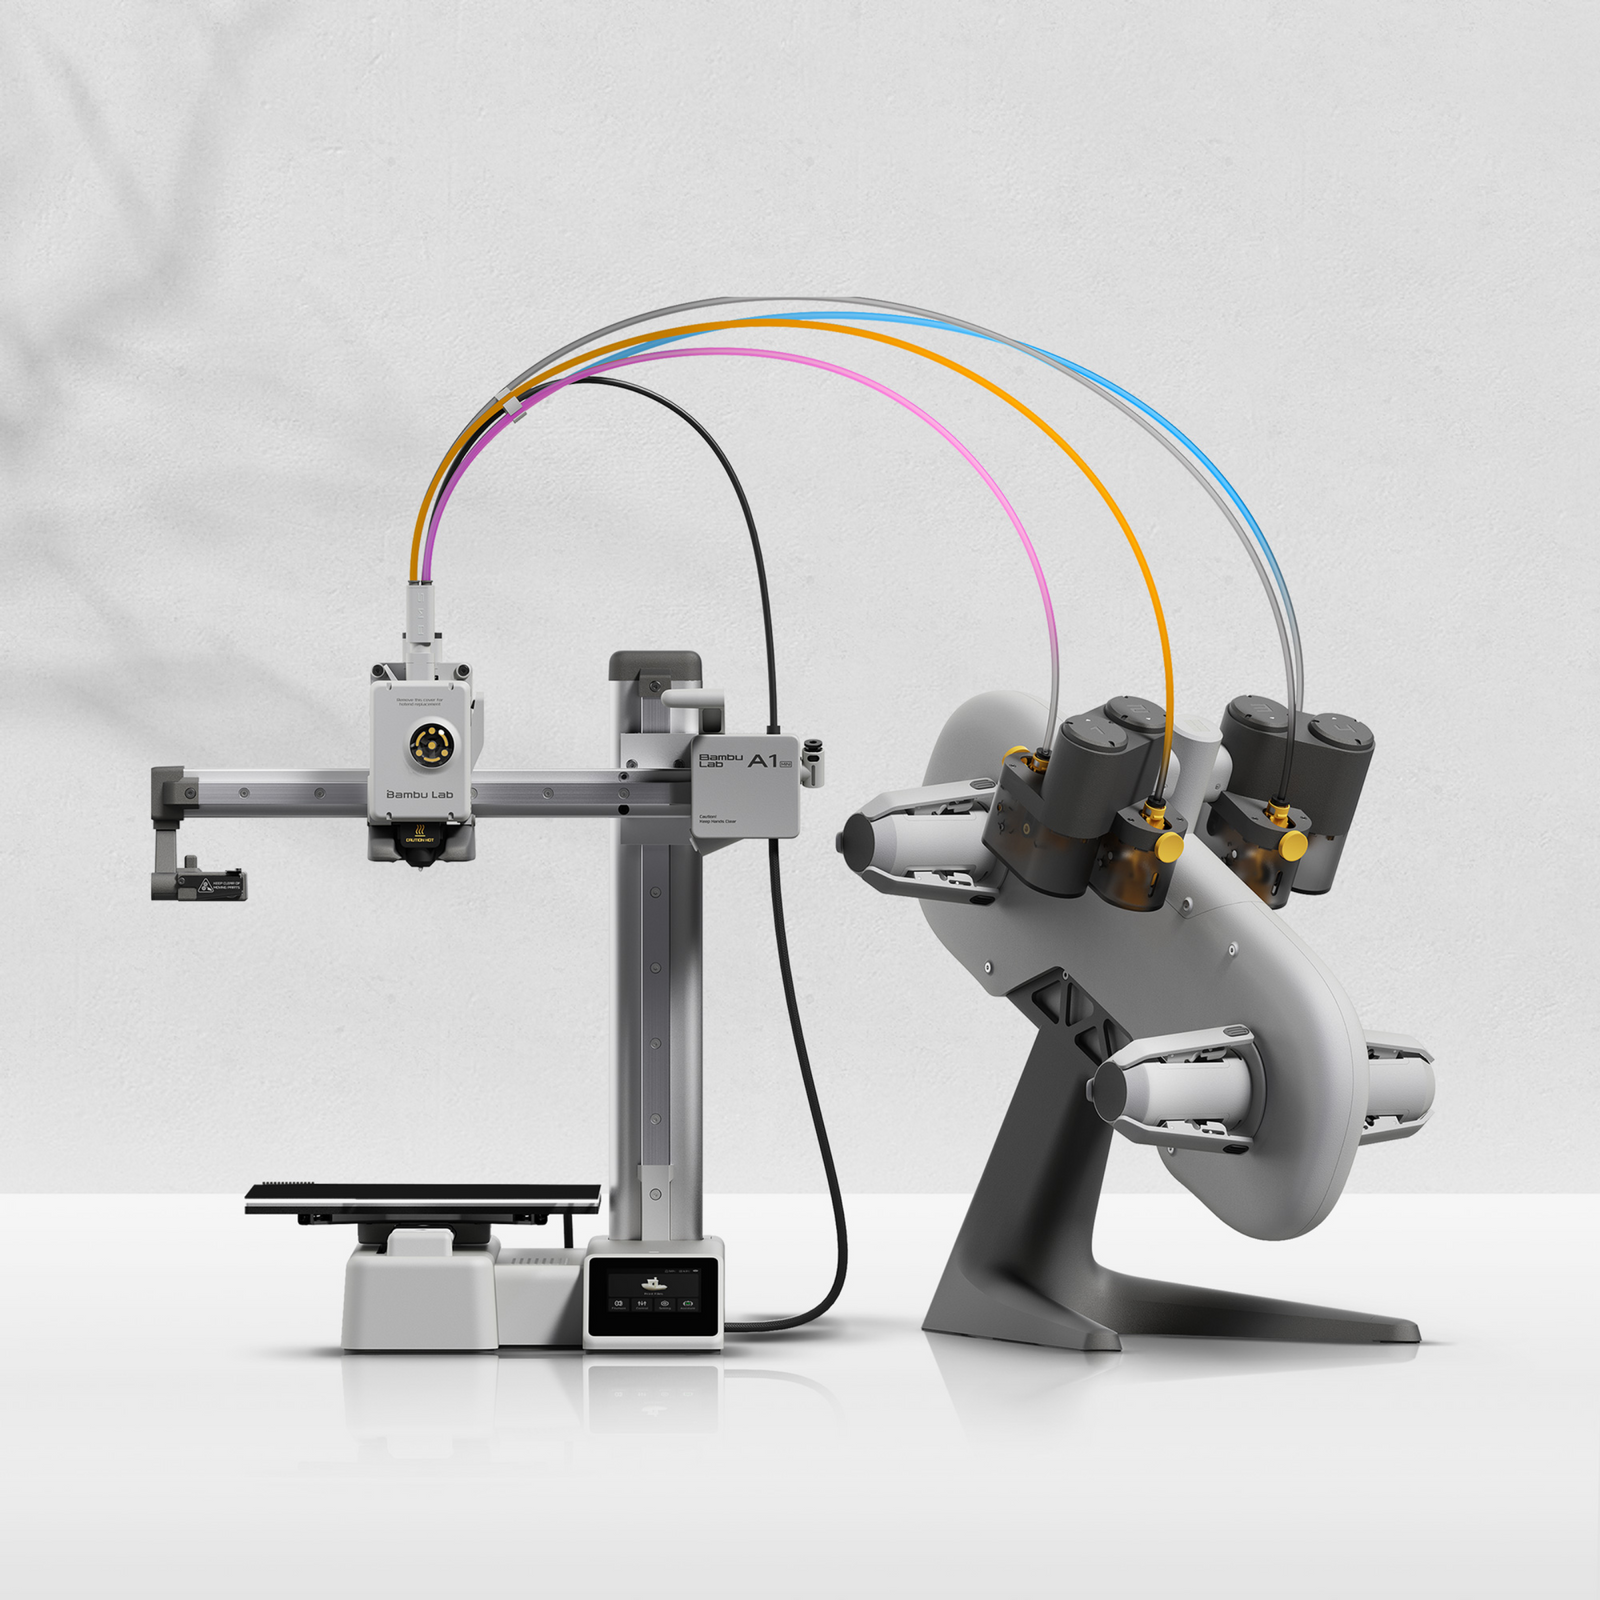
The Bambu Lab A1 mini is an entry-level 3D printer that can print with up to 4 filaments and that at high speeds and perfect quality.
Build Volume: 180 × 180 × 180 mm
Speed: max. 500 mm/s
Extruder: Direct Drive with swapping mechanism
Print Bed: Textured PEI, magnetic, flexible
Leveling: Automatic
Nozzle Temp.: 300 °C
Bed Temp.: 80 °C
Connectivity: Wi-Fi, Bambu-Bus, Micro SD Card
Pros:
✓ Perfect print quality
✓ Fully self-calibrated
✓ Multi-filament 3D printing
✓ Easy to use
Cons:
× The AMS Lite filament switcher is not compatible with flexible filaments
Table of Contents:
- 1 My Verdict – What Sets the Bambu Lab A1 mini Apart?
- 2 Packaging and Scope of Delivery of the Bambu Lab A1 mini
- 3 Setup of the Bambu Lab A1 mini
- 4 Self-Calibration of the Bambu Lab A1 mini
- 5 Multi-Material Printing with the AMS Lite
- 6 Bambu Studio Slicer
- 7 Filament Flushing Volumes – Quality vs. Cost
- 8 Print Speed of the Bambu Lab A1 mini
- 9 Print Quality of the Bambu Lab A1 mini (Multicolor Prints)
- 10 Conclusion: Should You Buy the Bambu Lab A1 mini?
- 11 Technical Specifications of the Bambu Lab A1 mini
- 12 Important Accessories for a FDM 3D Printer
My Verdict – What Sets the Bambu Lab A1 mini Apart?
The Bambu Lab A1 mini is a budget-friendly 3D printer with spectacular features and components. But it offers two features that sets it apart from all the other 3D printers in it’s price range.
One of the standout features of the A1 mini is the AMS Lite. This allows users to print with up to four different filaments at once, creating vibrant and detailed multicolor prints.
The second feature which impressed me the most is the self-calibration. The A1 mini 3D printer offers automatic calibrations for Z-offset, bed level, filament flow, axis vibration resonance and active motor noise. With most normal entry-level 3D printers, some of these calibration cannot be done and the others have to be made manual.
I think that especially these two features are a game changer for many users. Not only do they make the whole process easier, but they also open up new possibilities for creativity and customization in prints.
I have tested more than 50 3D printers thus far, and this is the first printer that required no manual calibration from me. I didn’t even need to print a temperature tower or adjust the retraction settings. The default values in the slicer, combined with the printer’s self-calibration, consistently yielded near-perfect results every time!
And now let’s start the hands-on review of the Bambu Lab A1 mini!
Packaging and Scope of Delivery of the Bambu Lab A1 mini
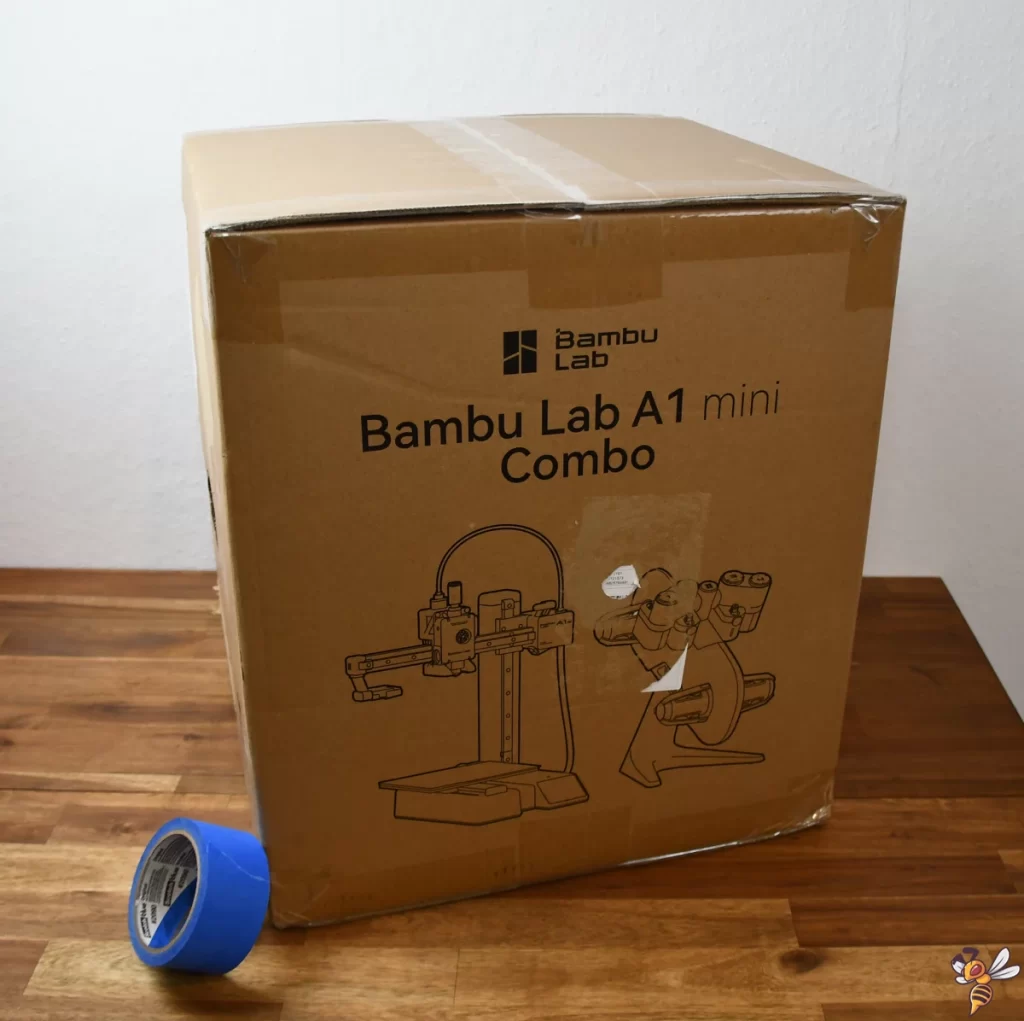
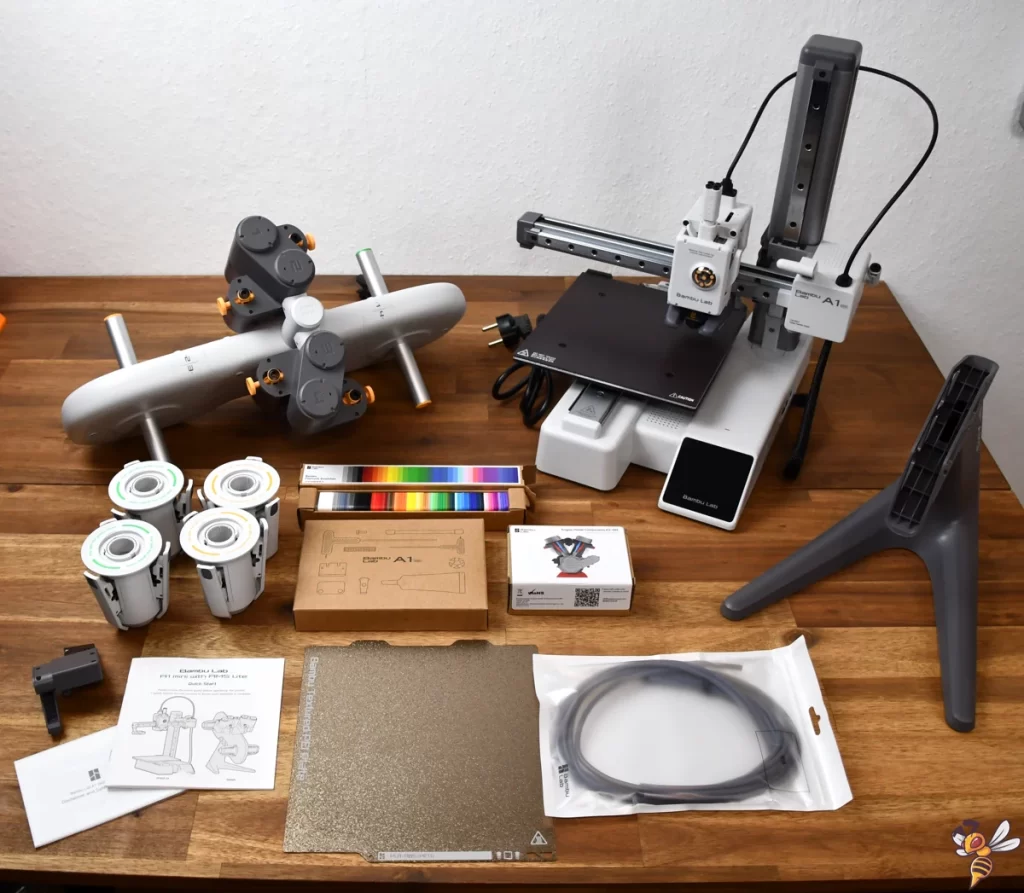
During the unboxing process, it’s clear that a significant amount of careful consideration and planning has gone into the design and production of the Bambu Lab A1 Mini 3D Printer.
The first noticeable thing is the weight of the printer. It’s surprisingly heavy, indicating a robust and stable construction. This heftiness is generally a positive sign in 3D printers, suggesting the use of durable materials that can withstand the demands of regular printing and create fewer vibrations.
The package includes:
- The printer itself.
- A PEI build plate for proper adhesion and easy removal of printed objects.
- The combo package includes the AMS Lite.
- An accessory box contains necessary tools and spare parts.
- A micro SD card contains pre-sliced objects, slicing software, and a digital copy of the printer manual.
Setup of the Bambu Lab A1 mini
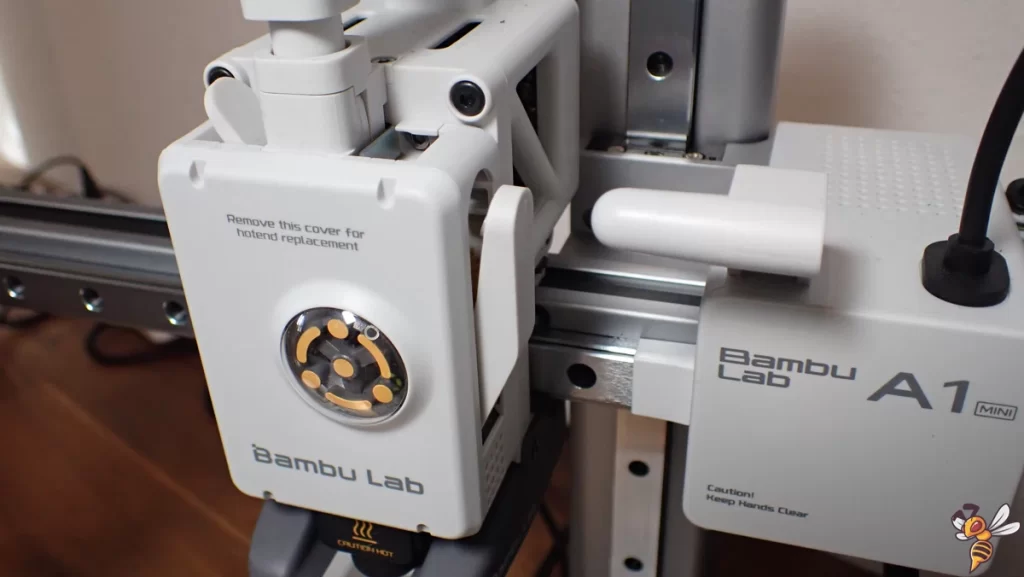
The Bambu Lab A1 mini 3D printer arrives fully assembled, saving you the hassle of complex setup procedures. The printer is ready to work almost straight out of the box.
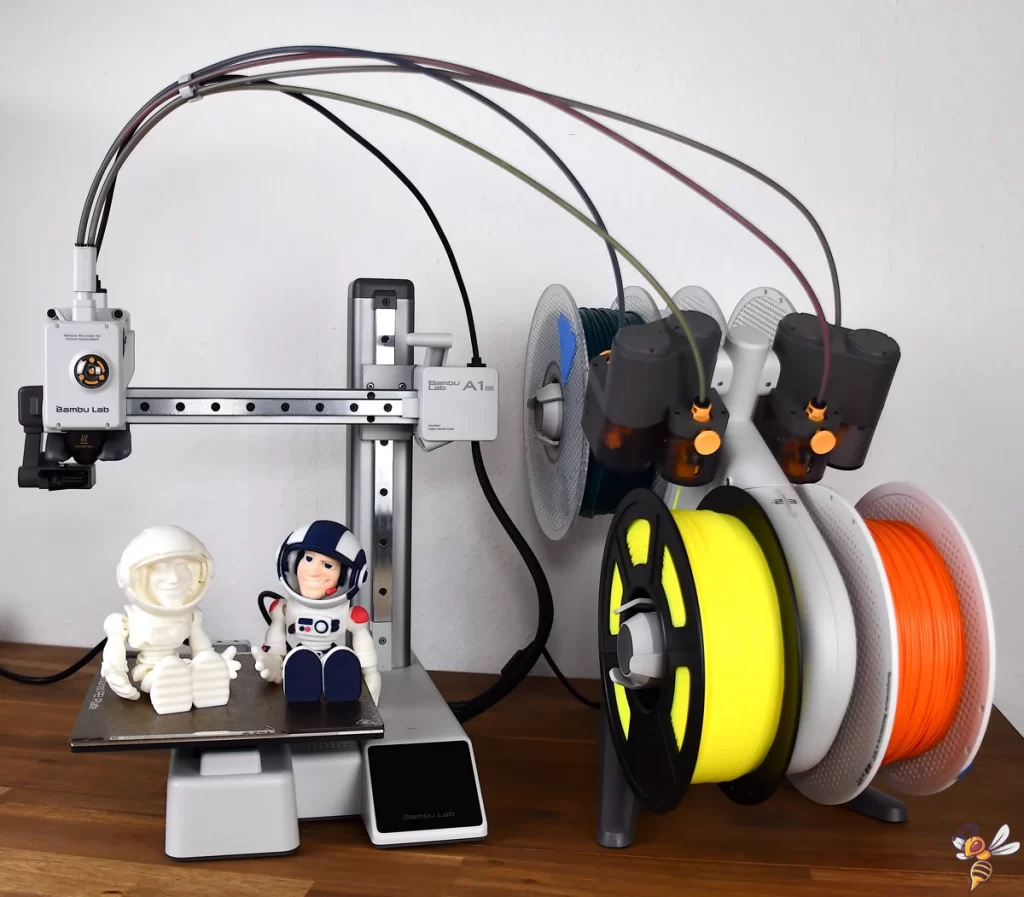
If you got the combo with the AMS Lite, you have to assemble the filament switcher. But the AMS unit only comes in two major parts: the body and the stand. After connecting these two modules, you only have to stick on the spool holders and connect it with the PTFE tubes to the extruder.
The whole assembly process took me only about 15 minutes, including taking photos.
Self-Calibration of the Bambu Lab A1 mini
The automatic calibrations offered by the Bambu Lab A1 Mini are designed to simplify the process and ensure consistent, high-quality prints. As mentioned above, I was really impressed by the impact these self-calibrations have!
- Z-offset: The Z-offset calibration adjusts the distance between the nozzle and the build plate of the A1 mini, ensuring optimal adhesion.
- Bed Leveling: The bed level calibration checks the flatness of the build plate, making necessary adjustments to compensate for any deviations and prevent failures. There are no screws under the bed. You do not have to level it in any way!
- Filament Flow: The A1 mini is equipped with an innovative nozzle pressure sensor. It automatically calibrates the flow dynamics, similar to pressure advance in Klipper.
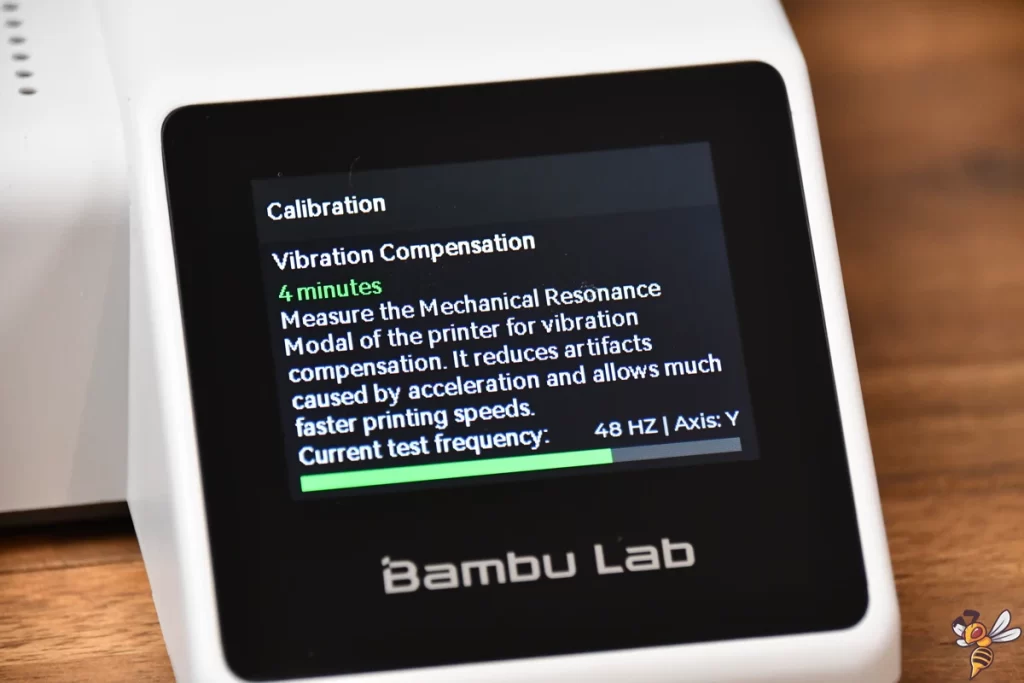
- Axis Vibration Resonance: The axis vibration resonance calibration reduces vibrations, minimizing ringing/ghosting and improving precision at high speeds.
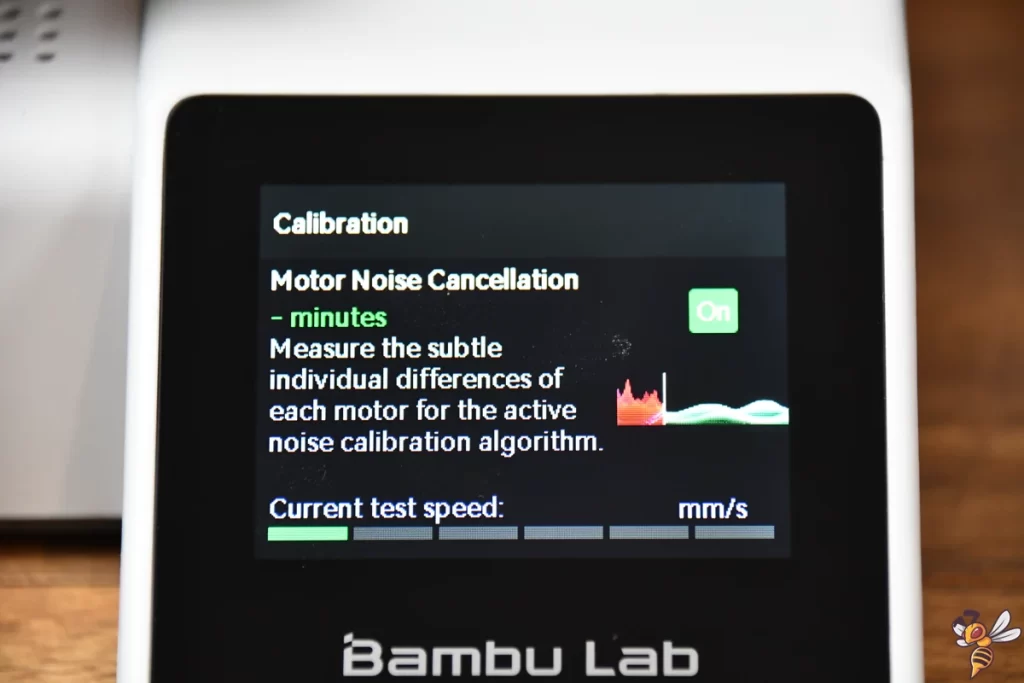
- Motor Noise: The motor noise calibration reduces the noise generated during printing. It does not have a huge impact on the overall noise, but it reduces it by several decibels and it cuts out the most annoying high-pitched noises. The part cooling fan is not affected by this.
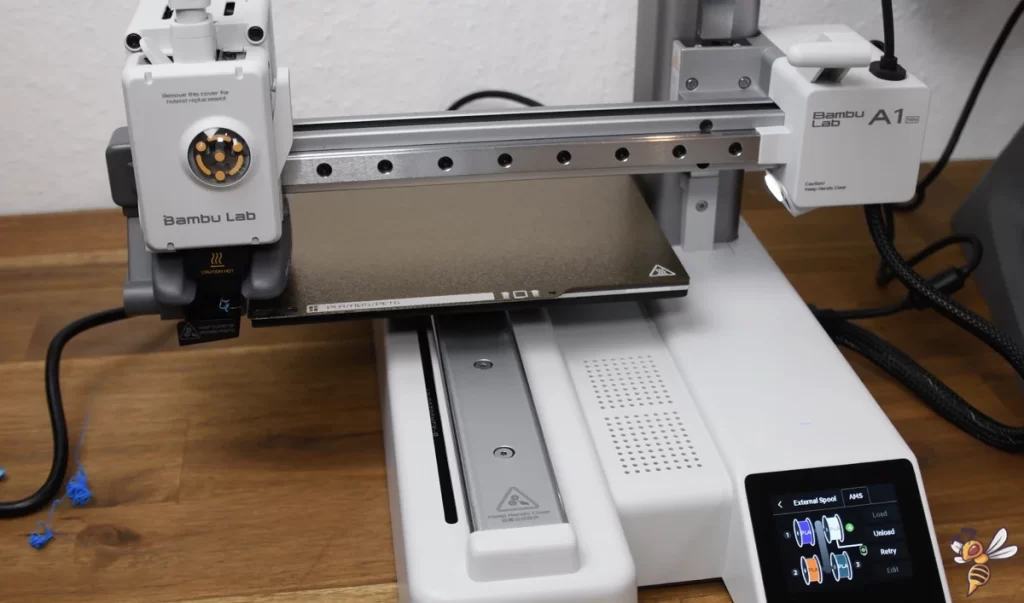
Multi-Material Printing with the AMS Lite
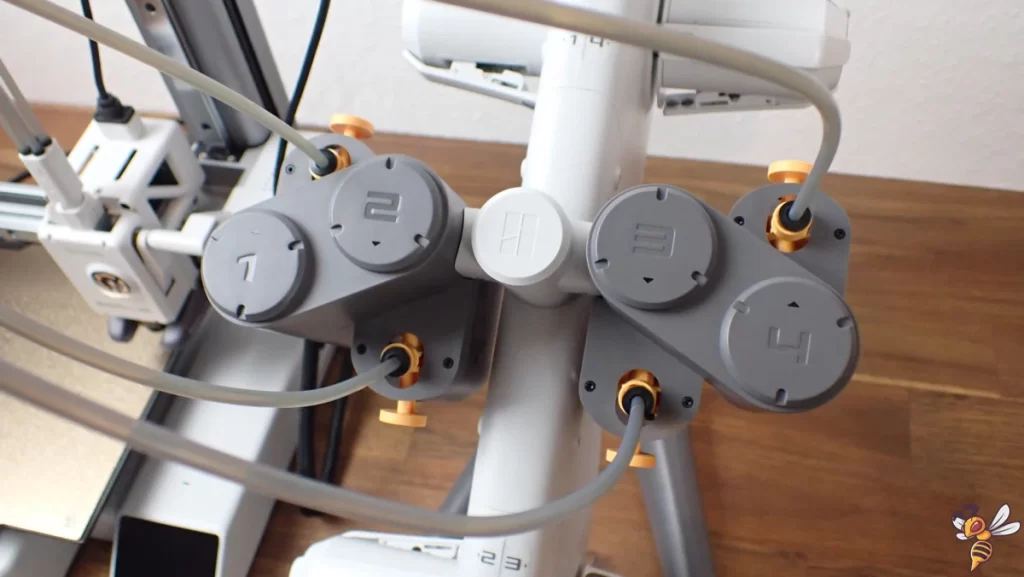
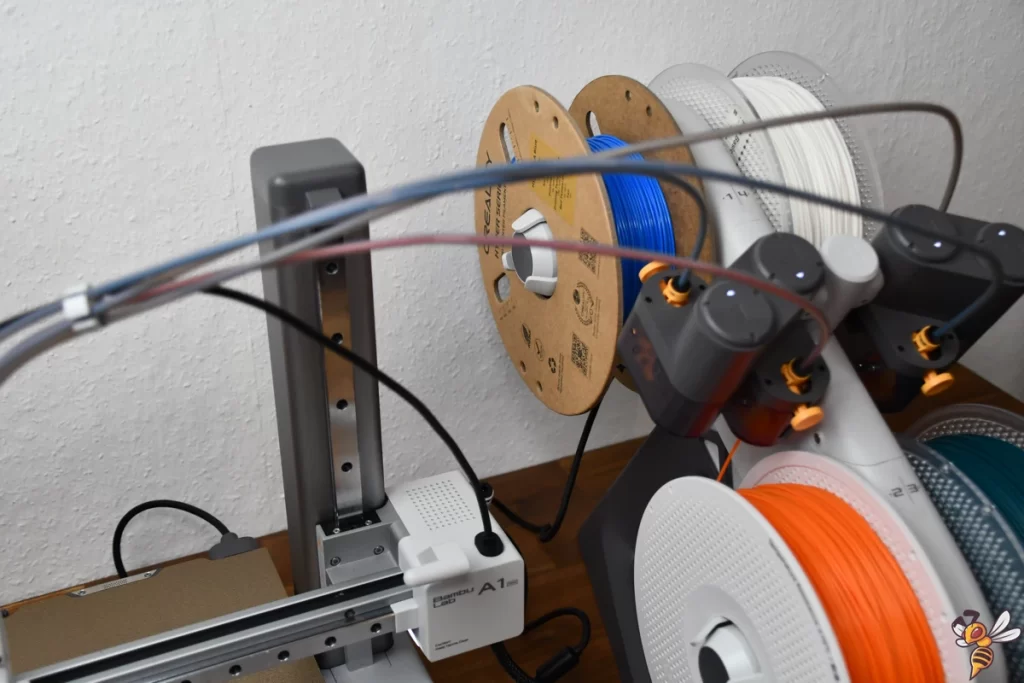
The Bambu Lab AMS Lite aims to revolutionize multi-material 3D printing by supporting up to four colors when paired with the A1 mini. A particularly commendable feature is its ease in handling filament issues, like effortlessly removing a snapped filament from the PTFE tube.
With the included RFID reader, the new AMS system can automatically synchronize Bambu Lab filament types. Inside the printer menu, the color of the new spool automatically appears.

If the AMS Lite doesn’t automatically recognize the color of the new spool, you’ll need to manually select the position of the filament on the AMS in the menu. This manual selection ensures that the correct filament is used for the designated parts of your print.

From a hands-on perspective, the Bambu Lab A1 mini makes it extremely easy to load filament because the filaments do not have to be fed into the hot nozzle. All four filaments wait in the PTFE tubes a bit before the extruder.
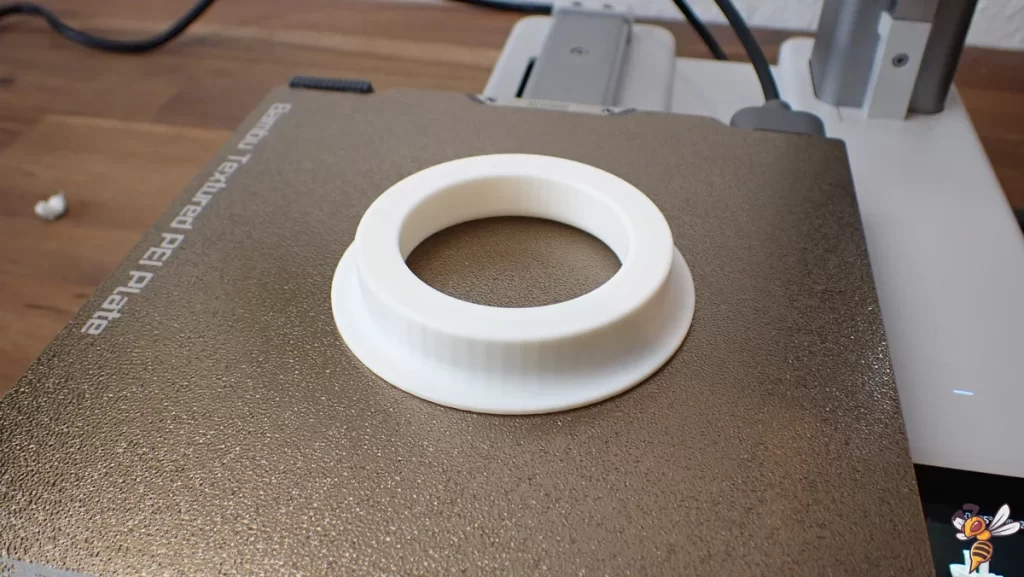
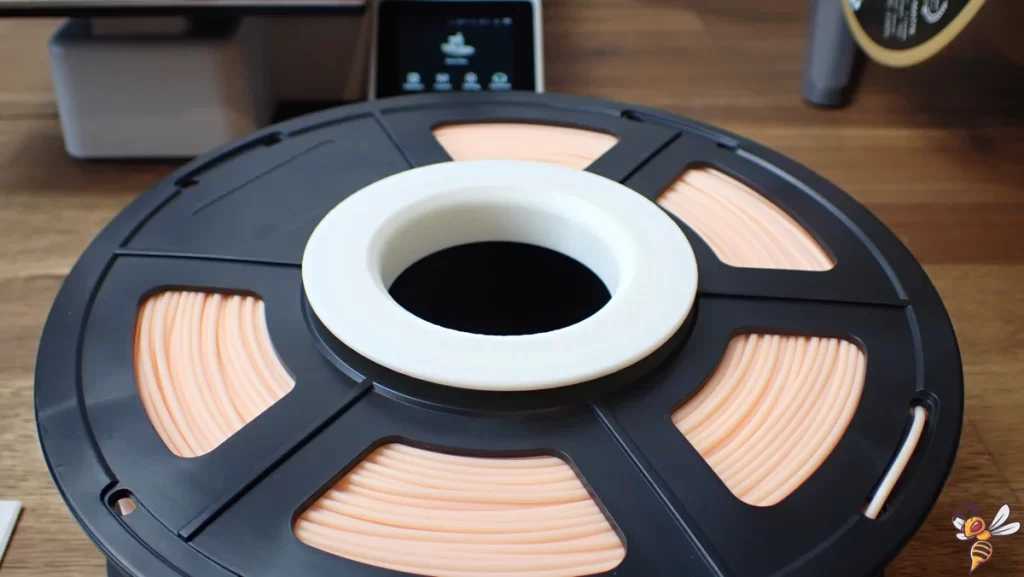
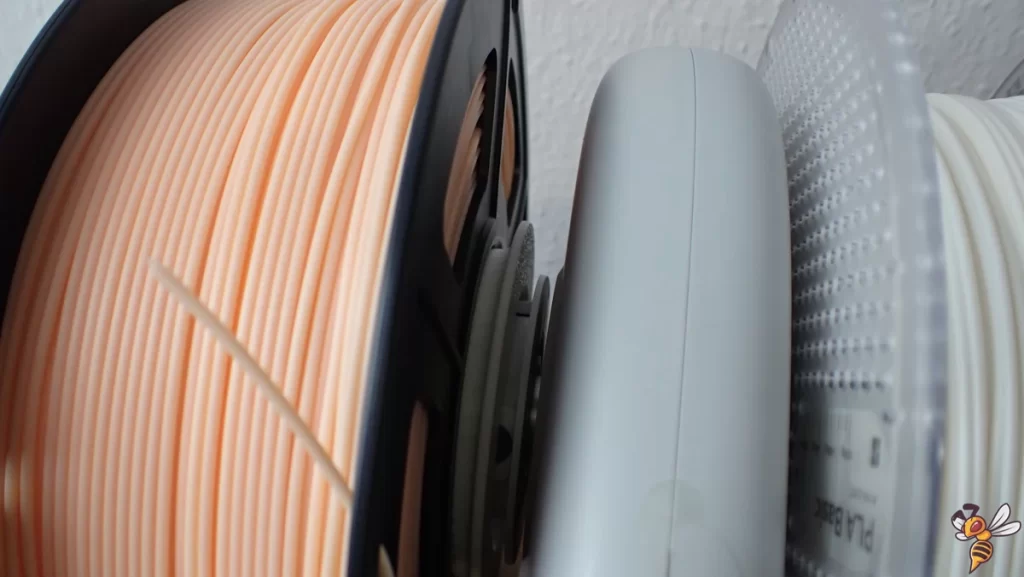
However, a minor hiccup I encountered was its incompatibility with certain spool diameters. But I just printed a small adapter, which then made it possible to fit bigger spools onto the AMS unit.
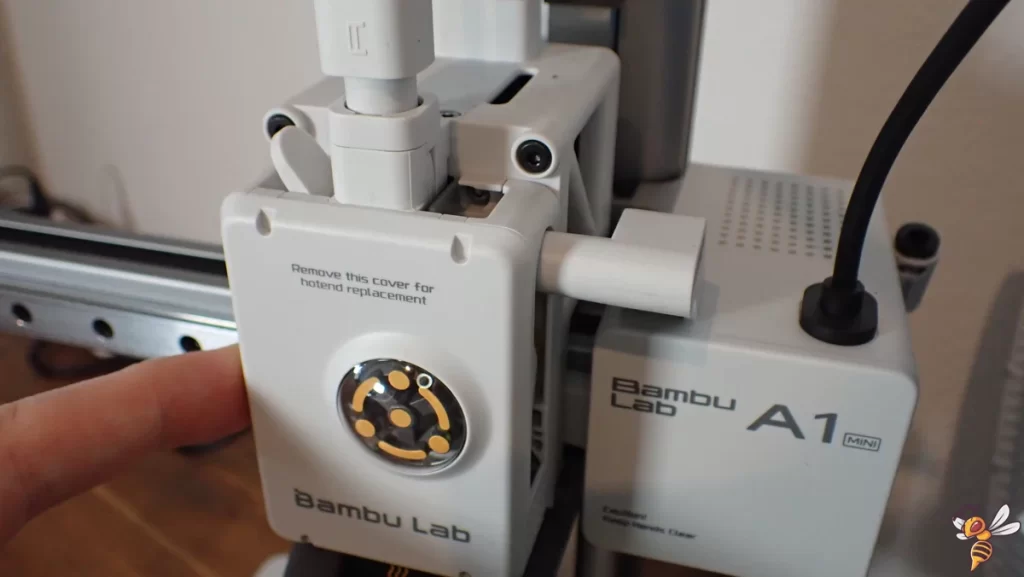
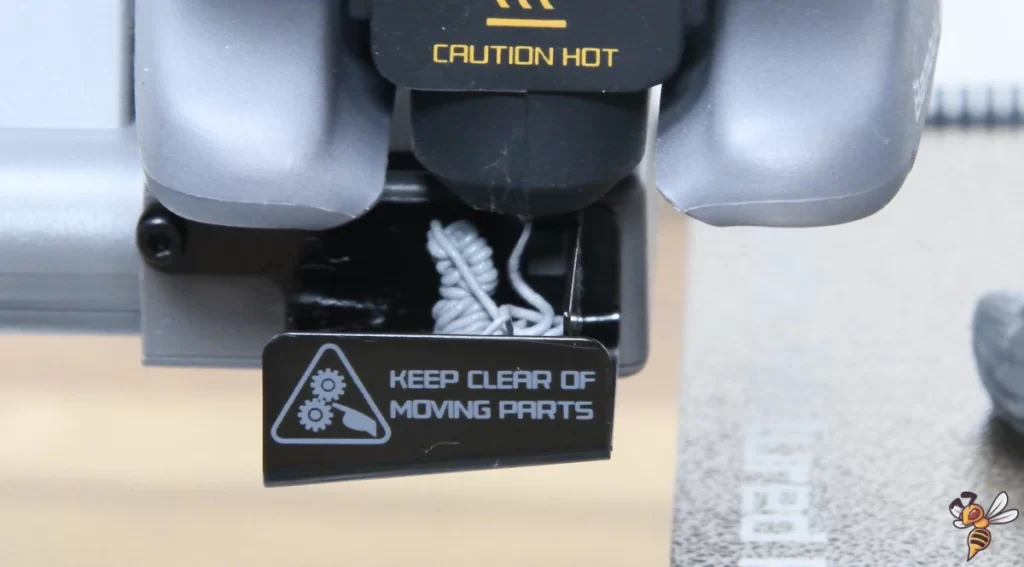
The filament switching on the A1 mini itself is initiated by cutting the previous filament using a specifically designed blade inside the tool head. This cutting operation is triggered via a lever situated on the right side of the tool head. Following this, the old filament gets ‘flushed out’.
Bambu Studio Slicer
With the Bambu Studio Slicer you can slice multicolor prints with ease. If you are used to Cura or PrusaSlicer, you get used to it very fast.
The slicer comes with pre-made printer profiles with well-tuned settings right from the start. This simplifies the process for beginners and ensures optimal results. Additionally, it offers an online model library, giving users a plethora of designs to choose from.
If you prefer to use Cura and you don’t want to print in multicolor, you can find my Cura settings for the A1 Mini in this article: Bambu Lab A1 mini – Complete Cura Profile & Print Settings
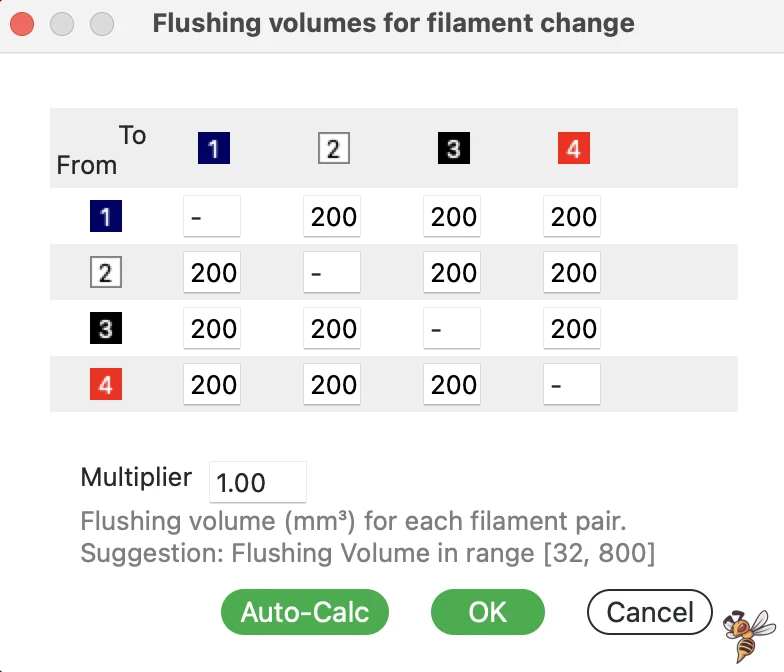
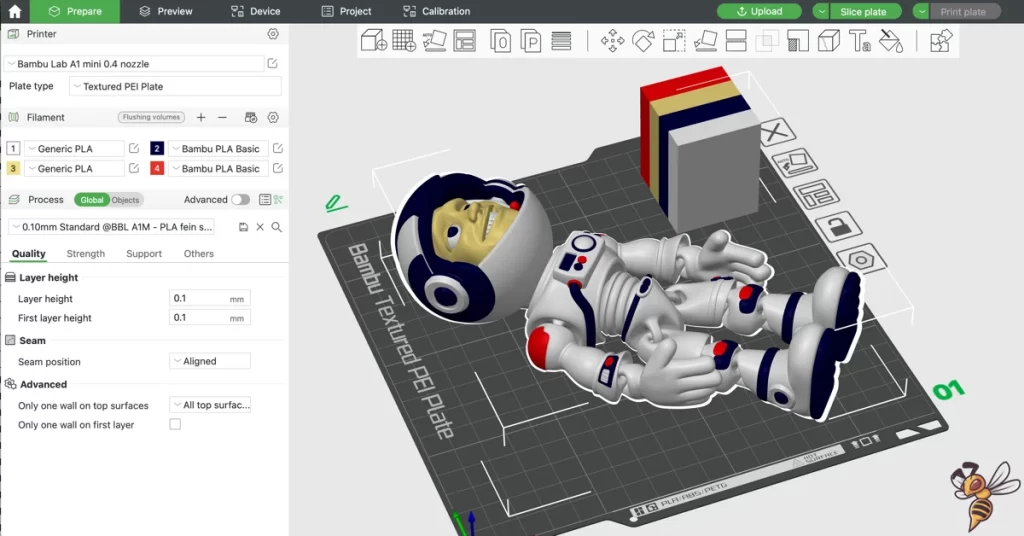
A necessary feature for multi-filament printing is the ability to adjust flushing volumes. These volumes refer to the amount of filament the printer extrudes post switching to a new filament, ensuring the old filament is completely flushed out. This feature is especially vital for ensuring clean transitions between colors.
You can set the flushing volumes manually or generate them automatically. I found the automatic setting to be most efficient, as it reliably modifies the values for the purged filament based on the specific colors in use.
However, when attempting to manually reduce these values to reduce the extruded amount to save filament, I observed some color mixing, indicating that the automatic setting is perhaps best for maintaining clarity between colors.
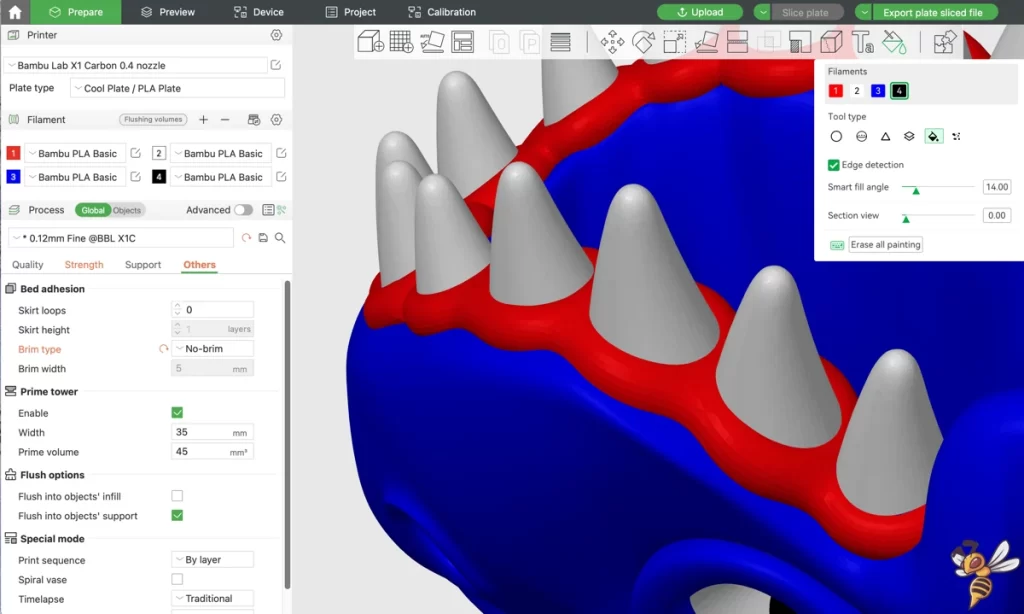
I really like the paint feature. With it, you can designate specific areas of the STL object to be printed with a chosen filament. This allows for intricate multicolor designs, eliminating the need to hunt for specialized multicolor STL files!
For multicolor prints, the slicer positions a purge tower on the print plate. This tower helps to clean and prime the filament before switching to a new color.
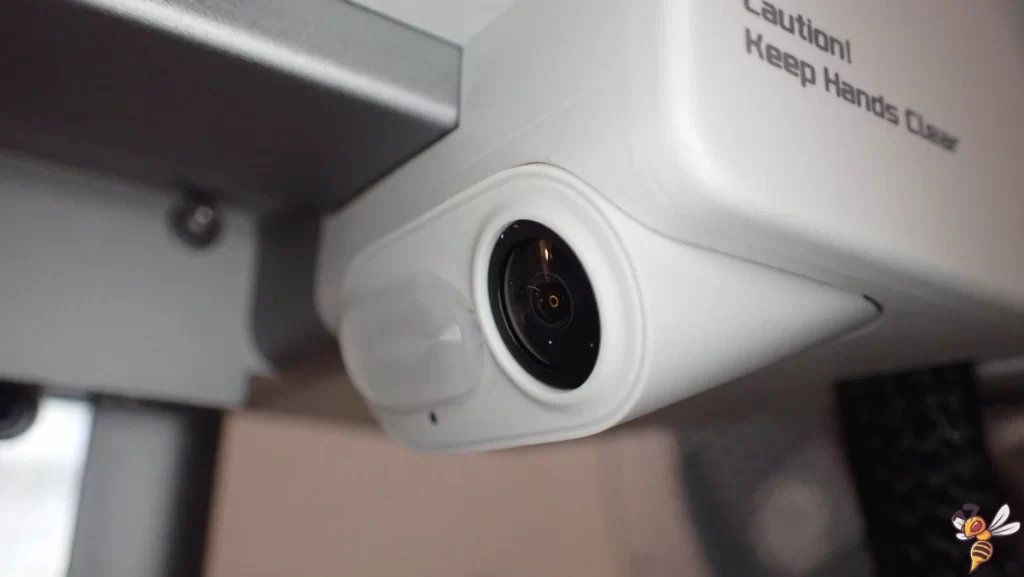
The Bambu Lab A1 mini printer is also equipped with a camera that allows monitoring via a dedicated app and Bambu Studio. This feature is particularly useful for remotely tracking the progress of your prints in real-time, regardless of your location. This adds a layer of convenience, as you need not be physically present at all times to oversee the printing process.
Filament Flushing Volumes – Quality vs. Cost

3D printing has always been a balance between quality, speed and filament costs. When working with multiple filaments, this gets even more interesting.
When I printed a flexible astronaut with the Bambu Lab A1 mini using four distinct filaments, the print time extended to nearly two days, using 660 g of filament. Conversely, using just a single filament for the same object slashed the print time to just over 8 hours and consumed merely 127 g of filament.
From a purely quantitative perspective, the differences are striking. The multicolor object used over five times the amount of filament and took more than triple the time compared to the single-color print.
However, when evaluating the final products, the difference in aesthetic appeal and perceived value between the two is substantial. The multicolor astronaut exudes a vibrant richness, giving it a significantly higher value than the extra filament cost implies.
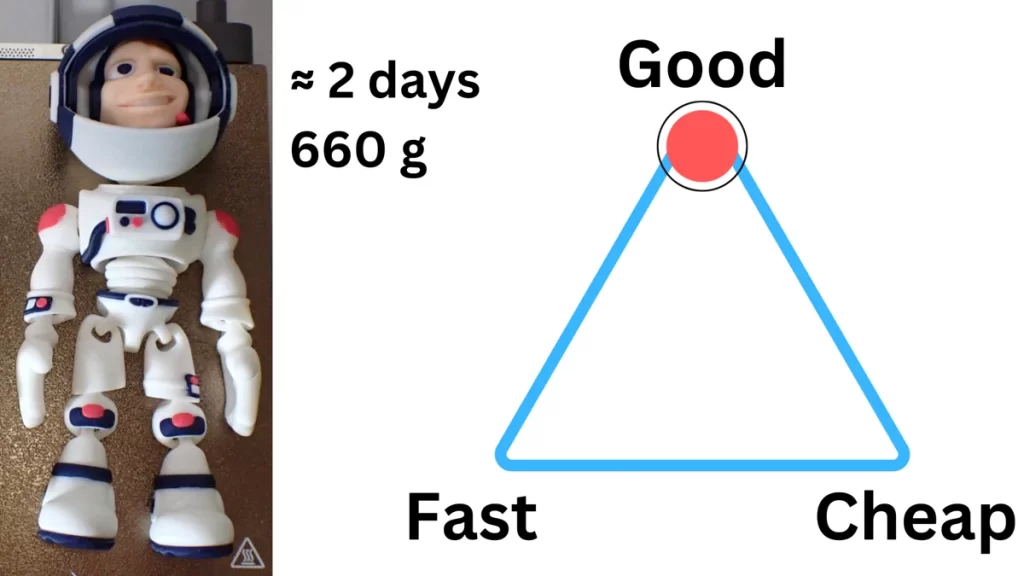
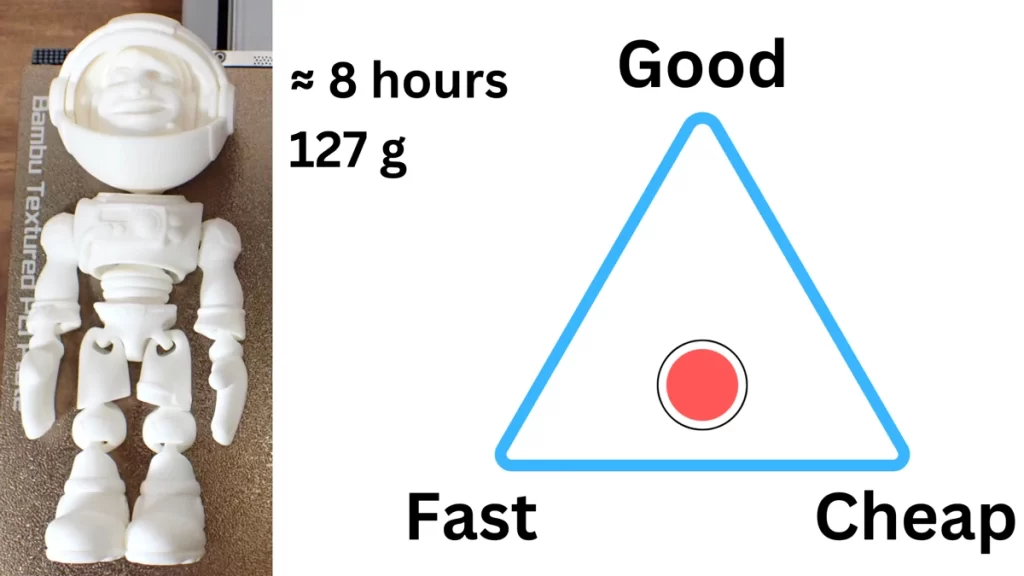
This trade-off is precisely what the classic quality-management triangle “Cost-Quality-Time” is about. In this case, while the multicolor print excels in quality, it lags in time and cost efficiency. On the other hand, the single-color print is time and cost-effective but falls short in terms of the richness of detail and overall appeal.
For projects where aesthetics are important, such as toys or decorative items, the multicolor feature is undeniably superior. Considering the impressive results, I would hesitate to go back to a standard single-color 3D printer for these types of prints. The added value and depth provided by multicolor printing are really stunning!
Print Speed of the Bambu Lab A1 mini
The Bambu Lab A1 Mini reaches a speed of up to 500 mm/s, and a maximum acceleration of 10000 mm/s². At the start of every print, the printer performs vibration calibration for both the X and Y axes to ensure accurate high-speed printing. This continuous calibration takes into account factors such as printer tension and environmental temperature, providing consistent and reliable results every time.
Although swapping and flushing filaments takes time, the printer’s fast print speed helps reduce the printing times. In my experience, this speed helps balance the overall time frame for multicolor projects.
All three axes of the Bambu Lab A1 Mini move on linear rails. This feature ensures smooth, precise movements, adding to the overall quality of the output. The linear rails also contribute to the printer’s impressive speed, allowing for quick, efficient operation without compromising on precision.
Print Quality of the Bambu Lab A1 mini (Multicolor Prints)
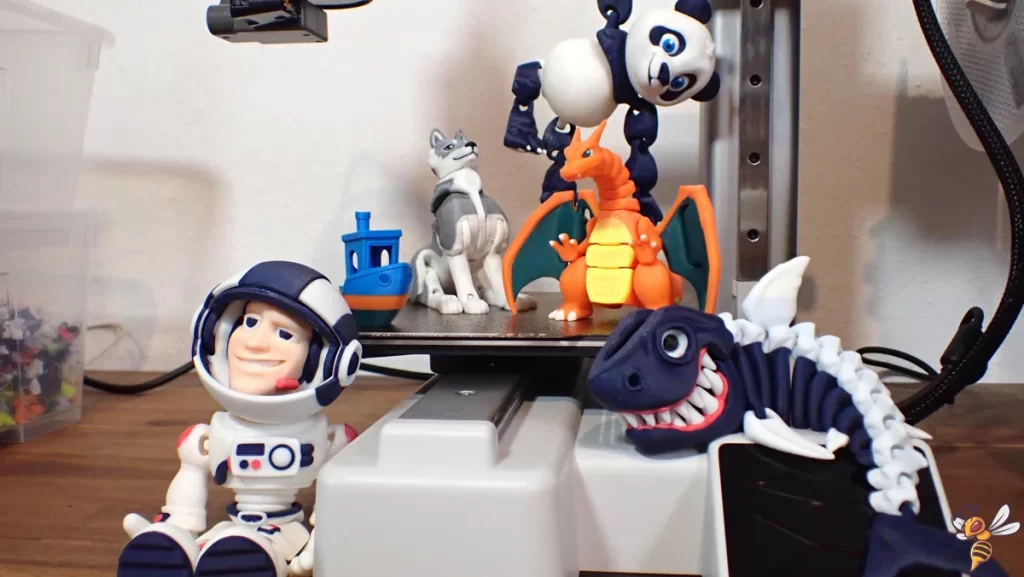
I had a lot of fun with the Bambu Lab A1 mini over the last few weeks. I printed several multicolor projects with it, and the results were impressive. The quality of the multicolor prints was top-notch, with vibrant colors and crisp transitions between them.
I concentrated on articulated, decorative toy STL’s. These kinds of objects are challenging to print perfectly and are nice to look at.
Pre-Scliced Models
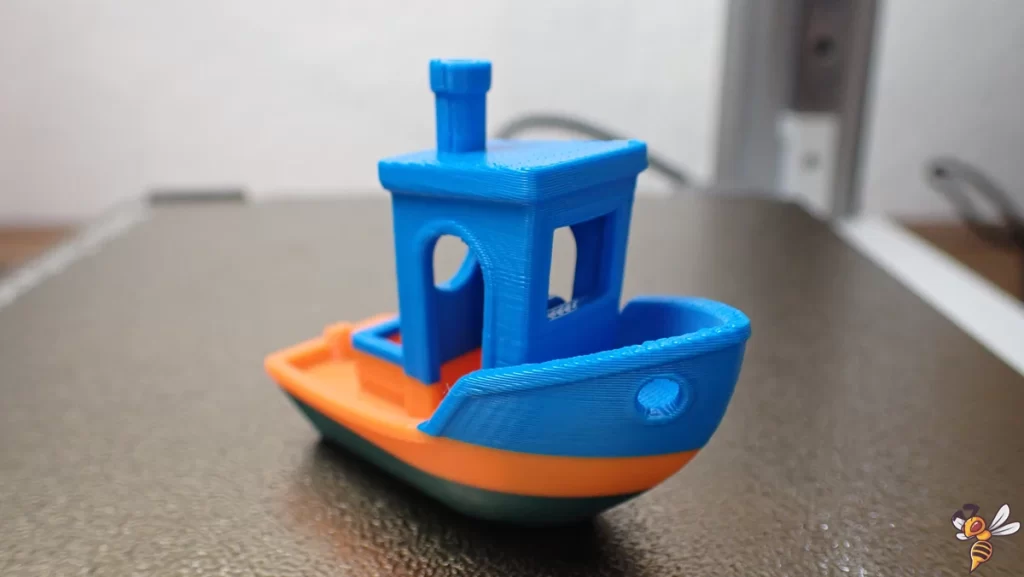
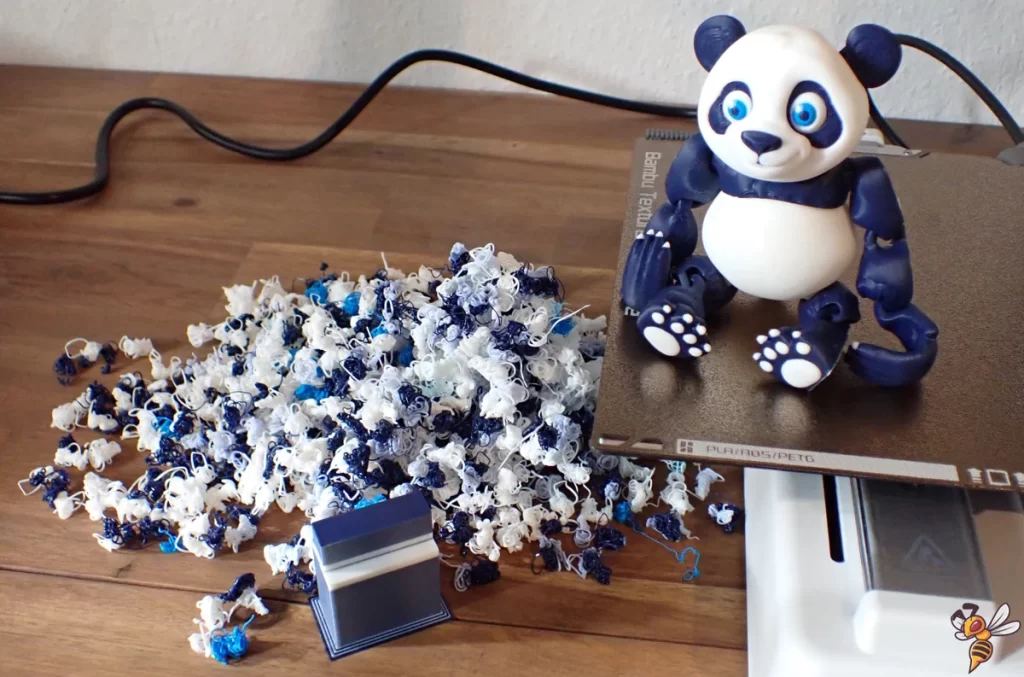
The Bambu Lab A1 mini comes with a microSD card that includes pre-sliced models such as the 3DBenchy and a panda. As with almost every 3D printer I test, the 3DBenchy was my first print. When printed, the 3DBenchy turned out near-perfect, with only minor ringing noticeable. Interestingly, this minor imperfection didn’t recur in subsequent prints.
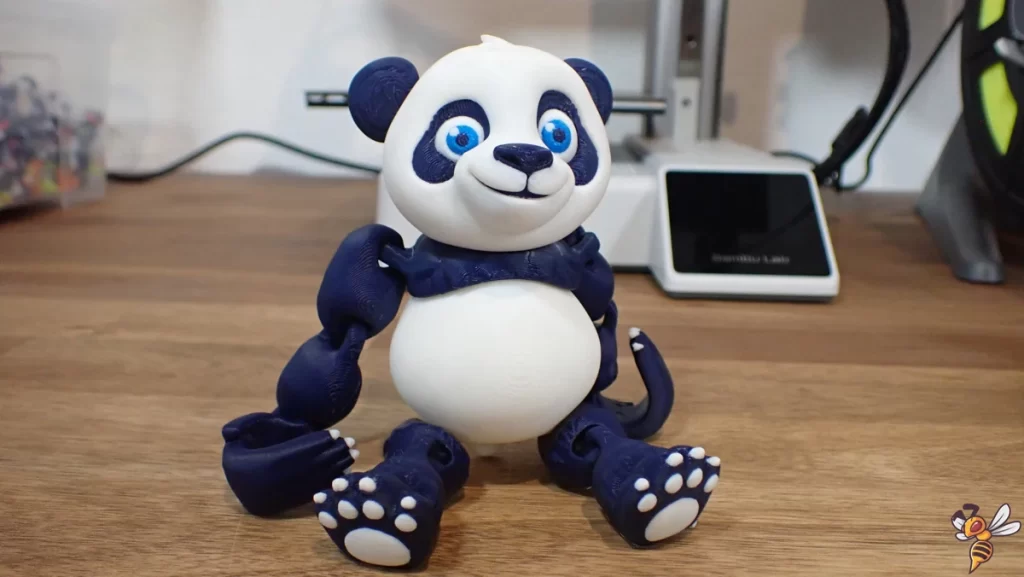
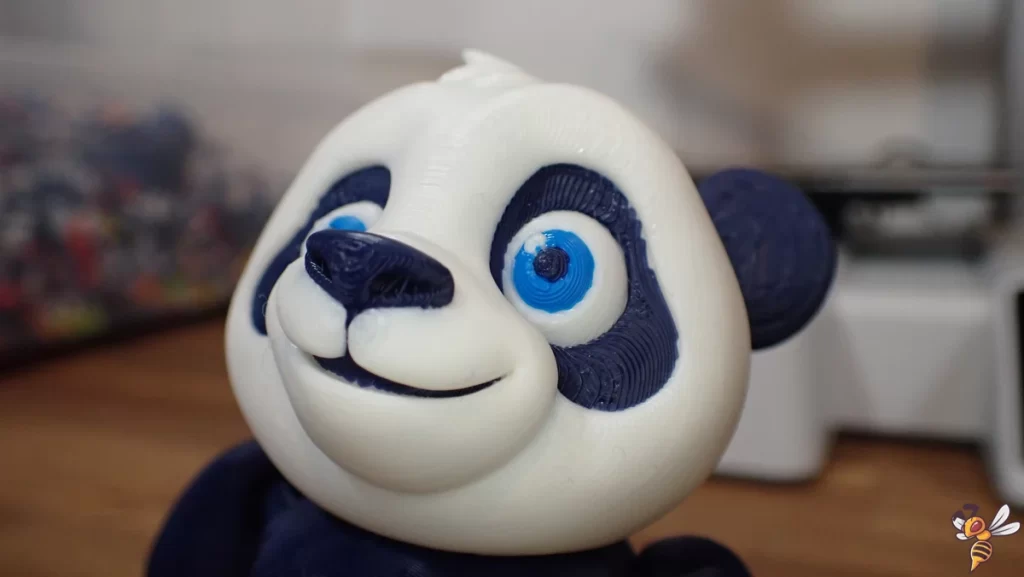
The panda, as my first true multicolor print with the A1 mini, was particularly impressive. The multicolor effect, especially on the face, showcased sharp and precise transitions between the filaments, exceeding my expectations for clarity and precision in multicolor 3D printing.
After printing the panda, I immediately knew that the A1 mini was a game-changer!
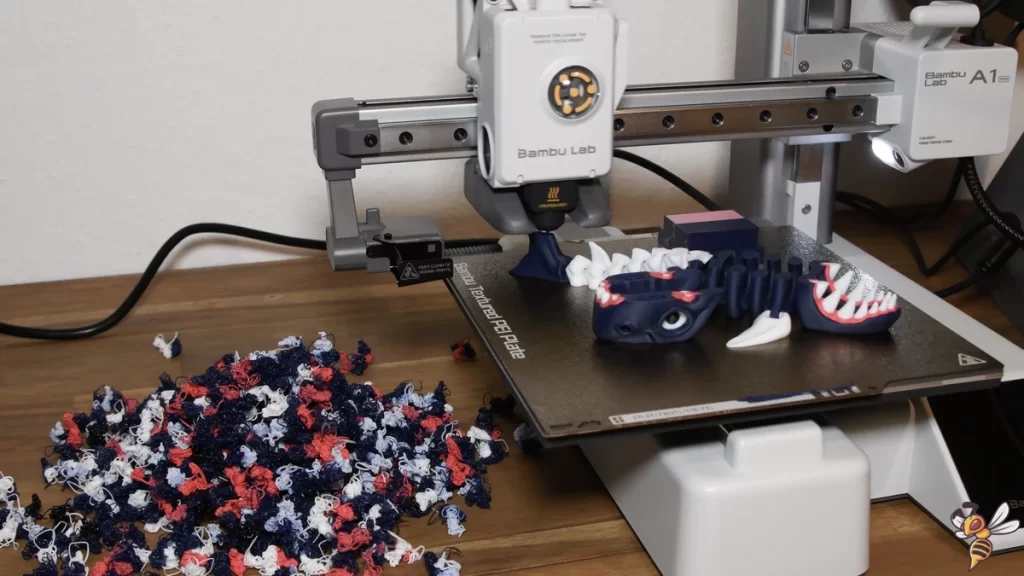
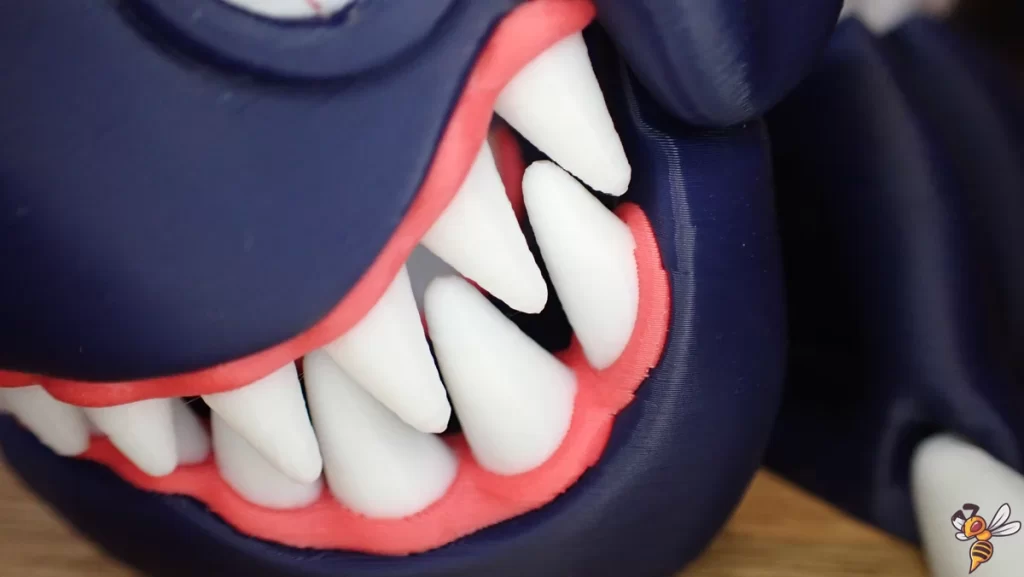
Shark
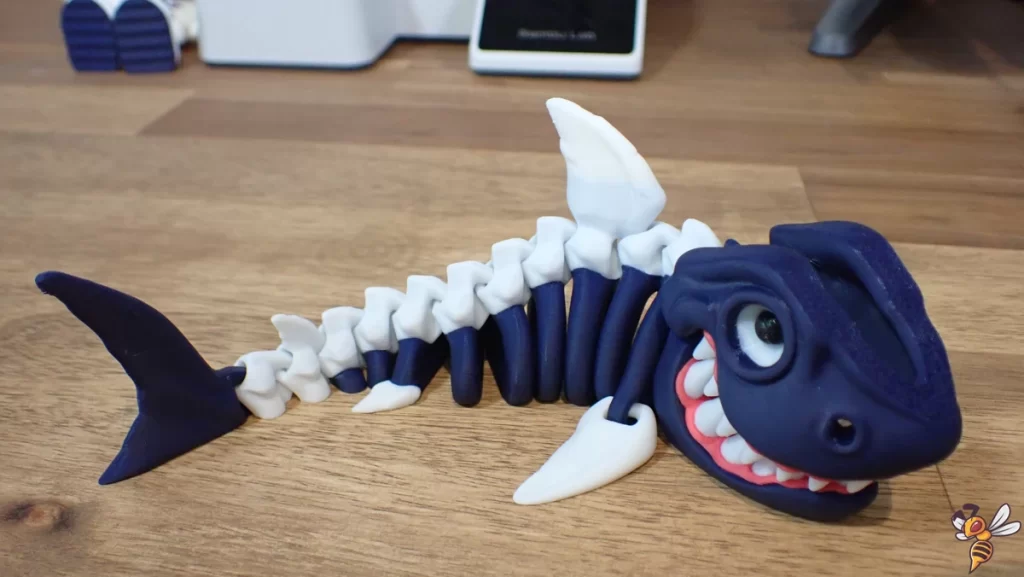
- Layer Height: 0.1 mm
- Printing Time: 1d2h42m
- Filament used for the model: 108 g
- Filament flushed: 179 g
- Filament used in total: 287 g
- Filament swaps: 710
Next, I chose this Flexi Shark with a layer height of 0.1 mm, and it turned out beautifully. The intricate details of the fins and teeth were captured accurately. The effect of the red gums just makes it so much better than a one-color print!
However, as mentioned above, I tried to lower the flushing volumes. As you can see on the back fin, white and blue were mixed a bit.
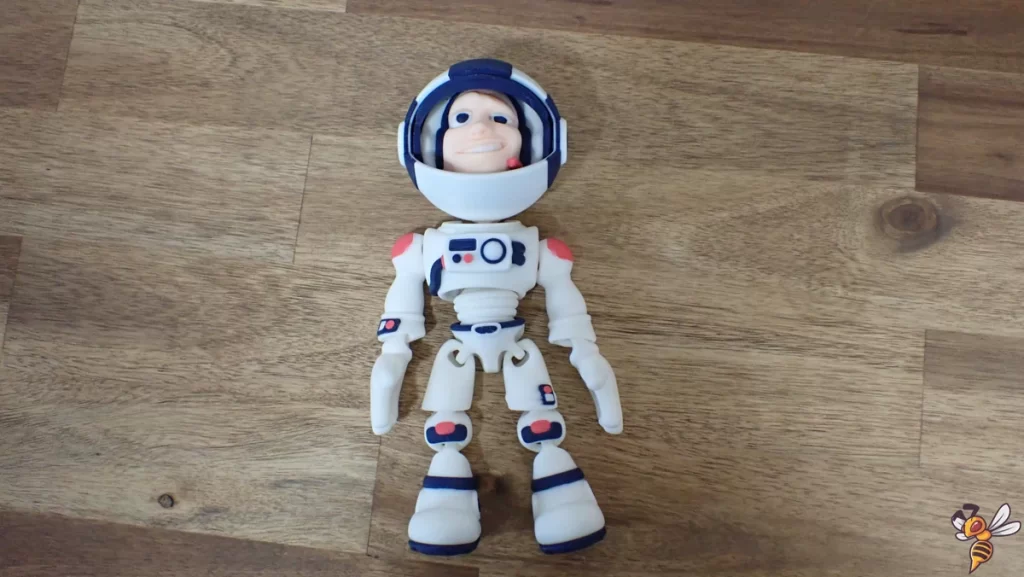
Astronaut
- Layer Height: 0.1 mm
- Printing Time: 1d22h3m
- Filament used for the model: 205 g
- Filament flushed: 454 g
- Filament used in total: 659 g
- Filament swaps: 967
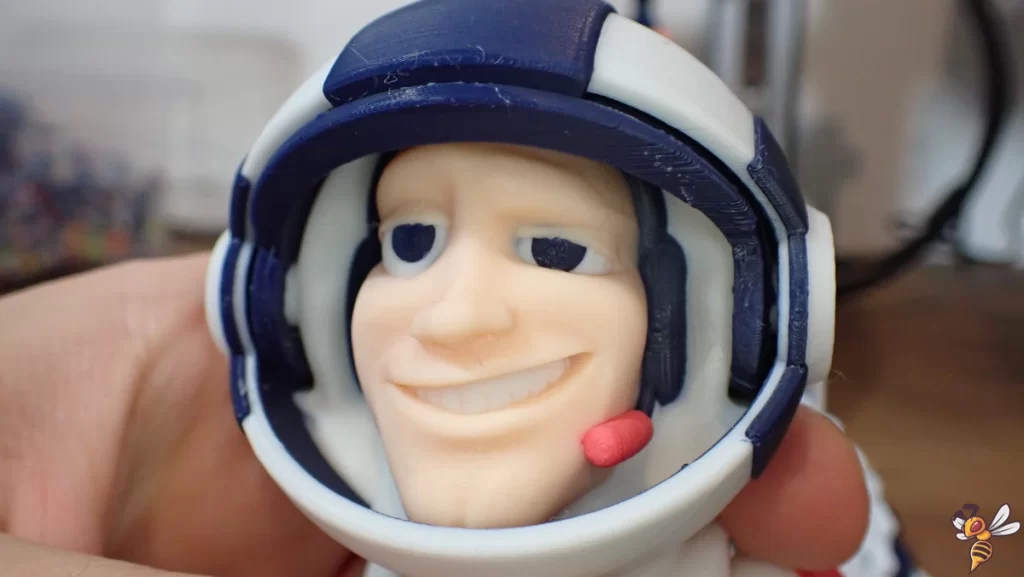
For my next print, I decided to print the Flexi Astronaut. I love this model and I printed it previously with another printer but only out of one color.
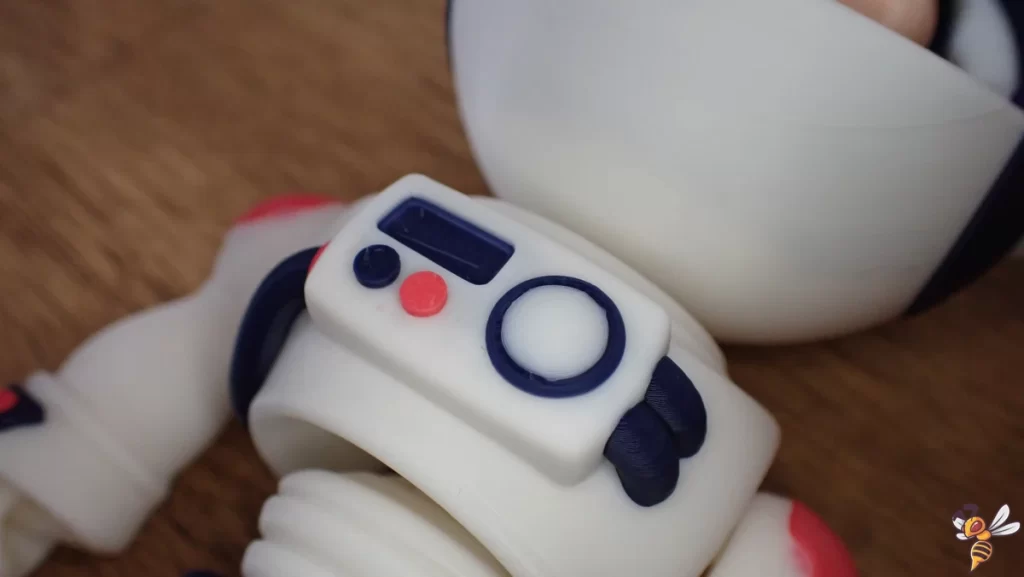
I used the painting tool in Bambu Studio slicer to add three additional colors. The result was astonishing! The transitions between the colors were seamless, and the details on the suit and helmet were incredibly sharp.
The printing time may seem a bit long, but it was worth every minute. This object made me appreciate the capabilities of multicolor 3D printing even more.
Wolf

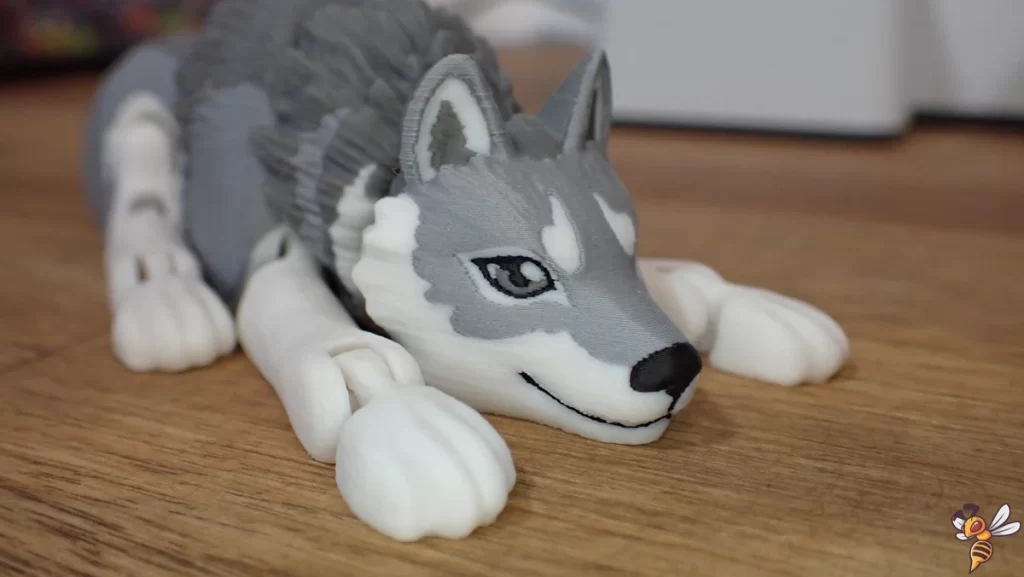
- Layer Height: 0.1 mm
- Printing Time: 1d6h3m
- Filament used for the model: 123 g
- Filament flushed: 216 g
- Filament used in total: 339 g
- Filament swaps: 652
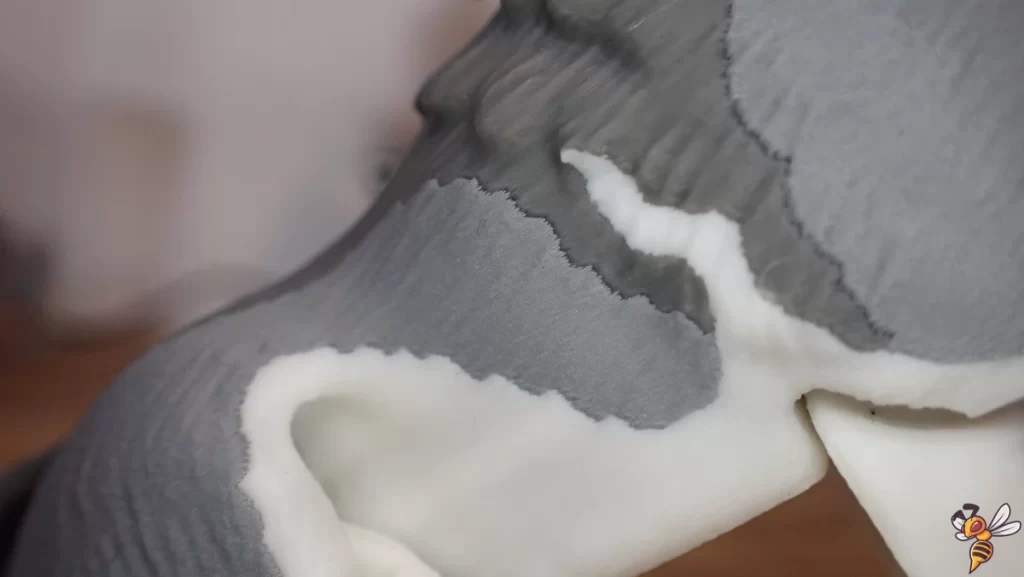
The Flexi Wolf was my next print. The model came out beautifully, with all the joints smoothly functioning. The face shows how accurately the filament transitions are.
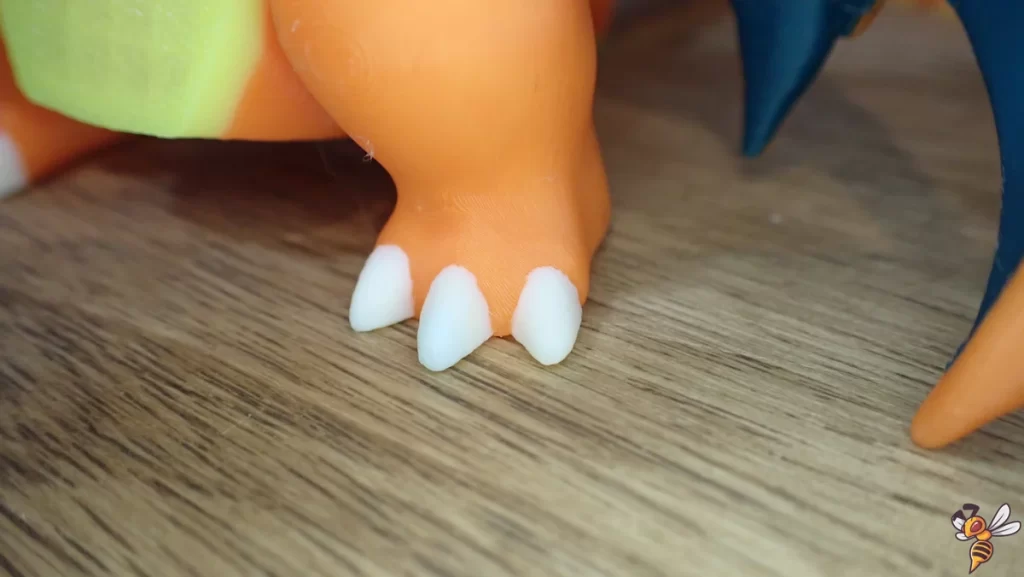
Charizard
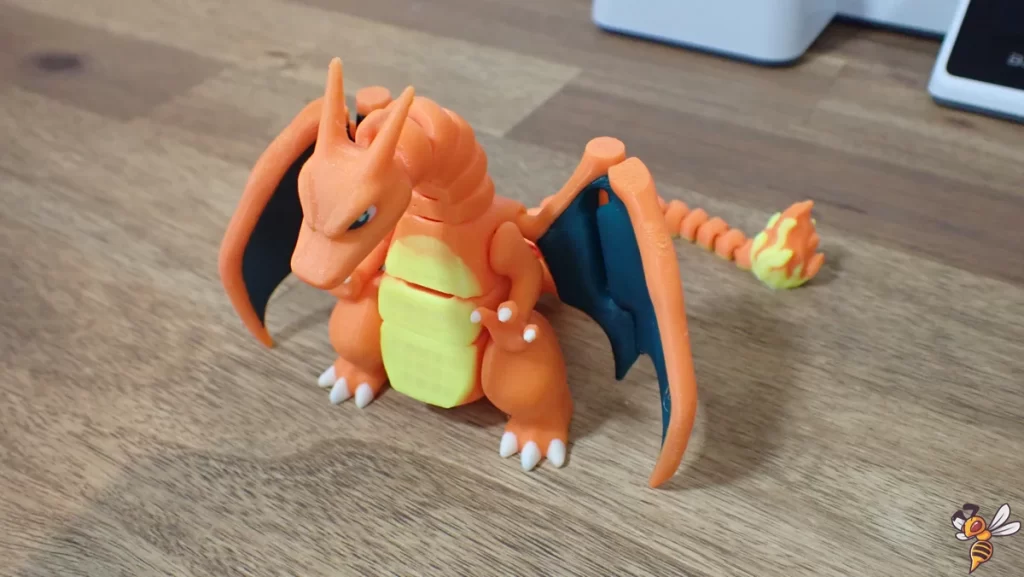
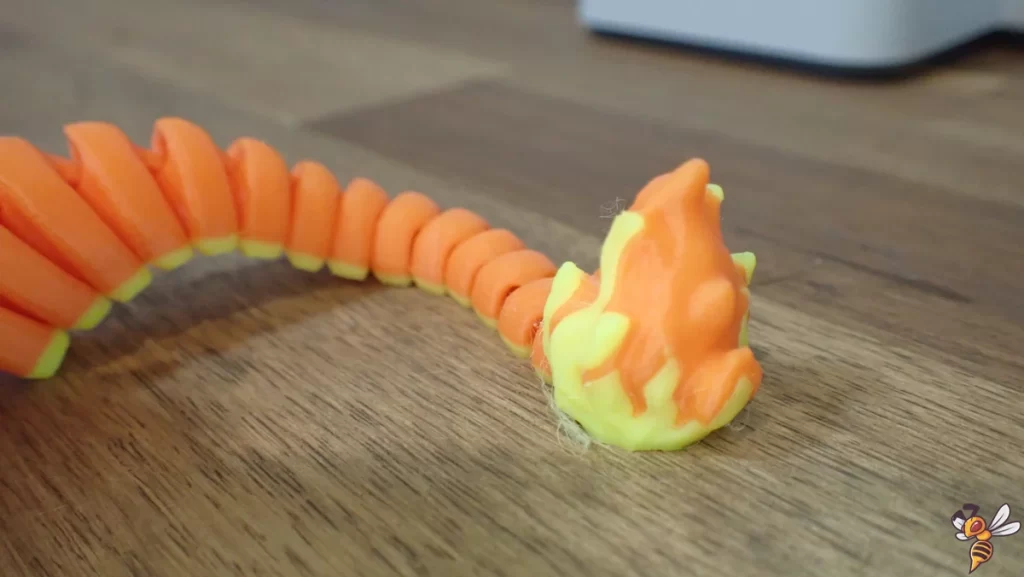
- Layer Height: 0.1 mm
- Printing Time: 1d14h11m
- Filament used for the model: 122 g
- Filament flushed: 405 g
- Filament used in total: 527 g
- Filament swaps: 832
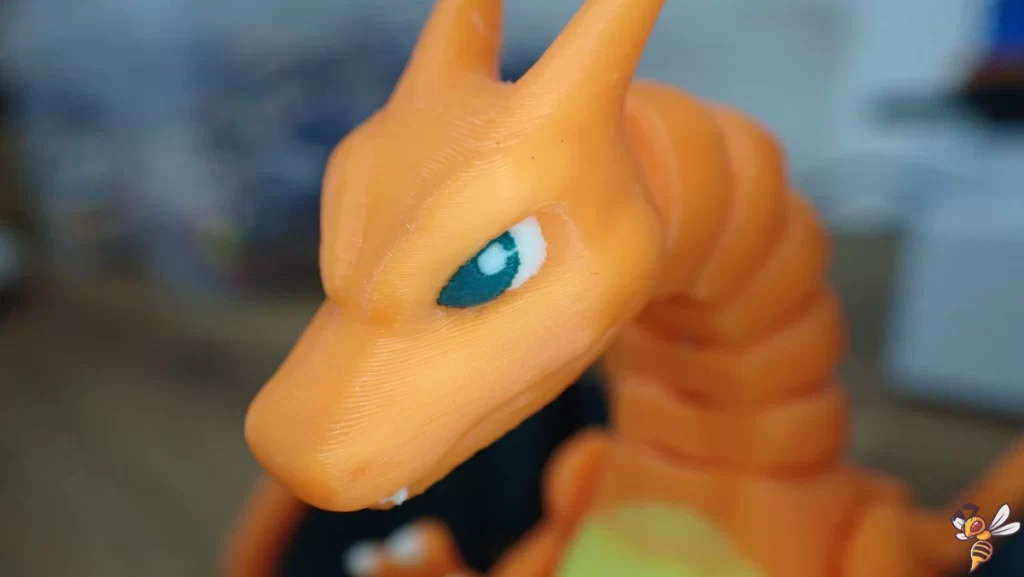
The last object was a Flexi Charizard. It has countless joints and many filigree filament transitions. I thought this would stress the A1 mini, but it carried on through the whole printing procedure easily.
Overall, I am incredibly impressed with the A1 mini’s multicolor capabilities. It has opened up a world of possibilities for me, and I can’t wait to see what other models I can print in multiple colors.
Conclusion: Should You Buy the Bambu Lab A1 mini?
The Bambu Lab A1 mini 3D printer, paired with the AMS Lite*, sets a new benchmark in affordable 3D printing. Its two standout features, the AMS Lite technology and the self-calibration, are game changers, especially for users at the entry-level. The ease of use, along with exceptional print results and capabilities for multicolor prints, makes this an exceptional choice for both newcomers and veterans to 3D printing.
From its meticulous packaging and design to its impressive print quality, the A1 mini ensures a hassle-free and creative printing experience. Despite minor hiccups like the spool compatibility, which are easily remedied, the overall package offers value that is hard to beat. The only thing I would improve is a slightly larger build volume. But larger machines cost more.
If you’re in the market for an affordable, high-quality, and innovative 3D printer, the Bambu Lab A1 mini should be at the top of your list.
The Bambu Lab A1 mini is an entry-level 3D printer that can print with up to 4 filaments and that at high speeds and perfect quality.
Build Volume: 180 × 180 × 180 mm
Speed: max. 500 mm/s
Extruder: Direct Drive with swapping mechanism
Print Bed: Textured PEI, magnetic, flexible
Leveling: Automatic
Nozzle Temp.: 300 °C
Bed Temp.: 80 °C
Connectivity: Wi-Fi, Bambu-Bus, Micro SD Card
Pros:
✓ Perfect print quality
✓ Fully self-calibrated
✓ Multi-filament 3D printing
✓ Easy to use
Cons:
× The AMS Lite filament switcher is not compatible with flexible filaments
Technical Specifications of the Bambu Lab A1 mini
- Build volume: 180 × 180 × 180 mm
- Extruder type/ tool head: Direct Drive with swapping mechanism
- Net weight: 5.5 kg
- Print bed: Textured PEI, magnetic, flexible
- Max. print temperature: 300 °C
- Max. print bed temperature: 80 °C
- Speed: max. 500 mm/s
- Filaments:
- Ideal: PLA, PETG, PVA, TPU (without AMS)
- Not recommended: ABS, ASA, PC, PA, PET, Carbon/Glass Fiber
- Filament tangle sensor: Yes
- Broken filament sensor: Yes
- Filament odometry sensor: Yes
- Display: 2.4 inches 320 × 240 IPS Touch Screen
- Connectivity: Wi-Fi, Bambu-Bus, Micro SD Card
- Power loss recover: Yes
- Slicer:
- Ideal for Bambu printers: Bambu Studio
- Not recommended: Cura, Superslicer, Prusaslicer, but certain advanced features may not be supported.
Important Accessories for a FDM 3D Printer
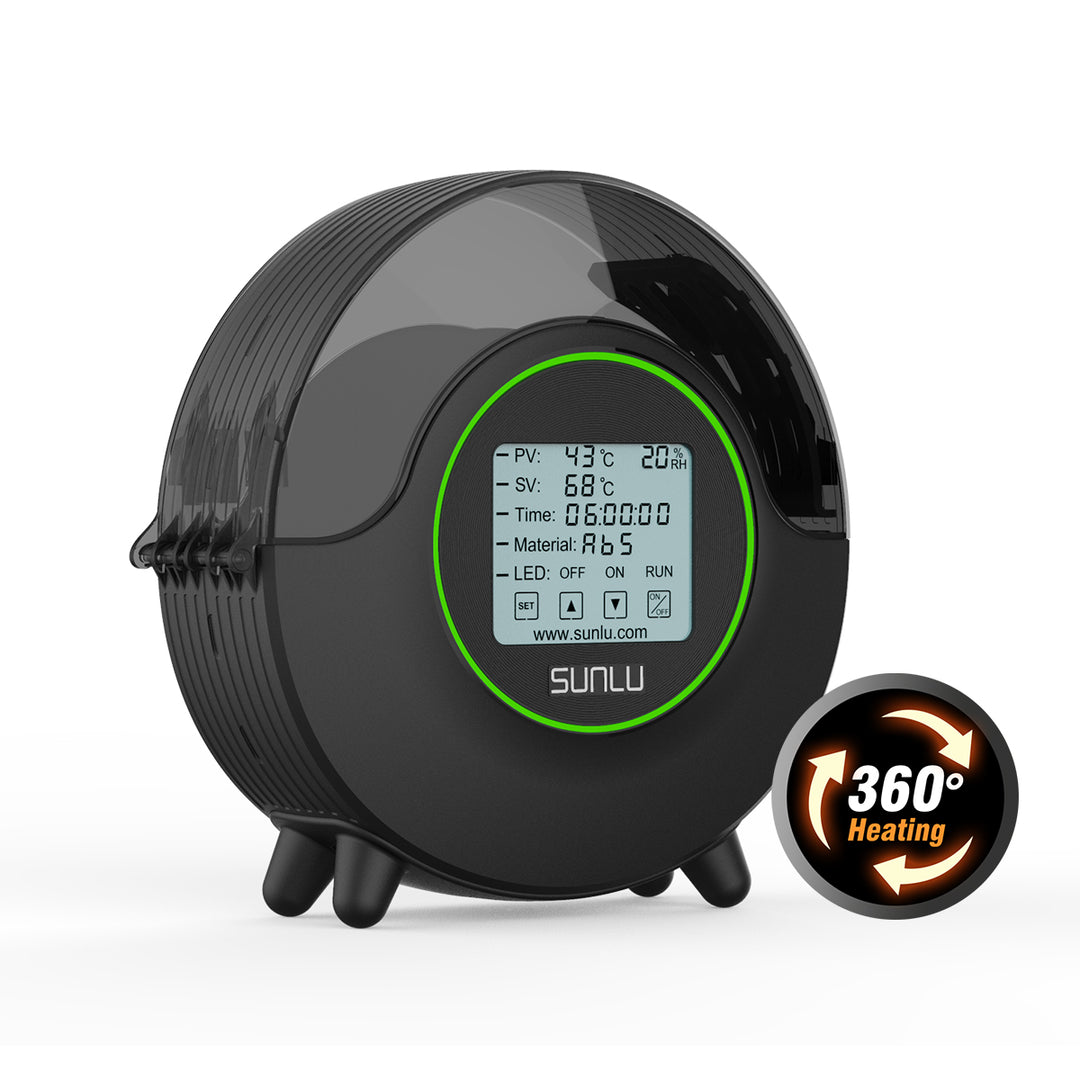
Hydroscopic filaments such as PETG or nylon absorb water from the air. This results in printing errors. A filament dryer dries the filament before printing.
Most filaments need to be stored dry to avoid printing errors such as stringing. Vacuum bags with desiccant are perfect for this.
Filament Storage Vacuum Bags:
Desiccant Silica Gel Packs:
Disclosure: This website is the property of Martin Lütkemeyer and is operated by Martin Lütkemeyer. Martin Lütkemeyer is a member of the Amazon Services LLC and other Affiliate Programs. These are affiliate advertising programs designed to enable websites to earn advertising revenue through advertising and linking to Amazon.com and others. Links marked with * are affiliate links.
