- Wet Filament: Prevention, Symptoms & Drying - July 18, 2024
- Sovol SV08 – Best PrusaSlicer Settings & Profile - June 26, 2024
- Sovol SV08 – Best Orca Slicer Settings & Profile - June 26, 2024
Disclosure: Links marked with * are Affiliate Links. I earn from qualifying purchases if you decide to make a purchase through these links – at no additional cost for you!
The Anycubic Kobra Plus can achieve perfect printing results. However, as with any 3D printer, these results depend heavily on the correct slicer settings. Choosing the optimal settings can make the difference between occasional printing errors and a perfect print.
Although a pre-made profile is available for the Anycubic Kobra Plus in Cura, it does not always deliver perfect results. While such standard profiles provide a good starting point, they cannot take into account the specific requirements of each individual print project or filament type. Therefore, it is often necessary to make individual adjustments to get the best out of your 3D printer.
In this article, I share my personally optimized Cura settings, which I have carefully tested and refined. These settings should serve as a solid foundation for you to achieve high print quality.
However, in order to achieve perfect results, it is usually necessary to perform a calibration for the respective filament. Each material has its own characteristics and requirements. I will cover the most important calibrations in this article.
For detailed instructions on calibration, I recommend that you refer to my detailed calibration guide or my 3D printing course. There you will find valuable tips and tricks to get the most out of your Anycubic Kobra Plus.
| PLA | ABS | TPU | PETG | |
|---|---|---|---|---|
| Printing temperature | 195 °C | 230 °C | 210 °C | 230 °C |
| Print bed temperature | 60 °C | 80 °C | 60 °C | 70 °C |
| Print bed speed | 60 mm/s | 60 mm/s | 30 mm/s | 60 mm/s |
| Retraction | 6.5 mm with 30 mm/s | 6.5 mm with 30 mm/s | 7 mm with 35 mm/s | 7 mm with 30 mm/s |
| Cooling | 100 % | 0% | 100 % | 50-100 % |
Table of Contents: [show]
How to Create a Cura Profile for the Anycubic Kobra Plus
A Cura profile consists of two main components: the machine settings and the print settings.
The machine settings define the physical parameters of your 3D printer, such as the build size and the print head movements. They are essential for the printer to function correctly.
Print settings, on the other hand, refer to specific parameters for each print, such as layer thickness, infill pattern and print speed, which influence the final result.
First of all, the machine settings must be defined. The standard profile of the Kobra Plus serves as a template for this.
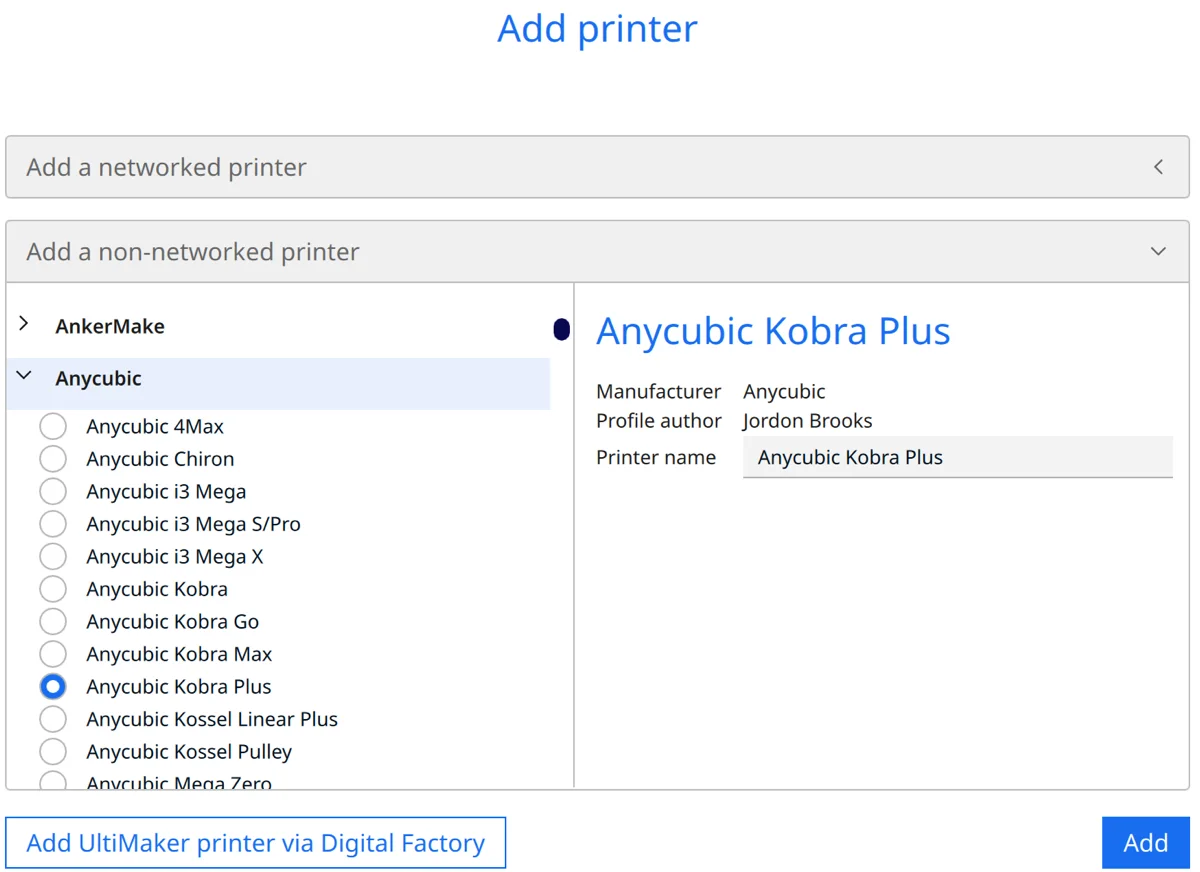
To add the Kobra Plus in Cura, click on ‘Settings’, then on ‘Printer’ and then on ‘Add printer’. In the next step, click on ‘Non-networked printer’. Then select ‘Anycubic’ and ‘Anycubic Kobra Plus’. Then click on ‘Add’.
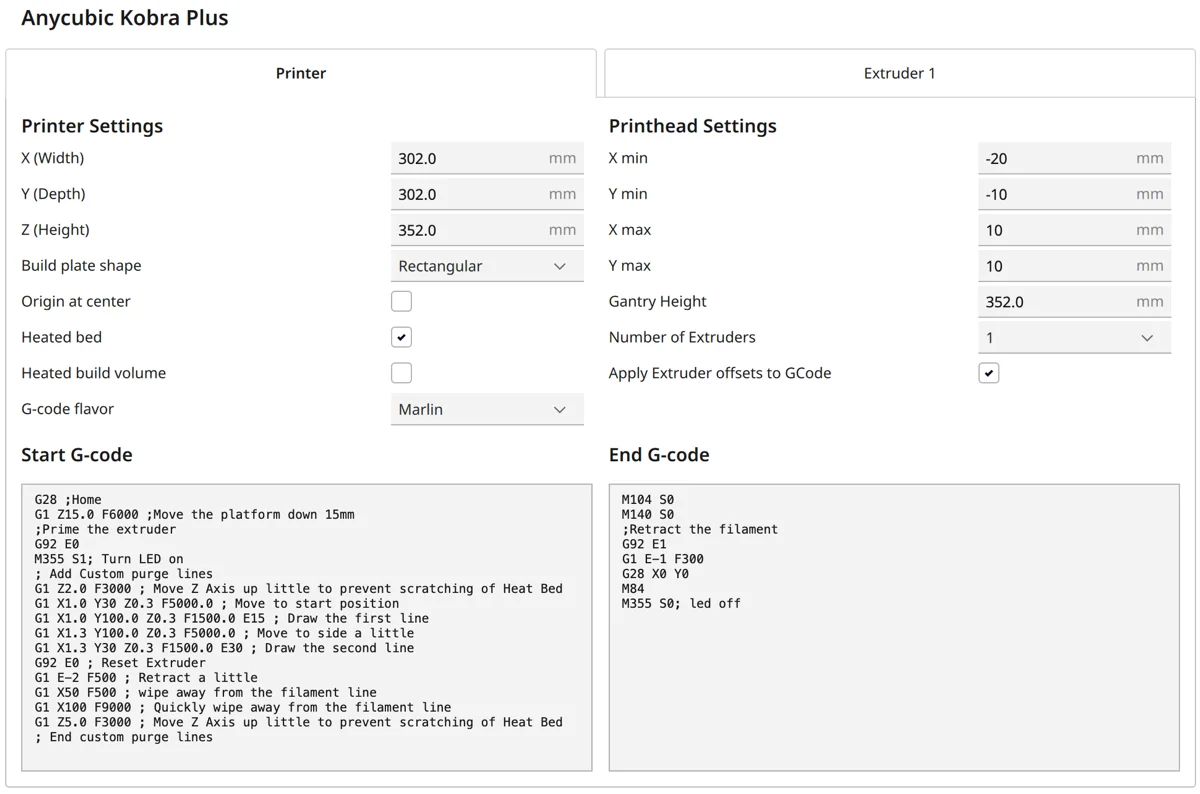
The machine settings are shown in the screenshot above. The G-code snippets are listed again directly after this to make it easier to copy them:
Start G-Code:
- G28 ;Home
- G1 Z15.0 F6000 ;Move the platform down 15mm
- ;Prime the extruder
- G92 E0
- M355 S1; Turn LED on
- ; Add Custom purge lines
- G1 Z2.0 F3000 ; Move Z Axis up little to prevent scratching of Heat Bed
- G1 X1.0 Y30 Z0.3 F5000.0 ; Move to start position
- G1 X1.0 Y100.0 Z0.3 F1500.0 E15 ; Draw the first line
- G1 X1.3 Y100.0 Z0.3 F5000.0 ; Move to side a little
- G1 X1.3 Y30 Z0.3 F1500.0 E30 ; Draw the second line
- G92 E0 ; Reset extruder
- G1 E-2 F500 ; Retract a little
- G1 X50 F500 ; wipe away from the filament line
- G1 X100 F9000 ; Quickly wipe away from the filament line
- G1 Z5.0 F3000 ; Move Z Axis up a little to prevent scratching of Heat Bed
- ; End custom purge lines
End G-Code:
- M104 S0
- M140 S0
- ;Retract the filament
- G92 E1
- G1 E-1 F300
- G28 X0 Y0
- M84
- M355 S0; led off
Once you have created the printer profile, you have to define the print settings. These settings control aspects such as the print temperature, the layer thickness and the movement speed of the printer.
They are crucial for the quality of your print result and should be carefully adjusted to the material to be used and the specific requirements of your project.
You can find more information on how to create a 3D printer profile in Cura and what you need to pay attention to in this article: How to Create a Custom 3D Printer Profile in Cura
PLA Settings
These are the correct Cura settings for printing PLA filament with the Anycubic Kobra Plus:
- Print temperature: 195 °C
- Print bed temperature: 60 °C
- Print speed: 60 mm/s
- Retraction: 6.5 mm at 30 mm/s
- Cooling: 100%
The Anycubic Kobra Plus can process PLA filament more or less perfectly without requiring a lot of calibration work. This is one of the reasons why this printer is so attractive, especially for beginners.
PLA is known to be easy to print, making it an excellent choice for beginners and experienced users alike. The Anycubic Kobra Plus is ideal for processing PLA. It delivers consistent and high-quality results.
The most important settings for PLA that should be optimized are the printing temperature and retraction. These parameters are crucial for avoiding stringing and achieving a smooth surface.
However, it should be noted that the values given above will not be perfect for every type of PLA. Later in this article, I will discuss calibration to adjust the settings for different PLA types.
ABS Settings
These are the correct Cura settings for printing ABS filament with the Anycubic Kobra Plus:
- Print temperature: 230 °C
- Print bed temperature: 80 °C
- Print speed: 60 mm/s
- Retraction: 6.5 mm at 30 mm/s
- Cooling: 0%
ABS is a commonly used filament in the 3D printing world, known for its robustness and heat resistance. However, the Anycubic Kobra Plus does not have an enclosure, which can lead to problems when printing ABS. A housing helps to keep the temperature around the print object constant and prevent warping, which can occur with ABS due to its shrinkage when it cools down.
However, the Anycubic Kobra Plus can achieve good results when printing smaller objects with ABS. A helpful tool for this is the use of a draft shield in Cura. This creates a kind of barrier around the object, protecting it from drafts and thus helping to keep the temperature more constant. For larger objects, however, it can be more difficult to avoid warping, especially without a closed housing.
TPU Settings
These are the correct Cura settings for printing TPU filament with the Anycubic Kobra Plus:
- Print temperature: 210 °C
- Print bed temperature: 60 °C
- Print speed: 30 mm/s
- Retraction: 7 mm with 35 mm/s
- Cooling: 100%
The Anycubic Kobra Plus has a Bowden extruder, which requires some consideration when printing with flexible filaments such as TPU. Bowden extruders are not positioned as close to the print head as direct extruders, which means that the filament is fed over a longer distance.
This can cause problems when printing flexible materials, as these materials tend to deform in the longer tube paths, leading to clogging and inaccurate extrusion.
Nevertheless, the Anycubic Kobra Plus is perfectly capable of processing some types of TPU. However, certain settings are particularly important here. A slower printing speed is crucial to prevent the flexible material from jamming or deforming in the extruder.
Slower printing helps to achieve a clean and accurate result, as it gives the filament time to flow correctly and without deformation in the nozzle. The retraction setting is also important to minimize stringing with TPU, which can be more common with flexible materials. Careful calibration and adjustment of these settings are key to successful printing with TPU on the Anycubic Kobra Plus.
PETG Settings
These are the correct Cura settings for printing PETG filament with the Anycubic Kobra Plus:
- Print temperature: 230 °C
- Print bed temperature: 70 °C
- Print speed: 60 mm/s
- Retraction: 7 mm with 30 mm/s
- Cooling: 50-100%
PETG is an interesting filament because it combines properties of PLA and ABS – it combines the easy printability of PLA with the strength and heat resistance of ABS. This balance makes PETG a popular filament for a variety of applications.
However, a common problem when printing with PETG is stringing, i.e. thin threads that can form between the printed parts. The retraction settings therefore play a crucial role when printing with PETG and must be carefully calibrated to minimize stringing. On the other hand, too much retraction can lead to other problems, such as under-extrusion.
It is also essential to store PETG in a dry place as it is hygroscopic and absorbs moisture from the environment. Moist PETG can lead to problems during printing, such as poor layer adhesion or extreme stringing. Therefore, correct storage is crucial to achieve the best printing results with PETG.
The Best Cura Settings for the Anycubic Kobra Plus
Print Temperature
The best printing temperatures for the Anycubic Kobra Plus in Cura:
- PLA: 195 °C
- ABS: 230 °C
- TPU: 210 °C
- PETG: 230 °C
The print temperature is one of the most important settings in 3D printing, as it has a major influence on the print quality and the properties of the finished part. It is advisable to calibrate the printing temperature for each material and even for each filament brand.
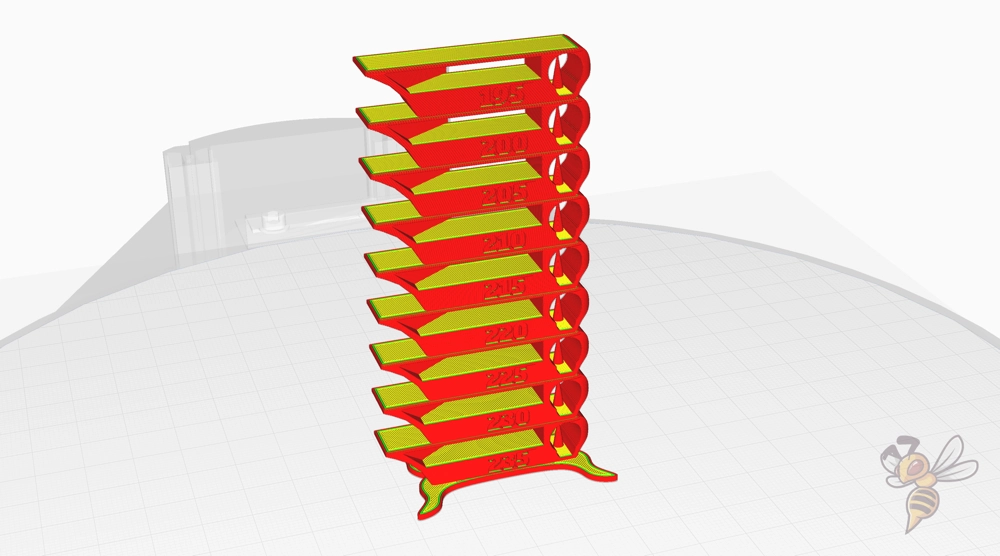
An effective way to find the optimal printing temperature for a specific filament is to use a temperature tower.
This method involves printing a test object where the temperature is gradually changed at different heights of the object. This allows you to observe how changes in print temperature affect aspects such as layer adhesion, stringing and overall print quality.
By analyzing the results of the temperature tower, you can determine the ideal printing temperature for your specific filament and 3D printer.
I like to use this tower for this.
Print Bed Temperature
The best print bed temperatures for the Anycubic Kobra Plus in Cura:
- PLA: 60 °C
- ABS: 80 °C
- TPU: 60 °C
- PETG: 70 °C
The right print bed temperature is crucial for the quality of your 3D prints. An appropriate bed temperature ensures good adhesion of the first layer to the print bed, which in turn helps to prevent problems such as warping or peeling.
Especially with materials that tend to shrink, such as ABS, a higher bed temperature is important to ensure even expansion during the printing process.
A common problem in 3D printing, known as “elephant foot“, occurs when the first layer of the print is pushed too hard and expands. This can often be caused by the print bed temperature being too high. Accurate calibration of the print bed temperature can minimize this problem and lead to a cleaner and more precise print result.
Print Speed
The best print speeds for the Anycubic Kobra Plus in Cura:
- PLA: 60 mm/s
- ABS: 60 mm/s
- TPU: 30 mm/s
- PETG: 60 mm/s
Print speed is another decisive factor in 3D printing. It influences how fast the printer is moved, which in turn affects the print quality and the duration of the printing process. Too high a print speed can lead to problems such as poor layer adhesion and inaccurate printing, while too low a speed can unnecessarily prolong the printing process.
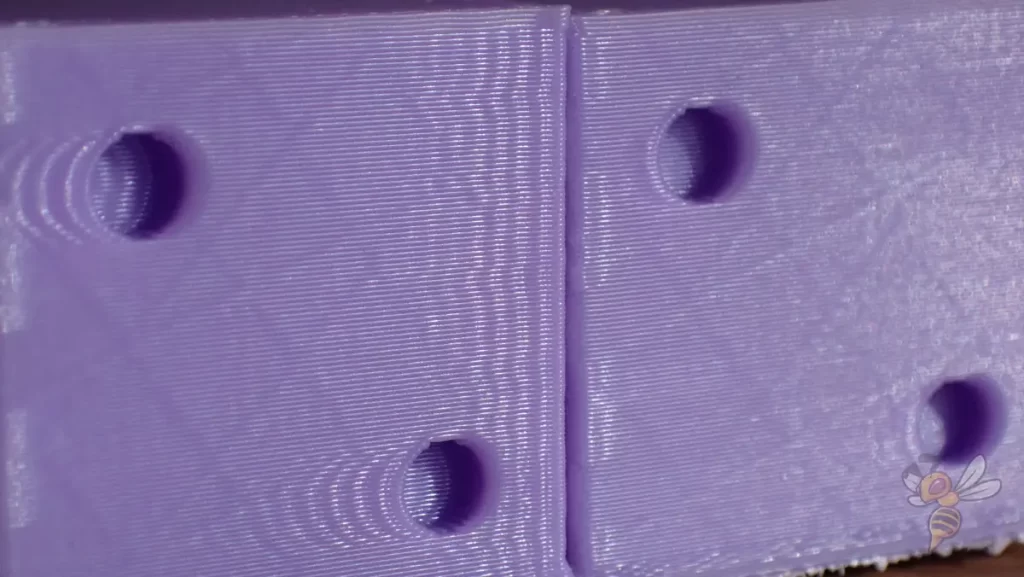
To calibrate the print speed, I recommend using a ringing test. This test involves printing an object specifically designed to visualize problems such as vibrations and resonances caused by excessive speeds. This test helps to find the optimal speed for your Anycubic Kobra Plus and the material used to achieve the best printing results.
Layer Height
These are the best layer heights for the Anycubic Kobra Plus in Cura:
- Decorative objects: 0.1 mm
- Standard: 0.2 mm
- Rough, fast prints: 0.3 mm
A lower layer height, such as 0.1 mm, is ideal for decorative objects with a high level of detail. This setting results in finer and smoother surfaces, but also requires more time for printing.
The standard layer height of 0.2 mm is a good compromise between print quality and speed. It is ideal for most printing projects where a good balance between detail and printing time is required.
However, when it comes to fast, rough prints, a layer height of 0.3 mm is recommended. This setting enables prints to be completed much faster, but at the expense of detail accuracy and surface quality. It is ideal for prototypes or parts where aesthetics are less important.
Flow Rate
These are the best flow rates for the Anycubic Kobra Plus in Cura:
- Standard: 100%
- For over-extrusion: 90% to 99%
- For under-extrusion: 101% to 110%
The flow rate should only be adjusted after the print temperature and retraction have been carefully calibrated. The flow rate influences how much filament is dispensed during the printing process. A correctly set flow rate ensures the optimum amount of filament required for clean, strong and accurate prints.
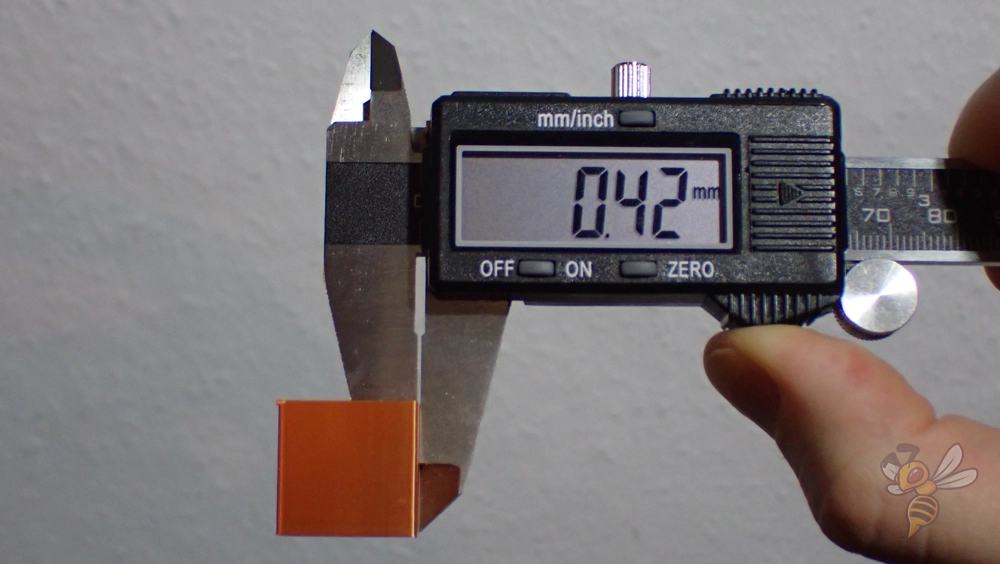
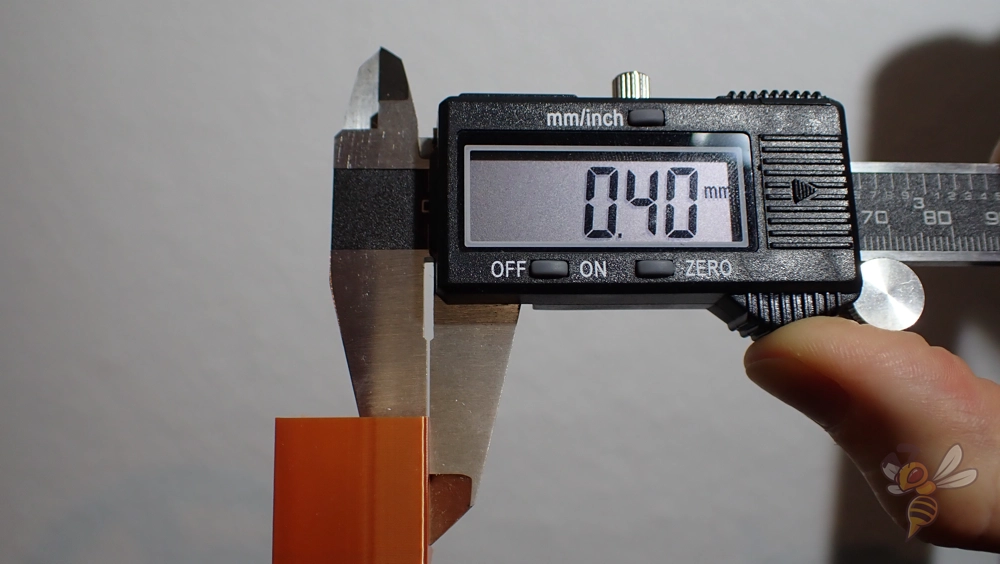
To calibrate the flow rate, it is recommended to print a cube without infill or top layers. The wall thickness of this cube serves as an indicator of whether the flow rate needs to be adjusted.
If the wall is thicker than intended, this indicates over-extrusion and the flow rate should be reduced. Conversely, if the wall is thinner than expected, this indicates under-extrusion and the flow rate should be increased. This method allows precise adjustment for consistent and accurate printing results.
Retraction
The best retraction settings for the Anycubic Kobra Plus in Cura:
- PLA: 6.5 mm at 30 mm/s
- ABS: 6.5 mm with 30 mm/s
- TPU: 7 mm with 35 mm/s
- PETG: 7 mm at 30 mm/s
Retraction is a critical aspect of 3D printing that helps prevent stringing and oozing. It is the process by which the filament is slightly retracted during the printing process when the print head is moving but not printing.
Correctly setting the retraction distance and speed is crucial for a clean and precise print surface.
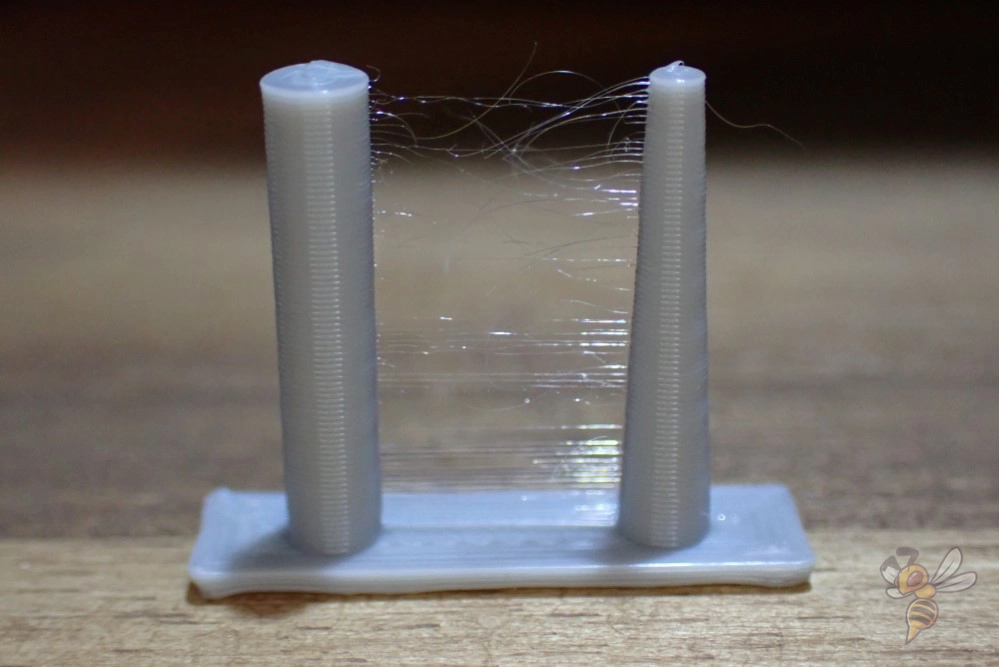
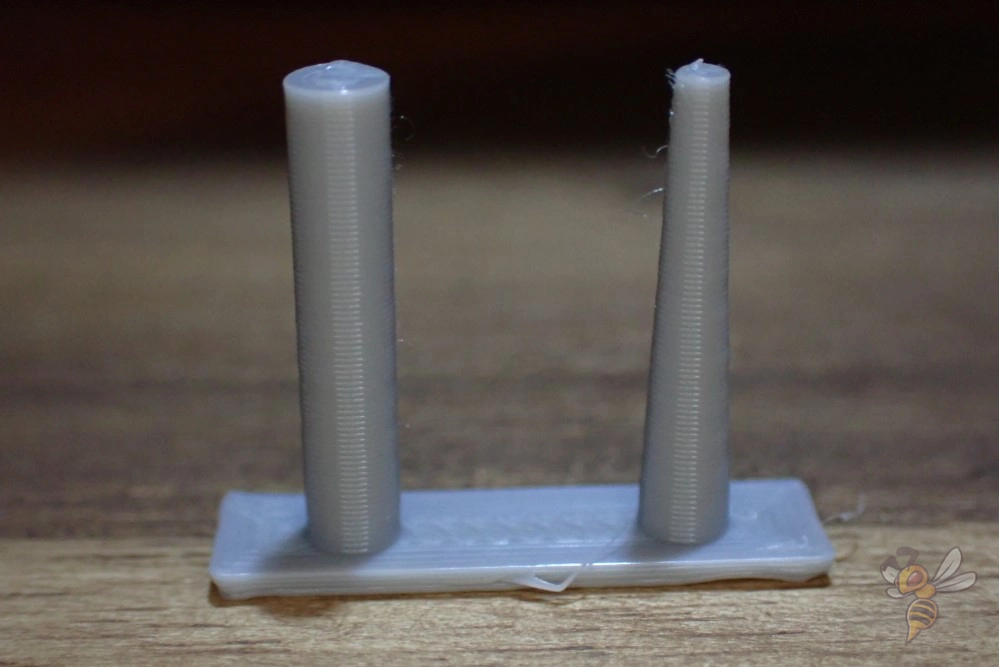
To properly calibrate the retraction, a special test pattern can be printed, usually consisting of several thin columns or towers.
By observing the print results on these patterns, you can see if stringing occurs and adjust the retraction settings accordingly.
Too high a retraction can lead to problems such as under-extrusion or even clogging of the hotend, while too low a retraction will not effectively prevent stringing. Careful calibration of these settings will allow you to achieve optimal results with your Anycubic Kobra Plus.
Infill
The best infill density for the Anycubic Kobra Plus in Cura:
- Decorative objects: 0-15%
- Standard objects: 15-50%
- Stable objects: 50-100%
Infill, or infill density, is a key factor in the strength and weight of your 3D prints. For decorative objects where structural strength does not play a major role, a low infill value between 0-15% is sufficient. This not only reduces the filament required, but also shortens the printing time.
For standard objects that require moderate strength, an infill density of 15-50% is recommended. This represents a good balance between material consumption, printing time and structural integrity.
For objects that need to withstand high loads, such as functional parts or tools, a higher infill value of 50-100% is appropriate.
First Layer
These are the best Cura settings for the first layer with the Anycubic Kobra Plus:
- Layer height: 100%
- Line width: 100%
- Print temperature: Same as the rest.
- Print speed: 10 mm/s
- Raft/Brim/Skirt: Skirt.
The first layer is crucial for the success of the entire printing process. A slower print speed for the first layer is particularly important, as it allows for better adhesion to the print bed. This is probably the most effective way to ensure that the print starts stable and minimizes the risk of warping or other problems caused by poor adhesion.
Summary
In summary, the optimal Cura settings for the Anycubic Kobra Plus are a combination of careful calibration and customization to the filament and print project at hand. With the settings shared in this article, you have a solid foundation for achieving high-quality printing results with your Anycubic Kobra Plus.
I hope these settings will help you on your journey into the world of 3D printing. They are the result of extensive testing and fine-tuning aimed at making it easier for you to get started and optimize your prints.
For more detailed information on calibration and advanced tips, I recommend you take a look at the calibration guide and 3D printing course referenced at the beginning of this article. These resources provide valuable and in-depth insights into the intricacies of 3D printing with the Anycubic Kobra Plus.
Disclosure: This website is the property of Martin Lütkemeyer and is operated by Martin Lütkemeyer. Martin Lütkemeyer is a member of the Amazon Services LLC and other Affiliate Programs. These are affiliate advertising programs designed to enable websites to earn advertising revenue through advertising and linking to Amazon.com and others. Links marked with * are affiliate links.

