
- Wet Filament: Prevention, Symptoms & Drying - July 18, 2024
- Sovol SV08 – Best PrusaSlicer Settings & Profile - June 26, 2024
- Sovol SV08 – Best Orca Slicer Settings & Profile - June 26, 2024
Disclosure: Links marked with * are Affiliate Links. I earn from qualifying purchases if you decide to make a purchase through these links – at no additional cost for you!
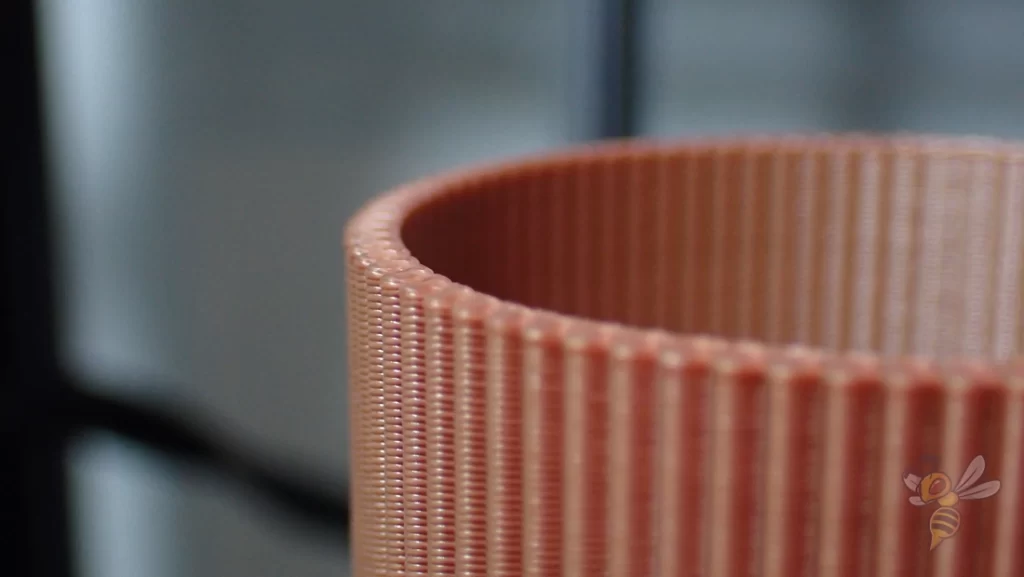
With the vase mode, you can save a lot of printing time and filament for certain objects. You also prevent a Z-seam because the nozzle moves in a continuous motion from bottom to top.
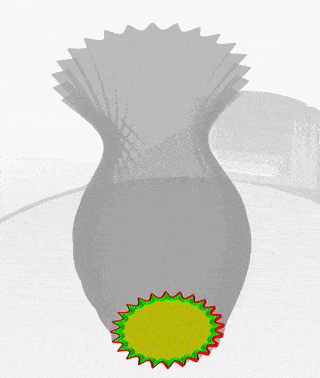
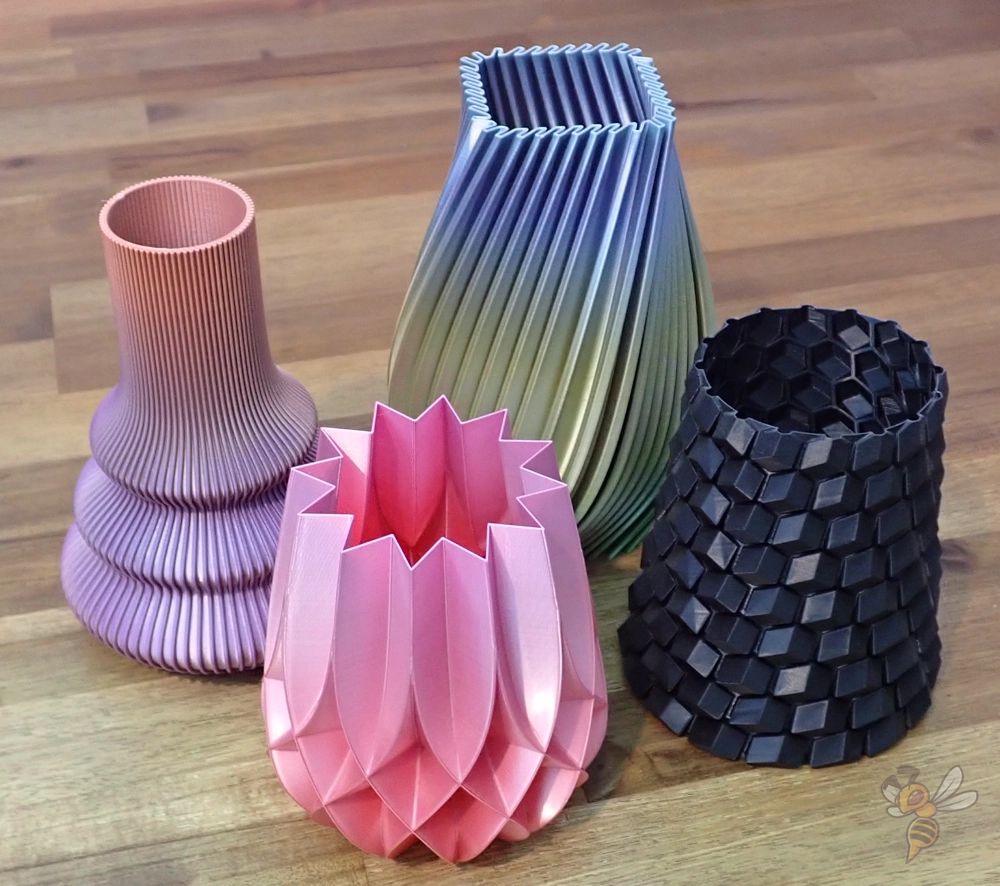
In vase mode, the 3D printer prints only a single outer wall, no infill (support structures inside the object), and no top layers. The finished object then resembles a vase, though the shape can be almost anything.
In addition to a detailed explanation of the vase mode, in this article I’ll show you a few simple examples of how to use the mode in the two most popular slicers for hobby 3D printing, Cura and PrusaSlicer.
Table of Contents:
What is the Vase Mode in 3D Printing?
Often, FDM 3D printing is used to make objects that have only a decorative purpose. For such objects, you don’t need to use much infill because they don’t need to be very stable. In some cases, you don’t need any infill at all.
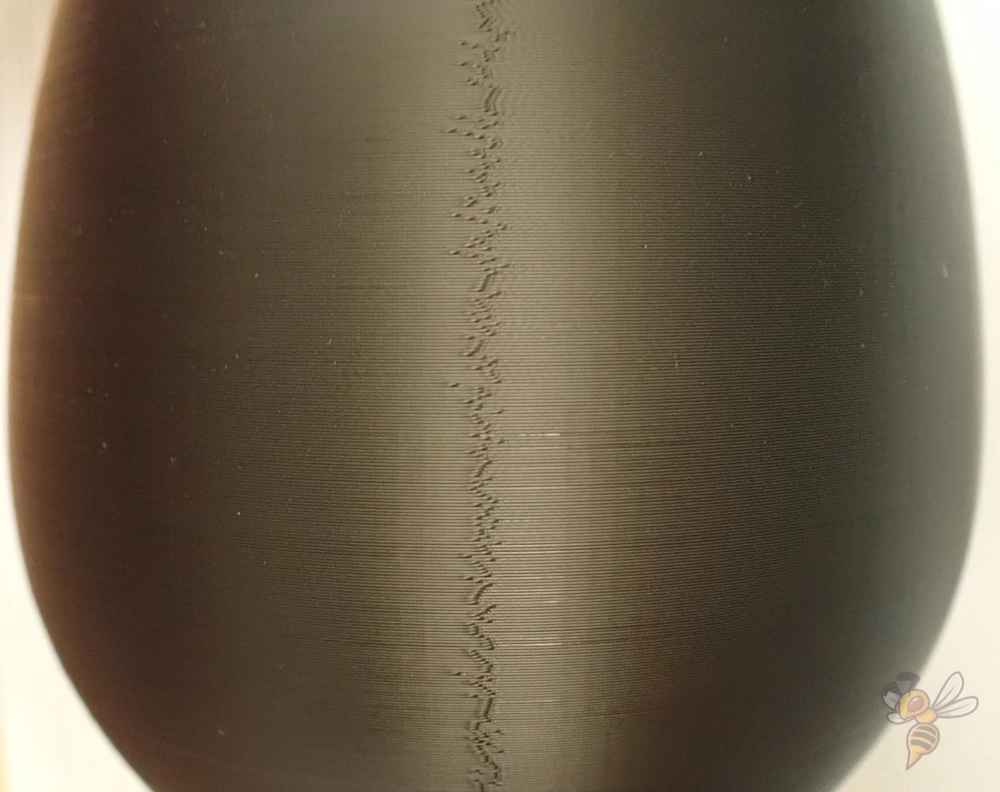
Normally, an object is 3D-printed layer by layer. In this process, the nozzle moves up a little in the Z direction after each layer and prints the next layer. Various printing errors can occur in the process.
If the nozzle moves back and forth between two positions without printing, stringing can occur. During the transition from one layer to the next, a Z-seam can occur. However, if the outer layer is printed continuously, the nozzle never stops extruding and consequently, these errors cannot occur.
So, the vase mode has several advantages over traditional print modes:
- You save a lot of filament.
- Less filament means less printing time.
- Without layer transitions, there is no Z-seam.
- Without retraction movements, there can be no stringing.
If your object should or can be open at the top, the vase mode is perfect for this. But it is also possible to print objects closed on top in vase mode. However, this only works if there is no real top layer, but the object continuously tapers off.
How Does the Vase Mode Work?
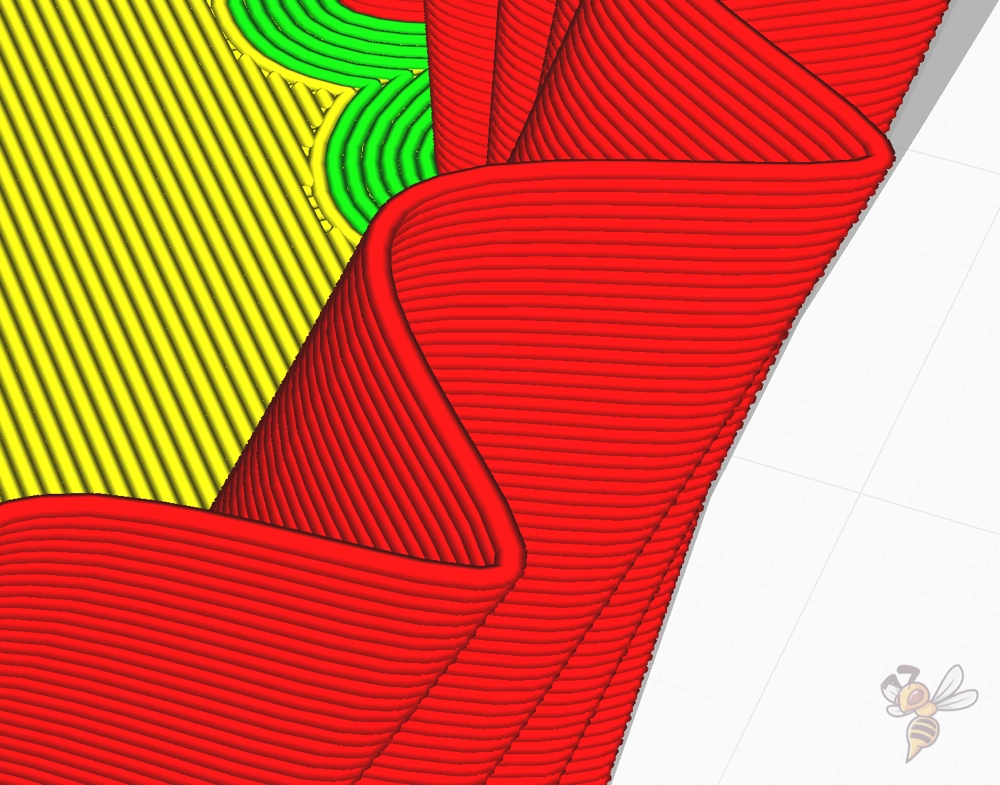
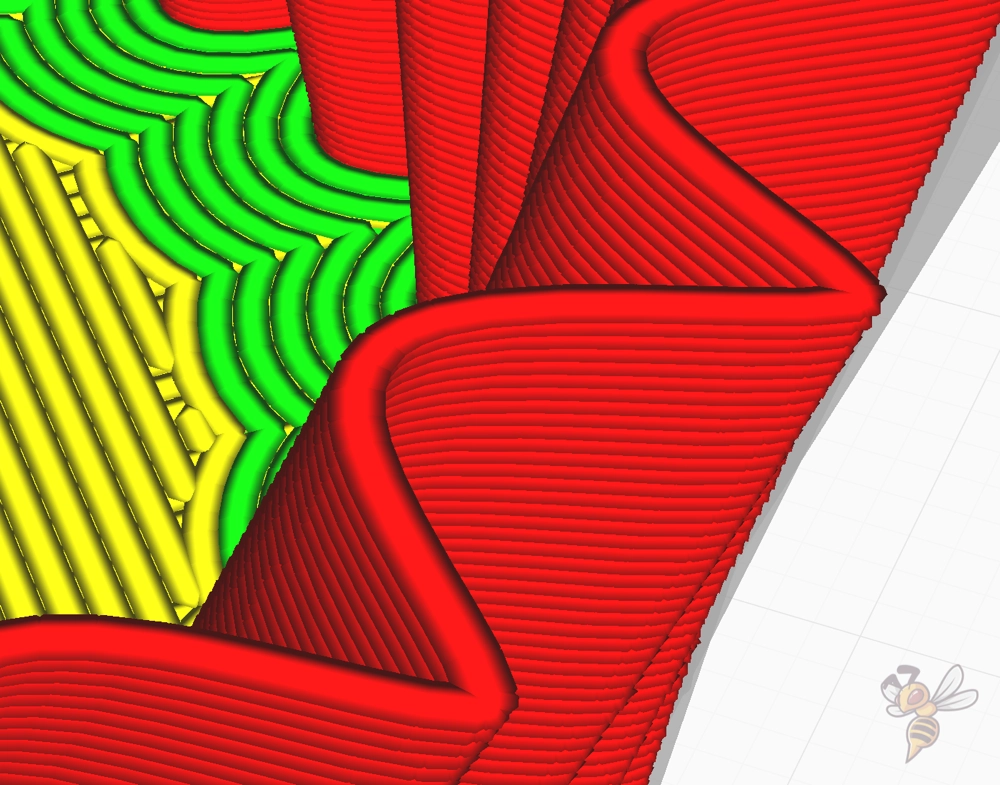
In vase mode, the nozzle does not stop extruding once as it prints the outer layer from bottom to top. Therefore, in some slicers, this mode is also called “spiralize outer contour”.
In vase mode, the lines on top of each other support each other. There are no other wall lines or infill to support or hold the outer structure of the object. Therefore, the final stability of the object depends mainly on the material used and the line width, in addition to its shape.
But there are a few other settings you can use to improve stability in vase mode.
To increase the layer adhesion, i.e. the adhesion of the lines to each other, you should print at a higher temperature. The usual printing errors that occur when printing at too high a temperature cannot occur in vase mode.
Since the nozzle never stops extruding filament, the filament cannot escape uncontrollably and form strings or blobs. The higher the print temperature, the better the filament will adhere to already printed filament.
Of course, you should not set the print temperature too high either. You can approach the ideal value in small steps of 5 °C.
Another important setting you should adjust in vase mode is the print speed. Depending on how large the circumference of your vase is, the printed filament may not have cooled properly when the nozzle passes over it the next time.
In most cases, this is not a problem. However, in my experience, to improve the surface and avoid printing errors, about half the normal print speed is advisable. Also, the larger the diameter of your object, the faster you can print.
Vase Mode or no Infill?
Of course, you can print your vases without the vase mode. This is useful, for example, if you are not satisfied with the stability and want to add a second wall.
However, the disadvantage is that without the vase mode, you will inevitably create a Z-seam. Especially with round objects, the Z-seam is then very obvious on one side. Typically, however, this is not a problem, since decorative objects are mainly observed from one side.
For objects with edges, you can hide the Z-seam on this edge. You can read how to do this in this article.
If you want to print a decorative object and for various reasons the vase mode is not suitable for your object, you can still save a lot of filament by using the right infill. For decorative objects, the best infill in Cura for such purposes is the lightning infill.
How to Activate the Vase Mode in Cura?
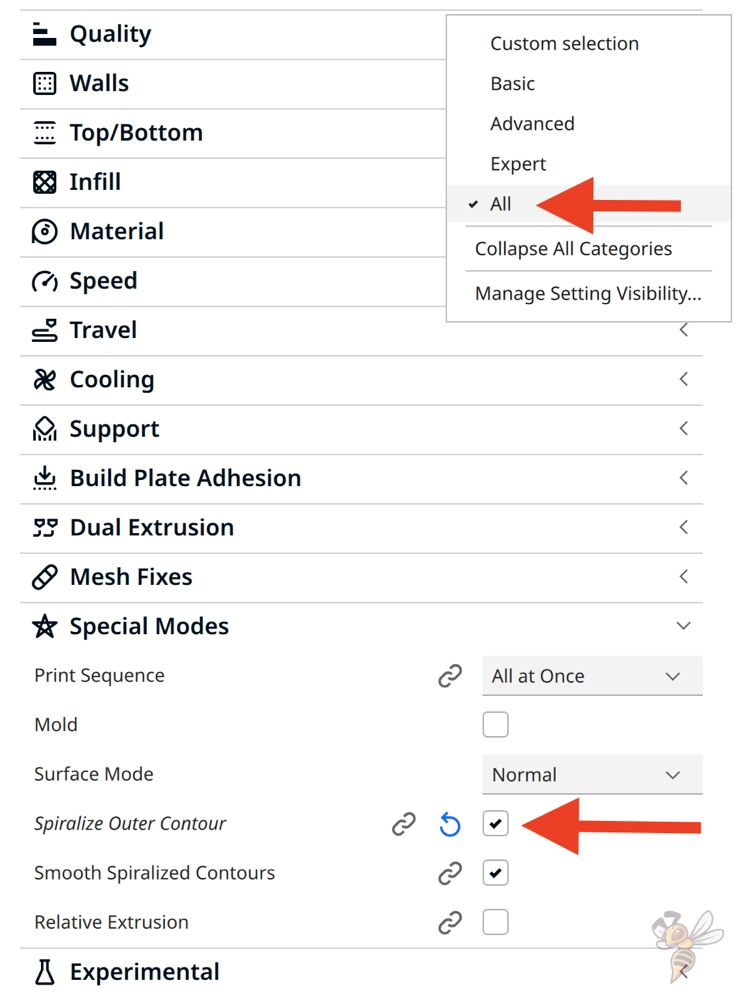
Vase mode in Cura is called “Spiralize Outer Contour” and is located under the Special Modes. If you don’t see this option, you can enable its visibility from the menu.
Once you activate the mode, various print settings are automatically adjusted. For example, the infill density will be set to 0%, the number of wall lines will be set to 1, and in the background the spiraling motion will be applied to the single outer skin.
You can learn more details about the vase mode in Cura in this detailed guide: Cura Vase Mode “Spiralize Outer Contour” Basics & Settings
How to Activate the Vase Mode in PrusaSlicer?
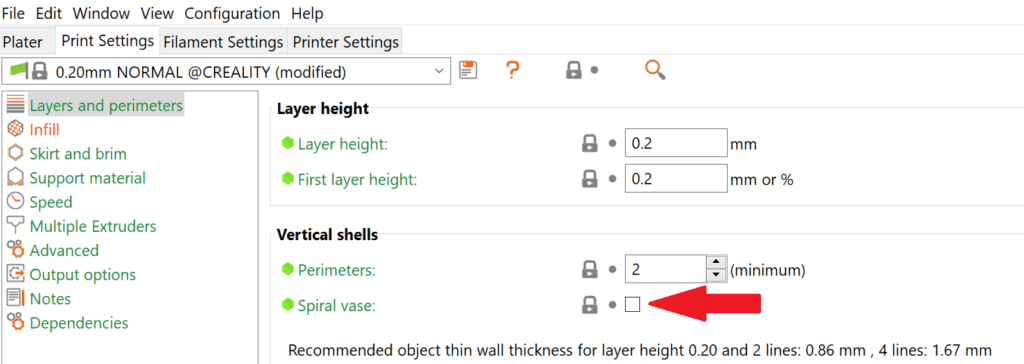
The spiral vase mode is located in PrusaSlicer under the object’s layers and perimeters settings.
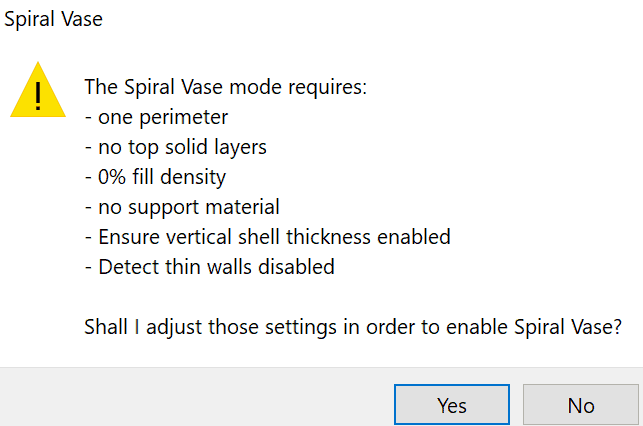
As soon as you activate the spiral vase mode in PrusaSlicer, a hint will appear which print settings will automatically change as a result.
Again, you can adjust some settings to improve the final result. What they are, you can read in this specialized article: PrusaSlicer Spiral Vase Mode | The Basics – Simply Explained
Conclusion
The vase mode opens up completely new possibilities in 3D printing to design objects, save printing time and filament. Especially for vases this mode is ideal. With the right settings you will succeed every time and the vase will be stable and beautiful.
Disclosure: This website is the property of Martin Lütkemeyer and is operated by Martin Lütkemeyer. Martin Lütkemeyer is a member of the Amazon Services LLC and other Affiliate Programs. These are affiliate advertising programs designed to enable websites to earn advertising revenue through advertising and linking to Amazon.com and others. Links marked with * are affiliate links.
