
- Wet Filament: Prevention, Symptoms & Drying - July 18, 2024
- Sovol SV08 – Best PrusaSlicer Settings & Profile - June 26, 2024
- Sovol SV08 – Best Orca Slicer Settings & Profile - June 26, 2024
Disclosure: Links marked with * are Affiliate Links. I earn from qualifying purchases if you decide to make a purchase through these links – at no additional cost for you!
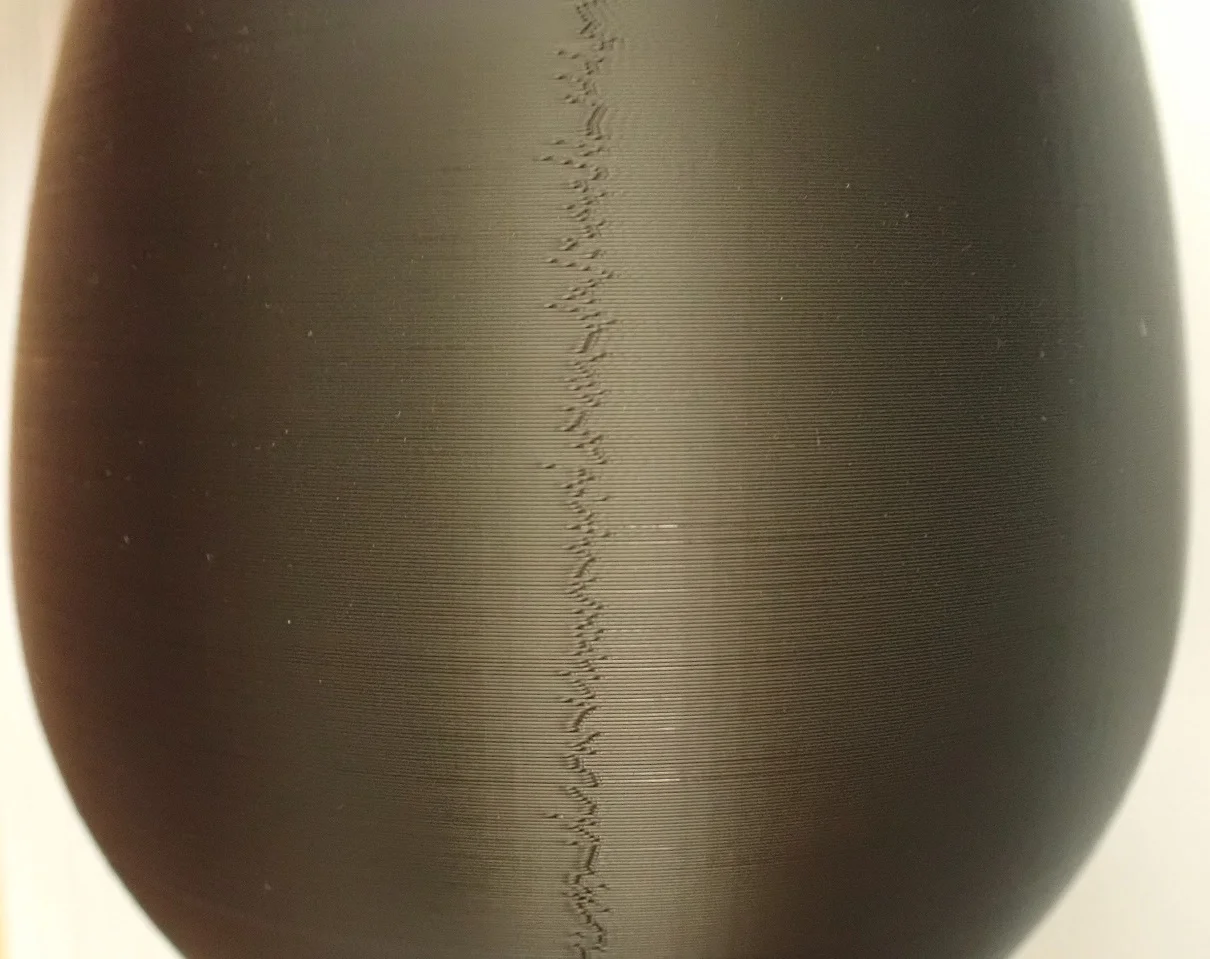
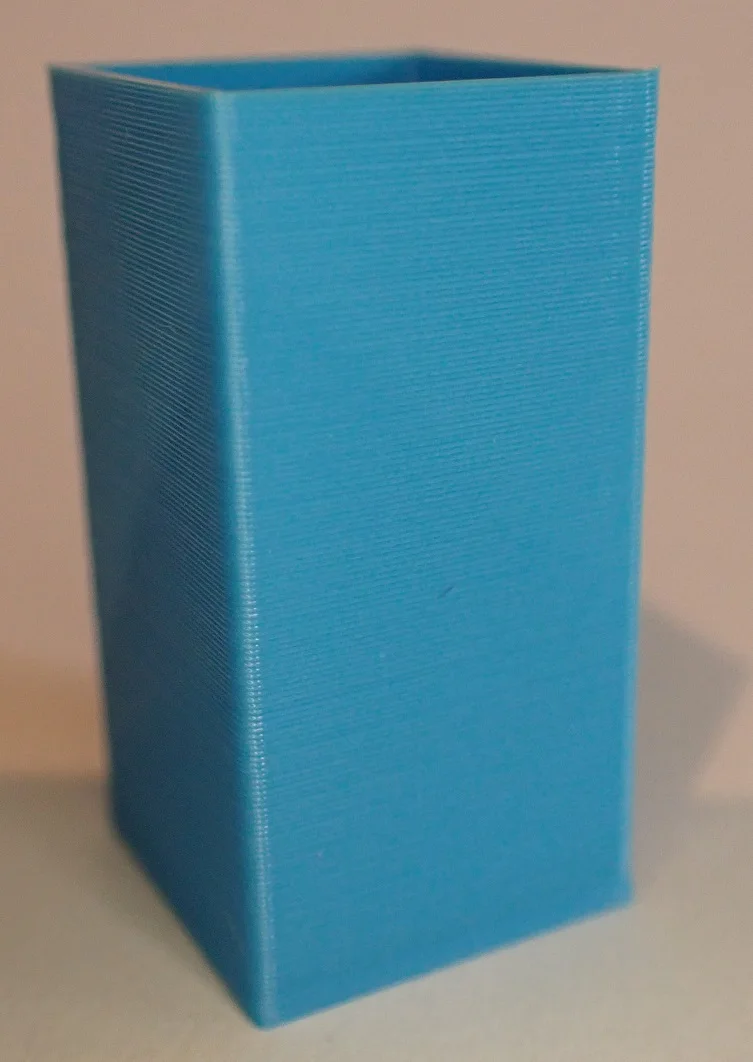
A Z seam is a line of print defects that runs along the Z axis of a 3D print from top to bottom. The resulting print defects are usually discontinuities and sometimes accompanied by blobs or zits.
A Z seam is usually visible on smooth and round objects that have not been printed in Vase Mode. With objects with corners, the slicer usually finds places where it can set the starting points of the individual layers so that they are not noticeable in the final result. With particularly smooth and especially round objects this is difficult.
A Z seam is created by over- or under-extrusion at layer transitions. If the transitions are on top of each other, a seam is created along the Z axis. Z seams can be reduced by correct extrusion settings and hidden by slicers. Z seams do not occur in Vase mode.
In this article, you’ll learn what can cause a Z-seam and how you can reduce or even avoid this printing error. I’ve tested all the settings hands-on to better demonstrate their effects.

Z Seam Causes
In principle, every 3D print has a Zseam. In some prints, it is more visible than in others. How visible it actually is depends on its position, the structure of the object and the extrusion settings.
A visible Z seam is caused by too much pressure in the hotend. When the printhead moves to the next layer, the pressure is released by an unwanted extrusion of filament. If the starting points of each layer are on top of each other, a visible seam is created along the Z axis.
At the end of each layer, the printhead stops for a very short time and tries to stop extruding as it is moved across the Z-axis to the next layer to continue printing. If over-extrusion occurs during this transition to the next layer, there will be a small blob of excess material.
This over-extrusion is due to too high pressure in the hotend. And this is exactly where the prevention of a visible Z seam lies. If you adjust the extrusion correctly and avoid over-extrusion at the transitions of the individual layers, you will get a less or hardly visible Z seam.
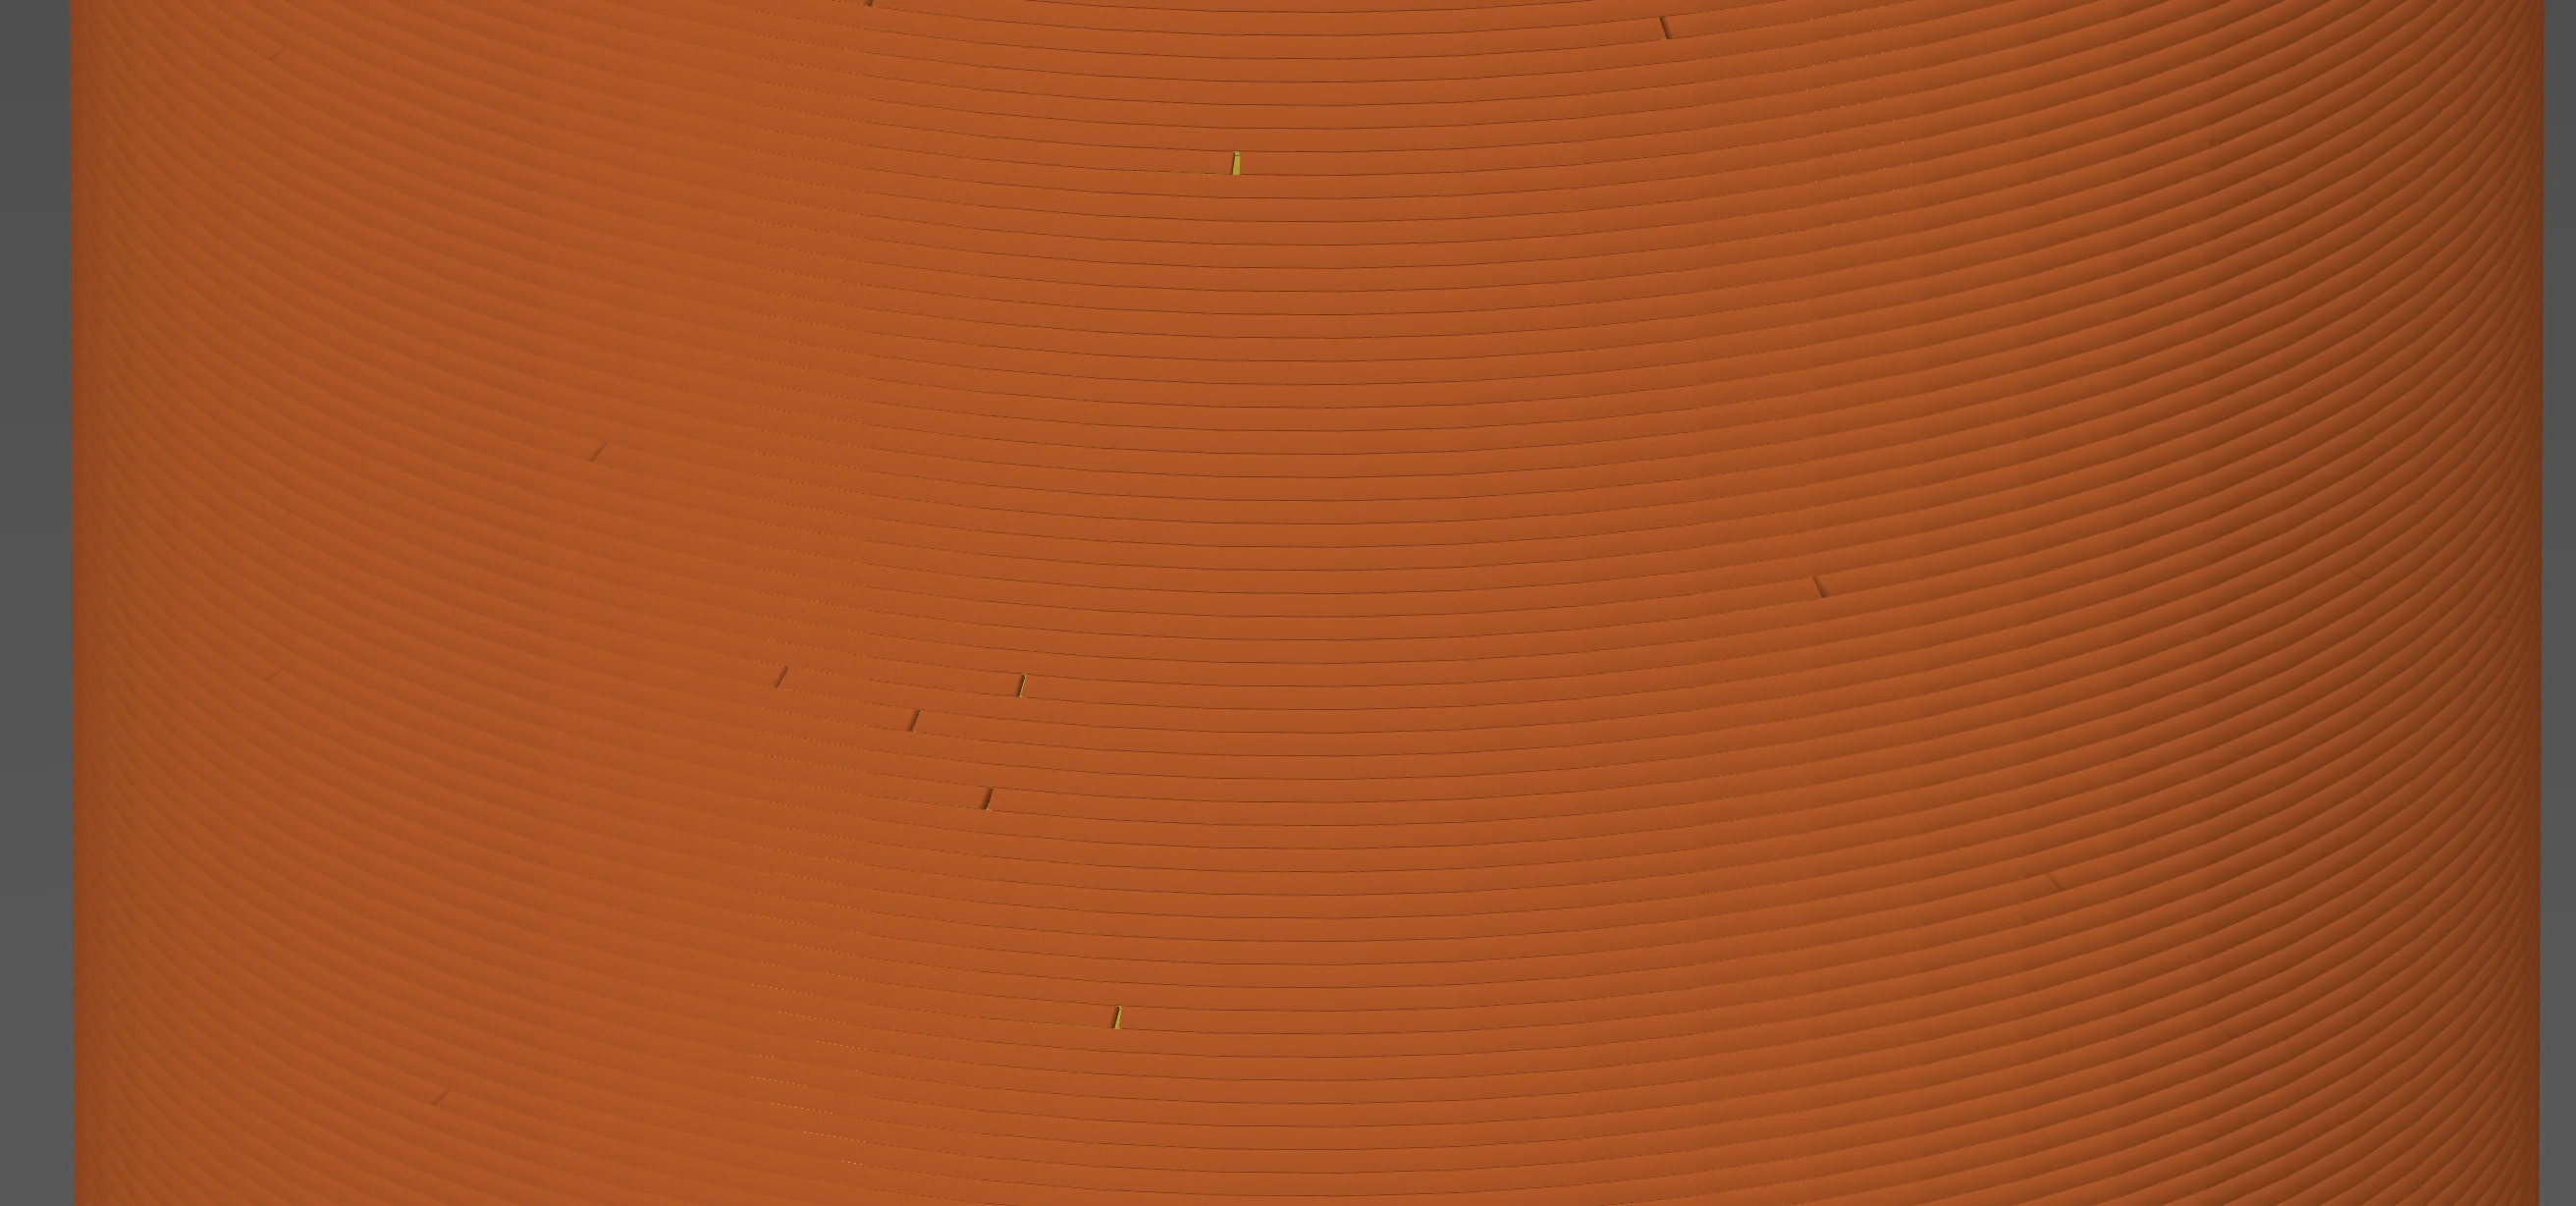
But even if you have set the extrusion perfectly, a Z seam can remain visible on very smooth objects. You will see a line that is no longer accompanied by blobs, but a tiny gap between the beginning and the end of each layer.
If you’re disappointed that you can’t completely avoid a Z seam (except with Vase Mode – see end of article), there are still a few ways to hide it. Further down in this article I’ll introduce you to the options Cura and PrusaSlicer offer you for this.
TIP: Learn how to calibrate your 3D printer to get perfect results every time in my 3D printing course: FDM 3D Printing: The Comprehensive Course from A to Z
(The course teaches everything you need to know for FDM 3D printing in over 60 lessons. The course will get beginners up to my level in no time!)
Z Seam Prevention
The best way to eliminate any problem is to solve the cause. Increased visibility of Z seams due to over-extrusion at the junctions of the individual layers can be prevented by making the correct settings.
However, there are several settings that affect the extrusion. Perfecting each setting will take a long time. And even if you find the perfect setting for each of these options, a Z seam may still remain visible. This is simply the nature of 3D printing and the transition from one layer to the next.
I therefore recommend optimizing the extrusion settings a bit and then try to hide the Z seam with the slicer or to avoid it completely with the vase mode for certain objects. In 95% of all cases, this is sufficient to get a perfect result.
If you want to perfect the last few percent, you should take a close look at the following options for improving extrusion.
Nozzle Temperature
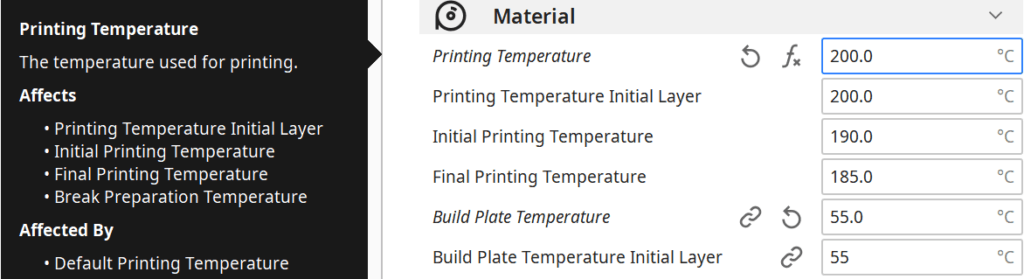
The nozzle temperature is one of the most important factors in extrusion. If it is too low, under-extrusion occurs. If it is too high, too much material will be extruded as the filament becomes more fluid.
So if you see a Z seam where there are blobs, it would make sense to lower the temperature a bit.
Retraction

Retraction is another setting that can greatly affect the extent of Z seams.
Retraction controls the negative movement of the filament at the end of a print motion. So when the printhead reaches the end of a layer and moves up the Z-axis to the next layer, the retraction causes the filament to be pulled slightly into the nozzle.
This way you can avoid over-extrusion at the layer transition.
Retraction is also a critical setting to avoid stringing. Don’t overdo it though, or you could produce a filament jam.
Extruder Calibration & Flow Rate
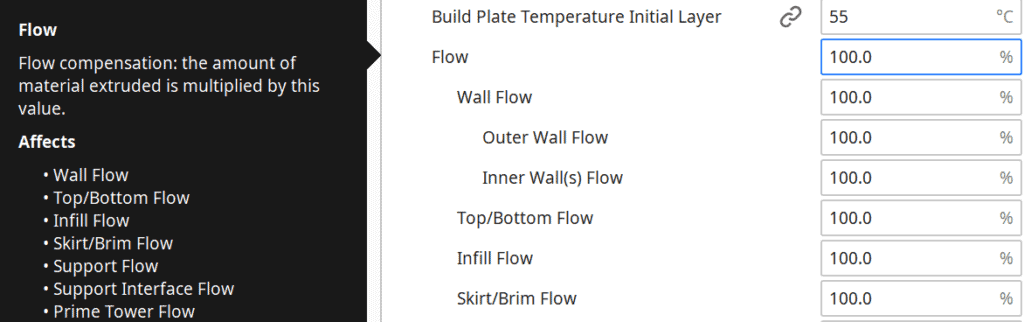
In order for the extruder to output the desired amount of filament, it must be calibrated. For example, if the slicer or G-code wants 1 mm of filament to be extruded, it should actually extrude exactly 1 mm of filament.
If the extruder extrudes more filament than it should, there will be a visible Z seam with filament blobs.
After the extruder has been calibrated, you can determine the flow rate. The flow rate determines the rate at which filament is extruded.
Print Speed
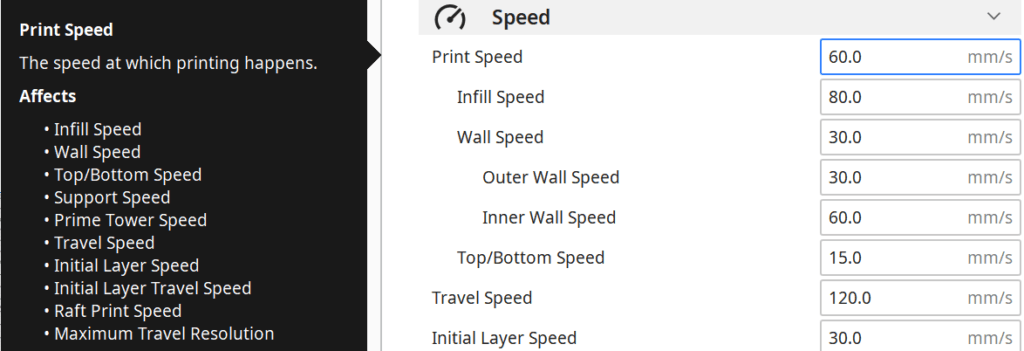
The print speed also affects the visibility of a Z seam. If the speed is too high, the extruder has too little time to retract the filament between two printing movements.
So the slower you set the speed, the less likely you are to over-extrude at a layer transition.
Wiping
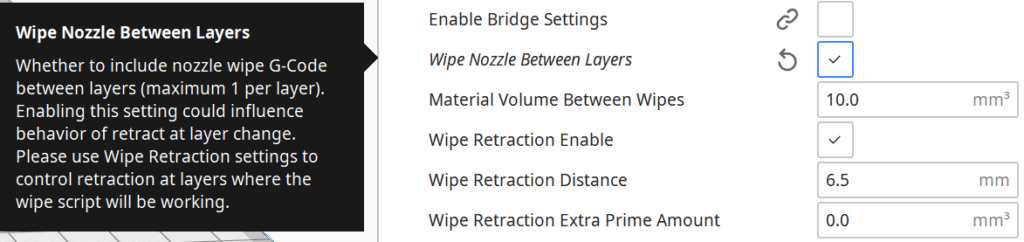
With this setting you don’t prevent the excess pressure in the hotend, you just release it at a different place than the layer transition. Wiping removes the excess filament from the nozzle before moving on to the next layer.
While this is not the most elegant solution, it can be effective in avoiding a Z seam.
Coasting

If you can’t avoid over-extrusion, you can deal with it better with coasting just as you can with wiping.
With this setting, the 3D printer stops extruding just before the end of a layer. With the correct settings, the excess pressure in the nozzle is sufficient to extrude enough filament to complete the layer.
As you can probably imagine, this setting is quite inaccurate. The only thing that helps here is trial and error. If you set too much coasting, you will get small holes at the layer transition.
Z Seam Hiding – Cura
With “hiding” I don’t mean that you should simply place the finished object so that the Z seam is no longer visible. You can use certain settings in Cura to hide the Z seam in edges, place it at the shortest point of the object, or hide it by randomizing the start of the layers.
With this feature, you can bypass the time-consuming optimization of all extrusion settings and hide the Z seam with one click. You can find the settings for the Z seam in the settings for the walls of the print object.
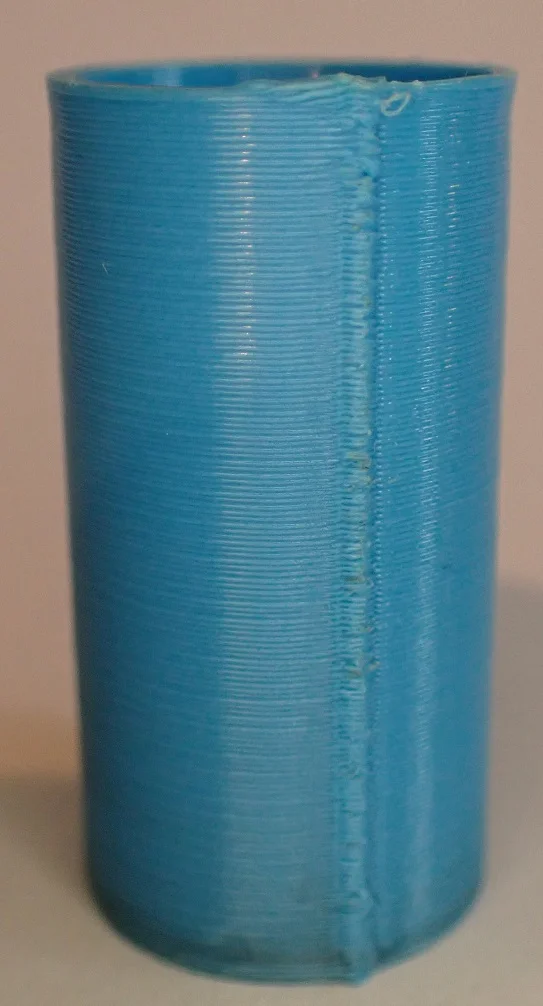
To illustrate the different settings and their effects, I printed test objects with extremely poor extrusion settings. You can clearly see the transitions between the individual layers as large filament blobs.
Z Seam Alignment
With this option, you can determine the position of the Z seam. There are four options to choose from.
User Specified: This selection allows you to place the Z seam at a location of your choosing. You can specify exact X and Y coordinates or predefined locations (front, back, right, left and 45° in between). This setting makes sense especially for objects where you know which side is mostly at the back and is rarely or never looked at. Also, if you can’t get the extrusion under control, you can place the seam where it is least noticeable.
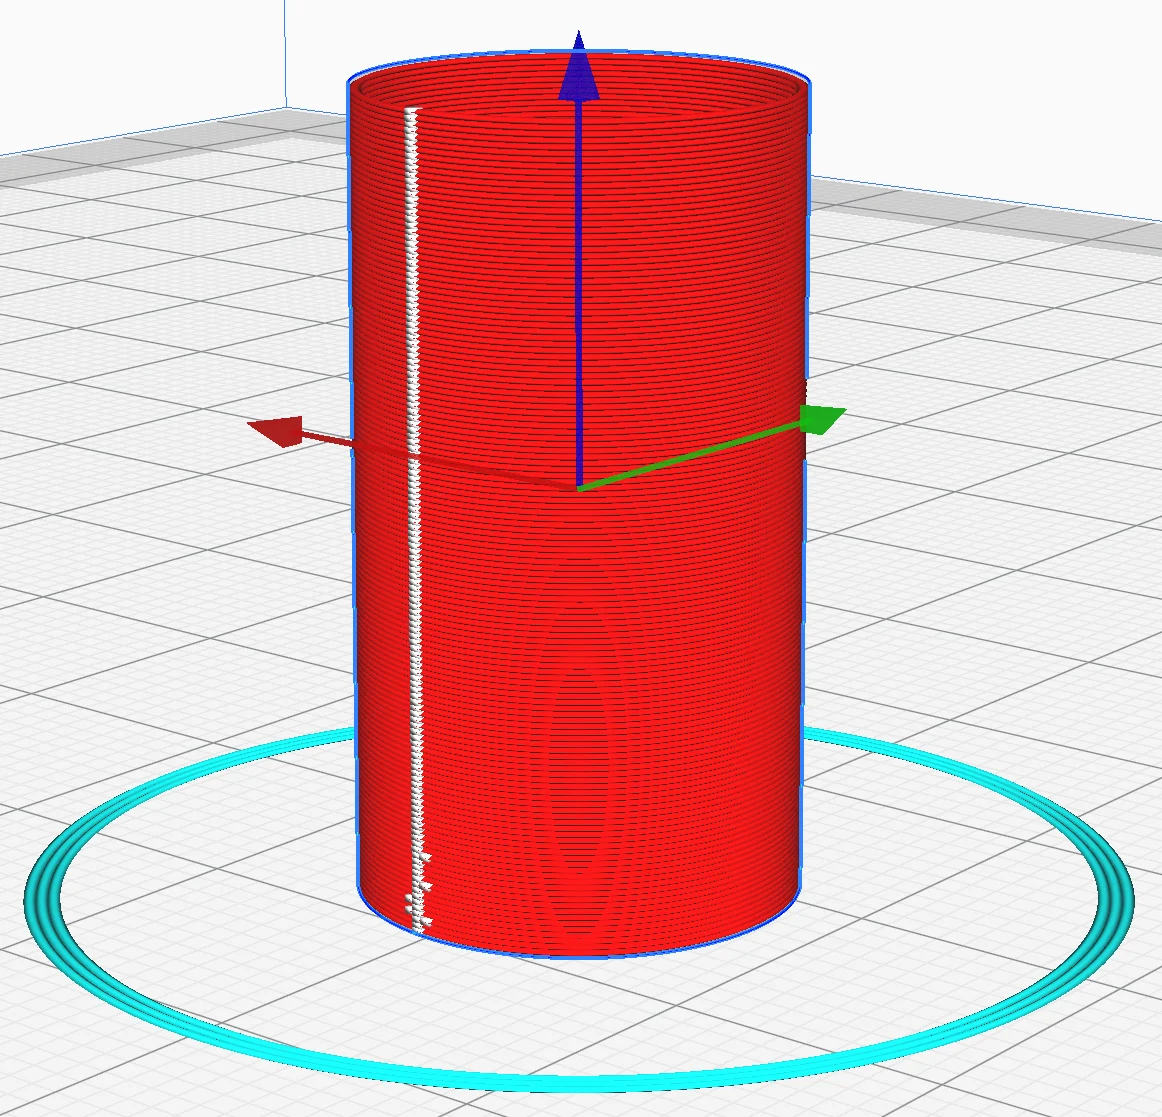
Shortest: With this setting, you can’t actually hide the Z seam. The slicer always looks for the shortest path from the end of the current Layer to the next Layer. This is in almost all cases always directly above. This results in the feared Z seam.
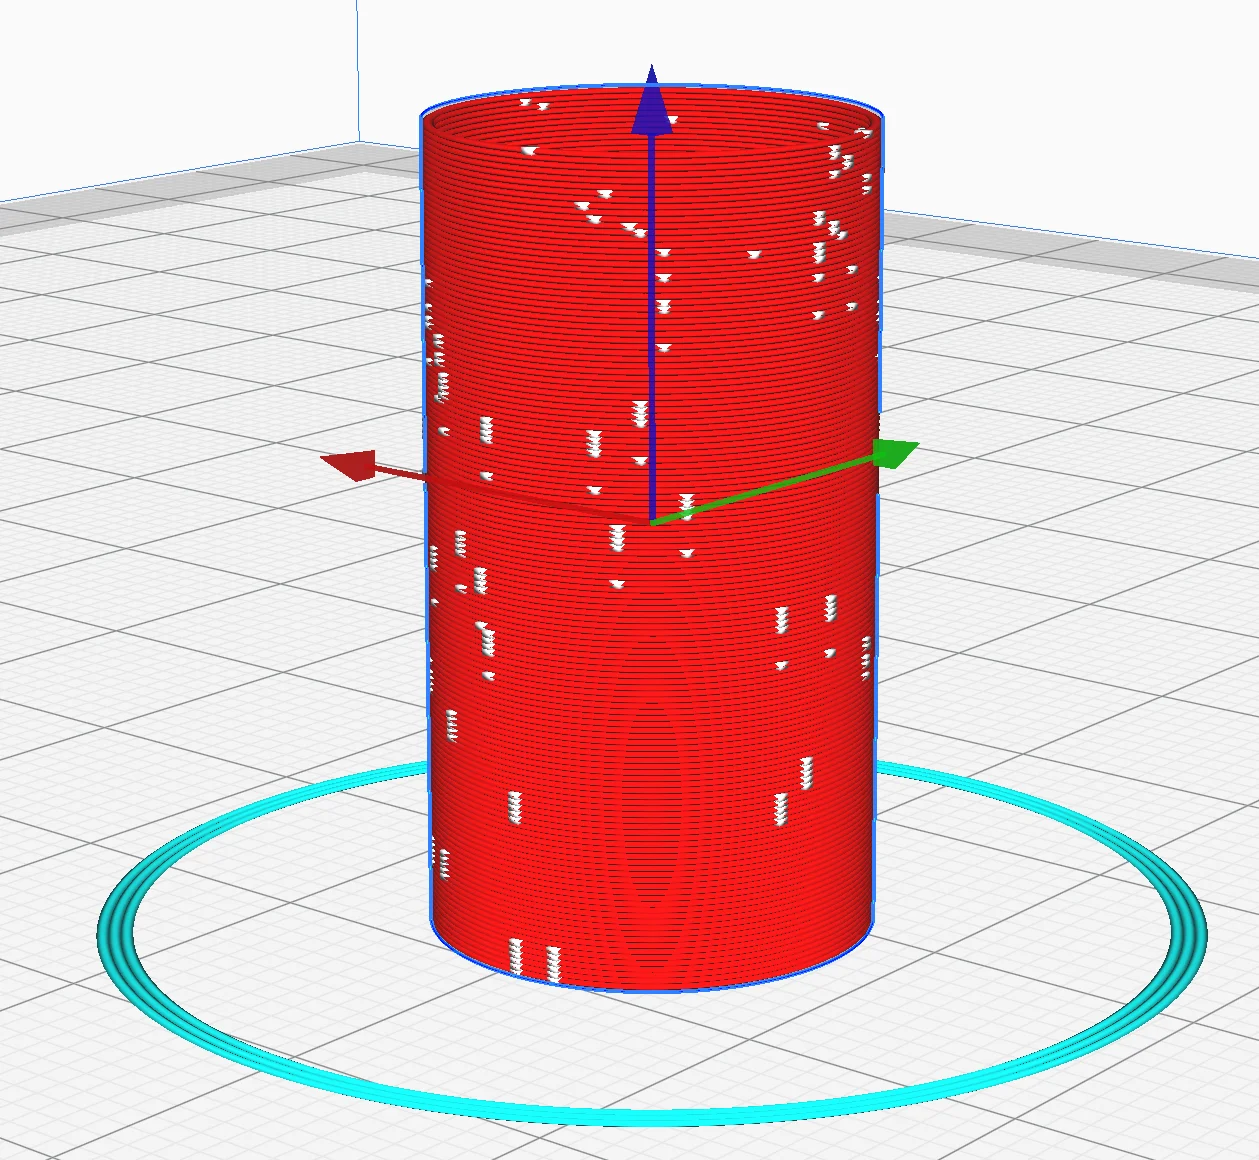
Random: Here the beginning of the next Layer is chosen randomly. If you have the extrusion under control, this function is good to avoid a visible Z seam. If you still have over- or under-extrusion, you will still see print defects at the layer transitions. These are then no longer arranged as a seam along the Z-axis but are randomly distributed over the entire object.
Sharpest Corner: This is usually the default selection and makes the most sense for objects with edges. Cura then looks for the sharpest edge of the object and builds the layer transitions there. The Z seam will then not be as visible. Especially if you have set the extrusion well, the Z seam will be invisible. So unless you have a round object, this is the best setting to hide a Z seam.
Seam Corner Preference
With this setting, you can set the preference of the slicer where the Z seam is set. If “Random” is selected when aligning the Z seam, this option disappears, as it then no longer makes sense.
There are a total of five choices to tell the slicer where it makes the most sense to place the edge.
None: Except for the settings when adjusting the Z seam, no special preference is made for this selection.
Hide Seam: With this selection, the slicer tries to place the edge on the inside of the model. The transition from the current layer to the next is then preferably not done on the outside of the model but on the inside. This should make the Z seam less pronounced or not visible at all.
Expose Seam: If you want to hide the Z seam, this selection is obviously the wrong one. Here the slicer tries to put the edge on the outside of the model, making it more visible. For most objects, this is not really useful, but it can be used for special cases.
Hide or Expose Seam: Here Cura sets the seam either outside or inside. This setting is also not useful if you want to hide the seam.
Smart Hiding: For some objects, it is very difficult to place the seam at the innermost edge. With smart hiding, Cura uses the next edge further out when the innermost edge is too inconvenient to print.
Z Seam Hiding – PrusaSlicer
Z seams can also be hidden with PrusaSlicer. You can place them in a specific location, similar to Cura, or randomize them on the object.
But there is another interesting feature that allows you to paint the Z seam on the model. This way you can define the places where the Z seam is allowed to appear and define areas where a Z seam is not allowed to appear at all.
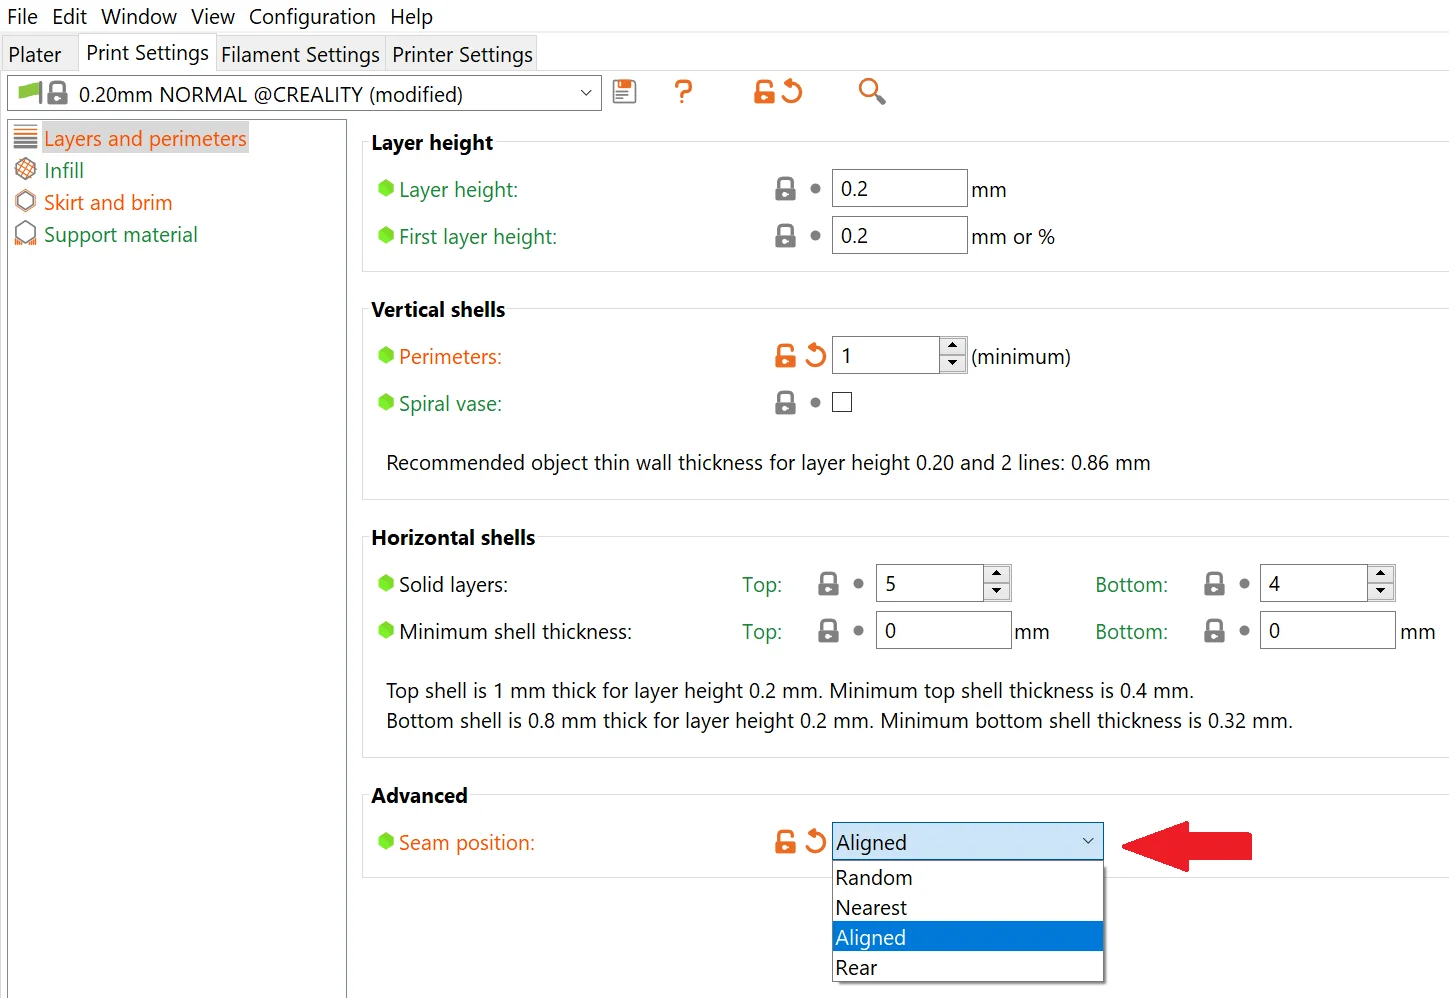
Seam Position
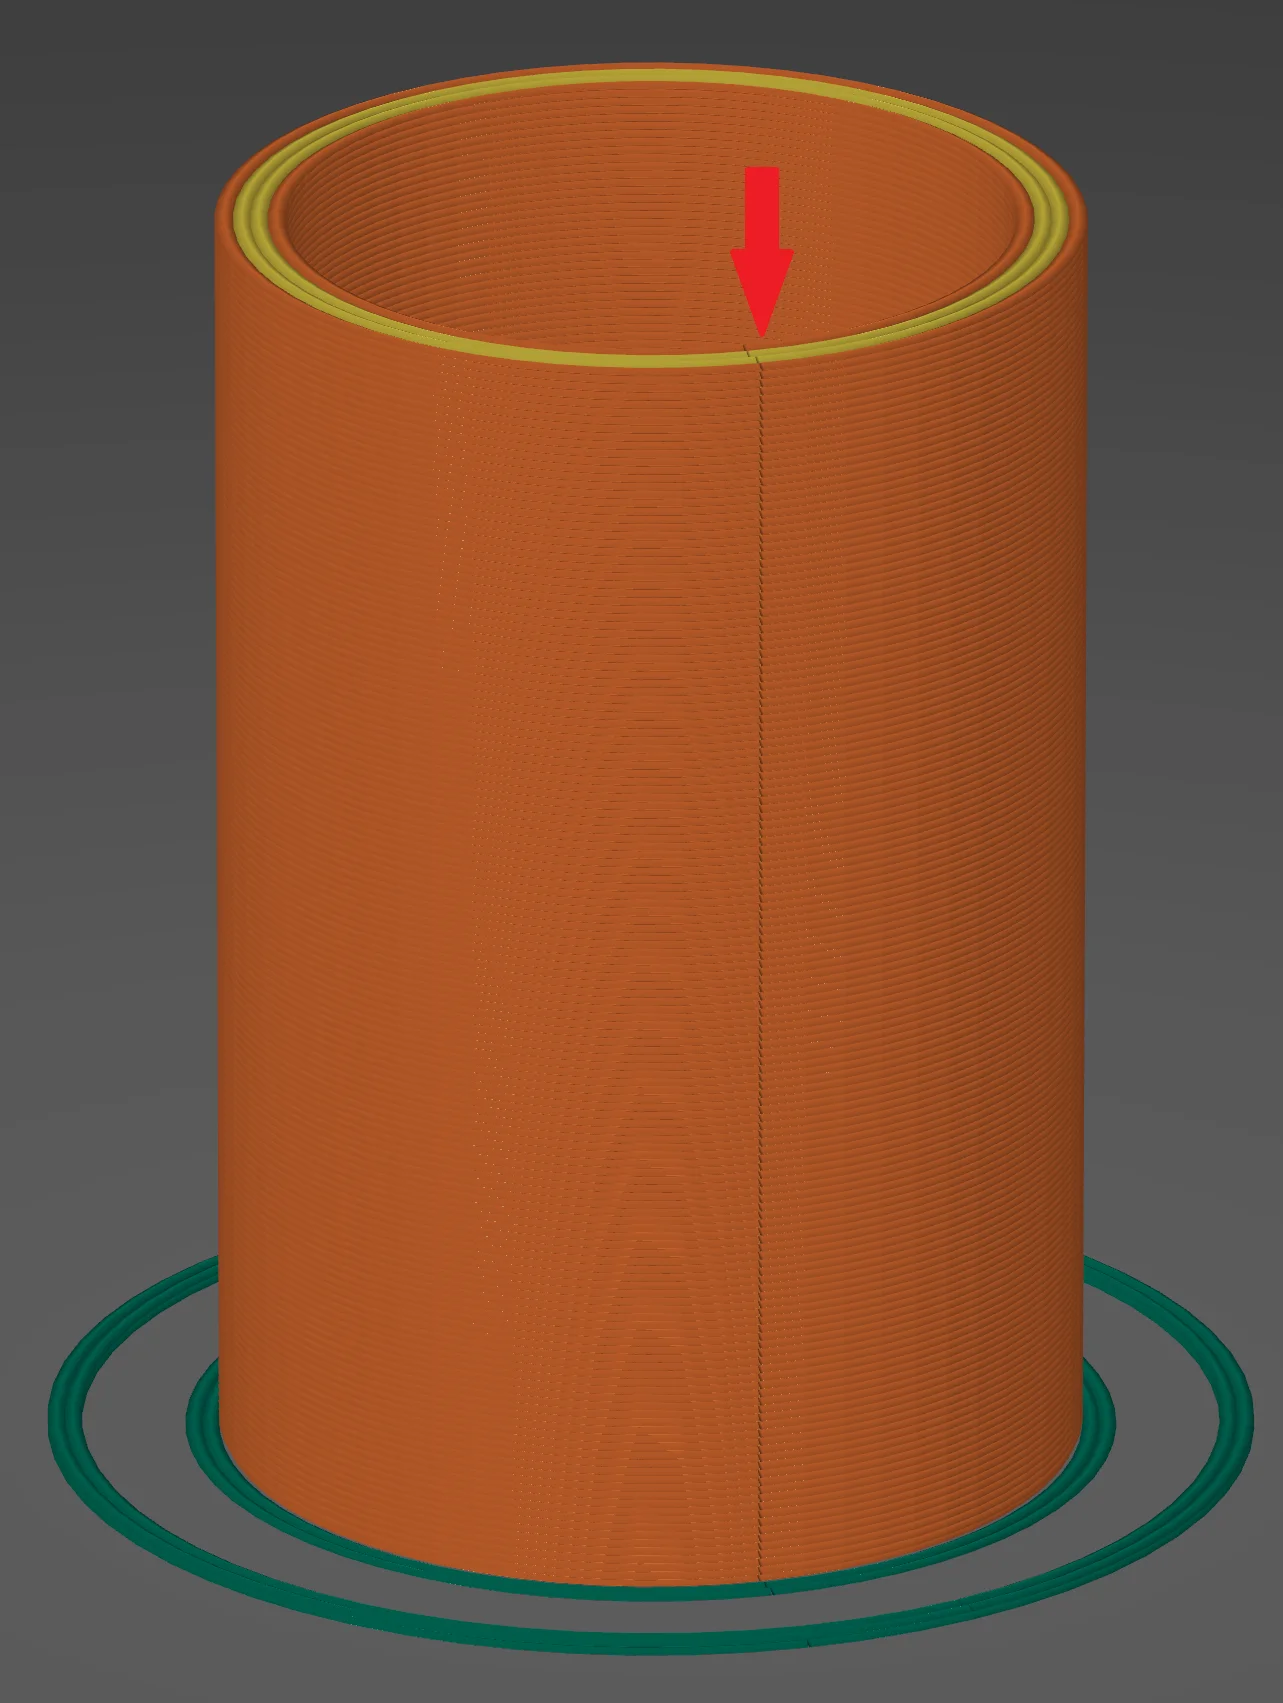
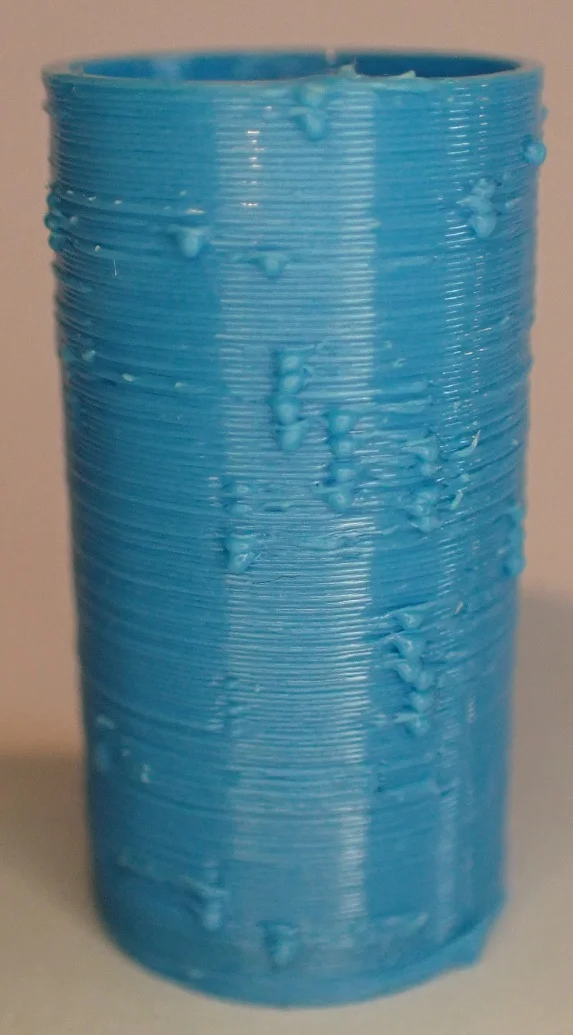
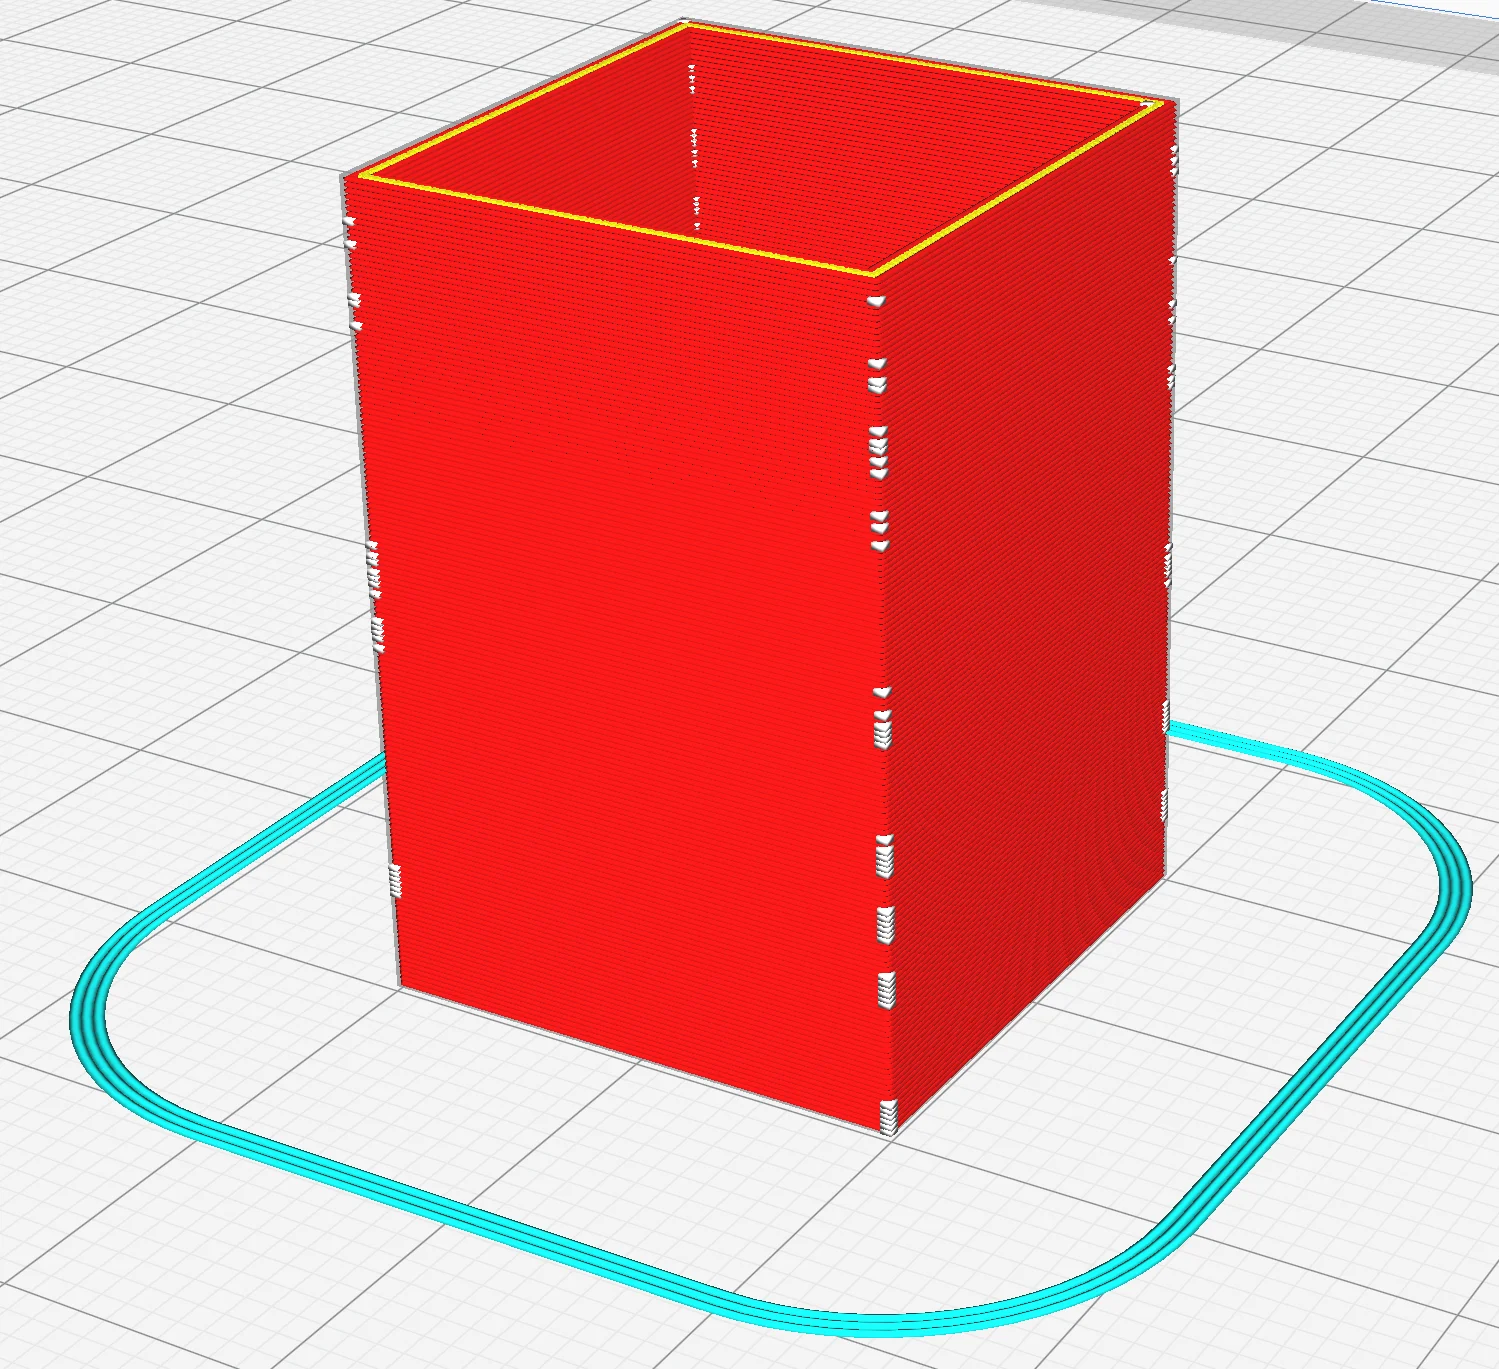
Random: Just like in Cura, this setting will randomly distribute the Layer transitions along the Z-axis. This means that the start of the next layer is always somewhere else, which means that no seam can occur. However, this can cause randomly distributed print defects over the whole object. This setting only makes sense if you have a round object, have optimized the extrusion setting and the object has to be viewed from all sides. For objects with edges, other settings are always preferable.
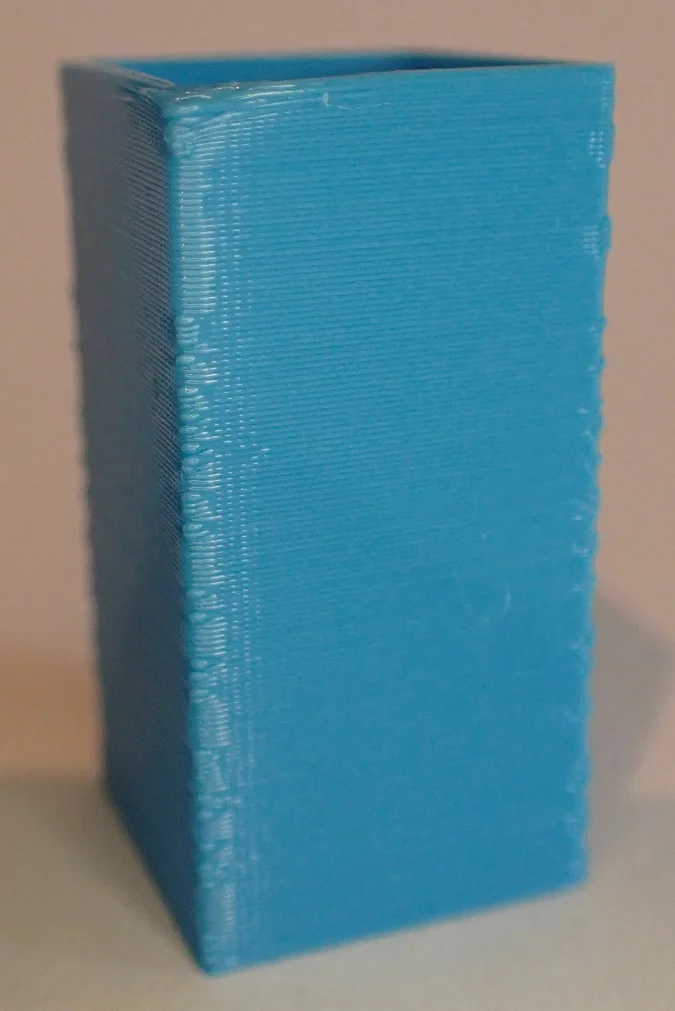
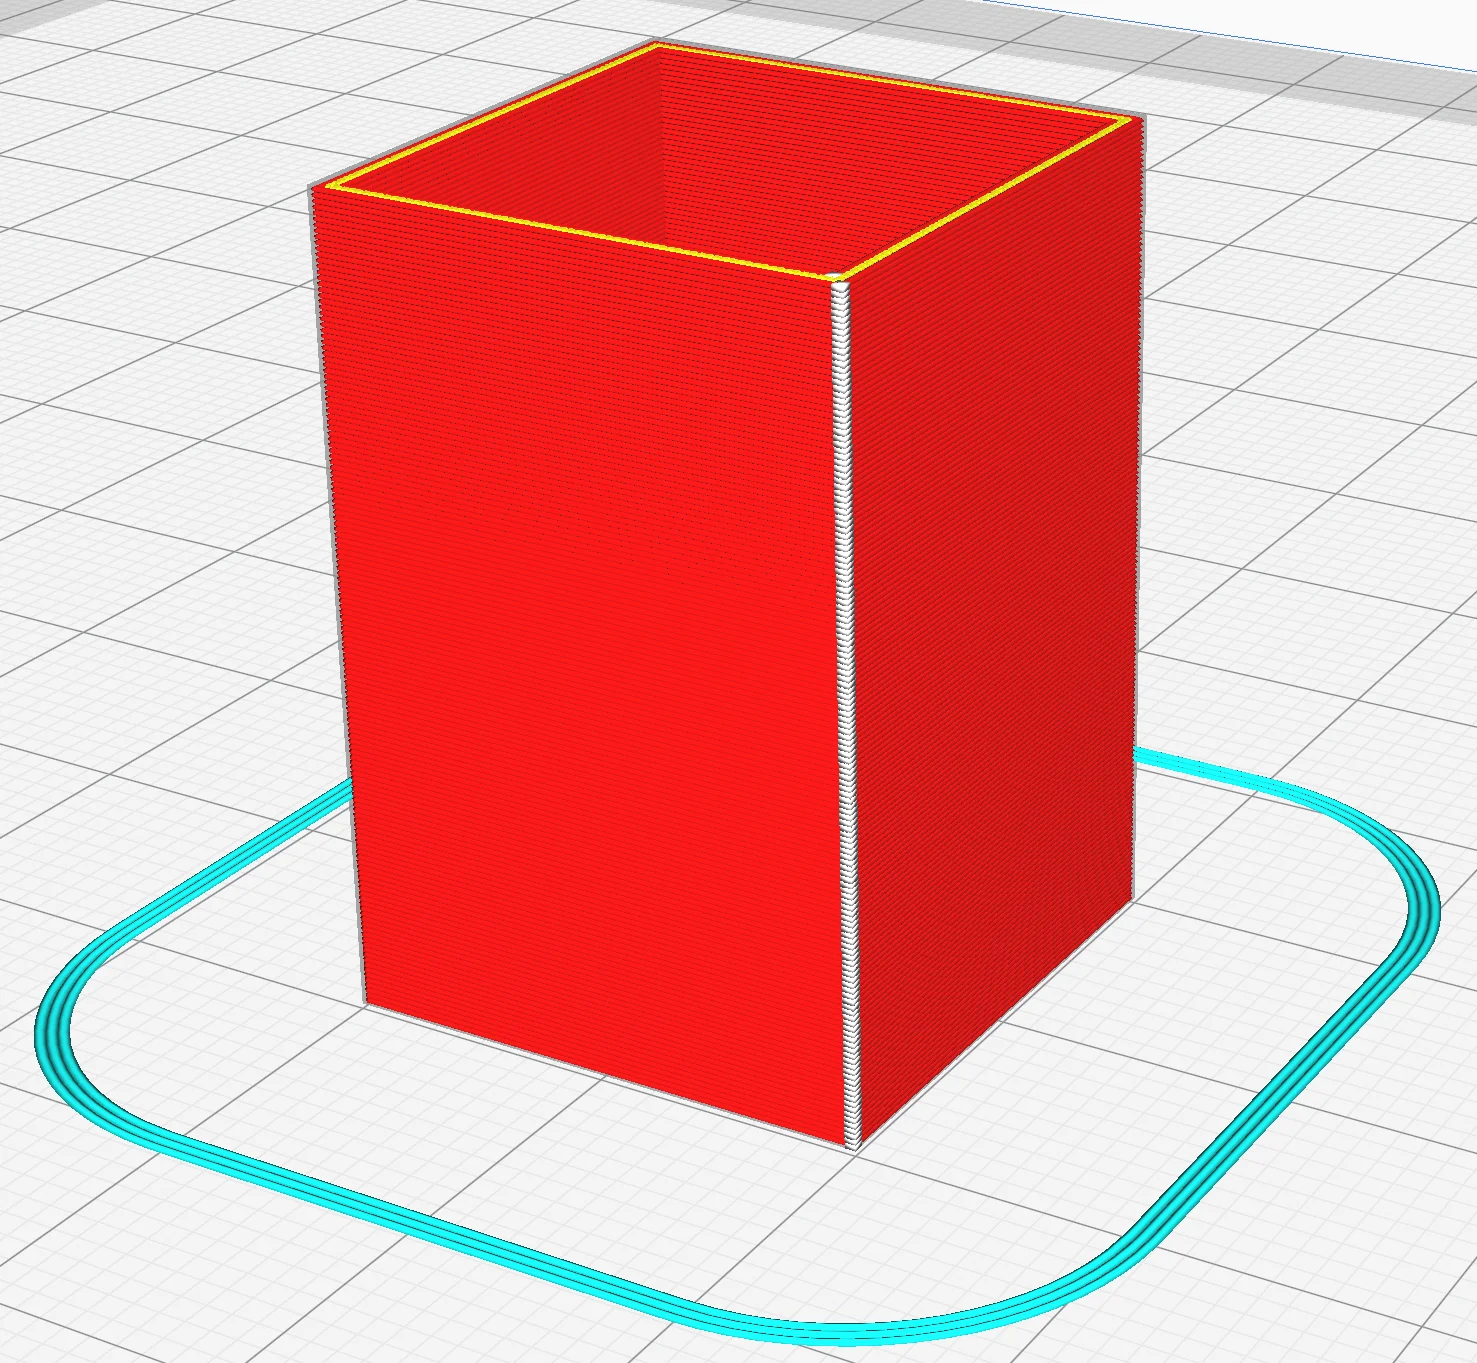
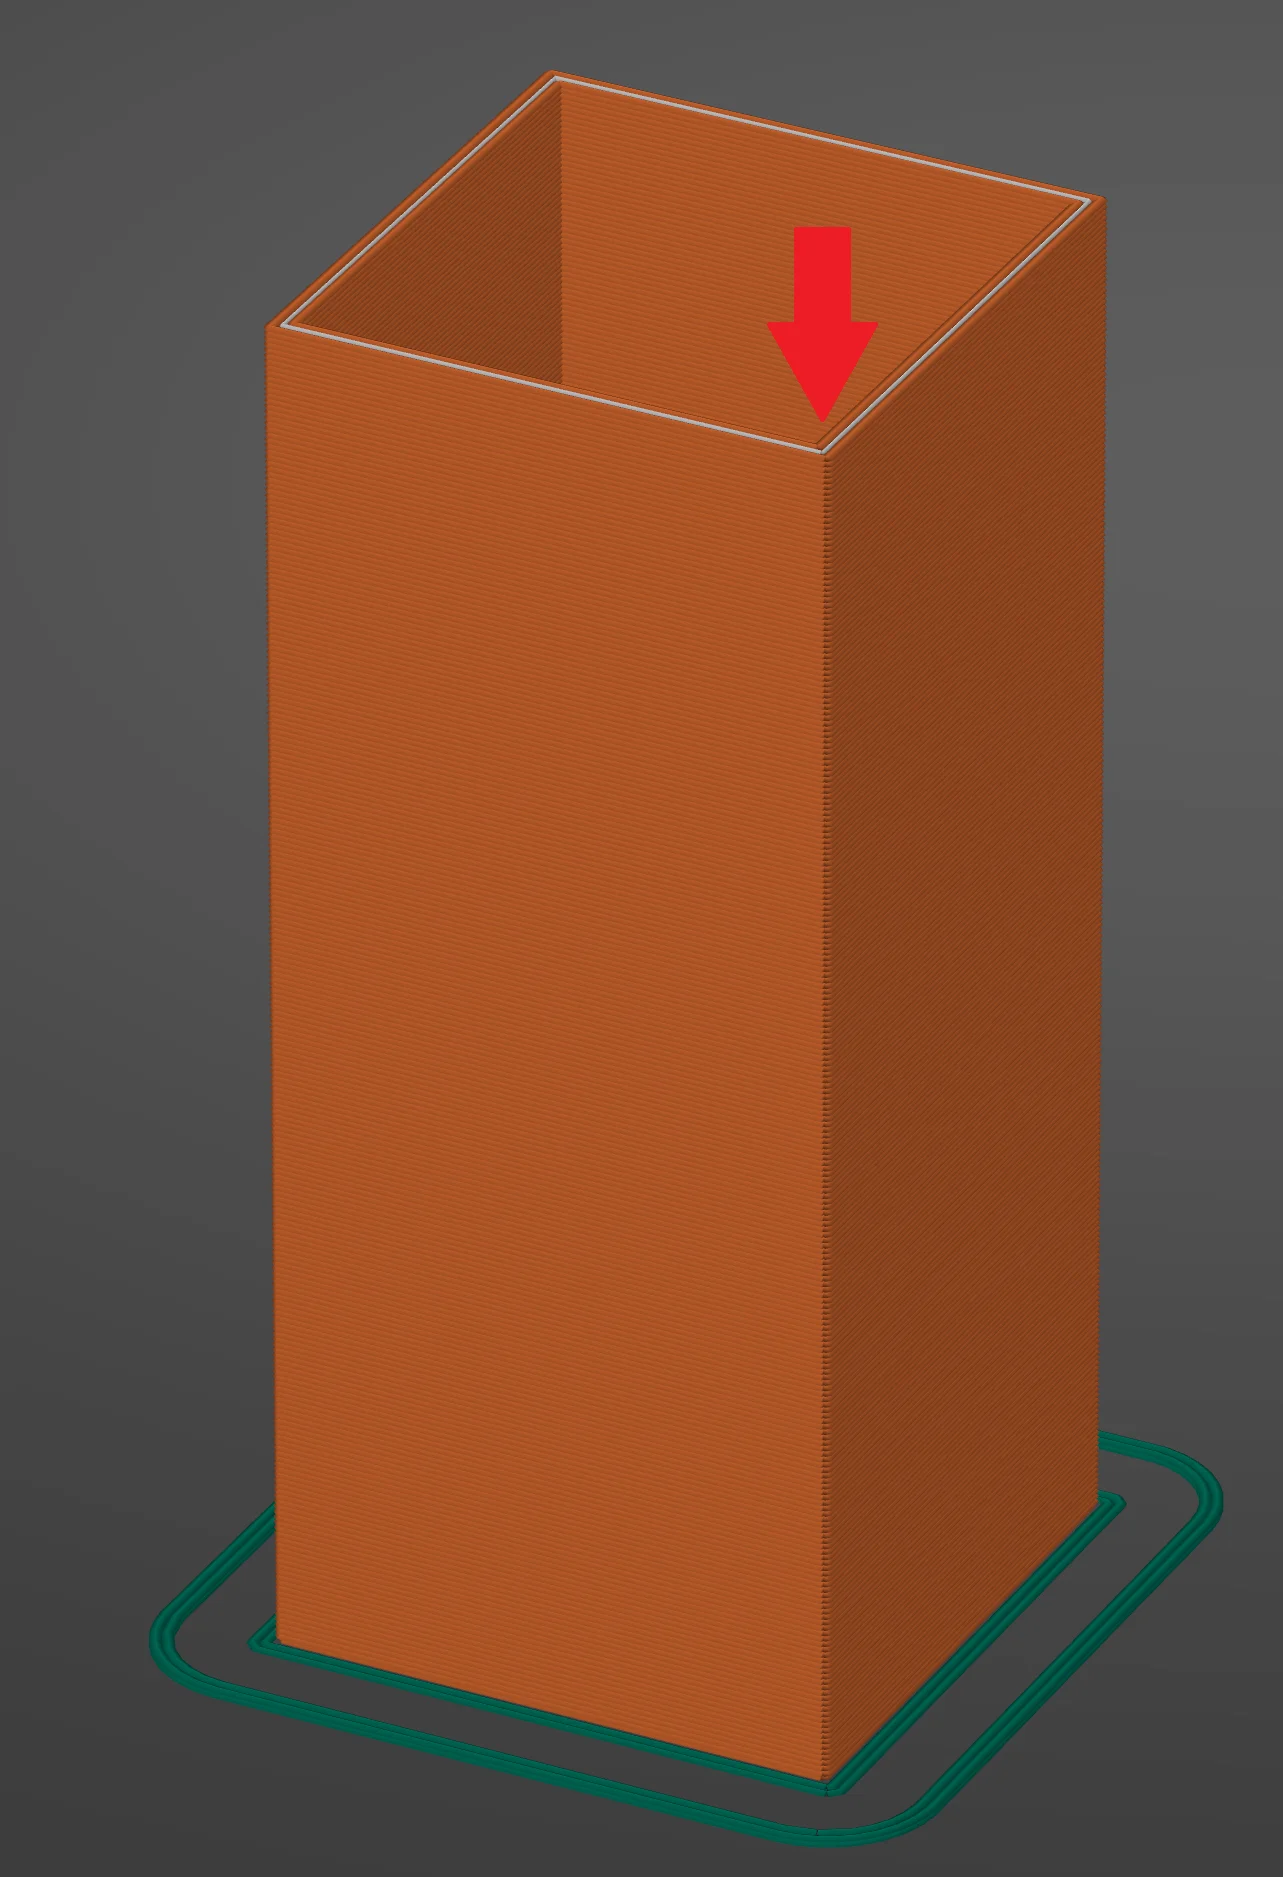
Nearest: This option places the seam in the next edge. If you have optimized the extrusion a bit, this will make the Z seam practically invisible. This setting makes the most sense for objects with edges.
Aligned: This setting does much the same thing as the previous one, but it selects the edge closest to the starting point of the previous layers. This will cause the Z seam to overlap across the entire object (even round objects).
Rear: Here the Z seam is placed in a corner just as with “Nearest” or “Aligned”, but as far as possible to the rear of the object (as far in Y max direction as possible). So this setting combines hiding the Z seam in a corner and orienting it to a place that is not in focus when viewing the model. So you can hide the Z seam in two ways.
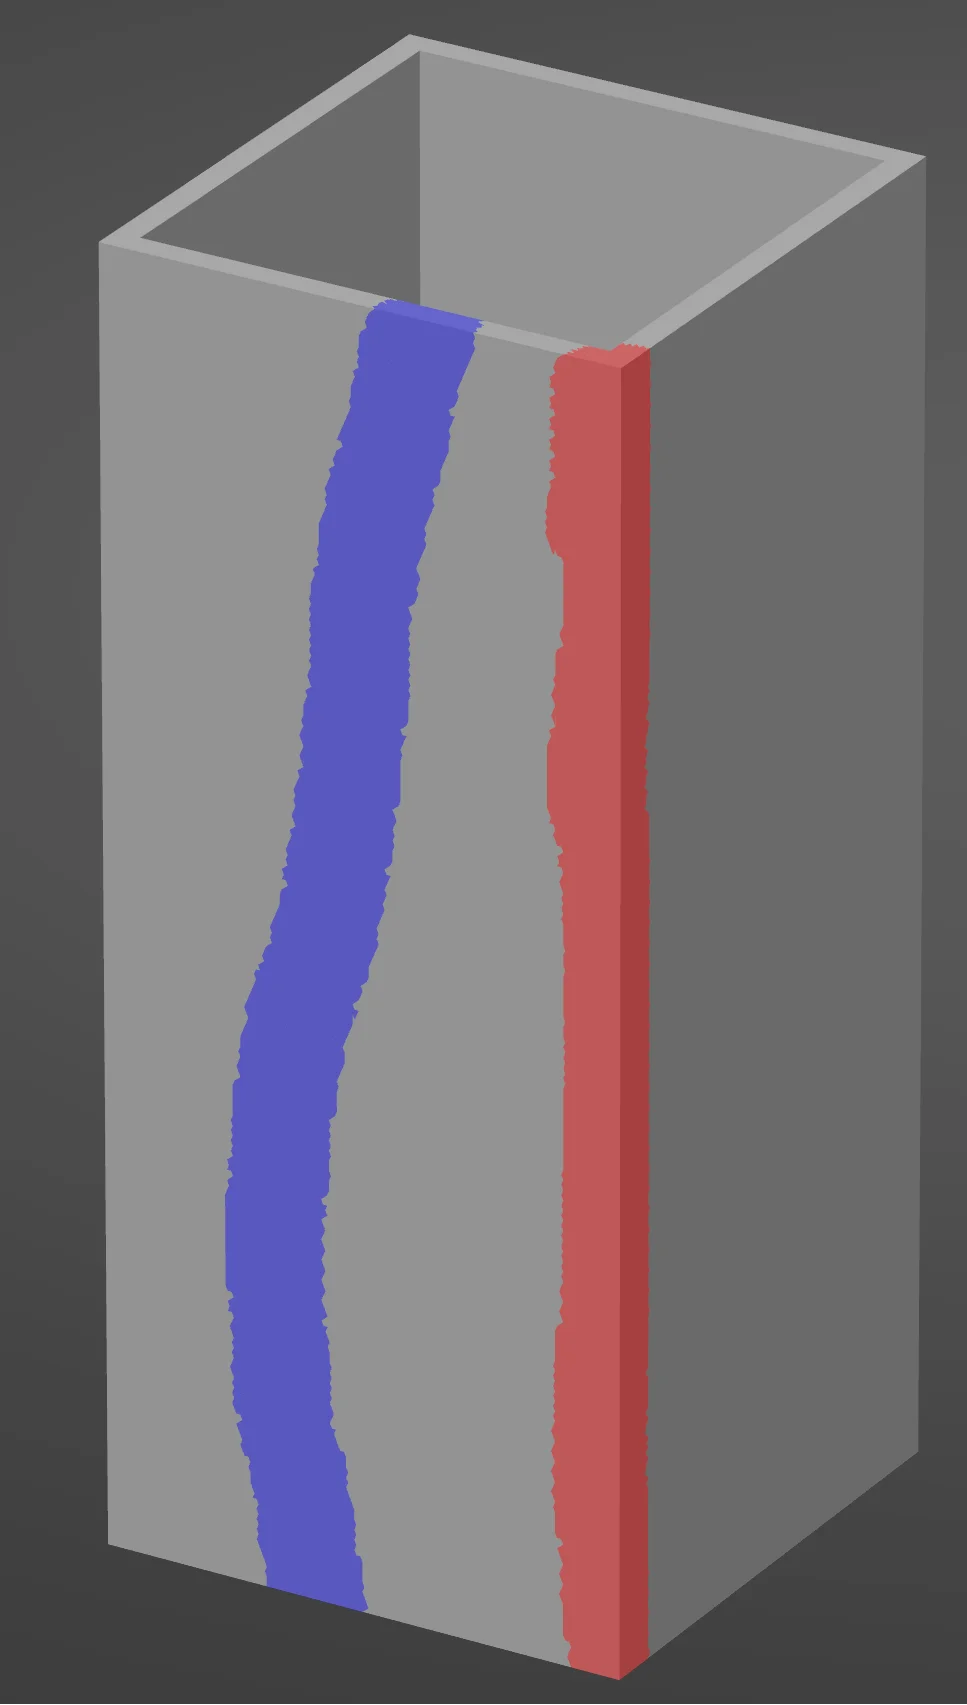
Painting the Z Seam
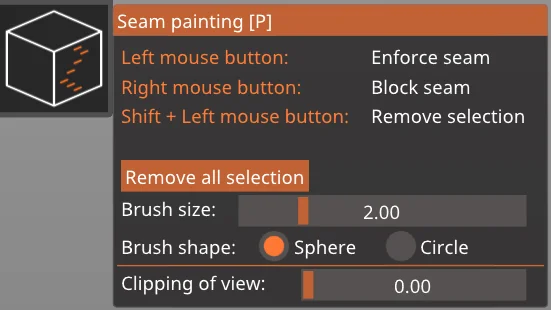
If you don’t trust the slicers’ algorithms and want to put the Z seam in a very specific place, this is the setting for you.
Here you can use your mouse to define areas on the object where the Z seam is allowed and exclude areas where the layer transition is not allowed.
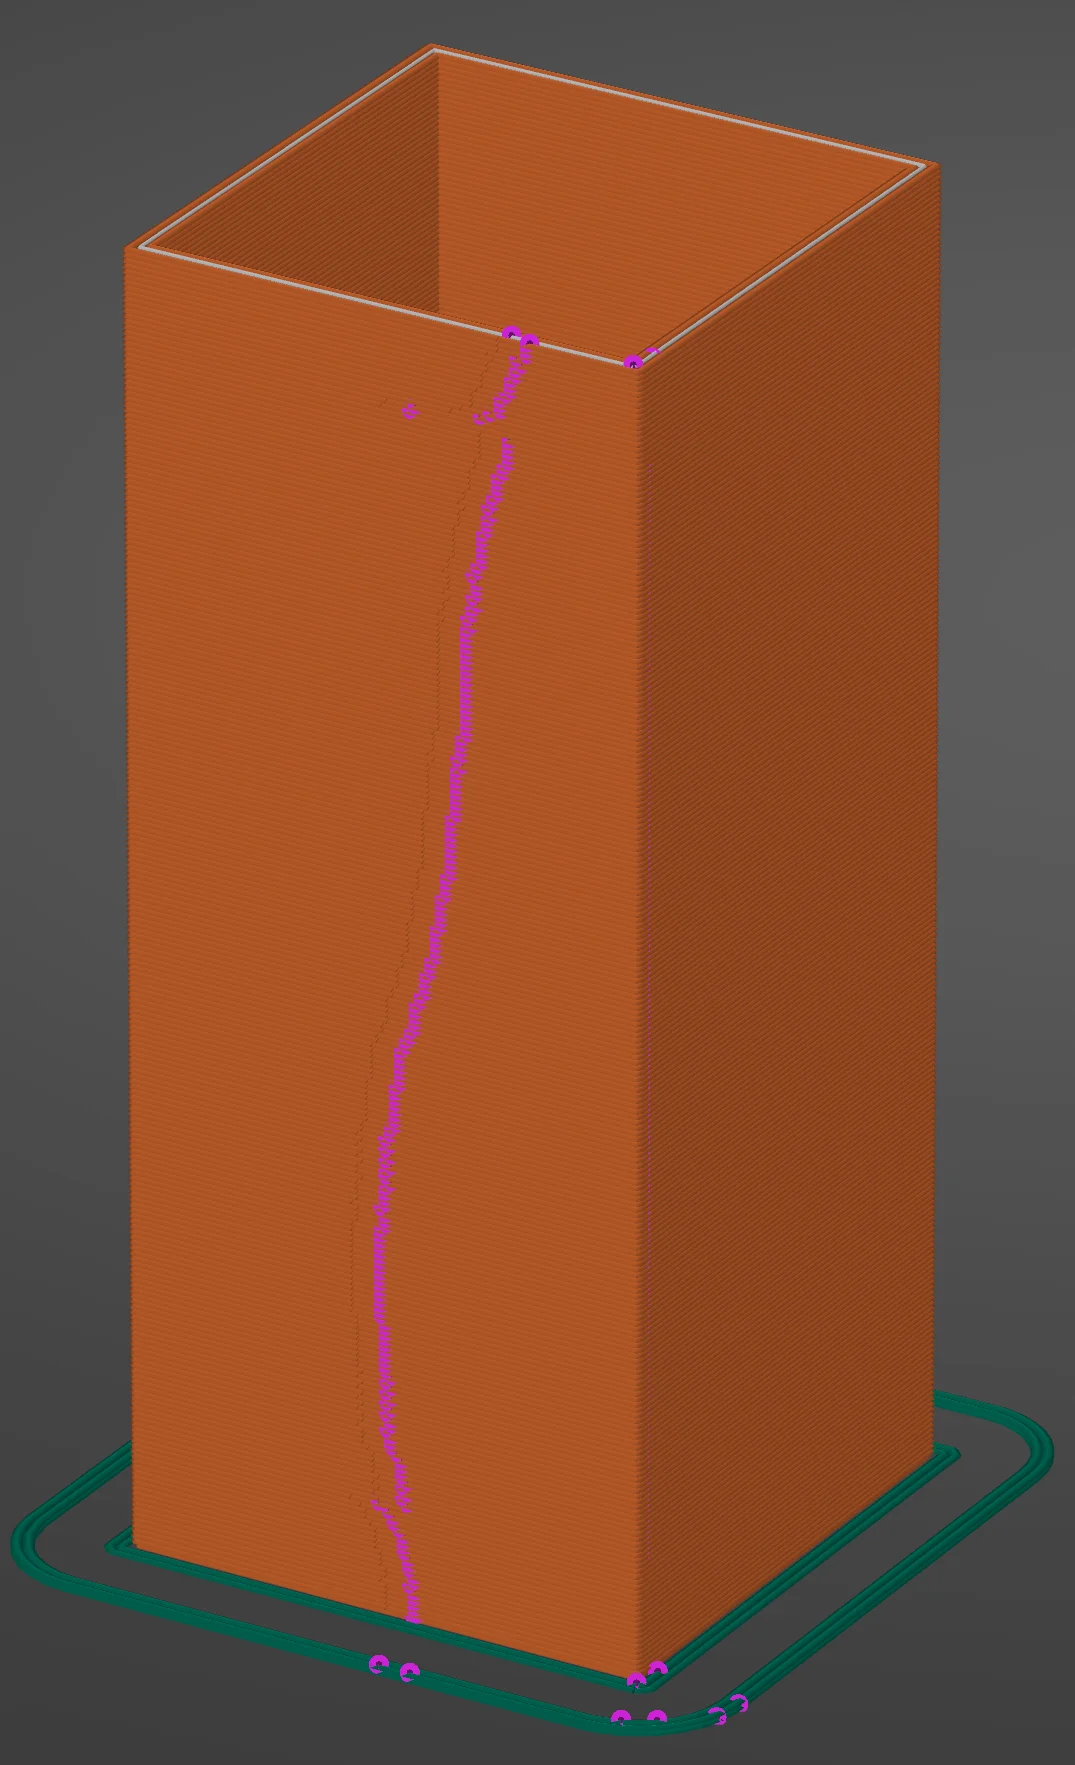
For some objects, it can make sense to place the Z seam at a specific point on the object that is not an edge. It is even possible to create curved lines that move along the Z-axis across the model.
Of course, such individual Z seams cannot be specified to the algorithm. This feature is exactly right for such applications.
Scarf Joint Seams – Orca Slicer
From version 2.0 of the Orcas Slicer, you can activate Scarf Joint Seams. This function makes the seams almost invisible.
But what is a scarf joint in the first place?

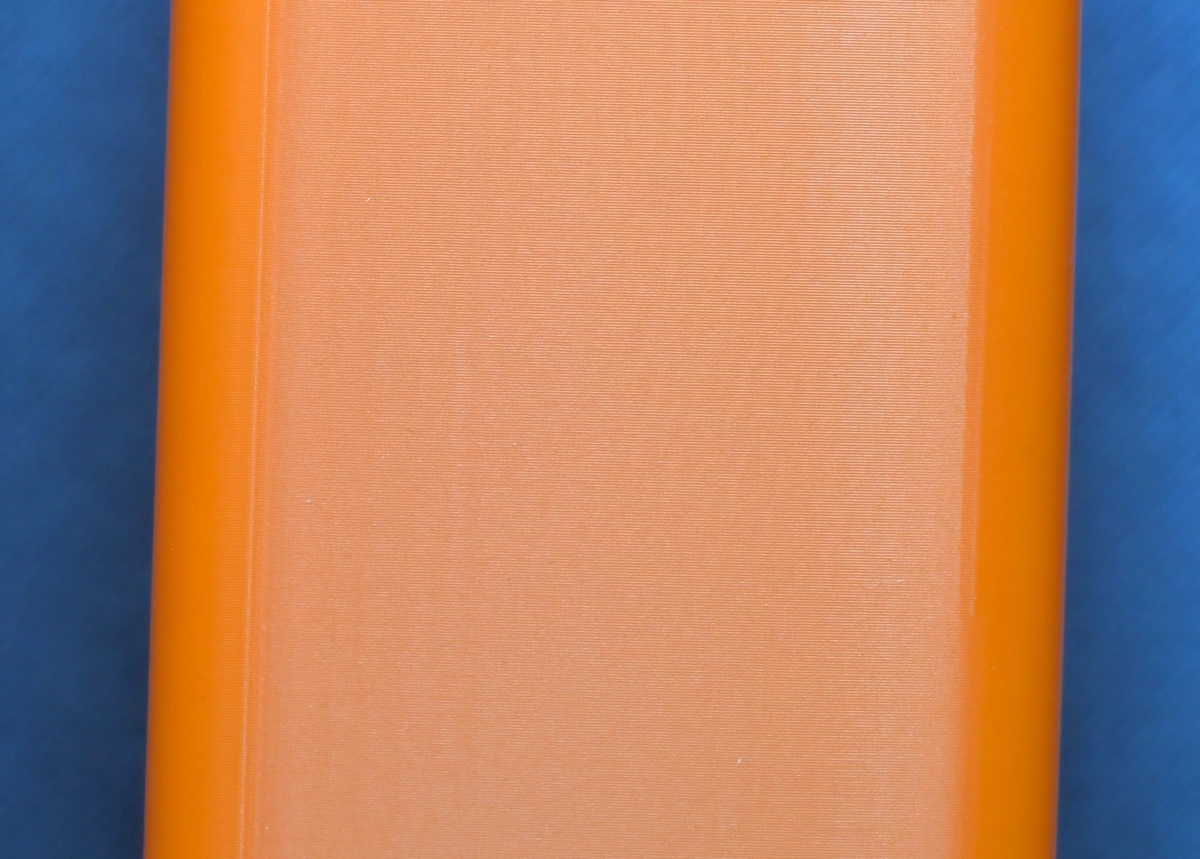
In a normal seam, the line ends abruptly and always in the same place. This makes it clearly visible. With a scarf joint seam, the line does not end abruptly. Instead, the beginning and end of the outer line overlap over a certain distance, making the seam blurred.
To prevent over-extrusion in this overlapping area, the extrusion is gradually adjusted in several steps.
In principle, the scarf joint seam is not a new invention and is commonly used in woodworking. You can see such a joint here on my table. However, it is mainly used there to improve stability rather than appearance.
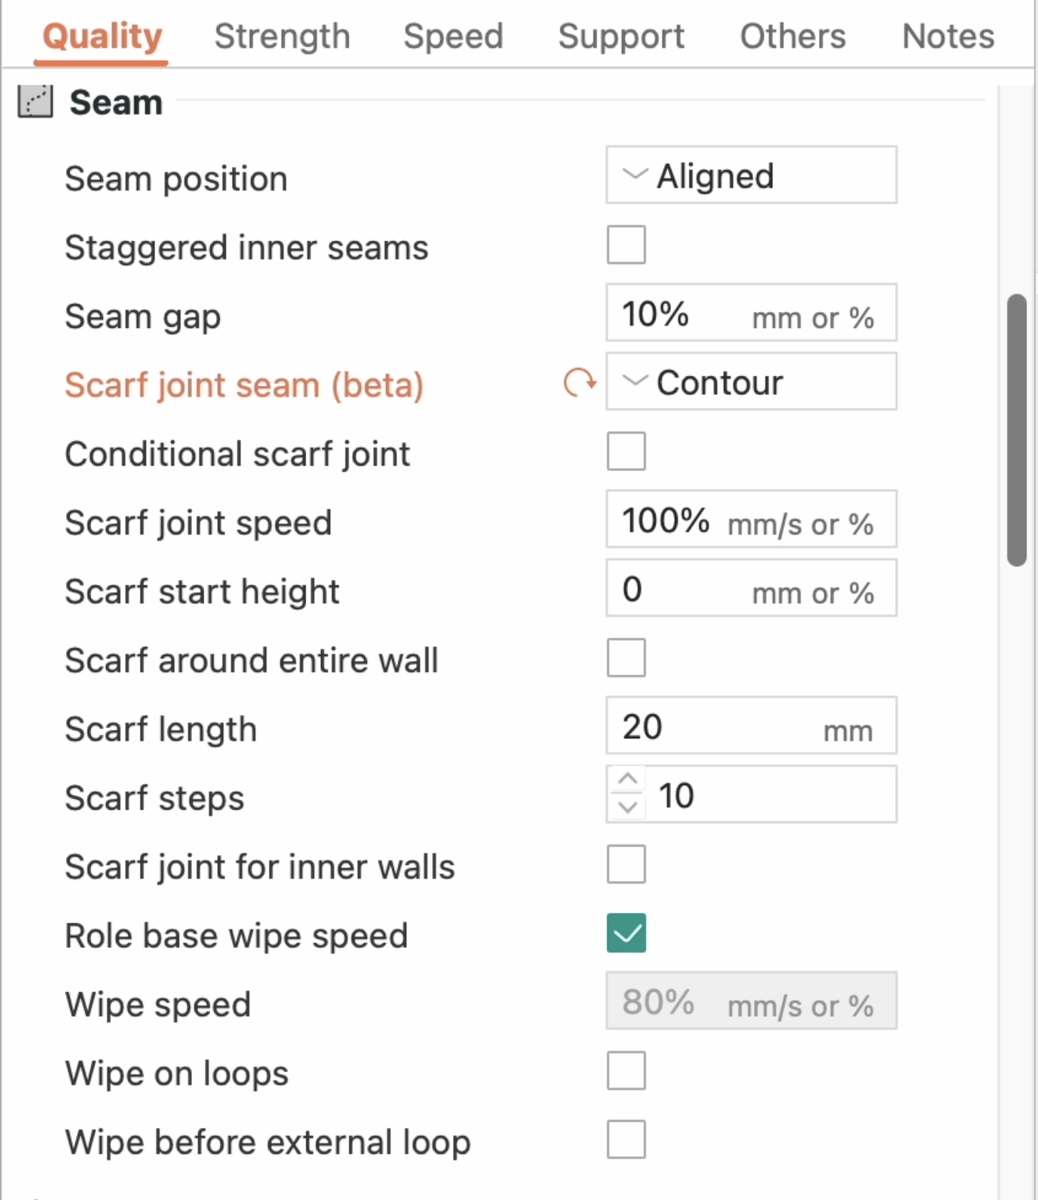
You can find the settings for the scarf joint seam under the quality settings in Orca Slicer. As soon as you activate the new feature, new settings will appear with which you can further customize the seam.
The default settings for the scarf joint seam are not bad at all and definitely a big improvement on the normal seam. However, we can use the settings to try to make the seam even more unnoticeable.
The most important settings for this are the length of the seam and the number of steps. And the longer the scarf joint seam is, the more blurred the seam becomes because the seam is spread over an increasingly large area. It is not really possible to avoid the seam completely, but in most projects it will be virtually invisible.
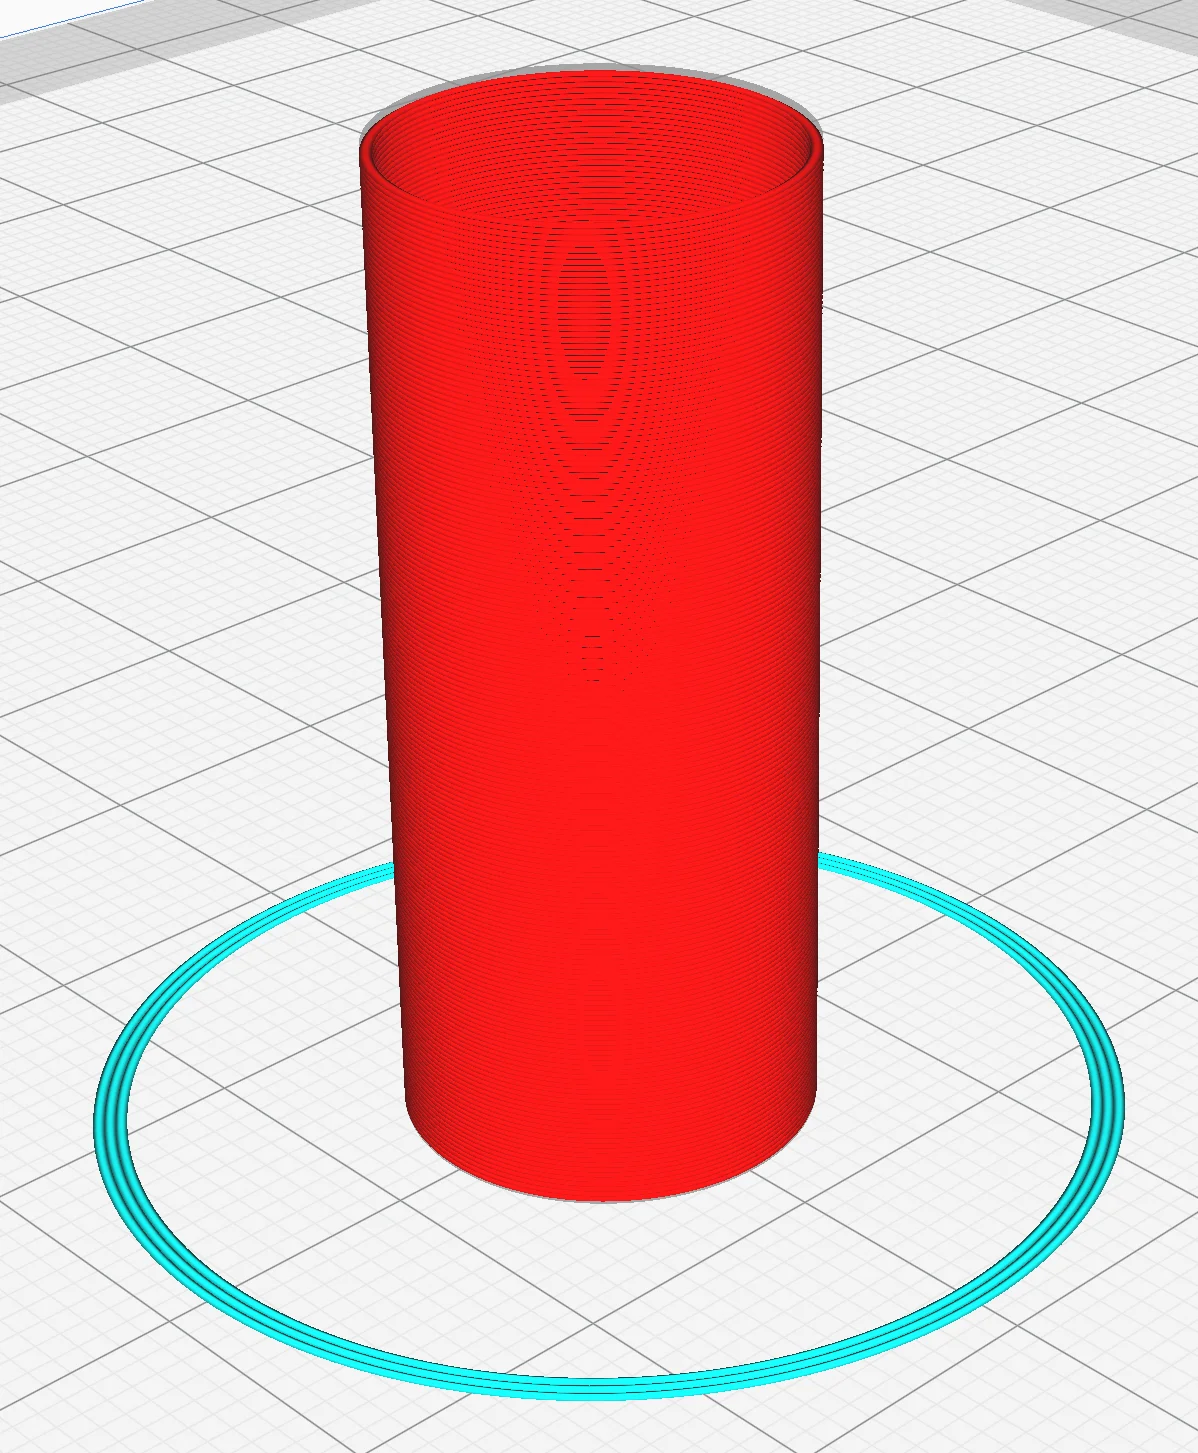
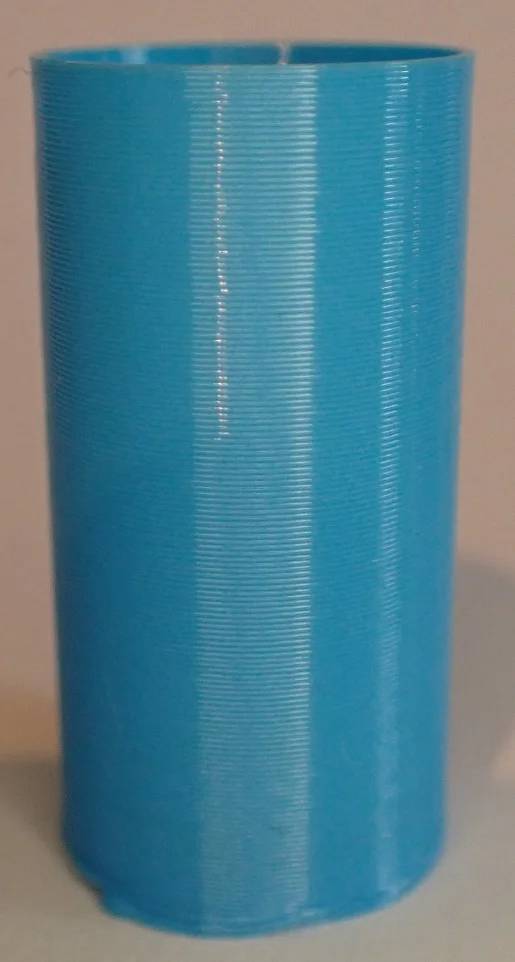
Vase Mode
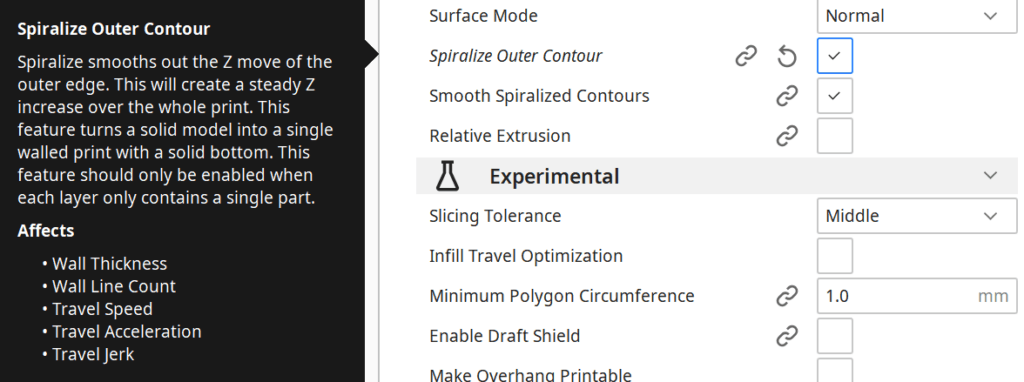
The Vase Mode (in Cura “Spiralize Outer Contour”) can prevent the Z seam completely. In PrusaSlicer the function also exists as “Spiral Vase Mode”.
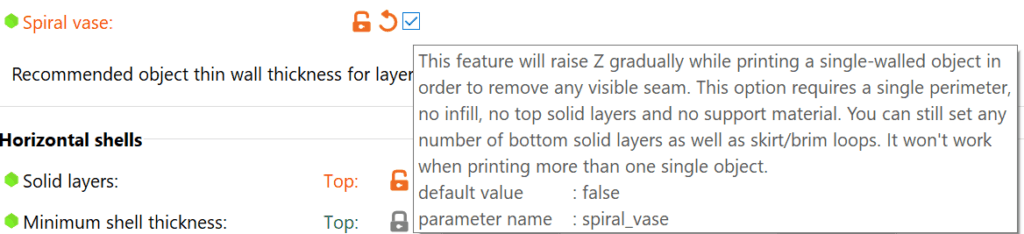
In vase mode, you can print objects that consist of a single layer wall quickly and without a visible Z seam. The layer transitions are not abrupt as in a normal print, but occur as a smooth transition from one layer to the next.
The printhead does not stop at a layer transition, but simply continues printing while it moves upwards in the Z-direction to the next layer and continues moving in the print direction.
The prerequisites of a Z seam are therefore no longer given. With very coarse prints you can see the slight change of direction in the Z-direction on closer inspection, but no blobs of over-extruded filament.
The extrusion always remains the same in Vase mode and therefore cannot produce a visible Z seam.
In Cura, you can activate an additional setting in the vase mode to smooth the movements of the print head even more.
Disclosure: This website is the property of Martin Lütkemeyer and is operated by Martin Lütkemeyer. Martin Lütkemeyer is a member of the Amazon Services LLC and other Affiliate Programs. These are affiliate advertising programs designed to enable websites to earn advertising revenue through advertising and linking to Amazon.com and others. Links marked with * are affiliate links.
