
- Wet Filament: Prevention, Symptoms & Drying - July 18, 2024
- Sovol SV08 – Best PrusaSlicer Settings & Profile - June 26, 2024
- Sovol SV08 – Best Orca Slicer Settings & Profile - June 26, 2024
Disclosure: Links marked with * are Affiliate Links. I earn from qualifying purchases if you decide to make a purchase through these links – at no additional cost for you!
PETG (PET modified with glycol) is considered an easy-to-print material that is cost-effective and very tough. As it also shows high temperature resistance, it is popular for printing technical parts.
PETG is printed at 230 °C in the nozzle for the first layer and 240 °C for all further layers. The heating bed should be 85 °C at the beginning and 90 °C from the second layer on. PETG adheres well to powder-coated printing beds, but also separates well after printing.
For technical parts, especially mechanical parts, a good surface finish is important. The component may have to fit exactly, for example when screws and brackets or clamps are made from it.
Covers and other parts for the 3D printer can certainly be made from PETG. However, this is not possible without surface processing after printing. There are various ways to smooth PETG.
PETG can be smoothed with fine sandpaper, epoxy resin and paint. Similar to ABS with acetone, PETG can also be smoothed with dichloromethane. However, dichloromethane is very dangerous and not easy to obtain.
Table of Contents:
PETG Properties
PET stands for polyethylene terephthalate. The thermoplastic belongs to the polyester family and is used, among other things, for transparent beverage bottles.
Some textile fibers are also made from PET. If PET is modified with glycol, PETG is produced.
The filament is easy to print and shows good layer adhesion. The processing of the material is better after the addition of glycol, because it makes the material less viscous/gooey.
Glycol thus ensures that the filament remains rather liquid when warm and also looks highly transparent. However, the milky, almost transparent surface requires a lot of skill when setting the print speed and print temperature.
After cooling and curing, it is very durable and, above all, highly temperature resistant. Warping is very low during printing, and PETG is water and moisture resistant.
PETG itself is food-safe, but the printed parts are not without further treatment. This is because fine layers are created during printing, between which bacteria can thrive. If PETG parts from the 3D printer are to be used for food, the finished component must be coated with a food-safe epoxy resin*.
In general, however, the surfaces of professionally printed components made of PETG are very good. This is because the material hardly warps at all, does not shrink and exhibits great layer adhesion.
Shrinkage on cooling is a slim 0.5 percent! In contrast to other filaments, reproducibility of the print results is therefore quite possible with PETG at the same printer settings.
However, there are also disadvantages: PETG is not UV-resistant, gets scratch marks easily and is otherwise just hard.
PETG can be glued: Cyanoacrylate adhesive*, for example, provides several components made of this material with a very quick hold to each other.
This works very simply: The adhesive is applied very carefully along the seam, and distributed in the central areas. You will achieve even adhesion if you apply the adhesive at regular intervals from the inside to the outside.
Excess adhesive should in no case remain on the part to be bonded, but should be removed with a paper towel! This must be done immediately after joining. This is because cyanoacrylate adhesive hardens immediately.
However, you can also work with epoxy glue. This is a classic two-component adhesive that is mixed and then quickly applied with a brush.
Epoxy adhesives require up to five days to cure. Therefore, it is essential to fix the parts bonded with it using a rubber band or clamps.
If you want to know more about PETG, check out the full guide:
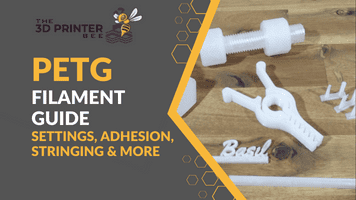
PETG Filament Guide | Settings, Adhesion, Stringing & More
Durability can be a Disadvantage
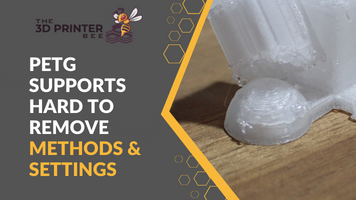
Because PETG is so hard and durable, it is difficult to remove supports from the component. PETG does dissolve in some chemicals, but these are dangerous and should therefore only be used by laboratories professionally trained to do so.
PETG has a tendency to bond very strongly with the printing surface. So it is also rather difficult to detach the printed parts from the build plate. Bridging and overhangs often do not look so appealing, and PETG is not suitable for printing filigree parts. Sometimes the material pulls threads during printing (PETG Stringing).
These properties make it clear that anyone printing with PETG must process the surfaces after printing.
There are basically two ways to do this: The surfaces can be filed wet (i.e. warm and not yet completely cured), or the surfaces can be treated with dichloromethane.
This chemical is critical to handle, but it dissolves the PETG and can thus be used for polishing the surface. Subsequent smoothing of the printed parts is not easy, because the effort involved is great.
Therefore, the print settings should be made as carefully as possible: This saves a lot of work after printing.
First Remove the Supports
Before the surface of the print models can really be smoothed, the support structures must be removed.
This is not easy with a material as durable as PETG. If you work with two extruders and have the appropriate equipment available, you can of course print the support structures with a water-soluble filament and simply place your model in a water bath after printing.
The supports then dissolve and are gone. However, this option is probably available to very few people.
All others carefully remove the support structures of PETG models with a scalpel. The material is very hard, so work must be done carefully and with great care.
Cutting PETG requires a lot of force. If you slip, not only the model may be ruined, but also your hand. Therefore, you should fix the print model for postprocessing and work with a steady hand, patiently and with the least amount of force possible.
It is normal that small irregularities remain visible after removing the support structures. These can be removed or concealed using various methods. Sandpaper is a good idea for easily accessible areas. Very fine files from model making or a nail file can also be helpful.
If there are still unevennesses or deeper cuts, you can fill them with paint.
PETG can be printed in color, but many crafters still finish the printed models with paints and varnishes. Finally, you can achieve a perfectly smooth and glossy surface by coating your model with a transparent epoxy resin*.
This means that after your printed part has cooled down, several surface treatment steps are necessary to ensure that your printed model looks really nice.
These are the things you should have ready:
- Cutter or scalpel
- Deburrer blades in various designs
- Side cutter or fine scissors
- various files and emery paper of different grain size
- the polisher from the manicure set or optionally a modified electric toothbrush (you can find building instructions on the Internet)
- a possibility to blow dust residues from the print model (strong hair dryer or similar)
- Brush, acrylic paints, maybe epoxy resin
- chemical resistant gloves
- Respiratory protection and safety goggles
Smoothing after Printing
It is true that the surface of components made of PETG is already much smoother after printing than that of other filaments.
However, it is not perfect.
For a really smooth surface, you may need to sand it. However, you will get a better surface if you coat your print model with a glossy layer of transparent epoxy resin after it has cured.
The model then looks very high quality.
If you don’t want to mix your own epoxy, you can buy a special 3D printing epoxy*. The resin achieves incredibly smooth and even surfaces, but can simply make smaller details disappear due to its thick consistency.
Epoxy resin is transparent. This means that if the surface of your model is uneven, if printing layers are visible, they will remain so even after treatment with the epoxy resin. But you will no longer feel them because the resin covers them.
For other filaments (ABS*, for example), it is often advised to smooth the surface with acetone (ABS Smoothing Guide).
This does not work with PETG, because the solvent cannot harm the PETG. And this also applies to the other solvents that are commonly used in 3D printing to smooth surfaces.
Fill Small Gaps with Paint
PETG prints can be colored and painted with acrylic paint*.
In the case of small models from the 3D printer, this is usually done with a fine brush. If the surface of the model is very uneven or if there are noticeable dents somewhere in the printed image, these impurities can be evened out with acrylic paint.
This will remove dust and grease from the surface of the print model. For a beautiful color result, a primer should be applied. Only then is the paint applied with a brush.
It may be necessary to apply a second or even a third coat of paint until the surface looks really smooth. This should always be done after the layer underneath has already dried.
Filing after Printing
The usual way here would be to reach for sandpaper. In the first pass, a coarser grit should be used, then it becomes finer and finer.
You rub your print model with the paper again and again until the surface meets your expectations. It is somewhat easier if you have a lathe at hand or can work with a small grinding machine.
Resourceful people have also already misused the manicure set with the small polishing machine for the fingernails. That works quite well. Which grinding or polishing attachment you use depends on how precisely you want to shape the surface.
A hard felt pad might work, but the coarser grit attachments do more damage than good.
For a clean result when sanding, it is important that the print model is fixed. A workbench with a vice works just as well as an improvised jig.
If you work with tools instead of sanding by hand, you should pay attention to the skin of your hands: It also reacts to sandpaper and polishing attachments! Perhaps you can work with gloves to keep the damage within limits.
The disadvantage of grinding is that PETG chips and fine plastic dust are released. You should not necessarily inhale these particles. It is better to work with respiratory protection.
Protect your eyes with chemical goggles*. The finishing process is somewhat less dusty if you use fine wet sandpaper*.
In grit sizes of 600, 800 and 1,200, the paper is available in DIY stores, while finer versions tend to have to be ordered on the net.
PETG can also be processed well with damp sandpaper, which provides you with a relatively clean and, above all, safe method. However, think carefully about where and how you dispose of the water after sanding, because it contains large quantities of microplastics.
Since PETG is very susceptible to scratch marks, you should not use very coarse sandpaper for the first revision. Grits of 60, 80 or 120 are more likely to destroy your print model than to give you a smooth surface!
Smoothing with a Polishing Machine
3D printing fans are known for designing and printing out their own tools when in doubt. Therefore, it is not surprising that a small polishing machine for smoothing PETG print pieces is described online.
At Techdroid, for example, the exact building instructions for such a polishing machine are available as well as the corresponding parts list, a circuit diagram, the Arduino base code and all other information.
The entire polishing machine consists of a small, rotating roller on a very minimalist support structure including motor. The device is operated similarly to the small grinders that you can get inexpensively in pedicure or manicure sets.
3D printing fans wouldn’t be what they are if they hadn’t found another solution: With a little skill and imagination, an electric toothbrush can also be modified so that you can use sandpaper to smooth your PETG model.
Depending on the model and building instructions, the head will be so fine that you can get into smaller interiors and work out the details on edges.
In the craft sector, for example for the fine processing of stone sculptures, there is also the right device. However, the local hardware store tends not to have these devices in stock.
What also speaks against it is the price: Such special (usually very high-quality) tools are not exactly inexpensive. If you just want to play around with PETG and try out the material, it’s not worth buying a professional tool.
Finishing with Spray Paint and Polyurethane
If you want your print model to have only one color, you have another option for surface finishing. You can apply paint with a spray can*.
The advantage of the spray can is that, with a little skill, a very even paint result is achieved and paint noses and accumulations in hollows do not form as easily as when working with a brush.
Before the spray paint is dry, apply a layer of polyurethane (also as a spray*). The model should now be placed in front of a fan so that the paint does not run down completely.
The two sprayed substances mix and run into the grooves and irregularities of the model. The advantage: You can apply very thin layers of paint and varnish, so even the finest irregularities are evened out.
If the model is still not satisfactorily smooth after one pass (and at least 20 minutes of drying, more likely a day), repeat the process.
This way you can apply several very thin, fine layers of paint and varnish until your model is really as smooth as you want it to be.
And of course you can also deliberately provoke color effects in this way: If you apply each layer in a different shade, the colors mix visually. The polyurethane varnish then fixes the colors.
However, it is not easy to control these mixing effects – it takes practice and experience.
Dichloromethane
Dichloromethane is suitable as a solvent for PETG. However, the material is dangerous like chloroform and can only be purchased at all with an appropriate permit. The chemicals may also only be used by appropriately trained personnel with sufficient experience.
Also known as methylene chloride, dichloromethane has been used for about 60 years as a solvent for stripping paints and varnishes and resin compounds. It is extremely flame retardant in air and has long been considered a safe substitute for other solvents.
However, you should work with dichloromethane if you wear personal protective equipment and ensure adequate ventilation of the premises.
Nearly 800 incidents and fatalities associated with dichloromethane are known today. In most cases, the accidents were fatal when ventilation was not adequately provided, personal protective equipment was not (or only partially) worn, and higher exposure occurred as a result.
If you are exposed to the chemical dichloromethane even for a short time, it already affects your nervous system. Visual, auditory and motor functions deteriorate relatively quickly – this can be described as a kind of paralysis of perception and movement.
As soon as the dichloromethane is removed from your environment, your body will recover – but you may not be able to take care of it yourself. Therefore, the handling of dichloromethane in the hobby sector is seen as extremely critical. In a nutshell: It is forbidden in most countries to sell and use paint strippers containing DCM – with the exception of appropriately inspected laboratories.
It is prescribed that the chemical must firstly not escape into the ambient air and secondly that the workplace must be extremely well ventilated in order to protect the people present from damage to their health caused by the chemical.
There’s a contradiction in that if you want to implement this at home – that’s why we advise using an appropriate service provider.
Dichloromethane is not applied directly to the surface of the printed part. This also works, but the result is not satisfactory. It is better to expose the PETG component to the vapors of dichloromethane for a short time. This is because PETG dissolves in dichloromethane. A bath in the chemical is therefore also not expedient.
If for some reason you are allowed to buy dichloromethane and do so, too much caution in handling the chemical is advised. With relatively simple measures you can build a steam bath for your printed parts.
Excursion: Building a Dichloromethane Steam Bath Yourself
Treating PETG surfaces with a brush soaked in dichloromethane will not completely smooth the surfaces.
It also consumes a large amount of the chemical. White spots may appear on the surface of your print. With some prolonged contact, the print will warp and bend.
But you want to work sparingly, because firstly, dichloromethane is not entirely harmless to your health, and secondly, it is a question of cost. Ideally, you should use only a little dichloromethane at a time.
You need a transparent PP (polypropylene) box for the steam bath. Such plastic boxes can be purchased inexpensively at IKEA, for example.
Important: Make sure which plastic the box is made of! A box made of PETG would dissolve in a dichloromethane steam bath. A box made of ABS or ASA would dissolve in an acetone steam bath.
As someone a little more experienced with 3D printing and the respective materials, you know that you can surface-smooth your ABS/ASA models in an acetone steam bath.
If you buy such a box, you want to use it for both the ABS/ASA models and the PETG models. Therefore, PP is the right choice in terms of material. It has proven useful to always have several boxes in different sizes and shapes in stock, so that several models can relax in the steam bath at once.
Inside the box, create a raised platform. This can be a pane of acrylic glass on an empty cardboard box, but a metal plate with an empty tin can underneath will also do.
To make the dichloromethane vapors waft through the box and around your print model on the platform, soak napkins, paper towels, or pieces of toilet paper in the liquid so that they absorb some of it.
Dripping wet would be unfavorable, you should be able to place the cloths in the container without spilling. If you are working with acetone to smooth your ABS/ASA models, you should of course proceed in the same way.
A good number of such cloths is sufficient to smooth smaller models. Even better results can be achieved if you install a small fan in the lid of the box, which evenly circulates the vapors in the box. It is important that the dichloromethane remains in the box, so the fan sits on the inside of the unpierced lid!
With large models, the result can be uneven with such a setup. This is because the vapors tend to collect at the bottom of the container, so that the surfaces of your model at the bottom become nice and smooth, but the superstructure just below the lid of the box does not get much.
In this case, it is advisable to use a so-called smoothing station such as the Polymaker Polysher or the Zortrax Apoller. However, these tools are quite expensive. These smoothing stations work with heat, because experience shows that the surfaces smooth out somewhat faster when heat is applied.
If you use your own construction, you should absolutely refrain from supplying heat! Dichloromethane volatilizes very quickly in the air and can lead to health problems when inhaled – this happens even faster when heat is added. And acetone is explosive
Conclusion
Prints made from PETG can also be given a wonderfully glossy surface. However, the post-processing in several steps is somewhat time-consuming.
PETG is a very hard material that does not make it easy for you. So you need not only the appropriate equipment and some skill, but also patience. If you choose the print settings very carefully and balance quality and print speed very much in favor of quality, you can save yourself a lot of effort in post-processing.
As a very hard and durable material, PETG is a good choice especially for the coverings of technical devices and the like. For example, if you print a cover for your 3D printer or a small toolbox yourself, extensive surface processing is not necessary.
Because these functional parts don’t have to win any beauty contests – they are just functional. The situation is different for parts with mechanical functions: Here, a smooth surface is necessary for proper function.
Disclosure: This website is the property of Martin Lütkemeyer and is operated by Martin Lütkemeyer. Martin Lütkemeyer is a member of the Amazon Services LLC and other Affiliate Programs. These are affiliate advertising programs designed to enable websites to earn advertising revenue through advertising and linking to Amazon.com and others. Links marked with * are affiliate links.
