- Wet Filament: Prevention, Symptoms & Drying - July 18, 2024
- Sovol SV08 – Best PrusaSlicer Settings & Profile - June 26, 2024
- Sovol SV08 – Best Orca Slicer Settings & Profile - June 26, 2024
Disclosure: Links marked with * are Affiliate Links. I earn from qualifying purchases if you decide to make a purchase through these links – at no additional cost for you!
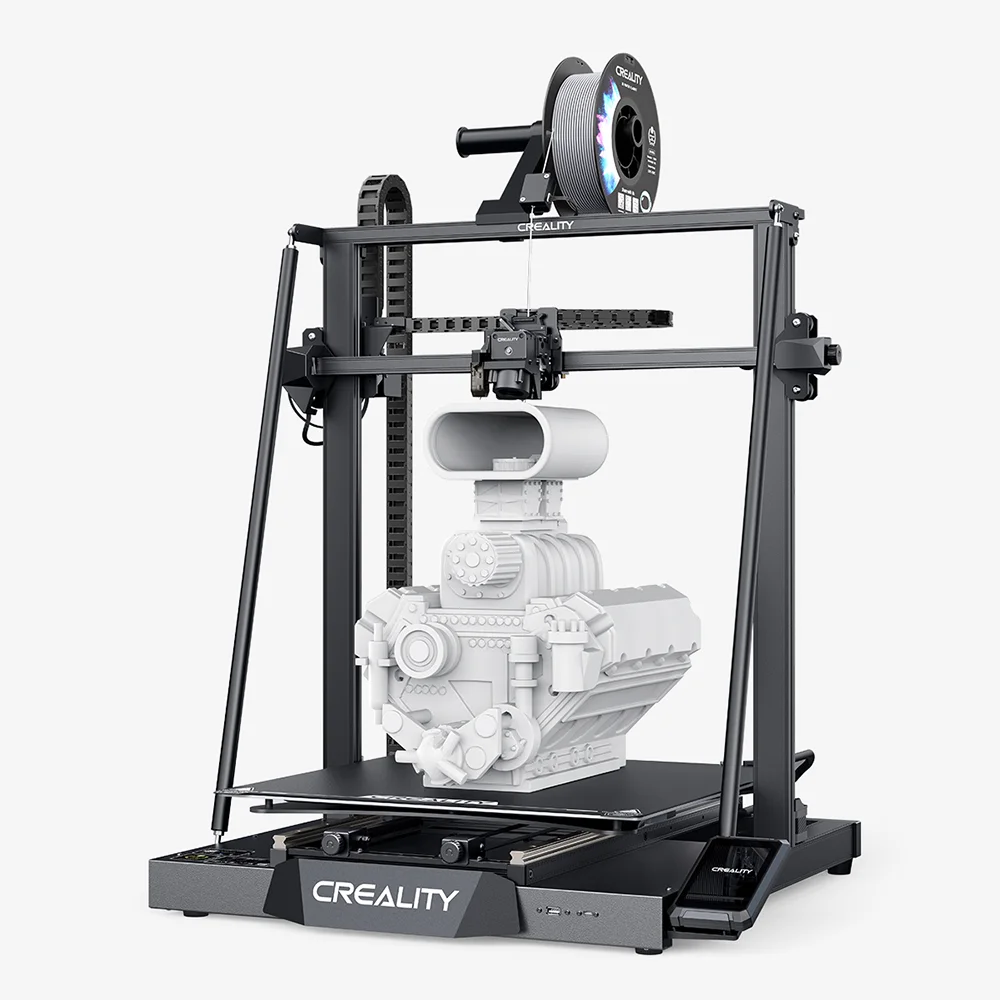
The Creality CR-M4* is huge! In addition to its large print volume, it also has other features that you won’t find on normal hobby 3D printers.
I took a close look at the CR-M4 and tested it for several weeks. Among other things, I used it to print the hook of Maui life-size!
PRO:
- All-metal “Sprite” direct drive extruder
- Automatic print bed leveling
- Automatic PID-Tuning
- Easy loading and unloading of filament
- Removable print bed with perfect adhesion
- Sturdy design
- Good workmanship
CON:
- Large
- Loud fans in print head
Who should buy the Creality CR-M4?
Creality advertises the Creality CR-M4 as being suitable for industrial use. However, it is also suitable for any home user looking for a robust device to use to print large objects in one piece. With the ability to run several of these printers at once, you could also build an efficient“printer farm“.
Check Price at:
In this video, I’ll show you the hook of Maui – the large-scale project I printed with the CR-M4:
Table of Contents:
Technical Specifications
- Technology: FDM
- Operation: 4.3″ color touch screen
- Extruder: “Sprite” Dual-Gear All-Metal Direct Drive Extruder
- Print temperature: max. 300 °C
- Print bed temperature: max. 100 °C
- Print volume: 450 × 450 × 470 mm
- Print bed material: PC-coated spring steel, magnetic, flexible
- Print bed leveling: Automatic at 25 points
- Print speed: Maximum 120 mm/s, standard 50 mm/s
- Nozzle: 1 × 0.4 mm
- Printing accuracy: ± 0.1 mm
- Layer height: 0.05 to 0.35 mm
- Filament: 1.75 mm PLA, ABS, PETG, TPU, Nylon, etc.
- Filament Sensor: Yes
- Resume Print: Yes
- File Transfer: USB, LAN, WLAN, Cloud
- Slicer: Creality Print, Creality Slicer, Cura
Scope of Delivery & Unboxing
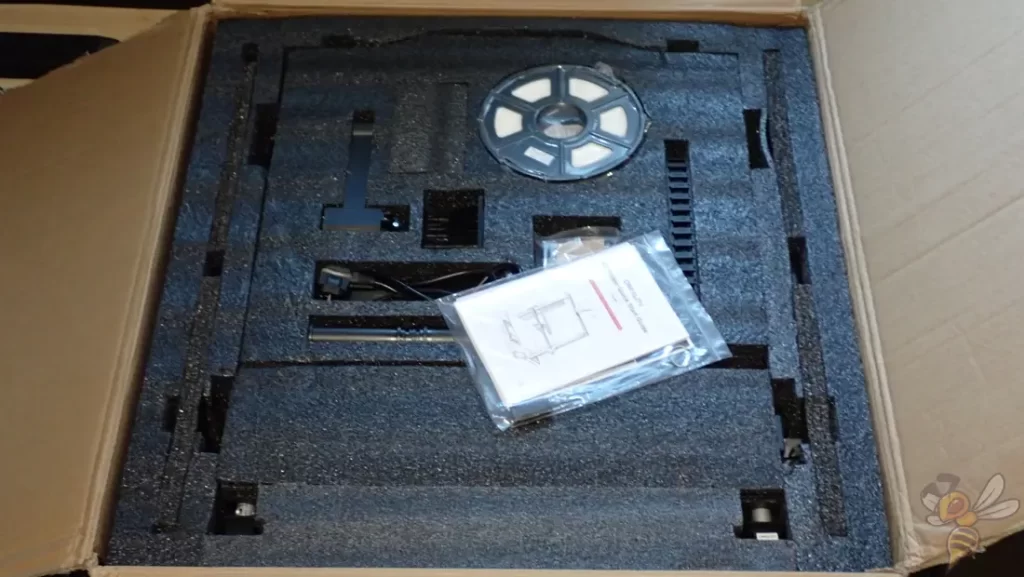
As usual from Creality, the CR-M4 is excellently packaged, with precision-fit foam parts. This protects all components even from heavier shocks. Due to the size, however, the package is also relatively heavy.
Everything is included in the scope of delivery to be able to perform the first test prints directly. Among them is also a spool of PLA filament and the necessary tools for assembly.
Assembly

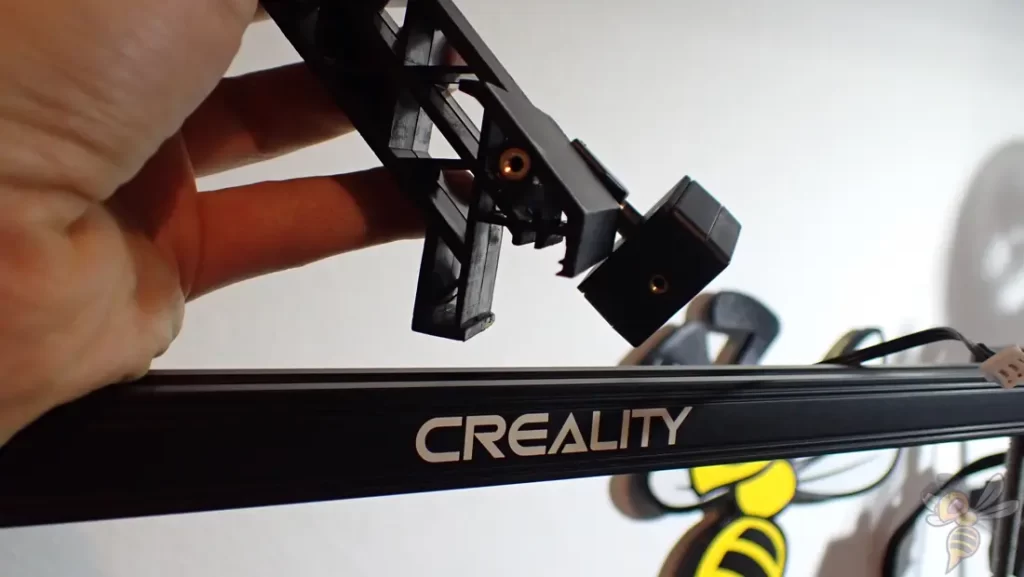
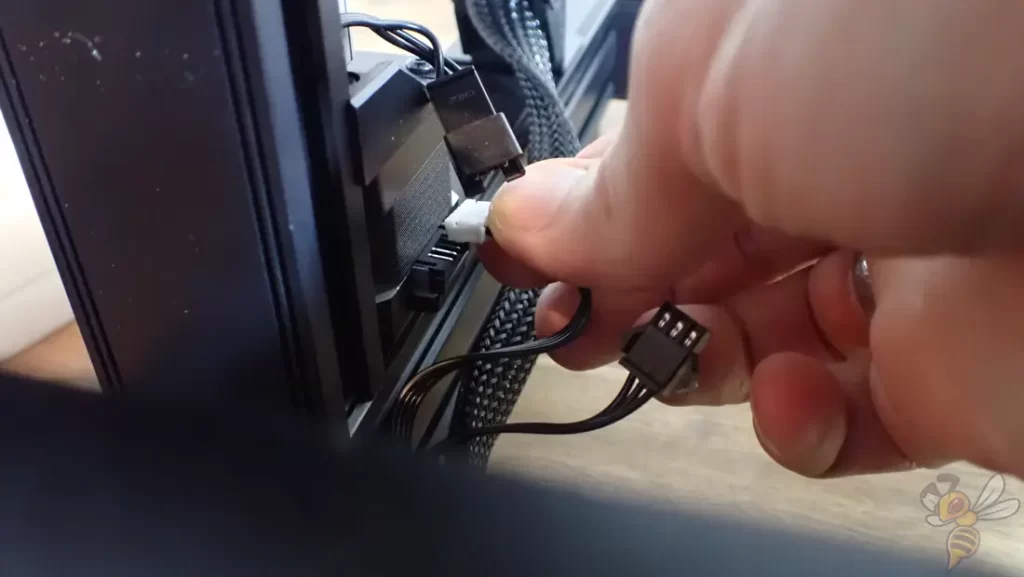
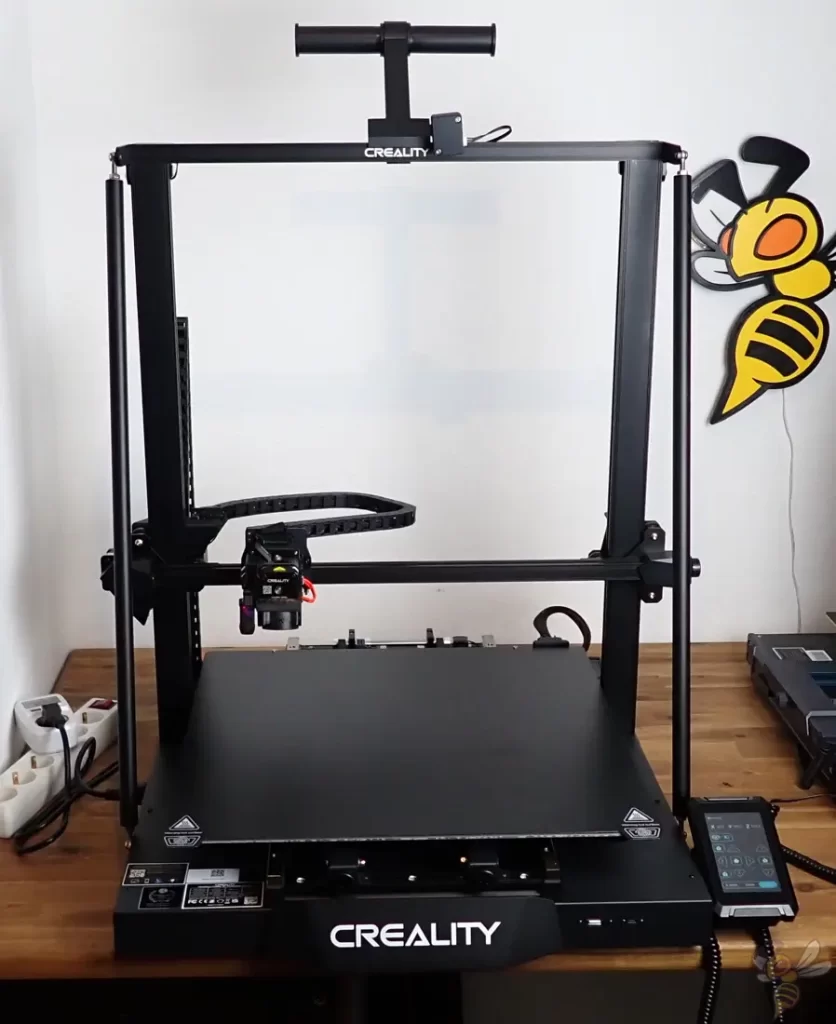
For such a large 3D printer, assembly is surprisingly quick. It took me about 15 minutes.
The most important parts of the 3D printer are already pre-assembled and only need to be connected to each other. The pre-assembled frame with the x-axis and print head needs to be screwed to the base. The diagonal struts are also quickly mounted and so is the filament holder with filament sensor.
After the installation of the touchscreen, the cables have to be connected. These are laid and marked in such a way that it is not possible to connect them incorrectly.
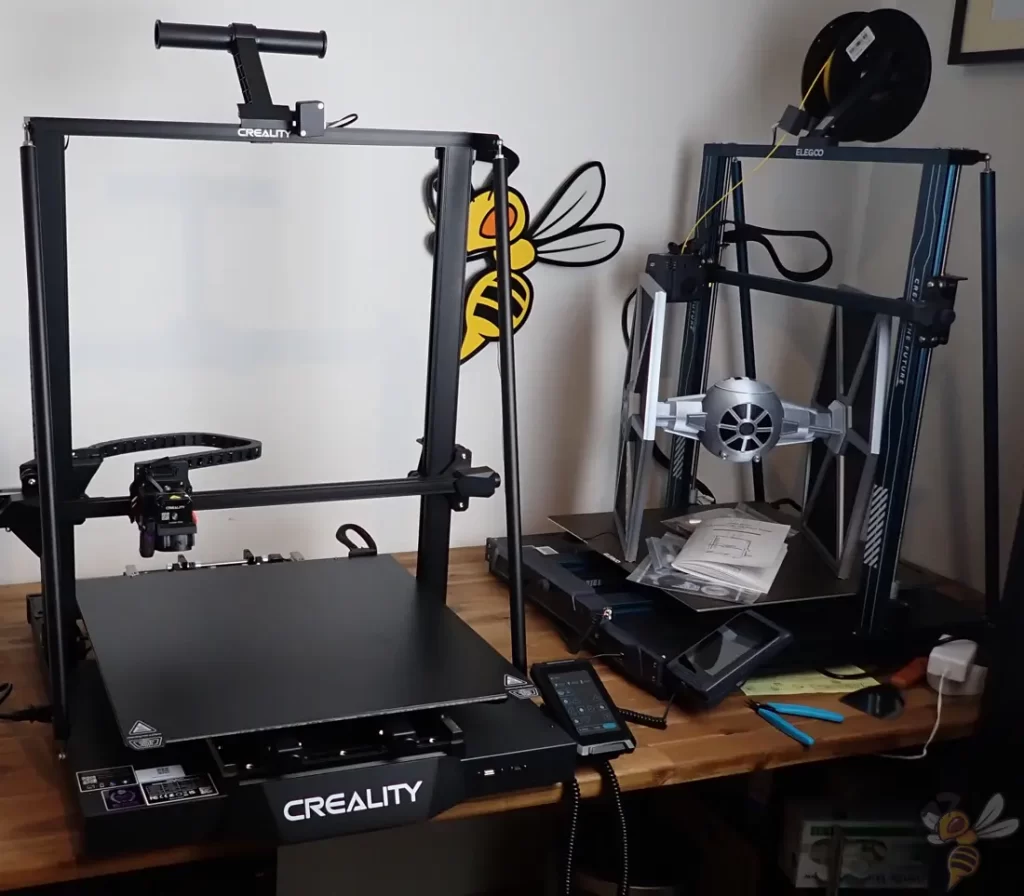
As illustrated by the picture above, you should be aware of how much space the CR-M4 takes up. My printer is at the very front edge of my work surface so that the print bed can still move all the way to the back without hitting the wall. So before you buy, you should think about where you’re going to put it.
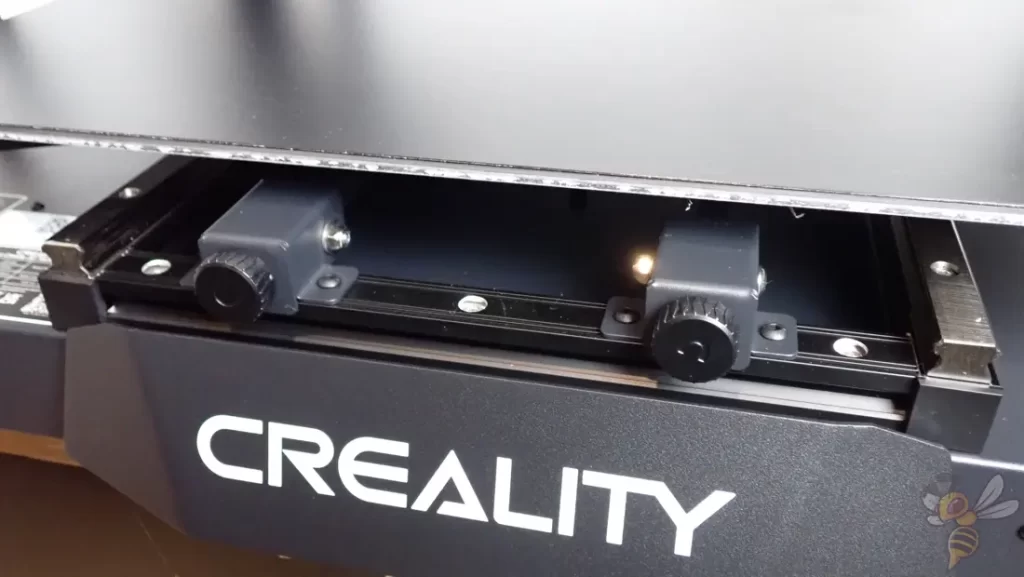
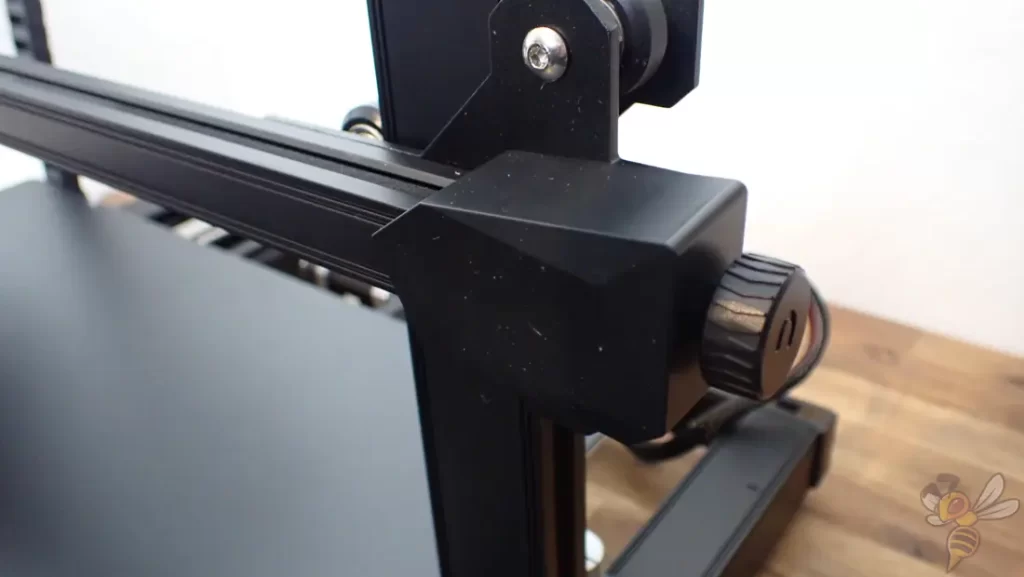
Due to transport, the toothed belts of the x- and y-axis can be too loose. But with the handy timing belt tensioners, they can be tightened quickly. Since the print bed is so huge, there are even two of them here!
Design
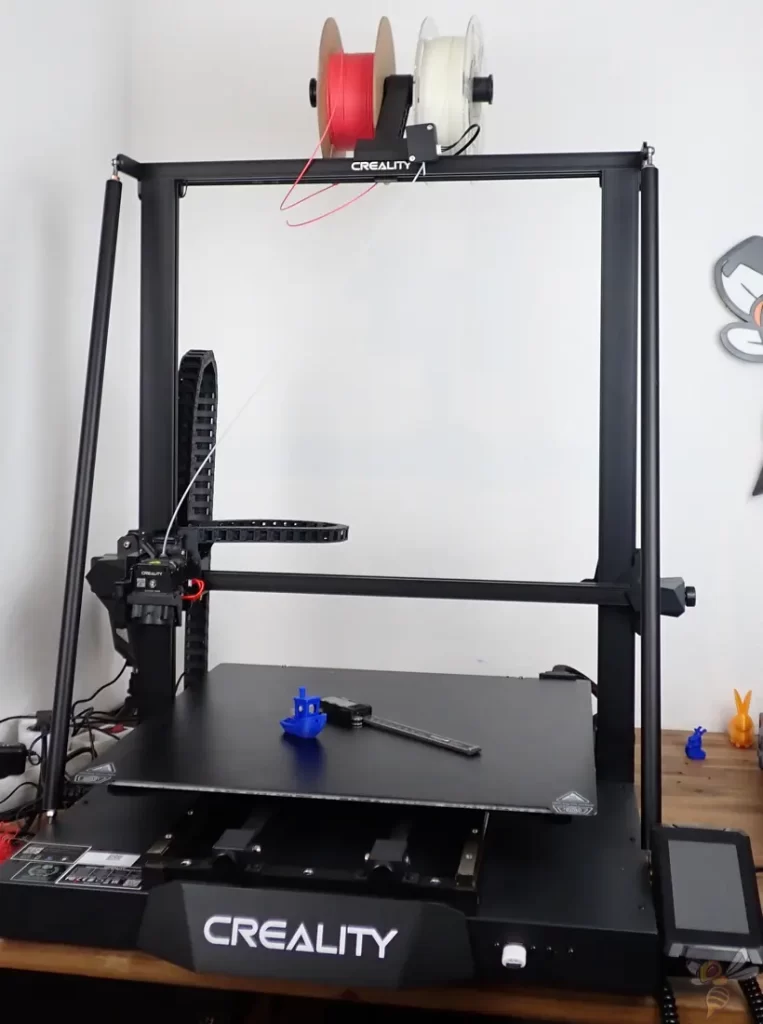
To demonstrate the gigantic print volume (450 × 450 × 470 mm), I put a standard size 3DBenchy and a caliper on the print bed. As you can see, you can print very large objects like cosplay armor in one piece with the Creality CR-M4.
To ensure that the frame is as stable as possible despite its size, it is connected to the base via diagonal struts. This prevents vibrations so that even very large objects have the same quality at the top and bottom.
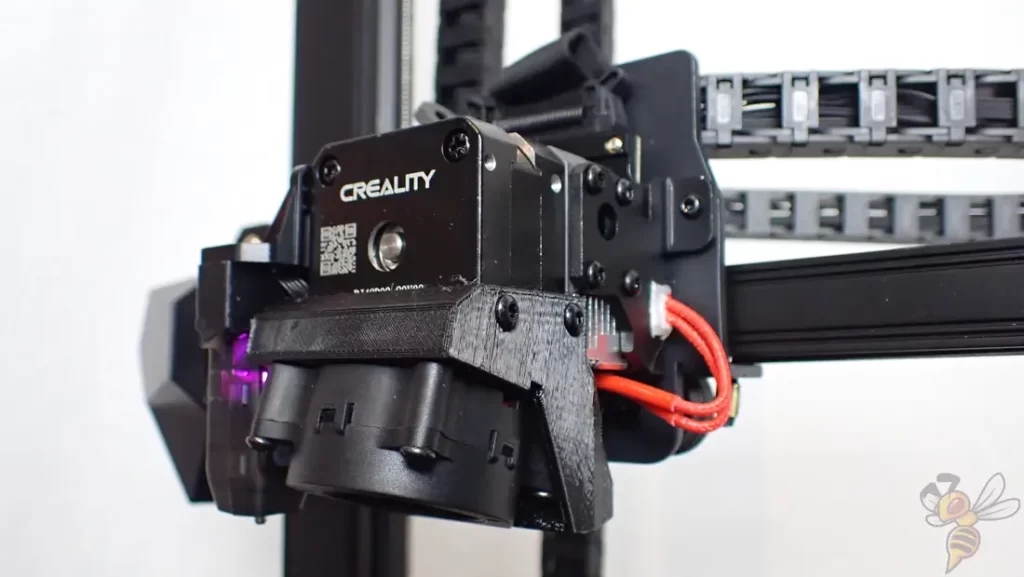
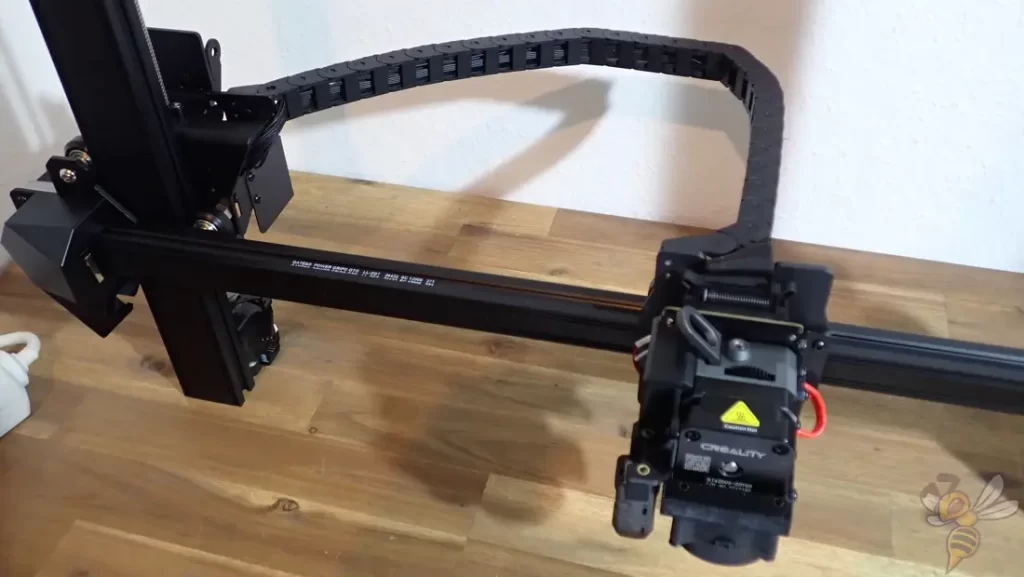
The small print head with the Sprite Dual-Gear Direct Drive Extruder is tiny in contrast to the large print volume! However, this is not a bad thing, but rather a good thing. It makes it very lightweight.
With the Sprite Extruder, Creality has eliminated all unnecessary components to keep the weight as low as possible. The lower the weight of a print head, the less vibration there is during changes in movement during printing. As a result, fewer printing errors occur and a higher printing speed can also be achieved without errors.
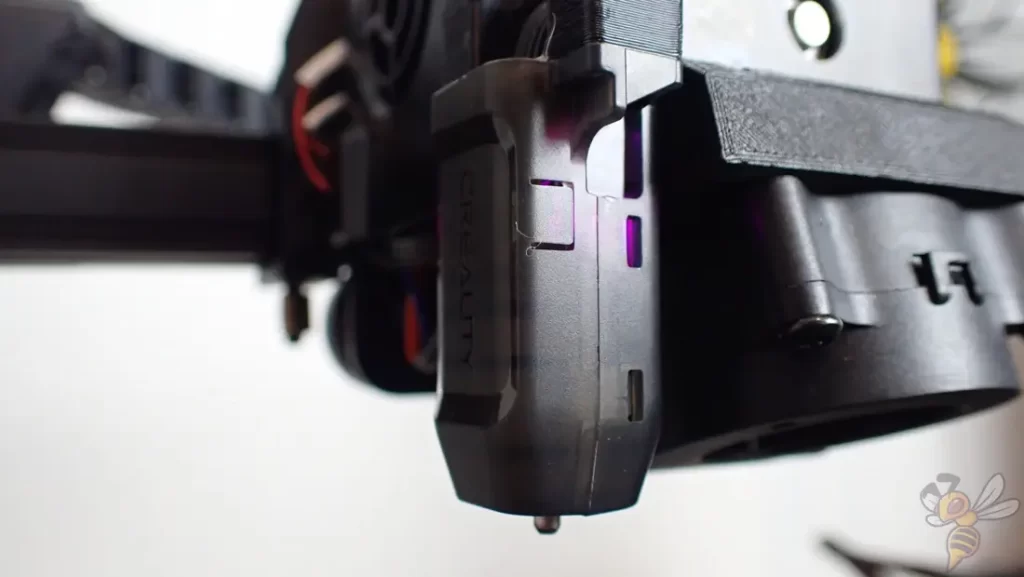
The CR-touch is also attached to the print head. This is a sensor for automatic print bed leveling.
Unlike many other FDM 3D printers, there are no rotating screws under the print bed to adjust the tilt of the print bed. It is fixed in place. If the print bed has minor deviations, these are detected by the sensor. The sensor automatically measures the inclination of the print bed at 25 points. The data is then applied during printing and the inclination is automatically compensated.
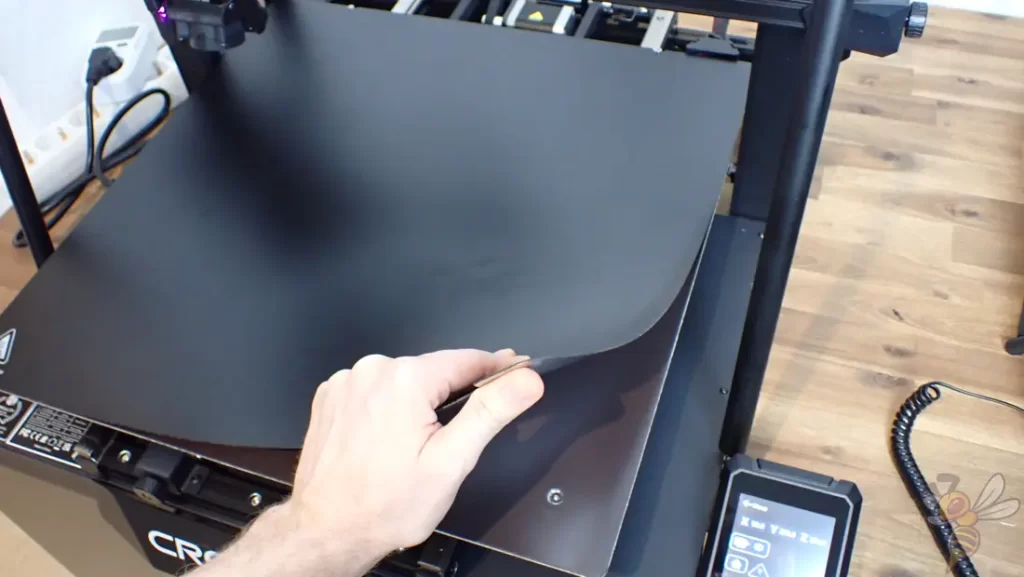
The print bed is truly massive at 450 × 450 mm. Even gigantic objects can fit comfortably on it. Alternatively, you can place many small objects on it at once (see here for a tip on how to print multiple objects at once without errors).
The print bed is made of PC-coated spring steel and can be bent after printing. This makes it very easy to detach the object. You won’t need a spatula anymore!
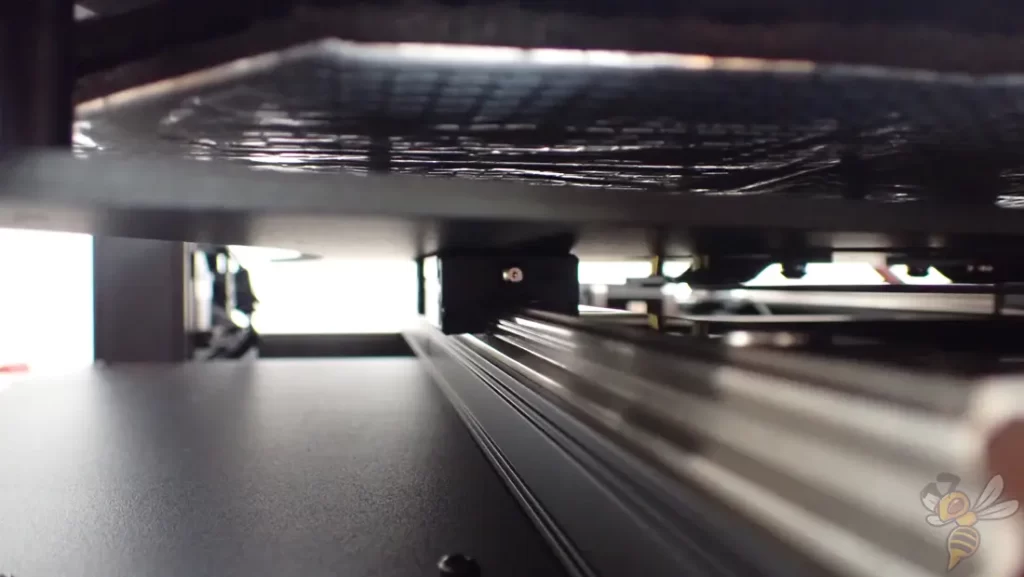
As mentioned before, you won’t find any screws under the print bed to adjust the tilt. Instead, you will see high quality linear rails on which the print bed runs. The life of these rails is longer than the traditionally used rails with wheels and they can carry a heavier load.
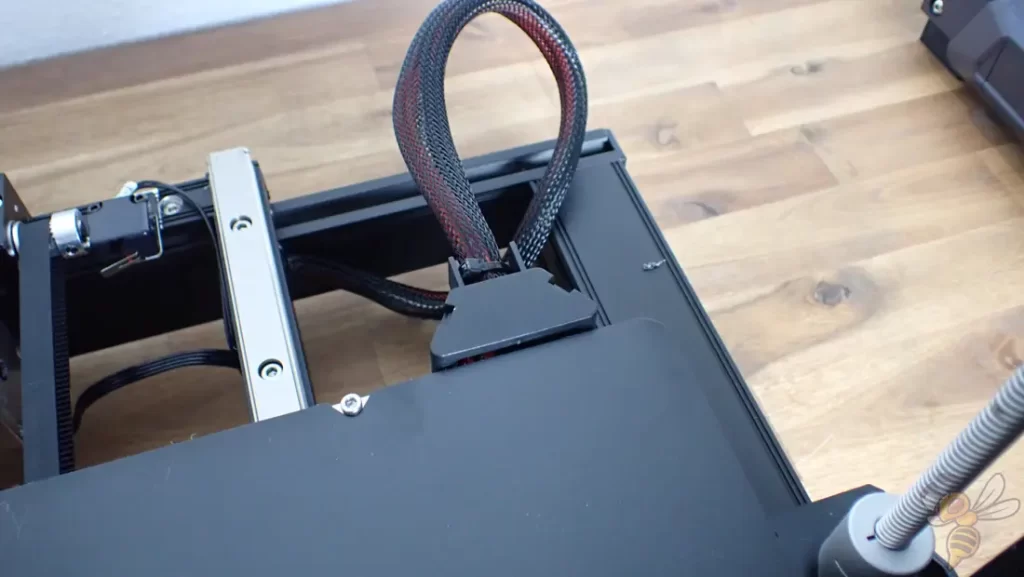
To heat the large print bed, relatively strong currents flow. To avoid early cable breakage and danger, the connection of the cables to the moving print bed has been implemented by a robust cable protection.
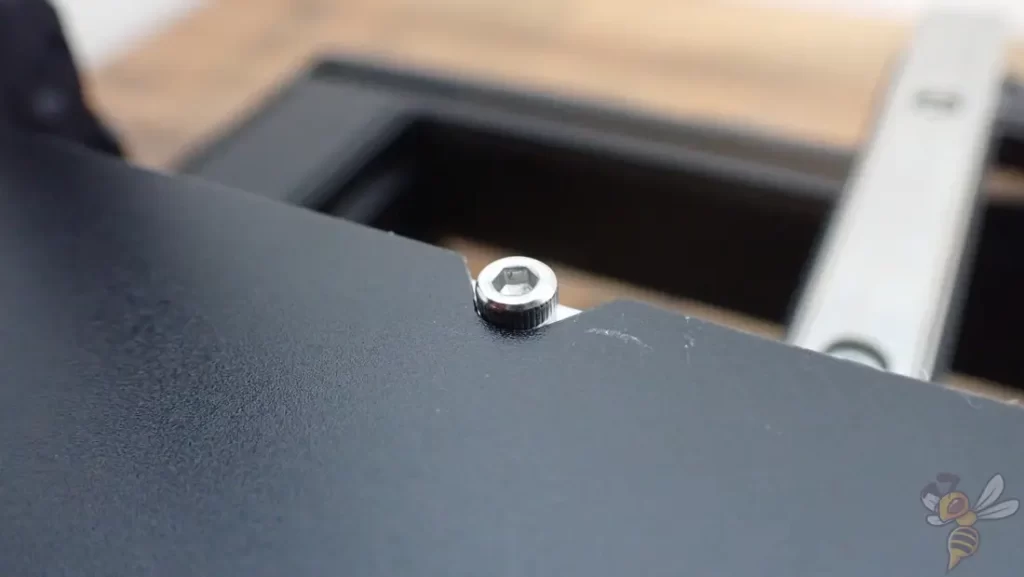
Since magnetic print beds have been available, one small thing has been annoying me during daily use: the exact positioning of the print bed on the printing plate. Fortunately, most manufacturers have now recognized this and insert small screws at the end of the print bed, which can be used to align the print bed.
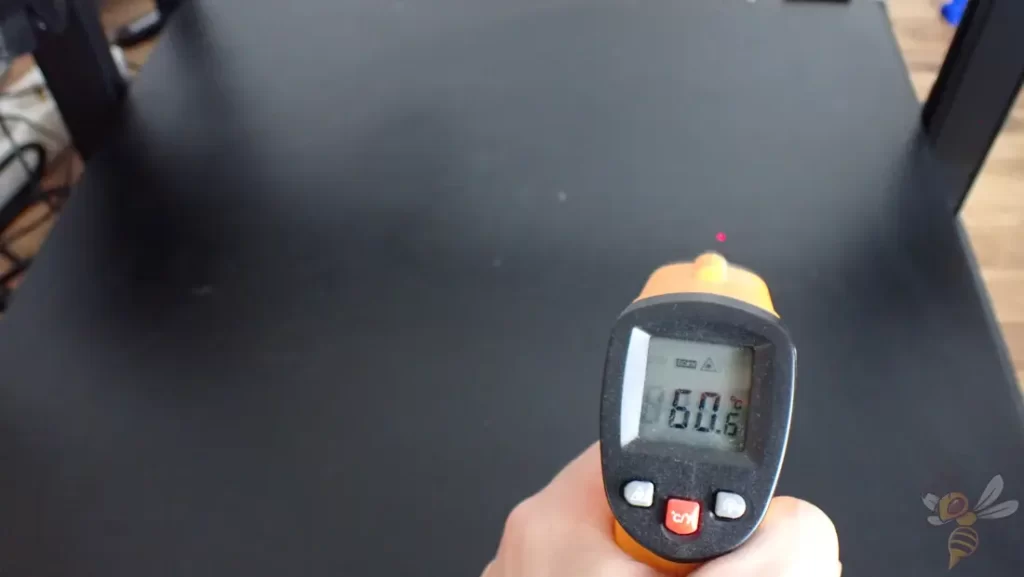
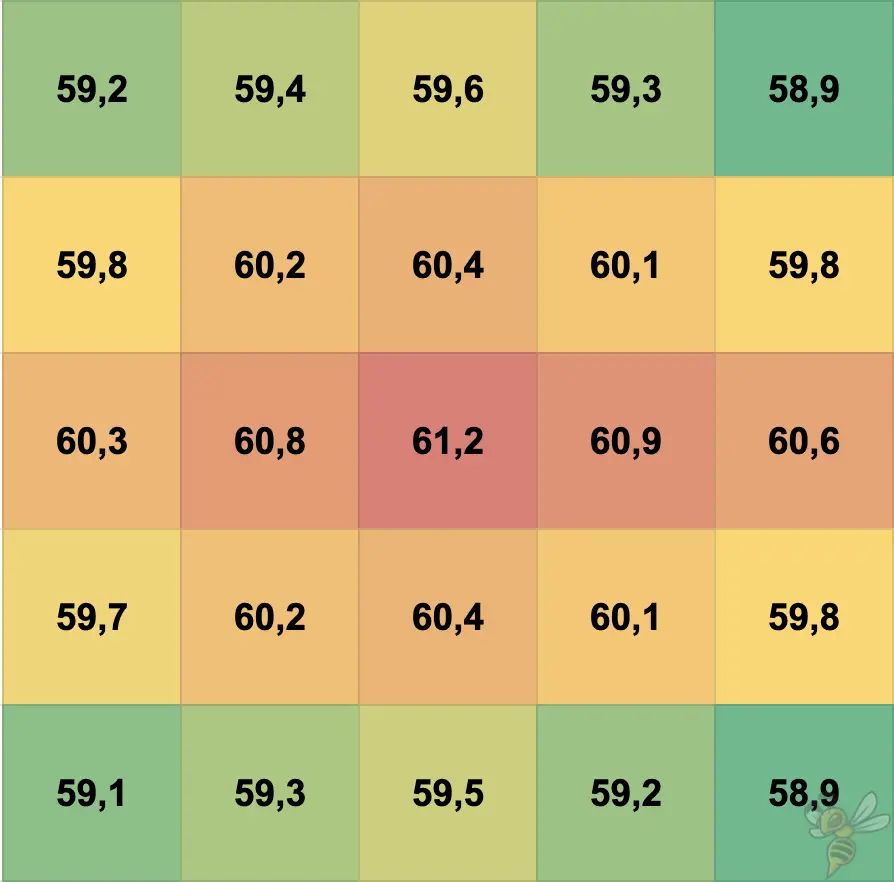
Often the problem with such large print beds is that their homogeneity is relatively poor. While the homogeneity of the print bed temperature is not ideal on the CR-M4 either, it should still produce near perfect adhesion for most filaments when combined with the PC coating.
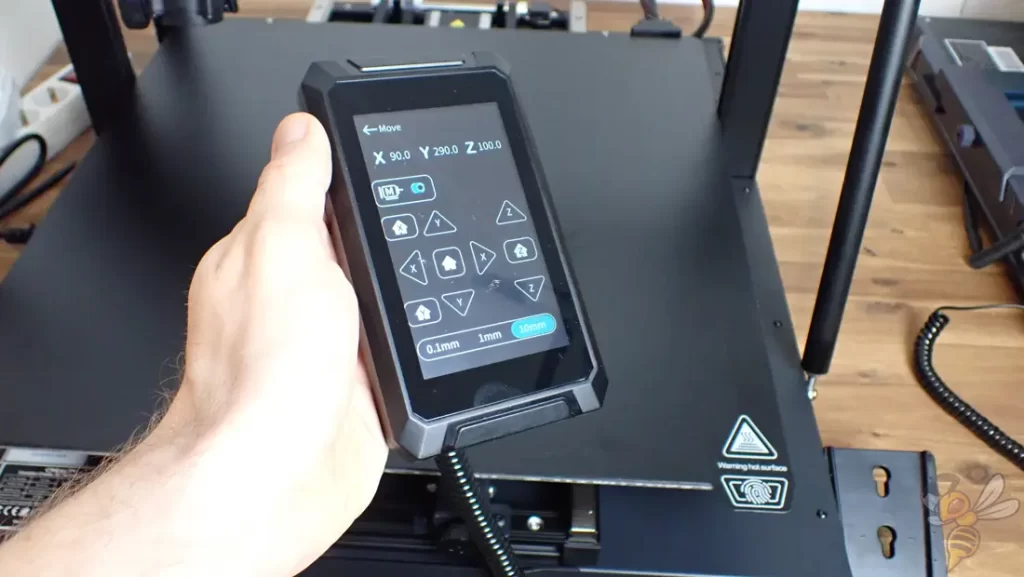
The color touchscreen is removable, the menu is very clear, and the touch function responds precisely to your input.
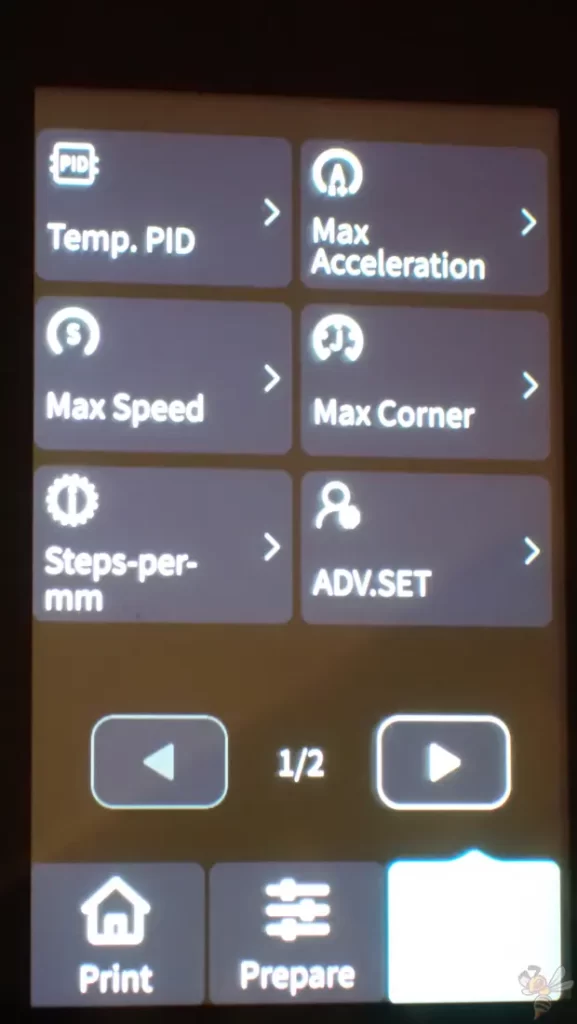
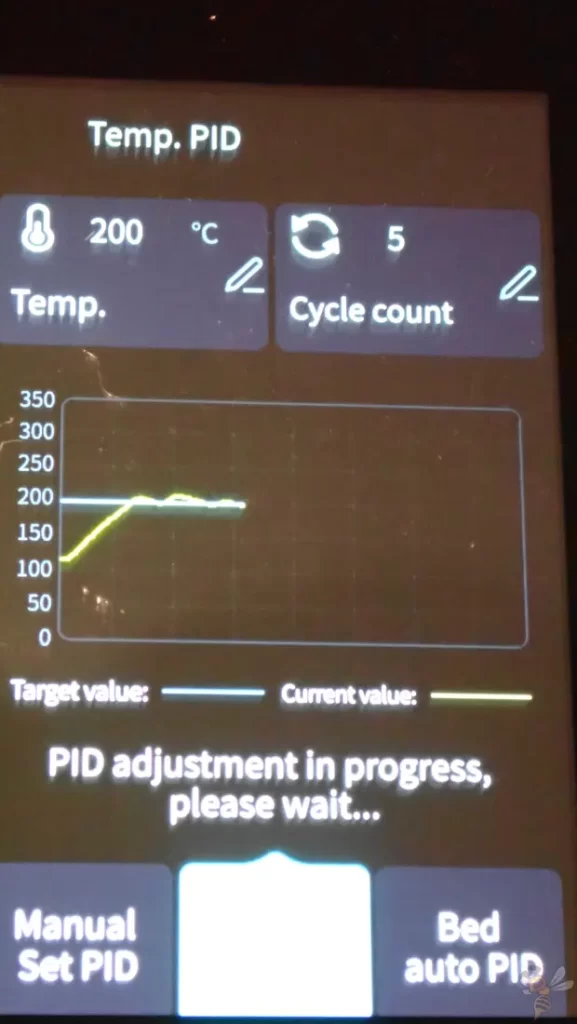
What I particularly like about the Creality CR-M4’s menu is that you can make various expert settings. One of the best of these is the automatic PID calibration. It starts with the push of a button, which means you don’t have to mess around with manual G-code commands.
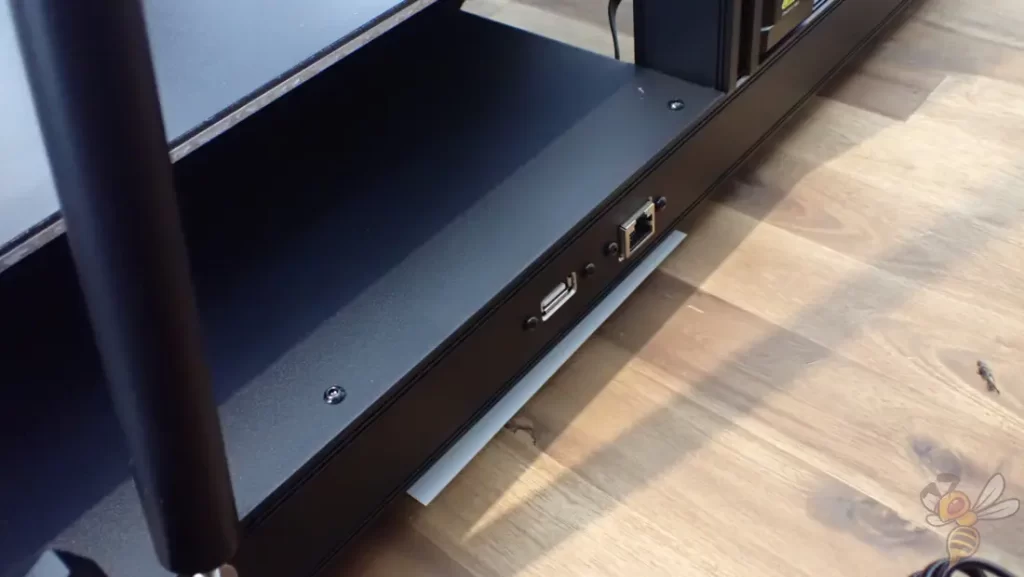
The Creality CR-M4 has multiple connectivity options. It has a LAN and a USB slot on the right side. On the front, you’ll find another USB and USB-C slot. It can also be controlled via WLAN and the Creality Cloud. And if you prefer to transfer your print files via a portable MicroSD card, a small adapter is also included.
If you connect multiple CR-M4s online, you can use the Multi-Printer Control to operate all of them simultaneously. If you want to make parts in large quantities, this is ideal for that!
Check Price at:
Print Bed Leveling
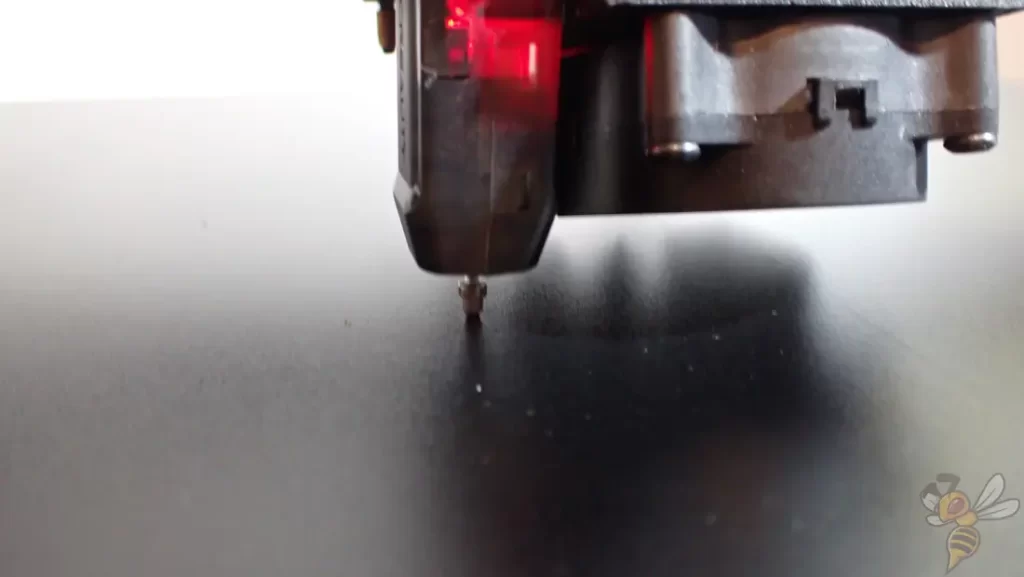
After assembly, the print bed needs to be leveled. Depending on how you set up the 3D printer, automatic print bed leveling will be done before each print. Nevertheless, you should run it once from the menu after assembly.
The process takes a few minutes. The print head automatically moves down the print bed and measures the distance to the print bed via the sensor. In this way, it determines the inclination of the print bed, which is automatically compensated for during printing.
After the automatic leveling, you only have to call up the Z-Offset via the menu and adjust it manually. If you don’t force the finished objects off or if collisions of the print head with the print have happened, you will rarely have to readjust the Z-Offset.
The Z-Offset is adjusted in the middle of the print bed. All you need is a normal piece of paper, which you place on the print bed under the nozzle. Using the menu, you can move the nozzle down in small steps. You do this until you feel a slight friction when you move the paper between the nozzle and the print bed.
Slicer
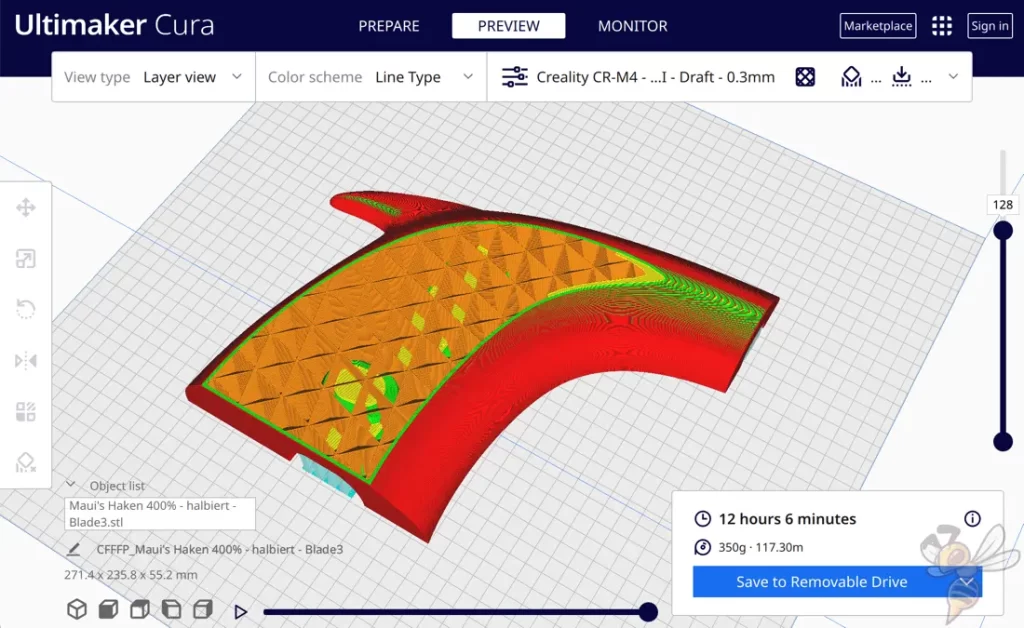
I used the Creality CR-M4 with Cura. But you can also operate it with Creality’s in-house slicers.
I calibrated my CR-M4 accurately and before starting any larger projects with it to determine the best Cura settings for it: Creality CR-M4 – Best Cura Settings for Perfect Prints
If you are using this 3D printer in a professional context or want to achieve the highest possible quality even on your home projects, calibration is highly recommended.
In this article, you can read my method of calibration of FDM 3D printer.
Filament Loading
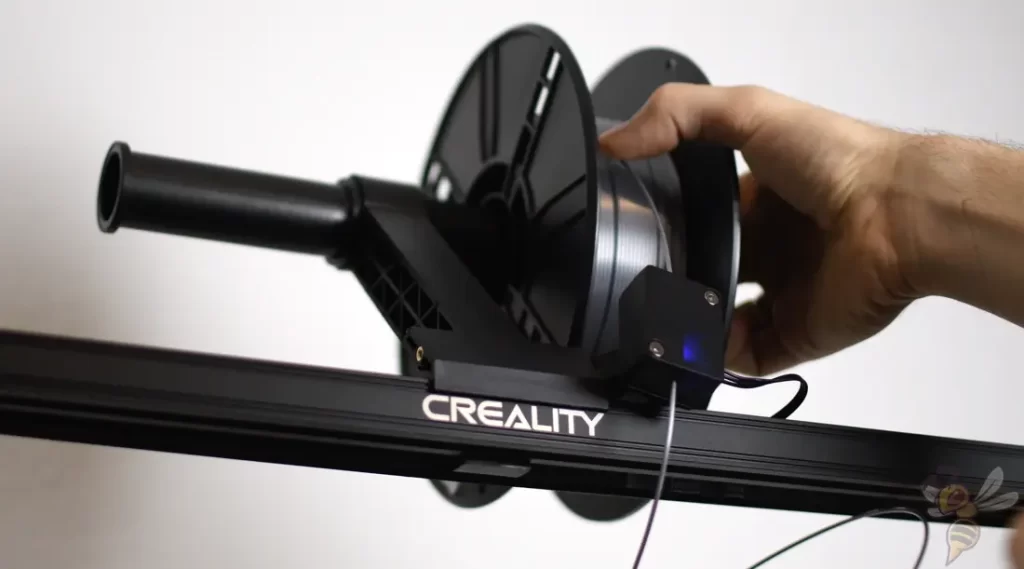

Loading filament is straightforward on the Creality CR-M4. From the filament holder, you push the new filament through the filament sensor. Then you simply pull the filament to the extruder.
There is support in the menu for loading and unloading the filament, but the design of the extruder is so perfect that manually pushing the filament through the extruder to the hot nozzle is really smooth.
With many other 3D printers, the filament often gets caught inside the hotend. In daily use, this is very convenient and prevents frustration!
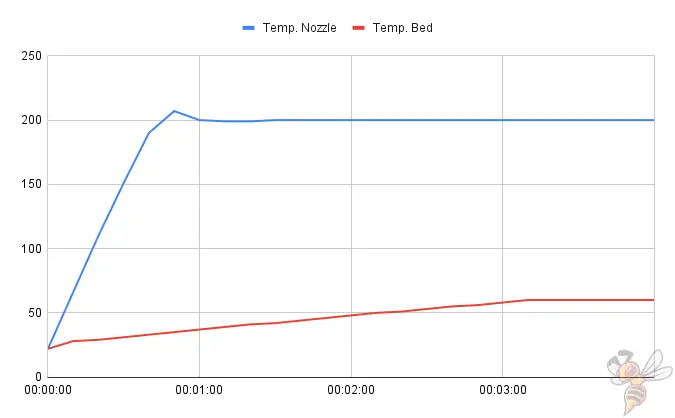
The nozzle heats up quickly to the desired temperature. In my test, it took about a minute for 200 °C.
However, the large print bed takes over 3 minutes to get to 60 °C. Still, this is relatively fast for such a large print bed.
Printing
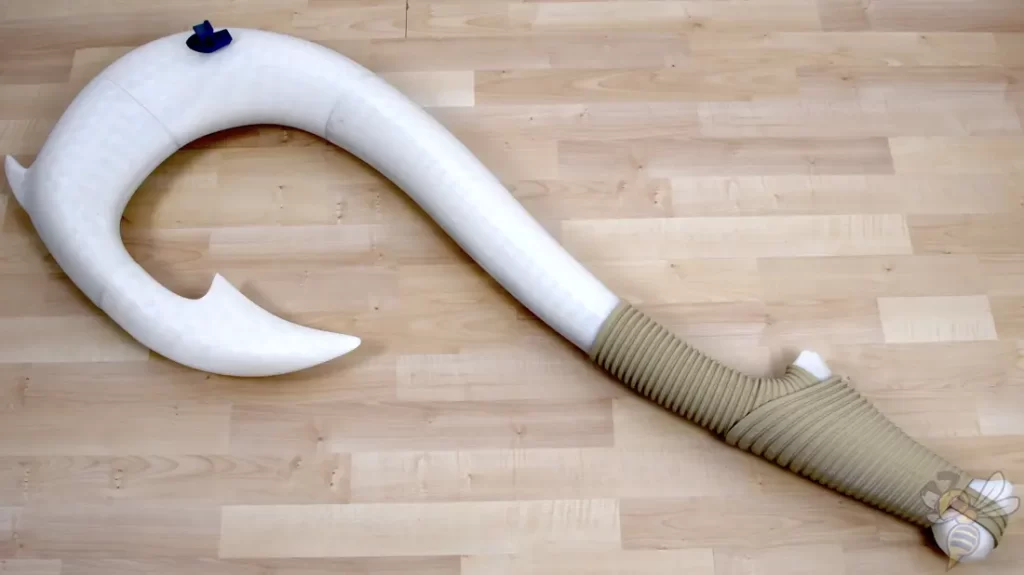
After printing the usual calibration objects and tweaking all the settings, I figured I’d take advantage of the Creality CR-M4’s large print volume to print a giant project.
I came across the Maui magic fishhook on myminifactory.com (link to file). I scaled it up to life-size and printed it out of glow-in-the-dark filament*!
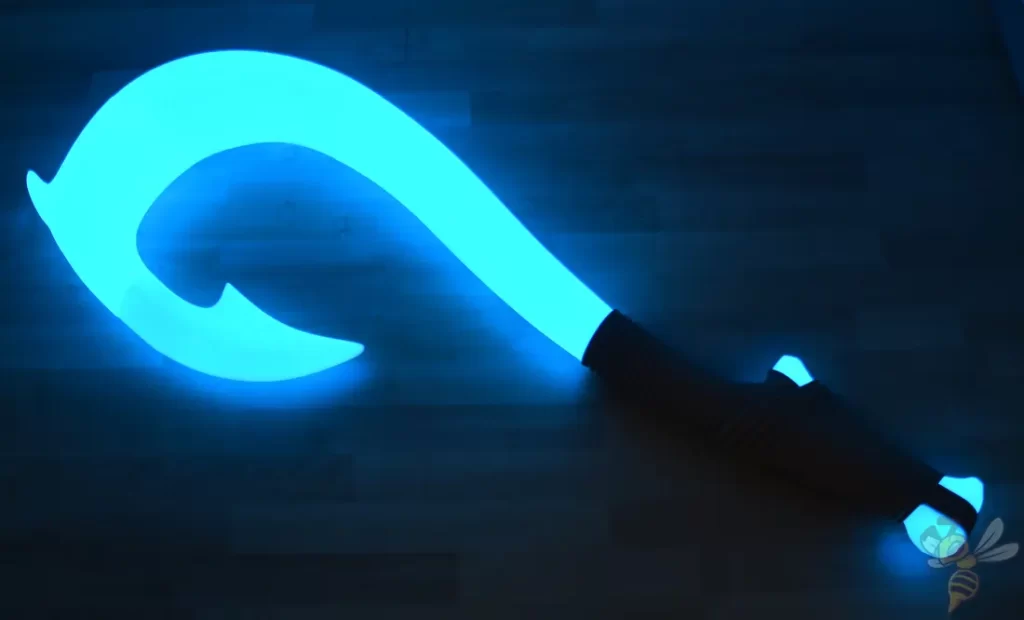
Of course, the CR-M4 isn’t large enough for me to print a 1.5 meter object in one piece. However, I didn’t have to break the hook into too many pieces to print it.
I did notice, however, when printing the first part from luminescent filament, that the filament has strong abrasive properties…
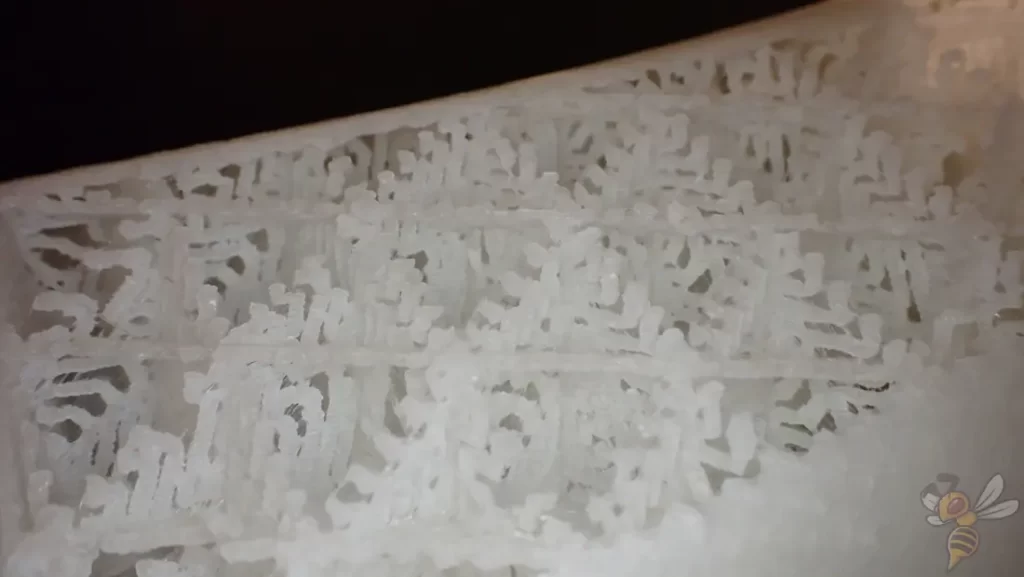
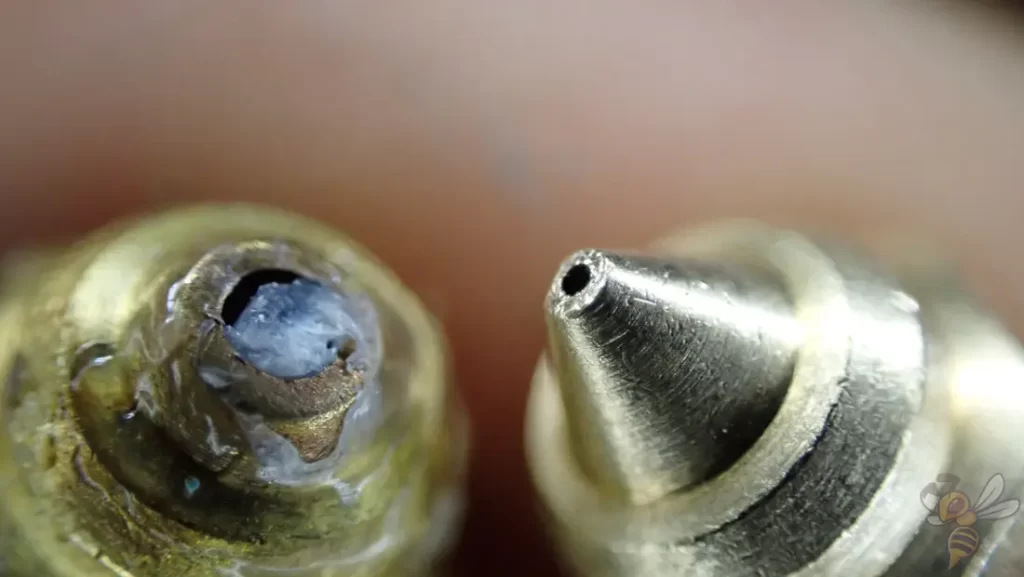
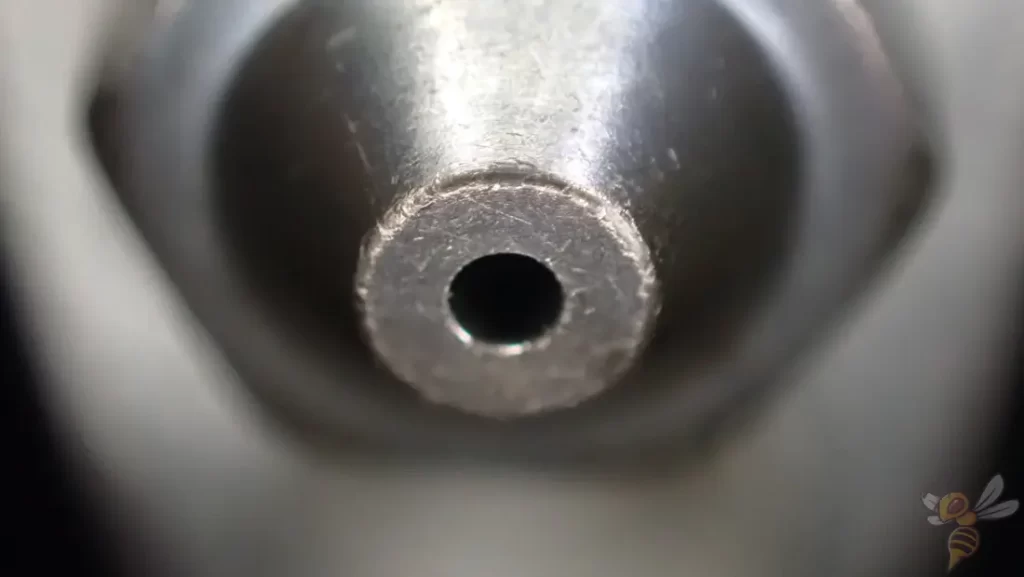
As you can see in the picture above, the pre-installed nozzle of the Creality CR-M4 was not hard enough to handle the glowing filament. I then ordered a hardened steel nozzle (here’s the link to the nozzle*). This nozzle was not abraded and looks the same as before, even after printing all the parts.

The hook weighed several kilos, but still ended up sturdy enough that you don’t have to handle it carefully. The project was really fun and successful!
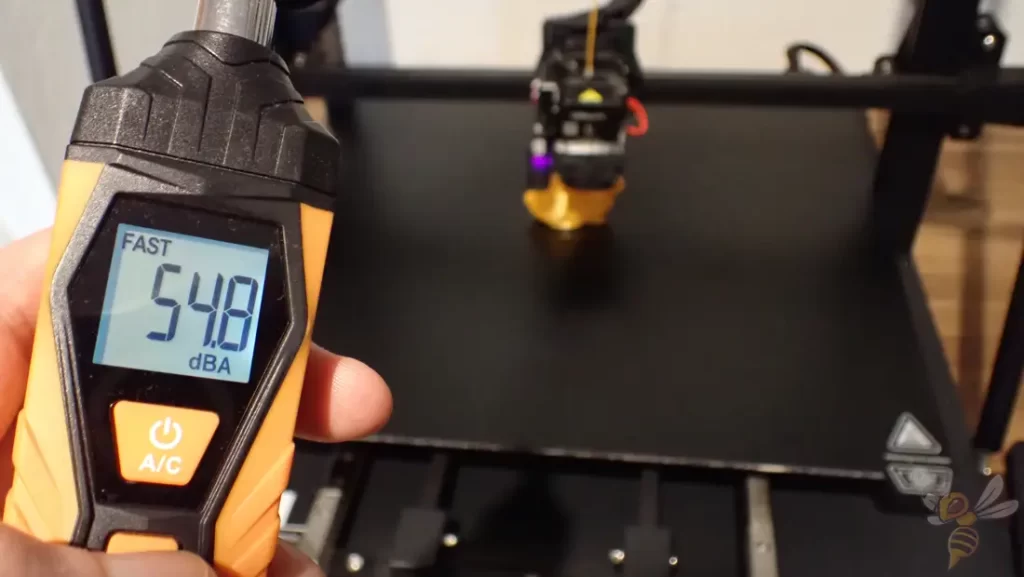
As far as volume is concerned, the Creality CR-M4 is about mid-range. During printing, I was able to measure an average volume of about 55 decibels. This is not so loud that it would be particularly disturbing, but also not so quiet that you could concentrate or relax in the same room.
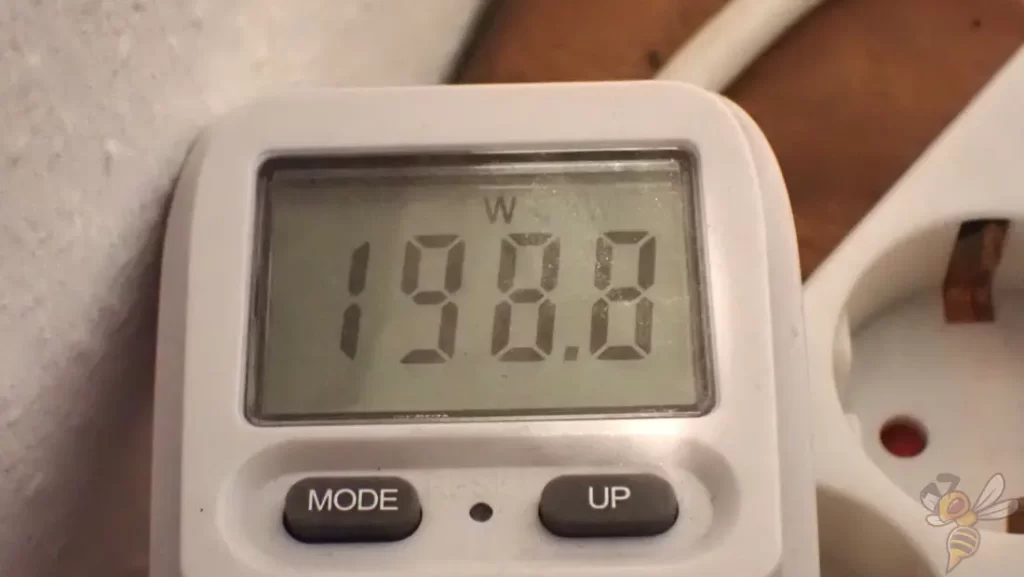
Due to the large print bed, the power consumption is, of course, much higher than with small 3D printers. During printing, and especially when heating the print bed, the CR-M4 has a power consumption of 200 watts or more.
CR-M4 vs. Neptune 3 Max
Check Price at:
One of the biggest competitors of the Creality CR-M4 is the Elegoo Neptune 3 Max. It has a similarly large print volume, also a direct drive extruder and a PEI-coated print bed.
I’ve tested both devices for several 100 hours and, aside from the obvious differences, I can show you the subtle differences. Why is the Creality CR-M4 about twice as expensive?
| CR-M4 | Neptune 3 Max | |
|---|---|---|
| Print volume | 450 × 450 × 470 mm (≈ 95 liters) | 420 × 420 × 500 mm (≈ 88 liters) |
| Max. hotend temperature | 300 °C | 260 °C |
| Max. print bed temperature | 100 °C | 100 °C |
| Extruder | Direct Drive | Direct Drive |
| Printing speed | Maximum 120 mm/s, standard 50 mm/s | Maximum 180 mm/s, standard 60 mm/s |
| Display | 4.3-inch color & removable touchscreen | 4.3-inch color & detachable touchscreen |
| Driven Z-axes | 2 | 2 |
| Print bed | PC coated spring steel | PEI-coated spring steel |
| Leveling | Completely automatic | Automatic + (rarely) manual with leveling screws |
| Cable chains | Yes | No |
| Linear rails on the print bed | Yes | No |
| Filament sensor | Yes | Yes |
| Resume print | Yes | Yes |
| Belt tensioner | Yes | Yes |
| Tool drawer | No | Yes |
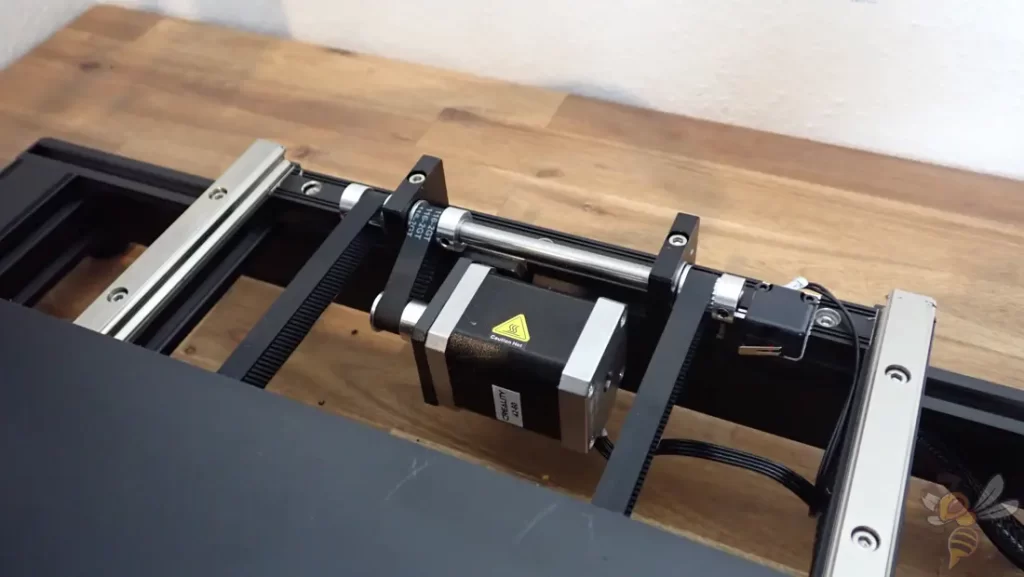
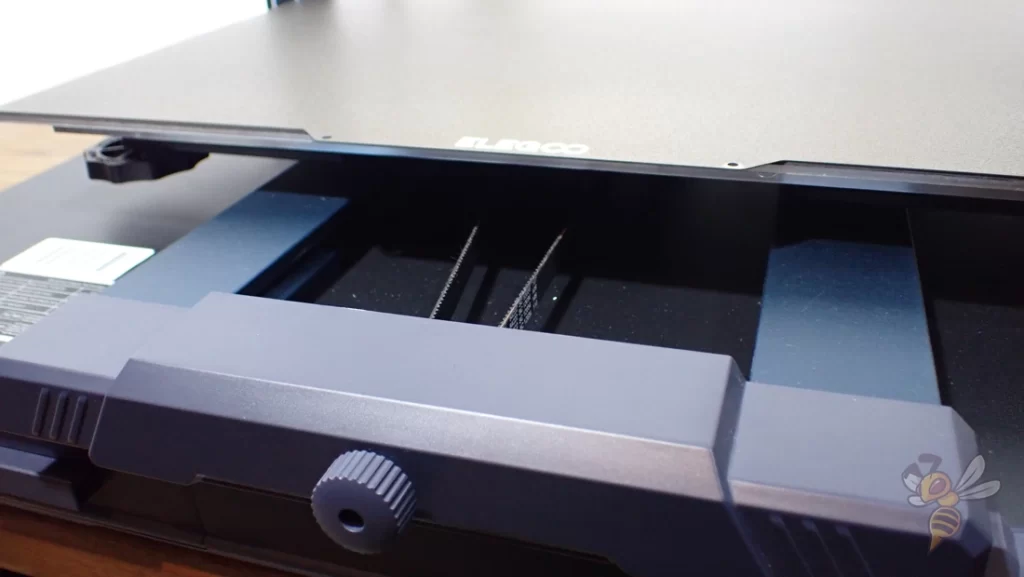
The Creality CR-M4 is designed for industrial use. Therefore, certain parts of the 3D printer are designed to be very sturdy. The most significant difference from the Neptune 3 Max in that regard is probably the print bed suspension.
The Creality CR-M4 has two high-quality linear rails installed, over which the print bed is moved by a relatively oversized stepper motor and two synchronized toothed belts. In the Neptune 3 Max, the print bed is moved by a toothed belt and a normal stepper motor, as is common in other 3D printers.
The next big difference is that the Creality CR-M4 has a completely automatic leveling. The Neptune 3 Max has 6 screws under the print plate, which you have to use to roughly manually adjust the tilt of the print bed before you can use the automatic leveling.
With these advantages, the Creality CR-M4 will take a little less time in everyday use and will also be subject to less wear and tear. Other than that, I didn’t notice any differences in print quality during the time I tested it.
CR-M4 vs. Kobra Max
Check Price at:
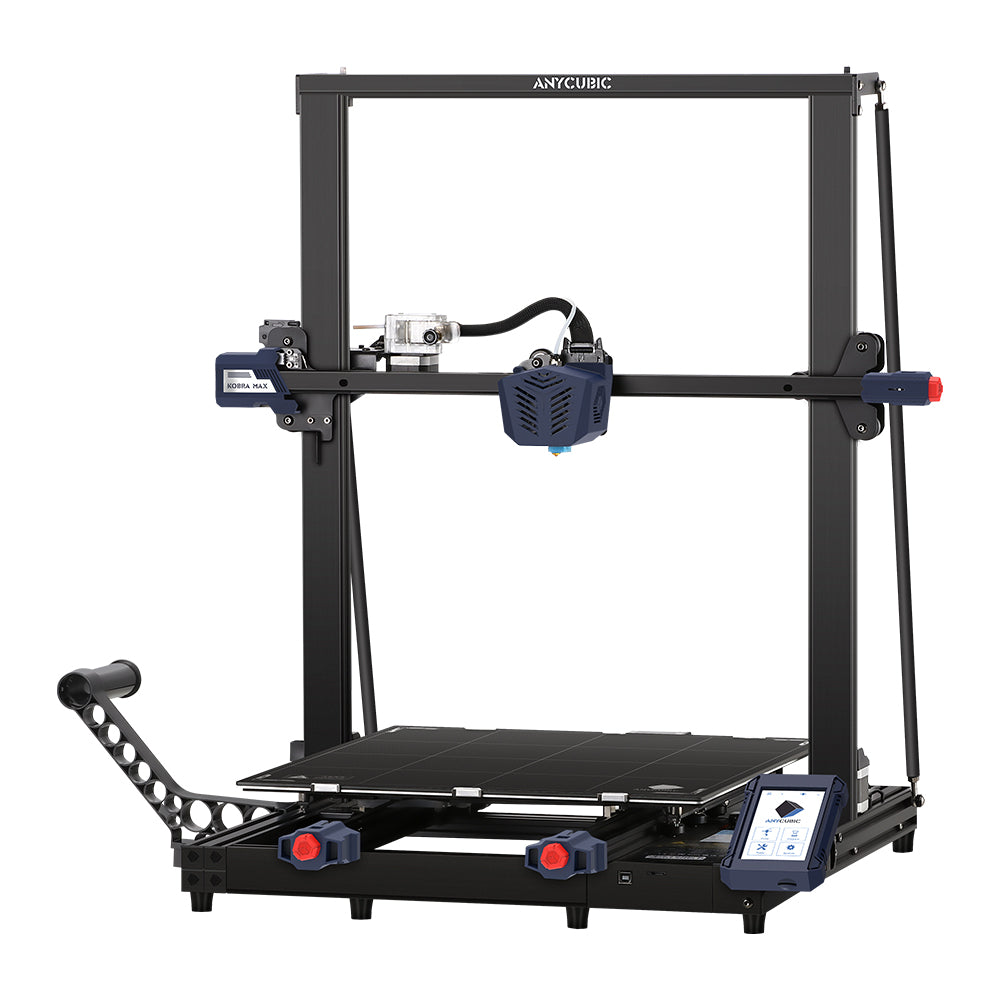
The Anycubic Kobra Max* is also almost as big as the Creality CR-M4, but can’t match it for many features. If the print volume of the Kobra Max is enough for you and you only want to print large objects sporadically, the Kobra Max is actually more worthwhile, as you save a lot of money here.
Otherwise, the CR-M4 is always preferable. It offers better performance in the long run, is more durable, and has some features that make it easier for you to use on a day-to-day basis.
| CR-M4 | Cobra Max | |
|---|---|---|
| Print volume | 450 × 450 × 470 mm (≈ 95 liters) | 400 × 400 × 450 mm (≈ 72 liters) |
| Max. hotend temperature | 300 °C | 260 °C |
| Max. print bed temperature | 100 °C | 90 °C |
| Extruder | Direct Drive | Bowden |
| Printing speed | Maximum 120 mm/s, standard 50 mm/s | Maximum 180 mm/s, standard 80 mm/s |
| Display | 4.3-inch color & removable Touchscreen | 4.3-inch color touchscreen |
| Driven Z-axis | 2 | 2 |
| Print bed | PC-coated spring steel | Carborundum glass |
| Leveling | Completely automatic | Completely automatic |
| Cable chains | Yes | No |
| Linear rails on print bed | Yes | No |
| Filament sensor | Yes | Yes |
| Resume print | Yes | Yes |
| Belt tensioner | Yes | Yes |
| Tool drawer | No | No |
Is the Creality CR-M4 worth it?
The Creality CR-M4* is worth it if you want to print large objects in one piece or many small ones at once.
It can’t print more accurately or faster than an Ender 3 S1 for example, but it has a huge print volume. It’s really only worth it if you’re using its print volume or large print area. In a professional context, however, the durability, robustness and the option to operate several printers at the same time can be decisive purchasing arguments.
I had and still have a lot of fun and success with the Creality CR-M4 and can really recommend it!
If you like the industrial feel of the Creality CR-M4, be sure to check out my review of the Snapmaker Artisan. It also has a very large print volume and can laser engrave and mill!
Check Price at:
If you are interested in the machine, I would love for you to purchase it through my links. I get a small part of the purchase price as a commission, without it becoming more expensive for you. I have received the device, but this has not influenced my assessment in any way.
Disclosure: This website is the property of Martin Lütkemeyer and is operated by Martin Lütkemeyer. Martin Lütkemeyer is a member of the Amazon Services LLC and other Affiliate Programs. These are affiliate advertising programs designed to enable websites to earn advertising revenue through advertising and linking to Amazon.com and others. Links marked with * are affiliate links.

