
- Wet Filament: Prevention, Symptoms & Drying - July 18, 2024
- Sovol SV08 – Best PrusaSlicer Settings & Profile - June 26, 2024
- Sovol SV08 – Best Orca Slicer Settings & Profile - June 26, 2024
Disclosure: Links marked with * are Affiliate Links. I earn from qualifying purchases if you decide to make a purchase through these links – at no additional cost for you!
Normally, a 3D printer prints everything on the print bed simultaneously, layer by layer. In Cura, however, there is a mode in which the print sequence can be set to print multiple objects on the print bed one at a time.
The print sequence “One at a Time” has the advantage that the print head does not have to move back and forth between the individual objects and thus avoids errors such as stringing. However, printing one at a time creates the risk that the print head may collide with the parts that have already been printed.
In this article, I’ll show you how to take advantage of this print sequence and avoid collisions. I’ll also show you how to work around the limitation in the z-direction!
I’ve used this mode on many 3D printers to print large batches of objects as error-free and fast as possible.
Table of Contents:
- 1 How to Enable the Print Sequence “One at a Time” in Cura
- 2 What are the Limitations of the Print Sequence “One at a Time” in Cura?
- 3 How to Place Objects in the Print Sequence “One at a Time” in Cura?
- 4 How to Print Tall Objects One at a Time in Cura?
- 5 Advantages of the Print Sequence “One at a Time” in Cura
- 6 Disadvantages of the Print Sequence “One at a Time” in Cura
- 7 Conclusion
How to Enable the Print Sequence “One at a Time” in Cura

You can find the print sequence “One at a Time” under the special modes in Cura. Here you can choose whether the objects should be printed all at once or one at a time.
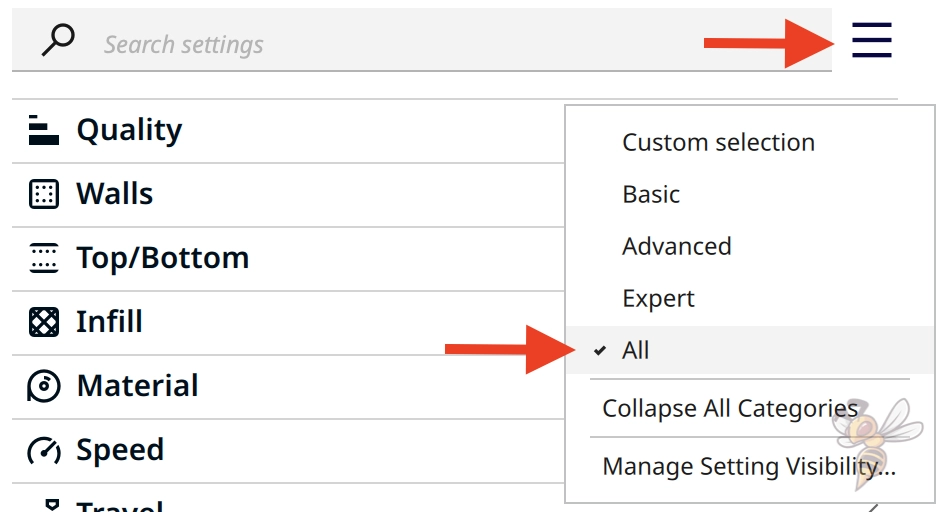
If you can’t find the setting, you can use the search. Its visibility may be disabled. If so, you can use the menu to make all settings visible.
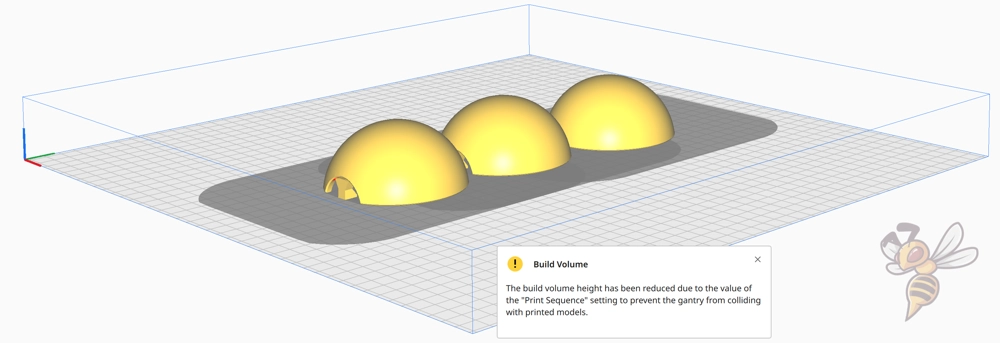
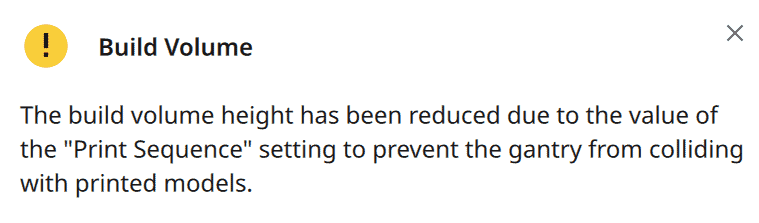
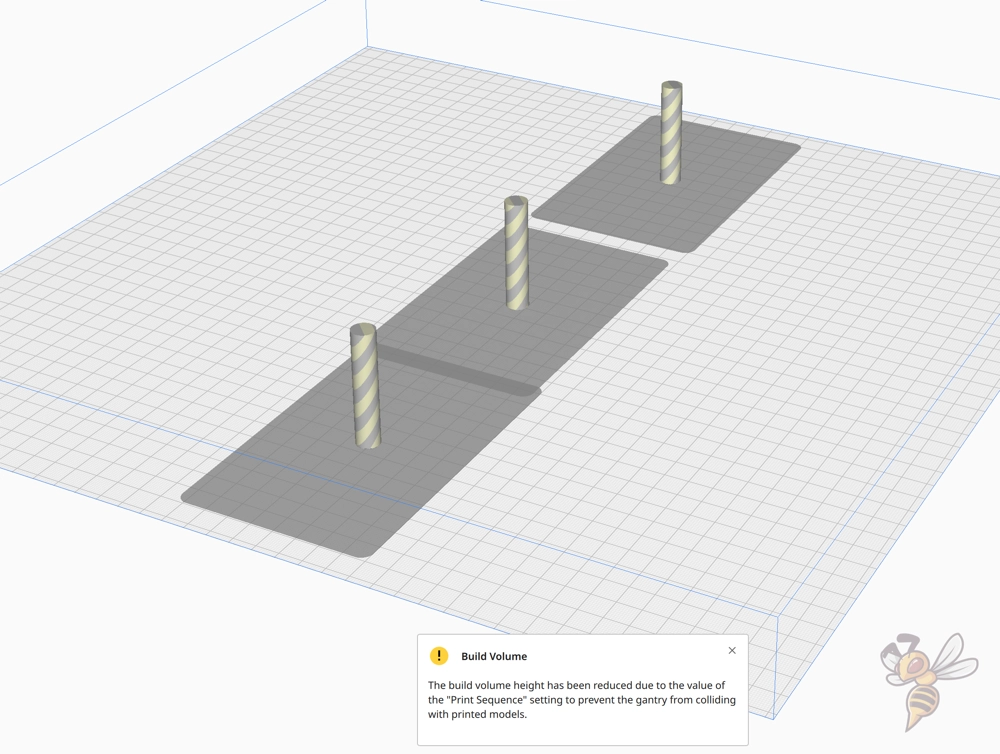
As soon as you select the order “One at a Time”, a warning appears that the print volume has been restricted in z-direction. I’ll show you what this warning means and why gray areas appear around your objects in the next section.
What are the Limitations of the Print Sequence “One at a Time” in Cura?
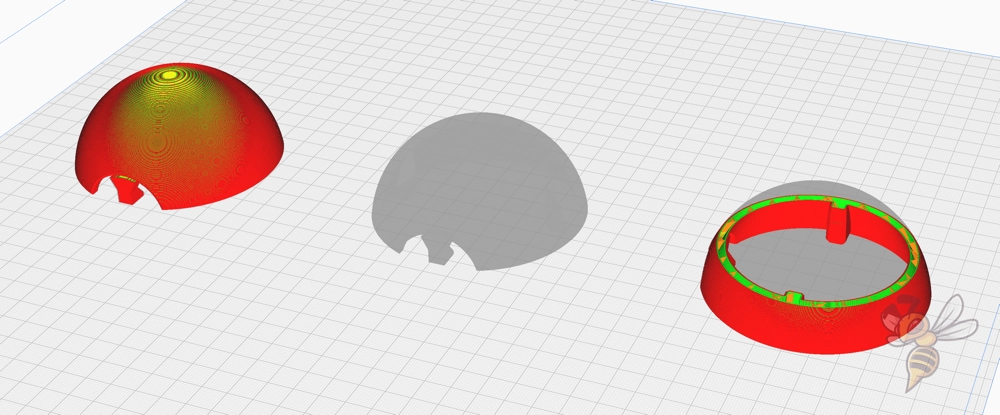
To prevent the print head from colliding with objects that have already been printed, Cura creates a shadow around the objects that indicates where the print head will move to when printing the object.
This way you can make sure that all objects are printed in sequence without the print head driving into already printed objects and ripping them off the print bed or damaging them.
However, for this to work, you have to properly define the print head settings in your 3D printer’s machine settings.
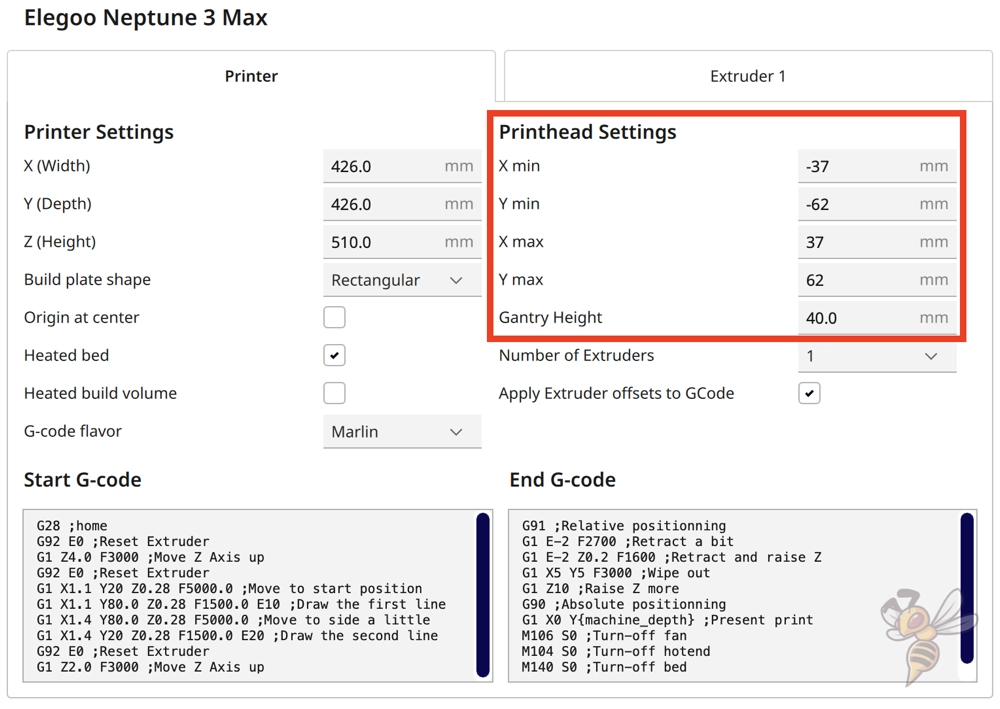
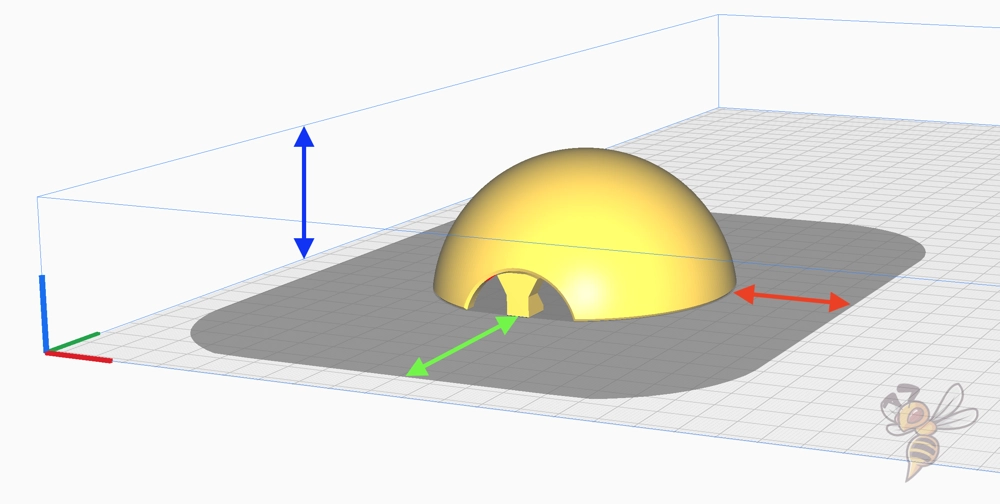
In the machine settings of your 3D printer, you will also find the geometric dimensions of the print head. There are five values you need to enter.
- X min: Distance from the center of the nozzle to the left edge of the print head.
- X max: Distance from the center of the nozzle to the right edge of the print head.
- Y min: Distance from the center of the nozzle to the rear edge of the print head.
- Y max: Distance from the center of the nozzle to the front edge of the print head.
- Gantry Height: Distance from the bottom of the nozzle to the bottom of the x-axis in z-direction.
If you are using a predefined standard profile, you should still make sure that these settings are correct. Often they are not, which can cause catastrophic collisions. Determining these dimensions is relatively simple, though.
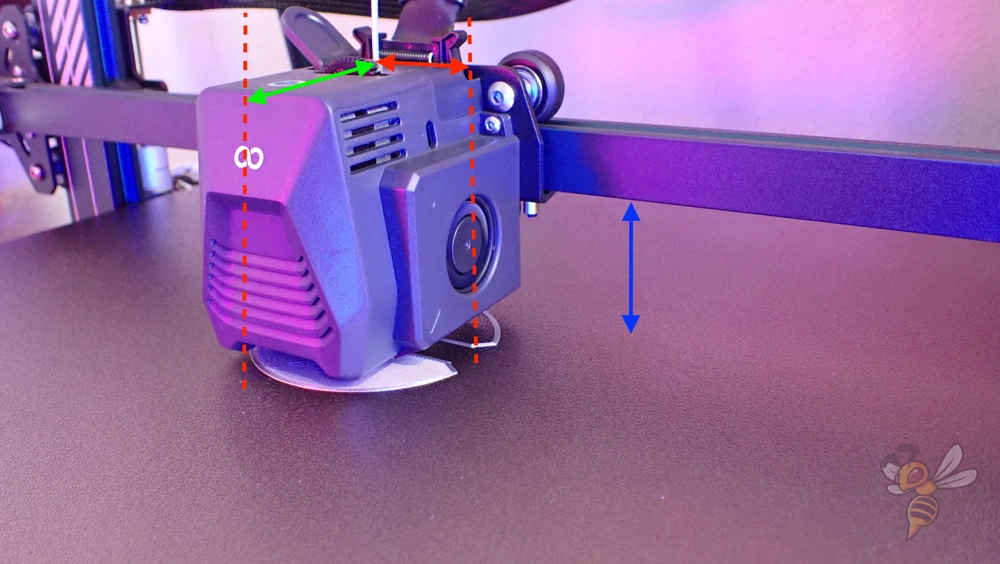
The respective X and Y values are the distances between the outer edges of the print head and the tip of the nozzle. In many 3D printers, the entrance of the filament at the top of the print head is at the same position on the XY plane as the nozzle itself. You can therefore also measure the distance between the filament and the outer edges of the print head.
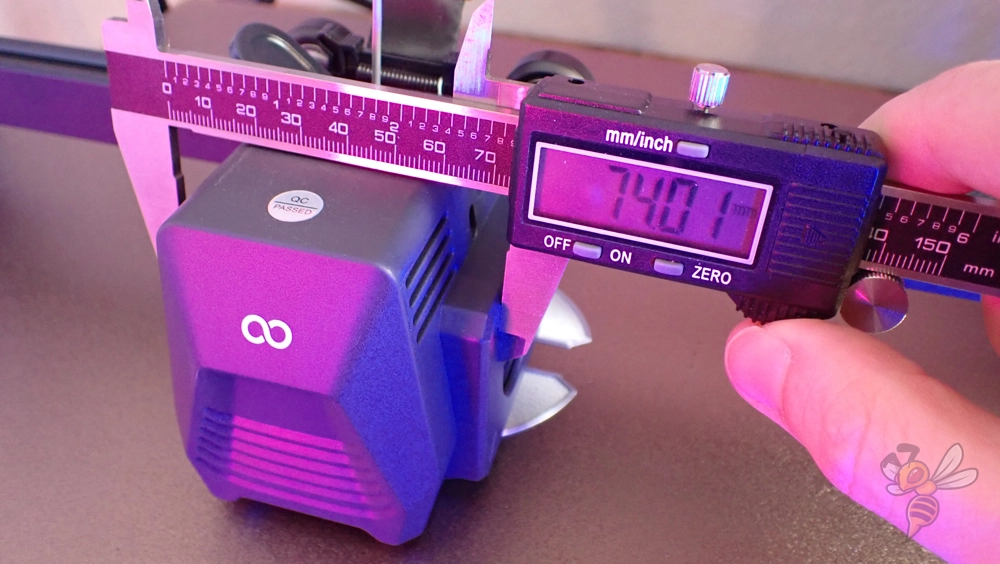
If the print head is symmetrical, you can also determine the X values by measuring the width of the print head and dividing it by two. In the example above, I measured the print head of the Elegoo Neptune 3 Max to be 74 mm. Half of that is 37 mm, making X min = -37 mm and X max = 37 mm.
The gantry height is the distance between the tip of the nozzle and the bottom of the x-axis. The easiest way to measure this value is to move the nozzle to the zero position and then measure the distance between the print bed and the bottom edge of the x-axis.
In addition to the limitation on the xy-plane, the z-axis of your 3D printer will get very small. The tallest objects you can print one at a time with this print sequence is dependent on the Gantry Height you just measured.
Usually, this means that the tallest objects you can print in this mode are in the 3 to 4 cm range. This significantly limits the range of objects you can print in this mode. However, later in this article, I’ll show you a trick how you can print taller objects one at a time.
How to Place Objects in the Print Sequence “One at a Time” in Cura?

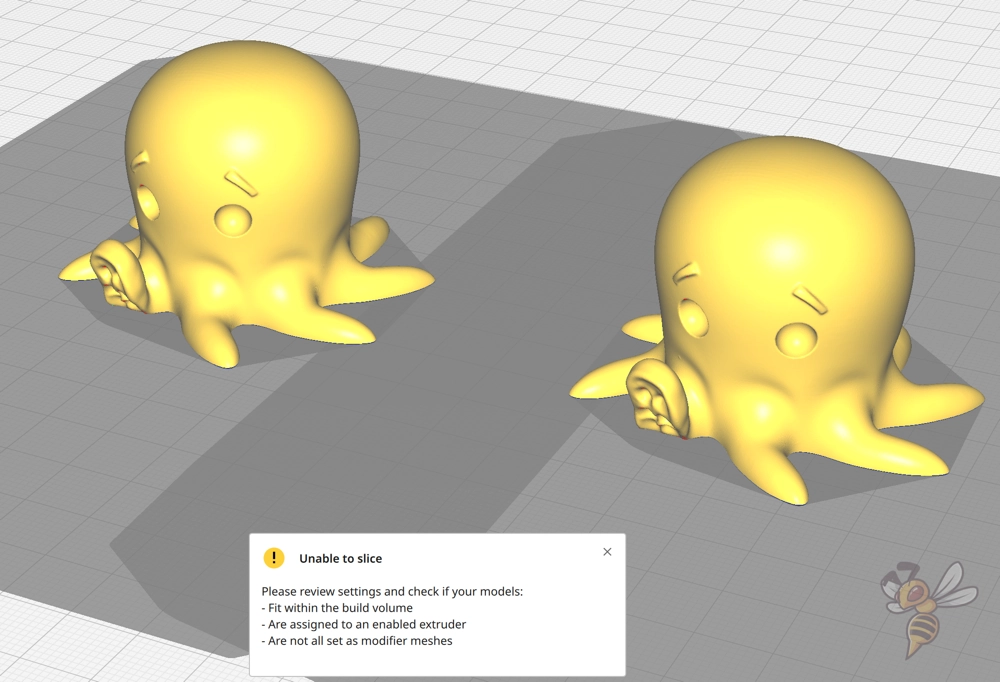
If you move another object inside the shadow of another, there will be a collision when printing. But Cura notices this by overlaying the shadows with the objects. Cura will generate an error message if you try to slice in this constellation.
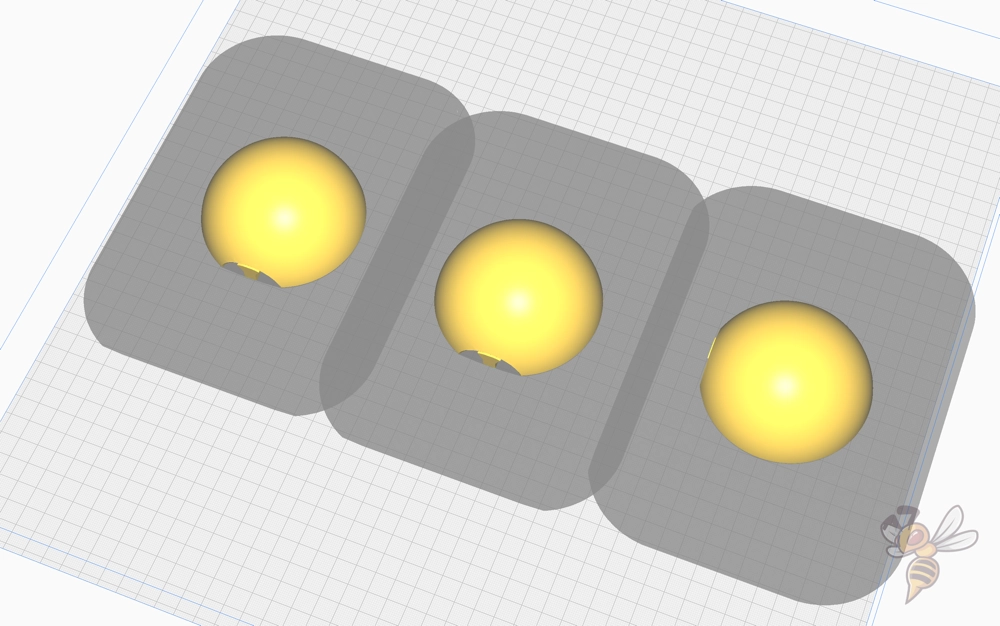
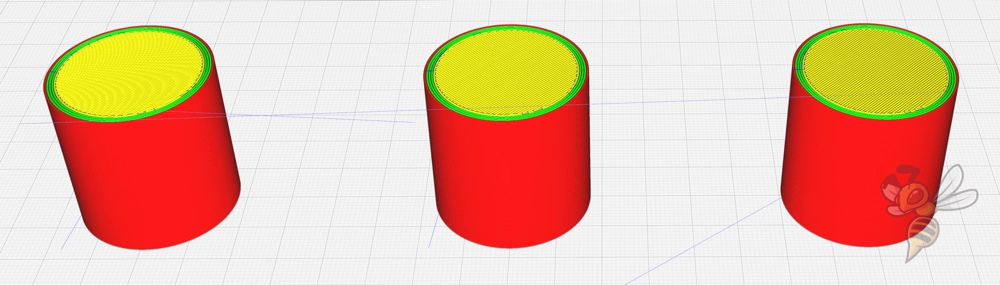
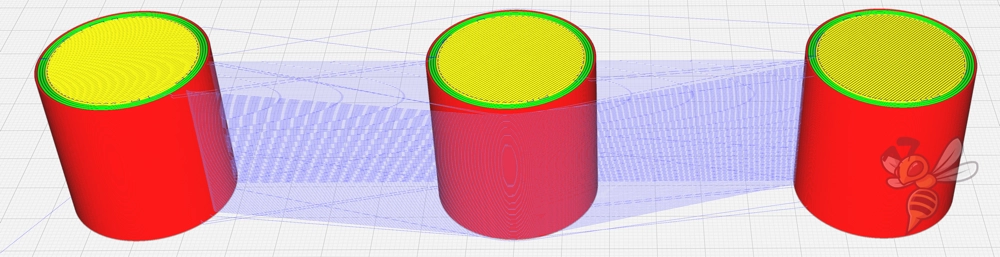
However, you can place the objects so that their shadows overlap. The outer edges of the shadows indicate how far the print head will reach when it prints each object. So, as long as the shadow is not over the neighboring object, there will be no collision.
Depending on how large your objects are, you can use this setting to print many of them in a row in one pass. This is especially valuable for mass production of small parts, as it minimizes printing time and the risk of printing errors.
To make sure everything works correctly, you can preview the order in which the objects will be printed after slicing.
If you have measured and set the gantry height correctly, it doesn’t matter in which order the objects are printed because no collisions with the x-axis can occur.
The order only becomes important if you want to print higher objects where collisions can happen.
How to Print Tall Objects One at a Time in Cura?
The biggest limitation of printing one object after the other in Cura is the restriction of the print volume in z-direction. To avoid collisions during printing, objects can normally only be as high as the distance between the print bed and the x-axis during the first layer.
With some clever thoughts and settings, you can use the complete height of the print volume and still print objects one at a time.
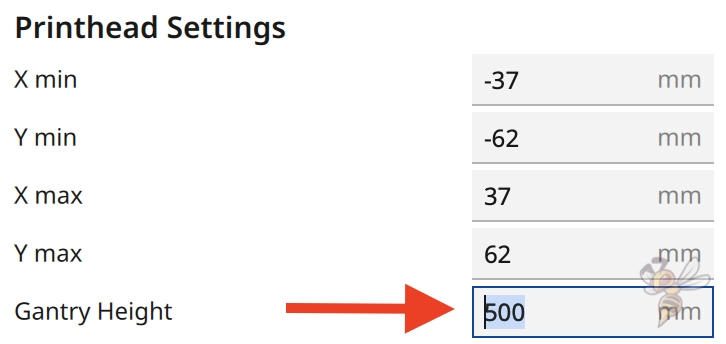
To be able to print higher objects one at a time, you have to trick Cura a bit and set the gantry height higher than the height of the objects. This will remove the limitation in the z-direction.
Attention: As soon as you set the gantry height higher than it really is, you will get collisions with the wrong settings! Collisions can damage the printed objects and even your 3D printer! So follow the instructions carefully and print at your own risk!
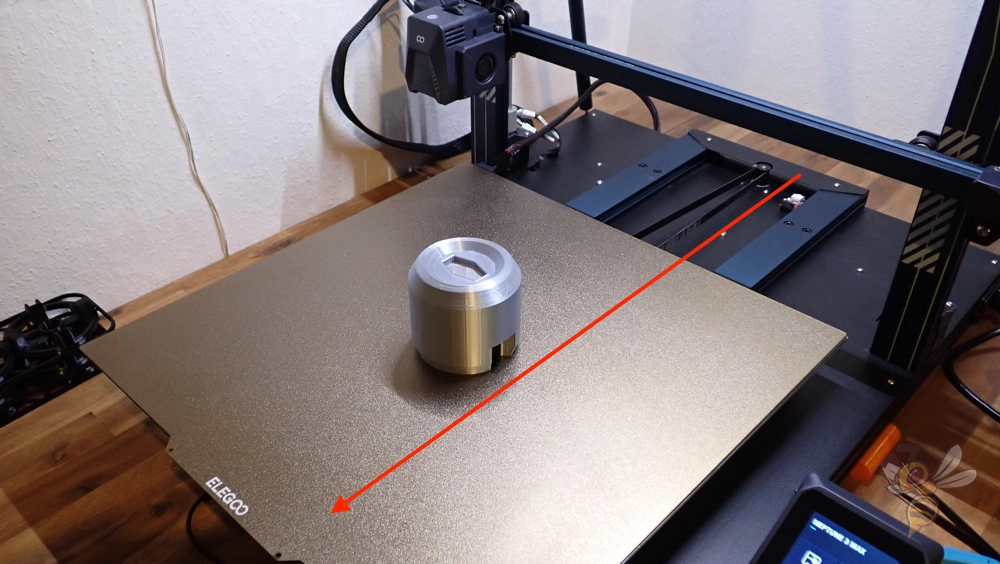
The first thing you need to know is what your 3D printer does after a print job is completed. Usually, the 3D printer moves the print bed forward so you can conveniently remove the finished object afterward. This sets the order in which you can print the objects one after another.
To avoid collisions after printing in this case, you have to print the front object first and the back object last. Otherwise, the x-axis would tear all the printed objects off the print bed at the end and possibly destroy them.
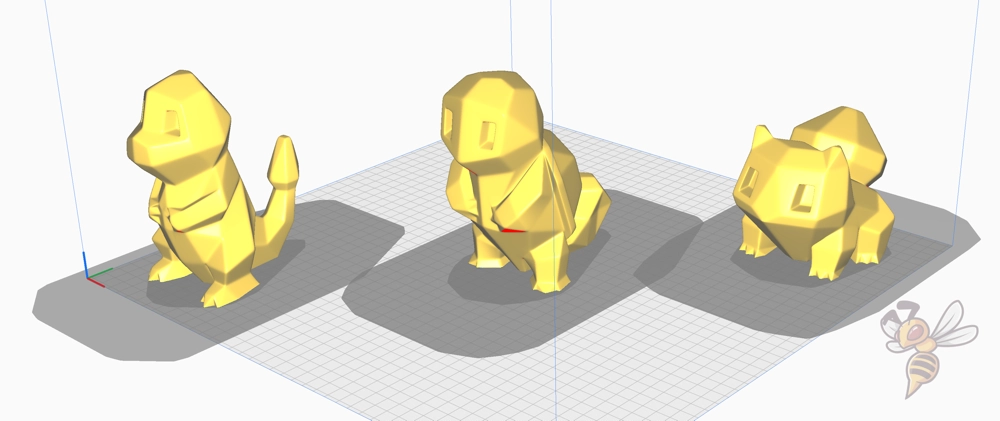
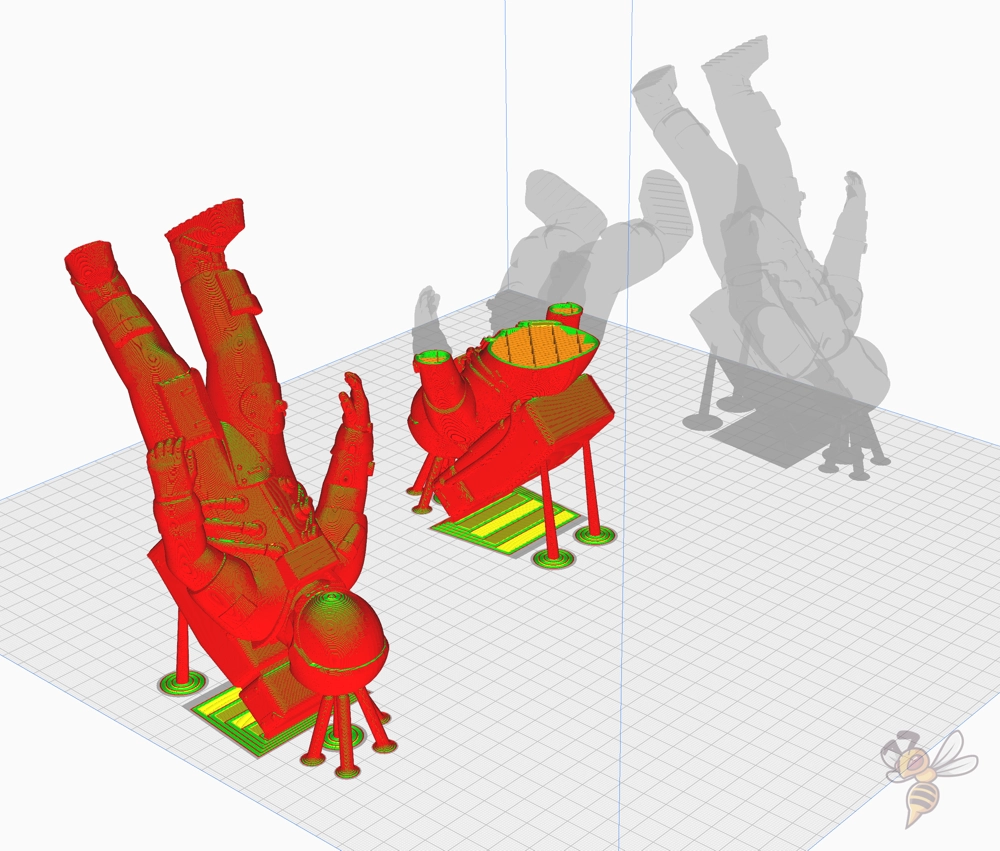
If you want to print several tall objects one at a time, they have to be placed behind each other. In the example above, I have placed them one behind the other and offset them on the x-axis. If they are positioned next to each other on the x-axis, there will also be collisions with the previously printed object and the x-axis. So, they have to be positioned behind each other along the y-axis.
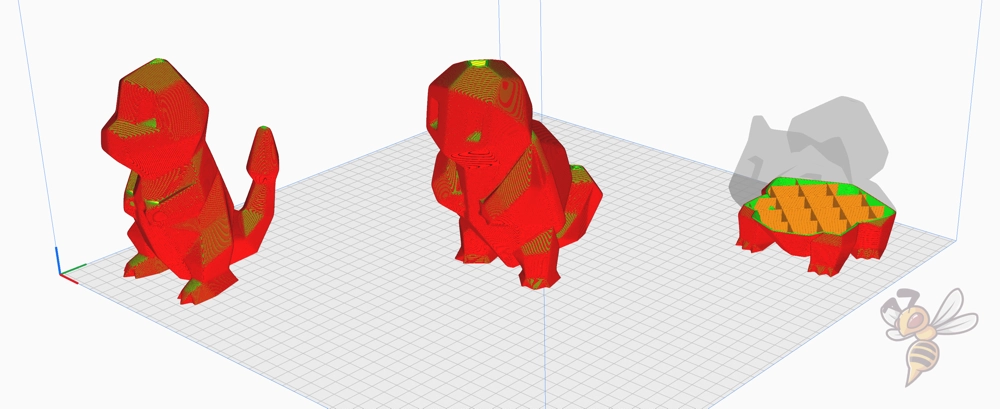
After you have positioned the objects correctly, you can slice them and then check if the order is correct.

Sometimes it’s a little tricky to get the order right. You can’t directly select which object to print first in Cura. You can define the starting point of each layer in the travel settings. But you can also swap the objects around to correct the order.
If you did everything right, your “too tall” objects will be printed one at a time without errors and without causing collisions.
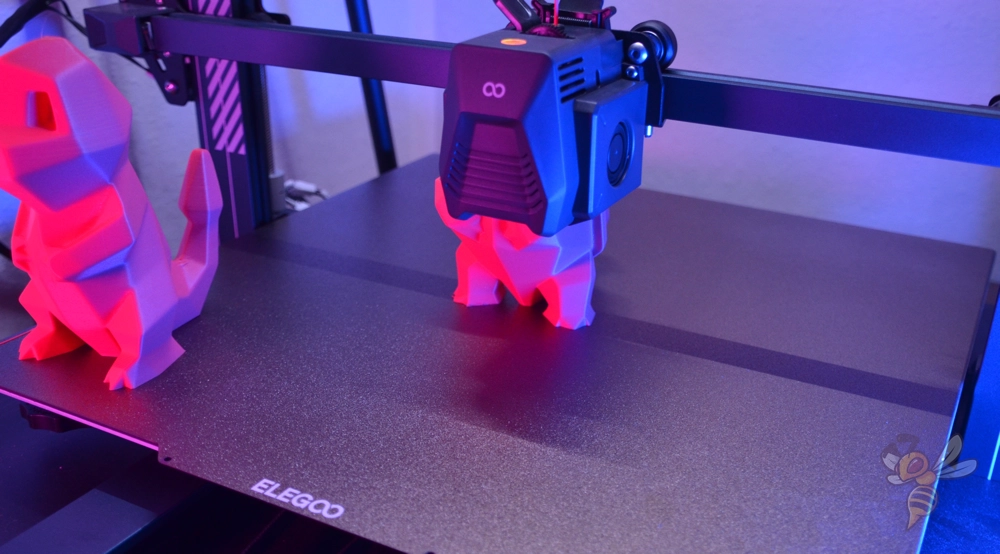
In the example above, I even added a pause between the objects to change filament. Although this defeats the purpose of the “One at a Time” print sequence, but changing the color brought a nice effect in this example 😉
Advantages of the Print Sequence “One at a Time” in Cura
Fewer printing errors: Because the objects are printed one at a time, the print head moves only once between each object and not after each layer. If you have problems with extrusion and phenomena like stringing occur frequently, you can completely prevent this error between objects by printing the objects one at a time.
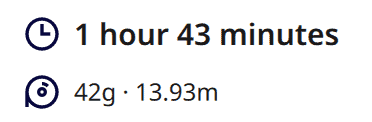
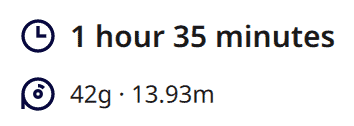
Shorter print time: By having the print head travel between the objects only once, you save a lot of print time in which the print head would travel back and forth between the objects. Although the distance between the objects is longer when printing consecutively, the many short distances usually add up to a longer print duration when printing simultaneously.
Less material loss when the print fails: 3D prints can suddenly fail at random times for a variety of reasons. If you want to print many objects in one go and print them one at a time, you can still salvage some of those objects after such an abort. If they had been all printed at the same time, all objects would not have been completed.
Disadvantages of the Print Sequence “One at a Time” in Cura
Limitations in geometry and placement of objects: Depending on the size of your 3D printer’s print head, the objects you want to print one at a time have to be placed a certain distance apart. Otherwise, collisions would occur. This determines how many objects you can place on the print bed. Also, the height of your objects limits how many you can print in succession and how you have to place them.
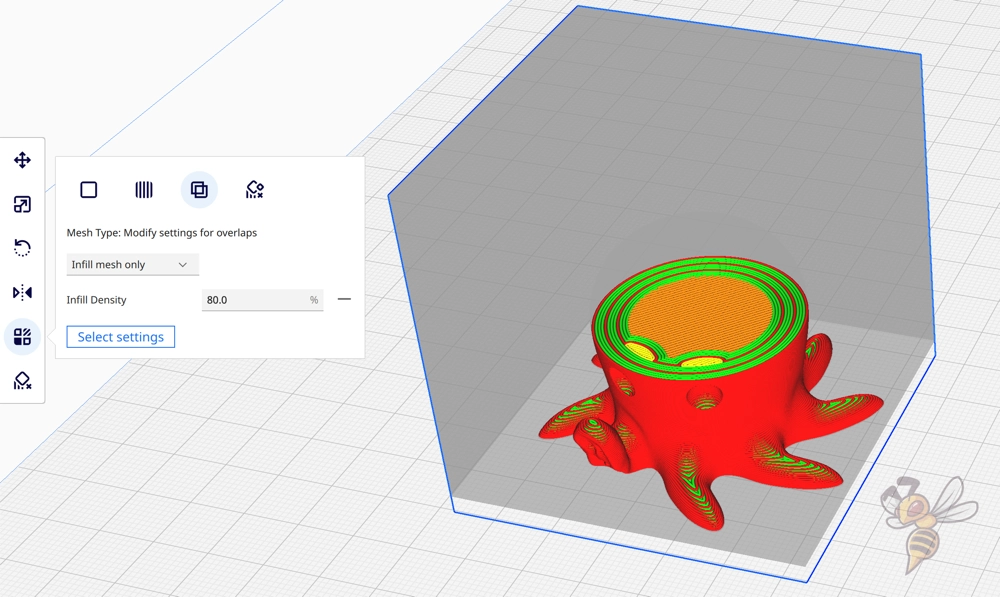
Different settings for objects: You can use a little trick to set certain settings differently for different objects on the print bed. You can use Support Blockers and adjust the settings and of the overlapping objects. But you also have this hurdle when printing objects at the same time. Therefore, this is not really a disadvantage of the “One at a Time” print sequence.
Complex settings: Often beginners shy away from the “One at a Time” print sequence because the settings for it are relatively complex and catastrophic collisions are possible if you make a mistake. Especially finding the correct print head settings is a problem for many. However, I hope that this article has helped you to get these settings right and successfully print objects one at a time in one print process.
Conclusion
With the print sequence “One at a Time” many objects can be printed in Cura with less print errors and shorter print duration.
I have been using this print sequence for a very long time and reap its benefits every time. I hope that I was able to share my experience with it well in this article and wish you good luck with your 3D prints!
Disclosure: This website is the property of Martin Lütkemeyer and is operated by Martin Lütkemeyer. Martin Lütkemeyer is a member of the Amazon Services LLC and other Affiliate Programs. These are affiliate advertising programs designed to enable websites to earn advertising revenue through advertising and linking to Amazon.com and others. Links marked with * are affiliate links.
