- Wet Filament: Prevention, Symptoms & Drying - July 18, 2024
- Sovol SV08 – Best PrusaSlicer Settings & Profile - June 26, 2024
- Sovol SV08 – Best Orca Slicer Settings & Profile - June 26, 2024
Disclosure: Links marked with * are Affiliate Links. I earn from qualifying purchases if you decide to make a purchase through these links – at no additional cost for you!
The Qidi Tech Q1 Pro is capable of delivering perfect printing results. However, the print quality achievable depends largely on the slicer settings used.
In this article, I share my calibrated Cura settings for the Qidi Tech Q1 Pro to give you a good start for high-quality printing results. These settings have been carefully tested and adjusted to ensure the best possible quality with different filament types.
However, perfect results are not only achieved by applying the correct settings; calibration is also crucial. To deepen your knowledge of calibration and achieve the best printing results, I recommend reading my detailed calibration guide or my watch my 3D printing course.
| PLA | ABS | TPU | PETG | |
|---|---|---|---|---|
| Print Temperature | 210 °C | 250 °C | 230 °C | 240 °C |
| Bed Temperature | 60 °C | 100 °C | 60 °C | 80 °C |
| Enclosure Temperature | – | 45 °C | – | – |
| Speed | 300 mm/s | 300 mm/s | 150 mm/s | 200 mm/s |
| Retraction | 6.5 mm at 35 mm/s | 6.5 mm at 35 mm/s | 7.0 mm at 35 mm/s | 7.0 mm at 35 mm/s |
| Cooling | 100 % | 30 % | 100 % | 60 % |
Table of Contents:
How to Create a Cura Profile for the Qidi Tech Q1 Pro
A Cura profile consists of machine settings and print settings.
The machine settings include the specific physical characteristics of your 3D printer, such as the print volume, nozzle size and maximum speed, which form the framework for the printing process.
Print settings, on the other hand, concern the variables of each individual print job, such as layer height, infill density and temperature, which influence the quality and properties of the print object.
First, the machine settings must be defined, using an empty profile as a basis.
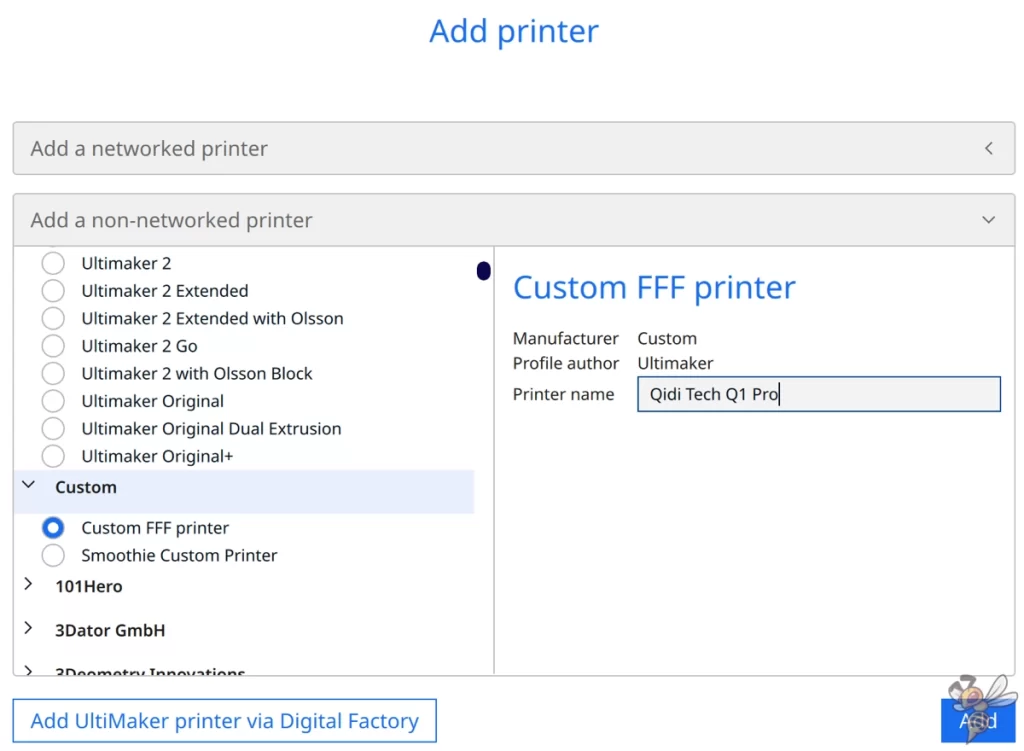
To integrate your 3D printer into Cura, navigate to ‘Settings’, select ‘Printers’ and then ‘Add printer’. Click on ‘Non-networked printer’, select ‘Custom’ and then ‘Custom FFF printer’. Enter the name of your printer and confirm with ‘Add’.
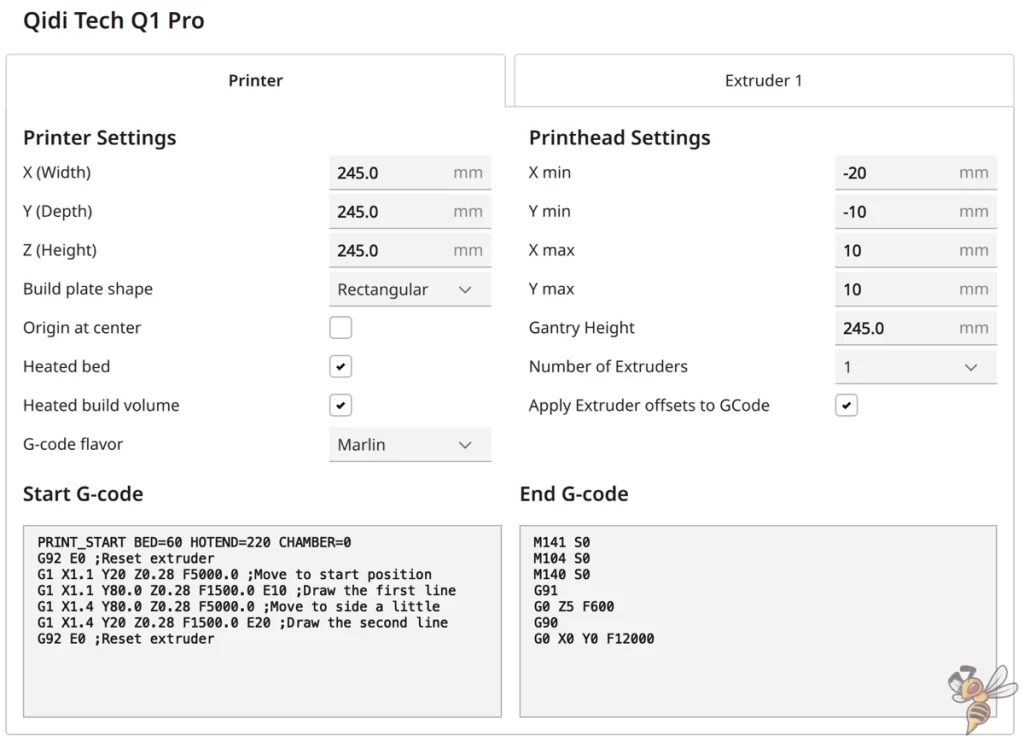
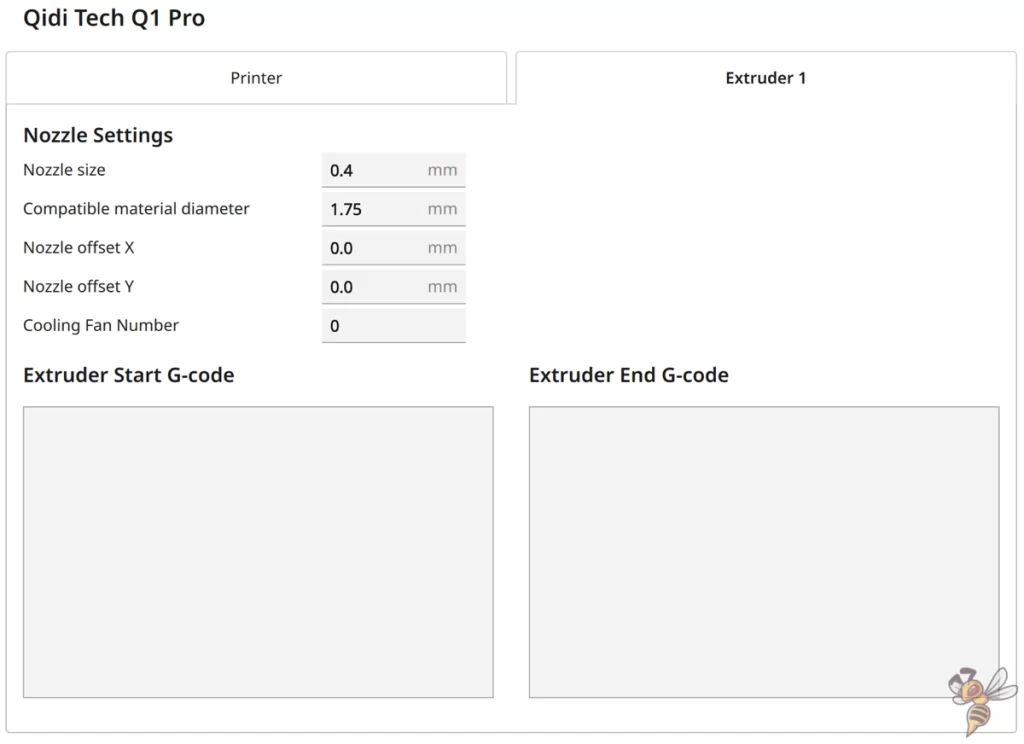
After setting up the machine profile, the next step is to configure the print settings. This step is crucial to optimize the quality of your prints. Depending on the material used and the aim of the print project, you can make adjustments here to achieve the best possible results.
PLA Settings
These are the correct Cura settings for printing PLA filament with the Qidi Tech Q1 Pro:
- Print temperature: 210 °C
- Print bed temperature: 60 °C
- Print speed: 300 mm/s
- Retraction: 6.5 mm at 35 mm/s
- Cooling: 100 %
The Qidi Tech Q1 Pro can process PLA filament almost perfectly with little to no calibration effort. Thanks to its sophisticated technology and precise control, the printer is ideal for printing PLA in outstanding quality.
PLA is generally considered a very easy material to print and the Qidi Tech Q1 Pro is ideally suited to processing this material. Two of the most important settings that should be optimized for PLA are the printing temperature and the retraction.
These settings are crucial to avoid stringing and ensure high print quality.
Later in this article, I’ll go into more detail about calibration and adjustments that can help further improve your results.
ABS Settings
These are the correct Cura settings for printing ABS filament with the Qidi Tech Q1 Pro:
- Print temperature: 250 °C
- Print bed temperature: 100 °C
- Print volume temperature: 45 °C
- Print speed: 300 mm/s
- Retraction: 6.5 mm at 35 mm/s
- Cooling: 30 %
ABS filament is known for its tendency to crack or warp, especially when printing larger objects.
However, the Qidi Tech Q1 Pro is equipped with an enclosure that can even be heated to stabilize the ambient temperature during the printing process. This feature plays a crucial role when printing with ABS, as it minimizes the temperature differences that can lead to the aforementioned problems.
As a result, the Qidi Tech Q1 Pro is able to print even large objects in ABS without cracking or warping, making it an excellent choice for demanding ABS projects.
TPU Settings
These are the correct Cura settings for printing TPU filament with the Qidi Tech Q1 Pro:
- Print temperature: 230 °C
- Print bed temperature: 60 °C
- Print speed: 150 mm/s
- Retraction: 7.0 mm at 35 mm/s
- Cooling: 100 %
The Qidi Tech Q1 Pro is equipped with a direct drive extruder, which is particularly suitable for printing flexible filaments such as TPU. This type of extruder enables more precise feeding of the filament directly into the nozzle, which is crucial for flexible materials, as they can tend to tangle if they have to be transported over longer distances.
When printing with TPU, it is particularly important to reduce the printing speed. Slow printing helps to avoid problems such as clogging of the nozzle or uneven extrusion.
PETG Settings
These are the correct Cura settings for printing PETG filament with the Qidi Tech Q1 Pro:
- Print temperature: 240 °C
- Print bed temperature: 80 °C
- Print speed: 200 mm/s
- Retraction: 7.0 mm at 35 mm/s
- Cooling: 60 %
PETG is a popular filament due to its robustness and flexibility, but has a strong tendency to string. Therefore, it is essential to carefully calibrate the retraction to minimize unwanted stringing between the printed parts.
Another important aspect of printing with PETG is the storage of the filament. PETG absorbs moisture from the air, which can lead to bubbles or stringing. You should therefore always store PETG in a dry place, ideally in an airtight container with a desiccant, in order to achieve optimum printing results.
The Best Cura Settings for the Qidi Tech Q1 Pro
In this section, you will find the optimized Cura settings specifically for the Qidi Tech Q1 Pro. These configurations will help you get the most out of your 3D printer, no matter what material you are using.
Print Temperature
The best printing temperatures for the Qidi Tech Q1 Pro in Cura:
- PLA: 210 °C
- ABS: 250 °C
- TPU: 230 °C
- PETG: 240 °C
The printing temperature plays a decisive role in the quality of your prints. Temperatures that are too high or too low can lead to problems such as stringing, warping or poor layer adhesion. It is therefore advisable to calibrate the printing temperature for each material and even for each brand.
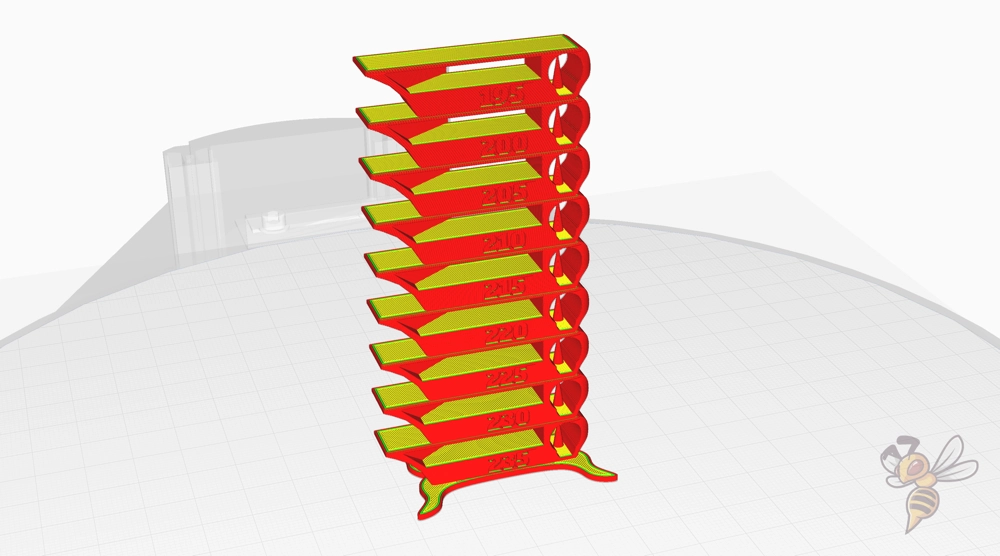
An effective method for calibrating the printing temperature is to print a temperature tower. This is a test object that is printed in different temperature ranges, allowing you to see directly which temperature gives the best results for your specific filament.
The tower helps you to find the optimum printing temperature without having to print numerous complete objects.
Print Bed Temperature
The best print bed temperatures for the Qidi Tech Q1 Pro in Cura:
- PLA: 60 °C
- ABS: 100 °C
- TPU: 60 °C
- PETG: 80 °C
The right print bed temperature is crucial for a successful first layer and therefore for the entire printing process. It helps the material to adhere better to the print bed, which prevents warping and creates a stable base for the subsequent print.
However, too high a print bed temperature can lead to a problem known as ‘elephant foot‘, where the lower layers of the print object expand and widen. This affects the precision and appearance of your print object.
However, you should not encounter this problem with the Q1 Pro, as you can achieve sufficiently good adhesion even at lower print bed temperatures.
Print Speed
The best print speeds for the Qidi Tech Q1 Pro in Cura:
- PLA: 300 mm/s
- ABS: 300 mm/s
- TPU: 150 mm/s
- PETG: 200 mm/s
The print speed has a direct influence on the print quality and the duration of the printing process. While a higher speed can speed up the printing process, it may lead to quality losses such as inaccurate details or poor layer adhesion.
One specific problem that can occur at excessive speeds is ringing or ghosting, where vibrations from the printer cause ripples or echoes alongside sharp edges in the print.
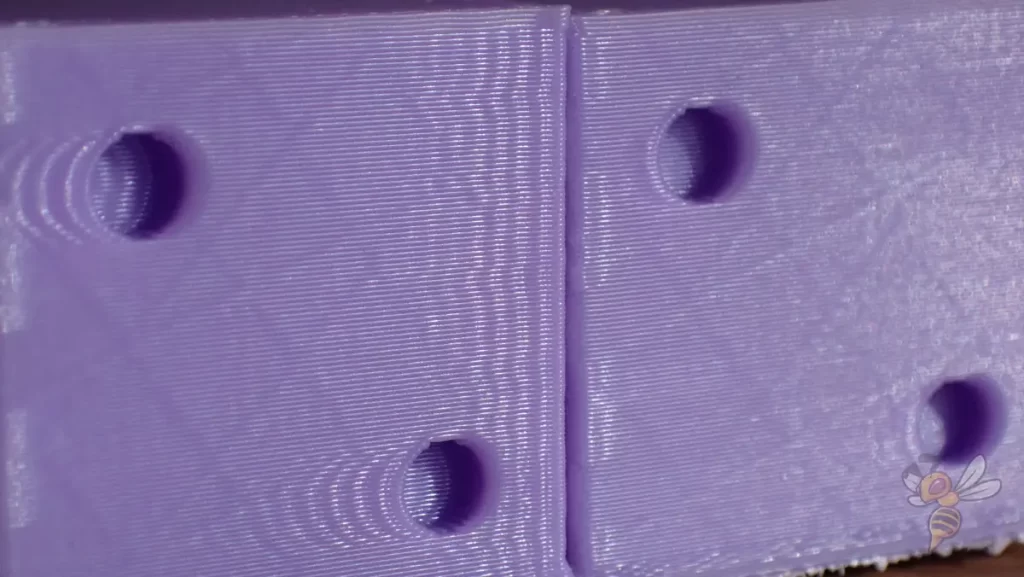
To find the optimal print speed for your Qidi Tech Q1 Pro, I recommend performing a ringing test. This test will help you calibrate the speed at which your printer can achieve the highest quality without ringing effects.
By adjusting the print speed to the specific material and complexity of the object, you can achieve the best possible results.
Layer Height
These are the best layer heights for the Qidi Tech Q1 Pro in Cura:
- Decorative objects: 0.1 mm
- Standard: 0.2 mm
- Rough, fast prints: 0.3 mm
The layer height directly influences quality and printing speed. With 0.1 mm you get detailed and smooth prints, ideal for precise decorative models, but with a longer printing time.
The standard layer height of 0.2 mm is a balanced middle ground for fast, high-quality prints. The 0.3 mm layer height is suitable for fast, functional prints, although the level of detail and surface quality will be reduced.
Flow Rate
These are the best flow rates for the Qidi Tech Q1 Pro in Cura:
- Standard: 100%
- For over-extrusion: 90% to 99%
- For under-extrusion: 101% to 110%
The flow rate should only be adjusted after the print temperature and retraction have been calibrated. These two factors have a significant impact on the quality of the print and can often be the cause of problems that initially appear to be a flow rate issue.
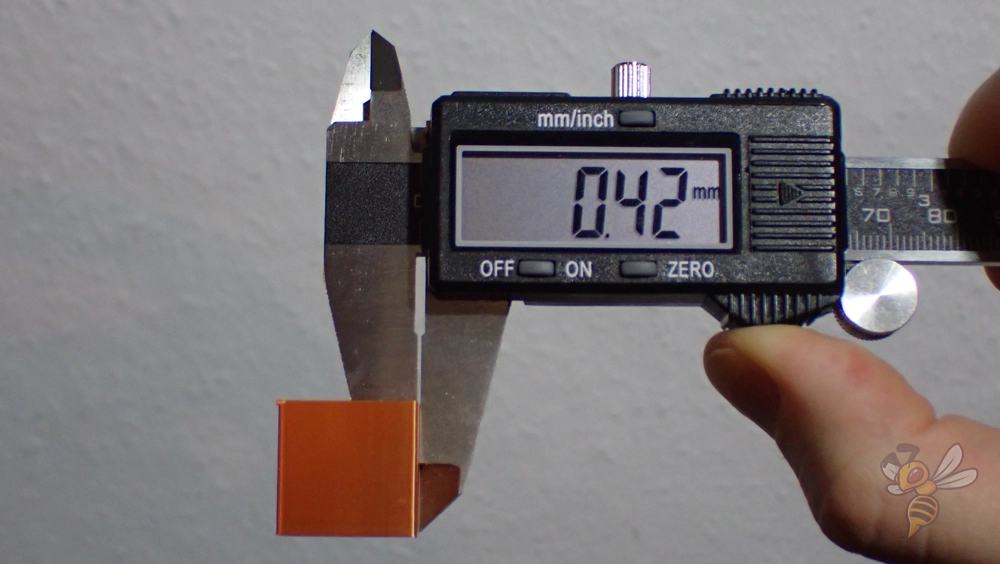
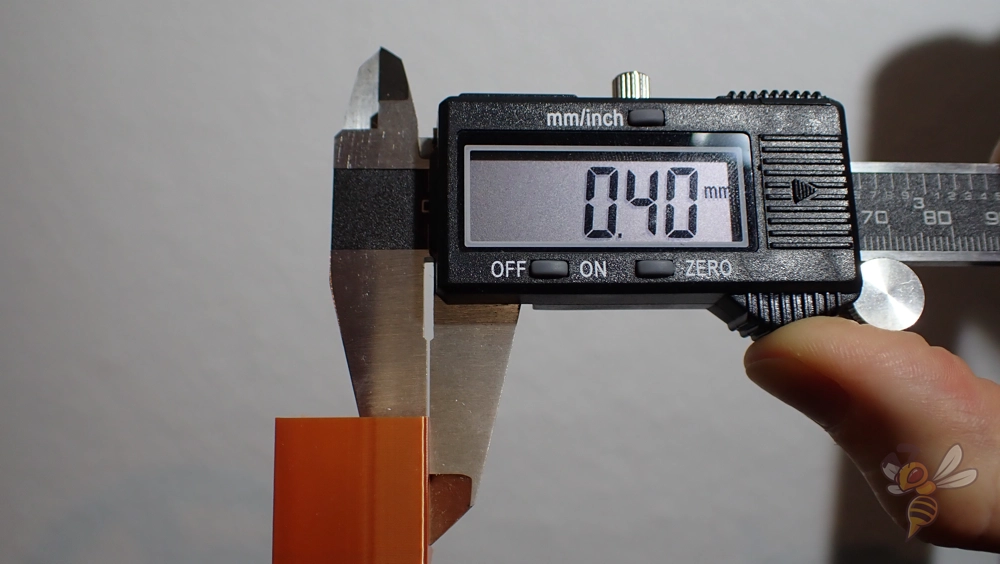
For precise flow rate calibration, it is recommended to print a cube without infill or top layers. The wall thickness of the cube serves as an indicator to determine whether the flow rate needs to be increased or decreased.
A correctly calibrated flow rate will result in the exact wall thicknesses set in your slicer without extruding too much or too little material. This adjustment helps to improve the accuracy of your prints and avoid wasting material.
Retraction
The best retraction settings for the Qidi Tech Q1 Pro in Cura:
- PLA: 6.5 mm at 35 mm/s
- ABS: 6.5 mm with 35 mm/s
- TPU: 7.0 mm with 35 mm/s
- PETG: 7.0 mm at 35 mm/s
Retraction plays a crucial role in preventing stringing and improving print quality. Calibrating the retraction always pays off, because stringing is the first printing error that can negatively affect the surface quality of your prints with the Q1 Pro.
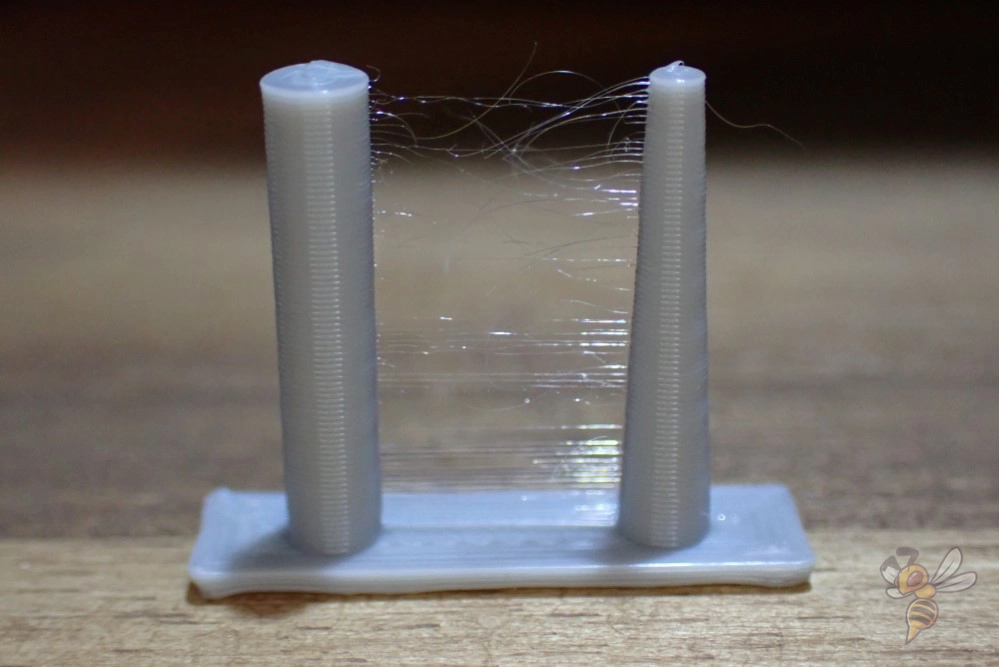
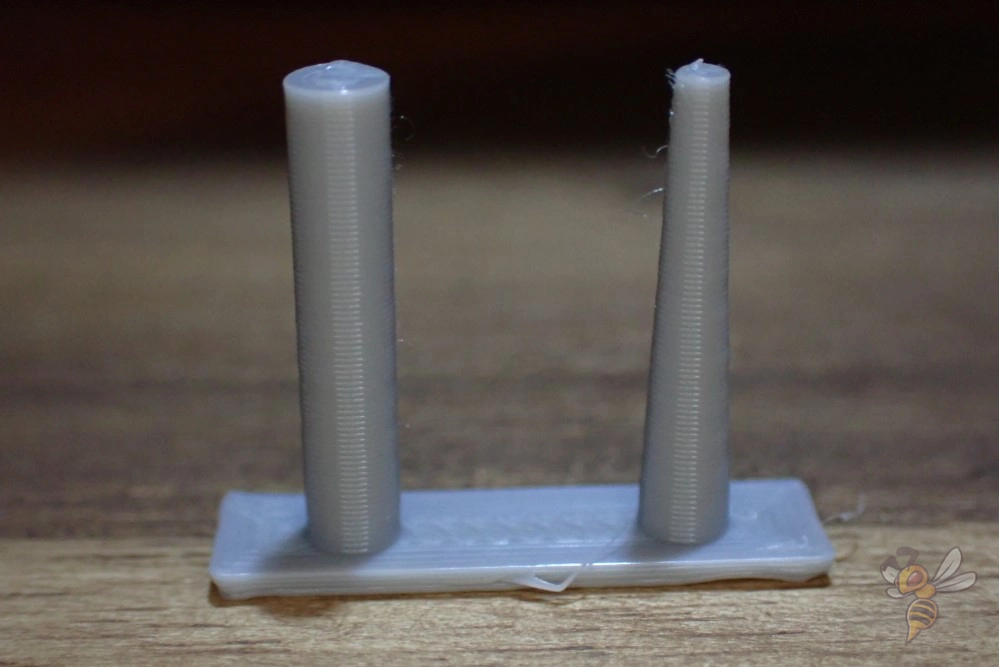
To calibrate the retraction correctly, you should perform special test prints that target retraction problems. These tests will help you find the optimal distance and speed settings to minimize stringing and unwanted material buildup between print parts.
Calibration is an iterative process where you should make adjustments based on the test results and retest until you achieve the best results.
Infill
The best infill density for the Qidi Tech Q1 Pro in Cura:
- Decorative objects: 0-15%
- Standard objects: 15-50%
- Stable objects: 50-100%
The selected infill density depends mainly on the function and requirements of the print object and is largely independent of the 3D printer used.
Low infill densities of 0-15% are sufficient for decorative objects, where the focus is primarily on appearance and less on structural integrity. These ensure a fast print time and low material consumption, making them ideal for objects that are not subject to stress.
For standard objects that require moderate stability, an infill density of 15-50% is recommended. This setting offers a good compromise between printing time, material consumption and strength.
For objects that have to withstand a high load, the infill density should be set to 50-100%. Although this increases material consumption and printing time, it ensures maximum strength and durability of the printed piece.
First Layer
These are the best Cura settings for the first layer with the Qidi Tech Q1 Pro:
- Layer height: 100%
- Line width: 100%
- Print temperature: Same as the rest.
- Print speed: 10 mm/s
- Raft/Brim/Skirt: Skirt.
The slow print speed of the first layer is crucial for good print bed adhesion and is considered one of the most effective ways to ensure that the print starts successfully. By slowing down the speed, the filament stays hotter for longer, which allows for better adhesion to the print bed.
This is because the filament has more time to bond with the surface of the print bed and cool down, resulting in a stronger bond and less chance of warping or other adhesion issues. This careful adjustment at the beginning of the printing process contributes significantly to the quality and reliability of the entire printing process.
Disclosure: This website is the property of Martin Lütkemeyer and is operated by Martin Lütkemeyer. Martin Lütkemeyer is a member of the Amazon Services LLC and other Affiliate Programs. These are affiliate advertising programs designed to enable websites to earn advertising revenue through advertising and linking to Amazon.com and others. Links marked with * are affiliate links.

