
- Wet Filament: Prevention, Symptoms & Drying - July 18, 2024
- Sovol SV08 – Best PrusaSlicer Settings & Profile - June 26, 2024
- Sovol SV08 – Best Orca Slicer Settings & Profile - June 26, 2024
Disclosure: Links marked with * are Affiliate Links. I earn from qualifying purchases if you decide to make a purchase through these links – at no additional cost for you!
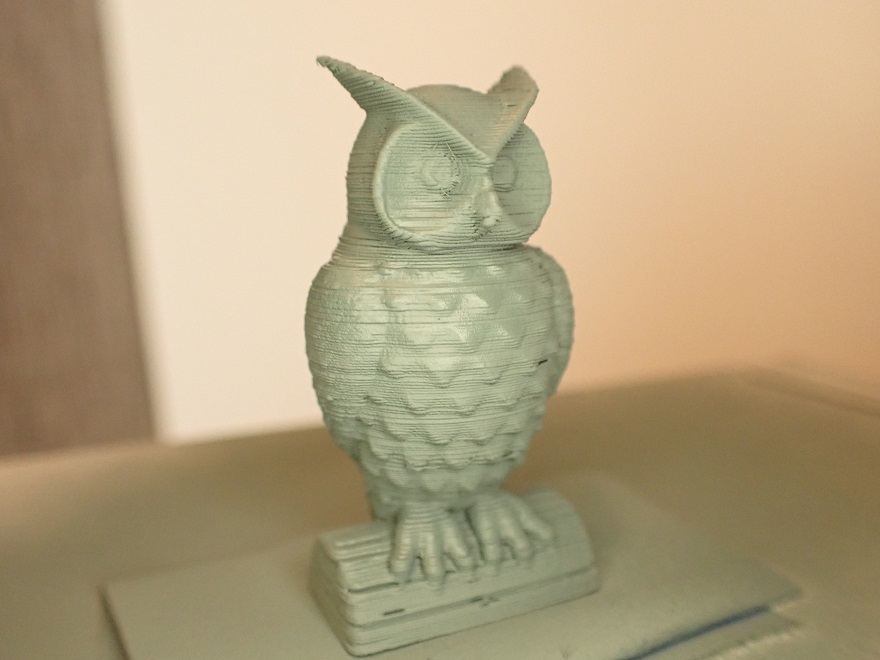
Smoothing PLA 3D prints is a crucial step in transforming your printed objects from rough and ready prototypes into polished, professional pieces.
Whether you’re new to 3D printing or looking to refine your finishing techniques, this guide offers straightforward, beginner-friendly methods to enhance the appearance and feel of your PLA prints.
Table of Contents:
Preparation
Before smoothing your PLA 3D prints, proper preparation is crucial for achieving the best results. Here are the initial steps that ensure a smooth and efficient smoothing process:
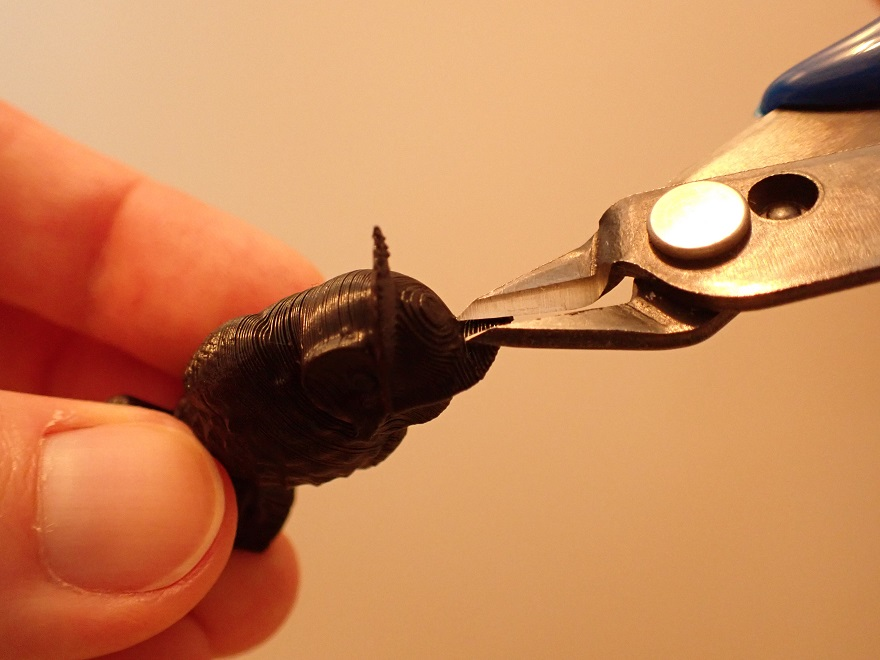
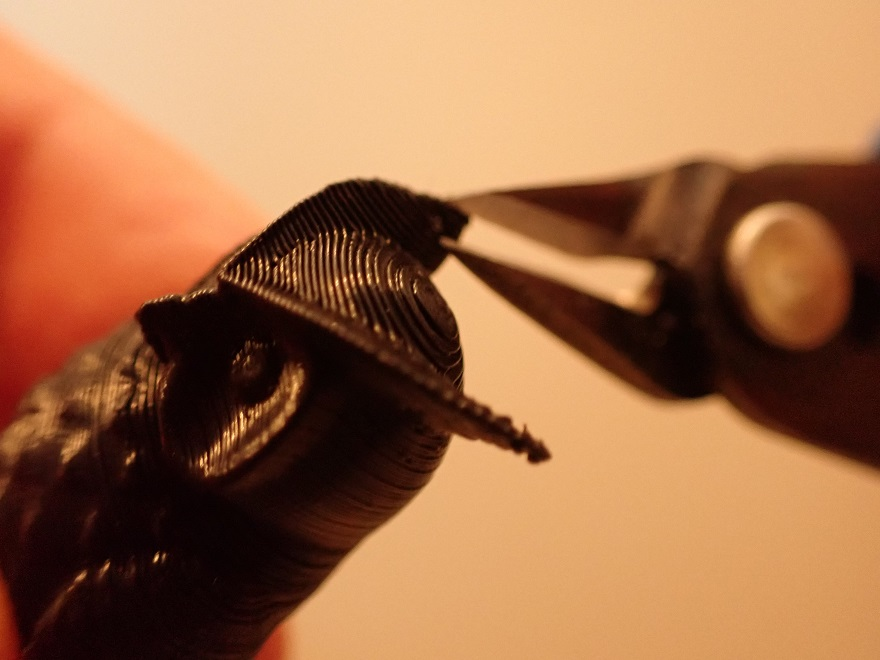
- Inspect the Print: Start by closely examining your 3D print for any obvious flaws, excess material or other imperfections. Look for strings, blobs, or any loose material that might affect the smoothing process.
- Clean the Print: Use a soft brush to remove any dust or debris from the surface of your print. If necessary, gently wipe the print with a damp cloth to remove any stubborn dirt. Make sure the print is completely dry before proceeding.
- Gather Necessary Tools: For sanding, you will need sandpaper with various grits (start with lower grits and move to higher for finer finishes). For epoxy coating or painting, gather the epoxy resin or primer/paint, along with brushes or rollers as needed.
- Safety First: Safety cannot be overstated. Always work in a well-ventilated area, especially if using chemical. Wear protective gloves to avoid skin irritation and goggles to protect your eyes from particles or chemical splashes.
- Workspace Preparation: Cover your workspace with newspaper or a plastic sheet to protect surfaces from spills, drips, or dust. Have all your tools and materials within reach to streamline the smoothing process.
Sanding
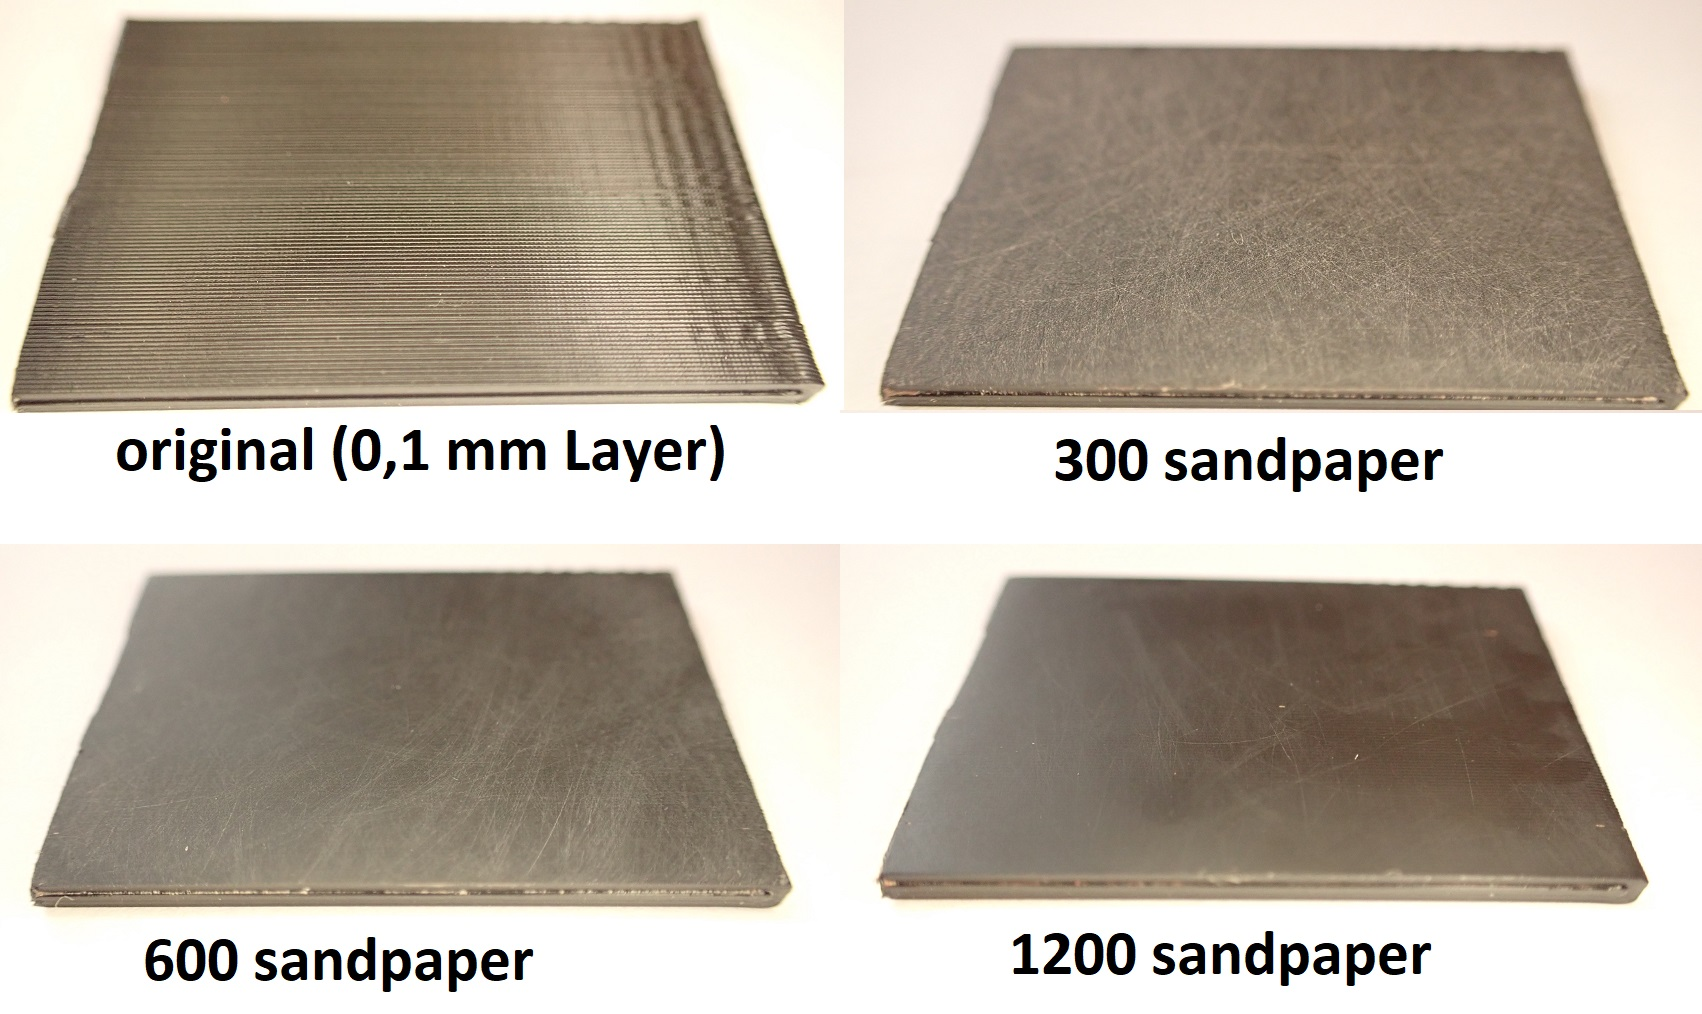
Sanding is a fundamental method to smooth PLA 3D prints, perfect for beginners looking to enhance the finish of their projects. Here are the basic steps to smooth the visible layer lines with sandpaper:
- Select Sandpaper and Remove Layer Lines: Begin with coarse sandpaper (around 200 grit) to remove larger imperfections. Gradually move to finer grits (up to 600 or higher) to achieve a smooth finish.
- Wet Sanding Technique: Wet the sandpaper slightly. This reduces dust and helps achieve a smoother finish. Sand in circular motions to avoid creating grooves in the print.
- Consistent Pressure: Apply steady, light pressure. Over-sanding can damage the print or alter its shape.
- Use a Sanding Block: If you have large, flat areas on your PLA print, a sanding block can make the process faster and more ergonomic.
- Reach Every Corner: For hard-to-reach areas, use smaller pieces of sandpaper or consider using tools like needle files.
- Final Checks: After reaching a satisfactory smoothness, inspect the print under good lighting to ensure you haven’t missed any spots.
- Clean Up: Remove any sanding dust with a soft brush or damp cloth. Ensure the print is completely clean and dry before moving on to any additional smoothing processes.
Epoxy Coating
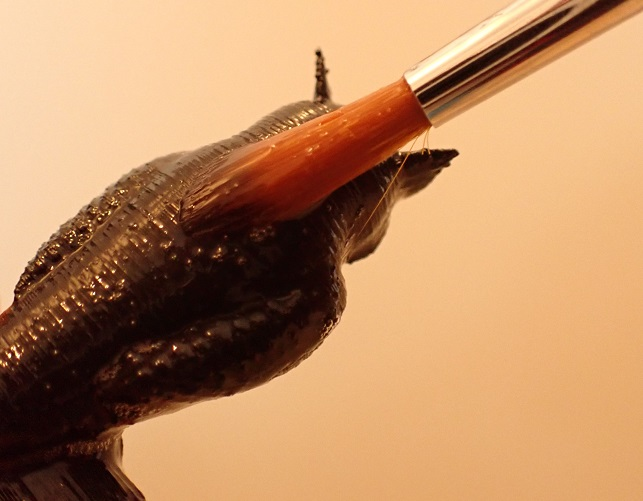
Epoxy coating is an effective way to achieve a smooth and glossy finish on PLA 3D prints. This method fills in the print lines and imperfections, providing a uniform surface texture. Here’s how you can apply an epoxy coating:
- Choose the Right Epoxy: Use a clear, two-part epoxy resin designed for coating surfaces. Ensure it’s compatible with PLA material.
- Mix Epoxy Resin: Follow the manufacturer’s instructions to mix the resin and hardener. Typically, this involves combining equal parts of each component. Stir thoroughly to ensure a consistent mixture.
- Apply Epoxy Coating: Use a soft brush or a foam roller to apply a thin, even layer of epoxy over the surface of your print. Work in a well-ventilated area and wear gloves to avoid skin contact.
- Eliminate Bubbles: After application, you may notice bubbles forming on the surface. Gently pass a heat gun or use a toothpick to pop these bubbles. This process helps achieve the desired surface finish.
- Curing Time: Allow the epoxy to cure as per the instructions. This can take anywhere from a few hours to overnight, depending on the product and ambient conditions.
- Sanding (Optional): If necessary, after the epoxy has fully cured, you can sand the surface with fine-grit sandpaper to achieve an even smoother finish.
- Clean Up: Clean your tools with acetone or a similar solvent like nail polish remover before the epoxy hardens.
Using Primers and Paints
Applying primer and paint is a straightforward method to smooth and finish PLA 3D prints, ideal for beginners. These are the essential steps for using primers and paints to enhance your 3D prints:
- Selecting Primers and Paints: Choose a primer and paint or spray paint suitable for plastics. Acrylic paints are recommended for their ease of use and cleanup.
- Surface Preparation: Ensure the print surface is clean and free from dust. Light sanding can help the primer adhere better.
- Applying Primer: Spray the primer in light, even coats to avoid drips. Allow the primer to dry completely, following the manufacturer’s recommended drying time. Sand lightly between coats if necessary to maintain a smooth surface.
- Painting: Once the primer is dry and the surface is smooth, apply your chosen paint. For brush painting, use a soft, fine-bristled brush to minimize stroke marks. Spray-painting can give a more uniform coat but requires a well-ventilated area. Apply multiple thin coats, allowing each to dry before applying the next, to build up color and coverage without drips.
- Finishing Touches: After the final coat of paint has dried, you may apply a clear coat for extra protection and shine. This also helps to smooth out any remaining imperfections.
- Curing Time: Allow the paint to cure fully, which may take up to 24 hours or as specified by the paint manufacturer. This ensures the paint is durable and resistant to handling.
- Clean Up: Clean your brushes or spray cans according to the manufacturer’s instructions. Proper cleanup extends the life of your tools and ensures they’re ready for your next project.
Chemical Smoothing is a Bad Idea!
Chemically smoothing PLA prints is a technique that involves using certain chemicals to dissolve the surface of a 3D print, thereby reducing the visibility of even thin layer lines and imperfections. While it might sound like a quick fix to achieve a smooth surface, there are several reasons why you should not do it!
- Toxicity and Safety Concerns: Many chemicals capable of smoothing PLA are hazardous. Solvents like Tetrahydrofuran (THF) and Chloroform, known for their effectiveness in smoothing PLA, are also highly toxic. They pose significant health risks, including irritation to the skin, eyes, and respiratory system, and more severe long-term effects with improper handling.
- Difficulty in Handling: Using chemicals requires a well-ventilated area, appropriate protective gear (gloves, goggles, respirator), and a precise understanding of the chemical’s properties. The process is not beginner-friendly and carries a risk of damaging the print if the solvent is too strong or left in contact for too long.
- Environmental Impact: Disposal of chemical solvents poses environmental hazards. Most smoothing chemicals are not biodegradable and require special disposal procedures to prevent harm to the environment.
- Inconsistent Results: Achieving a uniform, smooth finish with chemicals can be challenging. The process often requires trial and error to find the right balance, and there’s a high risk of uneven smoothing, which can ruin the detail or the entire print.
Disclosure: This website is the property of Martin Lütkemeyer and is operated by Martin Lütkemeyer. Martin Lütkemeyer is a member of the Amazon Services LLC and other Affiliate Programs. These are affiliate advertising programs designed to enable websites to earn advertising revenue through advertising and linking to Amazon.com and others. Links marked with * are affiliate links.
