
- Wet Filament: Prevention, Symptoms & Drying - July 18, 2024
- Sovol SV08 – Best PrusaSlicer Settings & Profile - June 26, 2024
- Sovol SV08 – Best Orca Slicer Settings & Profile - June 26, 2024
Disclosure: Links marked with * are Affiliate Links. I earn from qualifying purchases if you decide to make a purchase through these links – at no additional cost for you!
The Longer LK5 Pro is a popular large-format 3D printer for hobbyists. Since it is also excellent for beginners, many newcomers come into contact with this product.
To help you get started, this tutorial explains how to successfully start your first prints.

Check Price at:
Table of Contents:
Unboxing | Longer LK5 Pro
The Longer LK5 Pro is delivered in a compact package well secured by foam. The packaging of the individual parts makes a good impression. An accidental drop should not be a problem.
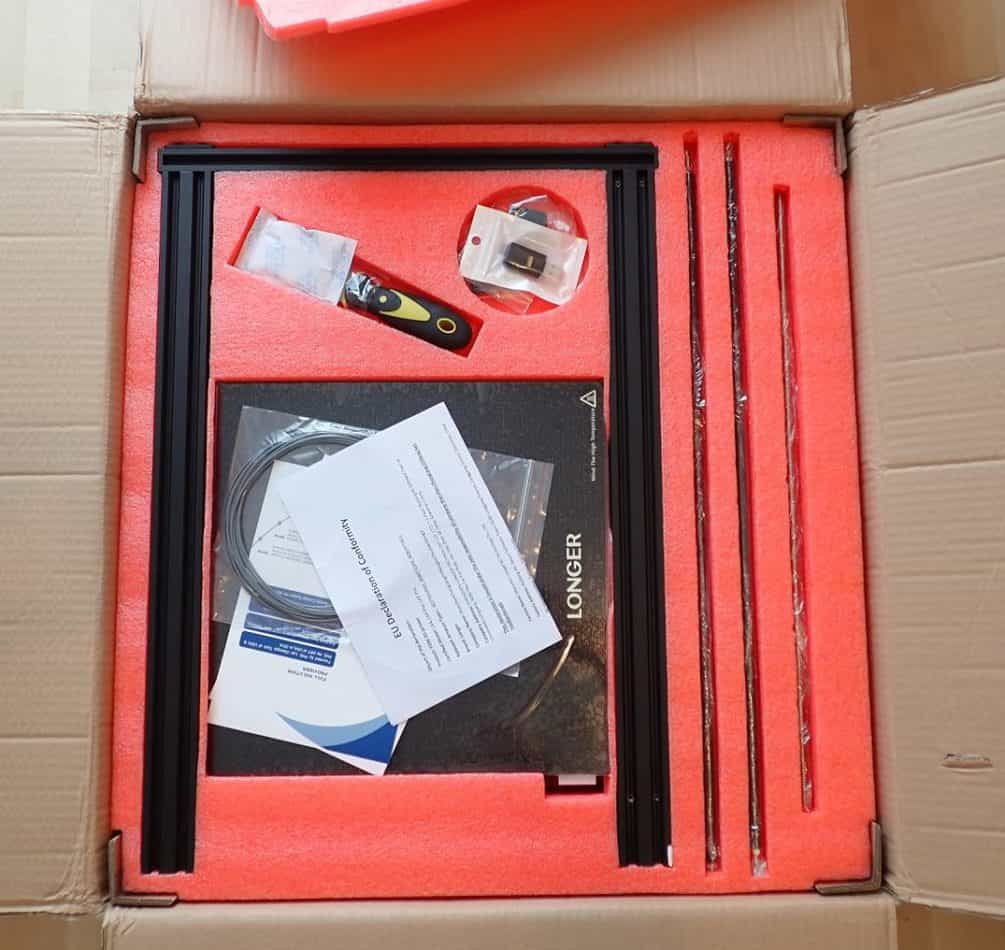
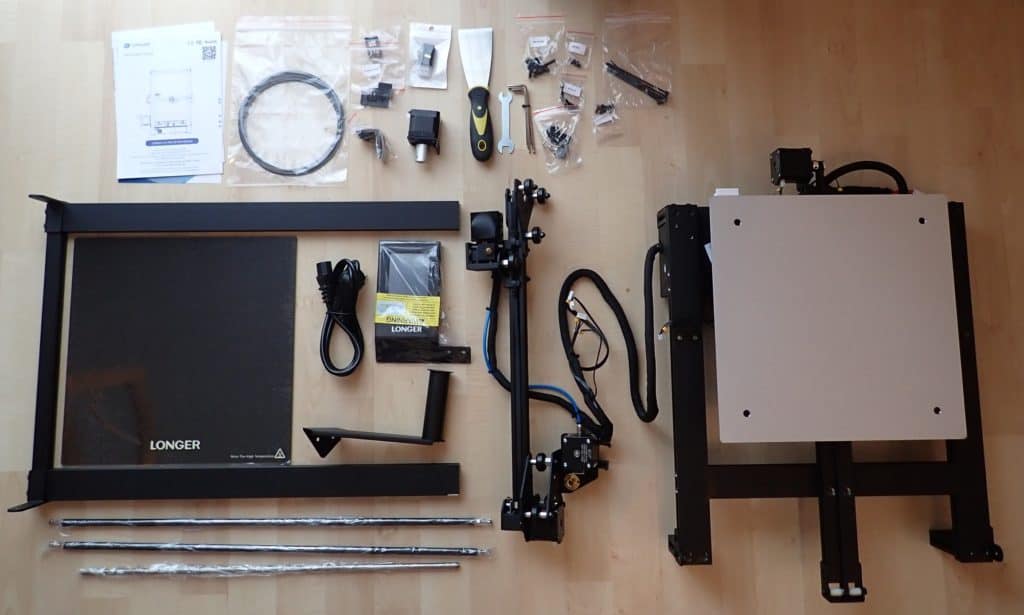
The scope of delivery includes the partially pre-assembled 3D printer, all necessary tools and screws, and a micro SD card with test objects, the Longer 3D Slicer and instructions.
Setup | Longer LK5 Pro
The assembly of the Longer LK5 Pro is not very complicated thanks to the included instructions (“Quick Start Guide“) and is done within a manageable time.
The instructions consist mainly of easy-to-understand pictograms, pictures and descriptions that explain the assembly step by step.
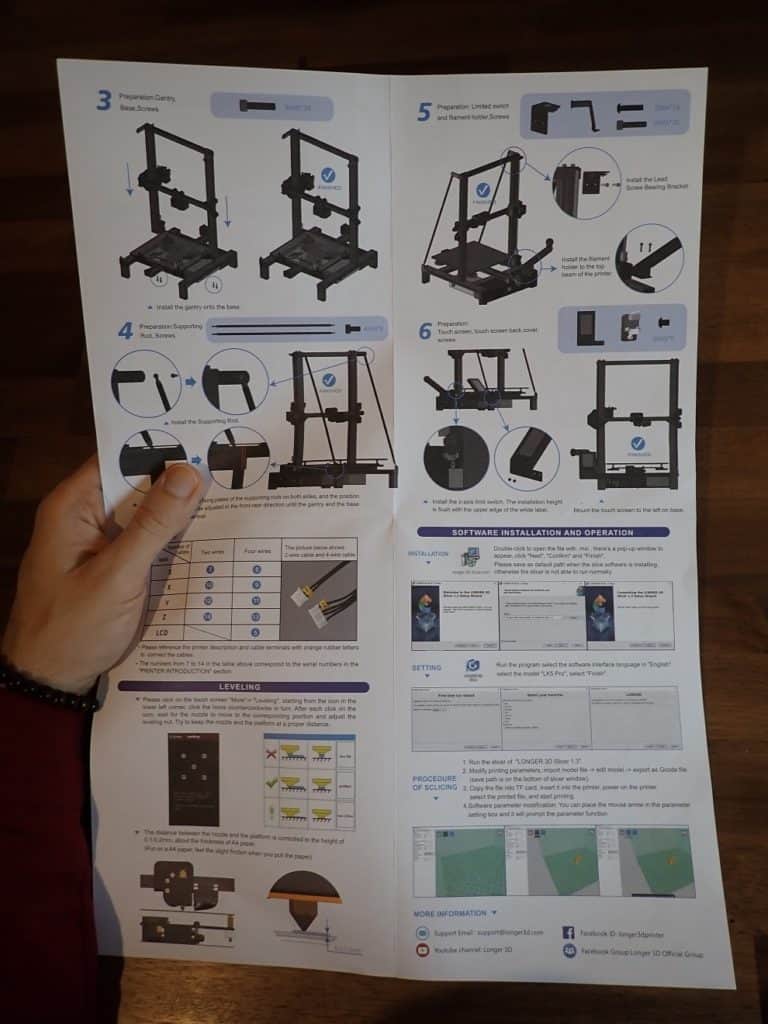
Sometimes, however, the descriptions are formulated a bit awkwardly. Therefore, the individual steps are listed here again in detail:
- Mount the X-axis on the frame: The 3D printer is delivered partially pre-assembled. The X-axis is also included. The extruder with filament sensor and the hotend are already assembled and connected to the X-axis. You only have to push the X-axis onto the frame. Pay attention to the correct orientation.
- Assemble the Z-axis: The Z-axis basically consists of the frame itself, the screw rod and the stepper motor. Mount the stepper motor at the bottom of the frame and turn the screw rod from the top through the thread provided for the X-axis and connect it to the stepper motor.
- Connect the frame to the base: You can now screw the frame with assembled X- and Z-axis to the pre-assembled base. After that you will notice that the frame is not really stable yet. The bigger the frame is, the more leverage there is at the end of the frame and harmful vibrations or other disturbances can occur. To remedy this, there are the support rods.
- Mount the support rods: The two support rods stabilize the frame. In principle, this is also the secret of the good ratio of size and price of this 3D printer. This elegant design makes the 3D printer much more stable with less material. The support rods can be easily attached to the 3D printer with the included screws. Make sure that you set a 90° angle between the base and the frame. You can do this with the help of the nuts on the rotating rods.
- Mount filament holder and touch screen: This is probably the easiest step of all.
- Connect the cables: There is a table in the Quick Start Guide that explains the names of the cables. All cables are connected with letters and the corresponding plugs also. So it is pretty much impossible that you can plug something wrong here.
- Mount the glass plate: The print bed of the LK5 Pro is a glass plate. This is simply placed on the print bed base and fixed with paper clips. When placing the paper clips, make sure that you leave some space at the front left corner, as the nozzle moves along there every time you start a print and can otherwise collide.
IMPORTANT: As with many other 3D printers sold internationally, the Longer LK5 Pro has a switch to adjust the input voltage. If it is set to the wrong value for your power supply, you will destroy the printer the first time you turn it on!
Print Bed Leveling | Longer LK5 Pro
The leveling of the print bed and the Longer LK5 Pro is done in four steps:
- clean print bed
- remove filament from nozzle
- clean nozzle
- paper method at 5 points
Before you can perform the actual manual leveling of the print bed using the paper method, you have to ensure that both the print bed and the nozzle are free of filament residues. Such residues lead to errors in the leveling, which in turn can lead to various printing errors.
In the menu of the 3D printer, there is a submenu for leveling. Here you can use five buttons to automatically approach the four corners and the center of the print bed with the nozzle.
The nozzle stops just before the print bed in the Z-Home position.
With the four screws under the print bed, you have to adjust the distance at each of the four corners so that the sheet of paper just fits between the nozzle and the print bed. When you move the paper, there should be slight friction.
Test Print | Longer LK5 Pro
After you have set up and leveled the printer, you are actually ready for your first test print.
It is definitely advisable to print smaller test objects before you start your actual projects. With such test objects, you can quickly see where problems can still occur and you can eliminate the errors without much material loss.
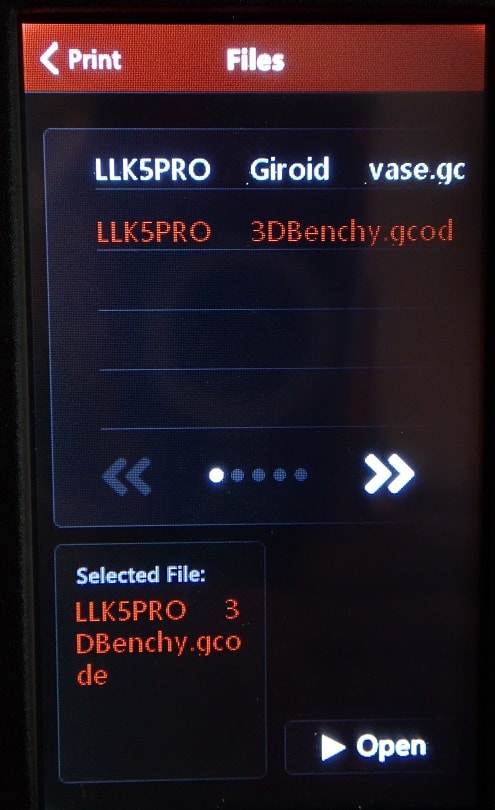
The included Micro SD card contains the Longer Slicer as well as many G-code files for test models.
To start your first test print the following five steps are necessary:
- Install Slicer
- Slice 3D object and save as G-code on micro SD card
- Insert micro SD card into the printer
- Load filament
- Start printing
Install Slicer
Since Cura has LONGER profiles since version 4.10, you can now use the LK5 Pro with the popular slicer software (free download).
Alternatively, you can also install the Longer Slicer from the micro SD card. Since I have already used many 3D printers, I prefer to use Cura, because it is compatible with most 3D printers.
3D object slicing and saving as G-code
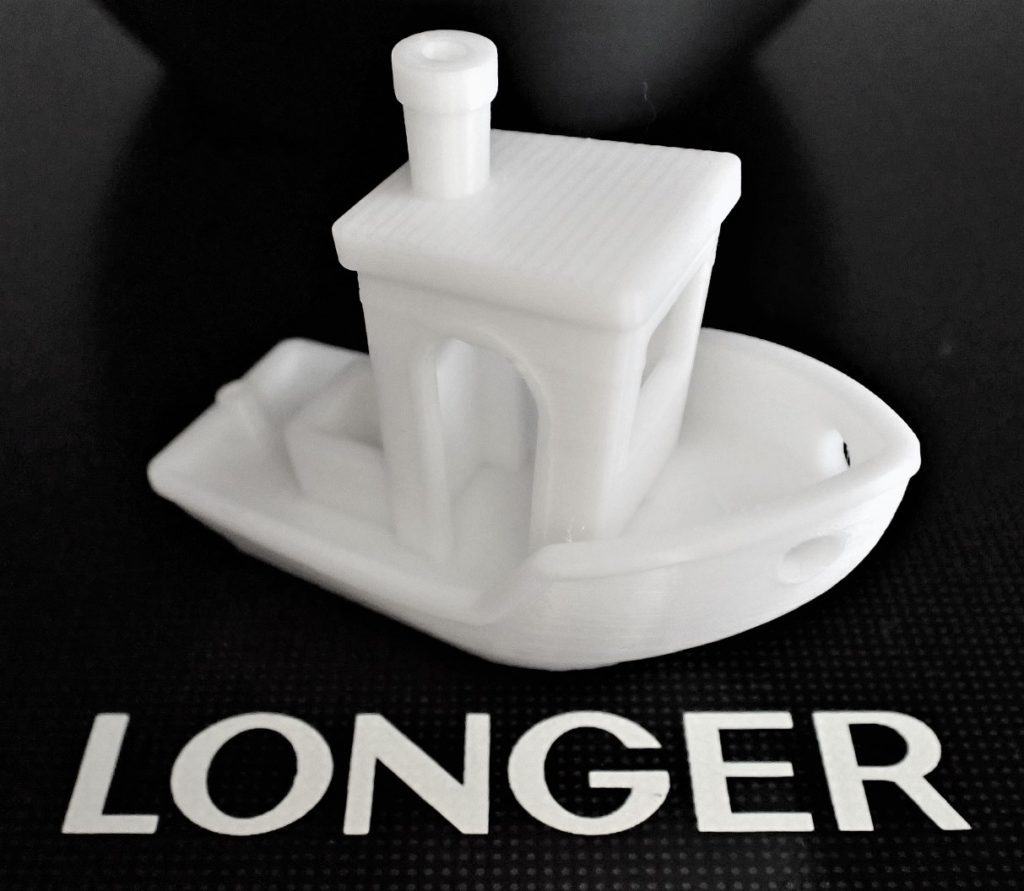
You can either use an object from the micro SD card or download a test object from portals like Thingiverse. By default, I always use 3DBenchy as the first test object to find the right settings for the 3D printer. It is specially designed to make different printing errors obvious.
After you have downloaded the model you can open it in Cura and slice it. You can choose preset modes or find your own settings.
For your first print, I would definitely recommend a preset profile and then keep optimizing.

Once you have found the right setting, you can click on slice in the bottom right corner. The program will then slice the object into the layers that the 3D printer prints and give you a fairly accurate estimate of how much time the print will take.

Insert micro SD card into the 3D printer
There’s not much to say about this. The opening for the micro SD card is located at the back left in front of the filament holder.
Filament loading
To load the filament, you need to preheat the printer to the required temperature. In the menu, there are predefined heating modes for PLA and ABS.

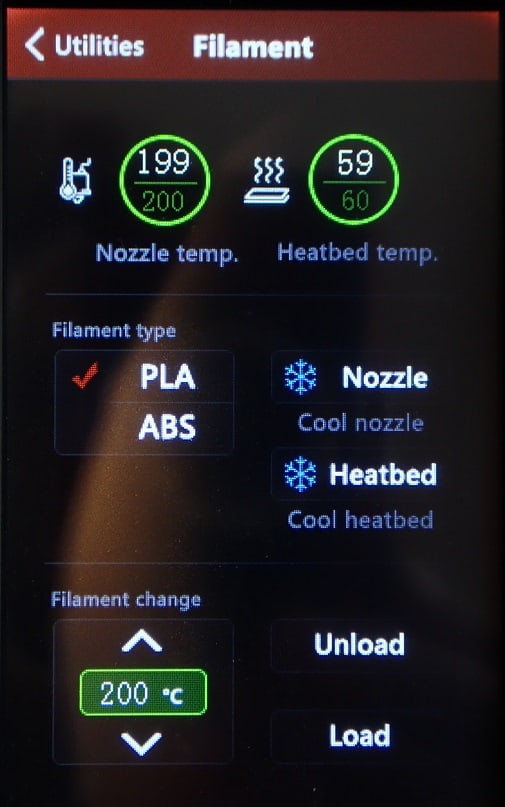
Once the temperature is reached, load the filament with the following steps:
- Place spool on filament holder
- With one hand open the extruder and with the other hand push the filament through the filament sensor and the extruder to the nozzle.
- Continue pushing until filament is extruded from the nozzle.
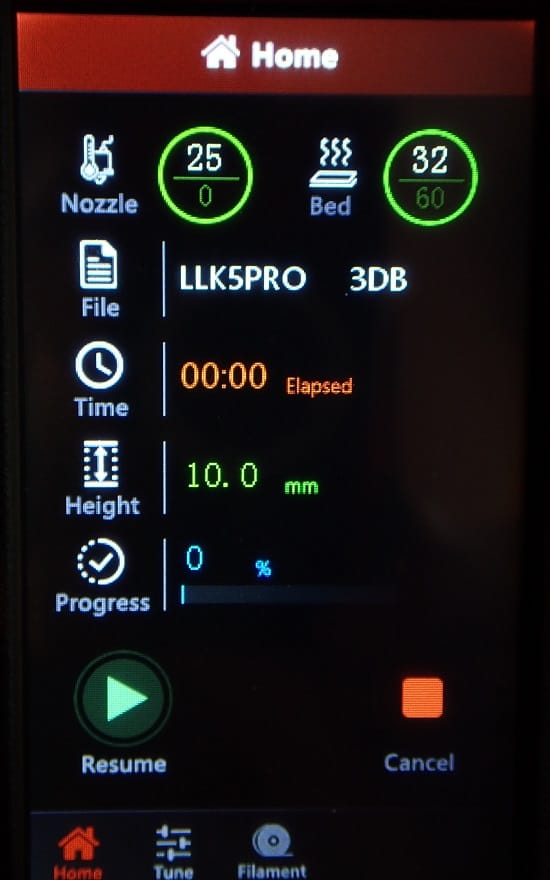
Start printing
Now that the printer is already preheated and you have the right object on the micro SD card, you can start printing directly. You can do this with a few clicks from the main menu.
During printing, you can monitor the progress via the display. It shows you data about the current temperatures, the progress of the print and other things.

Print Quality | Longer LK5 Pro
The print quality of the Longer LK5 Pro printer is very comparable to other hobby 3D printers, such as the Creality CR-6 SE or Creality Ender 3 V2.
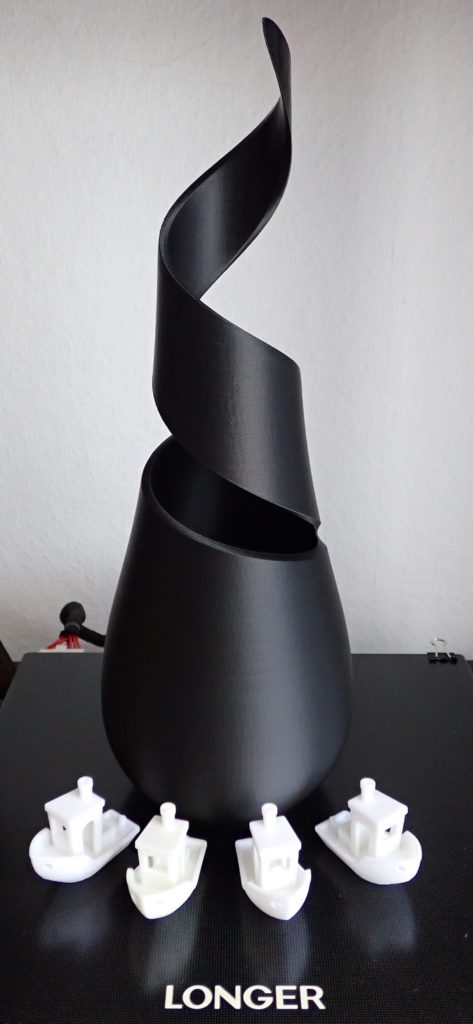
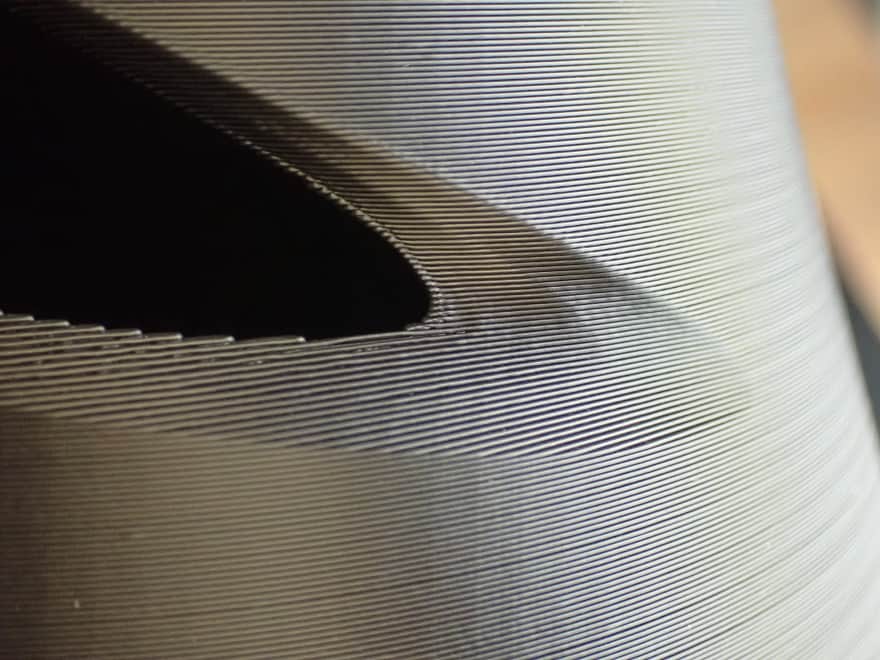
I printed my test objects with the preset “Super Quality” profile. The profile has a layer thickness of 0.12 mm. This accuracy was absolutely no problem for the LK5 Pro and the surface became very smooth.
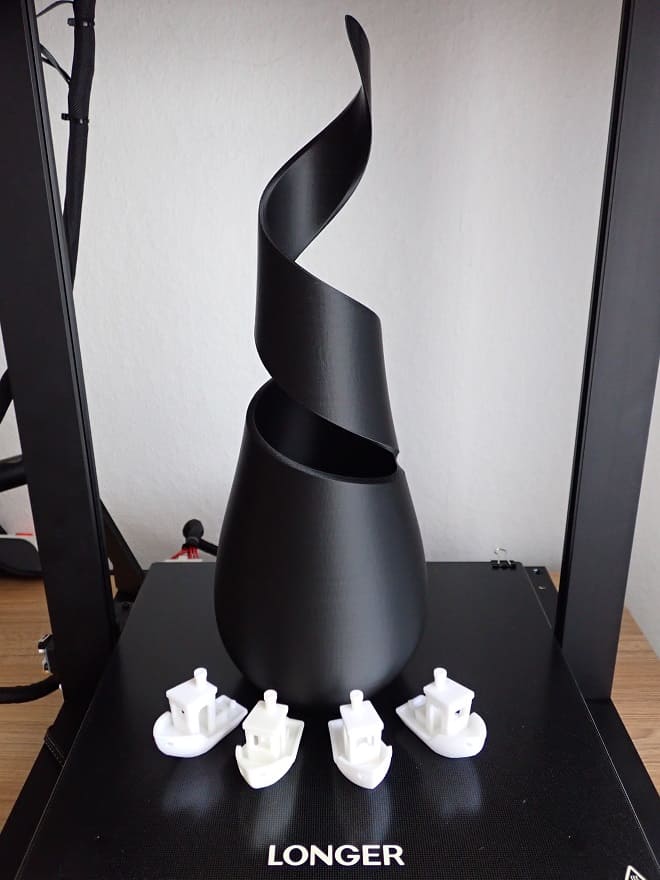
Directly after my test objects, I wanted to use the full size of the build volume with a stylish vase – perfect result!
Conclusion | Longer LK5 Pro
The assembly, the leveling of the print bed and the printing process are very user-friendly with this 3D printer. It won’t take you long to get your first print with the Longer LK5 Pro.
I also noticed the user-friendliness after my first prints in my continued use. Hardly any printing errors occur and if so, they are quickly fixed. Also, the glass bed is very well suited for most filaments. Blue Tape or other aids to increase print bed adhesion were rarely used.
The LK5 Pro is definitely recommended for anyone who wants to print medium to large objects in one piece for a fair price with good accuracy.
Check Price at:
Disclosure: This website is the property of Martin Lütkemeyer and is operated by Martin Lütkemeyer. Martin Lütkemeyer is a member of the Amazon Services LLC and other Affiliate Programs. These are affiliate advertising programs designed to enable websites to earn advertising revenue through advertising and linking to Amazon.com and others. Links marked with * are affiliate links.
