
- Wet Filament: Prevention, Symptoms & Drying - July 18, 2024
- Sovol SV08 – Best PrusaSlicer Settings & Profile - June 26, 2024
- Sovol SV08 – Best Orca Slicer Settings & Profile - June 26, 2024
Disclosure: Links marked with * are Affiliate Links. I earn from qualifying purchases if you decide to make a purchase through these links – at no additional cost for you!
The Longer LK5 Pro* is the consistent evolution of its predecessor. It is packed with useful features and offers quick success even for beginners.
Especially its intuitive operation and the reliability of the print results convinced me in this hands-on review. It did not take long until my first test print.
The clever design keeps the price down while allowing large objects to be printed without interference from vibration or similar disruptive factors.
Table of Contents:
Key Takeaways
- 0.1 mm resolution
- quiet
- intuitive operation
- 300 x 300 x 400 mm print volume
- nozzle up to 250 °C
- print bed up to 100 °C
- manual leveling
Who Should Buy the Longer LK5 Pro?
The Longer LK5 Pro* is suitable for beginners who want to print larger objects of good quality for little money. This budget 3D printer delivers not only a large print volume but also a very intuitive operation via a modern touch screen and a simple manual print bed leveling.
Pros & Cons
Longer LK5 Pro
PRO:
- intuitive menu and modern touchscreen
- large print volume
- very quiet
- good print quality
- fast heat-up
- simple assembly
- stable construction
- structured glass bed (good adhesion and easy release)
CON:
- No automatic print bed leveling (but it is BLTouch compatible)
Scope of Delivery
Longer LK5 Pro
The Longer LK5 Pro comes with everything you need to assemble and get started.
The only thing I noticed negatively here is the very sparsely dimensioned filament. It is just enough for a small test print.
Therefore, you should definitely buy more filament when you decide to use this 3D printer.
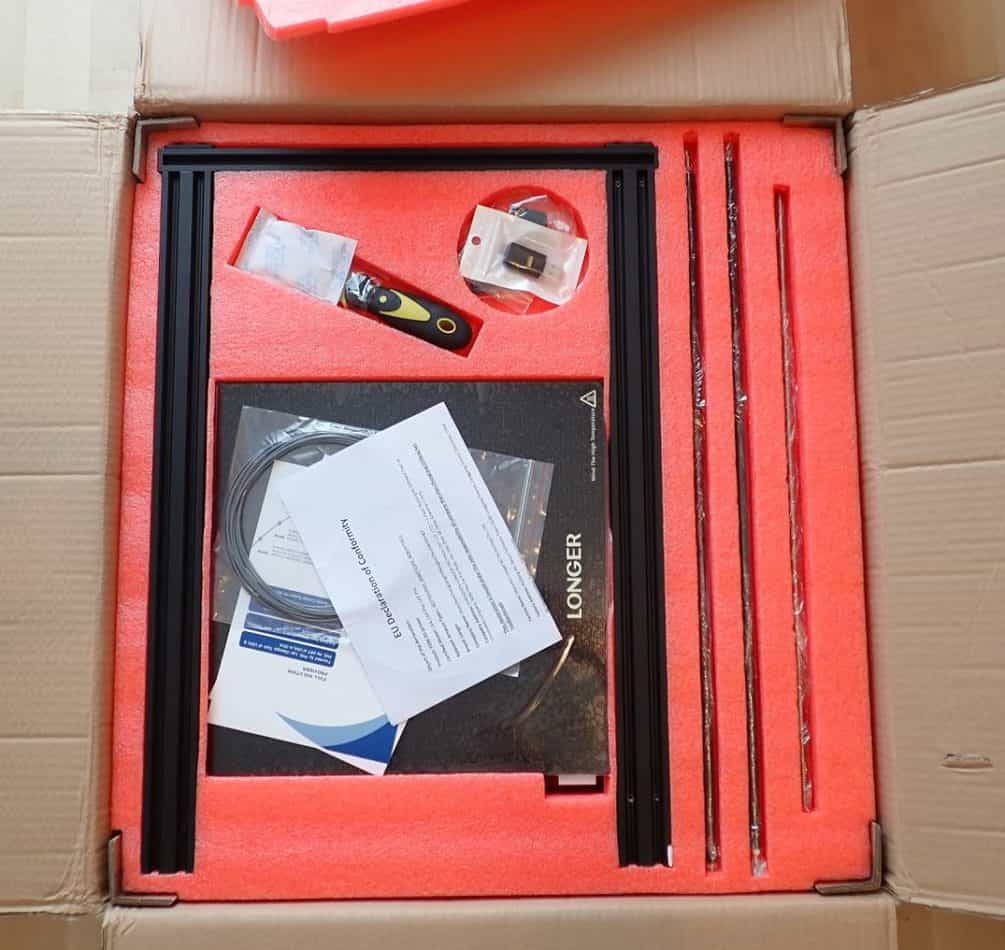
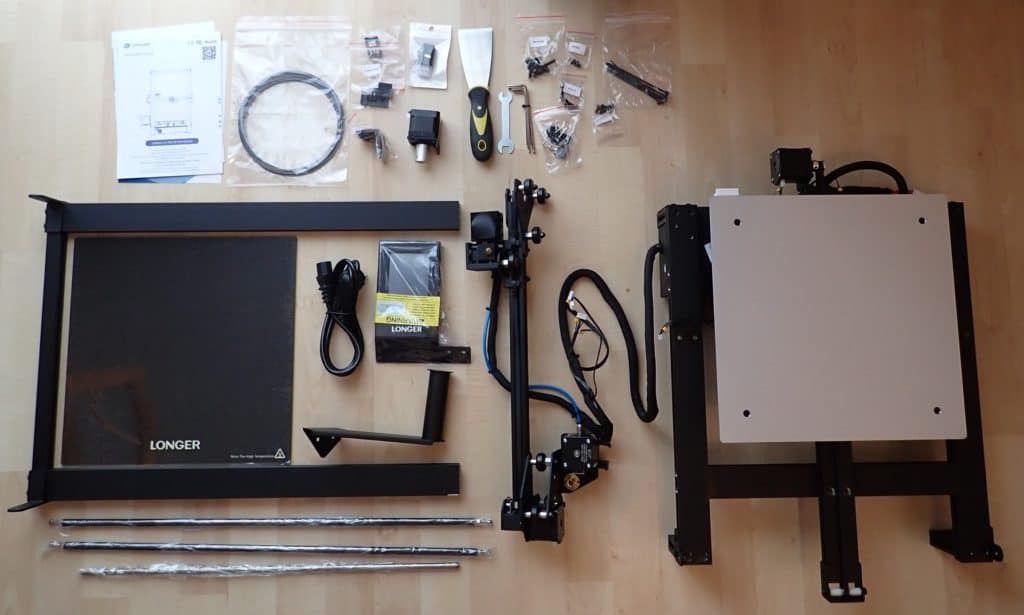
The scope of delivery includes the following things:
- Base with print bed and Y-axis
- Frame
- Support bars
- Screw rod for the Z-axis
- Mounting for the Z-axis
- X-axis with printhead
- Textured glass bed
- Touchscreen
- Filament holder
- Power cable
- Filament sample
- Spatula
- Z-axis limit switch
- Stepper motor for the Z-axis
- All screws needed
- Wrench
- Allen key
- Cable tie
- Micro SD card
- Card reader
- Instruction manual
The included micro SD card contains the following things:
- Multiple G-code files for printing
- Longer 3D Slicer
- Instruction manual
- Setup video tutorial
Setup
Longer LK5 Pro
The LK5 Pro is delivered partially pre-assembled. It can be assembled within a few minutes. The included instruction manual with easy-to-understand pictures and the assembly video on the micro SD card, it is a breeze to set up this 3D printer.
The 3D printer can be set up with the following steps:
- Mount the X-axis on the frame: The X-axis with the printhead comes pre-assembled. You do not need to assemble the hotend, extruder or filament sensor. The printhead is already mounted on the X-axis and only needs to be put on the frame with its guide wheels. You only have to pay attention to the correct orientation.
- Mount the Z-axis on the frame: After the X-axis, the Z-axis is mounted on the frame. To do this, you only need to mount the stepper motor at the bottom of the frame and turn the screw rod from the top through the X-axis and connect it to the stepper motor at the bottom.
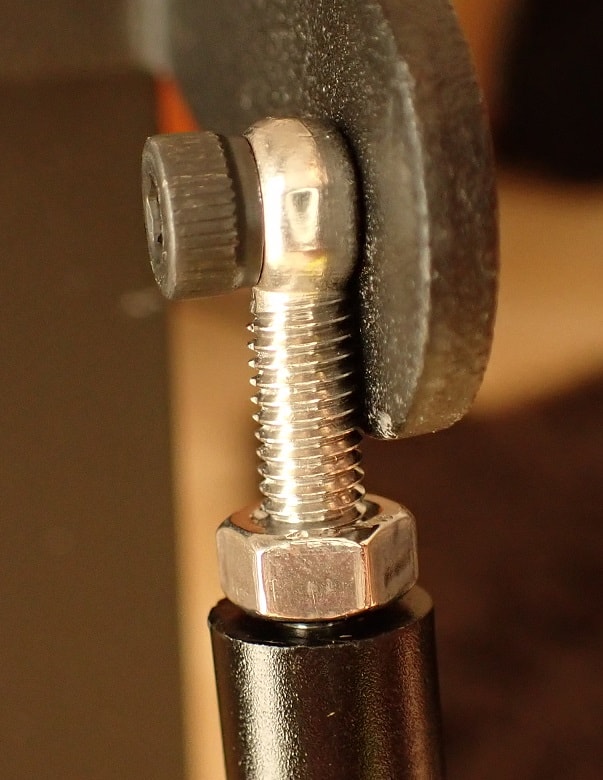
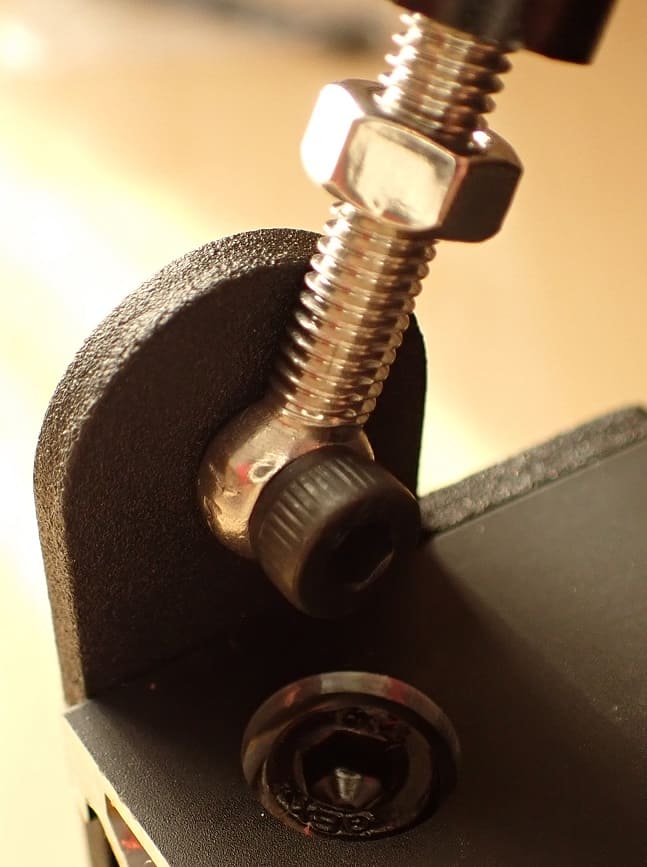
- Screw the frame to the base: With 4 screws, the frame including the X- and Z-axis can be screwed to the 3D printer base. during assembly, I found it a bit difficult to find the right position for the individual parts. It feels like you would need four hands! In the end it worked well when I put the entire printer on its side.
- Stabilize frame: The size of the 3D printer also brings problems. To ensure that the 3D printer remains stable, it has diagonal struts. These bars can be adjusted so that you can set a perfect 90° angle between the frame and the base. With the help of the nuts on the screws of the rods, you can fix the settings.
- Mounting the filament holder: The filament holder is mounted on the base with two screws. It protrudes to the rear at a 45° angle.
- Mounting the touchscreen: The touchscreen is also fixed to the base with two screws.
- Connect cables: All cables of the 3D printer are marked with letters. There is a simple table in the manual that shows you exactly where to plug in each cable. The connectors are designed so that you can not plug them in the wrong way.
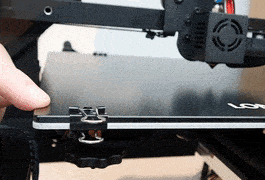
- Insert and fix the glass plate: The glass plate can be easily placed on the print bed base and fixed with the included paper clips. Make sure that the paper clip on the front left is not on the very outside, as the nozzle moves there when starting a print and could collide with it.

CAUTION: As with many other 3D printers, the power supply has a voltage switch. You must set this to the correct voltage of the local power supply. You can switch it between 115 and 230 volts. If you set the wrong voltage, the power supply will burn out immediately when you turn it on for the first time!
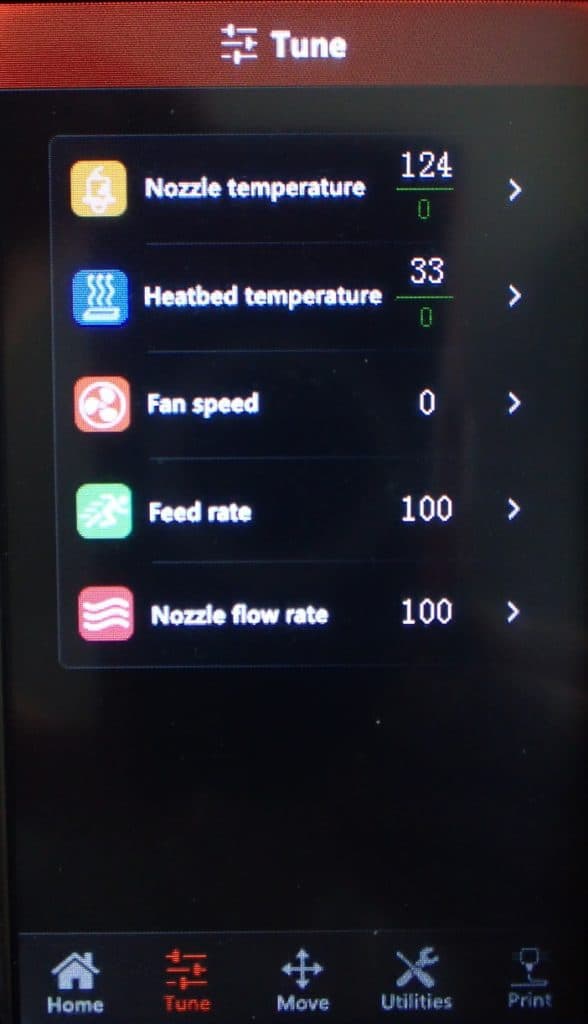
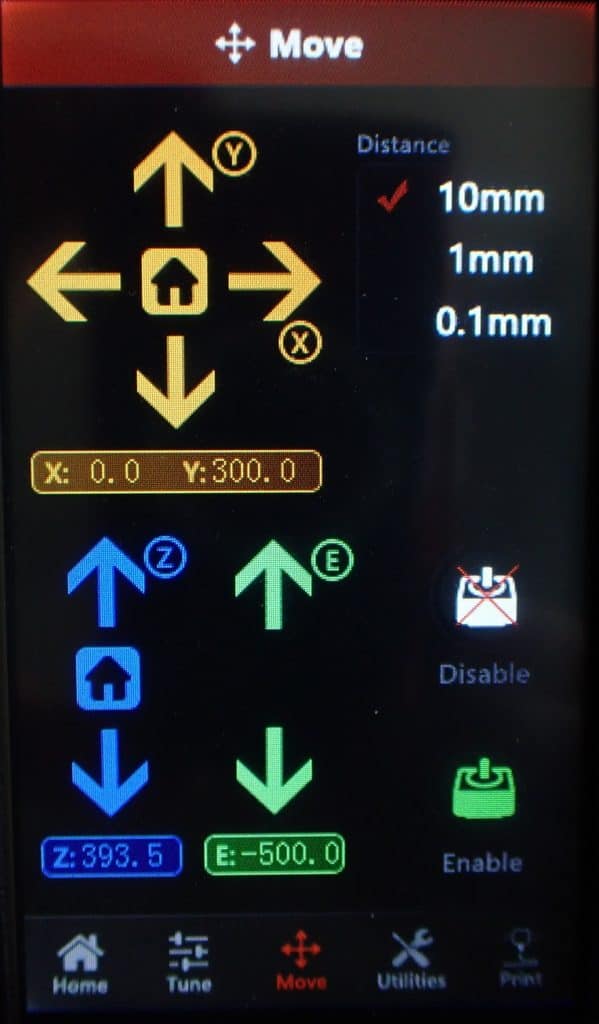
Print Bed Leveling
The leveling of the print bed happens manually on the LK5 Pro. There is a submenu for leveling the print bed in the menu of the 3D printer, but it is only a support. In this menu, you can move to 5 points on the print bed. At these 5 points, you have to level the print bed manually.

For manual print bed leveling, the so-called paper method is suitable. For this, you need a piece of paper with a thickness of approx. 0.1 mm. At the end, the nozzle should be so close to the print bed at each of the 5 points that you can just move the paper between the nozzle and print bed with some resistance.
To adjust the height of the glass plate, there are rotary screws at each of the four corners of the print bed.
Manual print bed leveling usually takes several passes to achieve a satisfactory result. If you are already somewhat experienced, one or two passes will be enough. If you have never manually leveled a print bed before, it can take 5 to 10 passes until you get a feel for it.
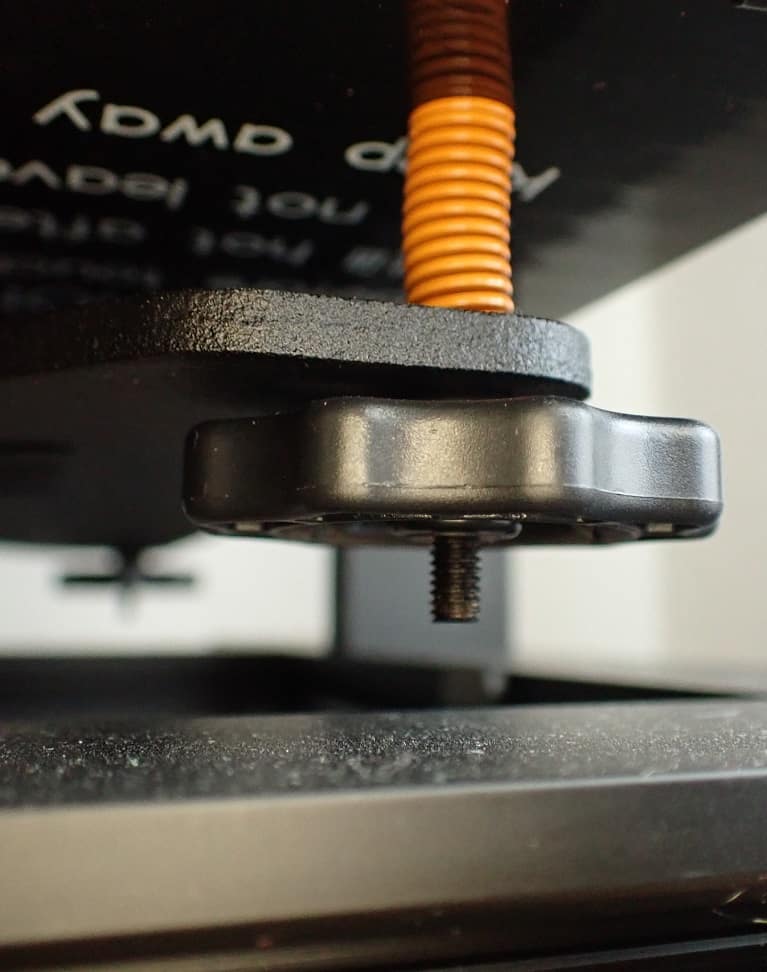
Wobbling Print Bed
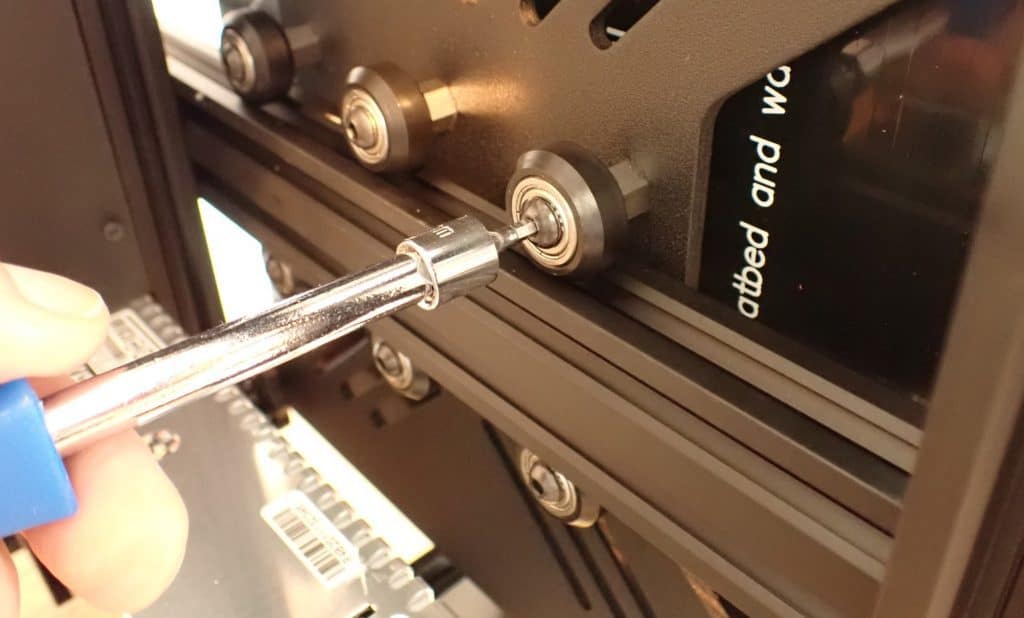
After mounting the Longer LK5 Pro, I had a rather rare problem: the print bed wobbled! This is of course bad for reliable operation…
But fortunately, this problem can be solved very easily by tightening the screws of the print bed’s guide wheels on the underside. This way, the print bed has less freedom and no longer wobbles.
Print Quality
Longer LK5 Pro
In terms of print quality, the Longer LK5 Pro is on par with other 3D printers in this price range. It has an accuracy of 0.1 mm with layer thicknesses between 0.1 and 0.4 mm. If you have chosen the right settings, you will hardly see the individual layers.
Cura Profile
From version 4.10 Cura also has profiles for the 3D printers from Longer. This way the software automatically knows how big the 3D printer is and where the coordinate system starts.
There are also preset accuracy modes that you can select. With these settings, you can get started right away and start your first prints.
Test Print
I used the most accurate of the preset settings for my test prints. The target is a layer thickness of 0.12 mm. The higher the accuracy is set, the longer the print also takes.
With a smaller layer thickness, the printhead must move over the same area more often to print the same volume as with a setting with thicker layers.
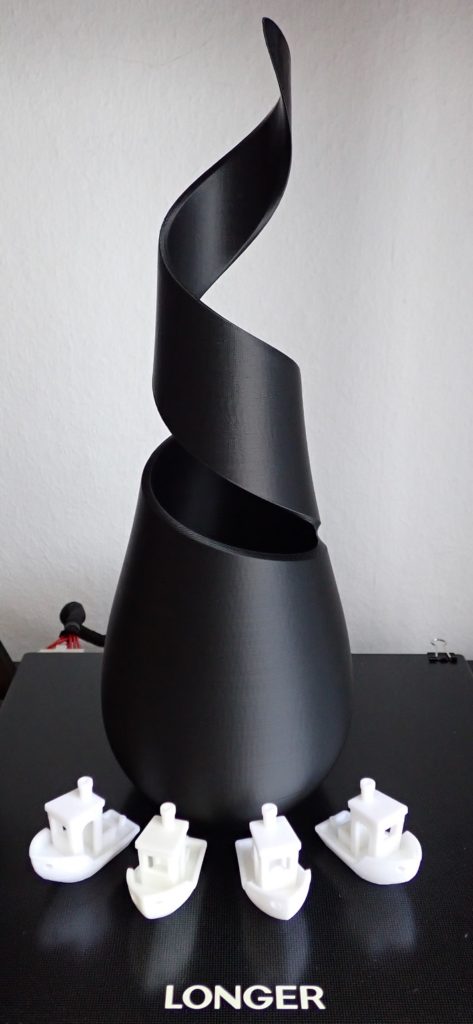
My first test print (model: Benchy) went smoothly:
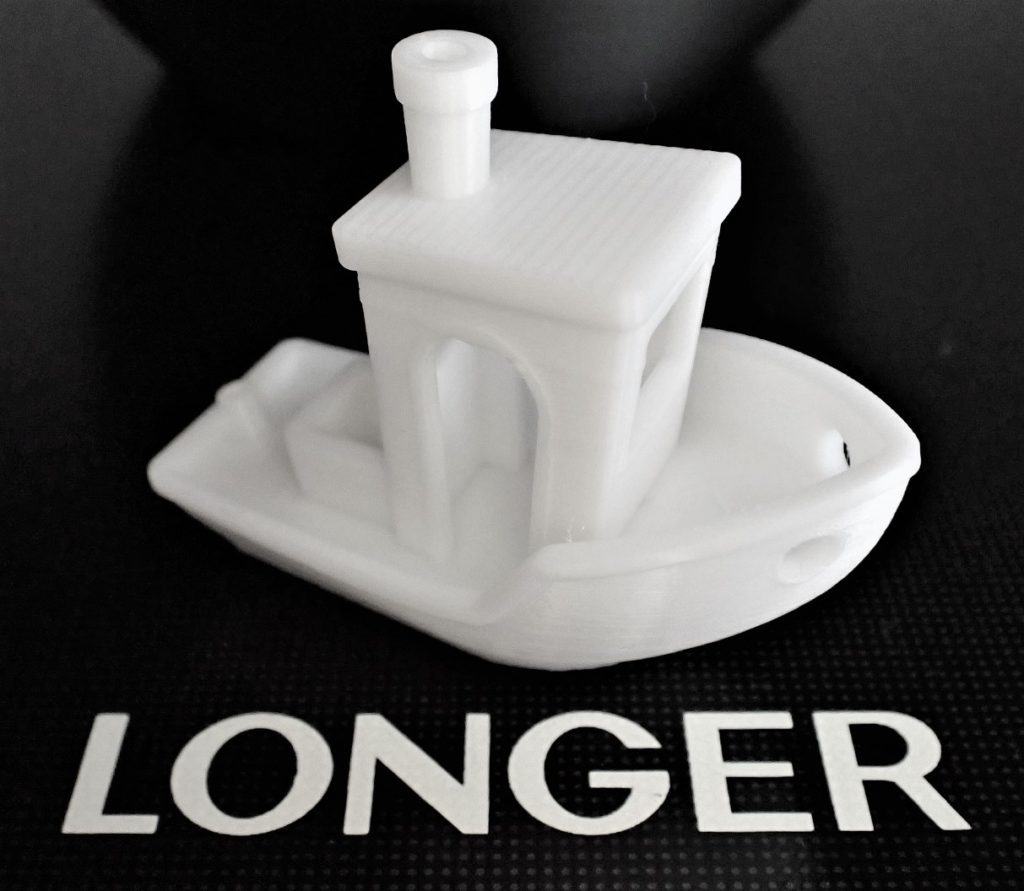
The quality of the surface and the accuracy of the details are impressive. I was very satisfied with the result. With a little fine-tuning, you can certainly get even more out of it!
I printed the test model a total of 4 times in a row. The goal was to test the repeatability and reliability of the 3D printer. Except for a few minor artifacts on the surface, probably due to too wet filament, the four models were virtually identical.
To test the size of the print volume, I completely utilized the Z-axis by printing a vase. The geometry of the vase is quite complex, but nevertheless, the print succeeded without problems.
The design of the LK5 Pro seems to do its job, preventing dimensional inaccuracies at high altitudes and apparently preventing vibrations as well.
Features
Longer LK5 Pro
The Longer LK5 Pro has some very pleasant and useful features. For example, there is the clear menu that can be operated via a colorful and modern touchscreen. The special design and the textured glass bed also stand out.
Triangle Design for Stability
Larger 3D printers often vibrate and wobble when printing. This can lead to various printing errors. Longer prevents such instabilities with a triangular design in the shape of the frame and 2 support struts.
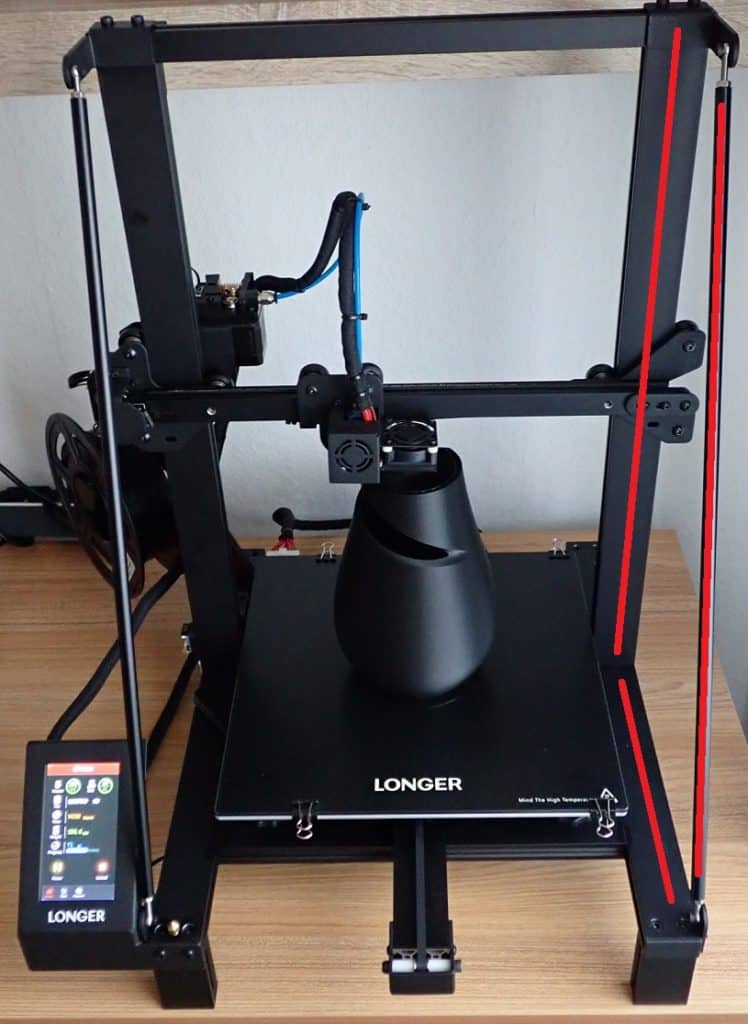
During my tests, I did not notice any particularly large vibrations, even at high printing speeds, and the construction makes a very stable impression.
The two support struts can be finely adjusted and fixed. After unpacking, I was still a bit skeptical, but after the printer was assembled, it became clear that the construction is very stable and the doubts were unjustified.
On the plus side of the design, the 3D printer stands on four feet and you can easily access the leveling screws.
Large Print Volume
The print volume is a whopping 300 x 300 x 400 mm! This means you can also print larger objects in one piece.
There are even larger print volumes on other 3D printers, but for this price range, it’s already very large.
Textured Glass Bed
The glass bed of the Longer LK5 Pro has a texture that increases adhesion. In none of my test prints did I have any problems with print bed adhesion and I was never forced to use aids such as Blue Tape.

Another advantage of this structure is that the printed object can be released very easily after cooling.
Longer also claims that the texturing makes the glass bed flatter. I can’t really understand this claim, but I couldn’t detect any unevenness on the print bed either.
Supported Print Bed Leveling
The print bed leveling is done manually on the Longer LK5 Pro. It is supported via the menu by pressing a button to move to 5 different locations on the print bed.
How well a 3D printer can be manually leveled really varies between different models. With very inexpensive DIY 3D printers, it can take several attempts until the print bed is really level.
With the Longer LK5 Pro, I only needed two passes before I was satisfied with the result.
Also, the setting stayed the same across all my test prints and I didn’t have to level the print bed again.
If you want, you can also install an optional BLTouch. Then you can automatically level the print bed. The sensor is installed on the side of the printhead housing.
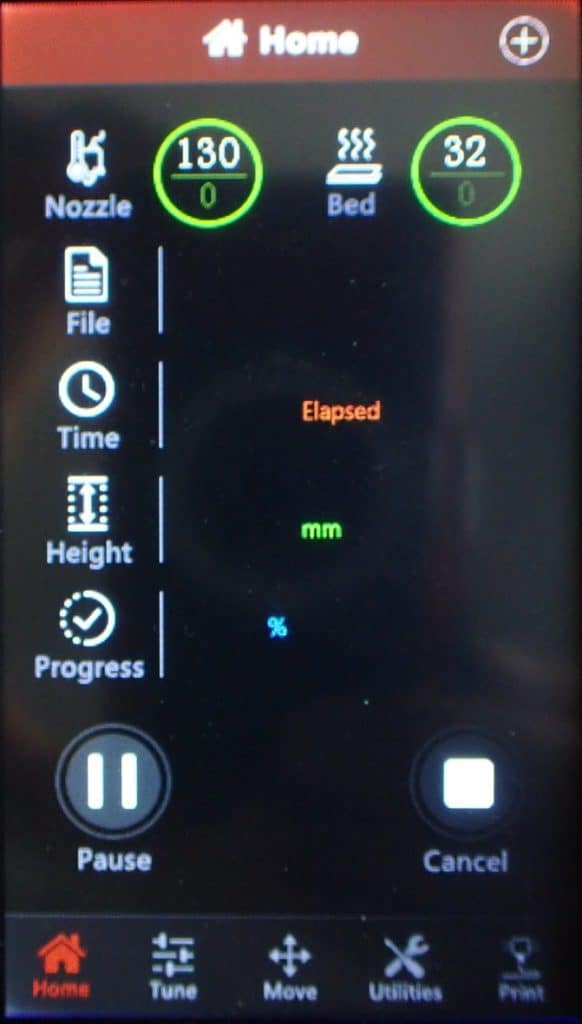
Operation via a color touchscreen is fortunately becoming more and more widespread among 3D printer manufacturers. In my opinion, this type of operation is much more pleasant than using buttons or arrow keys.
Like its predecessor, the LK4 Pro, the touchscreen of the LK5 Pro is very pleasant to use. It responds quickly to your inputs, has a sufficient resolution and colors.
With its size of 4.3 inches, you also don’t need a magnifying glass to see the text.
The menu navigation is so intuitively designed that you don’t need to read any instructions. Everything is presented in a self-explanatory way and you will find all important features just a few touches away.
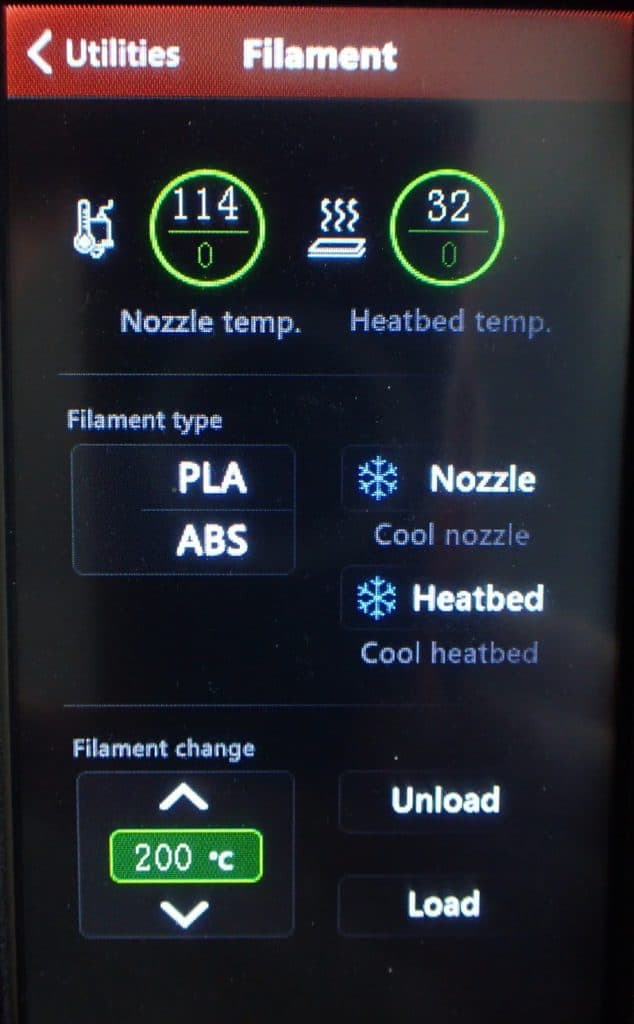
Teflon Tube for High Temperatures
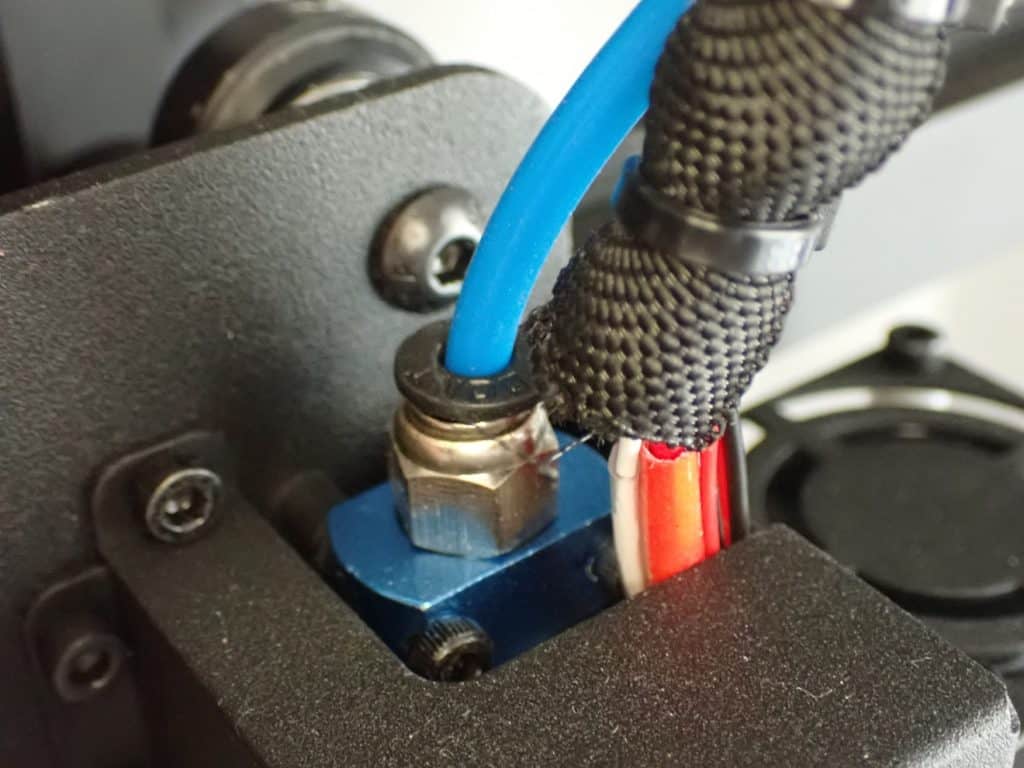
With Teflon or PTFE, you achieve higher temperatures and overall better printing results. The probability of the filament getting tangled or the nozzle clogging is also lower.
TMC2208 Stepper Motors
The built-in TMC2208 stepper motors from Trinamic struck me immediately when I started the first print. Many 3D printers are really very loud in operation, the Longer LK5 Pro but fortunately not at all!
Due to the built-in stepper motors, the 3D printer moves very quietly.
Easy Setup
As you read above, the 3D printer is really easy to assemble.
It is mostly pre-assembled and you only have to screw the individual parts together. The whole thing is done in about a few minutes and the included quick start guide clearly explains what you have to do.
All cables are also numbered so that no confusion can occur.
Technical Specifications
Longer LK5 Pro
DEVICE
- Technology: FDM
- Size: 580 x 540 x 663 mm
- Weight: 13,5 kg
- Touchscreen: 4.3-inch color touchscreen
- Structure: partially pre-assembled
- Power supply / voltage: 110V / 220V
PRINTING
- Print volume: 300 x 300 x 400 mm
- Extruder type: Bowden
- Print bed leveling: Manual
- Accuracy: 0.1 mm
- Layer thickness: 0.1-0.4 mm
- Nozzle quantity: 1
- Nozzle diameter: 0.4 mm
- Filament diameter: 1.75 mm
- Max. Print bed temperature: 100 °C
- Max. Nozzle temperature: 250 °C
- Print speed: max. 180 mm/s (recommended: 60-80 mm/s)
SOFTWARE
- Slicer: Cura, Repeater Host, Longer 3D Slicer
- File format: STL, OBJ, AMF, G-code
- Connectivity: MicroSD, USB Type-B
Disclosure: This website is the property of Martin Lütkemeyer and is operated by Martin Lütkemeyer. Martin Lütkemeyer is a member of the Amazon Services LLC and other Affiliate Programs. These are affiliate advertising programs designed to enable websites to earn advertising revenue through advertising and linking to Amazon.com and others. Links marked with * are affiliate links.
