
- Wet Filament: Prevention, Symptoms & Drying - July 18, 2024
- Sovol SV08 – Best PrusaSlicer Settings & Profile - June 26, 2024
- Sovol SV08 – Best Orca Slicer Settings & Profile - June 26, 2024
Disclosure: Links marked with * are Affiliate Links. I earn from qualifying purchases if you decide to make a purchase through these links – at no additional cost for you!
The Elegoo Neptune 4 Pro* is a significant improvement on its predecessor, the Neptune 3 Pro. It achieves very high printing speed due to a new cooling system and Klipper as firmware. Also, instead of the usual plastic wheels on the x and y axes, it has metal wheels and metal guide rails.
Who should buy the Elegoo Neptune 4 Pro?
The Neptune 4 Pro is a mid-sized FDM 3D printer that can reach incredibly high speeds of 250 mm/s by default and 500 mm/s maximum. It is also well suited for beginners due to the many features that also greatly simplify operation. However, the new guides for the x and y axes need to be cleaned and greased regularly to prevent damage to the printer.

The Neptune 4 Pro from Elegoo has multiple heating zones on the print bed and all-metal guide rails as an upgrade to the normal version.
Build Volume: 225 × 225 × 265 mm³
Speed: max. 500, normal 250 mm/s
Extruder: Direct Drive
Print Bed: Flexible PEI
Leveling: Automatic
Firmware: Klipper
Nozzle Temp.: max. 300 °C
Bed Temp.: max. 110 °C
Connectivity: USB, MicroSD, LAN
Pros:
✓ Klipper
✓ High print speed
✓ Touchscreen
✓ Good print bed adhesion
✓ Easy to use
✓ LED’s
✓ 2 heating zones on the print bed
Cons:
× Loud with layer fans on
× The guide rails need to be cleaned frequently.
Review Copy Disclosure
Elegoo provided me with the printer for testing. I did not promise Elegoo anything more than that. Money did not flow and my opinion of the printer was not influenced. Elegoo did not read this article until after it was published.
Table of Contents:
- 1 A brief overview of the Neptune 4 Pro
- 2 Packaging and scope of delivery of the Neptune 4 Pro
- 3 Here’s how to set up the Neptune 4 Pro
- 4 Print bed of the Neptune 4 Pro and leveling
- 5 Print volume of the Neptune 4 Pro
- 6 Klipper – the firmware of the Neptune 4 Pro
- 7 Layered cooling of the Neptune 4 Pro
- 8 Metal rails and wheels of the Neptune 4 Pro
- 9 Neptune 4 Pro touchscreen and menu
- 10 Filament Sensor of the Neptune 4 Pro
- 11 Stability of the z-axis of the Neptune 4 Pro
- 12 LEDs illuminate the Neptune 4 Pro
- 13 Dual-gear direct drive extruder of the Neptune 4 Pro
- 14 Slicers compatible with the Neptune 4 Pro
- 15 Test prints and calibration of the Neptune 4 Pro
- 16 Volume of the Neptune 4 Pro during printing
- 17 Print speed of the Neptune 4 Pro
- 18 Print quality of the Neptune 4 Pro (pictures of 3D prints)
- 19 Operating the Neptune 4 Pro & Ease of Use Features
- 20 Is the Neptune 4 Pro the right 3D printer for you?
- 21 Important accessories for an FDM 3D printer
A brief overview of the Neptune 4 Pro
The Neptune 4 Pro from Elegoo* is meant to continue and expand on the successful run of the Neptune 3 Pro. At first glance, it also looks almost identical, except for the large fan system on the x-axis and the modified guide rails on the x- and y-axes.
The big new feature is that it can print at very high speeds. Its predecessors were limited to 40 to 60 mm/s, otherwise printing errors would occur due to the vibrations in the print head. However, with Klipper as firmware, the vibrations in the print head can be compensated. This allows the print head to move much faster without causing print errors such as ringing or ghosting.
To ensure that the filament can also be extruded quickly enough and without errors, the hotend was optimized and a large fan system was mounted on the x-axis to cool the hot filament quickly.
With the interaction of Klipper as firmware, the efficient layer cooling and the improved hotend, the Neptune 4 Pro achieves print speeds of 250 mm/s by default and 500 mm/s maximum.
However, as you can imagine, the downside of having so many fans is that the 3D printer is relatively noisy. Numbers and a comparison with its predecessor can be found later in this article.
Although Klipper is used as firmware, the 3D printer’s menu on its screen is designed just like its predecessors. The advantage, however, is that you can connect the 3D printer to your network with a LAN cable and use a browser interface to operate and monitor the printer. For many users, this is a big plus and saves having to manually transfer data via a USB stick or microSD card.
One feature that I have seen on very few FDM 3D printers is that the print bed has two heating zones. When printing small objects, only the inner heating zone can be used to save energy.
TIP: Learn how to calibrate your 3D printer to get perfect results every time in my 3D printing course: FDM 3D Printing: The Comprehensive Course from A to Z
(The course teaches everything you need to know for FDM 3D printing in over 60 lessons. The course will get beginners up to my level in no time!)
My quick take on the Neptune 4 Pro:
My assessment of the basic Neptune 4 is that at least until the next version comes out, it will be one of the most popular, if not the most popular, entry level FDM 3D printer. In my review, I had absolutely no problems with it, only perfect print results and minimal calibration effort.
The additional features of the Neptune 4 Pro* sound interesting and for the most part, they are. However, I am not quite sure about the metal rails. I don’t quite see the advantage yet. Sure, the normal POM wheels, as they are also installed in the Neptune 4, wear out after a (long) time, but this has never been a big problem, at least with me.
For me, however, the metal rail on the y-axis and also somewhat on the x-axis of the Neptune 4 Pro disintegrated after a few hours of use. This led to several print defects that I will show you later on in this article. However, I have to say that this defect is probably my fault, as I tightened the wheels a bit after assembly because both the print bed and print head were wobbling. Also, I did not grease the rails, as I was advised to do afterward by Elegoo.
I use this 3D printer grease* from now on.
Packaging and scope of delivery of the Neptune 4 Pro
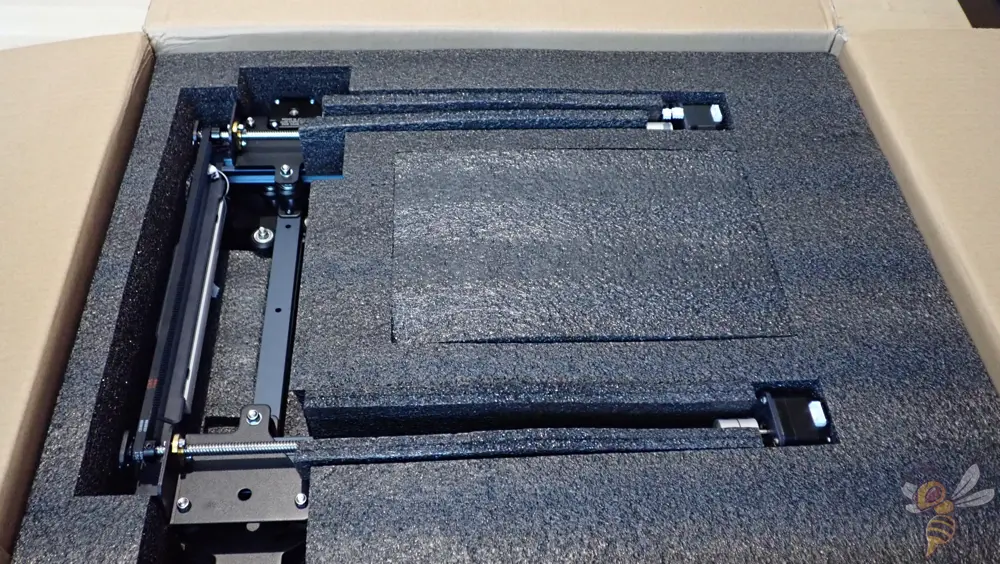
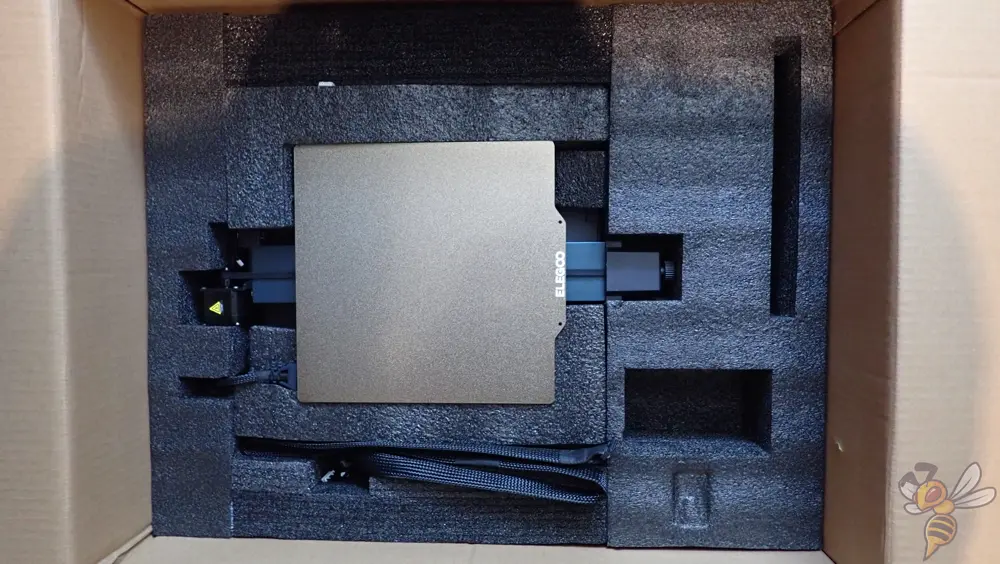
The individual components of the Neptune 4 Pro are well packed and protected from transport damage. The 3D printer is partially pre-assembled and comes with all the necessary tools for assembly.
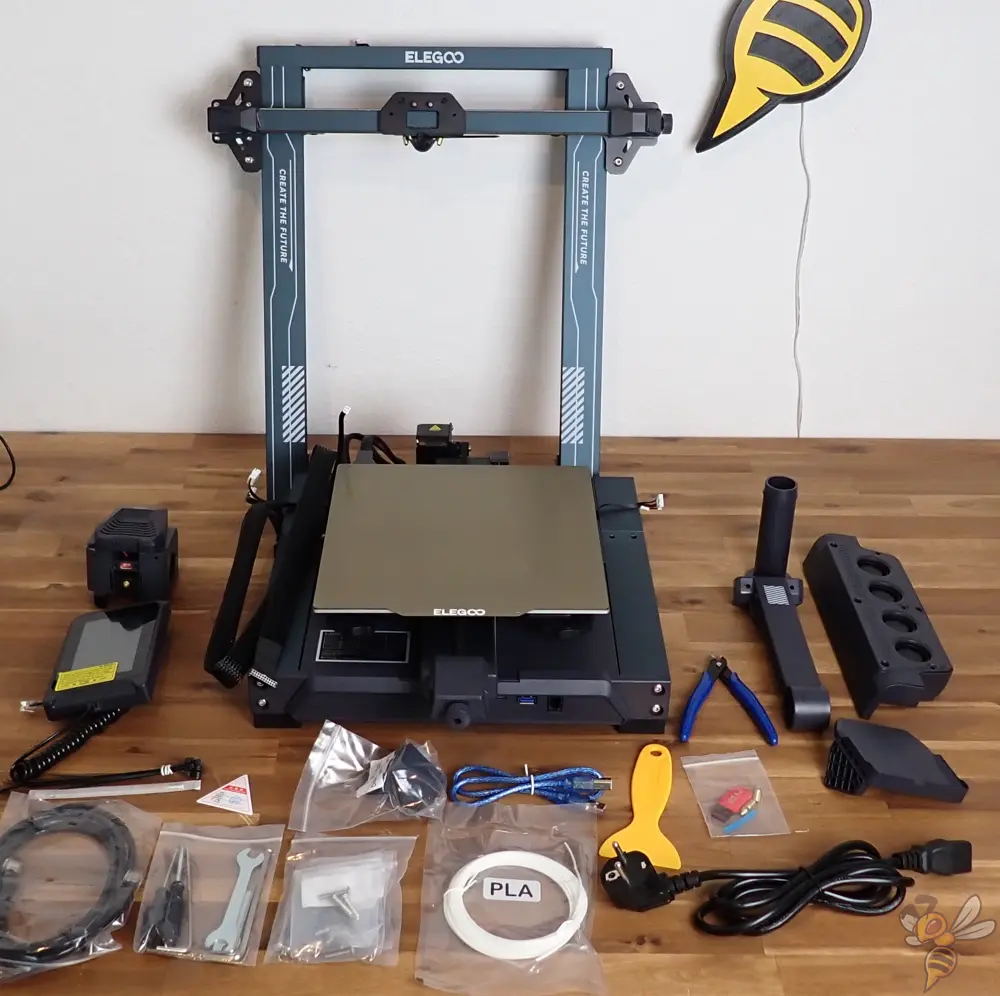
In addition to the individual modules of the 3D printer, the scope of delivery also includes the most important tools for assembly and operation. These include a side cutter for filament, a plastic spatula to lever stubborn objects off the print bed and a fine needle to clean the nozzle.
Very convenient is that the scope of delivery also includes a USB cable and a LAN cable each. This allows you to connect the Neptune 4 Pro directly to your network or computer.
While there is some PLA filament included, this is only a small sample and is just enough for a test print. So you should definitely get some more filament once you’ve decided on a 3D printer. For starters, I recommend PLA filament, I like to use this one*.
Here’s how to set up the Neptune 4 Pro
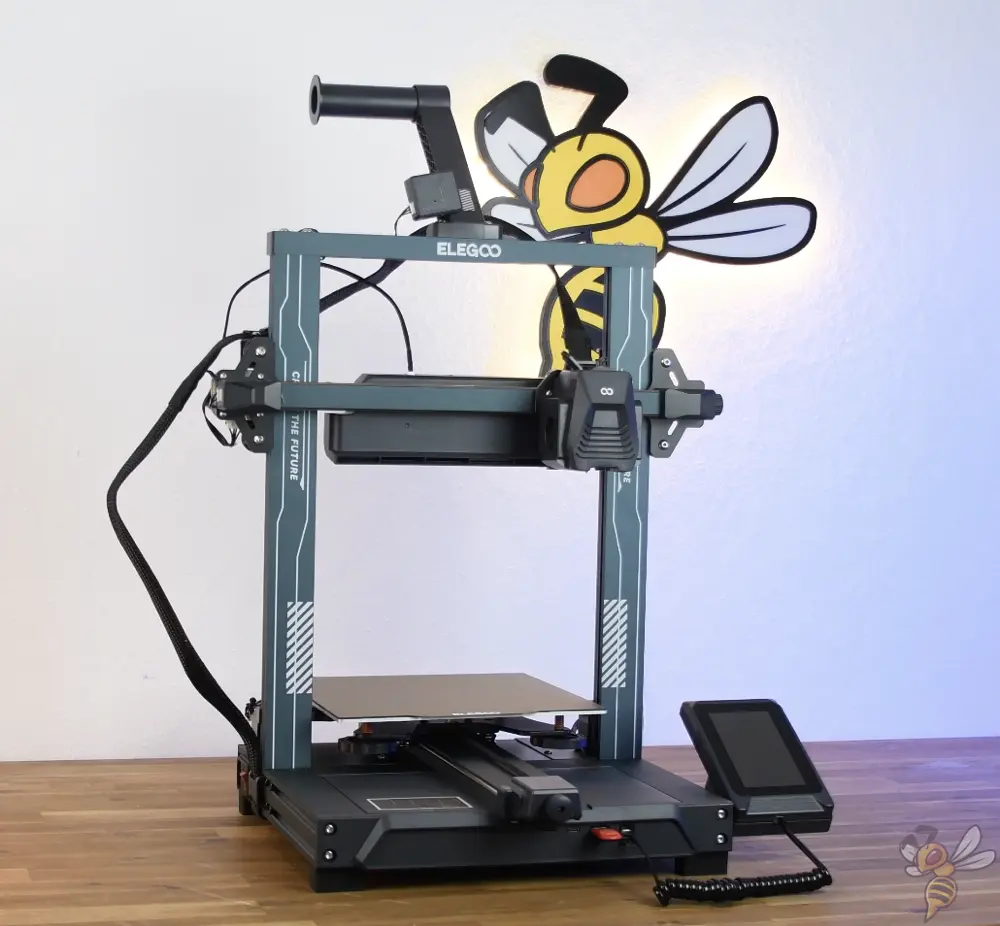
The Neptune 4 Pro is quick to set up, it took me 15 minutes. Basically, all you need to do is mount the large frame to the 3D printer base. After that you can already mount the extruder and the fan system to the x-axis, screw on the touchscreen and connect all the cables. Then the Neptune 4 Pro is ready for use and can be leveled.
One important assembly step that I was not aware of is greasing the metal rails. Otherwise, there will be abrasion of the metal rails, which will damage the printer and produce poor results.
Print bed of the Neptune 4 Pro and leveling
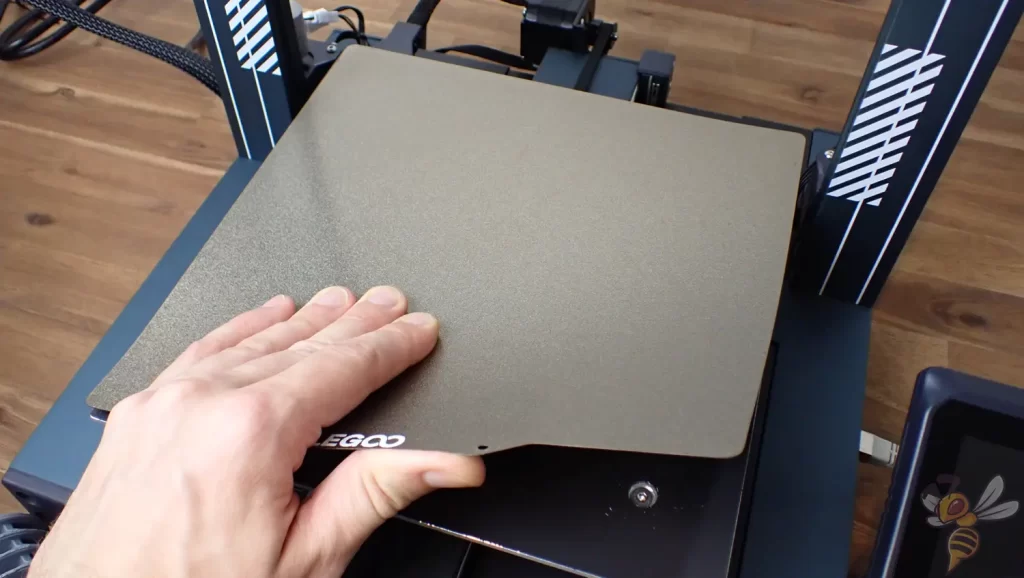
The print bed has a size of 225 × 225 mm. It is made of a flexible spring steel and is supported on a magnetic print plate. So you can bend it after printing and release your objects from it easily.
The print bed is equipped with a PEI coating, which is ideal for most filaments. The coating creates a rough surface that provides plenty of surface area for the hot filament. But the underside of your object won’t be absolutely smooth. For that, you can simply turn the print bed over and print on the smooth side.
The adhesion to the PEI coating is so good that you should never have problems with the print bed adhesion. If you do, you should take a look at this guide, where I have described the simplest solutions to increase adhesion: 3D Print Not Sticking to the Bed: How to Fix it Step-by-Step
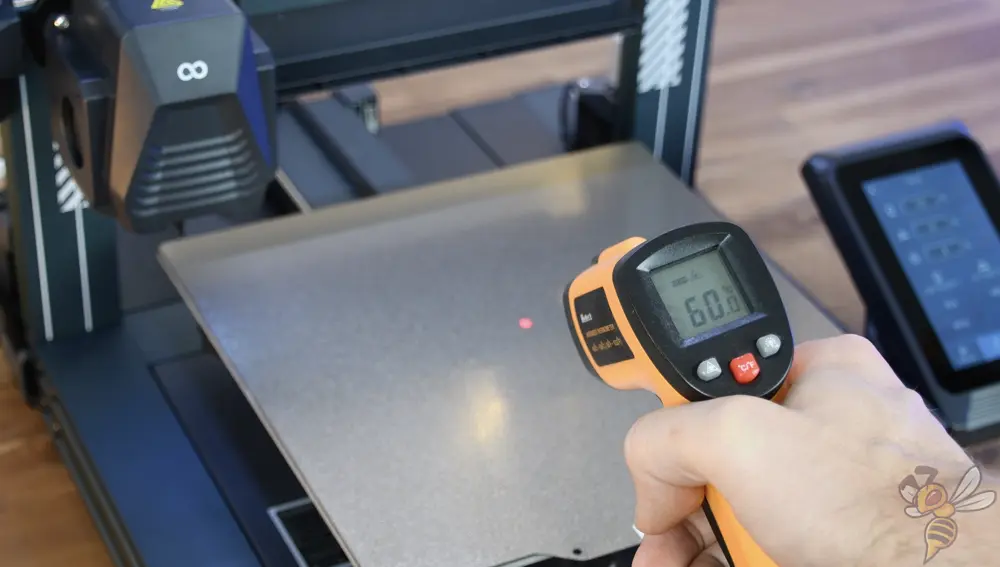
Unlike the basic version, the Neptune 4 Pro gives you the option to heat only the center of the print bed to save energy. In my eyes, this is a great feature, especially with energy prices getting more and more expensive.
However, either I overlooked the settings in the 3D printer’s menu, or it is only possible to use this feature via Klipper. There, you can set the temperatures of the two heating zones separately.
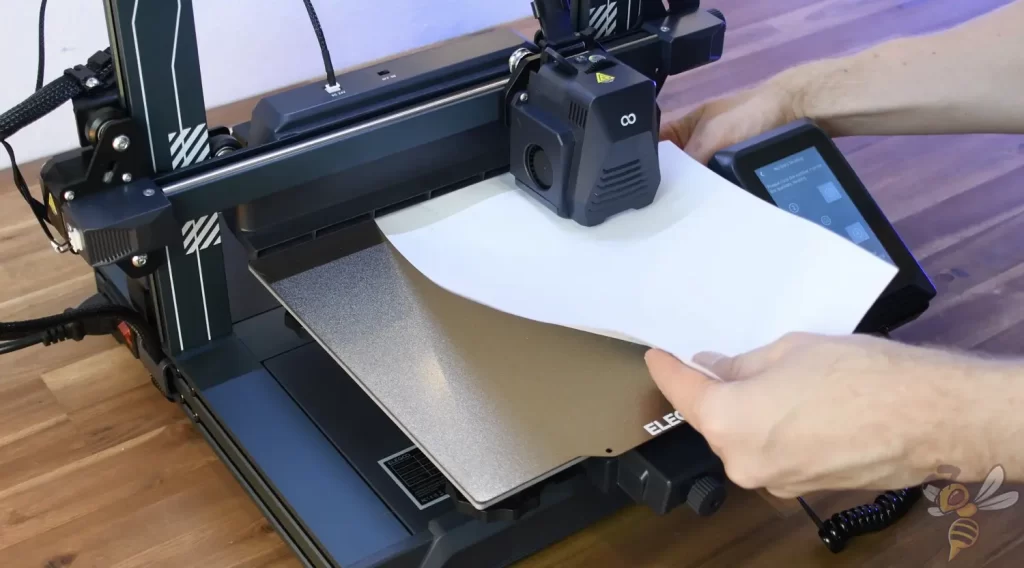
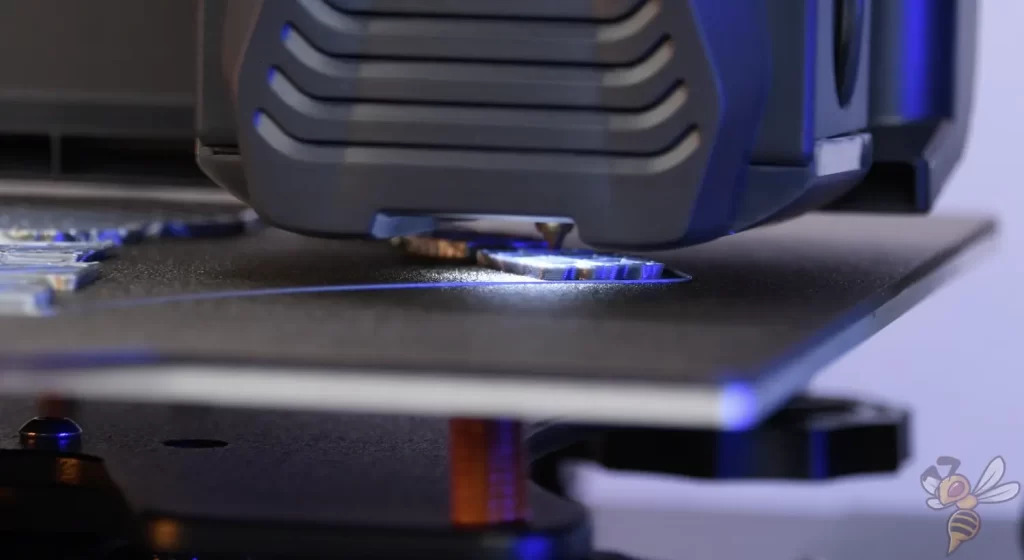
The leveling of the Neptune 4 Pro is divided into a manual rough leveling and a fine automatic leveling. This feature is particularly interesting for beginners, as fewer errors occur. But also for advanced users, this feature saves a lot of time.
For rough manual leveling, there are four screws under the print bed, which you can use to adjust the inclination of the print bed. Manual leveling is also supported via the menu. You can press a button to move the print head to the four corners to adjust the distance between the nozzle and the print bed.
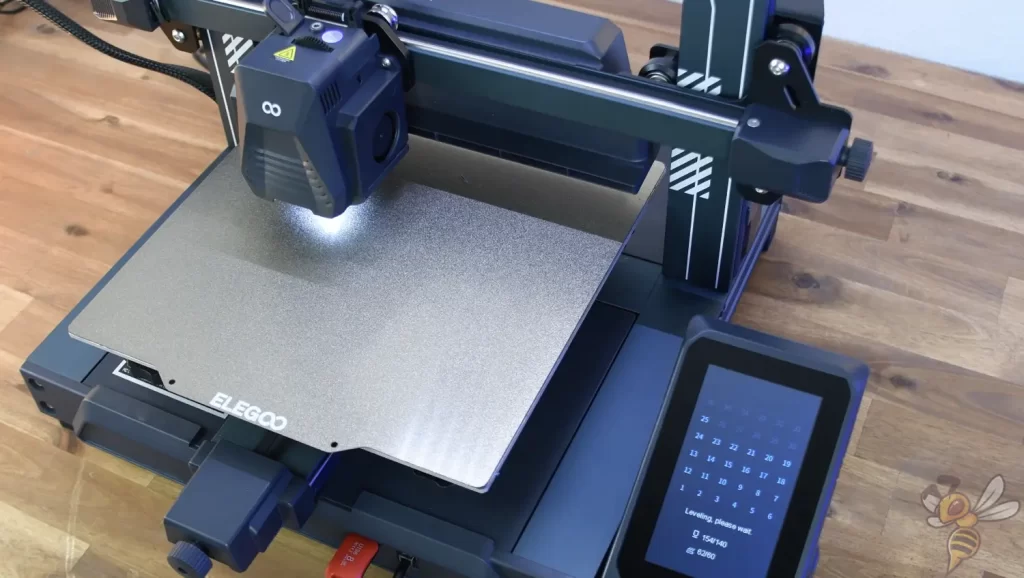
Then you let the 3D printer perform the automatic print bed leveling. In this process, the print head automatically moves to several locations on the print bed, where the sensor in the print head measures the distance to the print bed in each case.
From the data obtained from the automatic print bed leveling, the tilt is dynamically compensated for during printing.
During my test of the Neptune 4 Pro, I only had to level the print bed once. Only when I changed its location, I re-leveled it automatically to compensate for any changes in tilt due to the new location.
Print volume of the Neptune 4 Pro
The print volume of the Neptune 4 Pro is 225 × 225 × 265 mm³. With this print volume, you can print most projects in one job. Only larger objects, such as those that appear in cosplay, would have to be divided into several smaller objects and printed one after the other.
For many users, this print volume will be absolutely sufficient. However, if you want to use your 3D printer to print larger objects in one piece or many smaller ones at once, you can wait for the Plus or Max version of the Neptune 4 series. At least with the Neptune 3 series, these variants were much larger.
Klipper – the firmware of the Neptune 4 Pro
Klipper as firmware offers many advantages. However, one of the most important for the Neptune 4 Pro is the so-called Input Shaping. This compensates for the vibrations of the print head by calculation and adjusts the accelerations so that the print quality does not suffer. This ingenious feature makes it possible to print error-free at very high print speeds.
However, this feature and the associated print speeds mean that other aspects of the mechanics and also the software have to follow suit. Among other things, the performance of the hotend is essential. When the filament is quickly forced through the extruder to the hot nozzle where it is extruded, the control of the heating element must be very precise and allow for high flow speeds.
The feature that improves the high extrusion speeds of even normal filament is called Pressure Advance. This feature ensures that even at high printing speeds with many extrusion and retraction movements, there are no blockages in the hotend. As a result, printing errors such as stringing or blobs occur much less frequently.
After these two features, however, there are also a few mechanical prerequisites that support the high print speeds and even make them possible in the first place. These include, in particular, the new fan system.
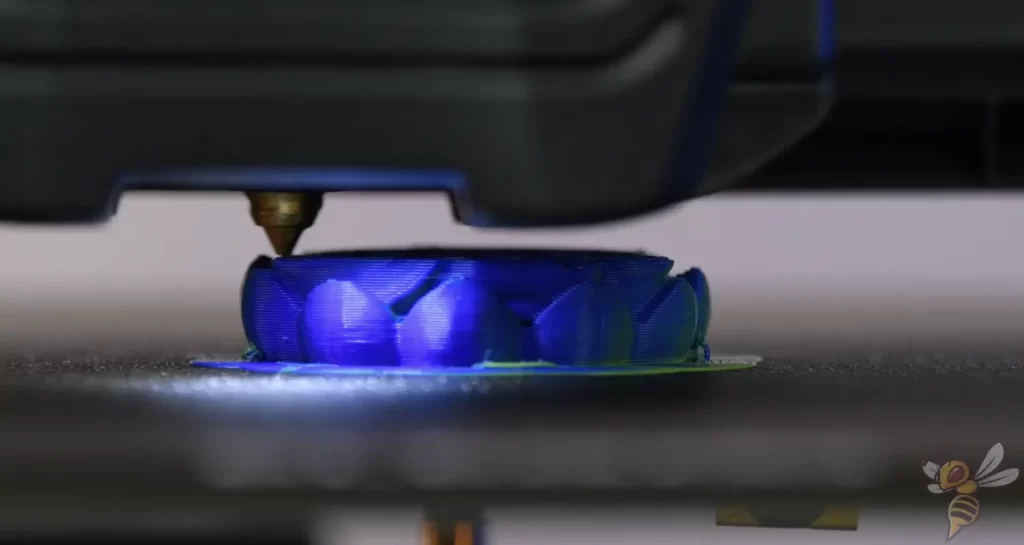
Layered cooling of the Neptune 4 Pro

Due to the powerful hotend and the optimization by Klipper, the hot filament is extruded very fast. So that it is not dragged away by the fast print head and the next layer does not have to be printed on a still hot and soft layer, a powerful system of fans was mounted on the x-axis.
Four fans are integrated into this fan system, and all of their power is directed to the layer that has just been printed. This cools the filament quickly, which also allows the nozzle to print new hot filament directly onto it shortly afterward.
If this fan system did not exist, various printing errors would occur. The fan system can be activated and deactivated via a switch.
At the print speeds of previous FDM 3D printers, the fans in the print head and the ambient air were sufficient to solidify the filament quickly enough. But now that the print head is moving very fast, the fans integrated there are no longer sufficient.
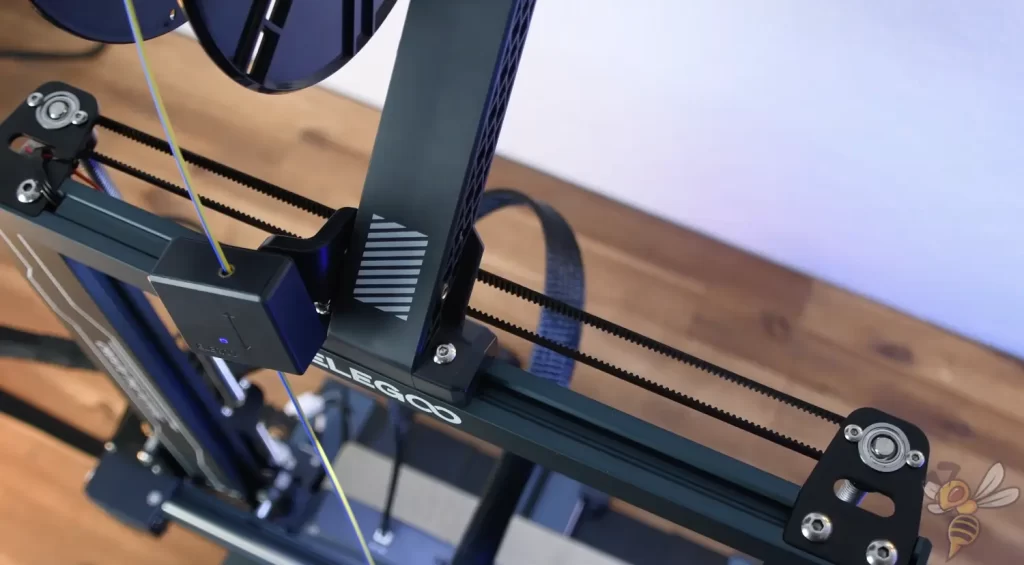
Metal rails and wheels of the Neptune 4 Pro
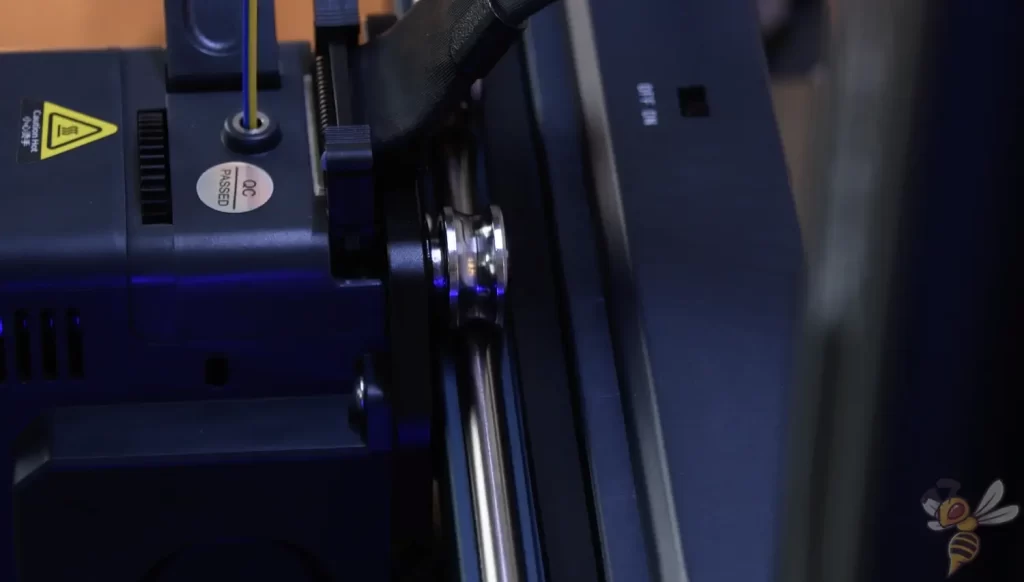
Normally, all three axes of an FDM 3D printer are equipped with aluminum profiles in which POM wheels run in a V-profile. The principle has not changed much over time, as it is reliable and relatively low-wear.
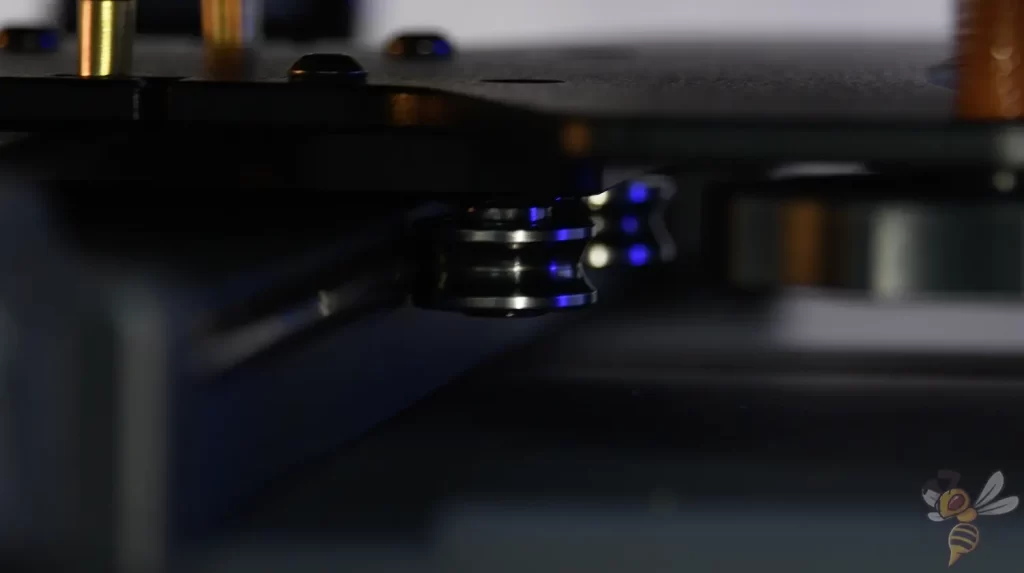
To further improve performance at high print speeds, Elegoo replaced the traditional POM wheels with metal wheels and a matching metal rail.
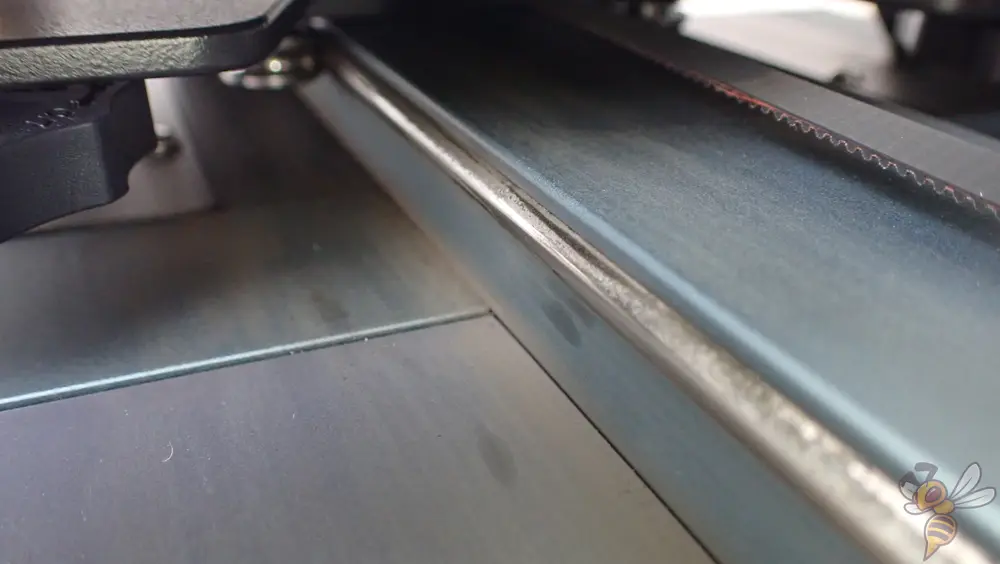
I had no problems with the x-axis on my unit, but I did have problems with the y-axis. The y-axis rails rubbed off after the first few prints, leaving a fine dust behind. Apparently, the rails need to be greased. This was not in the instruction manual that was available to me. After a brief consultation with Elegoo, I was confirmed that this assembly step would be better communicated via the instruction manual in the future.

The dust caused the print bed to move irregularly. This irregular movement directly affected the print object and caused printing errors. However, it was mainly the deposited dust that caused the errors. After I removed the dust and greased the rails, the print result was almost perfect again.

My conclusion on the new metal rails and wheels is that they may improve performance eventually, but they are much more maintenance intensive and require more care than the traditional POM wheels. However, as long as you grease them regularly, they are superior to the basic POM wheels in the long run.
When it comes to the touchscreen and menu, nothing has changed from its predecessor. There isn’t much to change here either, as the touchscreen responds well to inputs and the menu is simple and intuitively designed.
One possible improvement would be to be able to start the PID tuning via the menu. For experienced users, it is of course no problem to start the PID tuning via the Klipper console, but beginners often do not even know that there is such a calibration or how to start it. Only on very few 3D printers have I discovered this feature in the menu. How you perform this calibration, and what it’s for, I’ll explain later in the calibration of the Neptune 4 Pro.
Filament Sensor of the Neptune 4 Pro
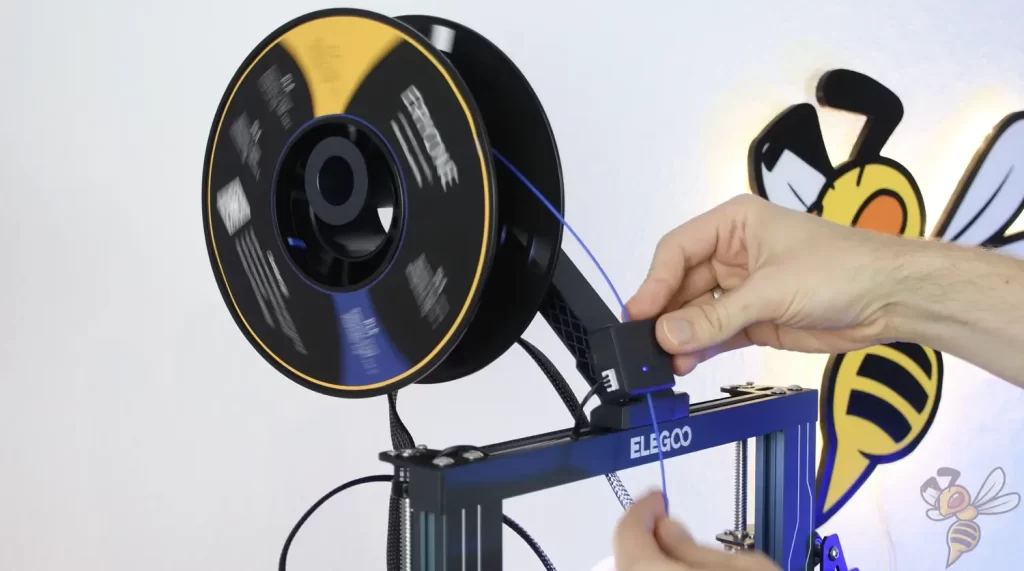
The filament sensor sits directly under the filament holder and detects if there is any filament left. As soon as the filament is used up or broken on the spool, printing is automatically paused. You can just load new filament and continue printing. Without this filament sensor, the printer would simply continue printing. You would then have to repeat the print completely.
To keep the weight of the print head as light as possible, the filament sensor does not sit directly in front of the extruder, but hangs freely under the filament holder. At first glance, this may seem a bit odd, but it makes technical sense and works flawlessly. This type of mounting is now the standard for many other 3D printers.
Stability of the z-axis of the Neptune 4 Pro
The z-axis of the Neptune 4 Pro has two stepper motors and synchronization via a toothed belt at the top of the z-axis. This ensures that the x-axis always moves smoothly and does not lag on one side.
This feature directly improves print quality. For 3D printers with a medium print volume, such as the Neptune 4 Pro, a dual z-axis is generally not essential. However, since a fan system is installed on the x-axis, the double z-axis is even mandatory here. Otherwise, one side of the z-axis, which would not be motorized, would always lag a bit behind with the movement.
LEDs illuminate the Neptune 4 Pro
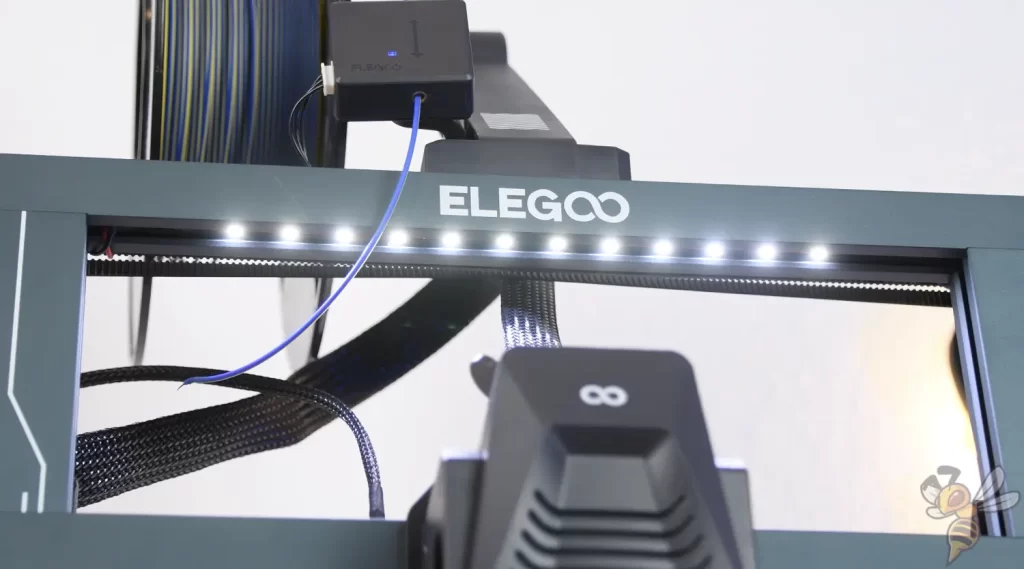
On the top frame of the Neptune 4 Pro, there is an LED bar that illuminates the entire build area. This way, even in a dark room, you can quickly see whether your print is going as planned or not.
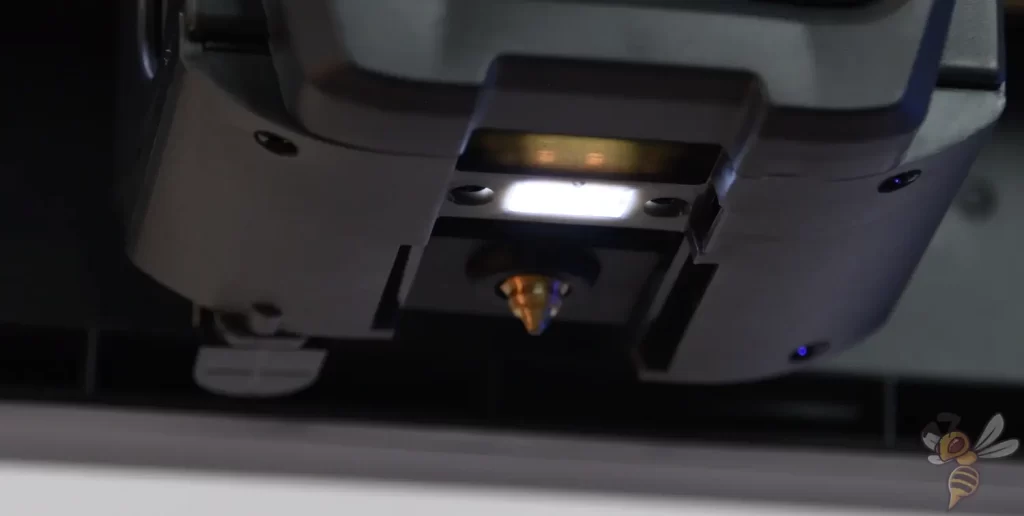
However, I think the small LED installed right next to the nozzle is much better. It illuminates the area under the print head, so you can quickly see if there are print errors or not.
You can turn both LEDs on and off separately via the menu. This is also possible during printing.
Dual-gear direct drive extruder of the Neptune 4 Pro

With the direct drive extruder, you can process all common filaments and also flexible filaments flawlessly. Unlike a Bowden extruder, this extruder sits directly above the hotend, making it much less likely to clog with flexible filament.
Another advantage of this extruder is that loading filament is very smooth. With some extruders from other manufacturers, it is often the case that you have to cut the filament at a certain angle and thread it into the extruder with a lot of care so that it doesn’t get stuck on an edge inside. With the Neptune 4 Pro’s extruder, it doesn’t really matter how you push the filament in, it can’t get stuck. This is very user-friendly, especially for beginners.
The precision of the extruder is also excellent, as you will see later in the print results.
Slicers compatible with the Neptune 4 Pro

The Neptune 4 Pro is compatible with all major slicers for FDM 3D printers. I’ve been running it with the Cura clone from Elegoo.
The advantage of the Cura clone currently is that they already have pre-made standard profiles for the Neptune 4 Pro. Cura usually needs a few weeks or even months to add suitable standard profiles for new 3D printers. But if you still want to use Cura because there might be more up-to-date features, you can simply copy the settings from Elegoo Cura and create a new profile in Cura.
I have also used the Neptune 4 Pro with Cura and share my calibrated Cura settings in this article: Elegoo Neptune 4 Pro | Cura Settings – Guide & List
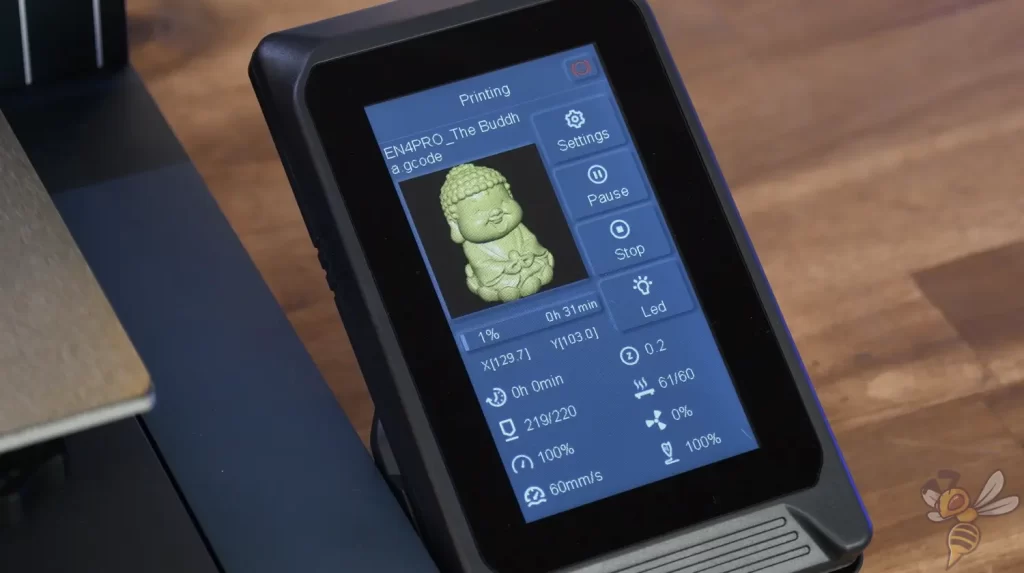
Test prints and calibration of the Neptune 4 Pro
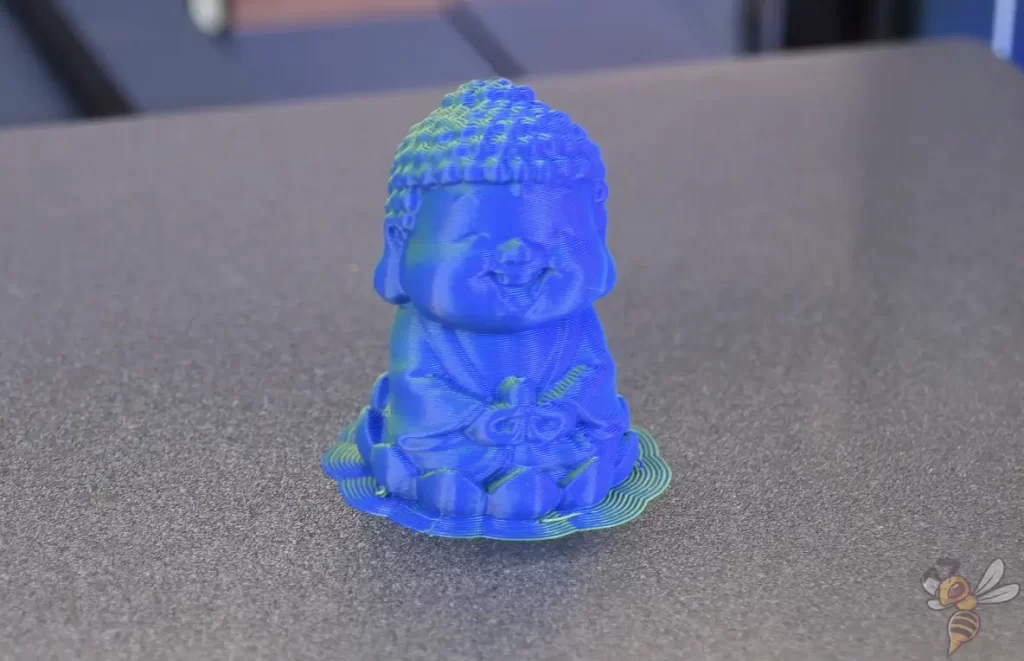
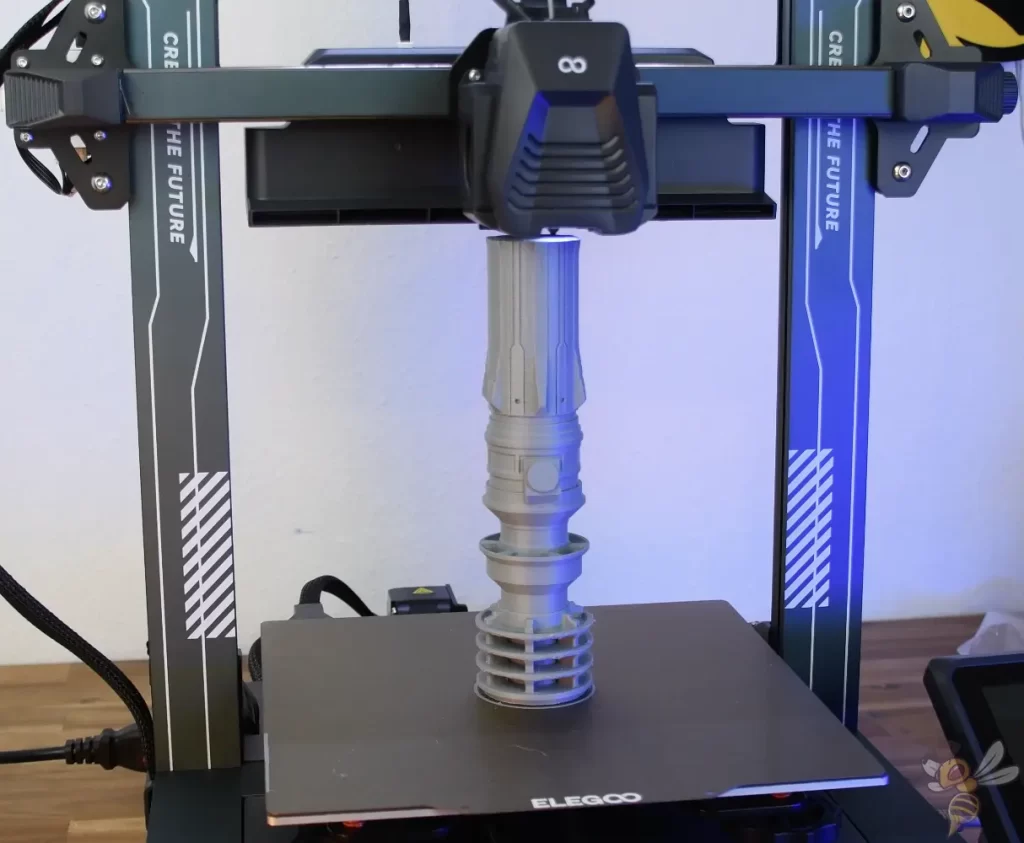
With most 3D printers, there is a ready-made G-code file on the supplied disk that you can print directly. I did that, of course, to check if I did anything wrong during assembly. The small Buddha was printed perfectly and I was already thrilled with the high printing speed during this first print.
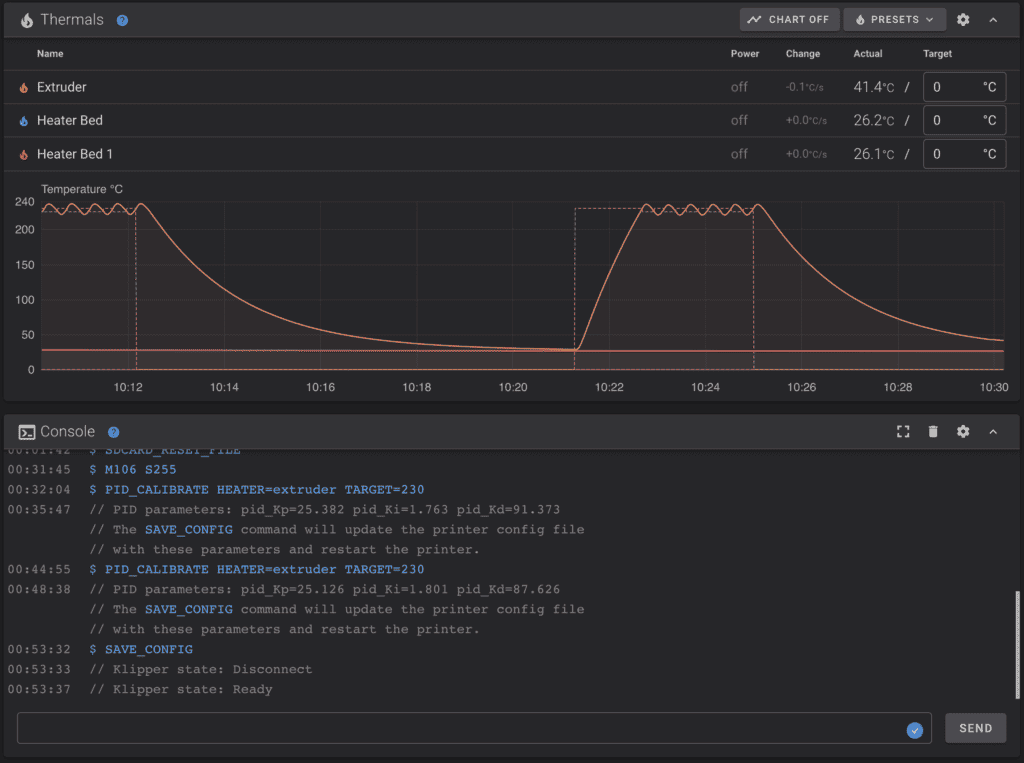
After that, I did the most important calibrations. After calibrating the print temperature and retraction, I did some PID tuning for the extruder. Using the console in the Klipper browser interface, there are a few simple commands you can use to start this calibration.
PID Tuning runs multiple cycles of heating and cooling to analyze the heating behavior. This allows the 3D printer to better maintain the temperature at the desired target temperature, improving print quality.
If you would like to perform PID Tuning on your Neptune 4 Pro as well, here are the commands to do so:
- TURN_OFF_HEATERS: Ideally, you start the PID tuning from room temperature. With this command, you turn off all heaters.
- M106 S255: With this command, you activate the fans and set them to 100%. This simulates the printing environment for PLA. For PETG or ABS, where you need less cooling, you have to adjust the value accordingly.
- PID_CALIBRATE HEATER=extruder TARGET=230: This command starts the PID tuning for the extruder with a target temperature of 230 °C.
- SAVE_CONFIG: After PID tuning, Klipper will spit out the PID parameters that you can save with this command.
Volume of the Neptune 4 Pro during printing
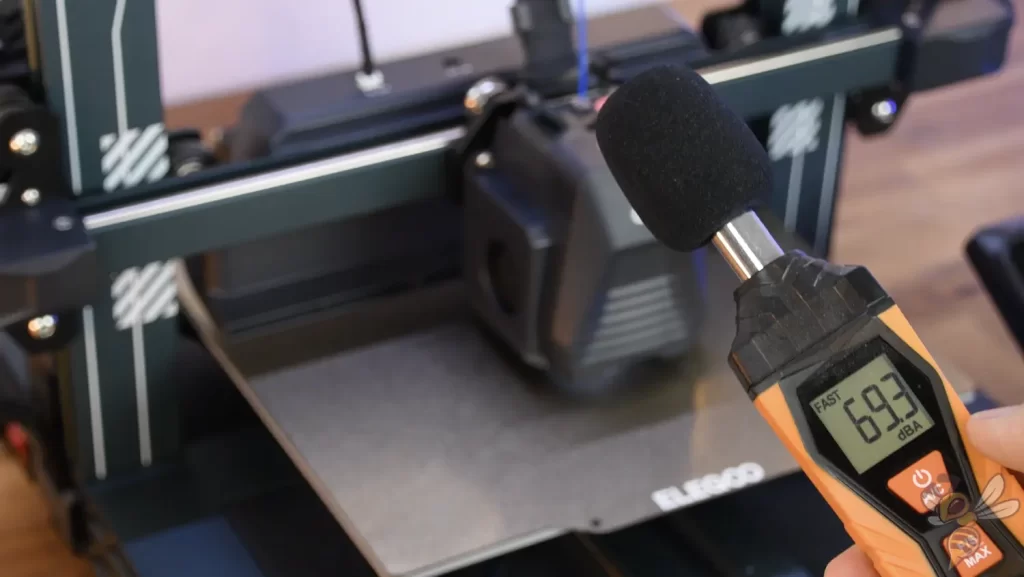
One of the few drawbacks of the Neptune 4 Pro is that the x-axis layer cooling is very loud. Noise levels over 60 decibels and peaks up to 70 decibels can easily occur. Without the layer cooling, however, it is very quiet, just like its predecessor, and comes in at around 35 decibels, which is equivalent to quiet whispers or rustling leaves.
Print speed of the Neptune 4 Pro
The biggest improvement of the Neptune 4 Pro is, of course, that it can reach very high print speeds of 250 mm/s to 500 mm/s. In my test, I mainly printed at 250 mm/s with regular PLA filament.
You can only reach the maximum 500 mm/s with special filament that has a higher flow rate. Elegoo will soon release a suitable filament, Creality already has the Hyper PLA filament* for it. This makes it easy to print error-free, even at extremely high speeds. With normal filament, you have to do a very precise calibration to reach such speeds.
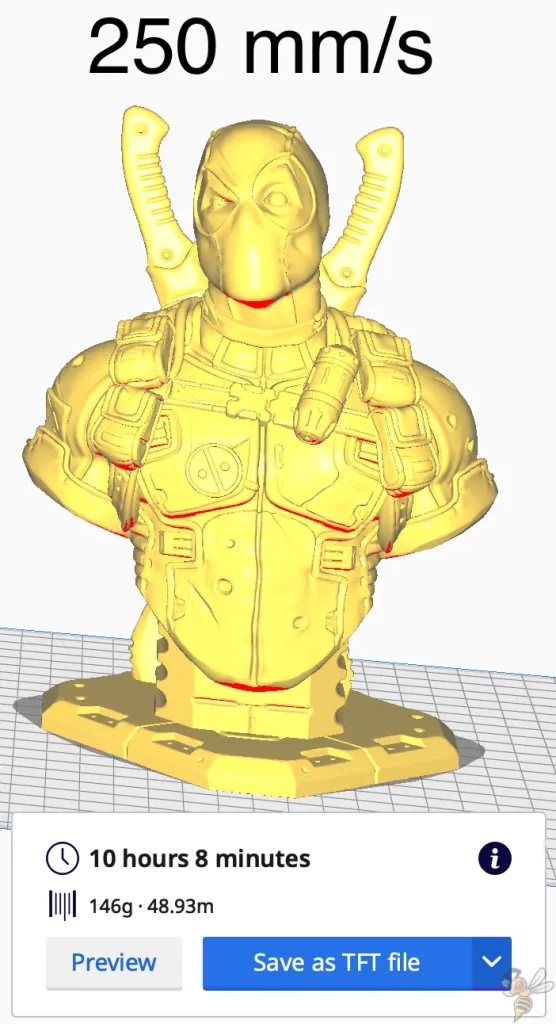
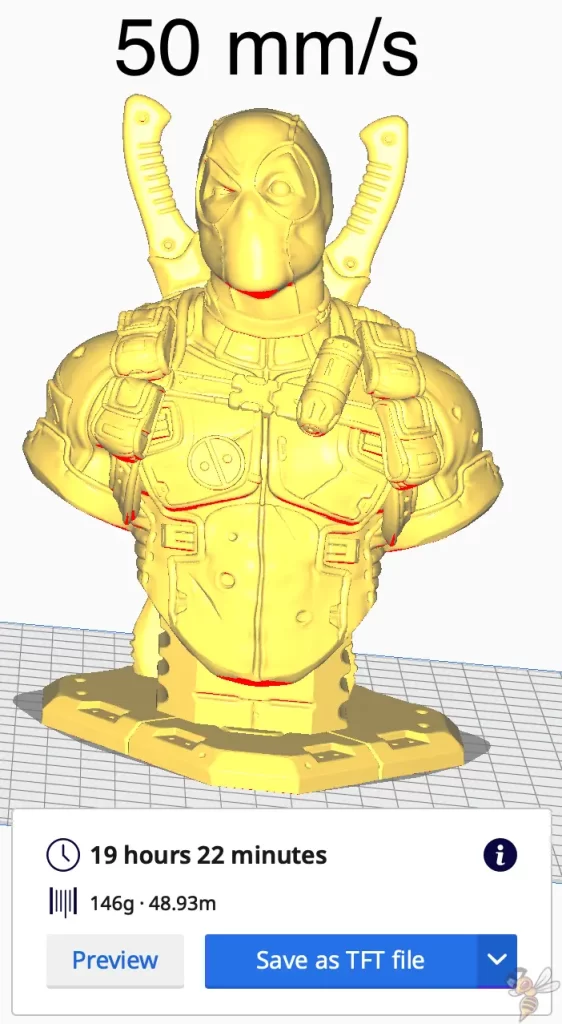
To make clear the difference between the high print speeds of the Neptune 4 Pro and standard FDM 3D printers, I sliced the same object once at 250 mm/s and once at 50 mm/s.
- 250 mm/s = 10h 8m
- 50 mm/s = 19h 22m
Although the print speed is five times that of normal FDM 3D printers, the print time is not five times less. The total print time depends on many settings in the slicer:
- Acceleration limits of the print head
- Minimum layer duration
- Ratio of infill to outer and inner walls
- etc.
But as you can see in the two pictures above, the print duration is still much shorter, almost twice as short, with the high print speeds of the Neptune 4 Pro. And in doing so, I only adjusted the global print speed and did not adjust the print head acceleration limits and other values to default values from other 3D printers.
Basically, the Neptune 4 Pro prints as fast as if you were running two to three other 3D printers at the same time.
Print quality of the Neptune 4 Pro (pictures of 3D prints)
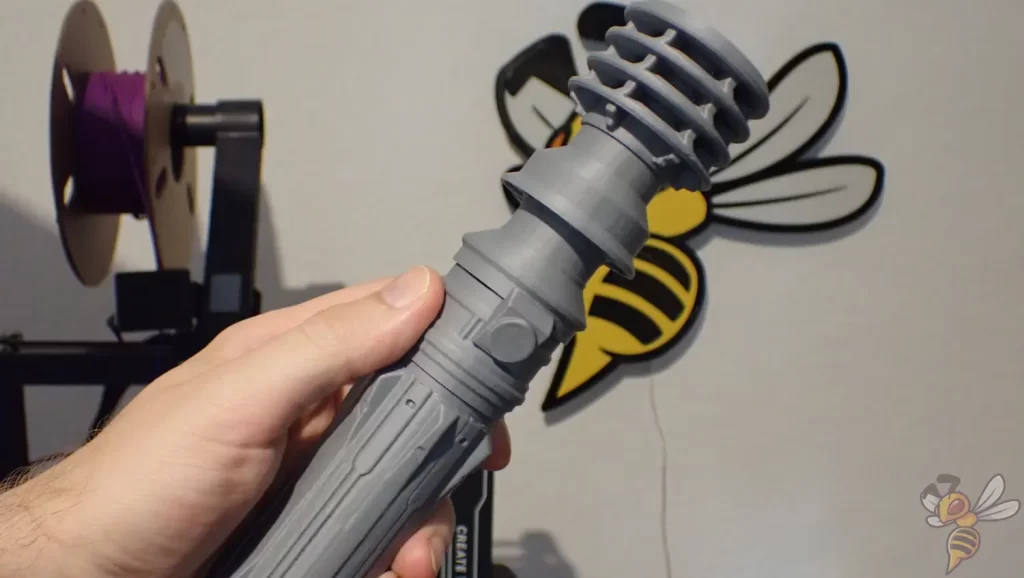
Once I had my experience with the y-axis and established regular maintenance of that axis, I tested the print quality on a few other complex objects.
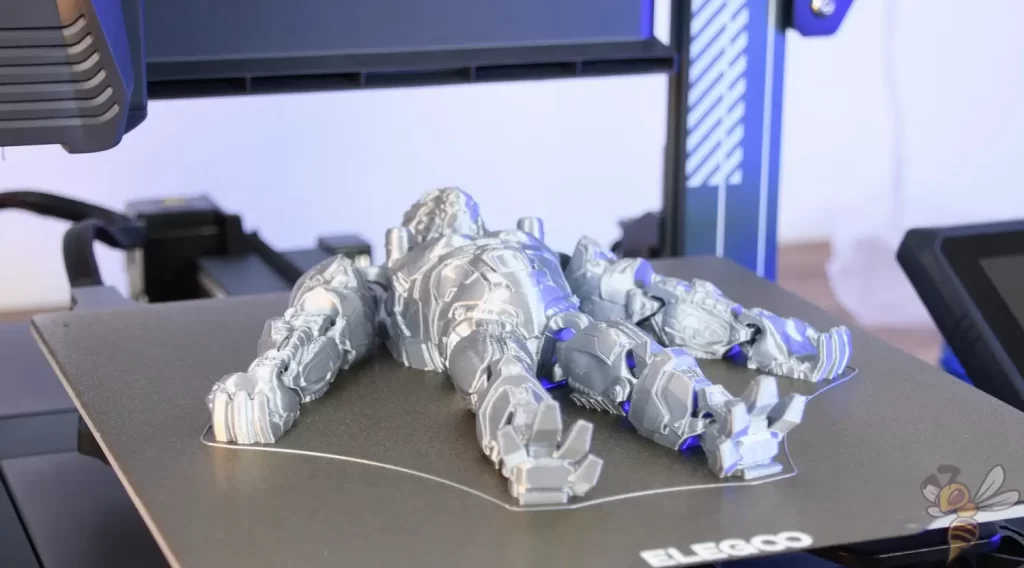
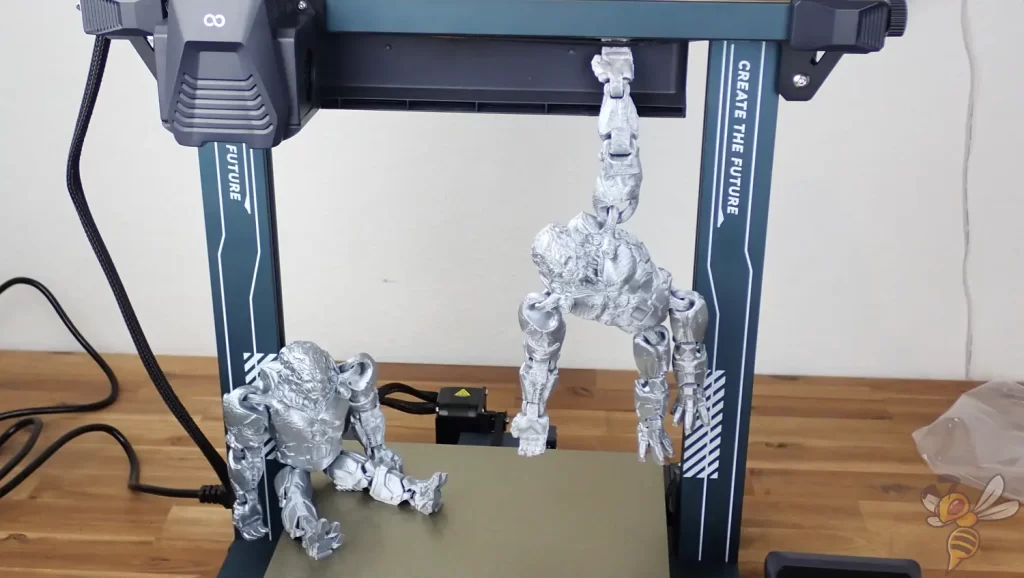
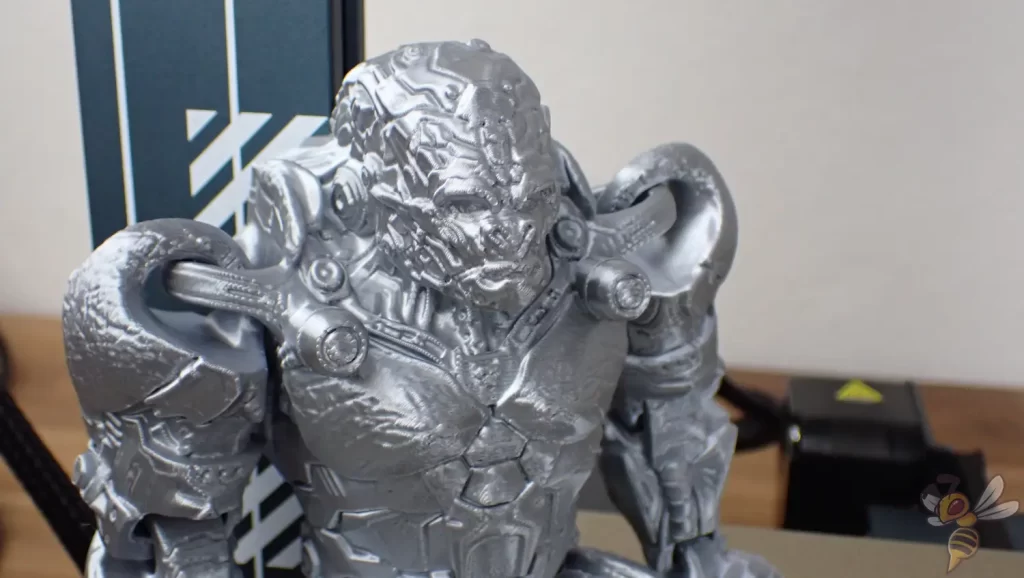
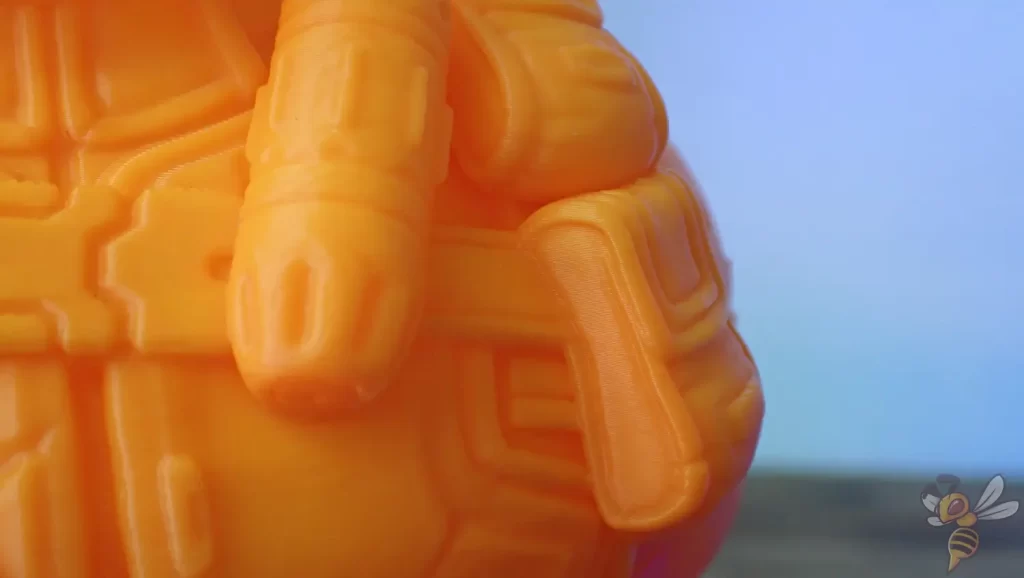
I printed the Optimus Primal in two different qualities, once with a layer height of 0.12 mm and once with 0.2 mm (here is the link to the file).
Print settings of the Optimus Primal (0.12 mm):
- Layer height: 0.12 mm
- Line width: 0.3 mm
- Print speed: 250 m/s
- Infill density: 15%
- Infill pattern: Grid
- Number of walls: 3
- Duration: 8h 48m
- Filament consumption: 86 g
In both cases the result turned out excellent, no printing errors occurred. I printed this pattern in two qualities because I was not completely satisfied with the details at the layer height of 0.2 mm. With the layer height of 0.12 mm, the fine details turned out much better.

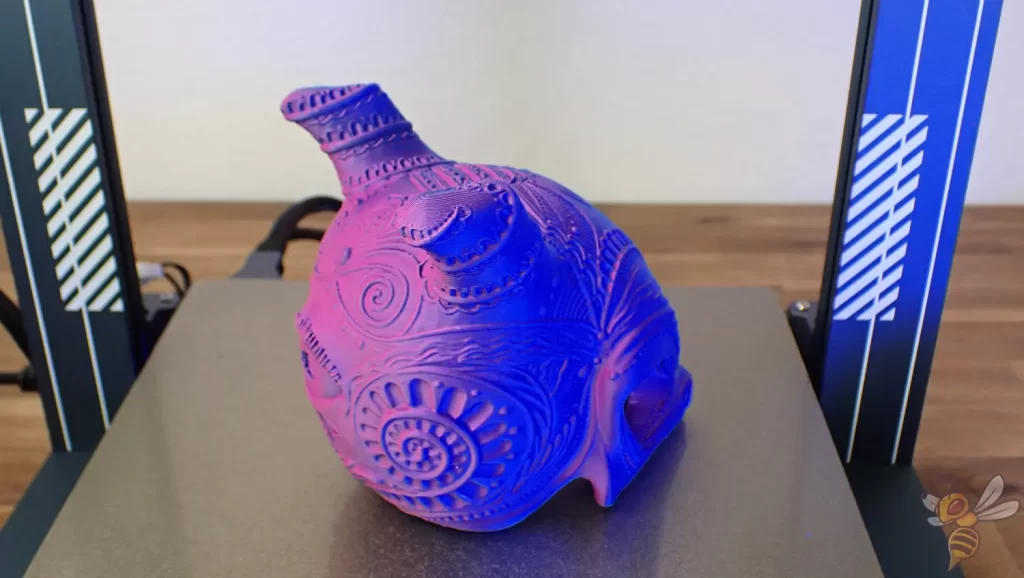
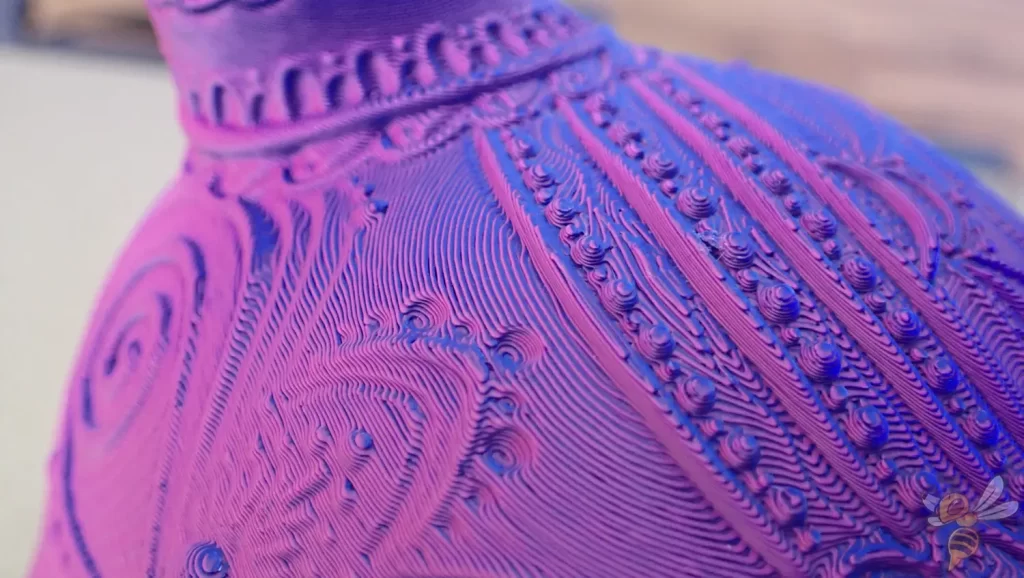

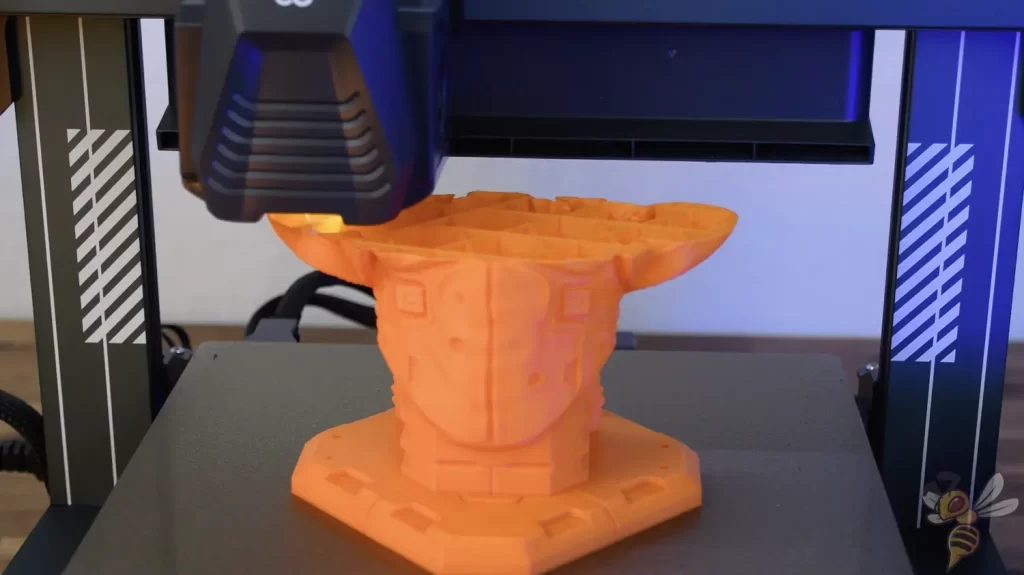
Next, I wanted to test an object with a lot of supports. The skull of Mew was good for this (here is the link to the file).
Print settings of the Ornate Mew Skull:
- Layer height: 0.16 mm
- Line width: 0.4 mm
- Print speed: 250 m/s
- Infill density: 15%
- Infill pattern: Tri-Hexagon
- Number of walls: 3
- Duration: 10h 33m
- Filament consumption: 227 g
The print quality turned out well and the supports were easy to remove.
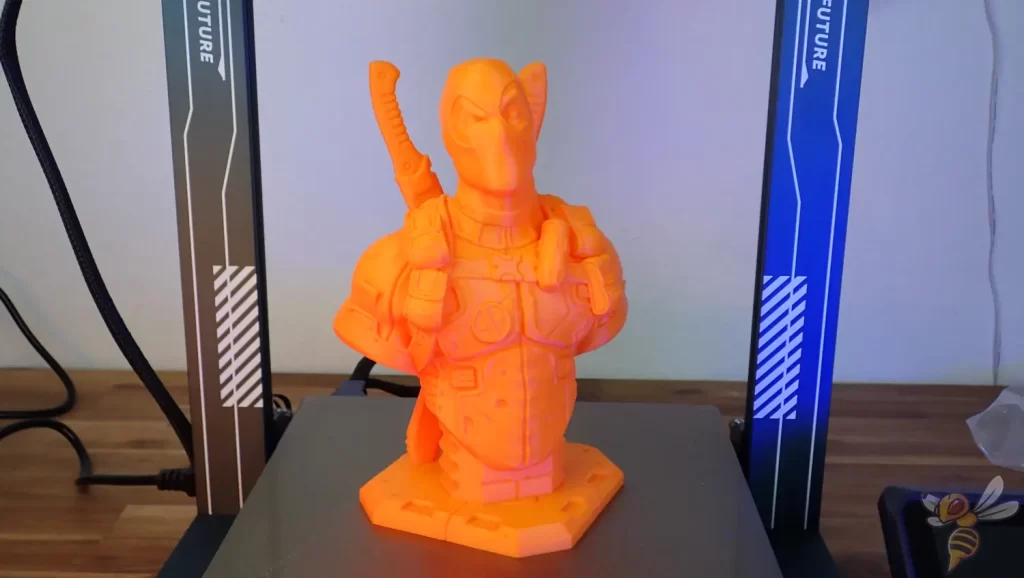
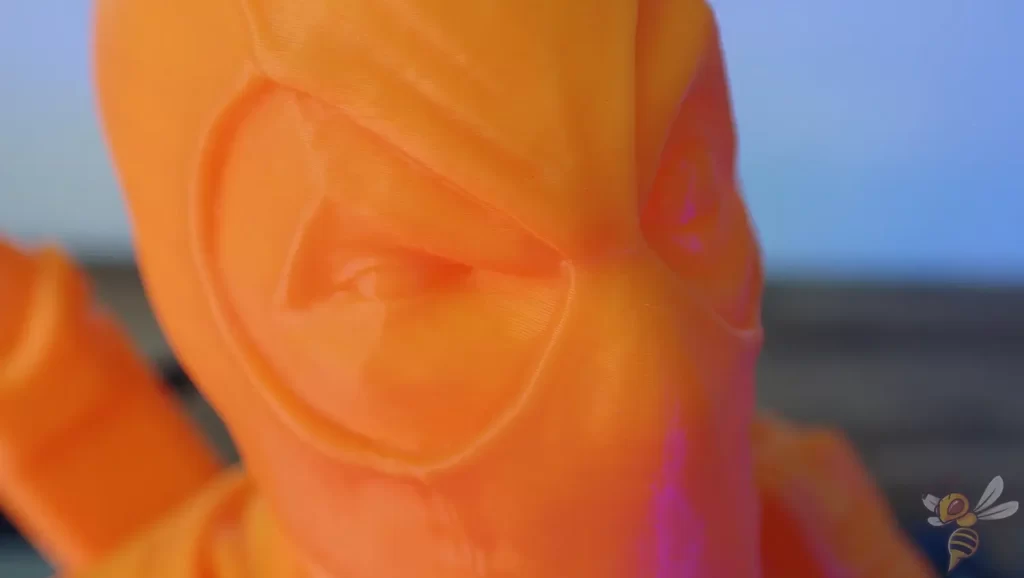
The last test was to print a relatively large bust with the highest print quality possible. I chose a very detailed Deadpool bust for this (click here for the file).
Print settings of the Deadpool bust:
- Layer height: 0.12 mm
- Line width: 0.3 mm
- Print speed: 250 m/s
- Infill density: 5%
- Infill pattern: Tri-Hexagon
- Number of walls: 3
- Duration: 11h 35m
- Filament consumption: 160 g
The bust turned out absolutely perfect. From not too far away, you’d think it was printed with a resin 3D printer and not an FDM 3D printer! The fact that this print quality is possible with such a high printing speed is the most amazing thing.
I think the combination of Klipper and the hardware enhancements it requires will be the way of the future for FDM 3D printers!

3D printing can be difficult – especially in the beginning. Many beginners struggle with print errors, poor print bed adhesion, or don’t know how to properly set up the slicer.
That’s why I created an online course to get everyone up to my expert level and as quickly as possible.
The course covers everything you need to know about FDM 3D printing to get perfect results every time. Click the link below to learn more about the content and what to expect (and don’t worry: there are no tests! Learn at your own pace, completely stress-free).
Operating the Neptune 4 Pro & Ease of Use Features
In my review of the Neptune 4, I said that it was the most user-friendly and probably the best 3D printer for beginners right now. Even after testing the Pro version, I stand by that statement. Unfortunately, the usability of the Neptune 4 Pro is slightly worse than the basic version.
The new metal rails on the y- and x-axis require more maintenance than the normal V-profiles with POM wheels. As you saw earlier in my review, severe printing errors can quickly occur if you neglect greasing and cleaning.
Otherwise, the Neptune 4 pro is just as easy to use as the Neptune 4. The intuitive menu guides you quickly to all settings, the print bed gives you perfect adhesion, and loading the filament is smooth. The newly installed LEDs also make handling even more pleasant.
Is the Neptune 4 Pro the right 3D printer for you?
What I really liked about the Neptune 4 Pro:
✓ The very high printing speed makes it worth as much as two to three 3D printers.
✓ Near perfect print quality, even without much calibration effort.
✓ Using Klipper as firmware not only makes it faster, it can even be operated and monitored from the computer.
The disadvantages of the Neptune 4 Pro:
× It is very loud with activated layer cooling.
× The new metal rails require more maintenance
The Elegoo Neptune 4 Pro* is an outstanding FDM 3D printer. However, I think the basic version is better. But maybe I am the only one who had a bad experience with the new metal rails. Other than that, I can strongly recommend the Neptune 4 Pro across the board!
The Neptune 4 Pro from Elegoo has multiple heating zones on the print bed and all-metal guide rails as an upgrade to the normal version.
Build Volume: 225 × 225 × 265 mm³
Speed: max. 500, normal 250 mm/s
Extruder: Direct Drive
Print Bed: Flexible PEI
Leveling: Automatic
Firmware: Klipper
Nozzle Temp.: max. 300 °C
Bed Temp.: max. 110 °C
Connectivity: USB, MicroSD, LAN
Pros:
✓ Klipper
✓ High print speed
✓ Touchscreen
✓ Good print bed adhesion
✓ Easy to use
✓ LED’s
✓ 2 heating zones on the print bed
Cons:
× Loud with layer fans on
× The guide rails need to be cleaned frequently.
Important accessories for an FDM 3D printer
Most filaments need to be stored dry to avoid printing errors such as stringing. Vacuum bags with desiccant are perfect for this.
Filament Storage Vacuum Bags:
Desiccant Silica Gel Packs:
Hydroscopic filaments such as PETG or nylon absorb water from the air. This results in printing errors. A filament dryer dries the filament before printing.
Disclosure: This website is the property of Martin Lütkemeyer and is operated by Martin Lütkemeyer. Martin Lütkemeyer is a member of the Amazon Services LLC and other Affiliate Programs. These are affiliate advertising programs designed to enable websites to earn advertising revenue through advertising and linking to Amazon.com and others. Links marked with * are affiliate links.
