- Wet Filament: Prevention, Symptoms & Drying - July 18, 2024
- Sovol SV08 – Best PrusaSlicer Settings & Profile - June 26, 2024
- Sovol SV08 – Best Orca Slicer Settings & Profile - June 26, 2024
Disclosure: Links marked with * are Affiliate Links. I earn from qualifying purchases if you decide to make a purchase through these links – at no additional cost for you!
Cura offers a ready-made profile for the Anycubic Kobra Go, but this standard profile does not always deliver the best results. It’s like a one-size-fits-all recipe that doesn’t necessarily fit all ingredients. Especially with 3D printers, the variety of materials and complexity of projects can mean that a ‘one-size-fits-all’ approach doesn’t deliver the desired print quality.
In this article, I therefore share my own Cura settings for the Kobra Go, which I have carefully tested and optimized. These settings will give you a solid foundation for high print quality with your Anycubic Kobra Go. From the right print temperature to the speed, these customized settings are designed to help you achieve better results right from the start.
However, you can only achieve perfect printing results if you calibrate your device and the material used precisely! Every filament has its own characteristics and small adjustments can make a big difference. That’s why in this article, I’ll also go into the most important calibrations so that you get perfect results with every filament using your Kobra Go Cura profile.
For more in-depth knowledge about calibrating your 3D printer and fine-tuning the materials, I recommend taking a look at my detailed calibration guide or visiting my comprehensive 3D printing course. Here you’ll learn how to tune your device perfectly for every project.
Table of Contents:
How to Create a Cura Profile for the Anycubic Kobra Go
The entire Cura profile is divided into the machine settings and the print settings. While the machine settings define basic information about your 3D printer, such as dimensions and capabilities, the print settings deal with specific parameters for each print process, such as print speed and temperature.
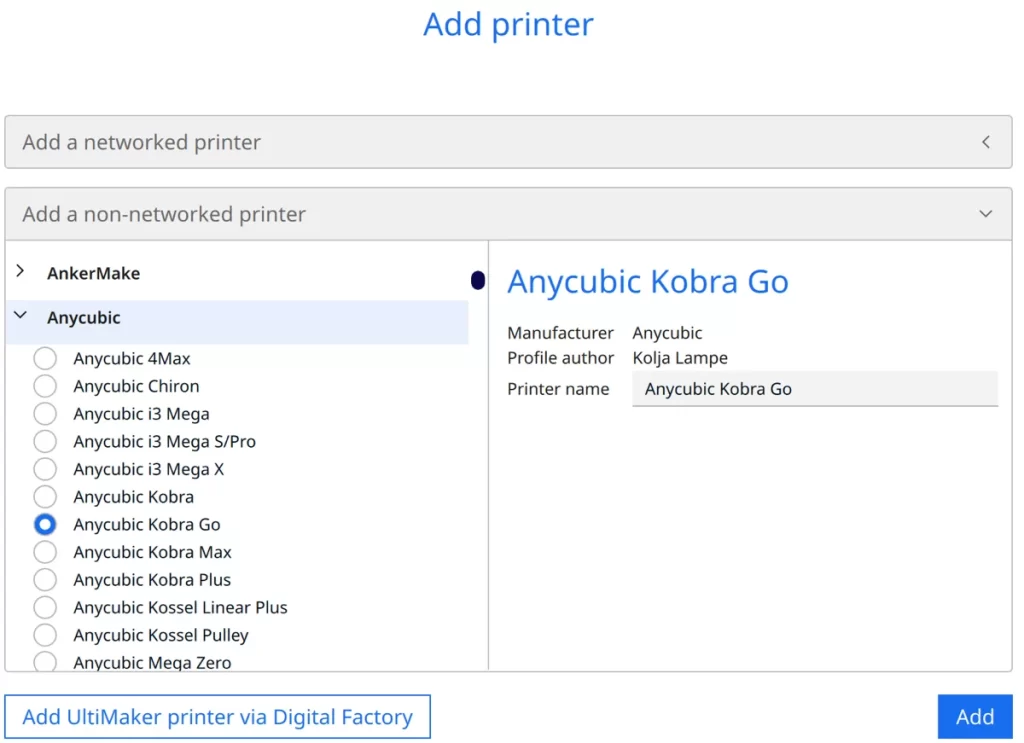
To add the Kobra Go 3D printer in Cura, click on ‘Settings’, then on ‘Printers’ and select ‘Add printer’. In the next step, click on ‘Non-networked printer’ and then select ‘Anycubic’ and ‘Anycubic Kobra Go’. Then click on ‘Add’.
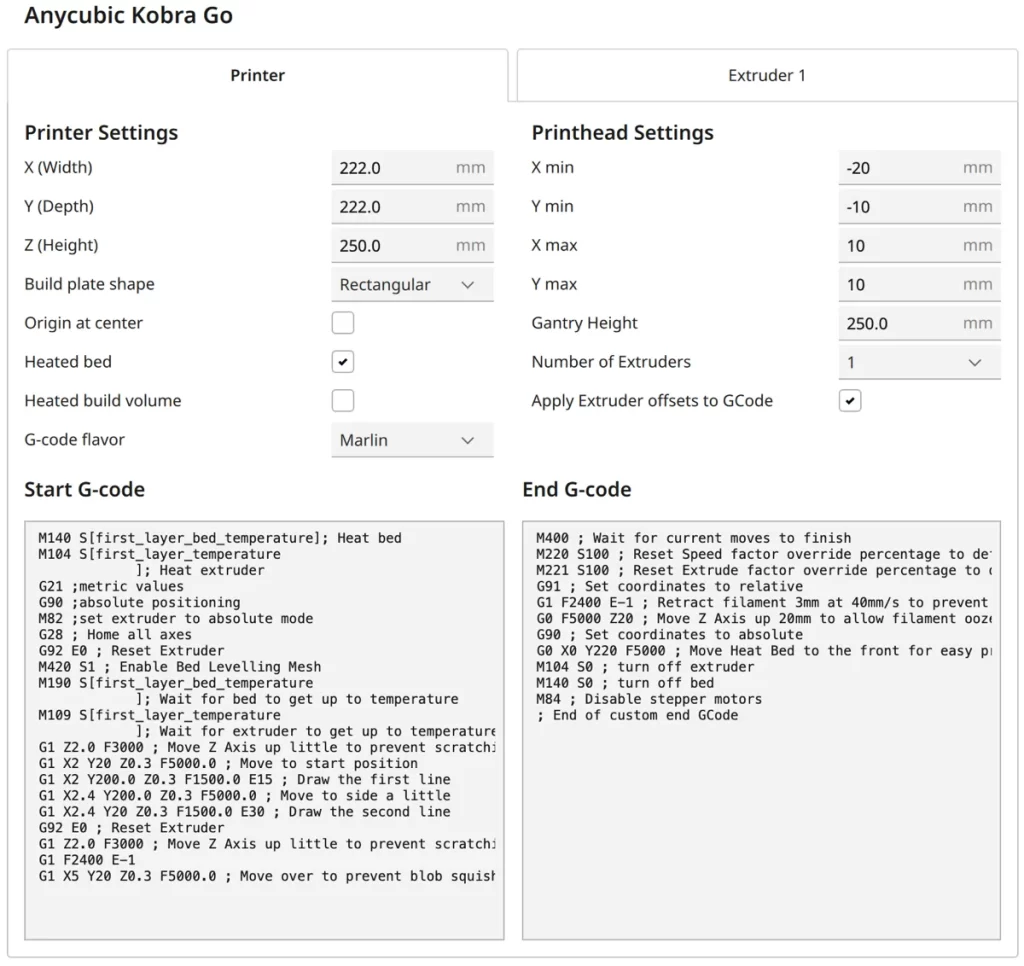
You can accept the machine settings contained in the standard profile unchanged.
After you have created the printer profile, the print settings must be defined. Here you define the specific parameters for each print, such as the temperature of the extruder and bed, print speed, cooling and more. These settings are crucial to achieve the best possible quality and reliability for your print projects.
You can find more information on how to create a 3D printer profile in Cura and what you need to pay attention to in this article: How to Create a Custom 3D Printer Profile in Cura
PLA Settings
These are the correct Cura settings for printing PLA filament with the Anycubic Kobra Go:
- Print temperature: 190-200 °C
- Print bed temperature: 60 °C
- Print speed: 50 mm/s
- Retraction: 6-7 mm with 25 mm/s
- Cooling: 100%
The Anycubic Kobra Go can process PLA filament more or less perfectly without the need for much calibration. This makes it an ideal material for beginners or for projects that require fast and efficient results.
When using PLA filament, it’s important to note that these settings provide a good starting point, but may require fine adjustments depending on the specific brand of filament and the details of your project. Further down in this article, I will discuss how to calibrate the most essential settings of these. This will help you to further improve the quality of your prints and get the most out of your Anycubic Kobra Go.
ABS Settings
These are the correct Cura settings for printing ABS filament with the Anycubic Kobra Go:
- Print temperature: 230-240 °C
- Print bed temperature: 80 °C
- Print speed: 50 mm/s
- Retraction: 7 mm with 25 mm/s
- Cooling: 50%
ABS is a popular filament in 3D printing due to its high strength and heat resistance. It is often used for functional parts that need to be robust and durable. However, it is notoriously more difficult to print flawlessly than PLA, for example, especially because of its tendency to warp.
The Anycubic Kobra Go does not have an enclosure, which can be a challenge when printing with ABS filament, as it is susceptible to temperature fluctuations and drafts.
Nevertheless, this printer can successfully print smaller ABS objects if the correct settings are applied. To avoid warping, for example, you can select a lower print speed for the first layer to improve adhesion to the print bed.
Using a draft shield in Cura can also help to minimize temperature fluctuations around the print object.
TPU Settings
These are the correct Cura settings for printing TPU filament with the Anycubic Kobra Go:
- Print temperature: 190 °C
- Print bed temperature: 0/60 °C
- Print speed: 30 mm/s
- Retraction: 6-8 mm at 30 mm/s
- Cooling: 100%
TPU is a flexible filament, but the Anycubic Kobra Go is not optimally equipped for processing such flexible filaments. It uses a Bowden extruder instead of a Direct Drive extruder, which makes it almost impossible to print TPU in good quality. There is also a higher probability of clogging due to the flexibility of the material.
It is very unlikely that you will achieve perfect results with TPU using the Kobra Go, even if you try to calibrate all settings accurately.
PETG Settings
These are the correct Cura settings for printing PETG filament with the Anycubic Kobra Go:
- Print temperature: 220-240 °C
- Print bed temperature: 70 °C
- Print speed: 50 mm/s
- Retraction: 7-8 mm with 30 mm/s
- Cooling: 50-75%
PETG has a strong tendency to string, but the Anycubic Kobra Go can be configured relatively easily with the correct settings to minimize this problem. The values given above, especially for retraction and print temperature, should give relatively good results. However, specific calibration is necessary for perfect results.
Different PETG filaments can vary greatly and the settings, especially the cooling, need to be adjusted to the specific filament. It is important to observe the behavior of your specific PETG filament during the printing process and adjust accordingly.
The Best Cura Settings for the Anycubic Kobra Go
In the following, we will go into the individual print settings and explain how you can calibrate them for your Anycubic Kobra Go in Cura. These adjustments are crucial for the quality of your print results.
Print Temperature
The best printing temperatures for the Anycubic Kobra Go in Cura:
- PLA: 190-200 °C
- ABS: 230-240 °C
- TPU: 190 °C
- PETG: 220-240 °C
An incorrectly set printing temperature can cause various problems, such as poor adhesion of the first layer, uneven filament flow or poor printing results. The values given in this article should provide good results for most filaments, but must be optimized for the filament used in order to achieve perfect results.
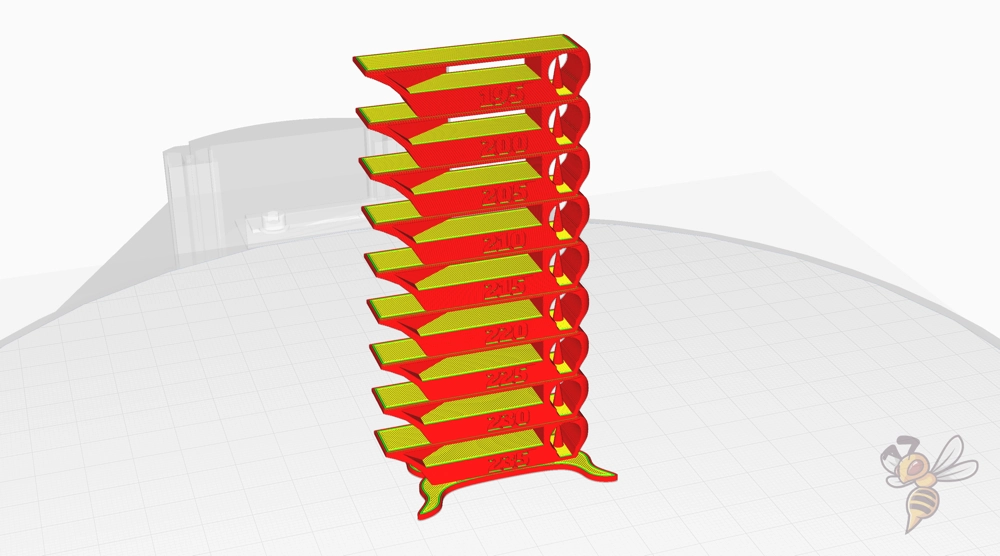
You can calibrate the printing temperature of your 3D printer using a temperature tower. This test print helps you find the optimum printing temperature for each filament.
I like to use this tower for calibration. You can find out how to write the script for the tower in the slicer in this article.
The tower is printed at a different temperature for each layer. This allows you to see directly at the end which printing temperature produces the fewest errors.
Print Bed Temperature
The best print bed temperatures for the Anycubic Kobra Go in Cura:
- PLA: 60 °C
- ABS: 80 °C
- TPU: 0/60 °C
- PETG: 70 °C
With the Anycubic Kobra Go, it is relatively easy to find the right print bed temperature, as its PEI print bed offers great adhesion for most filaments.
The values given above should work well. If not, you can find more tips below in the article to improve print bed adhesion.
Print Speed
The best print speeds for the Anycubic Kobra Go in Cura:
- PLA: 50 mm/s
- ABS: 50 mm/s
- TPU: 30 mm/s
- PETG: 50 mm/s
Although the Kobra Go is advertised with a print speed of up to 100 mm/s, I have found that the above values deliver the best results.
Especially when printing with TPU, it is important to print slower to avoid tangling and other printing problems.
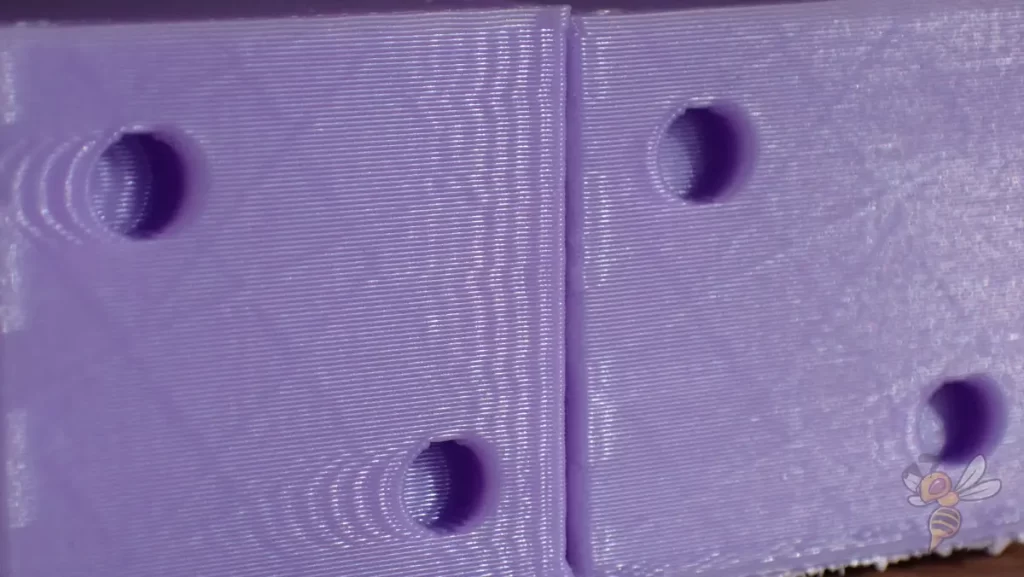
If you want to try printing at higher print speeds or adjust the acceleration settings, I recommend you always print a suitable calibration object before and after an adjustment. I like to use this cube for this.
The higher the speeds and accelerations, the higher the chance of ringing and ghosting. So slowly approach higher values and observe the effect on the calibration object.
Layer Height
These are the best layer heights for the Anycubic Kobra Go in Cura:
- Decorative objects: 0.1 mm
- Standard: 0.2 mm
- Rough, fast prints: 0.3 mm
For decorative objects where fine details are important, a layer height of 0.1 mm is ideal. This setting allows for high-resolution and fine surface detail, which is perfect for figures, models and other artistic prints.
For standard prints that offer a balance between quality and print time, a layer height of 0.2 mm is optimal. This setting is the most versatile and works well for a wide range of printing projects, from household items to technical parts.
If speed is more important than detail, a layer height of 0.3 mm is recommended. This setting is particularly suitable for rough, fast-to-print objects where print time is more important than detail. Note, however, that the fineness of detail decreases with increasing layer height.
Flow Rate
These are the best flow rates for the Anycubic Kobra Go in Cura:
- Standard: 100%
- For over-extrusion: 90% to 99%
- For under-extrusion: 101% to 110%
These values are guidelines and should only be adjusted after you have correctly calibrated the temperature and retraction. A correct flow rate is crucial to ensure an optimal amount of filament during the printing process.
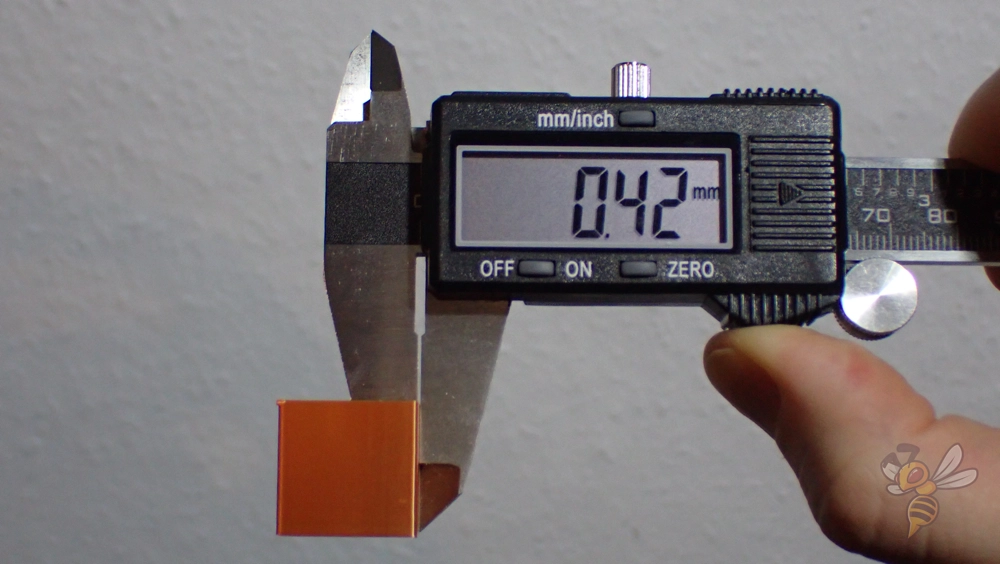
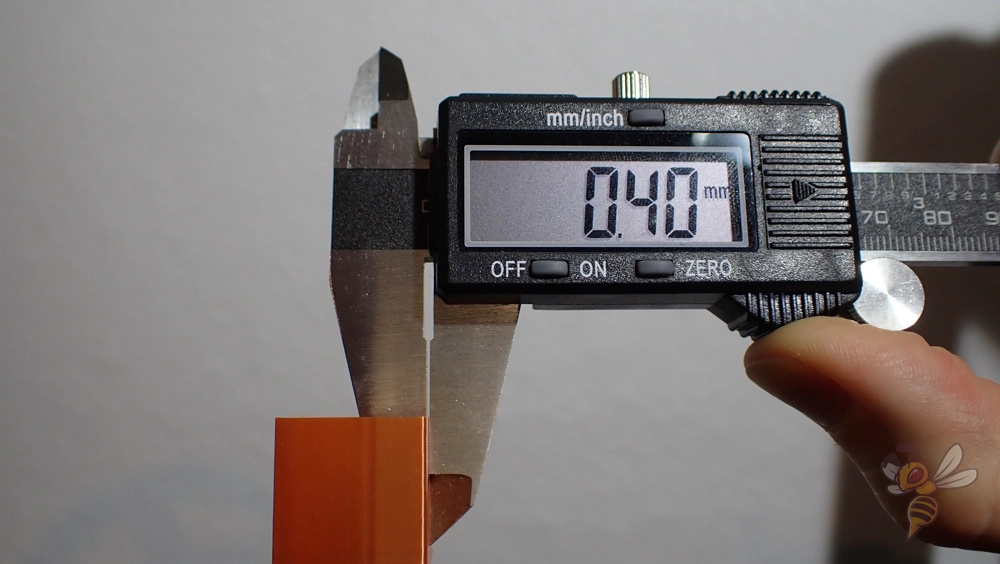
To calibrate the flow rate of your 3D printer, I recommend printing a cube without infill or top layers. This will allow you to accurately measure the wall thickness after printing.
- Step 1: First print a test cube with the current settings.
- Step 2: Measure the wall thickness of the cube with a caliper gauge. The wall thickness should correspond to the thickness set in Cura.
- Step 3: If the measured wall thickness is thicker than the setting in Cura, reduce the flow rate. If it is thinner, increase the flow rate.
- Step 4: Repeat the process until the measured wall thickness corresponds exactly to the thickness set in Cura.
This method allows you to precisely adjust the flow rate to ensure consistent and accurate filament extrusion, which is very important for the quality of your prints.
Retraction
The best retraction settings for the Anycubic Kobra Go in Cura:
- PLA: 6-7 mm at 25 mm/s
- ABS: 7 mm with 25 mm/s
- TPU: 6-8 mm with 30 mm/s
- PETG: 7-8 mm with 30 mm/s
An incorrectly set retraction can quickly lead to printing errors such as stringing with the Anycubic Kobra Go. Retraction is a key setting to prevent the filament from running out uncontrollably and stringing during non-printing movements of the extruder.
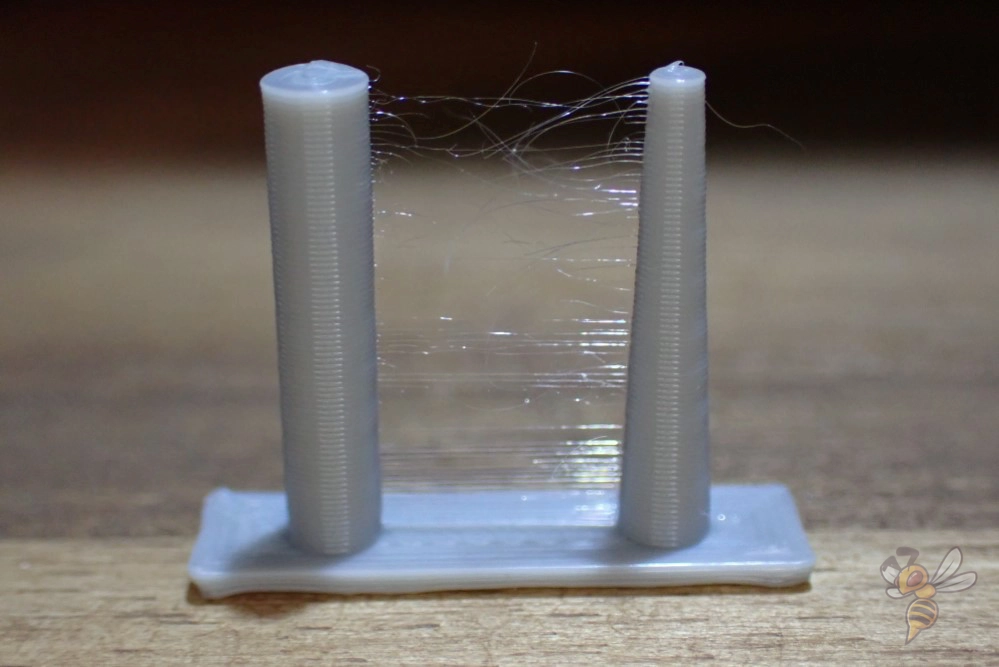
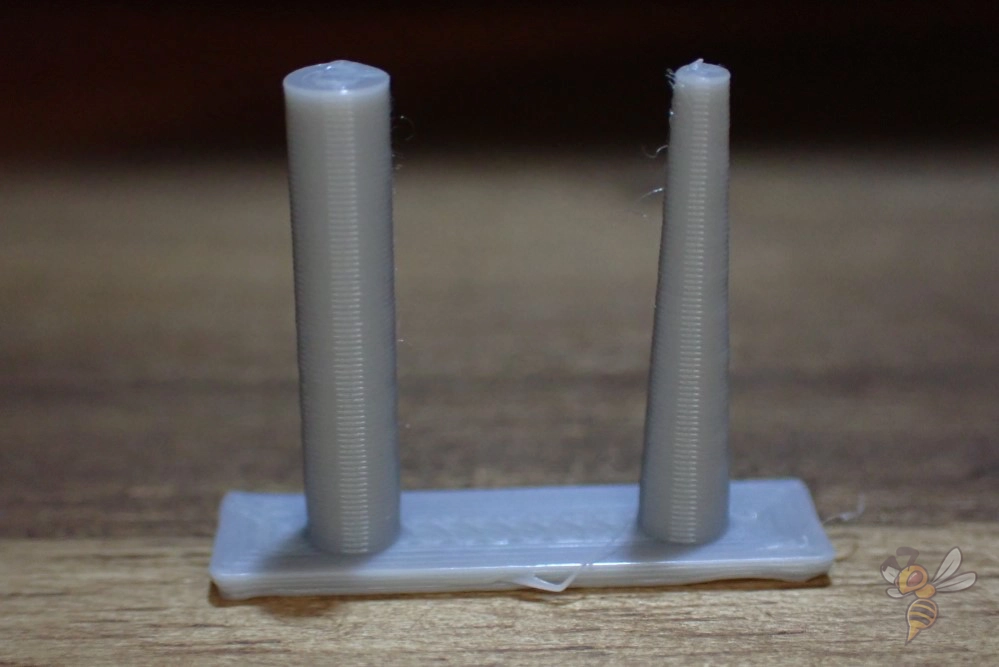
Calibrating the retraction is an essential step to ensure high print quality. Here is a simple guide on how to calibrate the retraction on your Kobra Go:
- Print a retraction test: start by printing a special retraction test model. This model should be designed to provoke stringing between towers or columns.
- Evaluate the result: After the test print is completed, evaluate the extent of the stringing. If there are many thin threads between the parts of the model, the retraction is too low. If the prints are rough or incomplete, this may indicate that the retraction is too high.
- Adjust the settings: Based on your observations, adjust the retraction settings. Increase the retraction distance and/or speed to reduce stringing, or decrease it to avoid extrusion flow issues.
- Repeat if necessary: Repeat the test until stringing is minimized without causing other problems.
Infill
The best infill density for the Anycubic Kobra Go in Cura:
- Decorative objects: 0-15%
- Standard objects: 15-50%
- Stable objects: 50-100%
The choice of infill density depends heavily on the intended use of the printed object and is basically printer-independent.
A low infill density of 0-15% is often sufficient for decorative objects, which are mainly concerned with the external appearance and less with structural strength. This not only saves material and time when printing, but also ensures that your object remains light.
For standard objects that need to offer a balance between stability, weight and material consumption, infill densities between 15-50% are ideal. This setting works well for everyday objects that need to have a certain durability without being overly heavy.
For objects that need to withstand high loads, such as functional parts or tools, you should choose a high infill density of 50-100%. This ensures maximum strength and durability, but also increases material consumption and printing time.
First Layer
These are the best Cura settings for the first layer with the Anycubic Kobra Go:
- Layer height: 100%
- Line width: 100%
- Print temperature: Same as the rest
- Print speed: 10 mm/s
- Raft/Brim/Skirt: Skirt
With these settings, the first layer should adhere perfectly to the print bed with most filaments.
If the adhesion is not sufficient, adjustments such as increasing the layer height, the line width and the print bed temperature can be made. In extreme cases, especially with larger or complex objects, the use of a raft or brim can be useful to ensure even better adhesion.
The quality of the first layer is crucial to the success of the entire printing process. The aim is to keep the filament hot and liquid for as long as possible so that it can bond optimally with the surface of the print bed.
Summary
The Anycubic Kobra Go can achieve perfect results with the right Cura settings. It is crucial to calibrate the settings carefully and match them to the specific filament and project.
I hope that the settings presented in this article have helped you and at least provide a good starting point for high-quality prints.
Achtung: Diese Website ist Eigentum von Martin Lütkemeyer und wird von Martin Lütkemeyer betrieben. Martin Lütkemeyer ist Mitglied bei Partnerprogrammen von Amazon Services LLC und anderen. Dies sind Affiliate-Werbeprogramme, die es Webseiten ermöglicht, Werbeeinnahmen durch Werbung und Verlinkung mit Amazon.com und anderen zu erzielen. Die mit * markierten Links sind Affiliate-Links.

