
- Wet Filament: Prevention, Symptoms & Drying - July 18, 2024
- Sovol SV08 – Best PrusaSlicer Settings & Profile - June 26, 2024
- Sovol SV08 – Best Orca Slicer Settings & Profile - June 26, 2024
Disclosure: Links marked with * are Affiliate Links. I earn from qualifying purchases if you decide to make a purchase through these links – at no additional cost for you!
As with the calibration of FDM 3D printers, the most important settings of a resin 3D printer must be calibrated to achieve perfect results.
In order for a resin 3D printer to deliver perfect results, the exposure time has to be calibrated. For this purpose, there are various calibration objects that have certain surface details. Whether the exposure time is set too high or too low can be easily detected on the surface.
Which of these calibration objects are best suited for resin 3D printers and how you perform the calibration to get perfect results, you will learn in this article.
Table of Contents:
What Settings Need to be Calibrated for Resin 3D Printers?
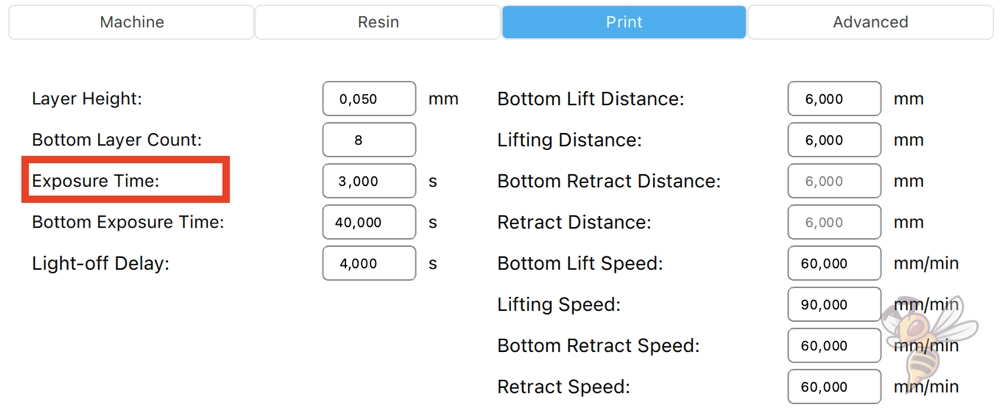
There are many settings that need to be made in the slicer for a resin 3D printer. Some of them depend on the geometry of the 3D printer, while others depend on the resin used.
The most important setting that has an impact on print quality, besides the layer height, is the exposure time. It must be neither too long nor too short.
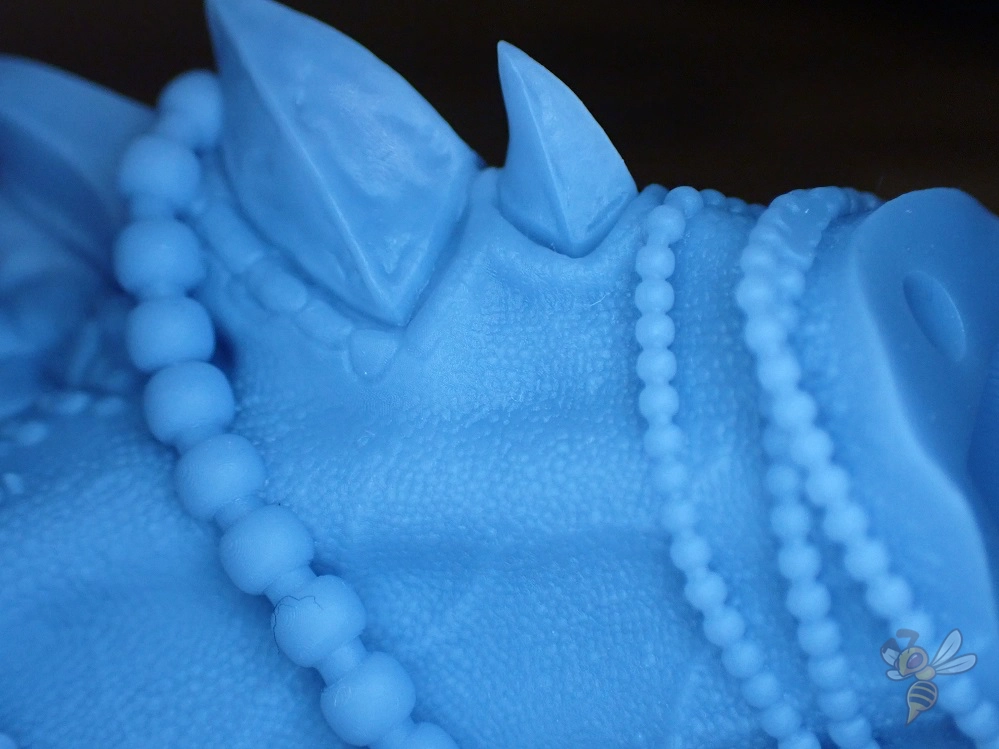
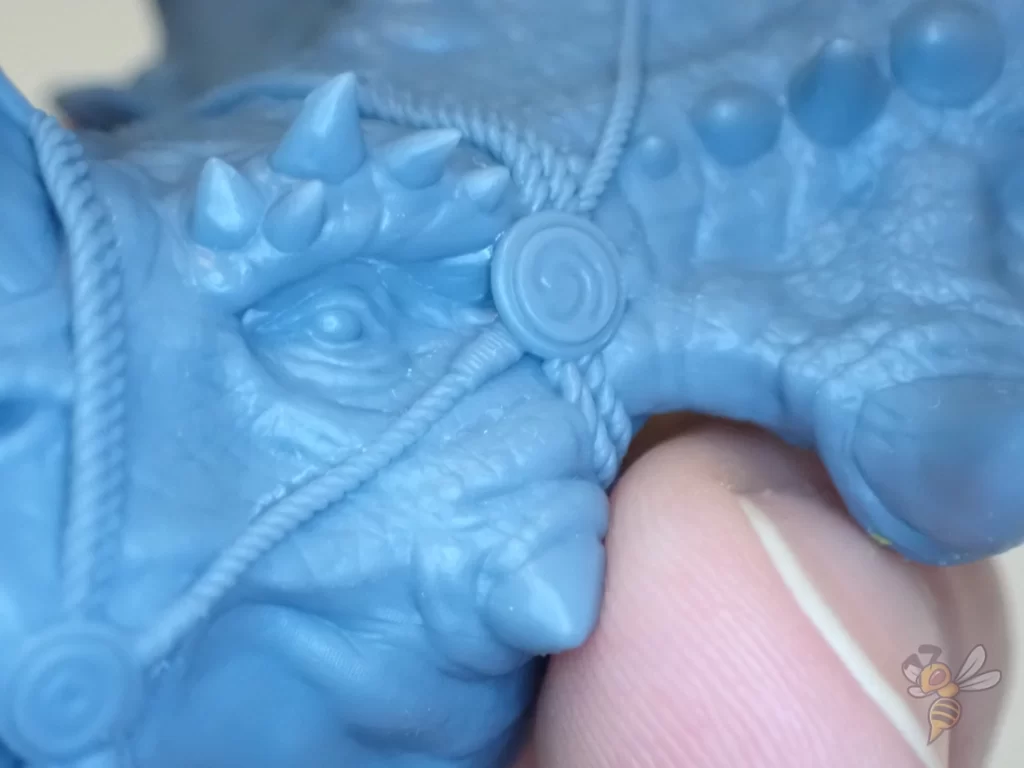
If the exposure time is too long, the surface details widen and can merge into each other. Moreover, transitions become rounded. If the exposure time is too short on the other hand, too little resin is cured, which means that surface details are not formed strongly enough.
The aim of calibrating the exposure time is to ensure that corners are printed as sharply as possible and that the printed dimensions resemble those in the slicer.
Layer height also has a big impact on print quality. Depending on the accuracy your project requires, you have a relatively wide range of adjustable layer heights. The smaller the layer height, the finer the surface, but the longer it takes to print.
When you calibrate the exposure time for your resin 3D printer, you should not change the layer height. If you want to use a different layer height, you should calibrate the exposure time again, as these two settings are coupled.
How is the Exposure Time Calibrated for 3D Printers?
There are special objects for the calibration of resin 3D printers. On their surface there are certain features which, if the exposure time is wrong, will either not be formed at all, will be too narrow or too wide.
Here is a list of the most popular calibration objects for resin 3D printers:
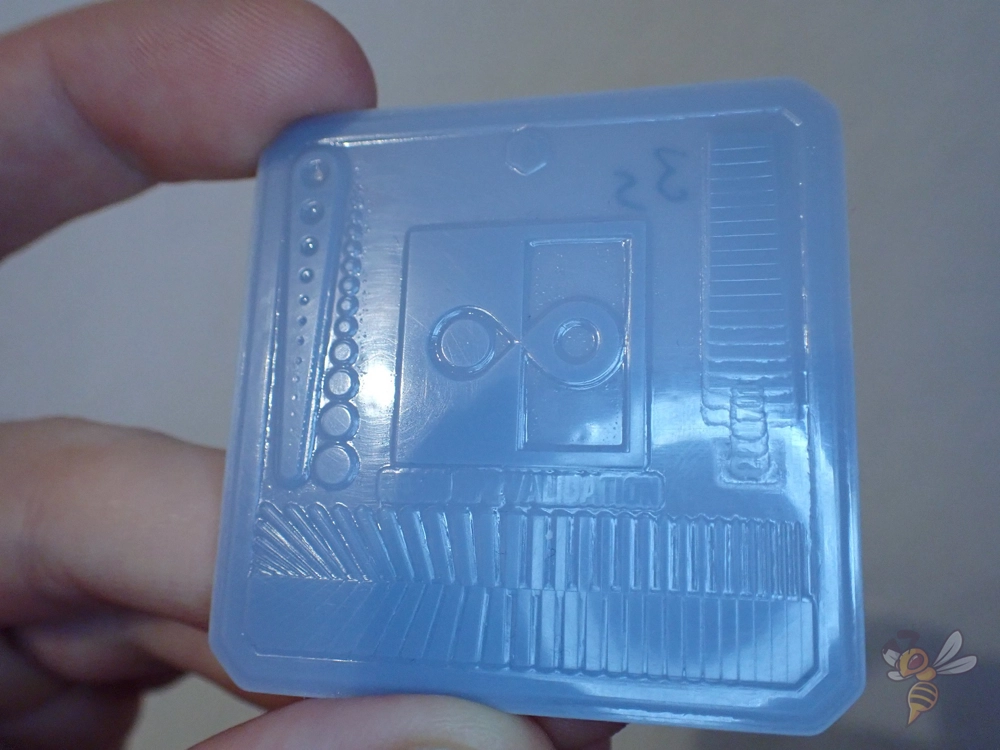
My favorite of these calibration objects is definitely the Validation Matrix v2. It prints quickly because it’s very flat, uses very little resin, and quickly tells you if your exposure time is set too high or too low through clever surface details.
It’s best to follow the 3D printer manufacturer’s suggested exposure time and the resin you’re using for your first test. From there, you can adjust the exposure time in small increments to achieve perfect results.
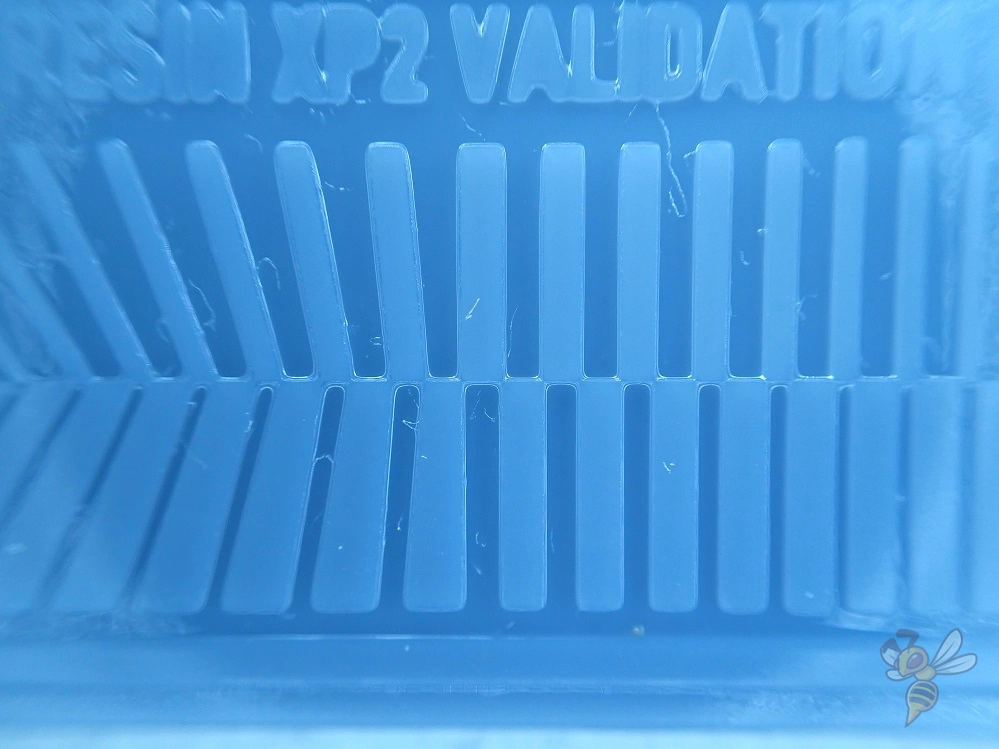
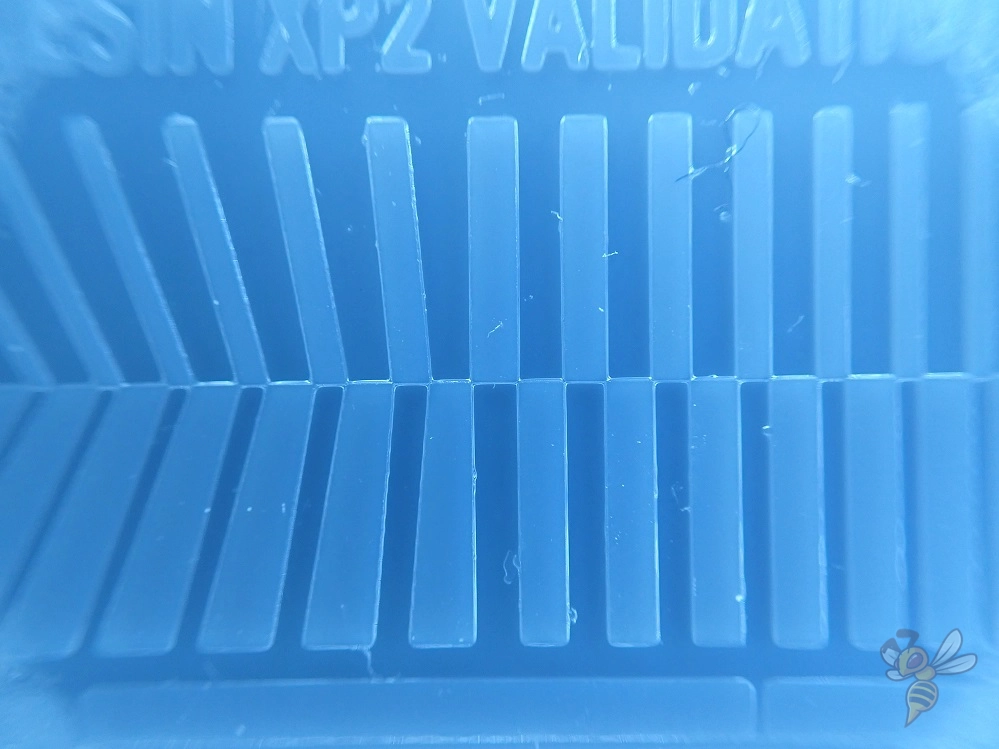
In the example above, you can see two surfaces printed with different exposure times. With the too high exposure time, the individual squares merge at the corners, although their corners should just be touching.
By analyzing the surfaces and comparing them with each other, you can approach perfect print quality step by step.
At first, you can set the exposure time relatively high and then decrease it to find the perfect value. For an initial exposure time of 3 seconds, you can change the value in steps of 0.5 seconds at the beginning and then find the perfect value in steps of 0.1 seconds.
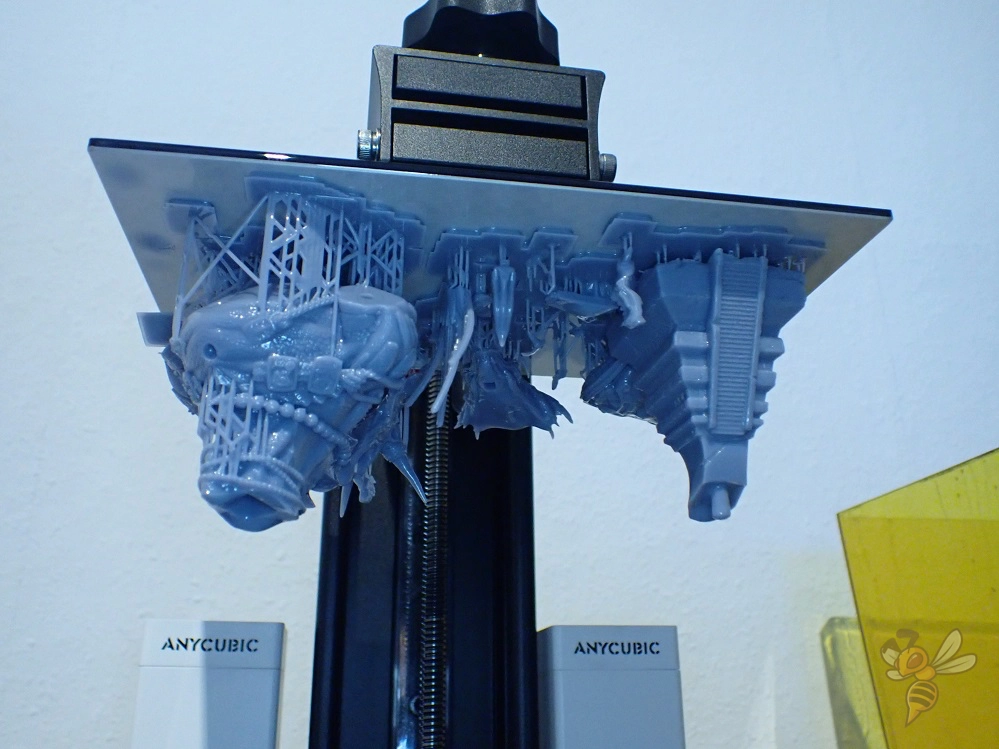
The calibration objects linked above are all relatively small and will print in a very short time. Since you need several prints to complete the calibration, you also need to remove the object from the print bed, wash and cure it each time. In my experience, however, you can leave the resin in the vat and not have to filter it and wash the resin vat each time. Only if you see cured resin residue, you need to filter the resin.
What Other Settings are Important for Good Print Quality?

In 3D printing, objects are printed layer by layer. These layers are easily visible to the naked eye in FDM 3D printers. But even with resin 3D printers, the individual layers can be visible, depending on how good your eyes are and how high you have set the layer height.
If you care a lot about the surface quality of your printed objects, you should choose a small layer height, calibrate the exposure time and optimize the antialiasing settings.
If you set the edge smoothing too high, small surface details will be swallowed up and smoothed too much. If the edge smoothing is too low, you might see the individual layers.
A good balance of a small layer height and light to moderate antialiasing leads to perfect printing results.
For a calibration of the edge smoothing, the Validation Matrix v2 is not as suitable as the MONO X R_E_R_F SIRAYA TECH V5 or the AmeraLabs Town. With these objects, you will also find rounded surfaces where too much edge smoothing would swallow details. Alternatively, you can print smaller round objects or simply a hemisphere.
Does the Bottom Exposure Time also Need to be Calibrated?
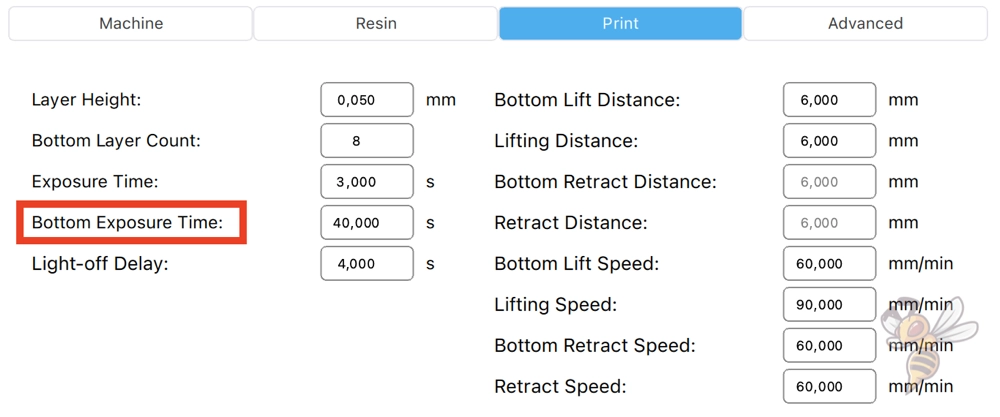
The longer the first layers of an object are cured, the better they adhere to the print bed. The exposure time for the first layers is therefore several times higher than the normal exposure time.
However, you do not need to calibrate this exposure time. The surface quality of the first layers is mostly irrelevant. All resin manufacturers give recommended values for the normal exposure time and the exposure time of the first layers.
It is best to start with this recommended exposure time. If you have problems with print bed adhesion, you can adjust the exposure time of the first layers according to the calibration of the normal exposure time or simply increase it a bit.
Disclosure: This website is the property of Martin Lütkemeyer and is operated by Martin Lütkemeyer. Martin Lütkemeyer is a member of the Amazon Services LLC and other Affiliate Programs. These are affiliate advertising programs designed to enable websites to earn advertising revenue through advertising and linking to Amazon.com and others. Links marked with * are affiliate links.
