
- Wet Filament: Prevention, Symptoms & Drying - July 18, 2024
- Sovol SV08 – Best PrusaSlicer Settings & Profile - June 26, 2024
- Sovol SV08 – Best Orca Slicer Settings & Profile - June 26, 2024
Disclosure: Links marked with * are Affiliate Links. I earn from qualifying purchases if you decide to make a purchase through these links – at no additional cost for you!
In this article, you will learn how to glue PLA and which adhesives are suitable for this. Each of the listed adhesives is tested practically in this article with step-by-step instructions.
Many adhesives are suitable for gluing PLA. These include superglue, plastic glue, epoxy glue, a hot glue gun, acetone, silicone, a 3D pen and PLA welding.
For small parts superglue, for medium-sized parts plastic glue and for large parts that need to withstand a lot epoxy glue is the most popular to bond PLA. However, the other adhesives or bonding methods have their own advantages and disadvantages that can make them the best choice in some instances.
At the beginning of this article, there is an overview table of every glue type that is used for PLA. What you need to consider in the individual steps and which adhesives are best suited for your application, you will learn in detail after that.
Table of Contents:
- 1 Best PLA Glues – Overview
- 2 How to Glue PLA? – Step by step
- 2.1 Step #1: Smooth & Roughen Surfaces
- 2.2 Step #2: Clean the Surfaces
- 2.3 Step #3: Apply the Glue
- 2.4 Step #4: Spread the Glue
- 2.5 Step #5: Position the Parts on Top of Each Other
- 2.6 Step #6: Press the Parts Together
- 2.7 Step #7: Clean the Glue Seam
- 2.8 Step #8: Wait
- 2.9 Step #9: Smooth out the Glued Seam
- 3 Protect Your Health!
- 4 Best Glue for PLA – Practical Test
- 5 Superglue
- 6 Plastic Glue
- 7 Epoxy
- 8 Hot Glue Gun
- 9 Acetone
- 10 Silicone
- 11 3D Pen (Hot Filament)
- 12 PLA Welding (with Friction)
- 13 Smoothing PLA Glue Seams
- 14 Related Questions
- 15 Conclusion
Best PLA Glues – Overview
There are various adhesives that are suitable for PLA. However, they differ in effectiveness and costs. In the following overview, you can see at a glance which adhesive is best suited for different PLA applications.
(Please scroll left and right to see everything.)
| Superglue | Plastic Glue | Epoxy | Hot Glue Gun | Acetone | Silicone | 3D Pen | Welding (with friction) | |
|---|---|---|---|---|---|---|---|---|
| Application | Small parts that do not have to withstand large mechanical forces. | Small to medium sized parts. Good all-round glue for PLA. | If you want the glue seam to be more stable than the rest of the object, use epoxy! | If you want to be fast mit large decorative objects or prototypes. | Small to medium sized parts. “High Risk, High Reward” | Medium to large objects that need to withstand mechanical forces and be somewhat flexible (e.g. in cosplay). | Small decorative objects. | Inconvenient emergency solution |
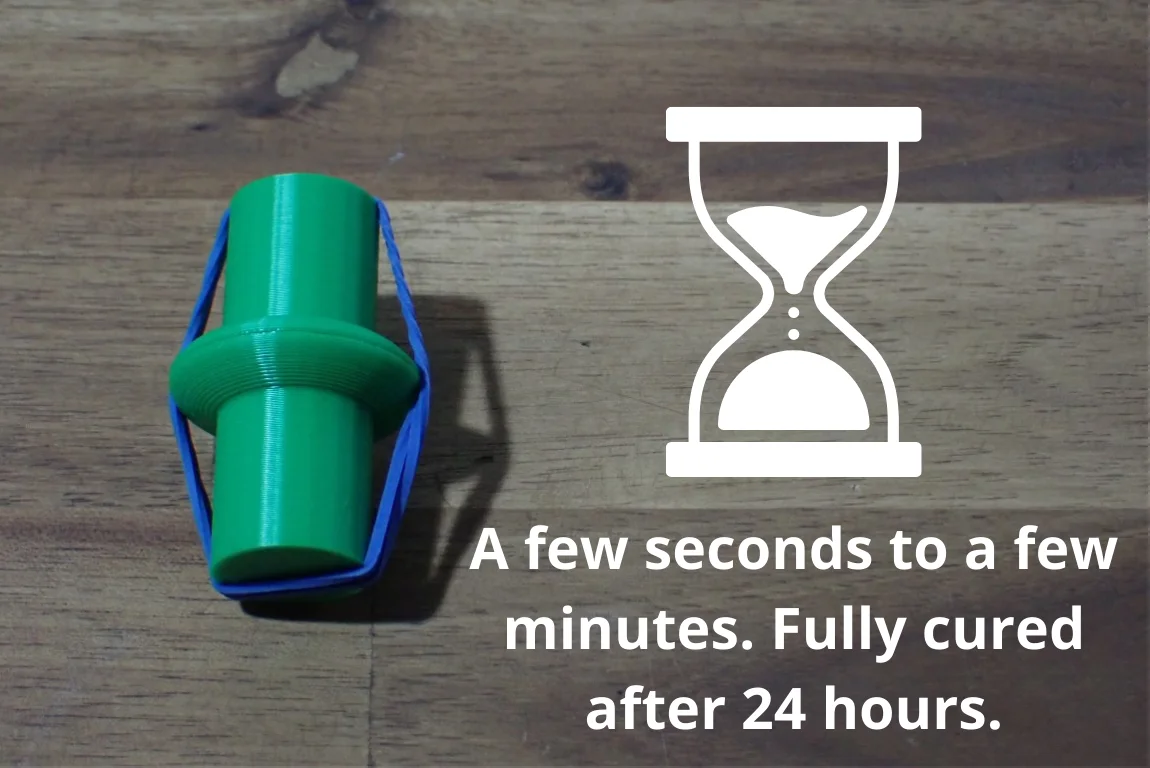
| Drying Time (depending on the size of the surface) | A few seconds to a few minutes. | A few seconds to a few minutes. Fully cured after 24 hours. | A few hours to a few days. | A few seconds. Fully cured after 0.5-2 hours. | A few minutes to a few hours. | A few hours | A few seconds to a few minutes. | A few seconds to a few minutes. |
| Strength | high but brittle | high | very high | medium | not at all to very high | medium to high | low | low to high (depending on the quality of the weld) |
| Flexibility | low | low to medium | low | medium | PLA-like | medium to high | low | low |
| Visibility | low to medium | low | medium | high | invisible to catastrophic | high | invisible to low | high |
| Ease of Use | easy | easy | medium | easy | hard | easy | medium | hard |
| Advantages | + dries very quickly + very good adhesion + barely visible | + dries quickly + perfect adhesion + almost invisible | + extremely strong adhesion (if your object breaks, it won’t be at the glue seam!) + fills uneven surfaces | + good for prototypes and large projects + very easy application + fills uneven surfaces | + produces perfect connections when used correctly and with suitable filament | + good for prototypes and large projects + very easy application + fills uneven surfaces + very flexible depending on the product | + almost invisible after successful application + good for decorative objects | + good emergency solution for projects where the optics is unimportant + may be the best choice for certain geometries (long seam, small contact area) |
| Disadvantages | – brittle connection – gases can produce white spots – only useful for small parts | – only useful for small and medium sized parts | – awkward handling (2-components) – only useful for medium to large objects | – medium adhesion – only useful for medium to large objects | – results vary greatly and depend on the filament | – adhesion varies between products – only useful for medium to large objects | – weak connection – practice necessary | – practice necessary – weld seam usually becomes relatively thick – much rework necessary for a nice result |
| Best Choice | Amazon* | Amazon* | Amazon* | Amazon* | Amazon* | Amazon* | Amazon* | Amazon* |
How to Glue PLA? – Step by step
Step #1: Smooth & Roughen Surfaces
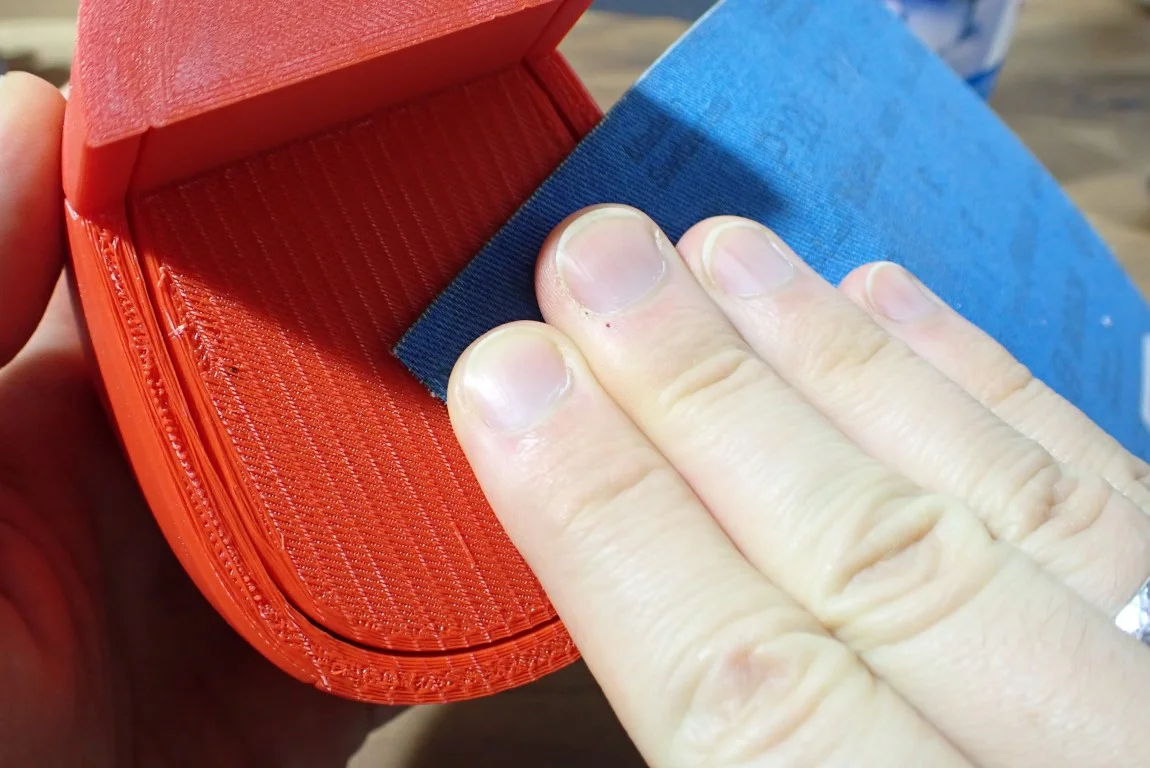
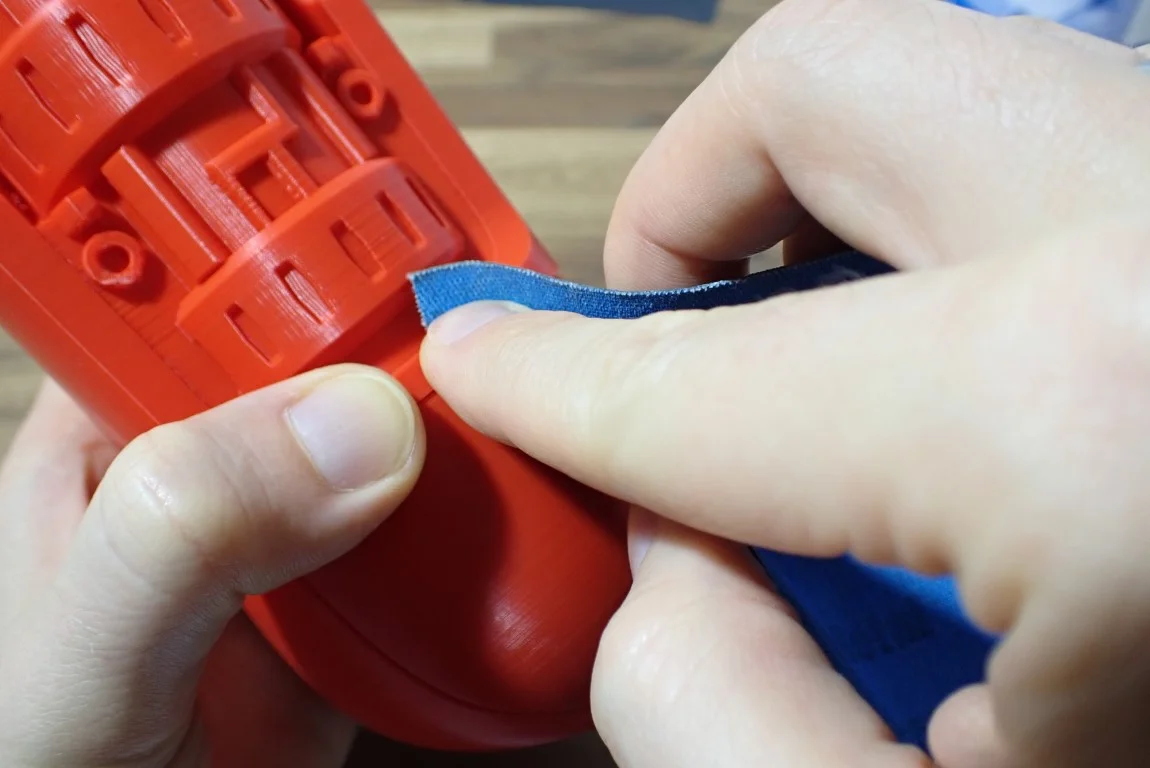
With any type of adhesive, the first thing to do is prepare the surface. For PLA 3D printed parts, this means removing any protruding filament blobs and roughening the surface a bit. Especially if you want to glue the bottom side of a 3D print, this is necessary.
Certain print bed surfaces, such as glass, create extremely smooth surfaces on the underside. In order for the adhesive to hold well, you increase its surface area on the part by roughening the surface. The best way to do this is with relatively coarse sandpaper.
There are also print bed surfaces with coatings such as PEI, which already create a relatively rough surface. But also here it can be advantageous to work the surface a little with sandpaper.
Step #2: Clean the Surfaces
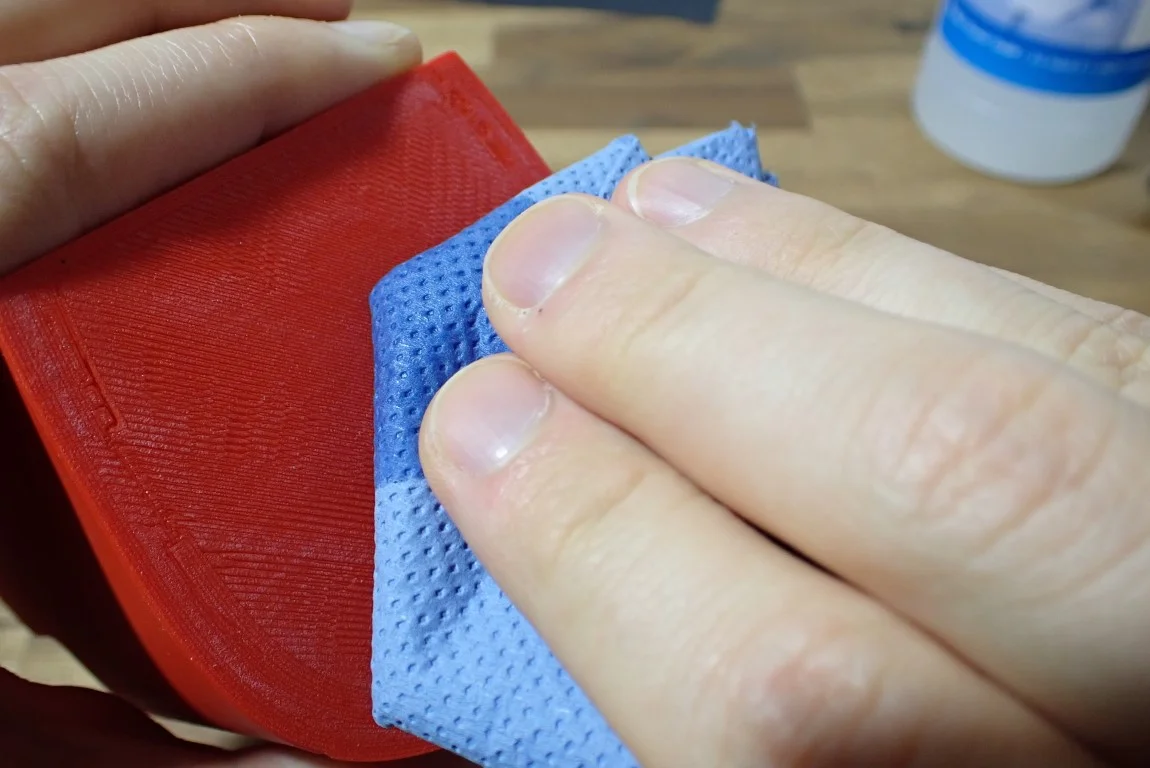
Depending on how you have prepared the surface for the glue, it may be necessary to remove any foreign bodies or sanding residues. Sometimes it is enough to remove the roughest with a finger, but a damp cloth would be better. The surface should of course be completely dry after cleaning and before applying the adhesive.
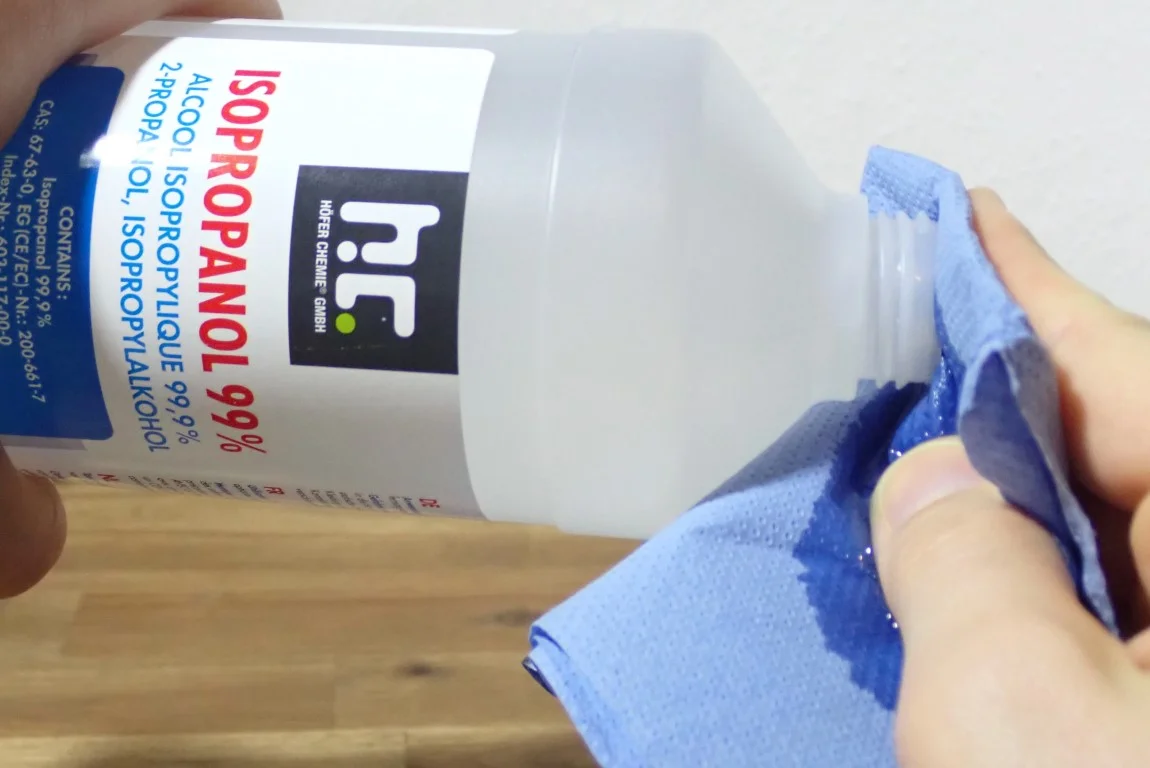
Another method would be to use isopropyl alcohol to also remove grease. If the parts you want to glue together are still “fresh from the printer”, this is not necessary. However, if you want to glue parts that have been lying around for a while or have been used elsewhere, it would be helpful to remove the grease layers with isopropyl alcohol.
Step #3: Apply the Glue
After you have prepared and cleaned the surfaces of the two parts, you can now apply the glue. Depending on which glue you use, slightly different rules apply here. Some adhesives like superglue need only very little glue, silicone on the other hand sometimes needs several millimeters to develop its full adhesive power.
No matter which adhesive you use, the amount must be right for the glue seam. If you use too little, the bond will be too weak. If you use too much, the glue will swell out at the sides and could be difficult to remove.
Step #4: Spread the Glue
When you are satisfied with the amount of glue, you need to spread the glue so that it covers the entire surface. For small surfaces, this can be achieved by applying a small amount of glue to the surface and pressing the parts together.
For larger areas you should spread the glue with the nozzle of the glue or with a suitable tool. Be careful not to get too close to the edges of the glue seam so that the glue is flush with the glue seam after positioning and pressing the parts together and does not overflow.
Step #5: Position the Parts on Top of Each Other

Before the glue sets, you need to position the two parts in the final position. Depending on the glue you have used, you may need to do this quickly.
Step #6: Press the Parts Together
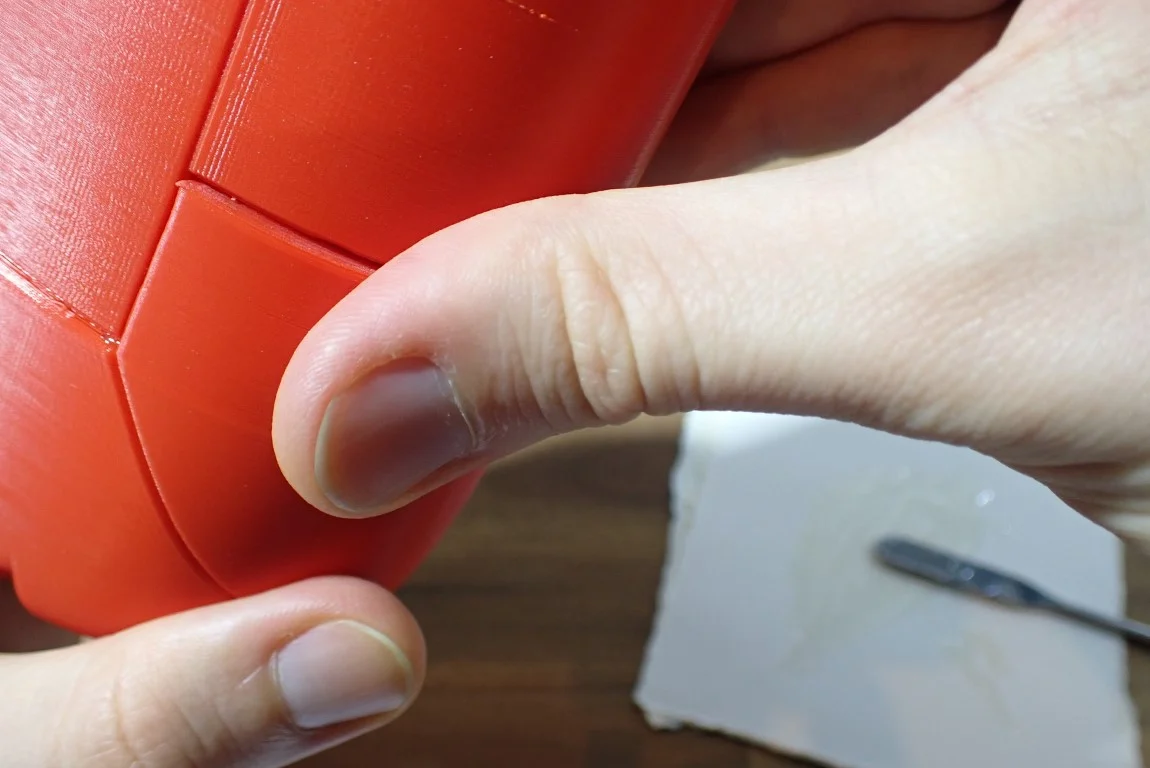
With some adhesives it is sufficient to position the parts on top of each other and then fix them until the adhesive has dried. However, it is usually a good idea to press the parts together lightly so that the adhesive can spread properly and bond well with the rough surface.
At this step you will also notice if you have used too much or too little glue. If you have used too little and the glue does not reach the seam when you press the parts together, you can still touch up some glues now. With superglue or a hot glue gun this is usually no longer possible, because the glue is already hardened after a few seconds.
Step #7: Clean the Glue Seam

If you missed some overflowing glue when applying or pressing the two parts together, you should immediately try to remove the excess material. Sometimes a cloth is suitable, sometimes a spatula or knife would be better.
Unfortunately, most adhesives cannot be removed completely from a surface without leaving residues. Therefore, you have to be very fast or use some solvent or mechanical means for the rework.
Step #8: Wait
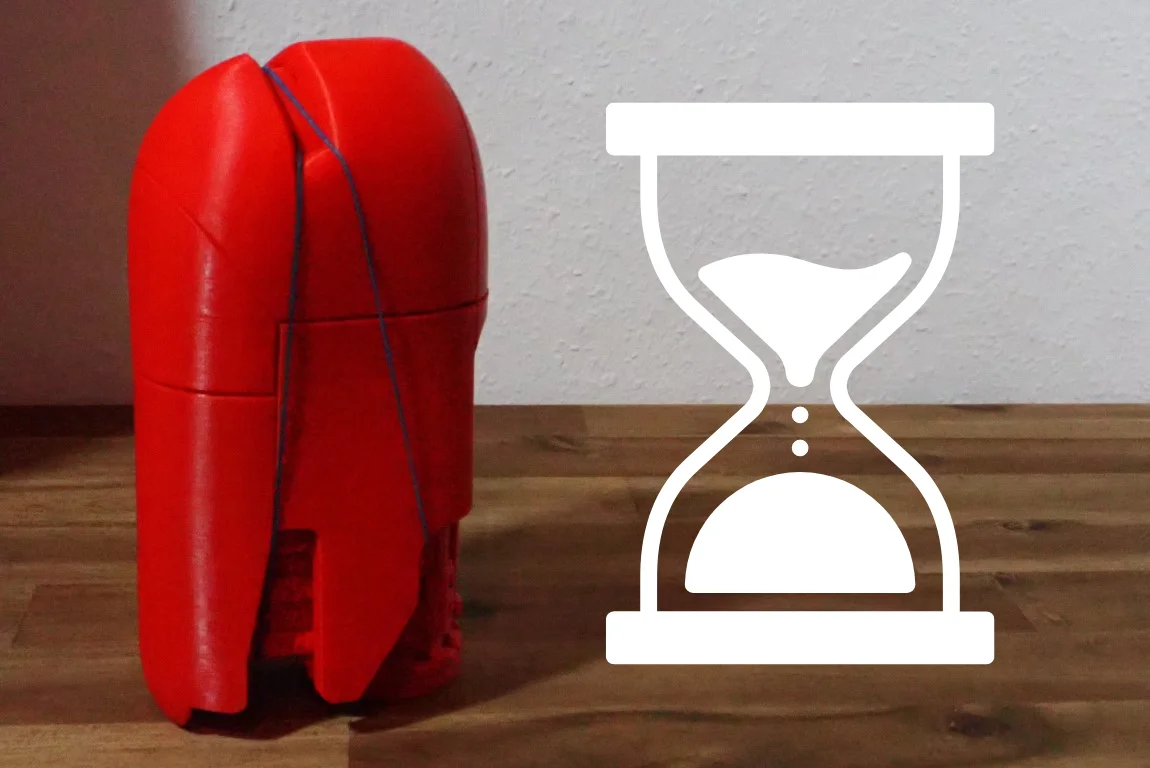
In this step, it is important to wait until the adhesive has completely cured. The time required for this depends primarily on the adhesive used. The quantity is also important. Even if you have used superglue, it can take a few minutes until everything is completely cured.
If you are working with adhesives that generally take a little longer to cure completely (such as silicone or epoxy) and you want to join larger parts together, you will need fixtures that can hold the two parts together for several hours.
For very large pieces this could be clamps, for small or medium sized pieces sometimes gravity is enough or you use rubber bands.
Step #9: Smooth out the Glued Seam
Depending on how carefully you worked in the previous steps, you may need to smooth the glue seam after the glue has cured. There are also adhesives that can still flow a little over a few hours and you have to do the rework anyway. But also with methods like PLA welding, a rework is indispensable for a nice result.
Smaller defects can be treated with sandpaper, with flexible adhesives you can also use fine knives to adjust the glue seam to the object. If there are larger holes or cracks, you can conceal them afterwards with some filler. Otherwise you still have the possibility to smooth the whole object.
Protect Your Health!
Many of the adhesives presented in this article are based on hazardous chemicals. Once you open the glue, toxic gases are released. While the gases are relatively harmless in small quantities, they become dangerous when used frequently or in high quatities.
So you should always ensure adequate ventilation when using them and consider respiratory protection if you are gluing a large print. In addition, most adhesives and/or their gases are flammable. Especially if you are completing large projects with glue, you must be careful to keep ignition sources away from the object.
Best Glue for PLA – Practical Test
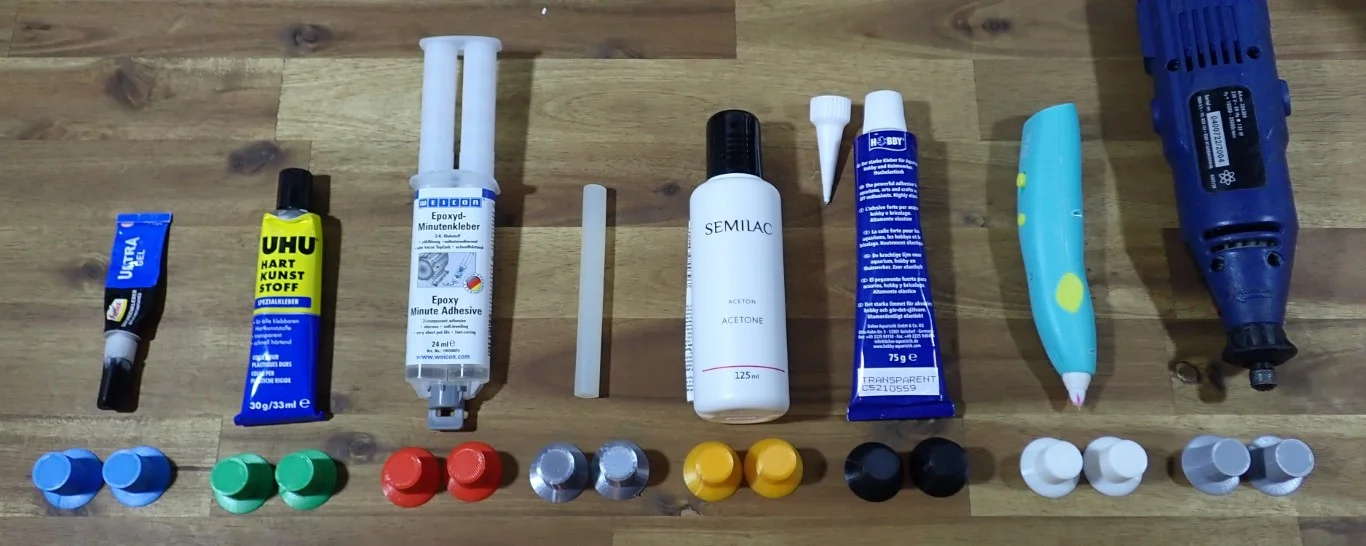
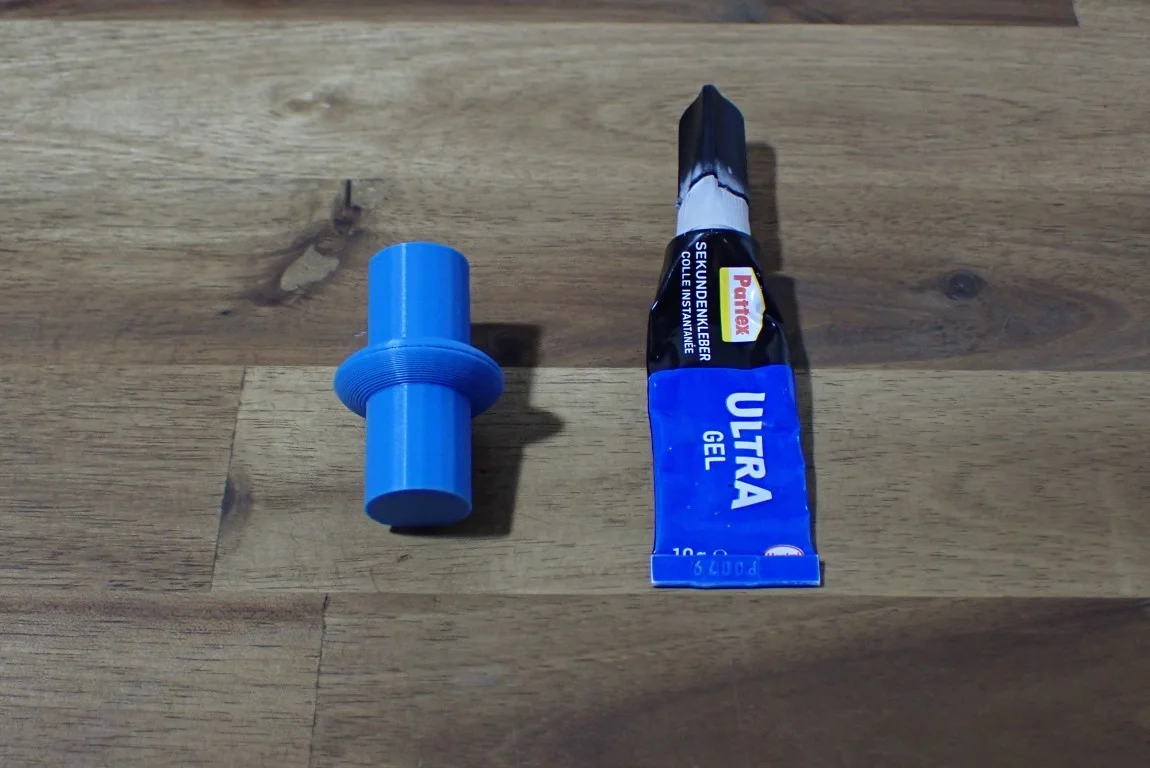
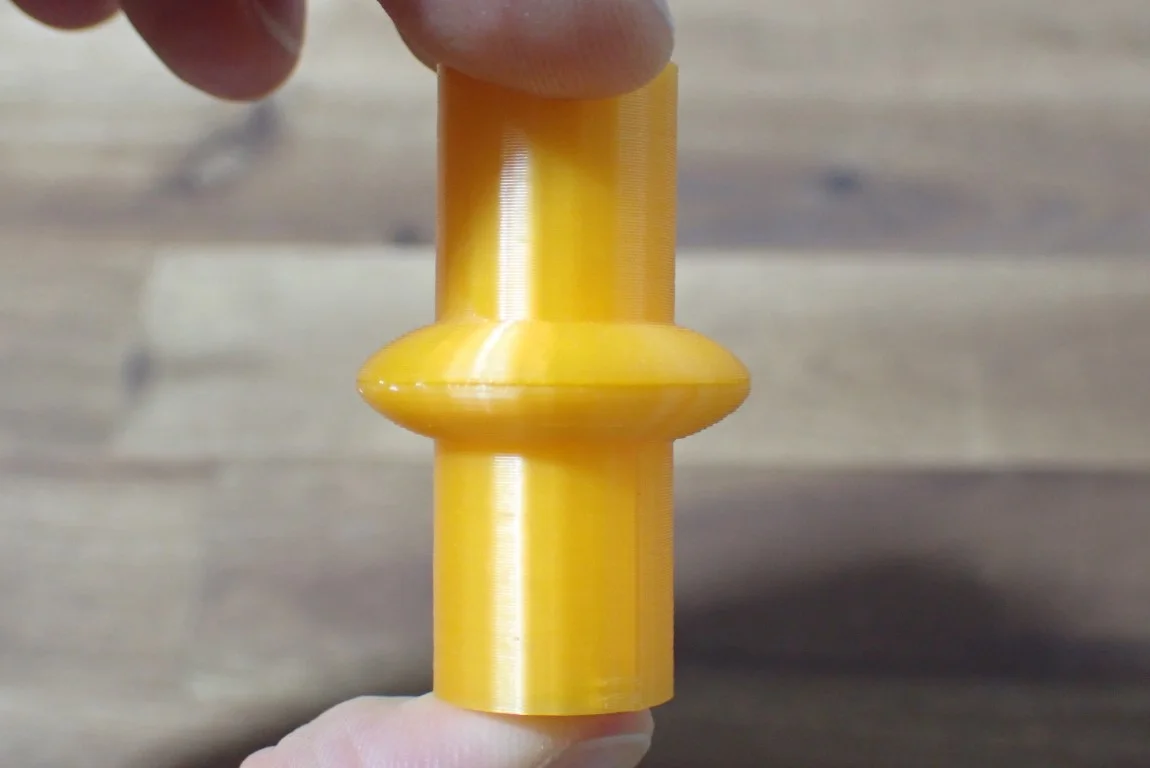
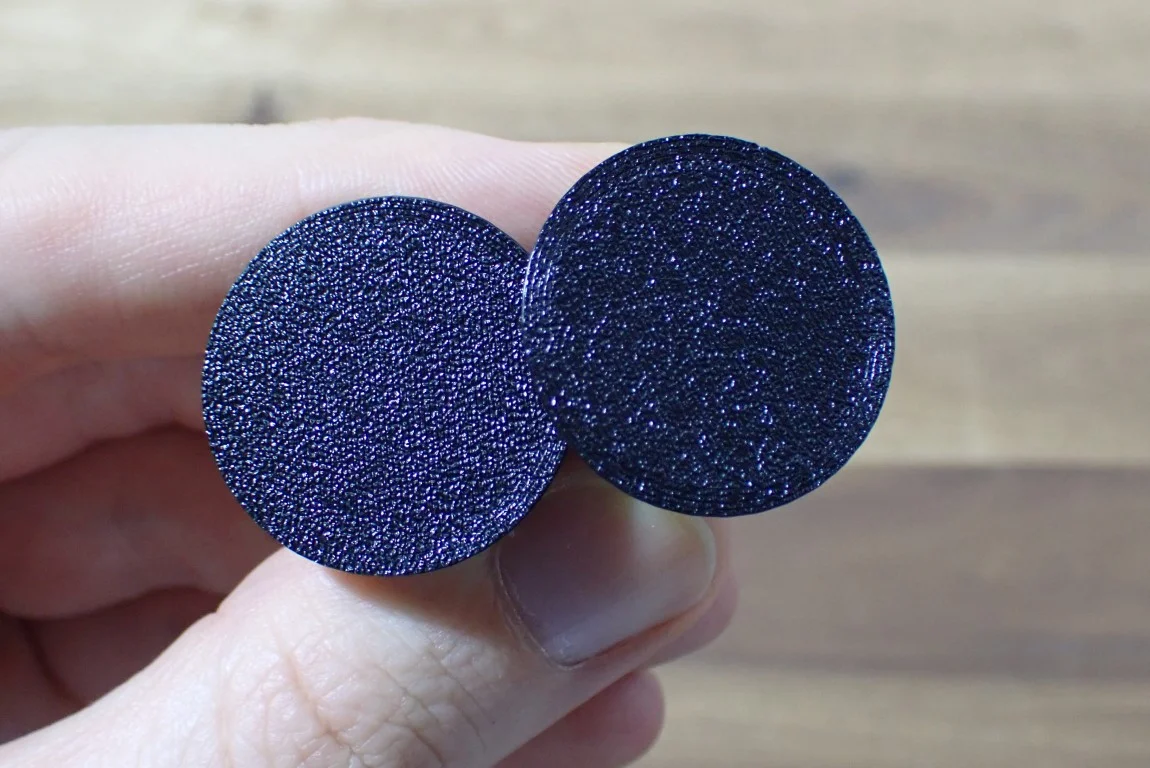
To demonstrate the application of each type of adhesive, I have printed PLA test objects in different colors. These are glued together step by step in the respective chapters of the adhesives.
- Blue: Superglue
- Green: Plastic glue
- Red: Epoxy adhesive
- Silver: Hot glue gun
- Orange: Acetone
- Black: Silicone
- White: 3D pen
- Grey: Dremel
Superglue
Superglue (cyanoacrylate adhesive) is a type of adhesive known for its fast bonding. This makes it a popular choice for gluing PLA, as the two materials form a strong bond quickly. However, superglue can also be too strong and leave ugly white marks. That’s why it’s important to be careful when using it.
Superglue is ideal for small PLA parts. The glue cures very quickly, provides a strong (but inflexible) bond, and forms barely visible seams. If a lot of superglue is used, its vapors can discolor surrounding PLA to a whitish color.
Check Price at:
Cyanoacrylate adhesives work on both porous and non-porous materials, forming a strong bond in seconds. This is also true with PLA, but here the superglue is best used only on small parts. This is mainly due to these two reasons:
- Dryed superglue is not flexible and breaks immediately if too much force is applied.
- The vapors that are released during curing attack surrounding PLA and leave white residues. However, this effect only occurs if the amount of vapors released is large enough.
If you join large PLA surfaces with superglue, it is not enough to blow away the fumes that arise during curing for some time or to provide good ventilation. The bigger the joint is, the longer these gases will escape. So it can be that even hours after the connections white spots arise.
So if you want to bond larger PLA parts together, other adhesives like plastic glue or epoxy are better suited. If you still want to use superglue and it has come to these white spots, you can try to remove them with isopropyl alcohol*.
Superglue is therefore ideal for repairing small defects or the joining of small PLA parts. Because this glue hardens so quickly and becomes extremely hard, you must be careful when processing that you do not accidentally bring glue to places that were not intended for it. A drop of superglue that accidentally got on a smooth surface can hardly be removed without residue.
How to Glue PLA with Superglue
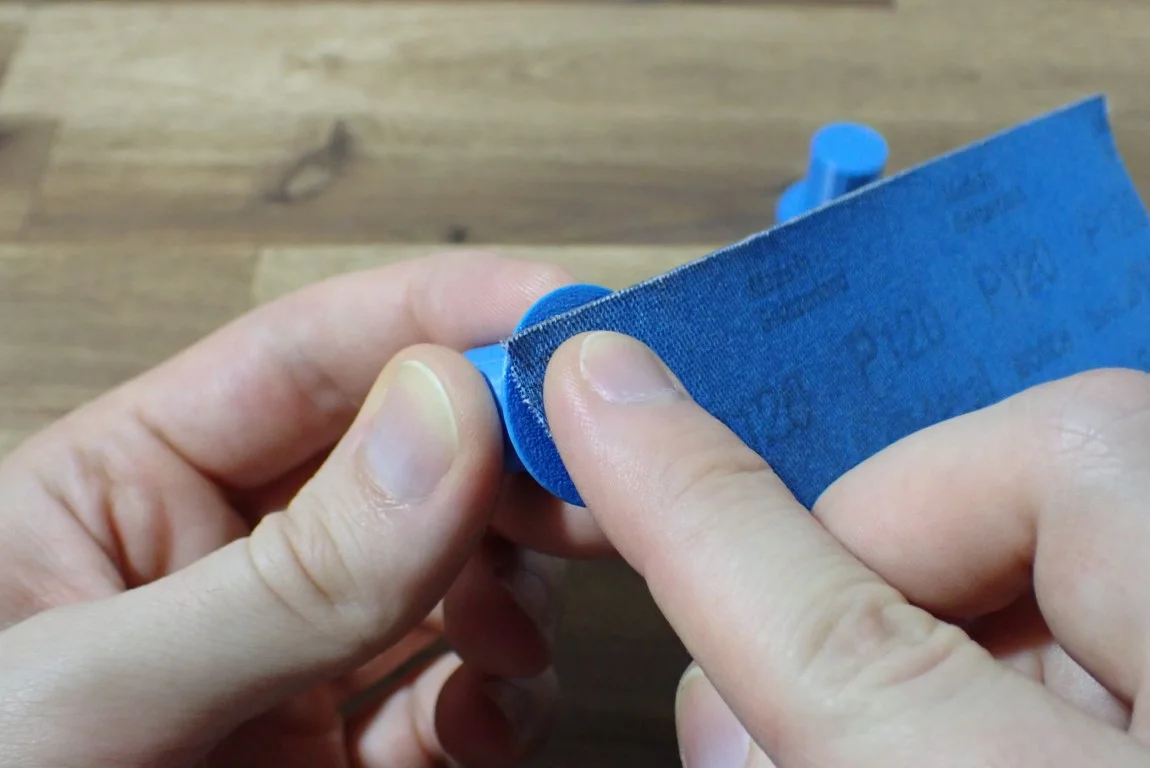
Smooth & roughen surfaces: In order for the superglue to create a good bond, both surfaces must fit together well. Superglue is only applied very thinly, so it is hardly possible to fill cavities with it. In addition, a slightly rough surface is ideal in order to provide the glue with as much contact surface as possible. A rough sandpaper is ideal for this.
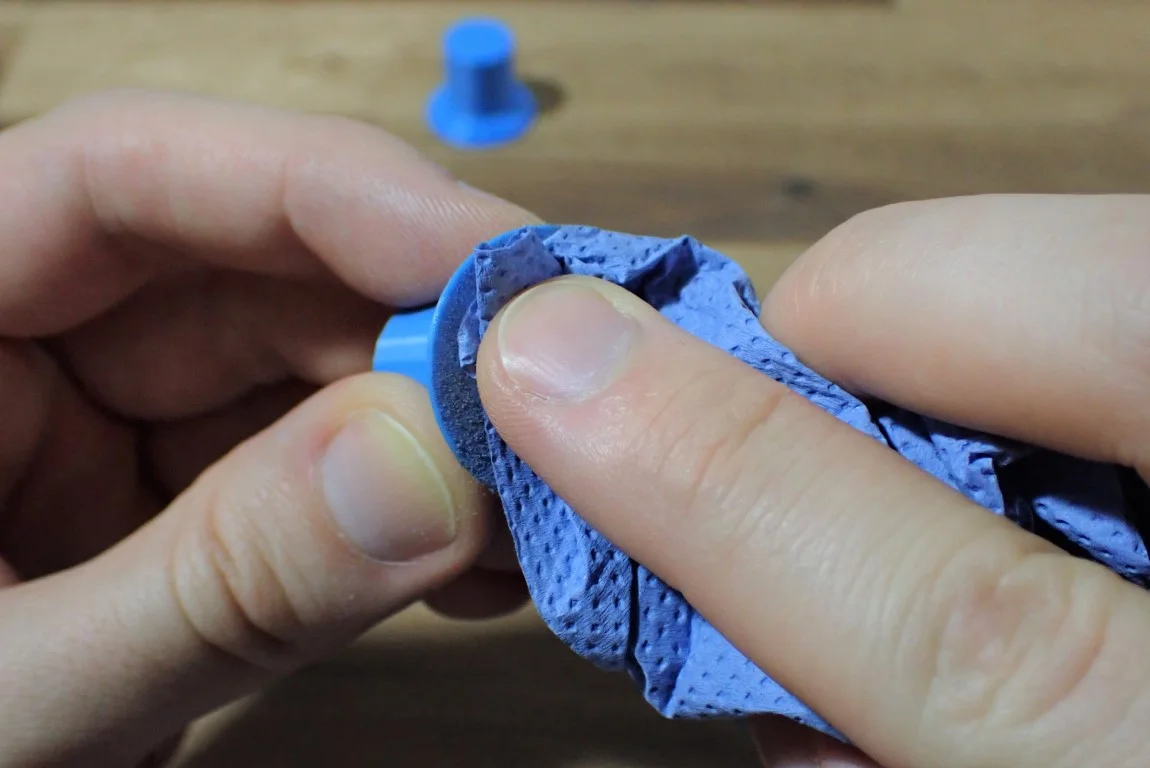
Clean surfaces: The surface must be free of foreign matter so that the superglue does not stick to it but only to the two surfaces that are to be glued together. If you have used sandpaper to roughen the surfaces, it is advisable to wipe the surface with a damp cloth or preferably with isopropyl alcohol. Before you can apply the glue, the moisture must have evaporated completely. Otherwise the glue will not stick very well.
Apply glue: As with most other glues, it is important not to apply too little or too much super glue. If you apply too much, the superglue will overflow at the seams and make it difficult to rework or even cause unsightly stains. If you apply too little, the adhesive strength may be too low to hold the part in place.
Spread the glue: You can spread the superglue with the nozzle of the glue for larger areas where a small spot is not enough. Sometimes it is also enough if you apply a spot of superglue on the object and distribute the glue by pressing the two parts together. With this method you have to estimate how much glue you need. If you have spread the glue with the nozzle, you should clean it with a cloth afterwards so that the opening does not stick together.

Position parts on top of each other: Because superglue cures so quickly and develops its full power after only a few seconds to a minute, you need to be very quick and careful when positioning the parts. You need to think ahead about how to position them for the curing time so that you move them as little as possible.

Press the parts together: With superglue, you don’t have to press the parts together that hard. Since the glue hardens so quickly, you will usually skip this step, since the superglue is already dry while you have positioned the parts. However, if you are supergluing larger surfaces together, you should fix them for a few minutes so that the glue inside the surfaces can also harden.

Clean the glue seam: If you’ve done everything right, you won’t have to clean the glue seam at all. In the best case, the superglue is only between the two parts and is flush with the outside of the seam. If there is a little too much glue between the surfaces, you have to remove it with a cloth as soon as possible while it is still liquid. Be careful not to smear the liquid glue on the outside of the object.
Wait: Since superglue sets so quickly, you probably won’t have to wait at all. While you are pressing the parts together or positioning them, the glue will have already dried. If it hasn’t, you should fix the parts so that they are pressed together immovably for a few minutes. Depending on the size of the object, you can do this with rubber bands, clamps or other tools.

Smooth out the Glue Seam: If you neglected to remove any super glue that was oozing out when you pressed the two pieces together, or if you accidentally smeared some super glue on your object in the process, you’ll need to do some touch up here. Since superglue is very brittle and hard when cured, you can easily remove or break off larger pieces with side cutters or tweezers. Larger areas of smeared superglue on your object are a little more difficult to remove. Here you can work with a fine knife or with a solvent.
Plastic Glue
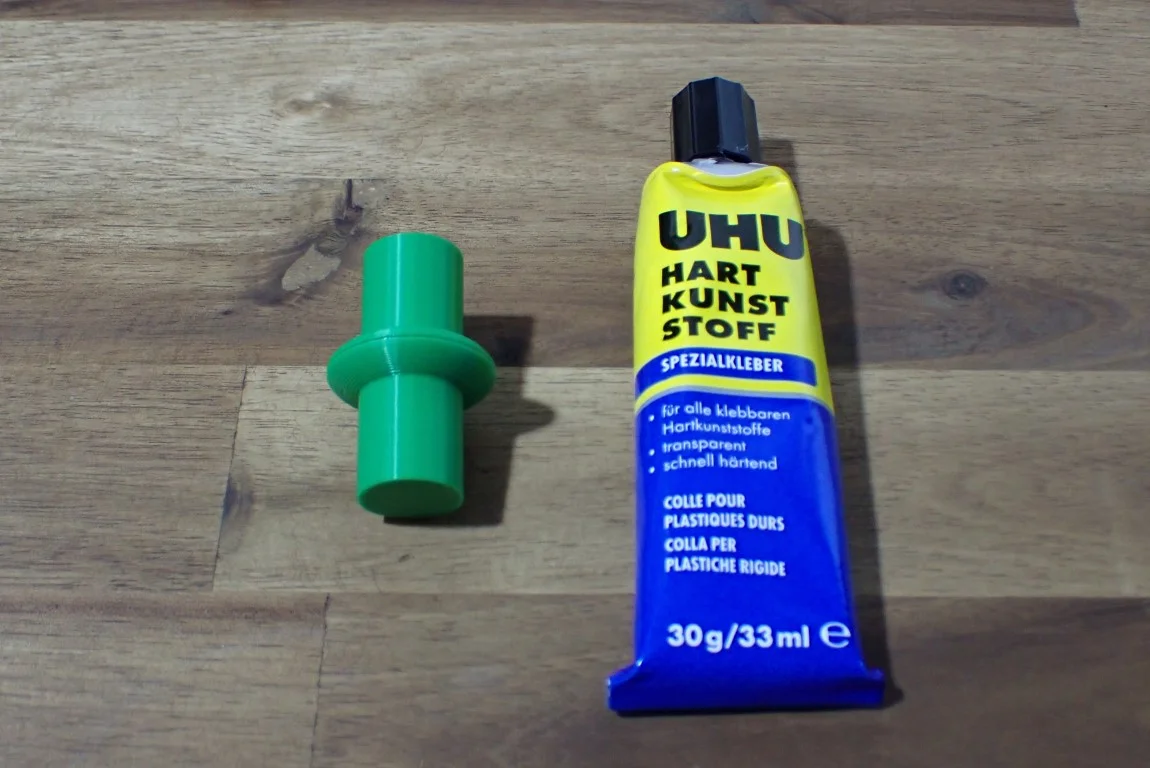
There are many types of glue, but some are specifically for use with plastic. Sometimes plastic glue is confused with superglue, but these two types of glue work very differently. Superglue’s bond is usually quite brittle, but it cures out extremely quickly. Plastic glue cures a little slower, but bonds the two plastic parts together much better. The PLA at the joint is more or less melted and thus connects to an almost inseparable seam.
Special plastic glue hardens almost as fast as superglue, is often somewhat flexible, makes a very strong bond and leaves no white spots around the glue seam. Therefore plastic glue is perfect for PLA.
Check Price at:
This does not mean that superglue is worse for PLA than plastic glue. The two adhesives just have different purposes. Superglue is great for joining very small parts together. However, as soon as the surfaces become larger, plastic glue is better suited.
Plastic glues come in different viscosities from very liquid to gel-like. Which viscosity you choose depends mainly on your preferences, but most often the medium viscosity is used. Very liquid adhesives come in a glass bottle with a brush for application.
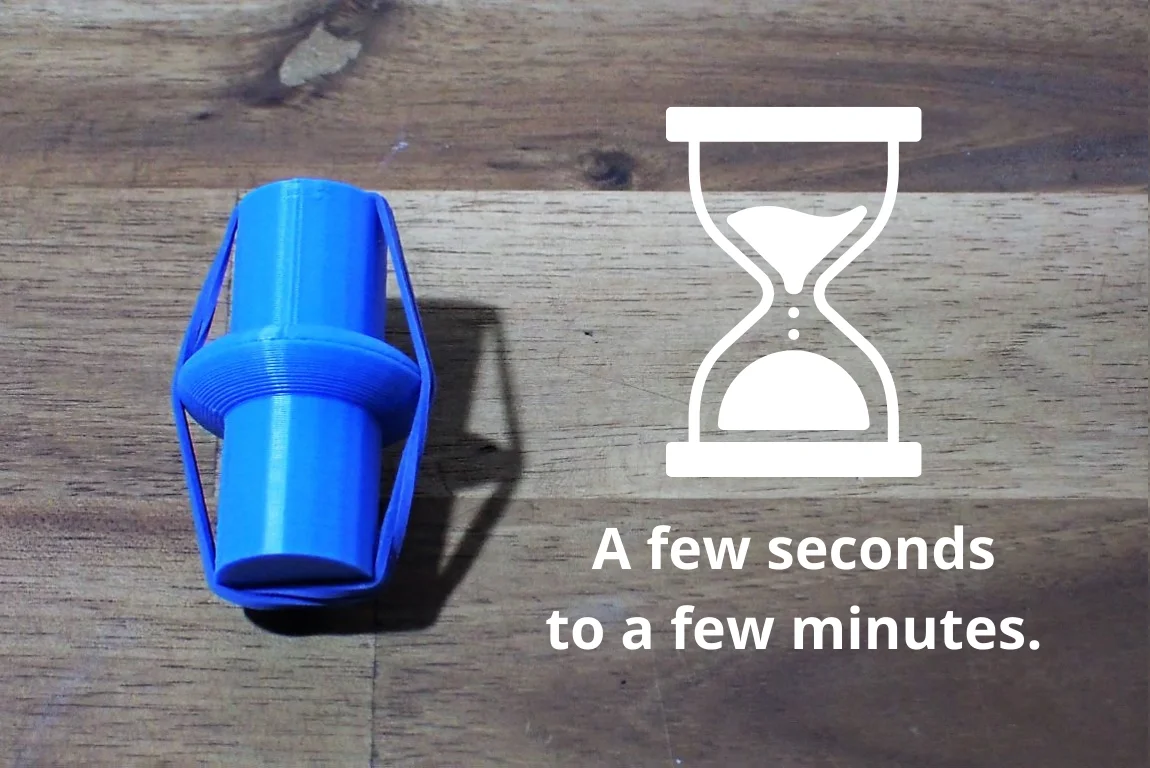
Plastic glue immediately begins to bond the two parts together. So you should have both parts ready to press together. Since plastic glue takes longer to cure than superglue, you should press small parts together for about 30 seconds so that the bond holds by itself. If you want to join large objects with plastic glue, you should increase this time. Fix them with clamps or rubber bands for 20 to 60 minutes. However, the adhesive will not be fully cured for 24 hours.
If you plan to work on the finished object further, for example to paint it, you should wait these 24 hours until the glue has completely cured. Otherwise the bond could either break or outgas further and destroy any coating. And speaking of coatings: Plastic glue can usually only successfully bond plastics together. If you sprayed your PLA parts with a varnish or paint before glueing, you won’t have much success with plastic glue. Then superglue or another method from this article would be more successful.
How to Glue PLA with Plastic Glue
Smooth & roughen surfaces: Since most plastic glues behave the same way as superglues, except that they cure a little slower, you’ll need to smooth and roughen the surface accordingly. A rough sandpaper is sufficient to prepare the surface.

Clean surfaces: Plastic glue specializes in plastic, as the name implies. Especially foreign bodies that are not plastic, therefore, interfere with the adhesive power of the adhesive significantly. Dust and the remains of sandpaper can have a very detrimental effect here. For very small surfaces, it is usually sufficient to remove the coarsest residues with a finger, for larger surfaces, a damp cloth or isopropyl alcohol is recommended.

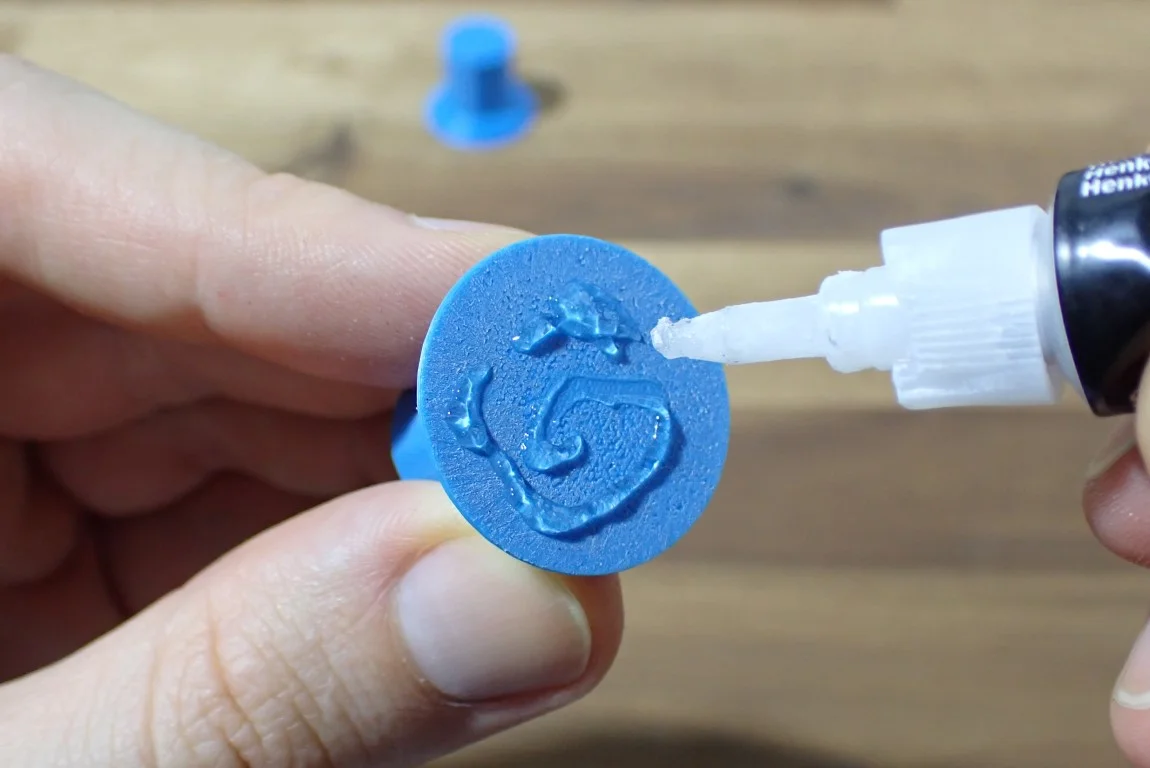
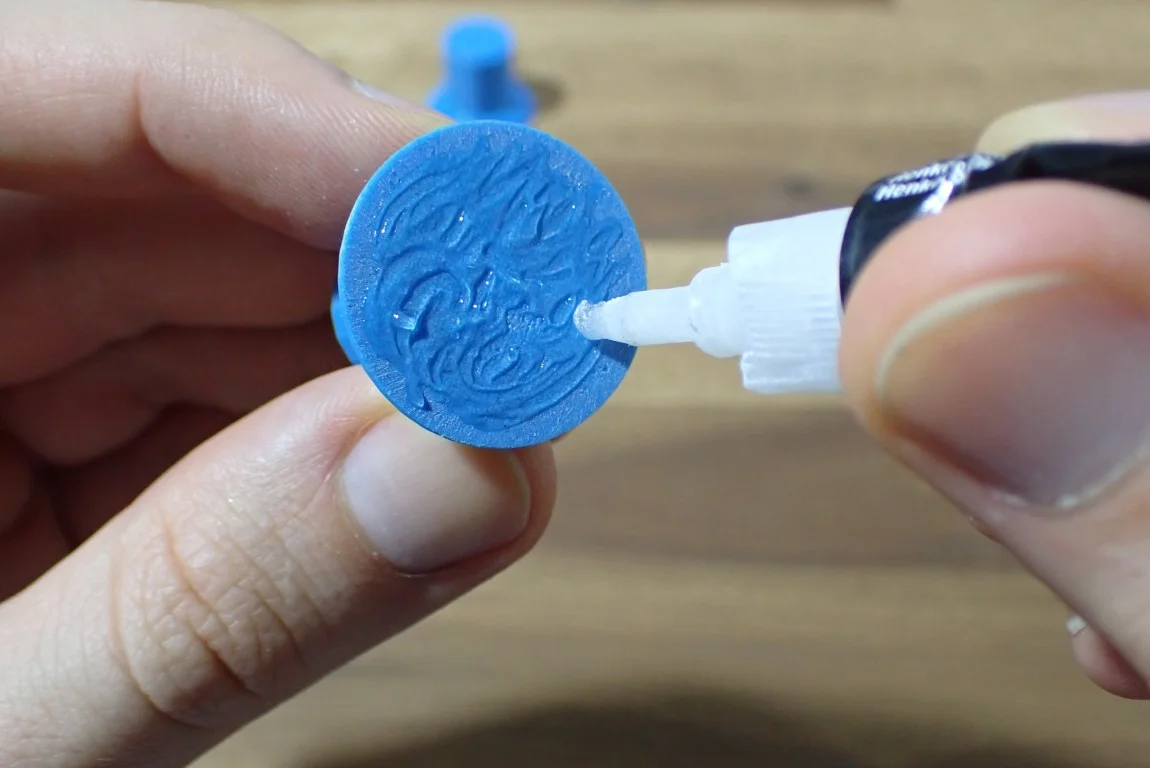
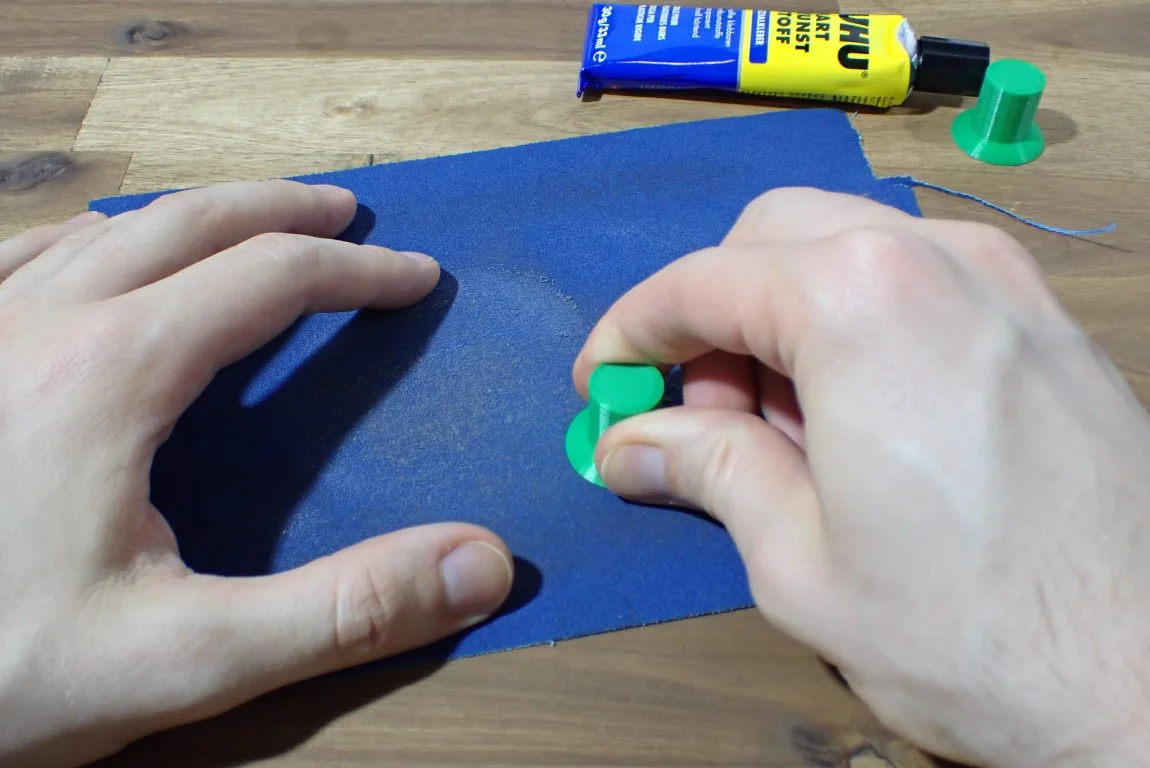
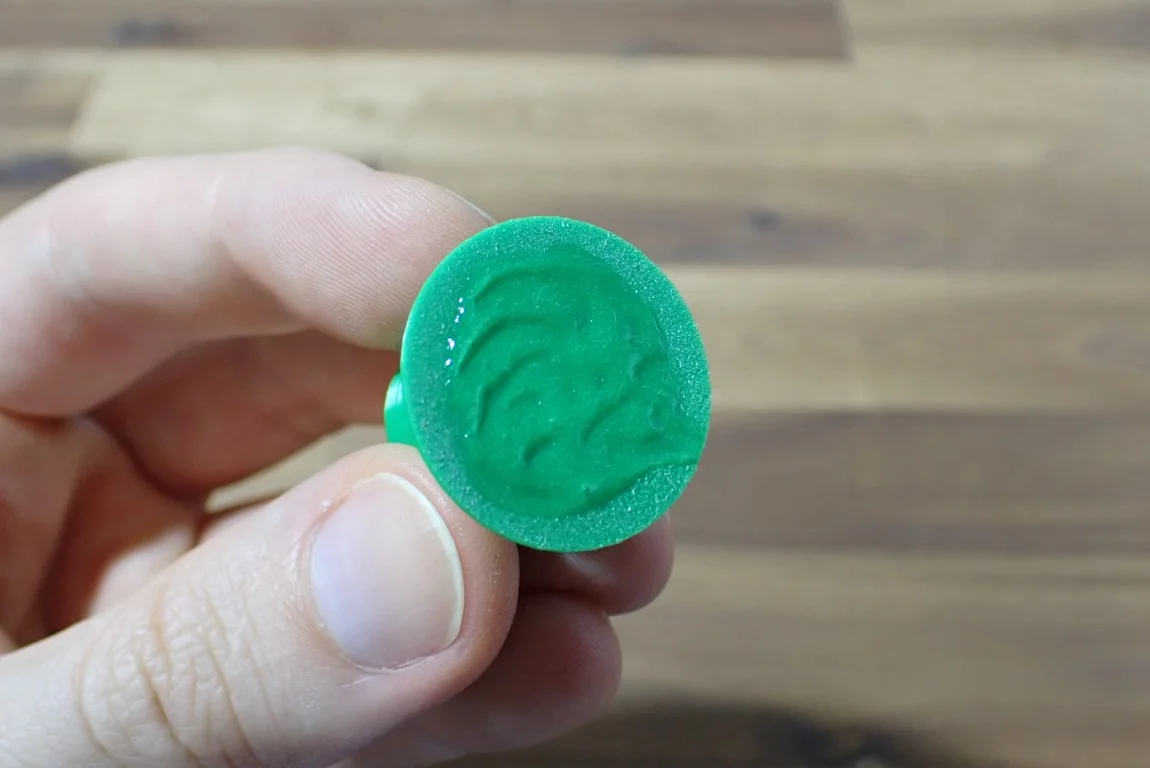
Apply glue: Depending on which plastic glue you use, the application is identical to superglue. In my case, the application was a bit awkward and pulled a lot of strings. Remember that plastic glue makes a very fine seam and you don’t apply too much.
Spread the adhesive: The best way to spread the plastic glue is with the nozzle of the glue tube. If you only want to connect small parts together, it is usually enough to apply a blob of glue, which then spreads when the two parts are pressed together.
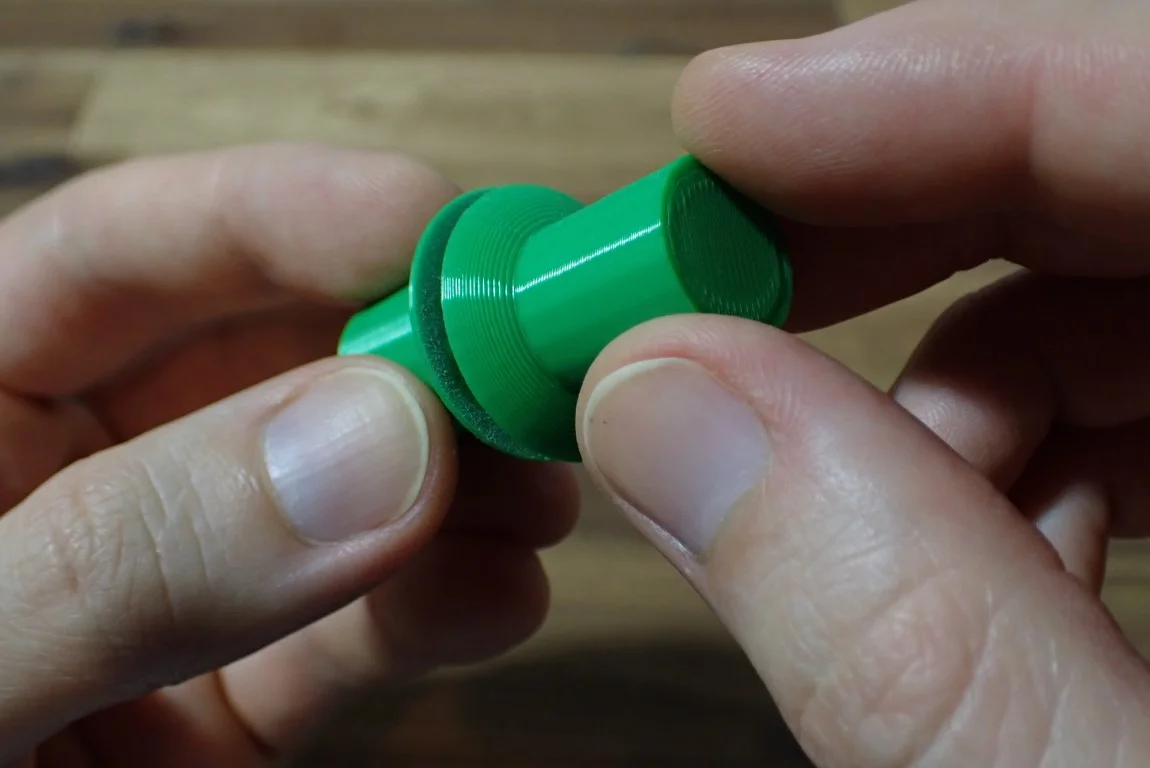
Position the parts on top of each other: Since plastic glue cures relatively quickly, and in the case of small amounts after only a few seconds, it is important to position the two parts accurately as quickly as possible. If you have somewhat larger parts, you do not have to be quite so fast, because the glue is only properly cured after a few minutes when used over a large area.

Press the parts together: Some plastic glues are very viscous. With such adhesives, it is important to press the parts together for a longer period of time so that the gel-like adhesive can spread well over the surface and flow into the smallest crevices.
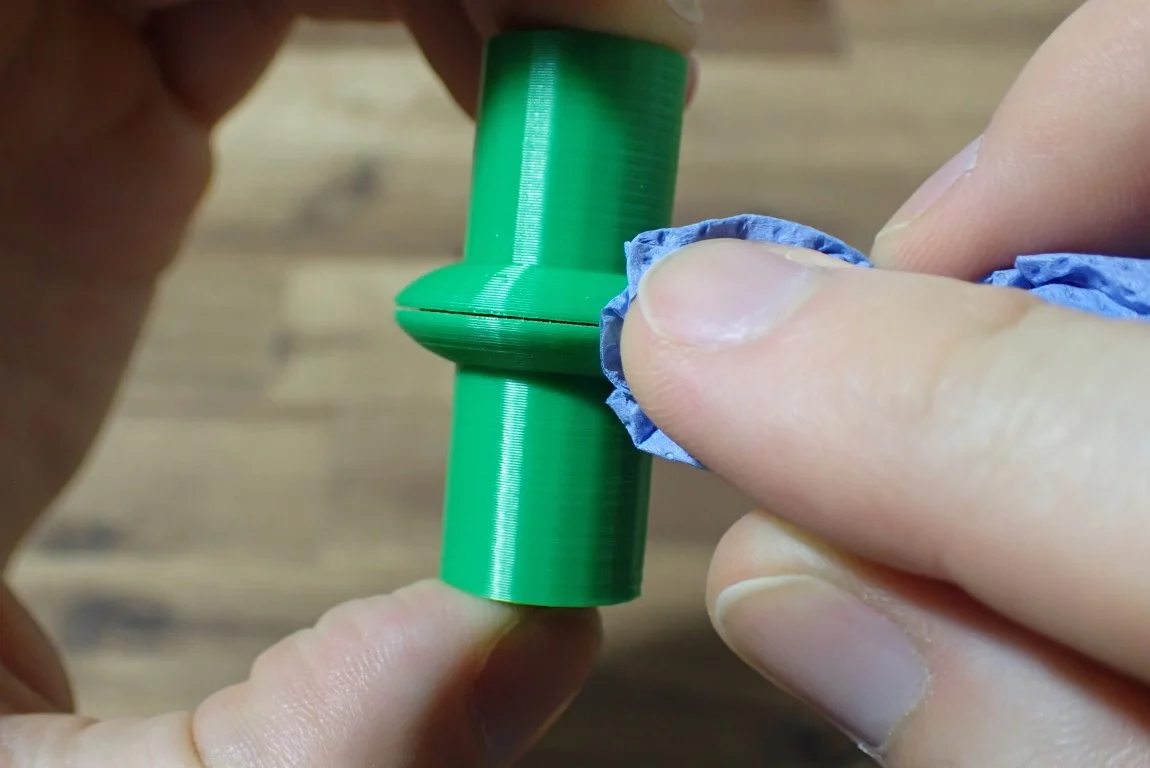
Clean the glue seam: If you have used a little too much glue, you must remove the excess glue from the glue seam as quickly as possible in this step, so that no drop of glue can run down the object.
Wait: With plastic glue, you have to wait a little longer than with superglue. If you have only used a little, the curing time is limited to a few seconds. For larger areas, it takes a few minutes until you no longer have to fix the parts from the outside. However, the adhesive is completely cured for larger areas only after 24 hours.

Smoothing the glued seam: Plastic glue creates a very thin seam and becomes very hard. If you still have excess glue on the seam, you can nip it off with a side cutter or carefully smooth out irregular areas with sandpaper.
Epoxy
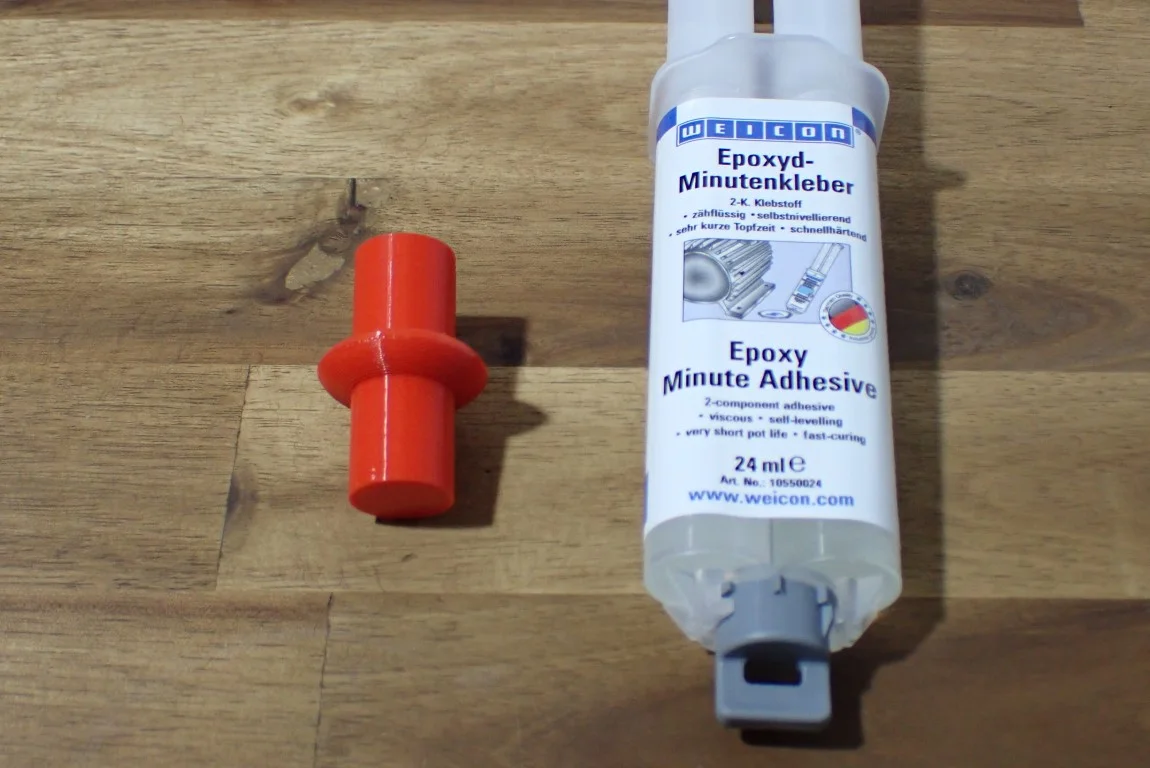
Epoxy adhesive is a two-part adhesive system consisting of an epoxy resin and a hardener. When the two parts are mixed together, they react and form a tough, durable plastic. Epoxy adhesives can be used on a variety of materials, including metals, plastics, and composites.
Epoxy adhesives are extremely hard when cured and are ideal for bonding large PLA parts together. Since epoxy is very tough and forms a smooth surface, it is not only suitable for bonding, but also for repairing and smoothing surfaces.
Check Price at:
Epoxy glue can be used for small and large joints and creates an extremely strong bond. Whenever you need to glue parts together that won’t break apart before the rest of the PLA object, this two-component adhesive is for you.
The disadvantage of epoxy resin is that it is relatively difficult to work with and you usually mix too much adhesive with this two-component adhesive and have to dispose of most of it afterwards. These two components consist of the epoxy resin itself and the hardener. You need to mix these two components in a certain ratio to start the curing process. The ratio is indicated on the packaging and can vary from product to product.
Although epoxy glue can also be used for small joints, its properties make it best suited for joining large parts together. For small parts, which usually have to withstand much lower mechanical forces than larger parts, adhesives such as superglues or plastic glues are more suitable.
When using epoxy adhesives, it is very important to join the two parts together immobile for several minutes or even hours. Only then can a good bond be created. The time required for complete curing is highly product-dependent. Although short curing times are nice when you need it fast, it is usually better to use epoxy adhesives with PLA that have a long curing time.
Epoxy adhesives become hot as they cure. Products that cure very quickly can sometimes get so hot that they can deform the temperature sensitive PLA. Especially with very large projects this can quickly become very annoying if you have to reprint the two parts or even the whole project if a part has warped or deformed due to this heat.
How to Glue PLA with Epoxy
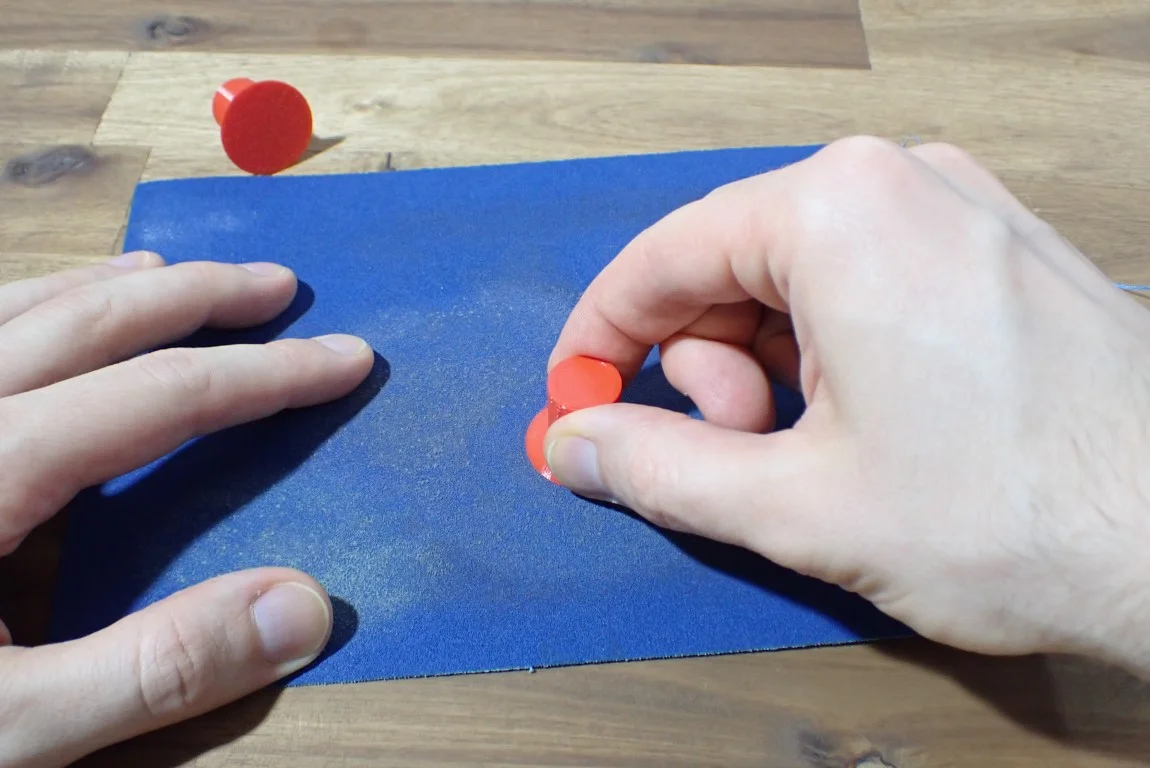
Smooth & roughen surfaces: Epoxy resin two-component adhesive has an extremely strong adhesive force. Often it is not even necessary to prepare the PLA surface with sandpaper to increase the adhesion even more. In my opinion, however, it can’t hurt and especially for large projects this is definitely a good idea. Also, smoothing the surface isn’t quite as important with epoxy since you’ll be applying a fairly thick coat anyway. The glue will smooth out minor imperfections and holes all by itself.
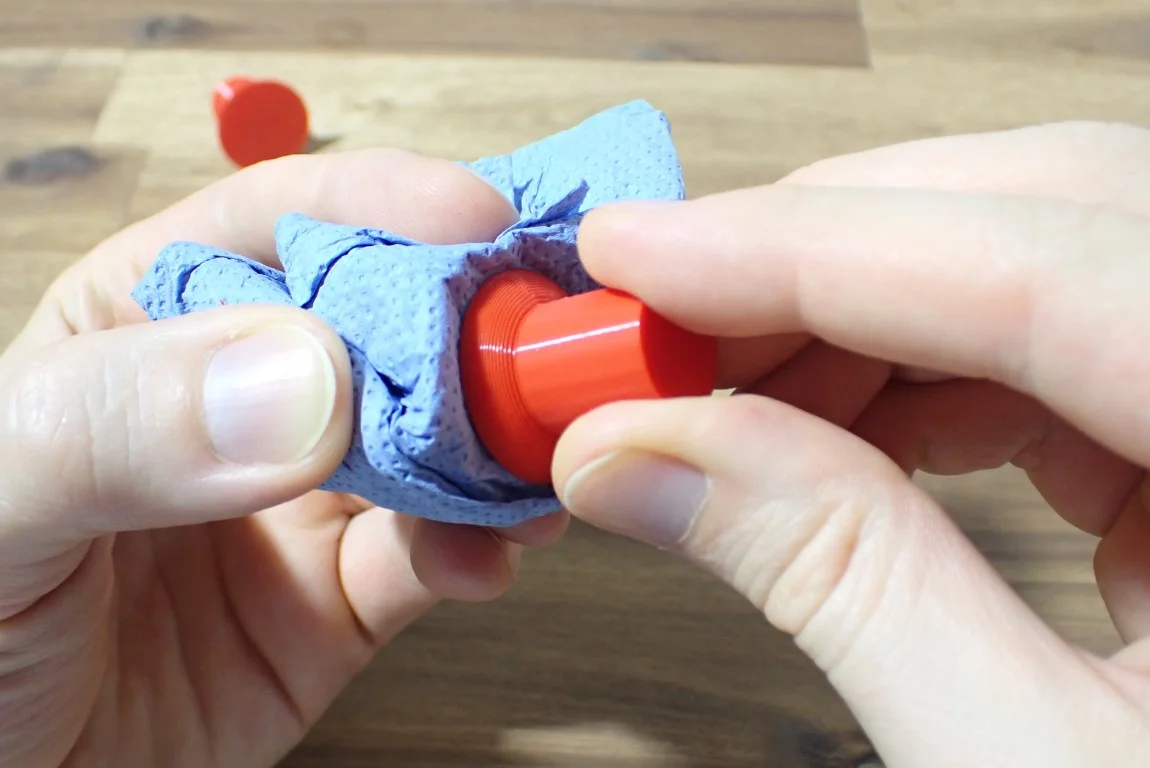
Clean surfaces: If you have cleaned the PLA surface with sandpaper or the object is not fresh from the 3D printer, you should clean the surface carefully and even degrease it. If the object comes directly from the printer and you have only roughened the surface with sandpaper, a damp cloth is sufficient to remove the dust from sanding. If the object is older, you should remove oil and grease with isopropyl alcohol (a little dishwashing liquid is also sufficient).
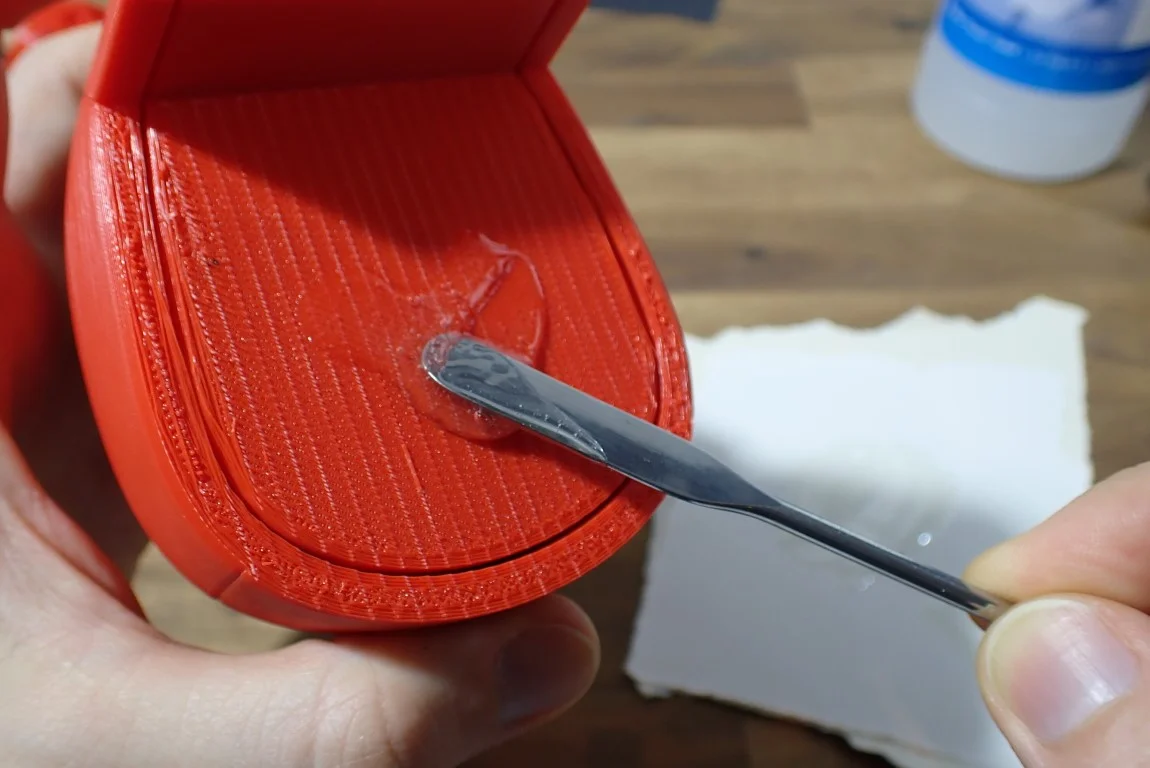
Apply the glue: Before you can apply the glue, you must first mix the two-component glue. In most cases, you will need to get a suitable surface and a stirring stick. You can also improvise like I did and use a piece of cardboard as a base and a piece of paper for stirring and as an applicator. Since you use a relatively large amount of glue, it is advisable to spread glue on both surfaces so that it can get into every little crevice in advance.
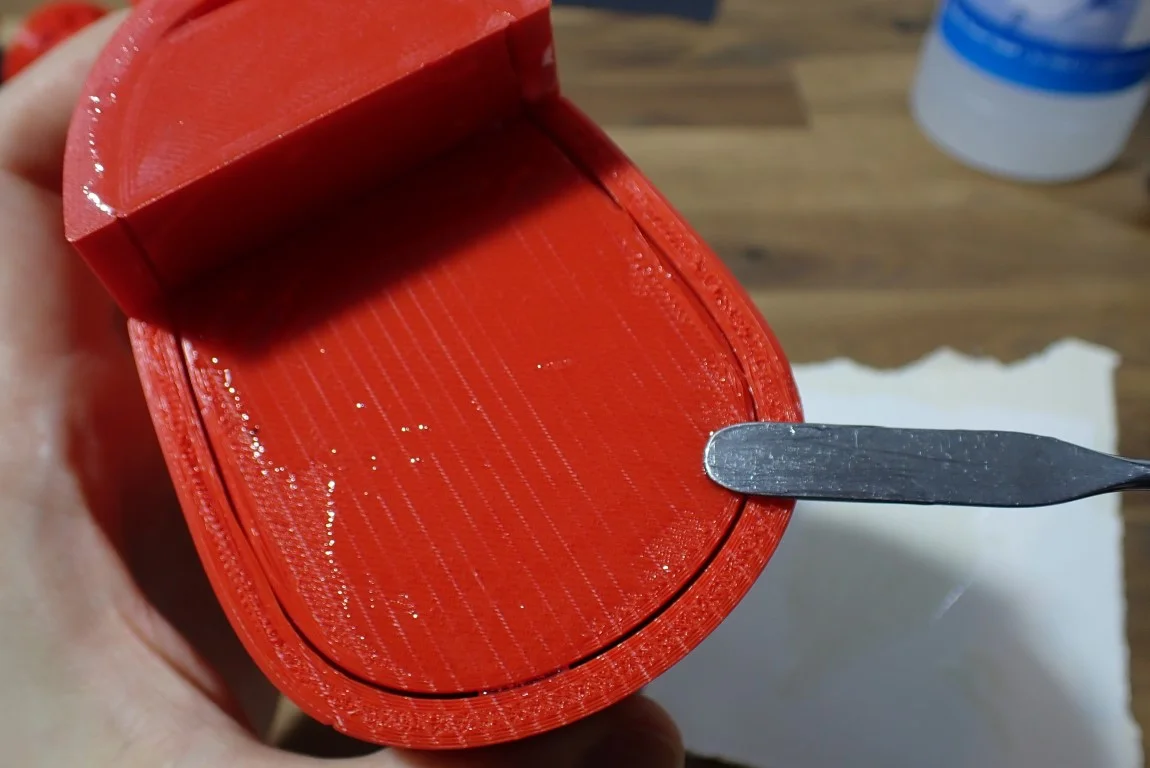
Spread the glue: Depending on how good you are with your applicator, applying the epoxy glue is relatively easy. Just smear it all over the area you want to glue.
Make sure you leave some space around the edge that will be filled with glue when you press the two pieces together. Also, the layer should not be too thin. Depending on how big your two parts are, the layer can be anything from 0.5 to several millimeters.

Position the parts on top of each other: Depending on how the surfaces of the two pieces are shaped and how thick the adhesive layer is, this step can be a bit awkward. The flatter the parts are and the thicker the layer is, the easier it is for the two parts to slide over each other. But since you have a relatively long time until the glue is cured, you can take your time to position the parts exactly on top of each other.
Press the parts together: Since epoxy glue hardens relatively slowly (several hours), you should fix the parts firmly. For larger parts, clamps are best, for medium sized parts you can also use rubber bands. For very small parts, gravity is usually enough to hold everything in place.
When fixing the parts, however, make sure that you don’t press them too hard together when using a thicker layer of glue. Otherwise, all the glue could ooze out the sides.

Cleaning the glue seam: Once epoxy glue has cured, it will be difficult to remove it. Therefore, it is important that you clean the glue seam immediately if something goes wrong.
Wait: How long you have to wait for epoxy glue to completely cure is extremely product dependent. Also, the amount is very important. In general, you should use epoxy adhesives for PLA that cure a little slower to avoid high temperatures during the reaction.
Roughly you can assume that after a few hours the glue is hard enough that you can move the object and release it from a fixation. However, the full hardness is only reached after several days.

Smoothing the glue seam: Fully cured epoxy is extremely hard. Sometimes it can be compared to glass. You can smooth the glue seam by sanding and polishing.
Hot Glue Gun

A hot glue gun is a tool used to join materials together by heating a glue stick and then pressing it against the materials to be joined. The glue stick is melted and flows down the barrel of the gun where it is dispensed through the nozzle. The glue then cools quickly and solidifies in the air, holding the materials together.
A hot glue gun is only suitable for large objects with PLA – the seams are relatively thick (1-3 mm). In return, hot glue hardens within seconds and creates a relatively good bond with properly prepared surfaces.
Check Price at:
No workshop should be without a hot glue gun. It is universally applicable and so easy to use that it can also be used by children under supervision. However, as the name suggests, the hot glue gun is not completely harmless and can cause serious burns.
Besides the advantages that the hot glue hardens very quickly and the operation is extremely simple, there is also the disadvantage that the joint often does not become so pretty. In order for hot glue to develop its full power, relatively thick layers are necessary, which are very noticeable on smaller objects. Therefore, the hot glue gun is particularly suitable for larger objects or for those where you still work on the surface of the object anyway.
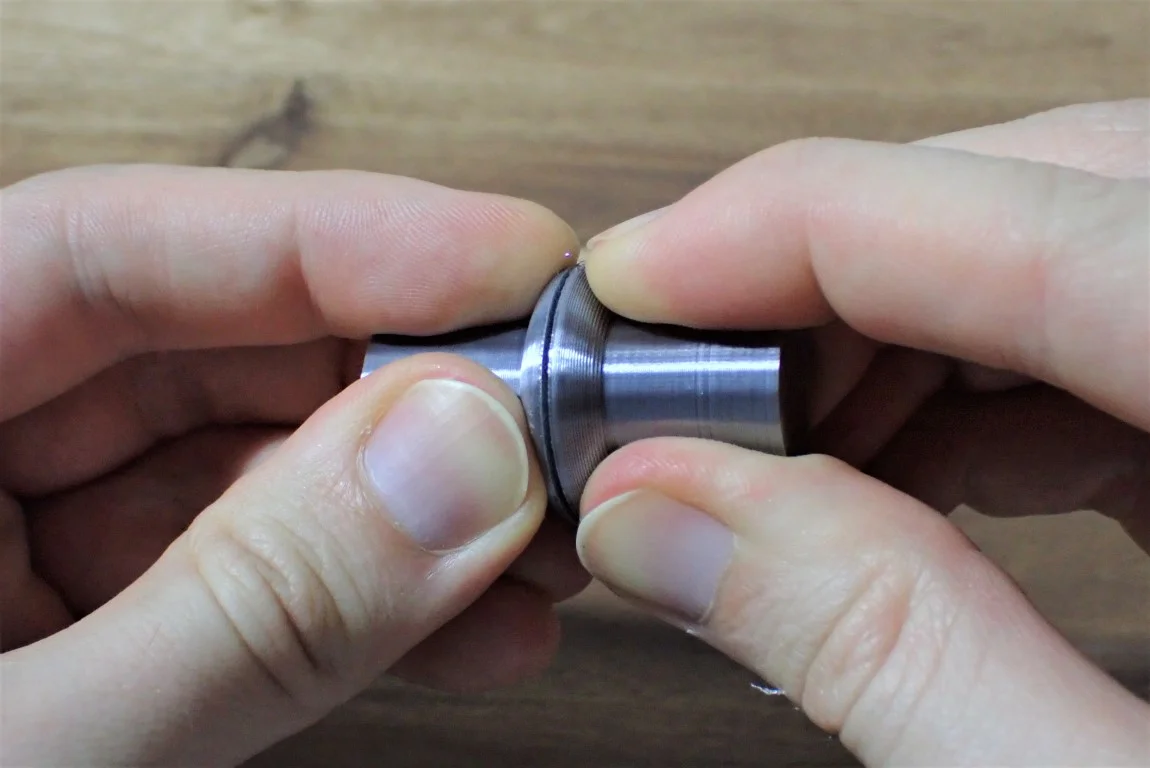
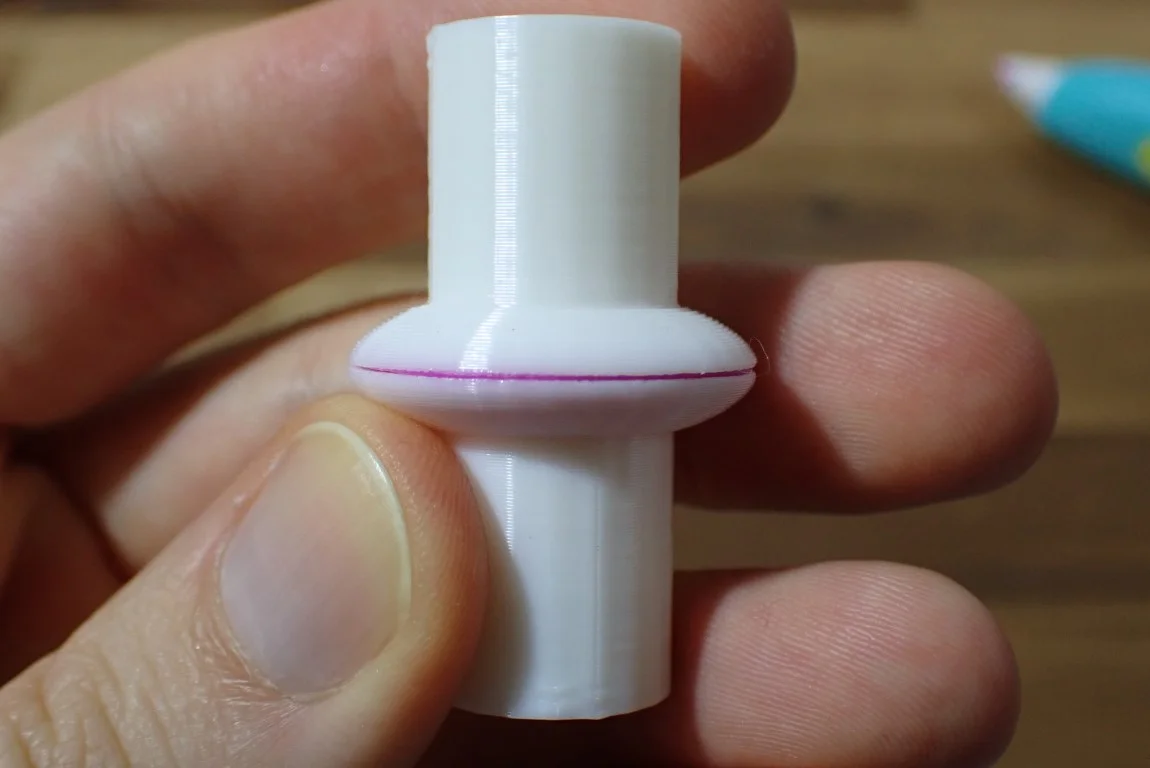
While we’ll cover how to glue PLA with a 3D pen later, you can also use a hot glue gun like a 3D pen. To do this, you need to measure the glue sticks of the hot glue gun and print a PLA stick with 100% infill with the same diameter. This way you can build your own PLA hot glue gun.
The idea behind this self-printed ammo for the hot glue gun is that the liquid PLA from the hot glue gun bonds very well with the other two PLA parts. If you do it right, the joint will behave almost exactly like the rest of the model. The advantage is that the seam is solid and not partially hollow like the rest of the model. The disadvantage is that the new PLA is applied to cold and already completely solidified PLA, so it won’t bond quite as well with the PLA that’s already there.
How to Glue PLA with a Hot Glue Gun
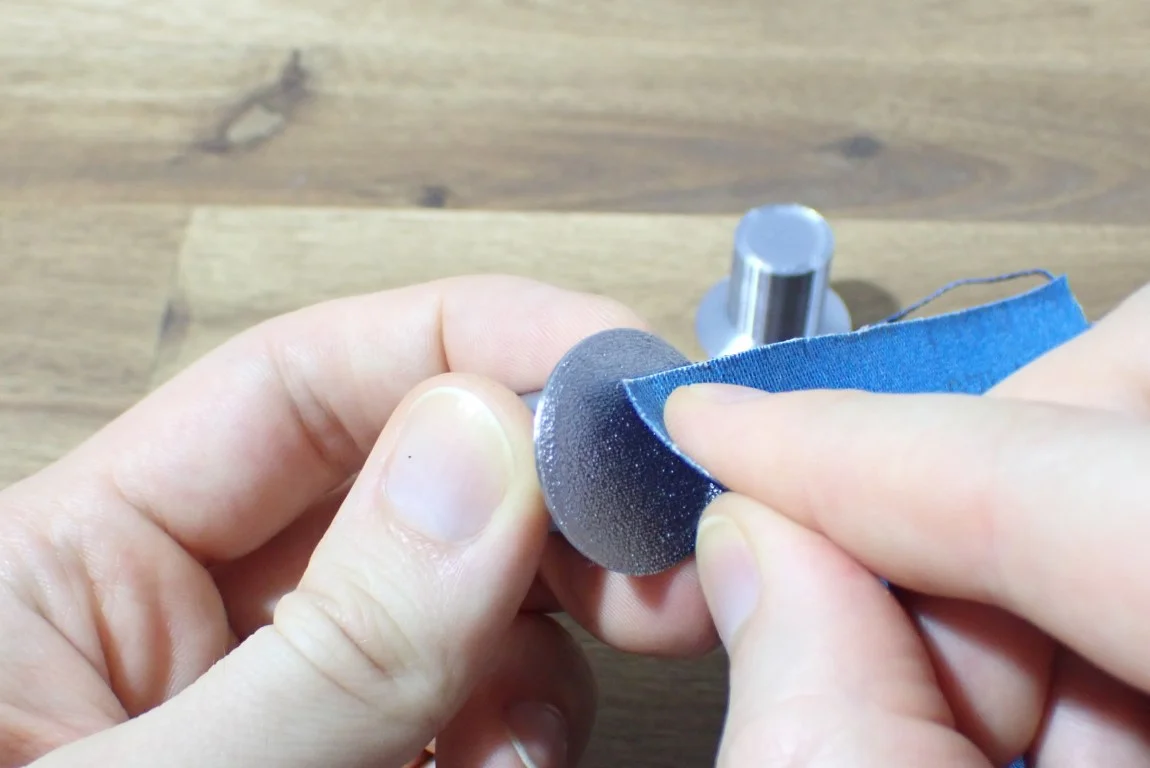
Smooth & roughen surfaces: Since the adhesive strength of hot glue is only moderate, it is advisable to roughen the surface well. Use the coarsest sandpaper you can find to give the hot glue a large surface to attack.
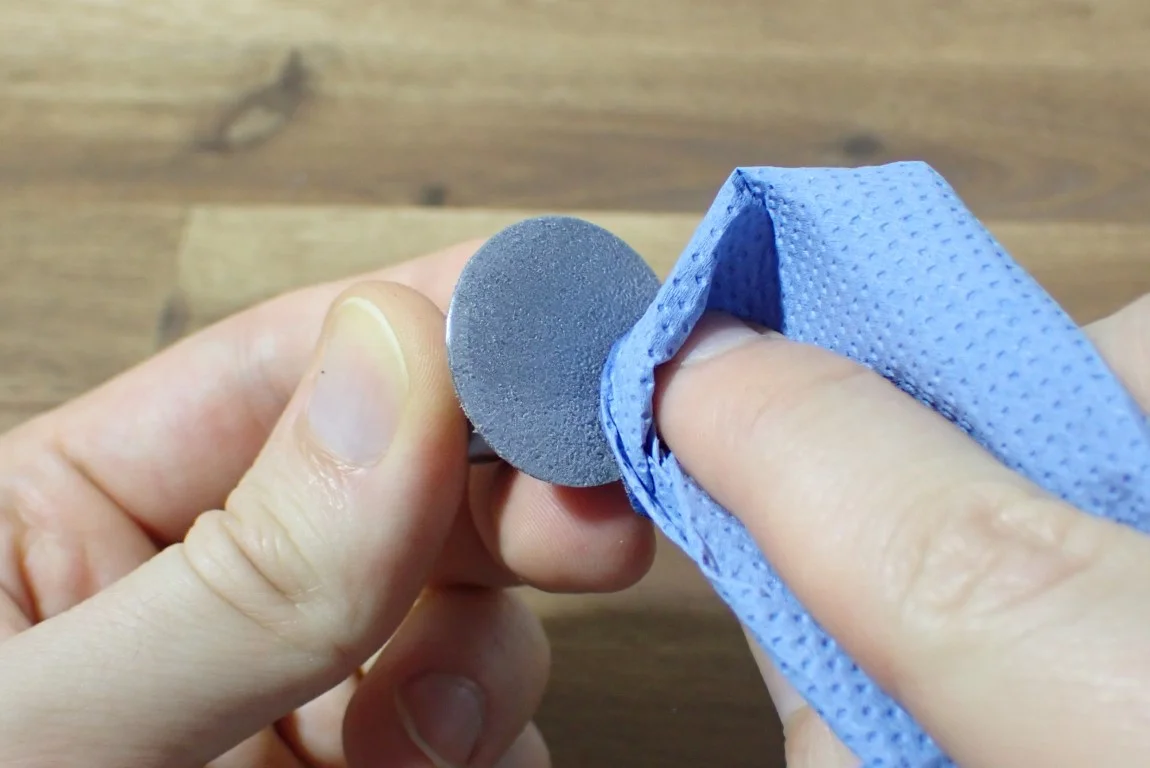
Clean surfaces: It is also very important with hot glue to clean the PLA surface well. Dust, sanding residues or greasy fingerprints can further reduce the adhesive strength. Foreign objects can be wiped off with a damp cloth and if the surface is very greasy, use some dishwashing liquid or even isopropyl alcohol for cleaning.
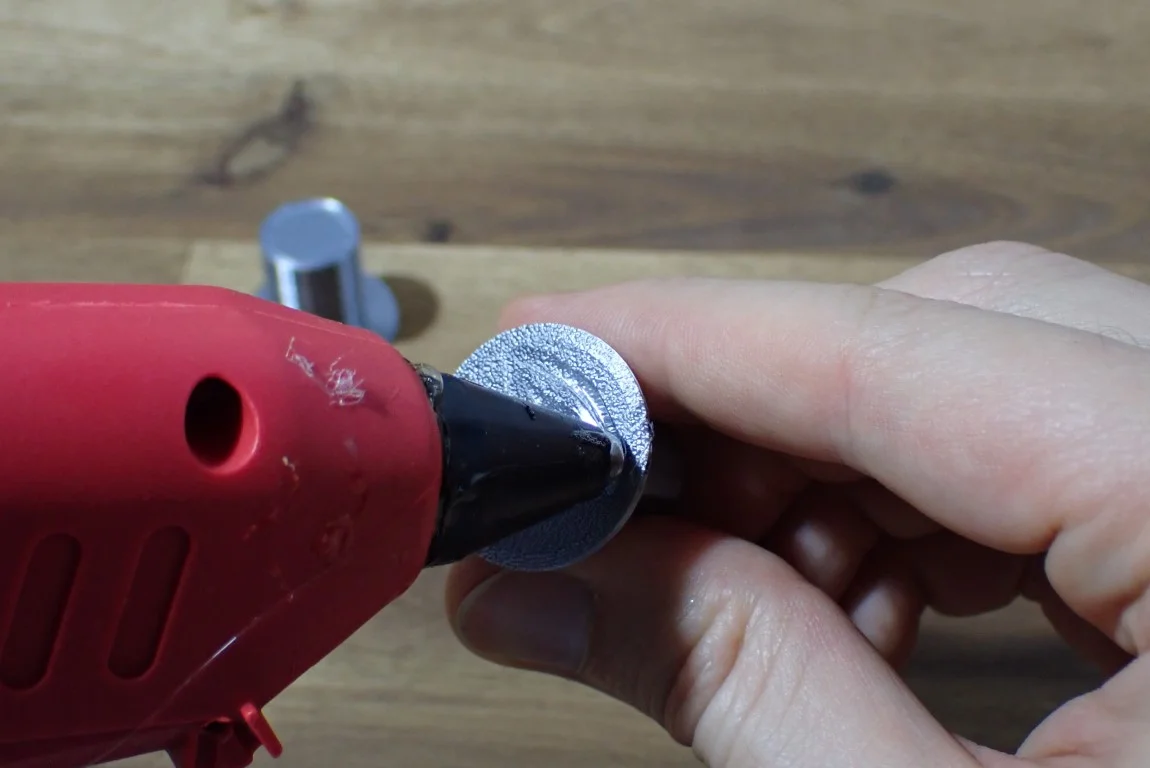
Apply glue: Depending on what kind of hot glue gun you’re using, you may well end up with too much glue leaking out unintentionally. While hot glue requires a thicker layer than superglue or other adhesives, if you apply too much, it will leak out of the cracks.
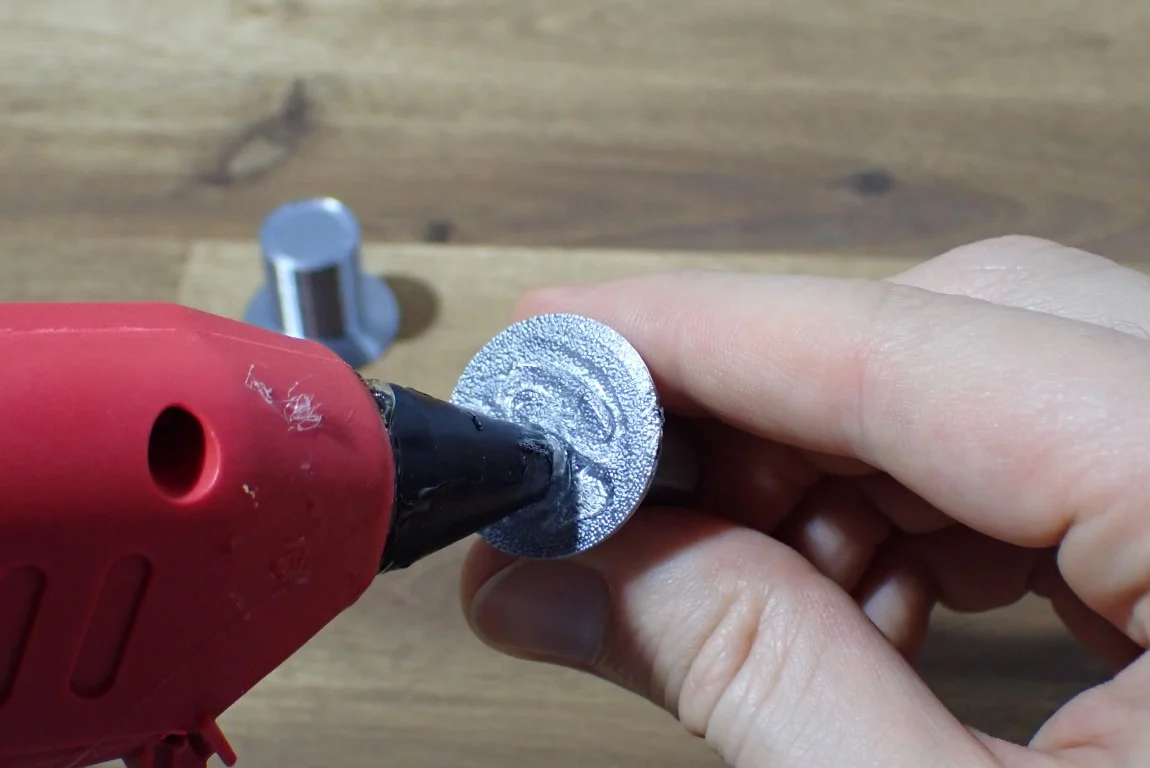
Spread the glue: Spread the glue over the surface of your object with the hot nozzle of the hot glue gun. Make sure you get every crevice to increase the adhesive strength as much as possible.
Position the parts on top of each other: Since hot glue cools down very quickly and loses its adhesive power, you have to be pretty quick when positioning the two parts. The larger the area you want to glue, the faster you have to be.
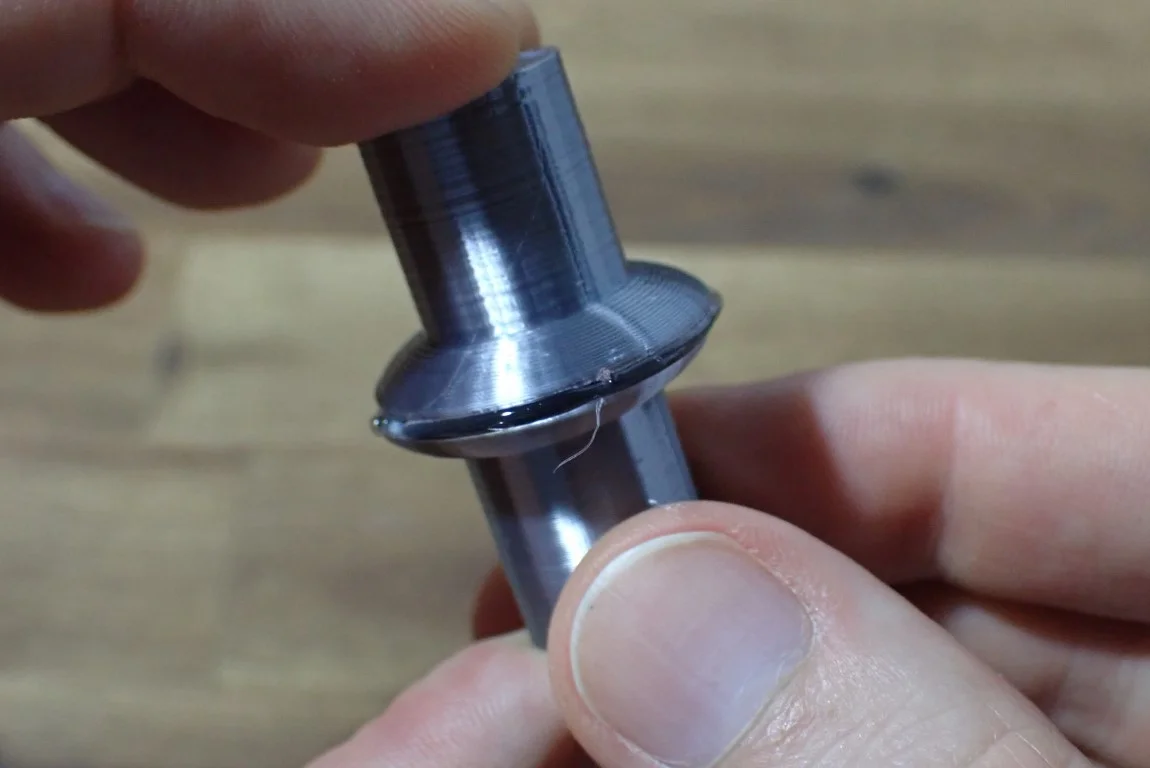
Press the parts together: If you were quick enough, and press pieces together, the hot glue will give a little before it cools and hardens. Press the two parts strongly together so that a good adhesive strength can be established.
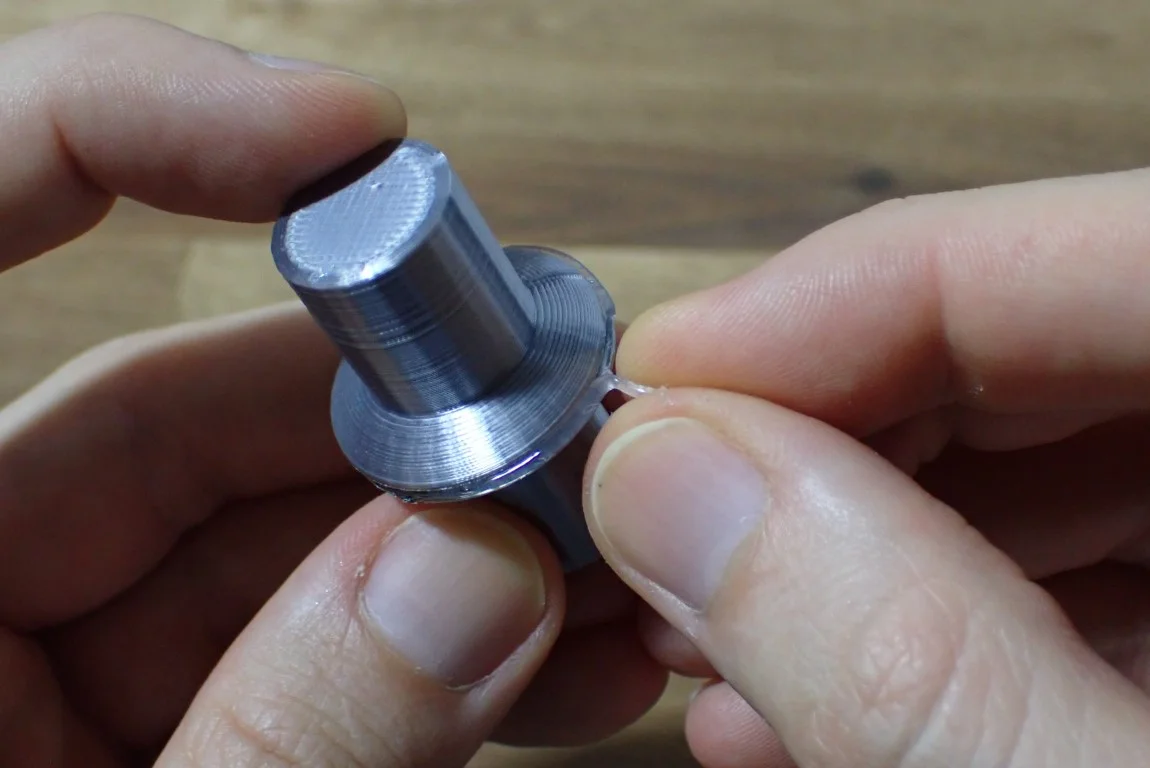
Clean the glue seam: Because hot glue cools and hardens so quickly, you have very little time to clean the glue seam. It usually makes more sense to smooth the glue seam after the glue has completely cooled and hardened.
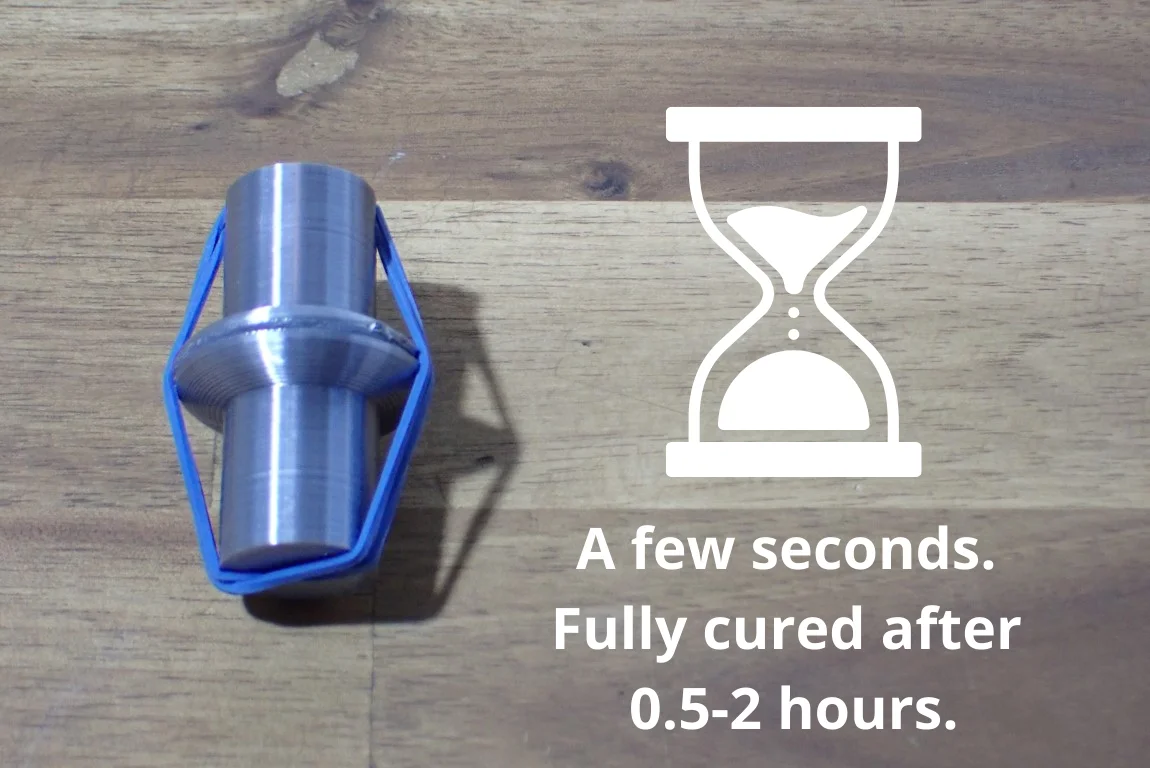
Wait: With hot glue, you only have to wait a few seconds until the adhesive force is high enough so that you can let go of the parts again. However, the glue is fully cured only after 30 to 120 minutes. The time depends mainly on the amount of glue used. Because of the short curing time, hot glue is perfect for crafting or prototyping.

Smooth out the glued seam: Hot glue usually stays flexible. Therefore you can work on the glue seam relatively well with cutting tools so that it corresponds to the shape of the surface next to the glue seam.
Acetone
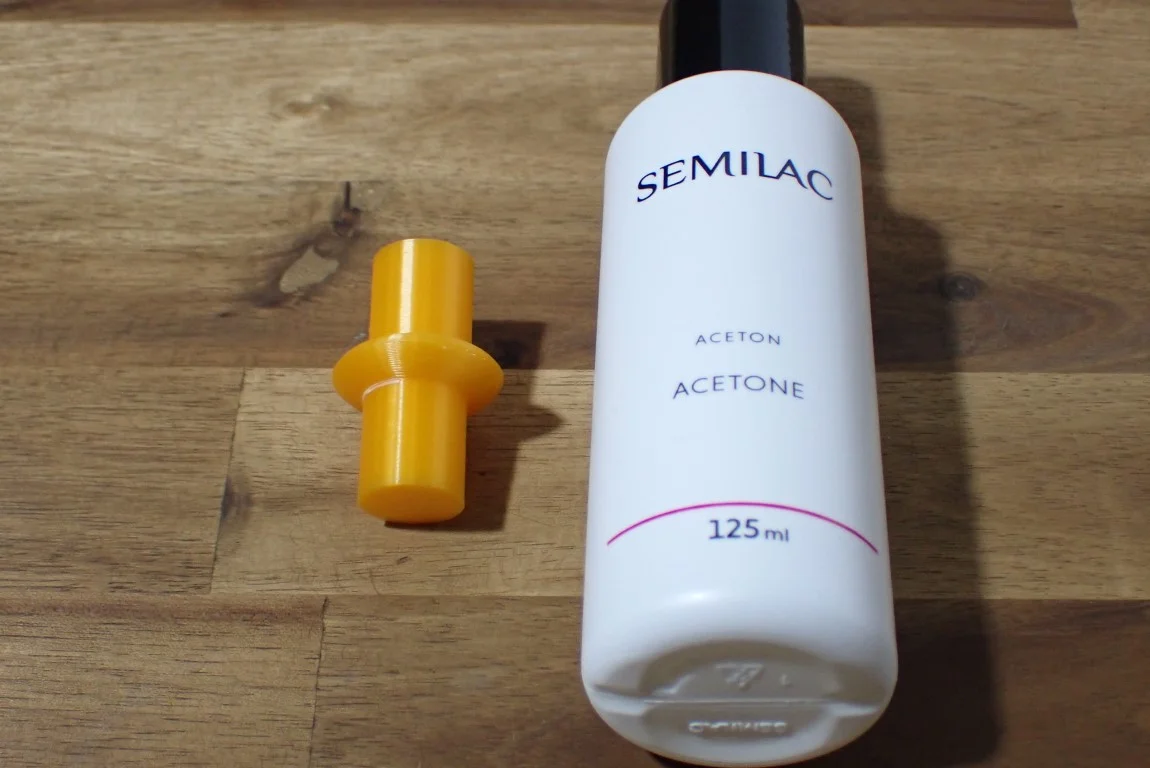
Acetone is a solvent that is often used to dissolve and glue PLA. However, it should be used with caution as it can damage the plastic – it literally dissolves it. Acetone can be applied to the surface of the PLA with a cotton swab or brush.
Acetone dissolves PLA. The PLA liquefies and hardens again after the reaction. Properly applied, a bond with acetone can be invisible and very strong. However, some PLA filaments have additives that can interfere with the reaction with acetone, which can lead to a poor bond.
Check Price at:
Before you try to glue two PLA parts with acetone, however, you should have some experience with it and try gluing it with test pieces. The results of bonding PLA with acetone vary greatly. How good the bond will be depends mainly on these two factors:
- If the acetone is applied irregularly to the surface, the PLA underneath will also dissolve irregularly. If too much acetone is applied in some areas, gaps or holes may form in the seam.
- Some PLA filaments contain additives that are not soluble in acetone. This can either completely prevent bonding with acetone or cause the filament to dissolve inhomogeneously or only with difficulty. There are very large differences between the various filaments.
The time it takes for the adhesive seam to cure completely depends on how much acetone you have used. With small amounts, it takes only a few minutes until everything is cured, with larger parts and more acetone it can take several hours. In any case, you should fix both parts well so that nothing can slip.
As you can probably tell, gluing PLA with acetone comes with several difficulties. You could call this method “High Risk & High Reward“, as it is relatively difficult to get a good result, but if you do, the result is better than with any other glue on this list!
When using acetone, you must take special care of your health and safety. Not only is it unhealthy to breathe in the fumes, but acetone is also highly flammable. So always make sure your workplace is well ventilated and take extra precautions for your health and safety when working on large projects where you use a lot of acetone.
How to Glue PLA with Acetone
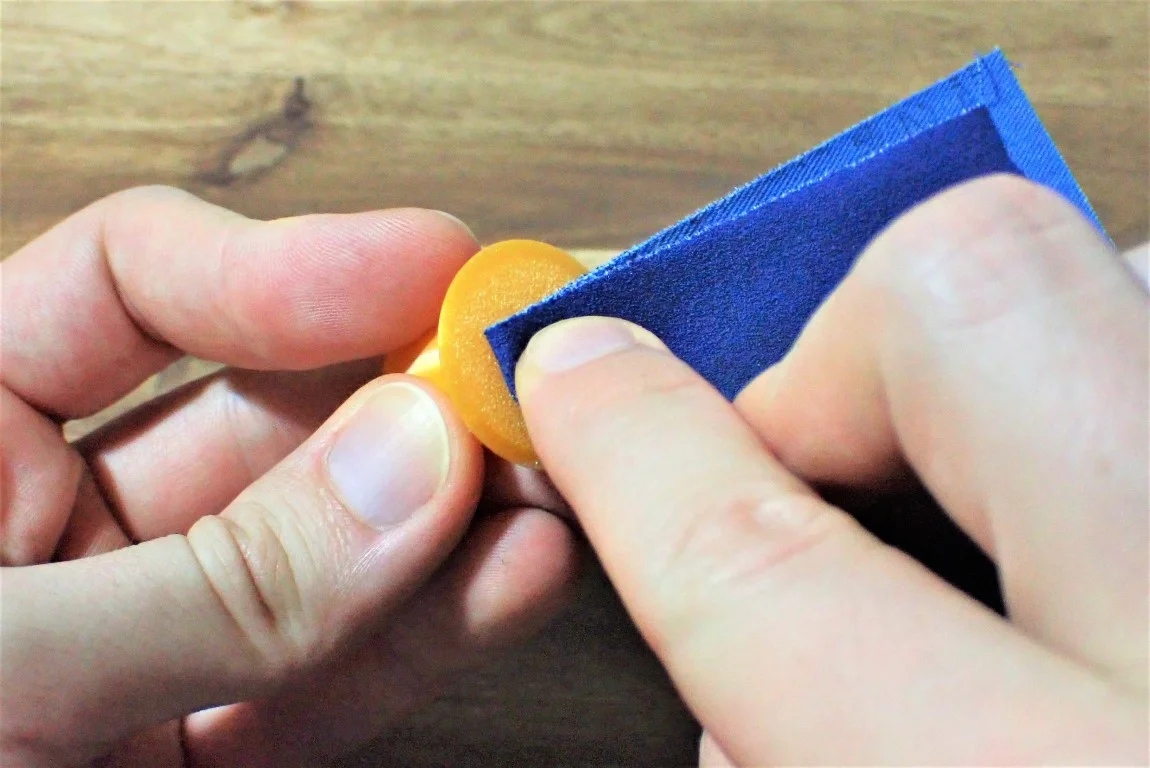
Smooth & roughen surfaces: Acetone is not an adhesive. This chemical dissolves PLA and fuses the two parts together. To make it even easier for the acetone, you can roughen the surfaces to increase the surface area and speed up the reaction.

Clean surfaces: Foreign objects, dust, grease and oils can interfere with the reaction between PLA and acetone. So make sure that the surface is free of them and clean it if necessary.

Apply glue: Acetone is very liquid. If your acetone bottle offers a good portioning, you can drip the acetone directly onto your object. Most of the time, however, it makes more sense to use a brush directly. You must be extremely careful when applying acetone, as PLA will immediately discolor when it comes into contact with acetone. You will not be able to remove the discoloration unless you scrape off the affected area.
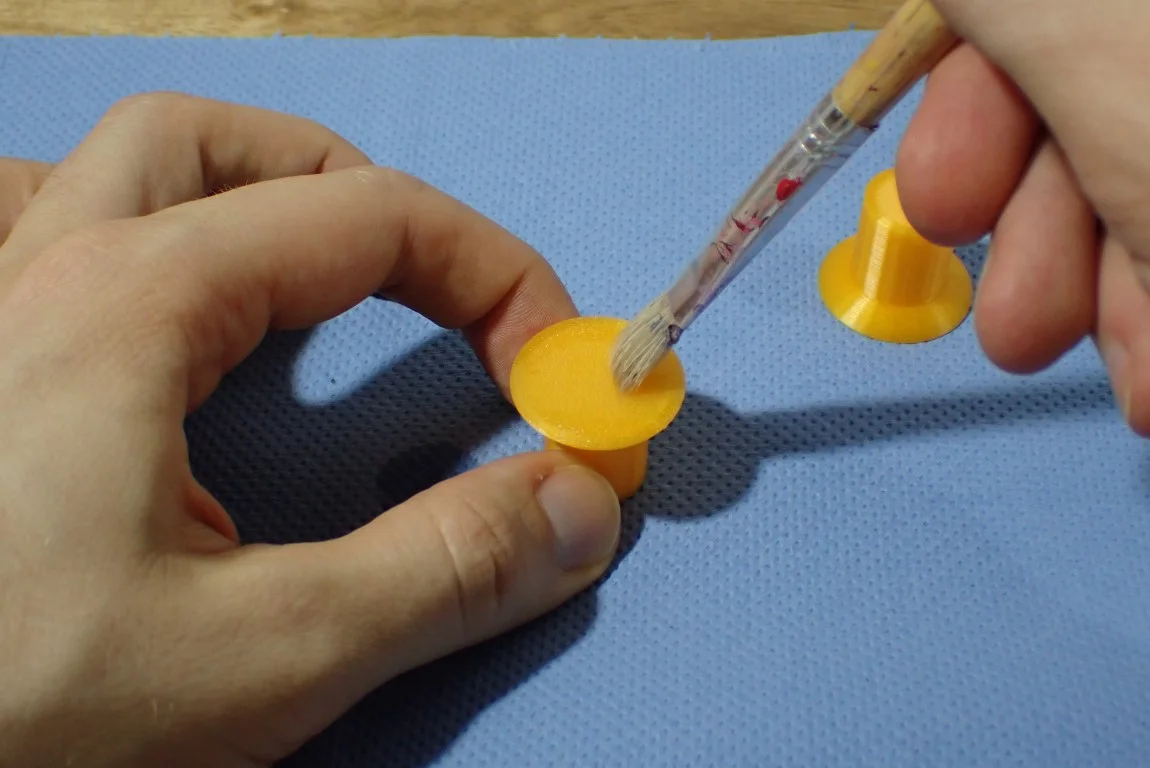
Spread the adhesive: In most cases, it is easiest to use a brush to spread the acetone over the surfaces. The larger the surface, the larger the brush should be, since you don’t have a lot of time.

Position the parts on top of each other: After you have spread the acetone on both surfaces, you need to position them on top of each other as quickly as possible. The reaction starts immediately and you should not lose any time so that the acetone does not eat into the parts, but mainly melts the seam and the liquid surfaces can mix well.
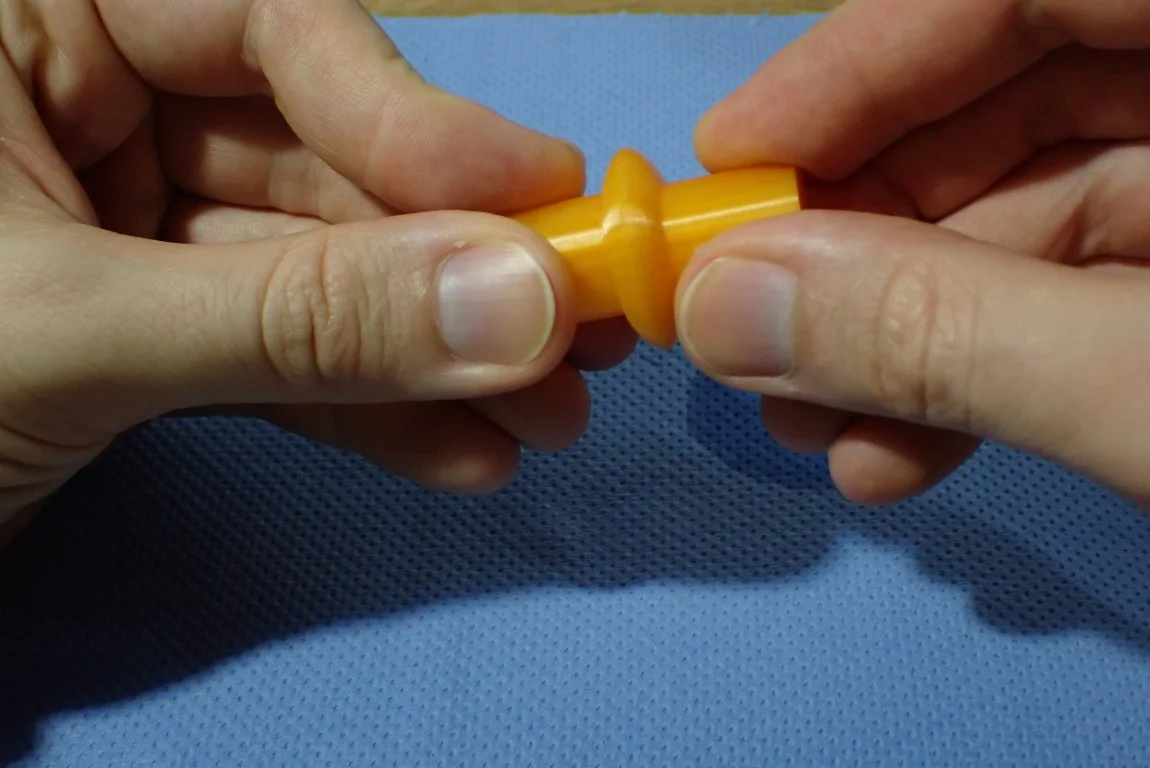
Press the parts together: Press the parts firmly together so that the two softened surfaces can be mixed with each other. As with the other adhesives, the best way to do this is to use clamps or rubber bands.

Clean the glue seam: With acetone, you can only clean the glue seam to a limited extent. If something should have gone wrong, the PLA underneath has already been attacked. You can try to wipe off excess acetone from the glue seam, but you can only reduce the damage.

Wait: Depending on how much acetone you used, the reaction may take a few seconds, minutes, or even a few hours to complete.
Smooth out the glue seam: If you’ve had a lot of practice and everything went perfectly, you don’t need to smooth the glue seam because it’s invisible. However, if the reaction between PLA and acetone has been irregular, the glue seam might be irregular as well and you might have to smooth it out here and there. Holes can be filled with epoxy resin or putty, too much material can be sanded or polished.
Silicone

Silicone glue is a type of adhesive that can be used to bond different materials together. It is often used in crafting and repairing because it can glue a variety of materials together. Silicone glue can be used on glass, metal, plastic and many other surfaces. It can be used both indoors and outdoors.
Silicone adhesives require a few hours to cure. The resulting bond is relatively strong and somewhat flexible. The strength and flexibility are very product dependent. The glue seam will be a few millimeters thick to make a good bond.
Check Price at:
Silicone adhesives are suitable for most materials and therefore also for PLA. They are easy to use and provide good adhesion. The downside, however, is that the resulting seam will be several millimeters thick for you to make a good bond. Just like the other adhesives that create such a thick seam in this article, silicone is therefore best suited for large objects where such a seam is not so noticeable. But also for those objects where you will still work on the surface, silicone is well suited and can be made invisible.
Another great advantage of silicone adhesives is that certain types of silicone remain relatively flexible even after curing. Depending on your needs for your project and what functions they have, this flexibility could be an advantage.
With silicone adhesives, it is especially important that you prepare and clean the surface well. Loose particles can severely impair the adhesion of silicone adhesives. If the surface of your PLA part is extremely smooth, for example because you printed on a glass print bed, you should lightly roughen the surface with sandpaper to provide the adhesive with a larger surface for adhesion.
There is a wide range of silicone adhesives on the market. Most of them are suitable for PLA. As with most of the other adhesives in this list, you should test silicone on a sample piece so you don’t accidentally destroy your project. This test is also about gaining experience on how to properly handle silicone. If you don’t have a lot of experience with it, it’s definitely worth doing some tests.
How to Glue PLA with Silicone
Smooth & roughen surfaces: To increase the adhesion of silicone, you should roughen the surfaces that are to be glued with it with coarse sandpaper.

Clean surfaces: Clean the surfaces carefully and free them from dust, other foreign bodies and especially from grease and oil. You can remove the latter with a little dishwashing liquid or isopropyl alcohol.
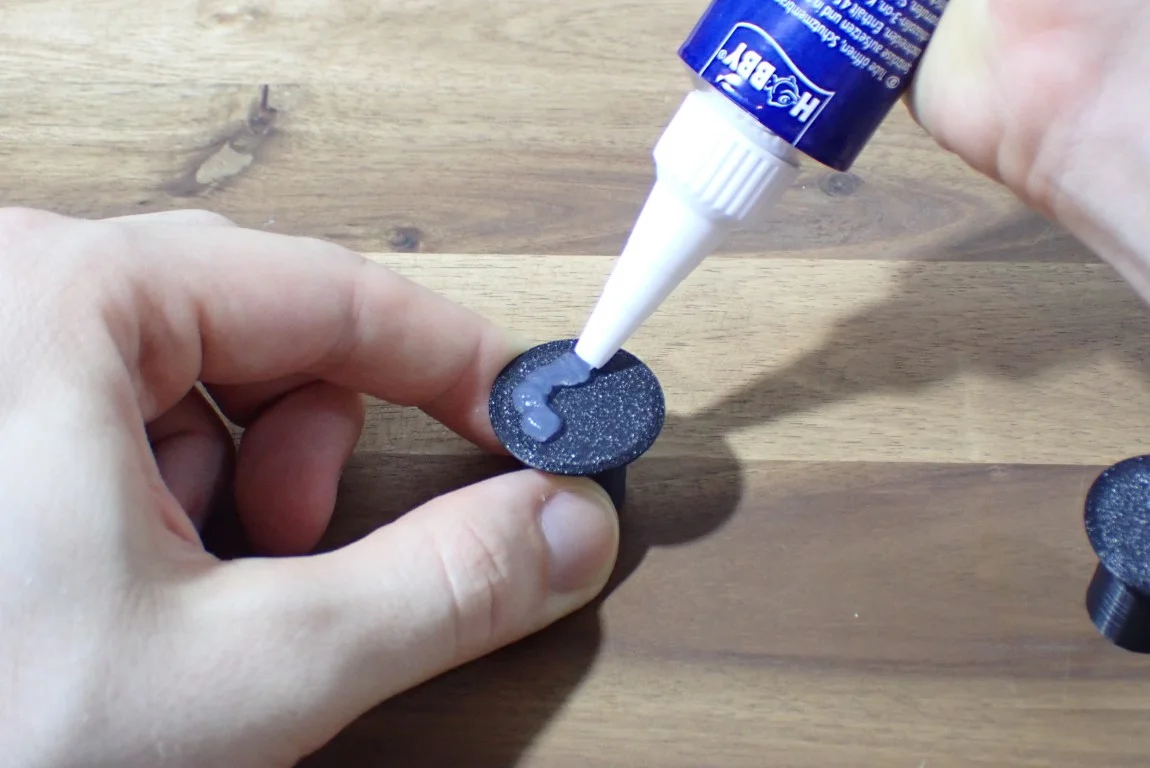
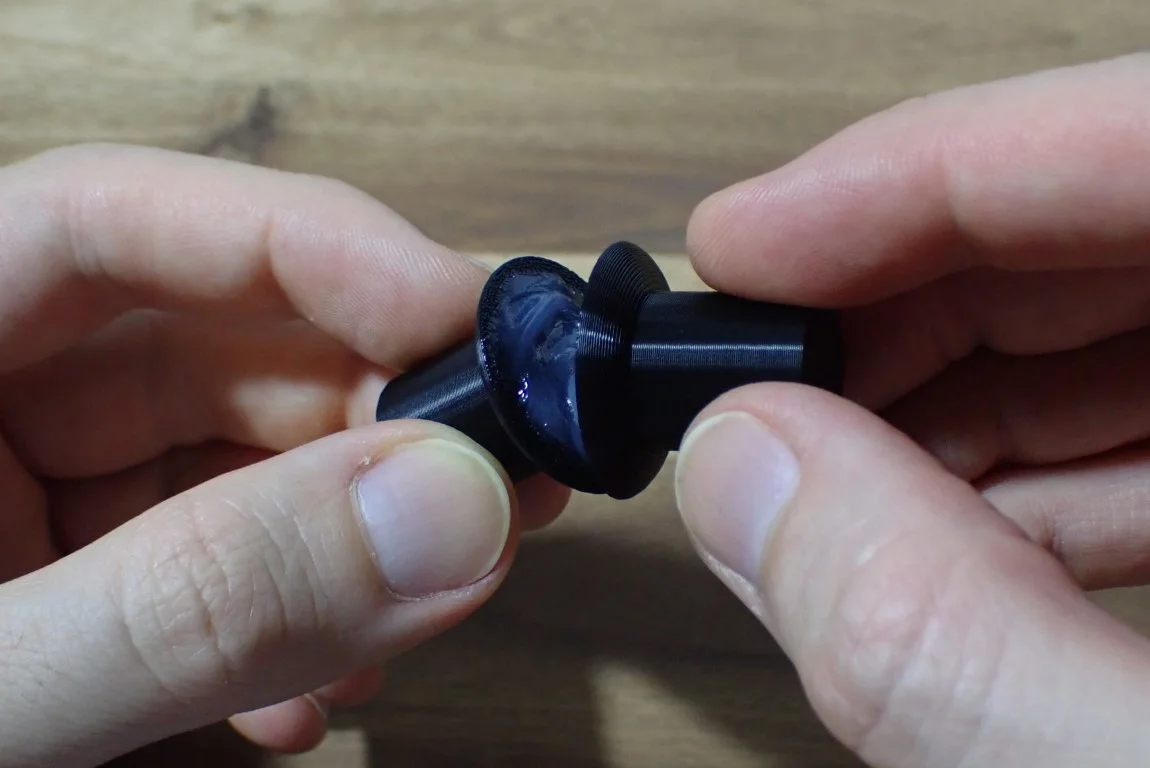
Apply the glue: When applying the silicone glue, you should make sure that you create a relatively thick layer to get the most out of the glue.
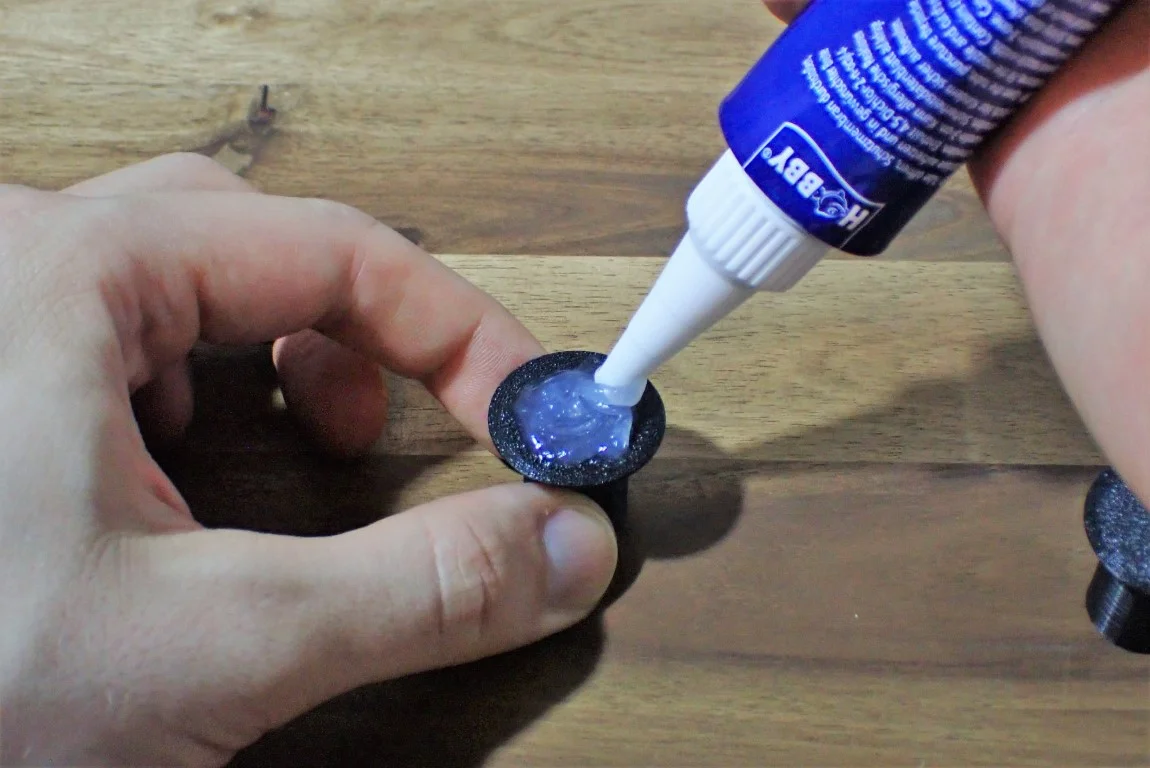
Spread the adhesive: Spread the silicone on the surface with the nozzle, so that the entire surface is wetted by it. Since you will only be pressing the parts together lightly in the next steps, you should also spread the glue relatively close to the edges of the parts.
Position the parts on top of each other: Positioning the parts is sometimes a little difficult with silicone, as the layer can be several millimetres for very large parts, making it easy to move the two surfaces against each other.
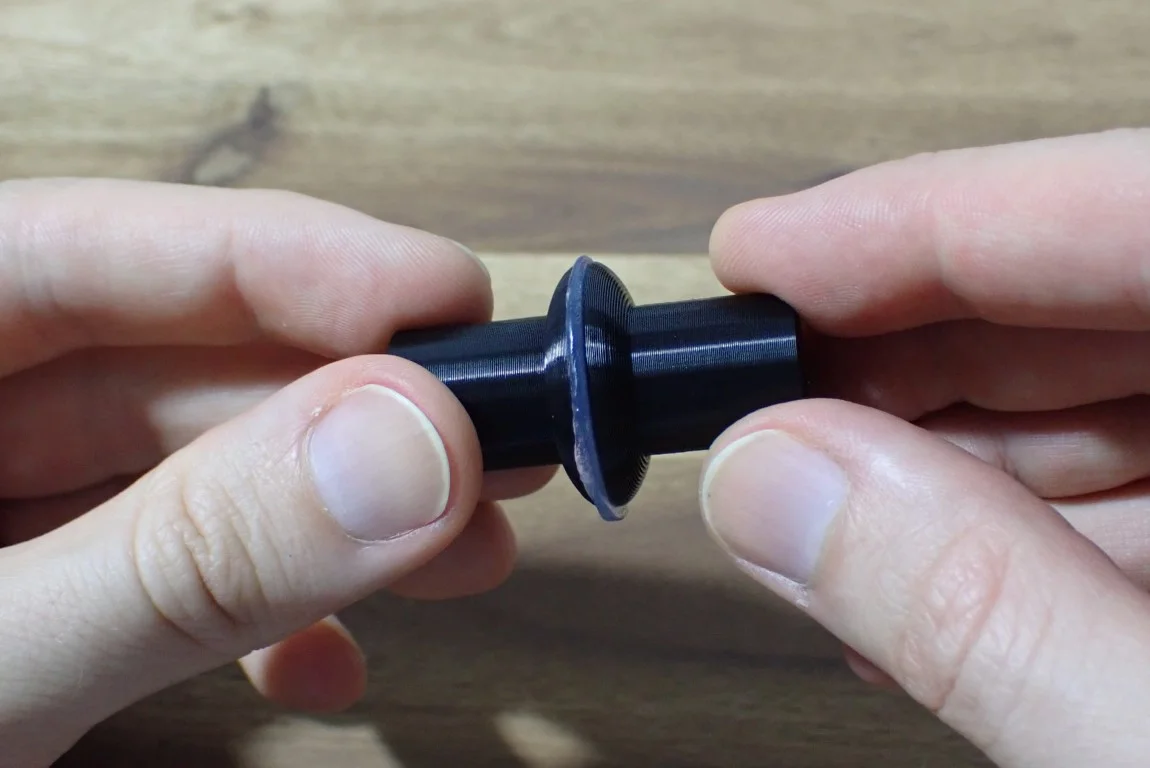
Press the parts together: If you have applied a relatively thick layer of silicone, you should only press the parts together lightly until the silicone is flush with the glue seam.
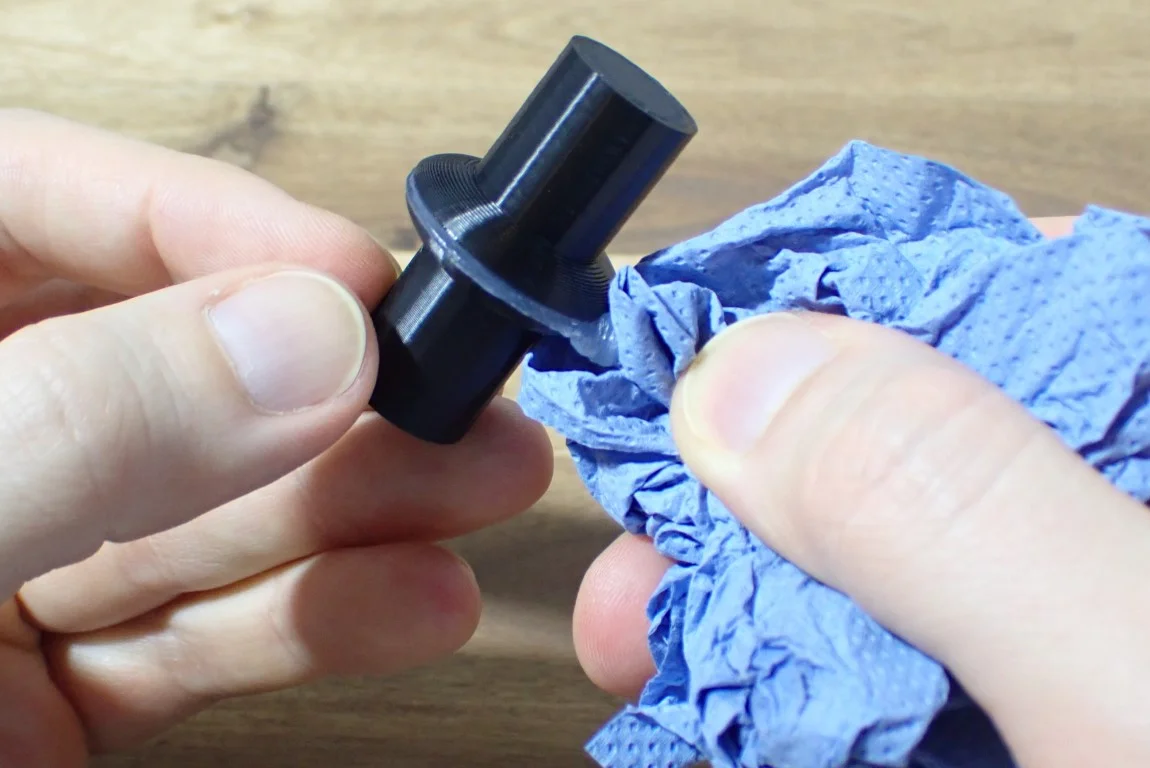
Clean the adhesive seam: Silicone is very smearing and can cause annoying residues. If you have very large seams, you can try using your finger with some dishwashing liquid. With this, you can also directly smooth the glue seam very well.

Wait: Since silicone needs a few hours to cure completely, you should fix the parts well so that nothing can move during this time.
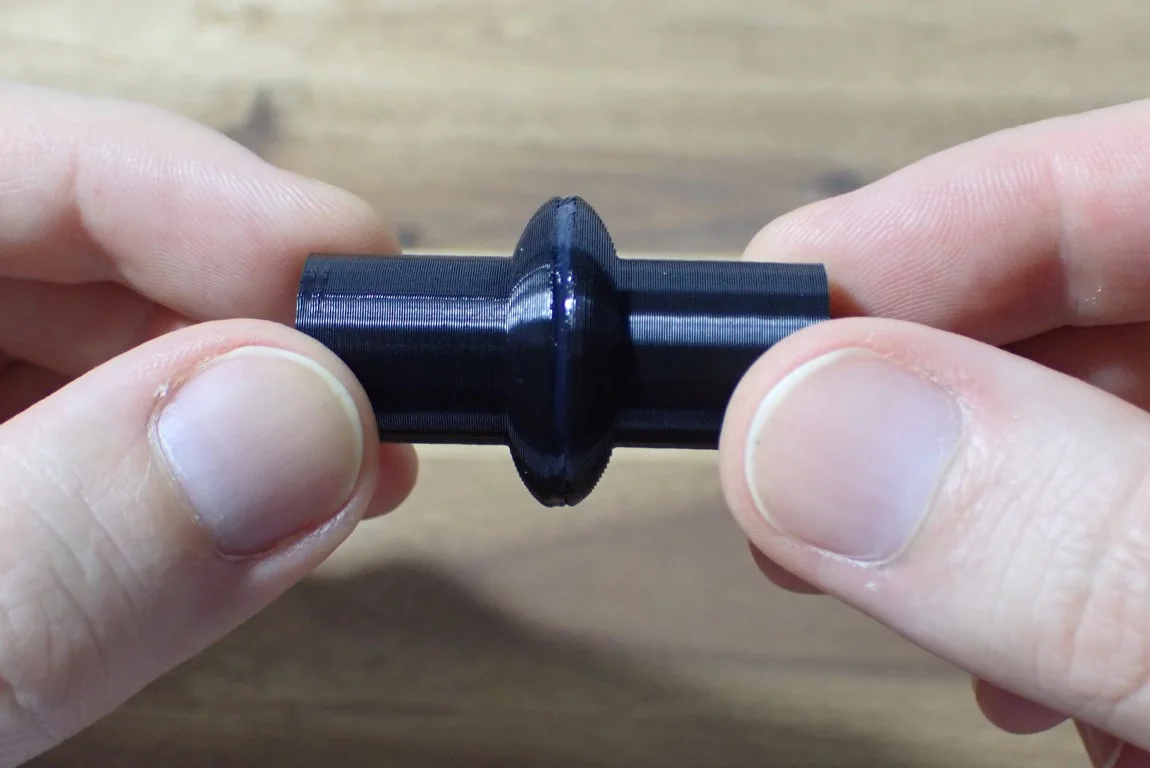
Smoothing the adhesive seam: Smoothing out the glue seam on silicone after it has cured isn’t quite as easy as when it’s still liquid. If you missed something in the liquid state or the silicone has flowed during the curing time, you can sculpt with a knife.
3D Pen (Hot Filament)
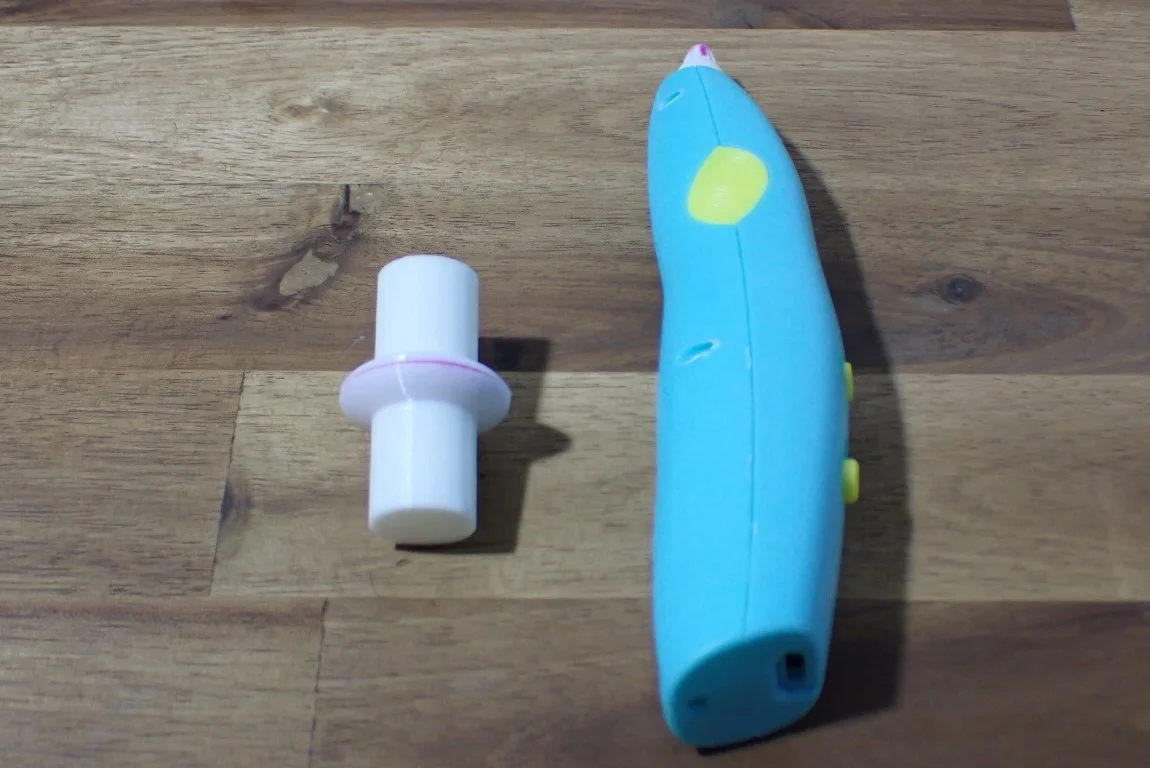
A 3D pen extrudes molten plastic that cools and hardens instantly. This allows you to create 3D objects by drawing them in the air. If the 3D pen is capable of printing PLA, you can also use it as a “PLA hot glue gun”.
PLA can be excellently glued with PLA. A 3D pen is ideal for this purpose. The glue seam can be invisible with careful application, but the strength of the bond is only sufficient for decorative objects.
Check Price at:
In 3D printing itself, the PLA from the nozzle is applied to not yet completely cooled PLA. Thus, the layer adhesion is greater than the adhesion you can achieve with a 3D pen. If you want to push it to the limit, you can of course try to heat up the object to be glued with a hair dryer to increase the adhesion. However, there is a big risk that the object will warp or even melt.
For the best visual results, use the same filament for both gluing and printing the object. If you then mimic the print direction, or the line direction of the individual layers, you can create almost perfect glue seams.
The big disadvantage of this method is that the bond is not too strong and it is mainly suitable for small to medium-sized decorative objects. Another problem is that the applied filament cools down very quickly and loses its adhesive effect very quickly. Therefore, you need to be relatively quick in applying it, which rules out larger areas. If you want to glue a large area this way, the PLA filament on one side is already almost cured when you have just applied the last bit on the other side. This would result in very poor and irregular adhesion.
How to Glue PLA with a 3D Pen
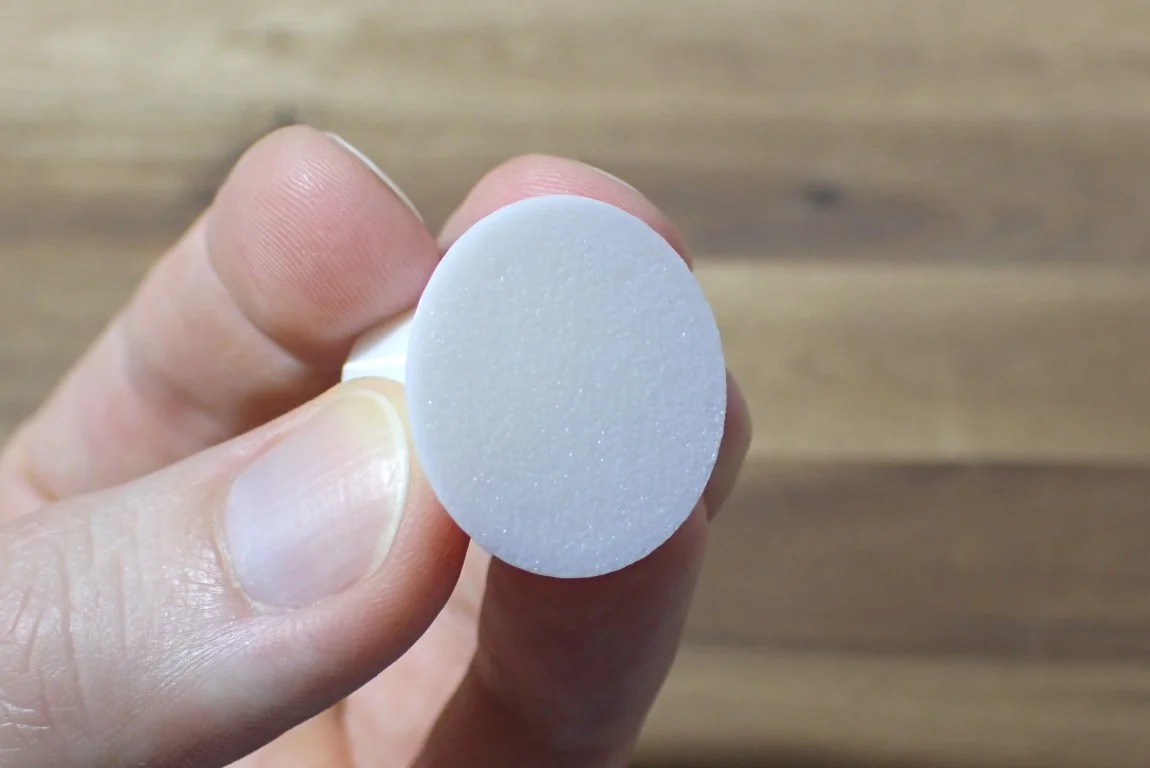
Smooth & roughen surfaces: The two PLA surfaces of the two parts you want to join together with a 3D pen should be free of protruding filament residue and foreign objects. It doesn’t hurt to roughen the surface a bit, but it’s not absolutely necessary since the connection won’t be too strong anyway.
Clean surfaces: If you roughened up the surfaces, you will need to remove the sanding residue and any other foreign matter from the surface.
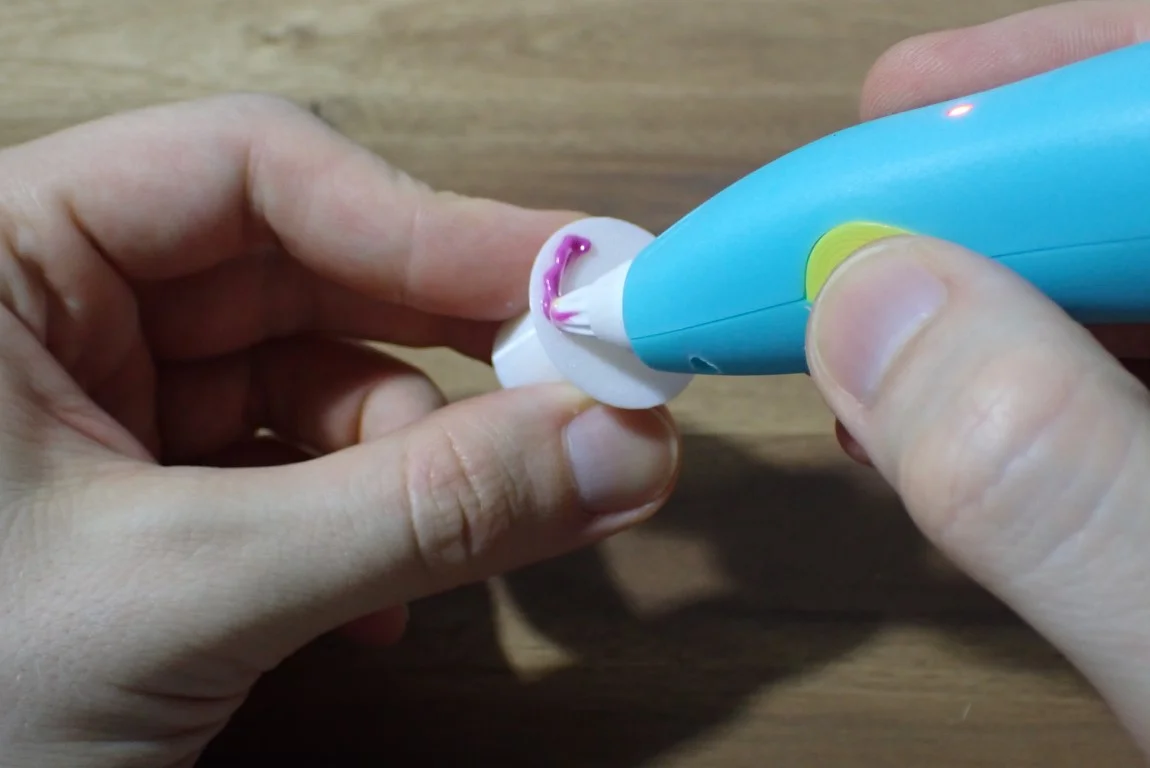
Apply glue: Try to imitate the print direction of the original parts with the 3D pen so that the seam is as invisible as possible. Remember not to press the lines together too much and print the line directly on the edge of the surface.
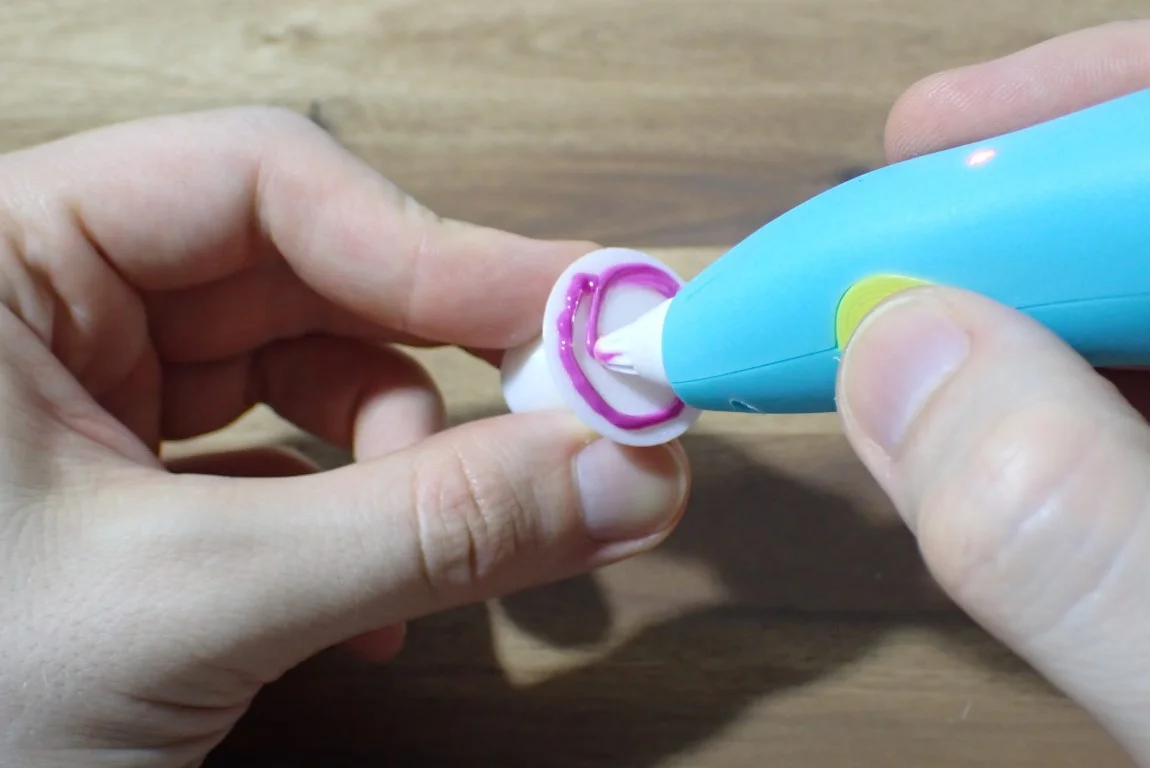
Spread the adhesive: To make the adhesion as high as possible, you should print the entire surface with filament.
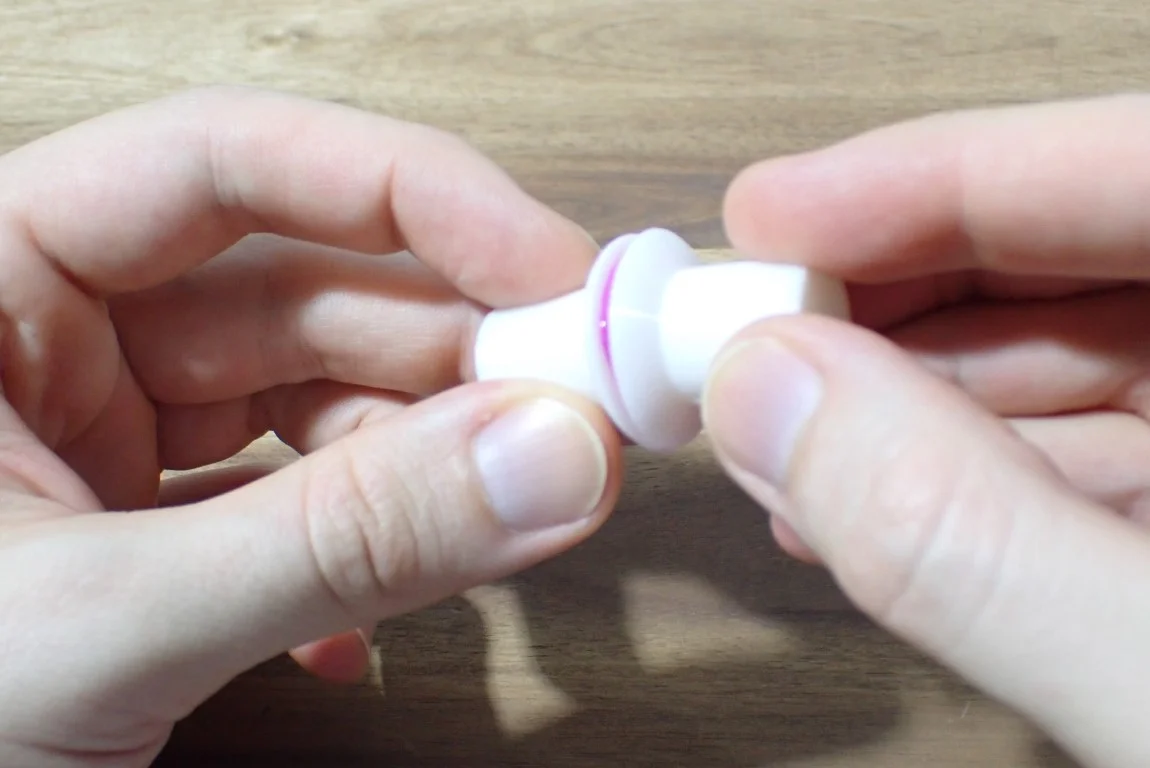
Position the parts on top of each other: Just like superglue and the hot glue gun, you have to be very fast here. The printed filament strands cool down very quickly and quickly lose their adhesion. Therefore, the 3D pen method works best with only small parts and gets worse the larger the area becomes.
Press the parts together: Use the time in which the filament cools down to press the two parts strongly together. So the still liquid filament can penetrate even into the smallest cracks and increase the adhesion.
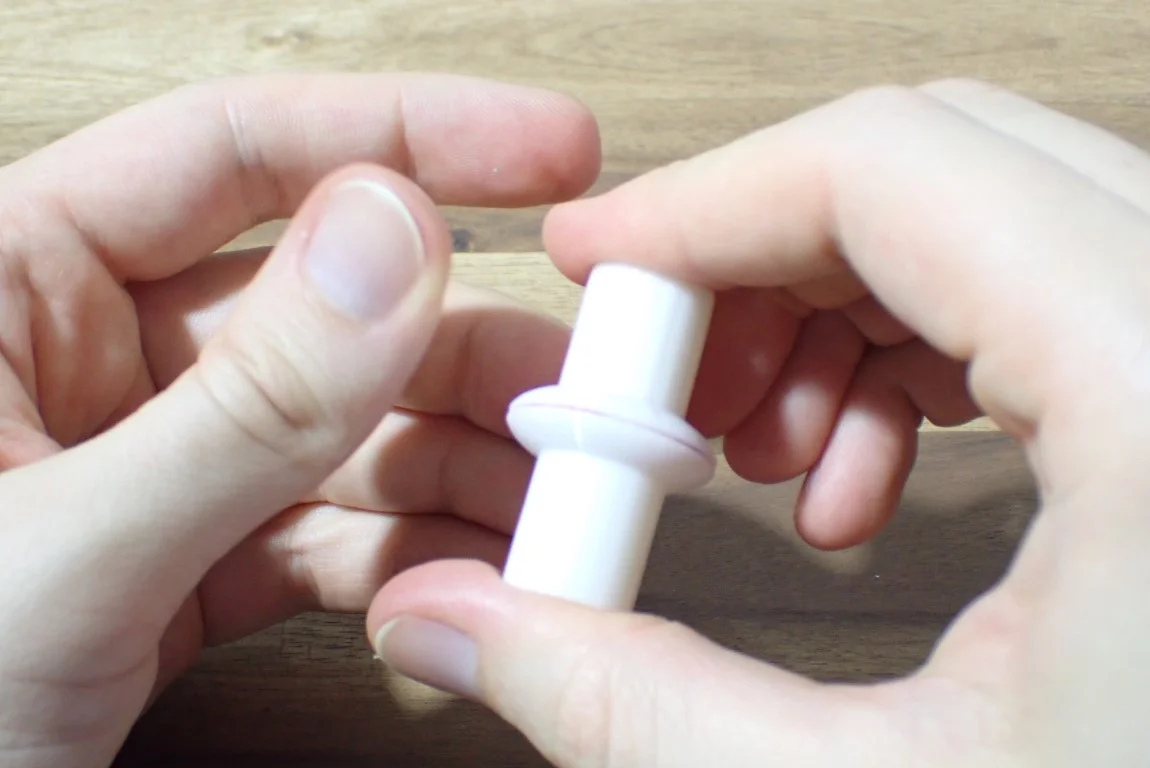
Clean the glue seam: If the filament was very liquid and you pressed something out of the sides of the glue seam, you can still try to wipe it off in the liquid state. Most of the time it is better to let the filament cool down and smooth it out afterwards.

Wait: The waiting time is very short with a 3D pen. The filament is completely cooled down within a few seconds, but sometimes also after a few minutes.
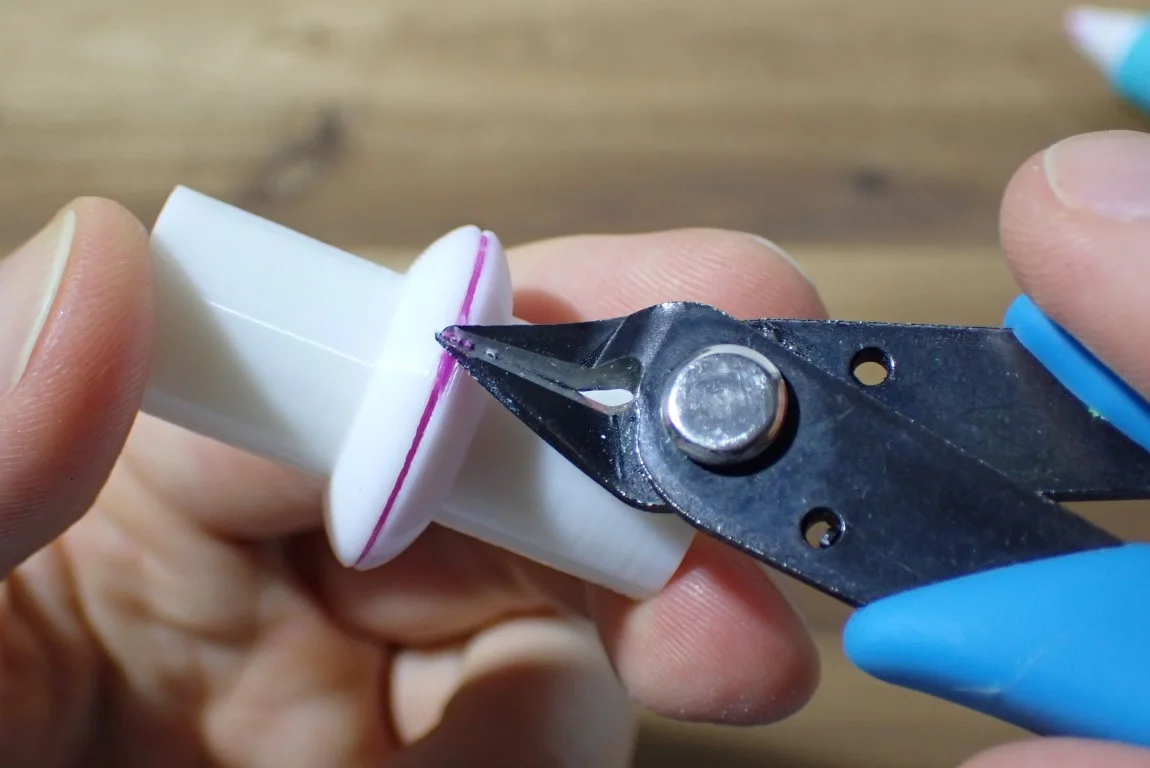
Smooth out the glue seam: You can smooth the PLA glue seam just like the rest of the model.
PLA Welding (with Friction)

Welding PLA has nothing to do with adhesives. This process is made possible by frictional heat. When welding PLA, a piece of filament is rotated very quickly by a Dremel or a drill and pressed onto the glue or weld seam. The fast movements lead to a strong friction which causes the filament to melt.
Gluing or welding PLA with the help of friction usually produces an unsightly seam and poor to high adhesion – depending on the seam quality. Due to the many disadvantages, other adhesives are usually better suited for bonding PLA than welding by friction.
Check Price at:
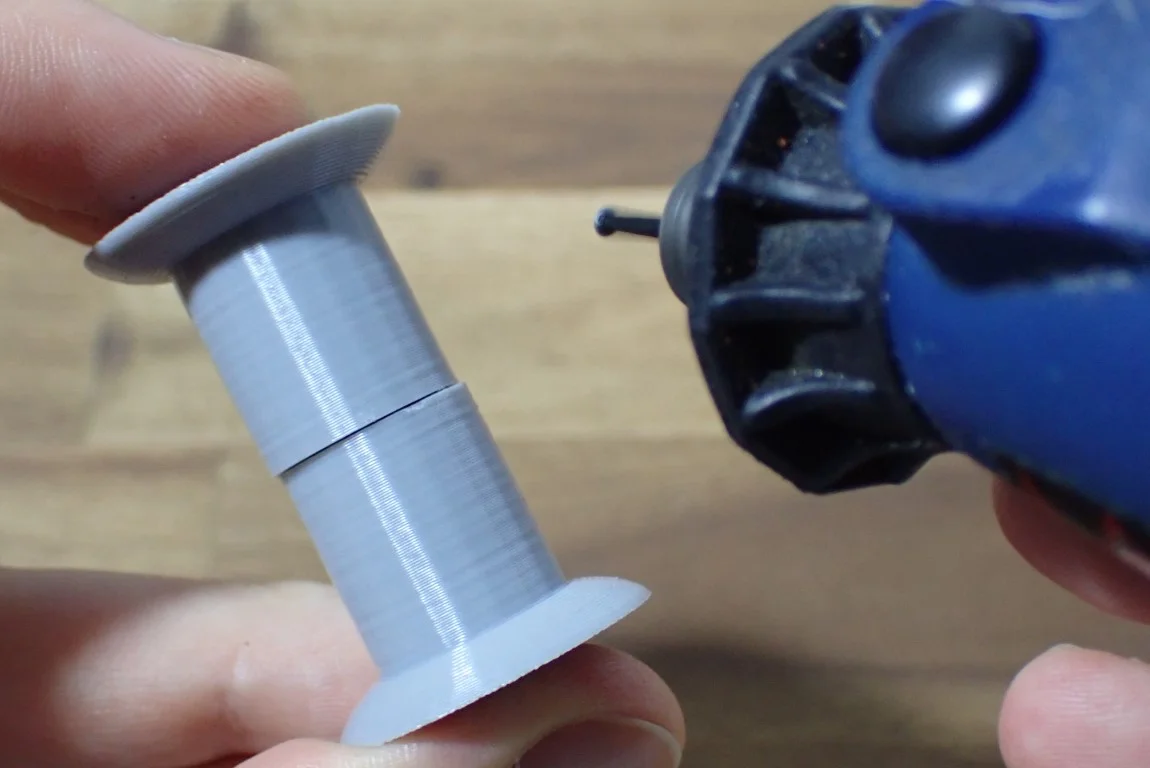
To be able to weld the PLA you need a suitable tool that can create the necessary friction. The most popular tool for this is a Dremel or a similar device.
Cut a piece of the filament you used for printing and clamp it in the rotary head of the Dremel. To use the filament for welding, press the objects to be glued together and then press the piece of filament in the Dremel onto the weld seam while rotating it quickly. If you’ve done everything right, the three materials will fuse together.
The weld itself can be relatively stable, but due to the process you can only use the method on the outside of the object and the surfaces that touch each other on the inside cannot be welded together. This means that the overall strength of the bond is usually worse than with real adhesives that use the entire surface.
There are a few other ways you can heat bond two PLA parts together. Friction is only one possibility. Another way is to carefully heat the two parts with a hair dryer and then press them together. As you can imagine, this method is very difficult and not really reproducible.
Another possibility is to heat a flat screwdriver and to heat the PLA point by point until it can bond with the other part. But this method is also difficult, the results vary greatly and only small parts can be joined in this way.
How to Glue PLA by Welding
Smooth & roughen surfaces: In preparation for welding, you can remove any protruding filament residue from the seam. You do not necessarily have to roughen the surface.
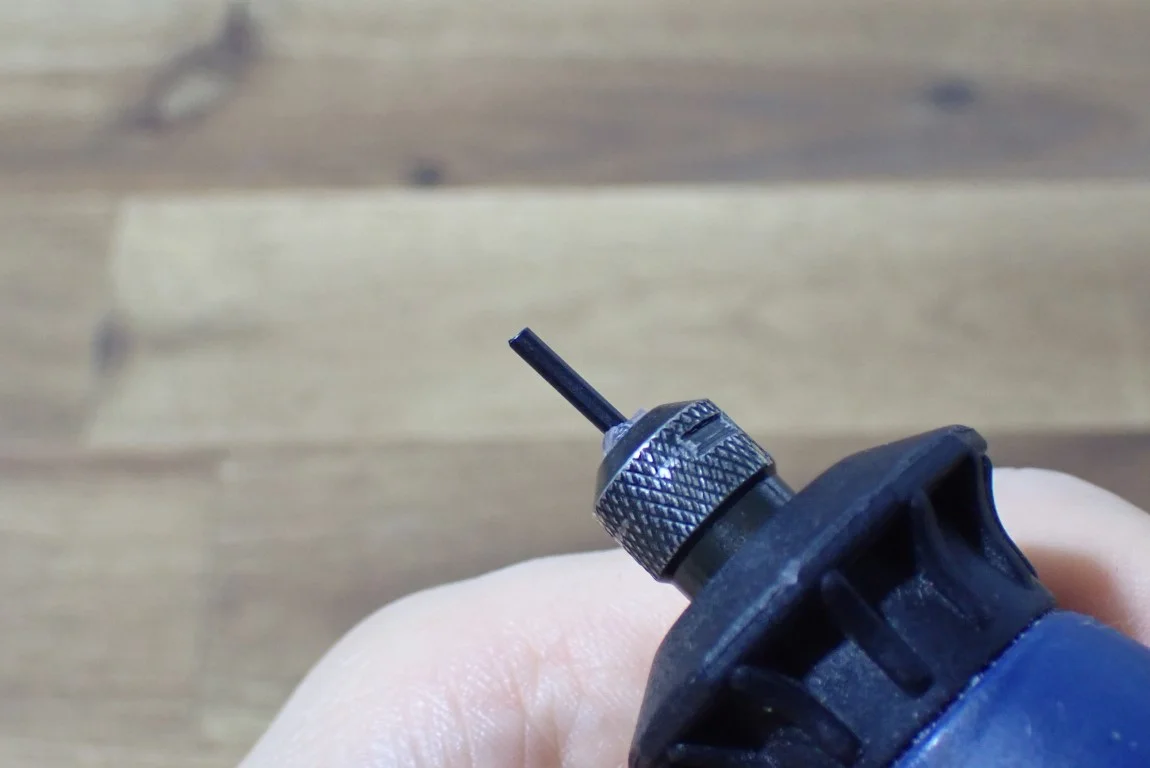
Preparation: Now clamp a short piece of filament in your Dremel. The piece should not be too long, otherwise it will bend outwards due to the spinning forces. Practice a bit with a low speed, as soon as you can guide the filament well, increase the speed to the maximum.
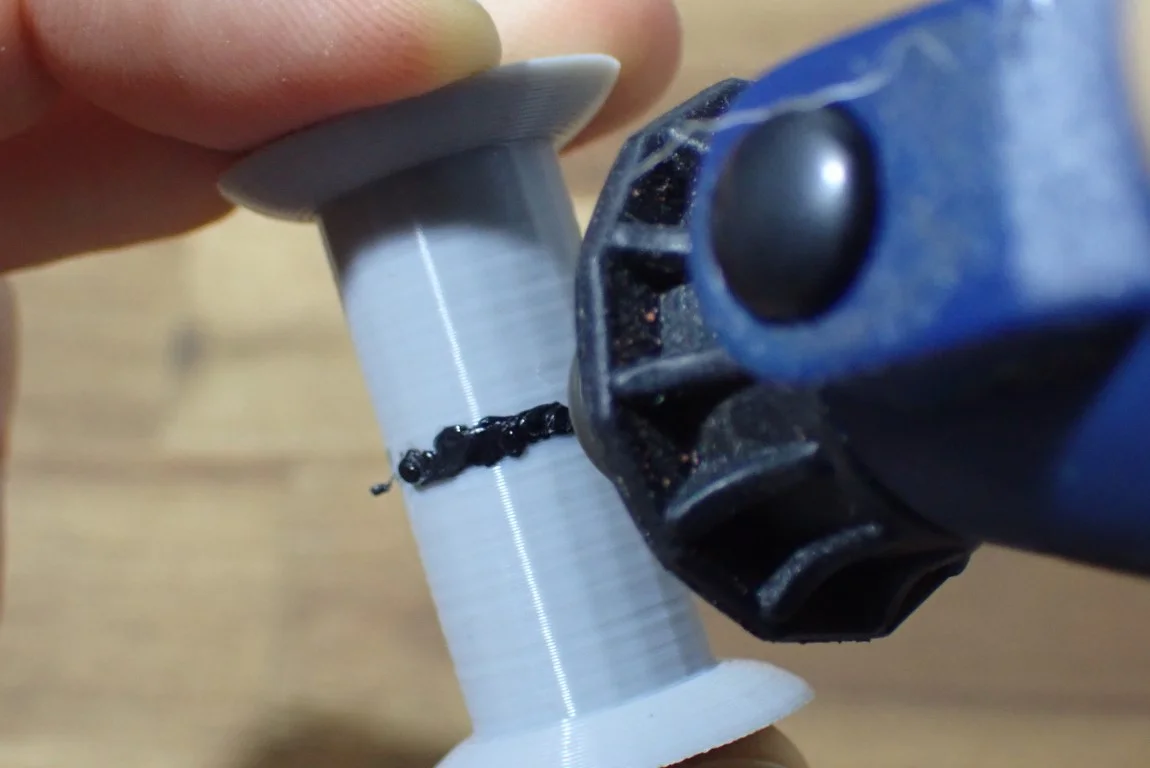
Welding: To fuse the three PLA parts together, you do not need to press the filament onto the weld. Light pressure and the high rotation speed are enough to melt all three filaments. As soon as the melting process starts, slowly pull the filament over the seam. Don’t move the filament too fast or the temperature will get too low again and the filament will solidify. This part of the welding process requires some practice, so it is best to practice on a test piece.

Wait: The weld is cured within seconds. Full hardness should be reached after a few minutes.

Smooth out the weld: If your object is meant to serve a decorative purpose, PLA welding probably wasn’t the right method. If you still want to smooth the weld a bit, sandpaper is the best way to do it.
Smoothing PLA Glue Seams
Depending on the glue you used, it may be necessary to smooth out the seam if you want a nice result. For pieces with no decorative purpose, you can skip this step as long as the glue seams are not so thick that they interfere with movement or other functions.
The smoothing of PLA glue seams can be done in various ways. Either only the seam, the area around the seam or the complete object can be processed.
Sanding & polishing: The easiest method to remove excess adhesive from a glue seam is to sand and/or polish it. The disadvantage of this method, however, is that it can sometimes take quite a long time to achieve a good result and the surrounding areas can be affected.
Cutting: An alternative to sanding is to use a knife or pliers to remove hard adhesives. Sometimes the result is better than if you had resorted to sandpaper. Especially with superglue or plastic glue, this method is a good choice. Especially with superglue, fine layers can sometimes be carefully scraped off the surface with a sharp object.
Varnish or epoxy resin: If you want to smooth not only the glue seam itself but also the rest of the model, varnish or epoxy resin coatings are certainly suitable. This can create a very smooth and homogeneous surface. The disadvantage is that the whole process takes quite a long time and is not suitable for fine details.
Related Questions
Can PLA be Glued with Acetone?
PLA can be glued with acetone. But gluing is actually not the right term for it, because acetone dissolves the PLA. The two etched and viscous PLA surfaces can then be joined together.
The final result depends on how well the PLA filament can be dissolved with acetone and how much practice you have with it. The glue seam is then either invisible and extremely strong or the attempt has failed catastrophically.
Can PLA be Welded?
PLA can be welded by friction. To do this, a short piece of PLA filament is clamped into a Dremel or a similar device and set in rotation. The rapidly rotating end of the filament is then pressed firmly onto the weld, causing the other two parts and the filament to heat up strongly. The three PLA components then fuse into one.
However, the weld is usually very unsightly and does not withstand too much stress.
Does a Hot Glue Gun work with PLA?
PLA can be glued with a hot glue gun. This method is particularly suitable for medium to large objects. The application of a hot glue gun is very easy and the glue hardens within a few seconds. However, it takes a little longer until the complete surface is cured.
However, since the resulting glue seam is several millimeters thick, the end result may not be perfect in terms of optical properties. Therefore, hot glue is best suited for prototypes or objects that are either post-processed or where optics are not important.
Which Glue Works for PLA?
PLA can be glued with a whole range of different adhesives. These include superglue, plastic glue, epoxy glue, hot glue gun, acetone, silicone and PLA welding (with friction).
Conclusion
In this article you have learned which adhesives you can use to glue PLA. Each of these adhesives has a justification and can be the best choice under certain circumstances.
Nevertheless, plastic glue is the best choice in most cases, superglue is the second choice and if something has to last forever, epoxy two-component glue is used.
Disclosure: This website is the property of Martin Lütkemeyer and is operated by Martin Lütkemeyer. Martin Lütkemeyer is a member of the Amazon Services LLC and other Affiliate Programs. These are affiliate advertising programs designed to enable websites to earn advertising revenue through advertising and linking to Amazon.com and others. Links marked with * are affiliate links.
