
- Wet Filament: Prevention, Symptoms & Drying - July 18, 2024
- Sovol SV08 – Best PrusaSlicer Settings & Profile - June 26, 2024
- Sovol SV08 – Best Orca Slicer Settings & Profile - June 26, 2024
Disclosure: Links marked with * are Affiliate Links. I earn from qualifying purchases if you decide to make a purchase through these links – at no additional cost for you!
Support structures are vital for 3D printing overhangs and complex shapes, but removing them can be tricky. This article is designed to guide you through the simplest and most effective methods for removing supports, ensuring your prints come out looking their best.
Let’s dive into the techniques that will make support removal a breeze, starting with the importance of slicer settings and moving on to practical removal methods.
Key Takeaways:
For easy FDM 3D printing support removal, set a higher support Z-distance and add a support interface. Use a heat gun or hair dryer for softening supports and peel them off carefully. Cut off any residue and smooth with sandpaper.
Table of Contents:
Slicer Settings for Easy Support Removal
Before you begin printing, understanding and configuring your slicer settings is key to ensuring easy support removal. These settings can make the difference between peeling the support structures off the object easily without any residue, or a frustrating manual removal with the need for post-processing.
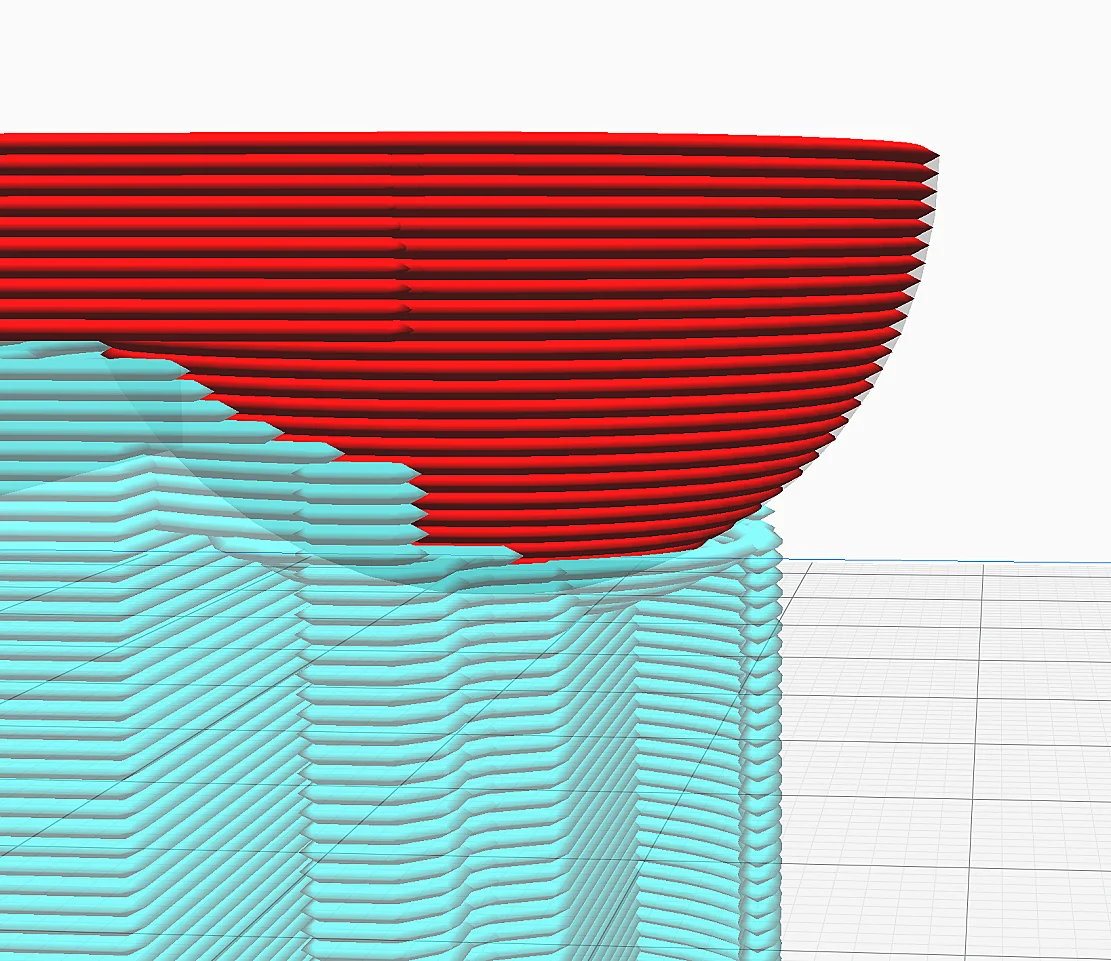
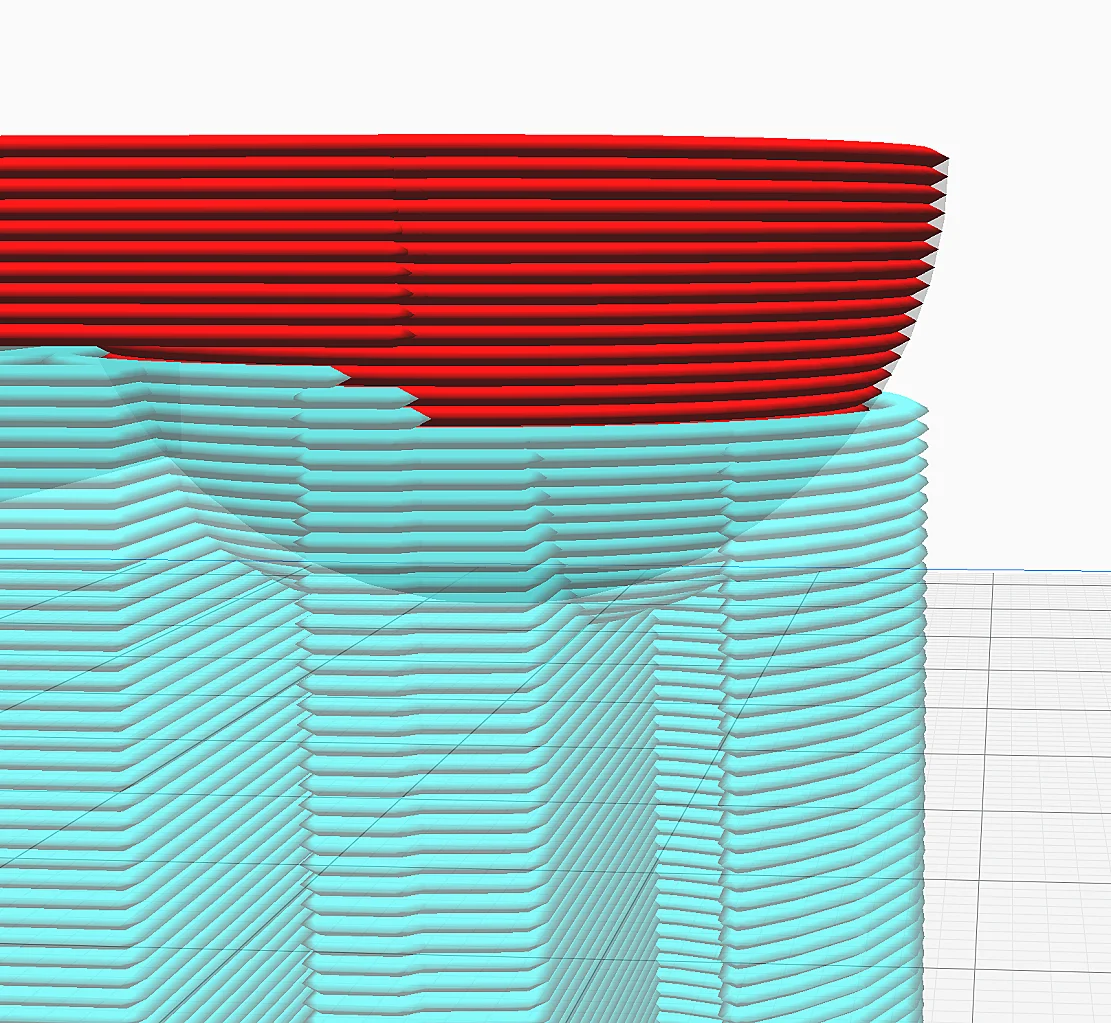
Support Z-Distance
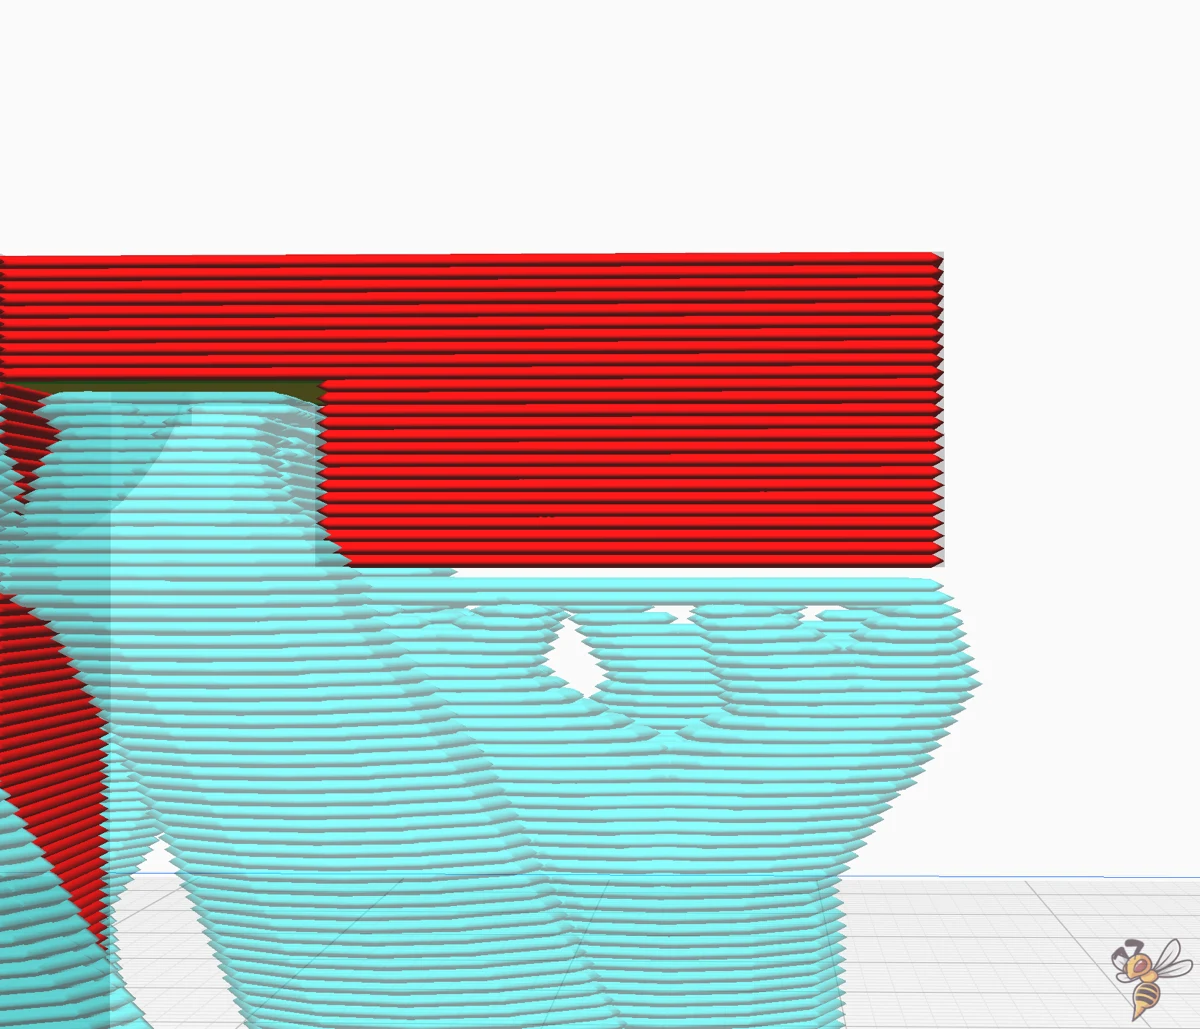
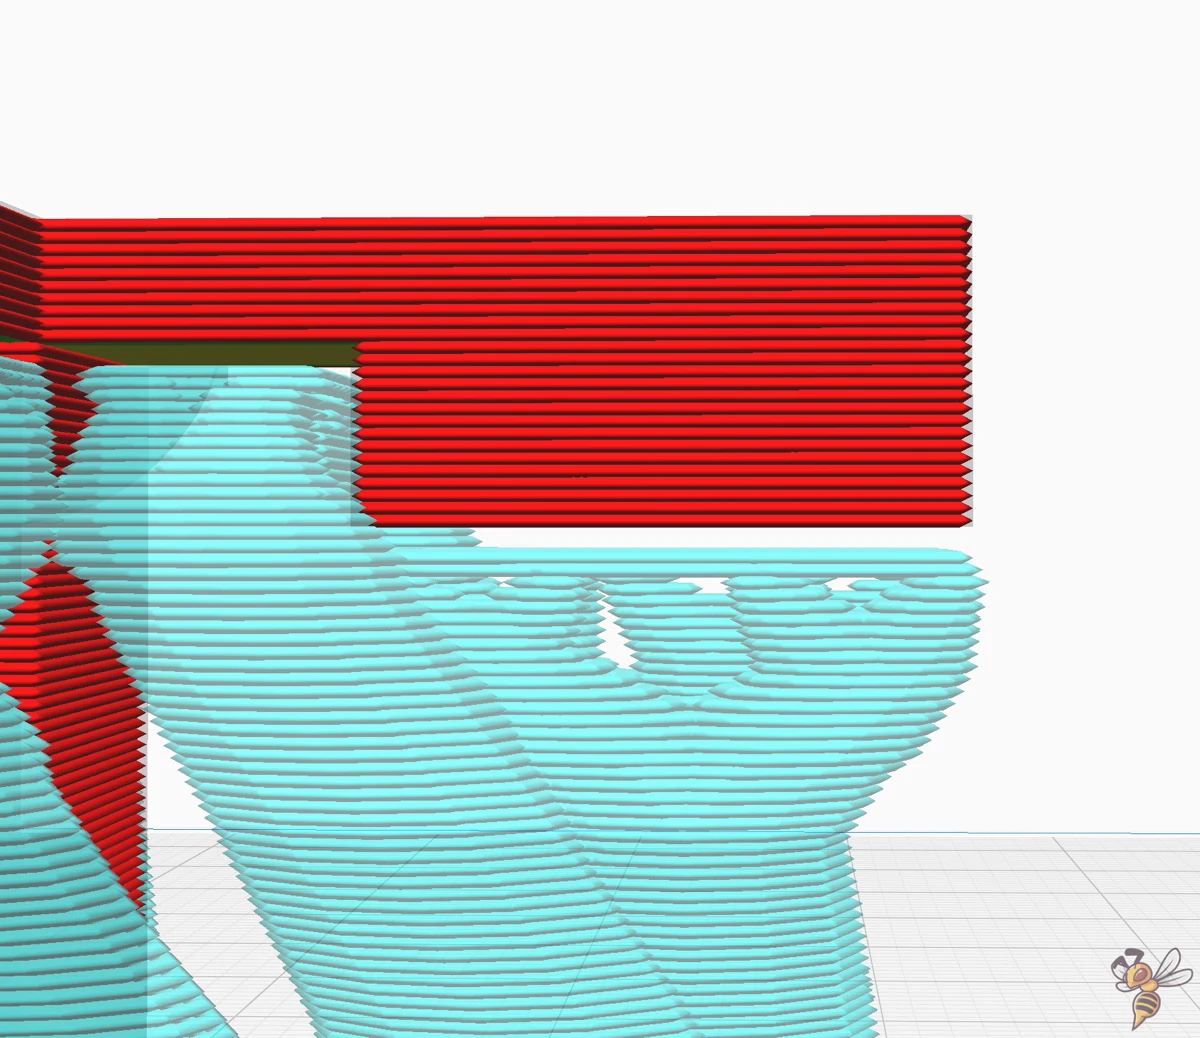
The Z-distance, the gap between your print’s lowest point and the top of the support structure, plays a pivotal role in ease of support removal. Ideally, this gap should be minimal to ensure print quality, yet sufficient to allow easy separation of the support.
The standard setting is often around 0.1 to 0.2 mm, but this can vary based on the material and the printer’s resolution. Experiment by adjusting in small increments, such as 0.05 mm, to find the ideal balance for your specific project.
A smaller gap results in better surface finish but harder removal, while a larger gap makes removal easier but may compromise surface quality.
Support Interface
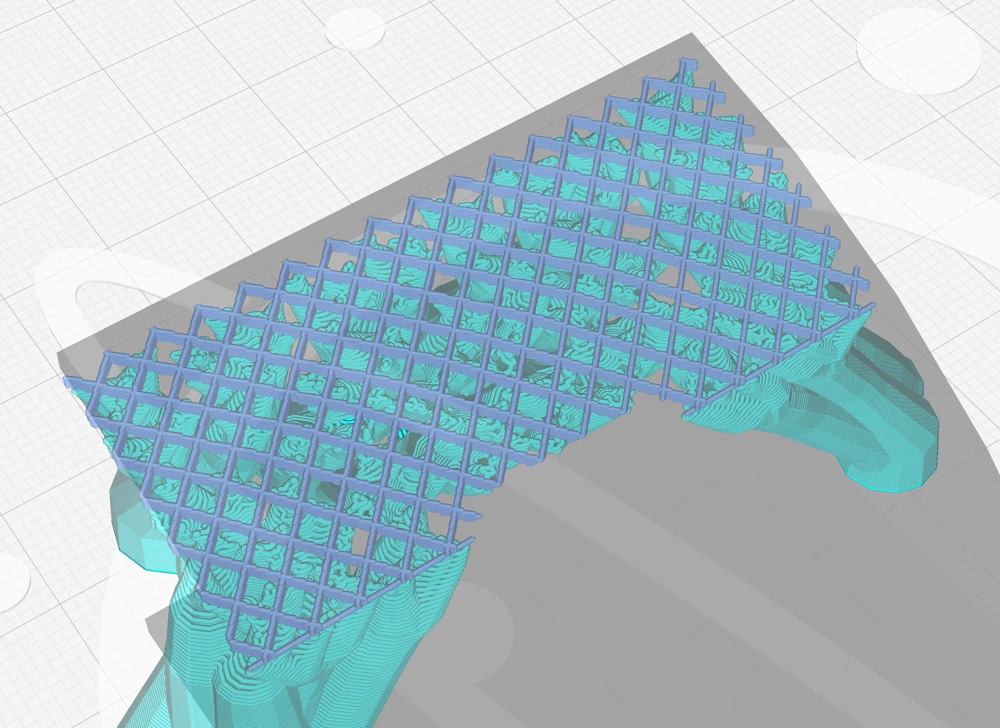
The support interface acts as a buffer zone between your print and the support structures. On some surfaces, a support interface can be easier to remove than the top layers of the support structures. But adjusting the interface layers’ thickness and density is crucial for a smooth detachment process.
A denser interface provides more stability during the printing process, but can adhere too strongly to the model. Conversely, a sparse interface eases removal but may not support intricate details well.
Experiment with the number of interface layers and their densities. Some slicers also offer options for different interface patterns, which can affect how easily the supports break away.
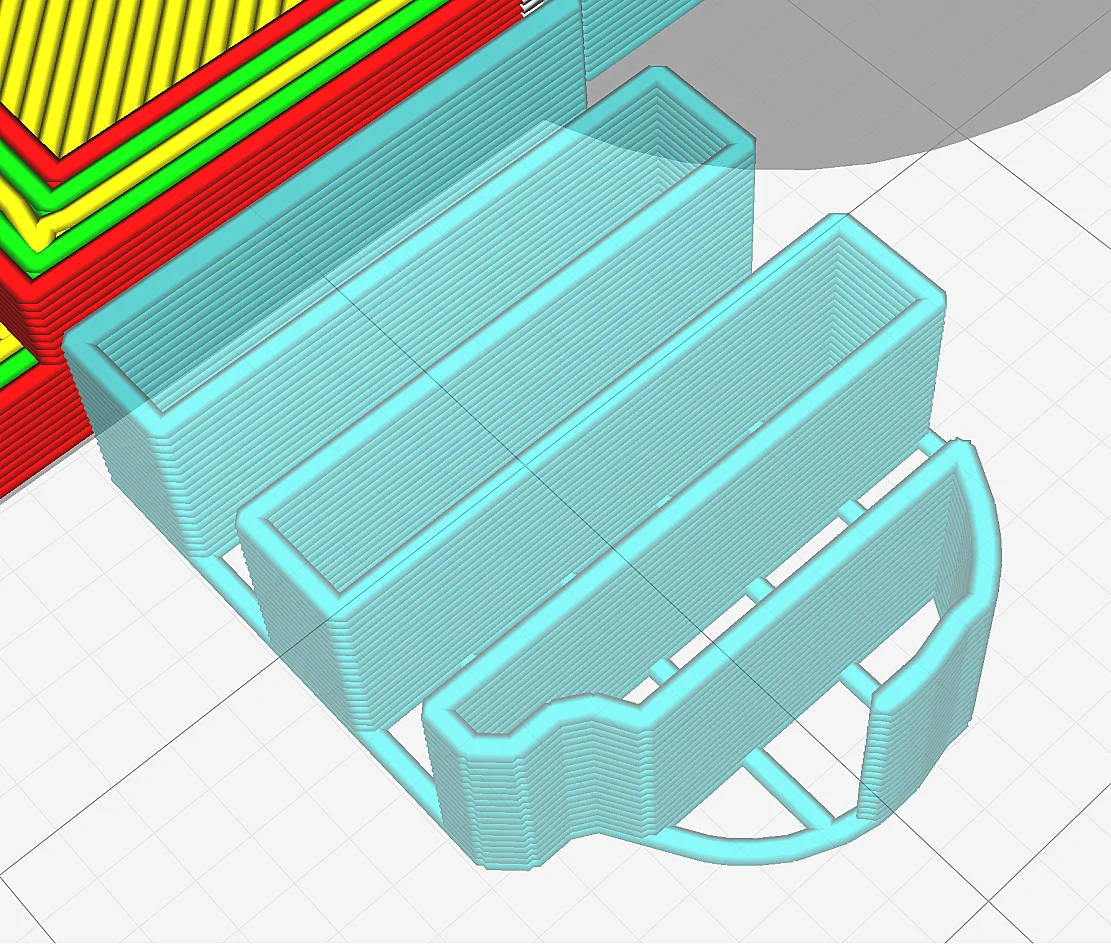
Support Wall Line Count
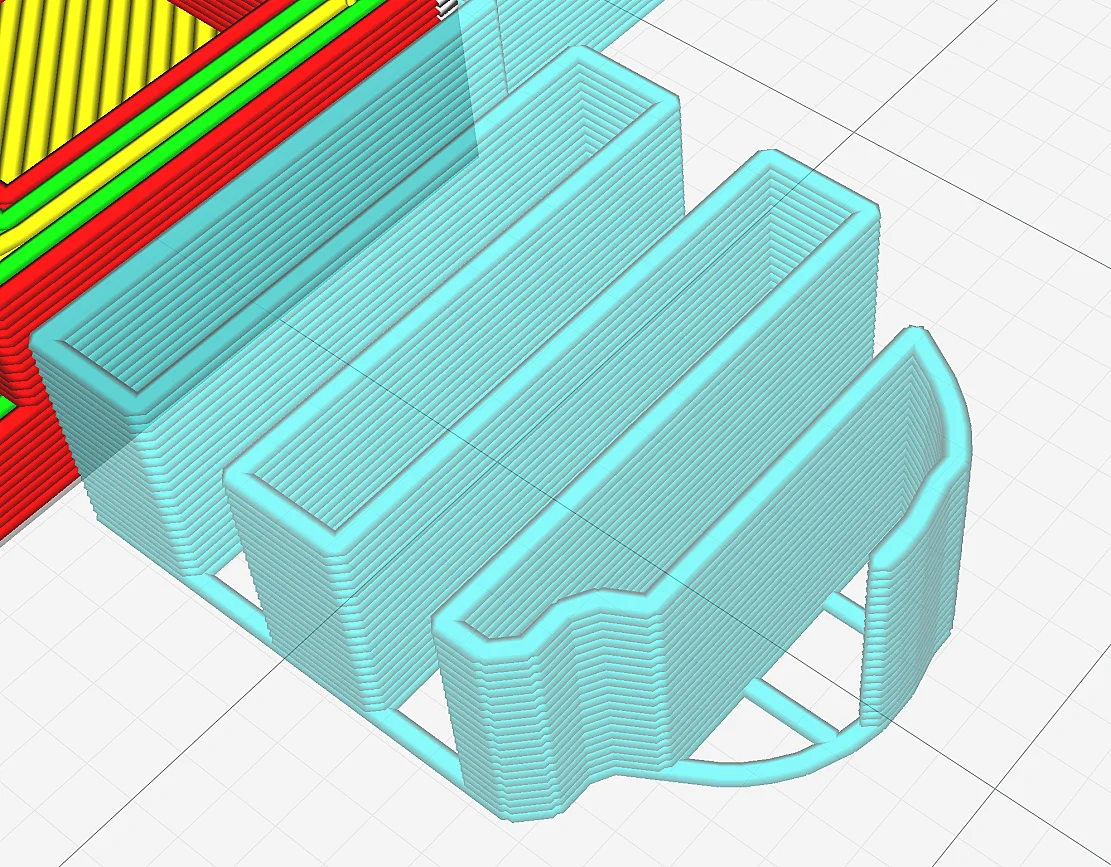

Support walls determine the outer boundaries of your support structures. Thinner walls are easier to remove but might not provide adequate support for overhanging parts. Conversely, thicker walls enhance stability but can be more stubborn to remove because they are a lot stiffer than supports with only one wall.
The key is to strike a balance: thick enough for structural integrity, yet thin enough for straightforward removal. Generally, one wall is enough for most print jobs. Only for big or heavy objects, more than one wall is needed. If you have trouble with print bed adhesion for your print supports, a higher wall line count also improves their adhesion to the build plate.
Support Infill
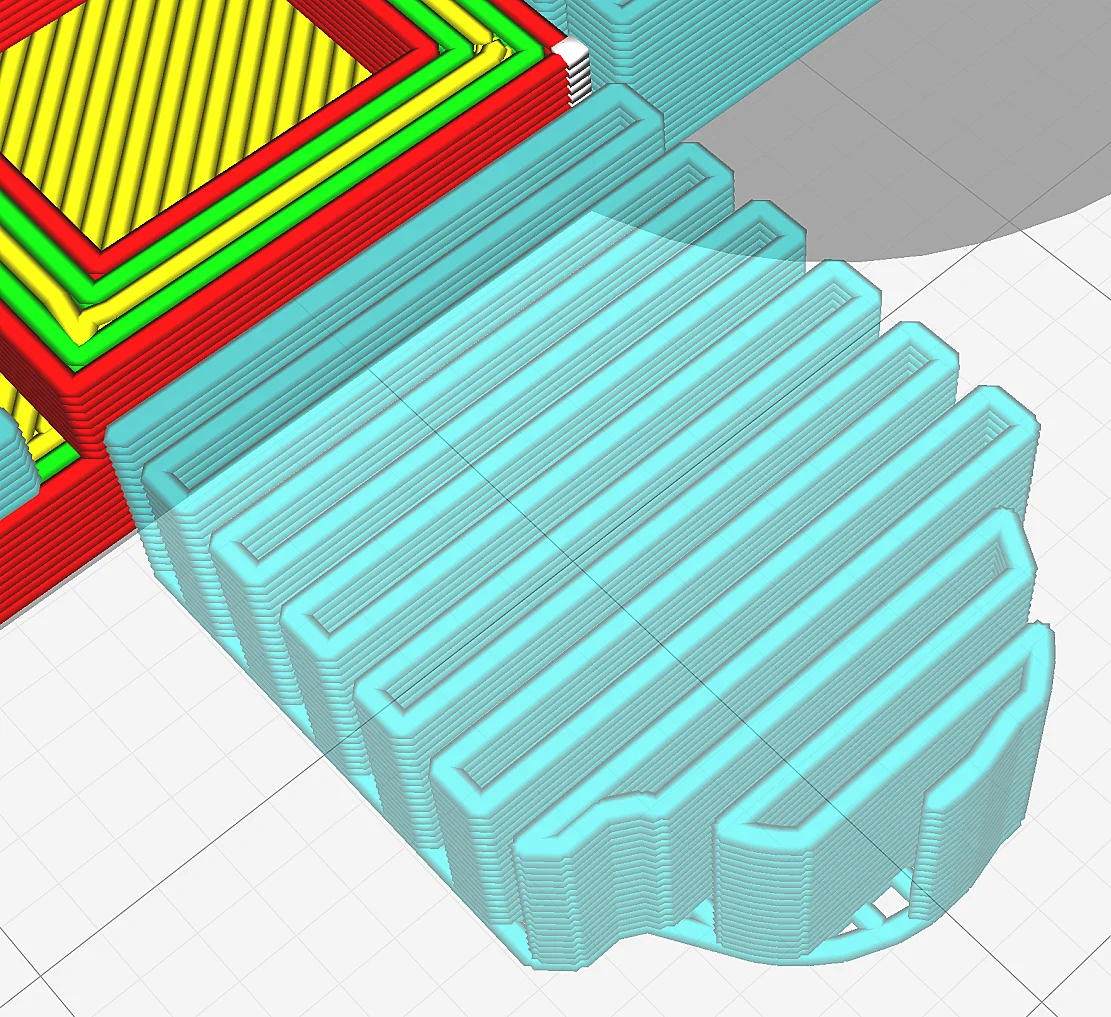
Support infill dictates the internal makeup of the support structures. A higher infill percentage increases stability but also material usage and removal difficulty. Conversely, a lower infill percentage means less material and easier removal but might not sufficiently support the print.
Finding the right infill density is a balance between material efficiency and structural integrity. Consider using a lower infill density for simple, non-complex prints and a higher density for models with extensive overhangs or delicate features.
If you are using a support interface, you can reduce the density. The support structures just have to be dense and strong enough to support the interface.
Linear vs. Tree Supports
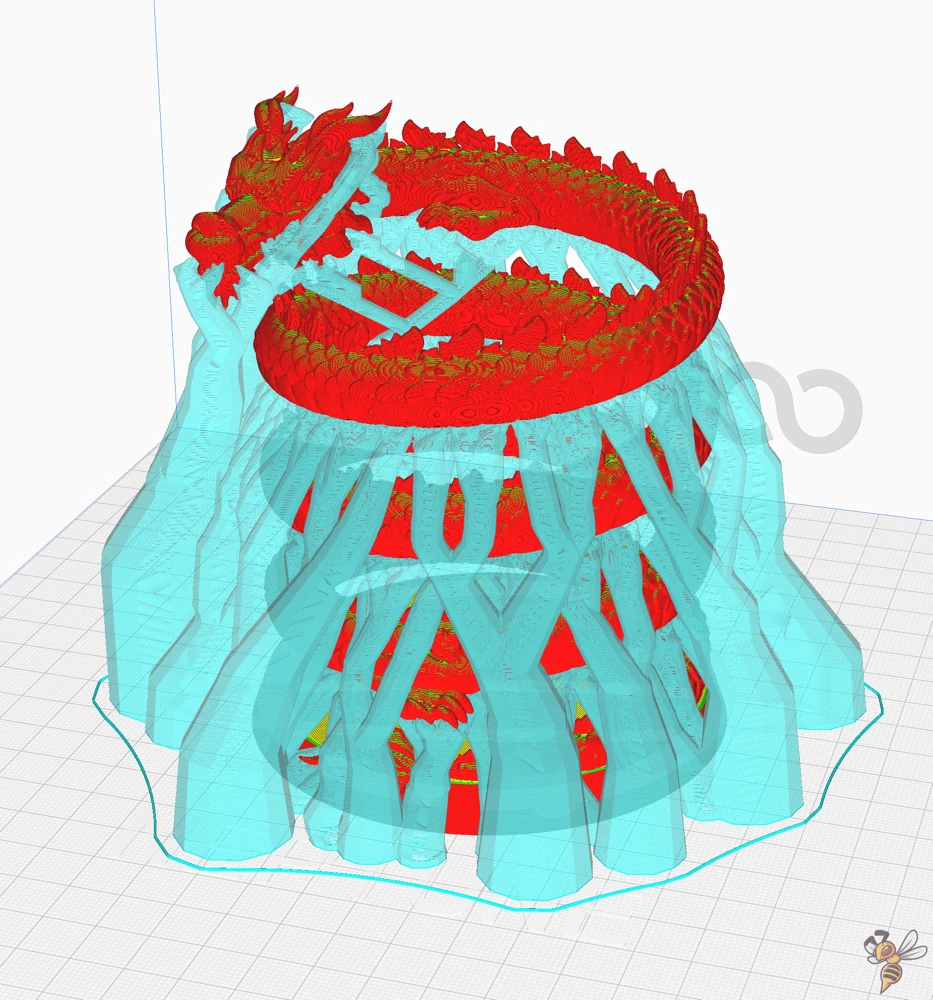
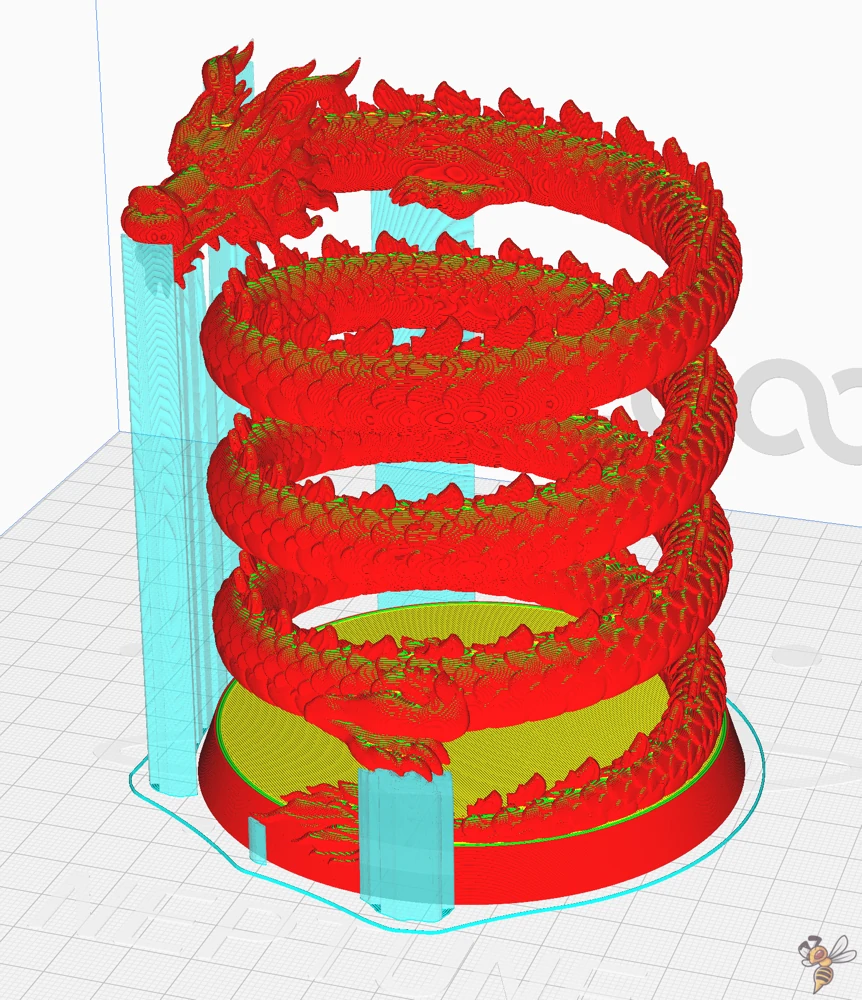
The choice between linear and tree supports can significantly affect both print time and ease of removal.
Linear Supports, structured in a grid-like pattern, offer uniform support and are generally easier to calculate for the slicer. However, they often cannot reach every corner of the object that has to be supported and they can be harder to remove. They are a good choice for simple geometries.
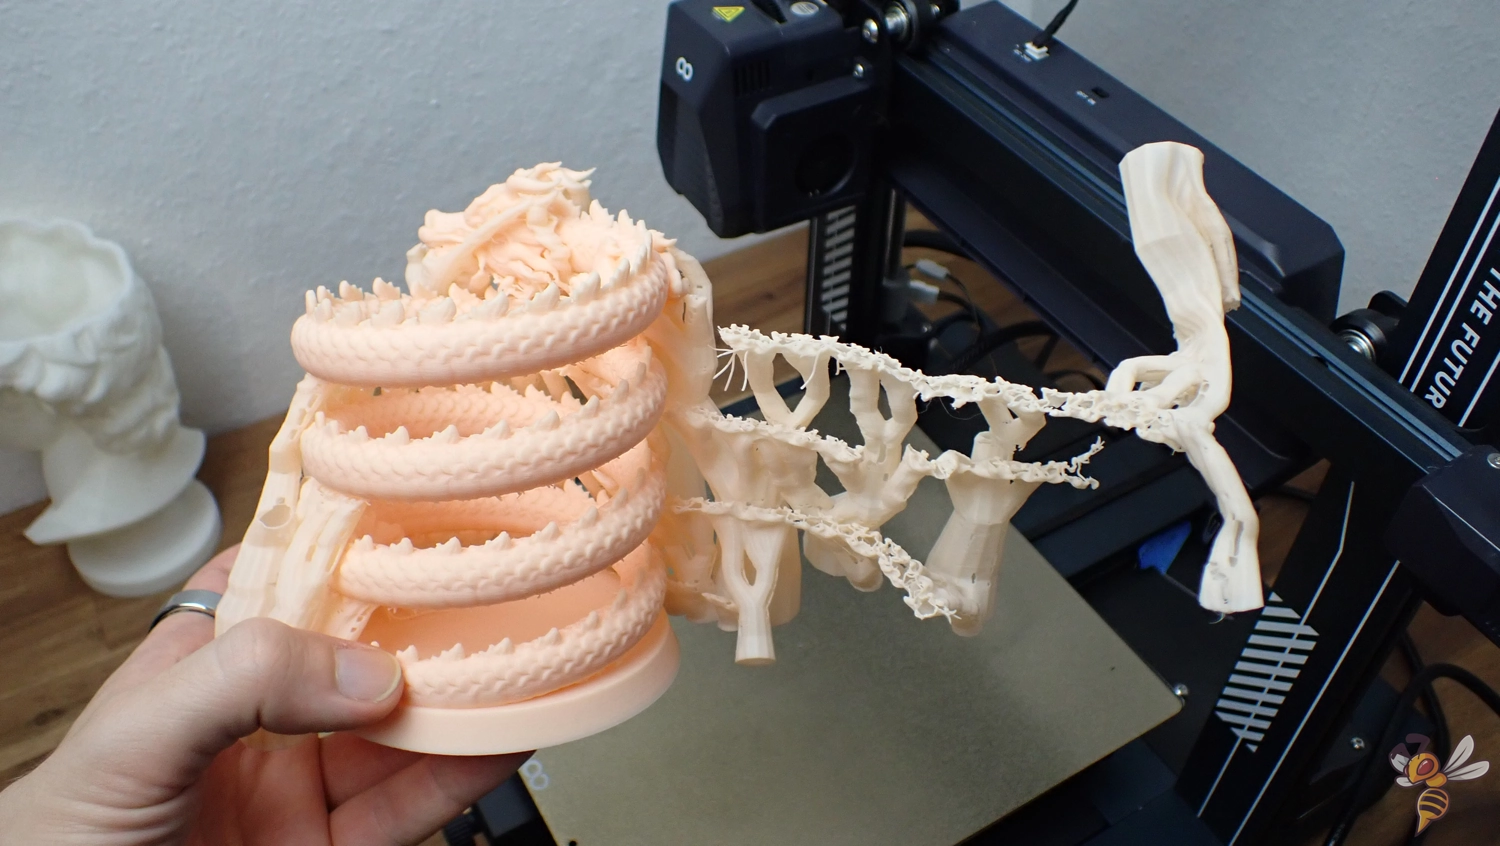
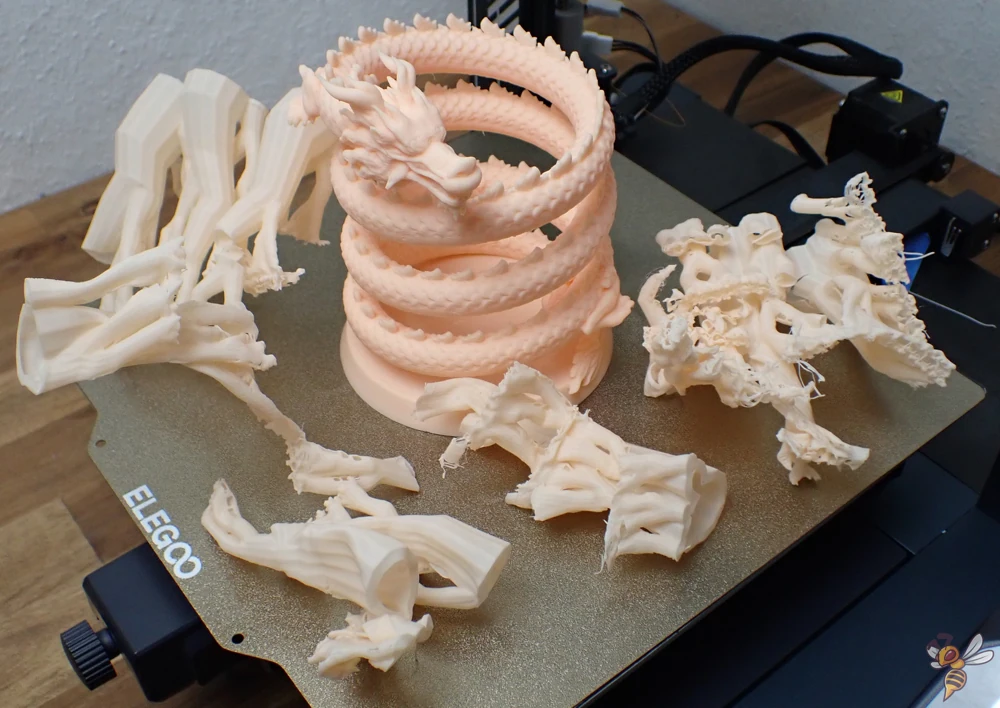
Tree supports, with their branching structures, are often more material-efficient and easier to detach due to their minimal contact points with the print. They are particularly beneficial for organic models with complex geometries. Your choice should depend on the geometry of your model and your priorities in terms of material usage and post-processing effort. But tree supports also create breaking points all over the surface of your 3D print.
Here you can find everything you need to know about tree supports in Cura: Cura Tree Supports: Step-by-Step Guide for Smooth 3D Prints
Support Overhang Angle
The first rule of removing support structures easily is not having to remove supports from 3D prints at all…
The support overhang angle determines the angles at which the slicer will automatically generate supports. A smaller angle means the printer will print supports for shallower overhangs, resulting in more supports overall. This can be essential for intricate models with numerous overhangs, but can lead to increased post-processing time.
Increasing this angle means fewer supports, which can reduce printing time and material usage but might risk the quality of steeper overhangs. Adjust this setting based on the complexity and geometry of your model, keeping in mind the trade-offs between print quality and post-print cleanup.
Try to increase this angle as much as possible without loosing too much support for important features of your 3D print.
Tip: Use a Support Calibration Model

To refine your support settings and make support removal more efficient, consider using a support calibration model. This is a specific 3D model designed to test and optimize your printer’s support structures.
By printing a calibration model, you can assess how different support settings impact the ease of removal and the quality of the final printed part. With this hands-on approach, you can find the perfect settings for your support structures without wasting too much time or material.
A calibration model typically includes various features to test different aspects of support removal. For instance, it might have overhanging elements to evaluate tree supports or linear supports, straight vertical columns to test support density, and intricate geometries to examine how supports from 3D prints can be removed manually or with tools.
Using such models allows you to experiment with different support patterns, densities, and styles, like breakaway support structures or soluble support structures.
For those using soluble supports, a calibration model can help determine the best soluble material to use, ensuring a balance between support efficacy and easier removal.
The Heat Method: Using a Heat Gun or Hair Dryer
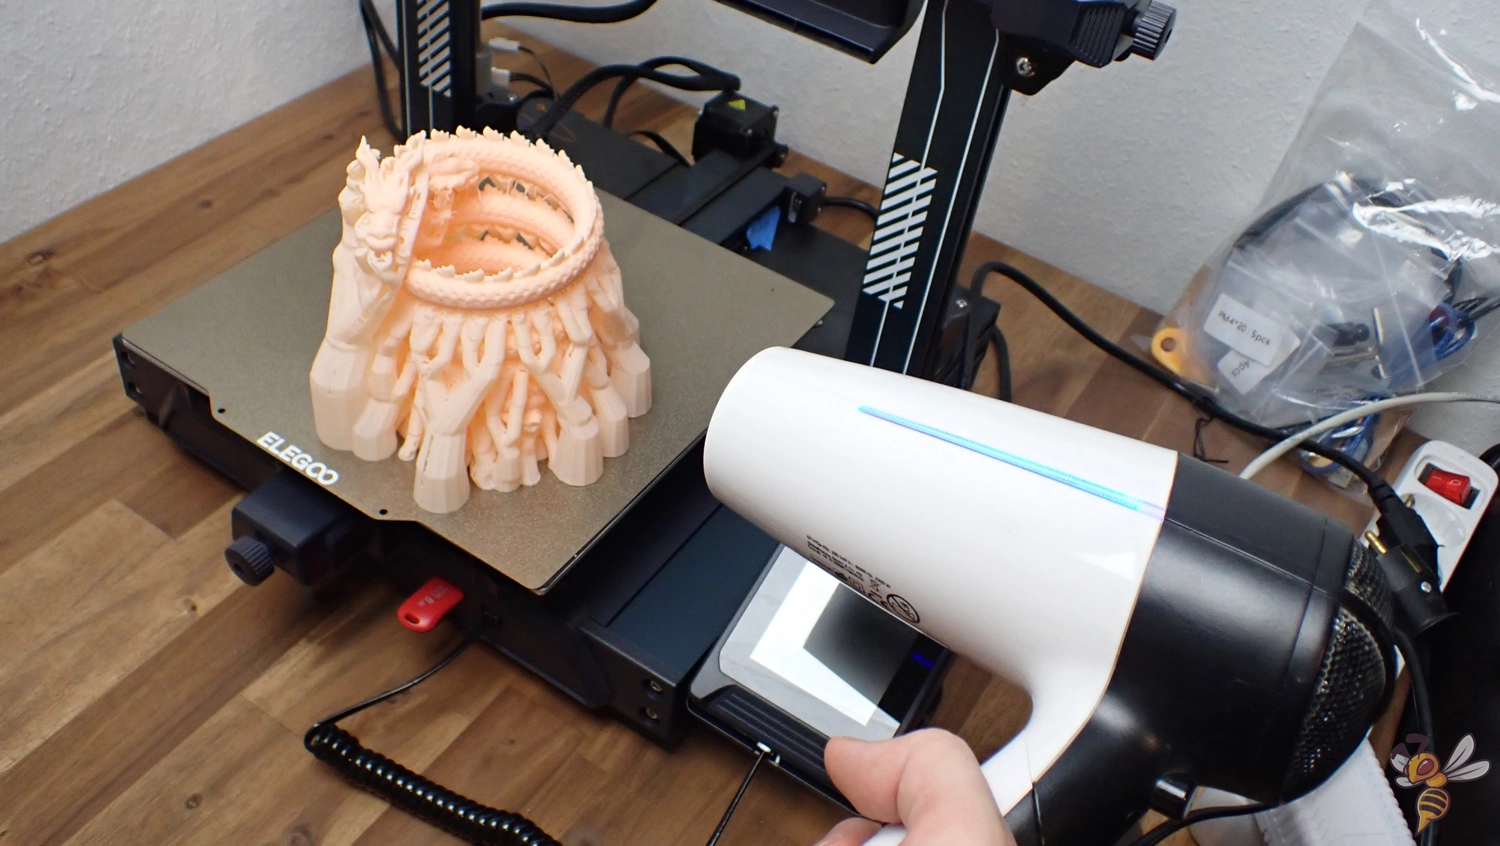
One effective method for easier removal involves using a heat gun or hair dryer. This technique softens the supports, making them more pliable and easier to detach. But don’t heat the 3D print too much. Otherwise, it can easily deform!
This method is by far my favorite, and I use it every time I remove supports from 3D prints!
Here’s a step-by-step guide to safely use this method:
- Gather Necessary Tools: Besides a heat gun or hair dryer, you might need needle nose pliers or flush cutters for precise removal, especially for intricate geometries. Always have a pair of heat-resistant gloves for safety.
- Start with Low Heat: Begin with the lowest heat setting to prevent warping or damage to the 3D print. Gradually increase the heat as needed, but avoid getting too close to the print to prevent melting.
- Apply Heat Evenly: Move the heat gun or hair dryer back and forth over the support structures. The goal is to evenly warm the supports without overheating any part of the 3D print. This process requires patience and careful observation.
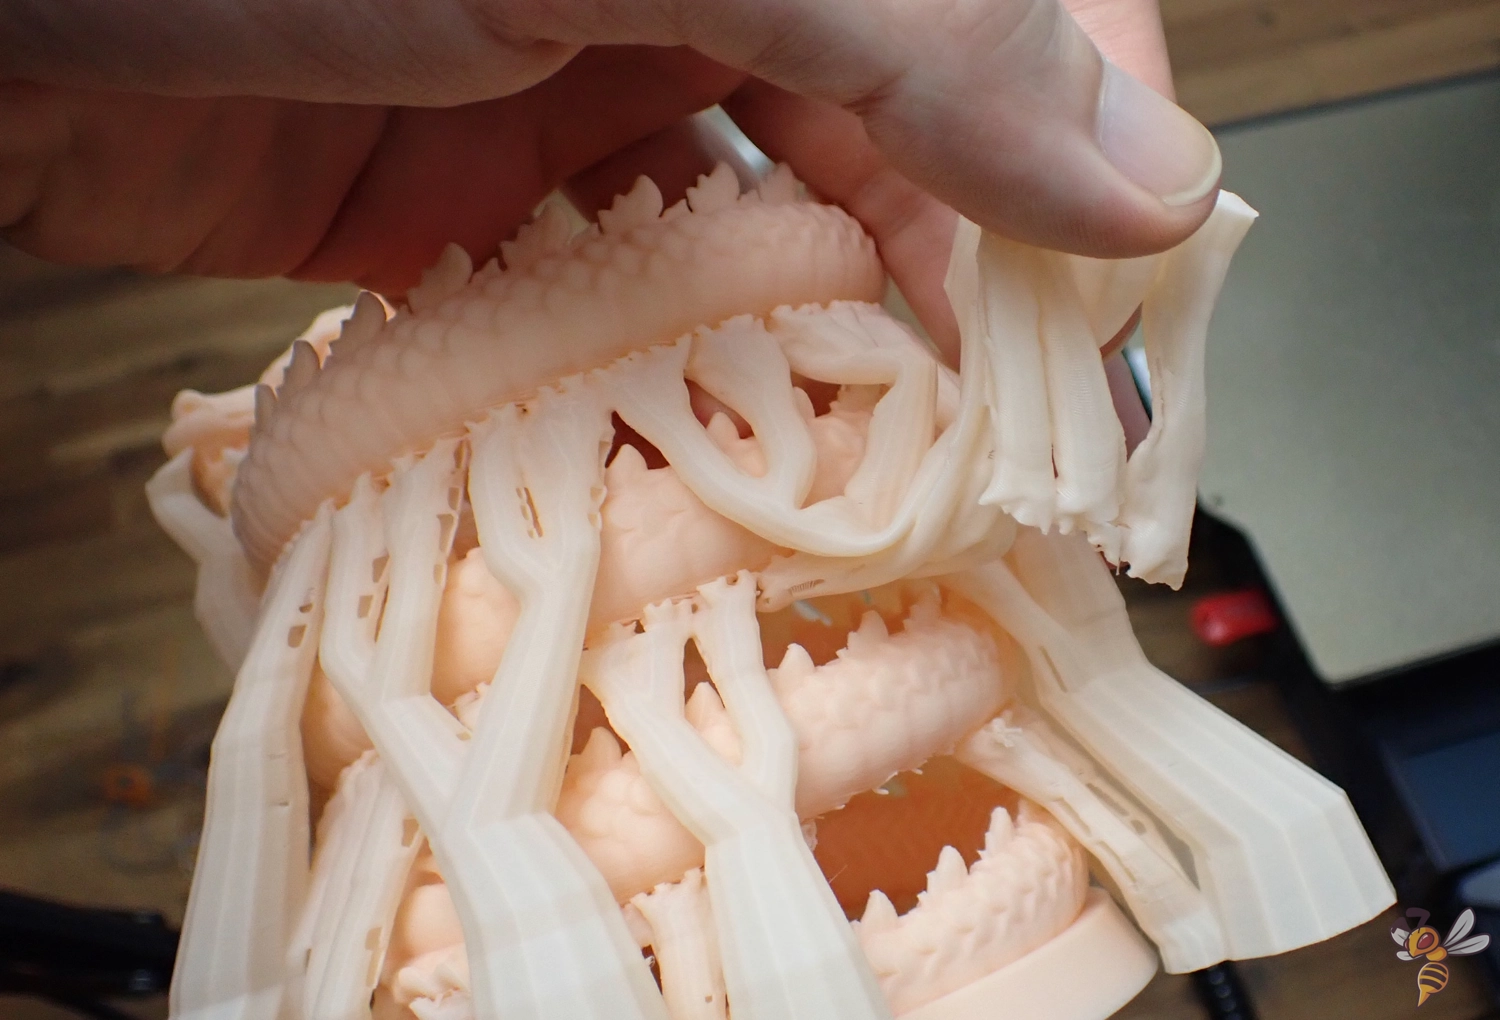
- Test Support Flexibility: After a few seconds, use your hand or tools like needle nose pliers to gently test if the supports have softened. They should bend or detach more easily. If not, continue applying heat for a short period.
- Remove the Supports: Once the supports are sufficiently softened, you can carefully remove them. For soluble support material, this method may not be suitable as the heat can affect the material differently.
- Cooling: If the 3D print got a bit too hot, allow it to cool down before handling it directly. Cooling helps the material re-solidify, maintaining the print’s integrity.
- Post-Processing: Check for any remnants of the support material and clean up the print surface. You may need to use a metal file or sandpaper for final touches.
Manual Removal Techniques
Manual intervention is often necessary for removing support structures from 3D prints, especially when dealing with materials that can’t withstand heat or when precision is crucial. Here are some techniques to remove supports effectively without using heat:
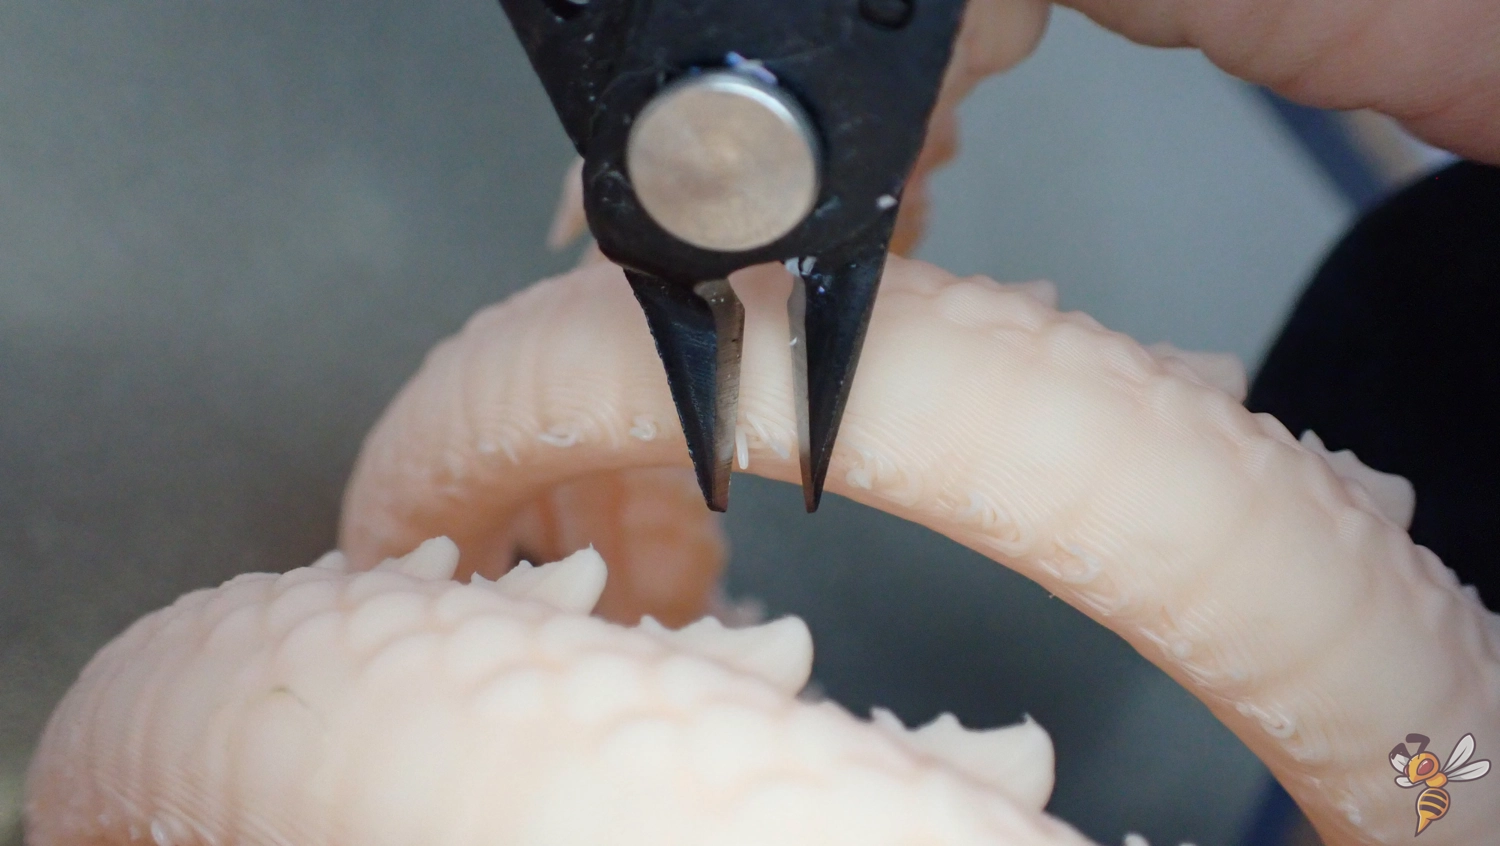
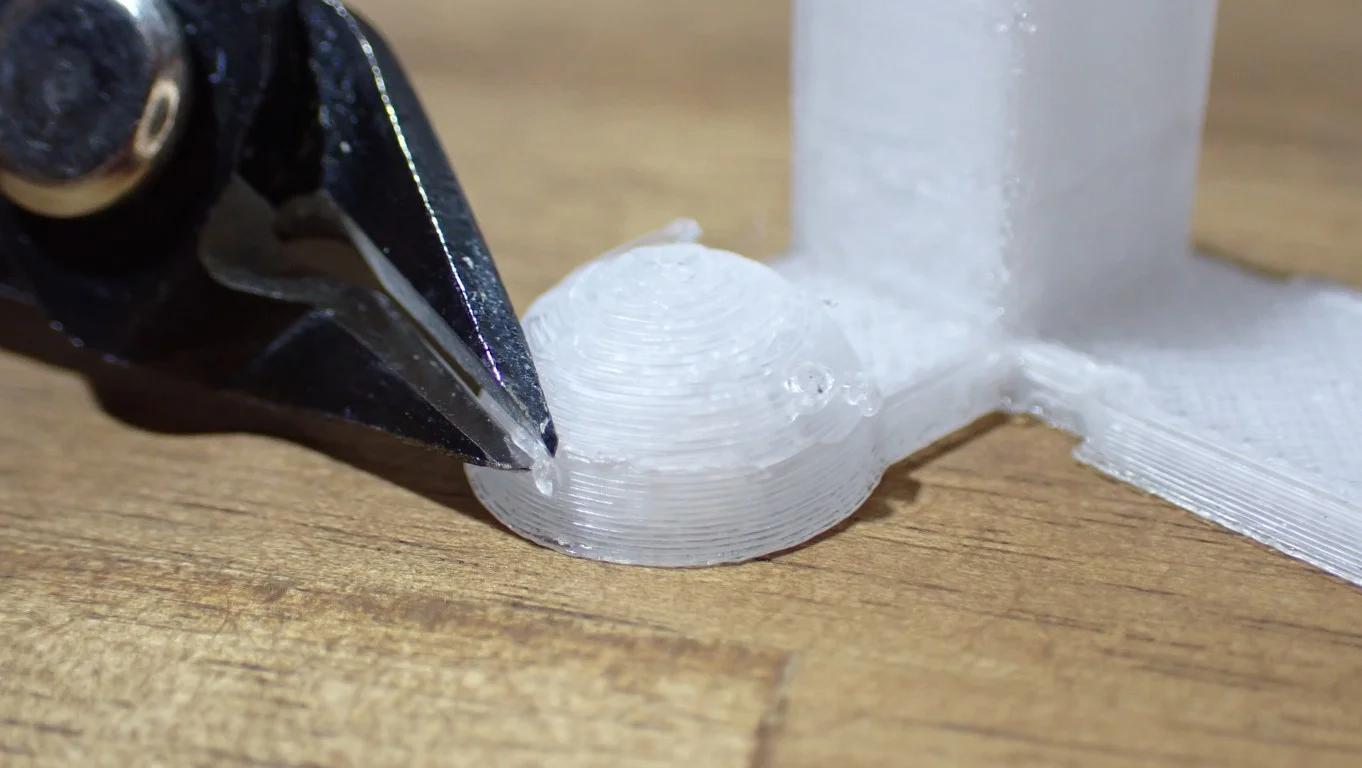
- Cutting the Supports: This is the most common method for removing supports. Using flush cutters or a sharp knife, carefully cut the supports at the points where they meet the printed part. This method is particularly effective for linear supports and breakaway support structures. The goal is to minimize damage to the print surface while detaching the supports.
- Twisting and Pulling: For certain types of support, especially those with low support density or tree supports, you can often remove them by gently twisting or pulling. This method works best when the supports are not firmly attached to the actual model and easily break off at the intended breaking points. It’s important to apply gradual pressure to avoid breaking the printed part, especially for designs with intricate geometries.
- Using Pliers for Tough Spots: Sometimes supports are located in hard-to-reach areas or are too firmly attached. In these cases, needle nose pliers can be an invaluable tool. They allow for more precise removal, especially in tight spaces or for supports that are closely adhered to the print. Use a gentle rocking motion to loosen the supports before pulling them away.
Post-Processing Tips
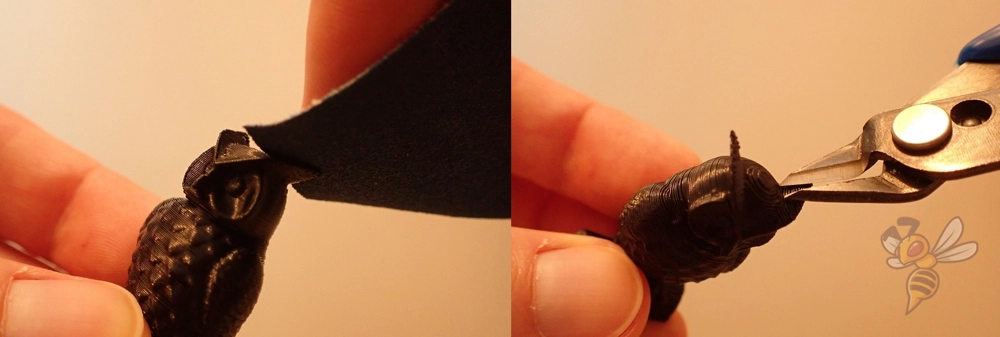
After removing the supports, there might be some remnants on the print surface. Using a fine-grit sandpaper or a metal file can help smooth out these areas. This step is particularly important for 3D prints that require a high level of surface finish or for printed parts that will be visible or handled frequently.
Multifilament FDM 3D Printing
Multifilament 3D printing is revolutionizing how we approach support usage and removal in 3D prints. With the advent of Independent Dual Extruder (IDEX) printers like the Snapmaker J1s or filament-switching printers such as the Bambu Lab A1 Mini, creating complex geometries with easily removable supports has become more accessible.
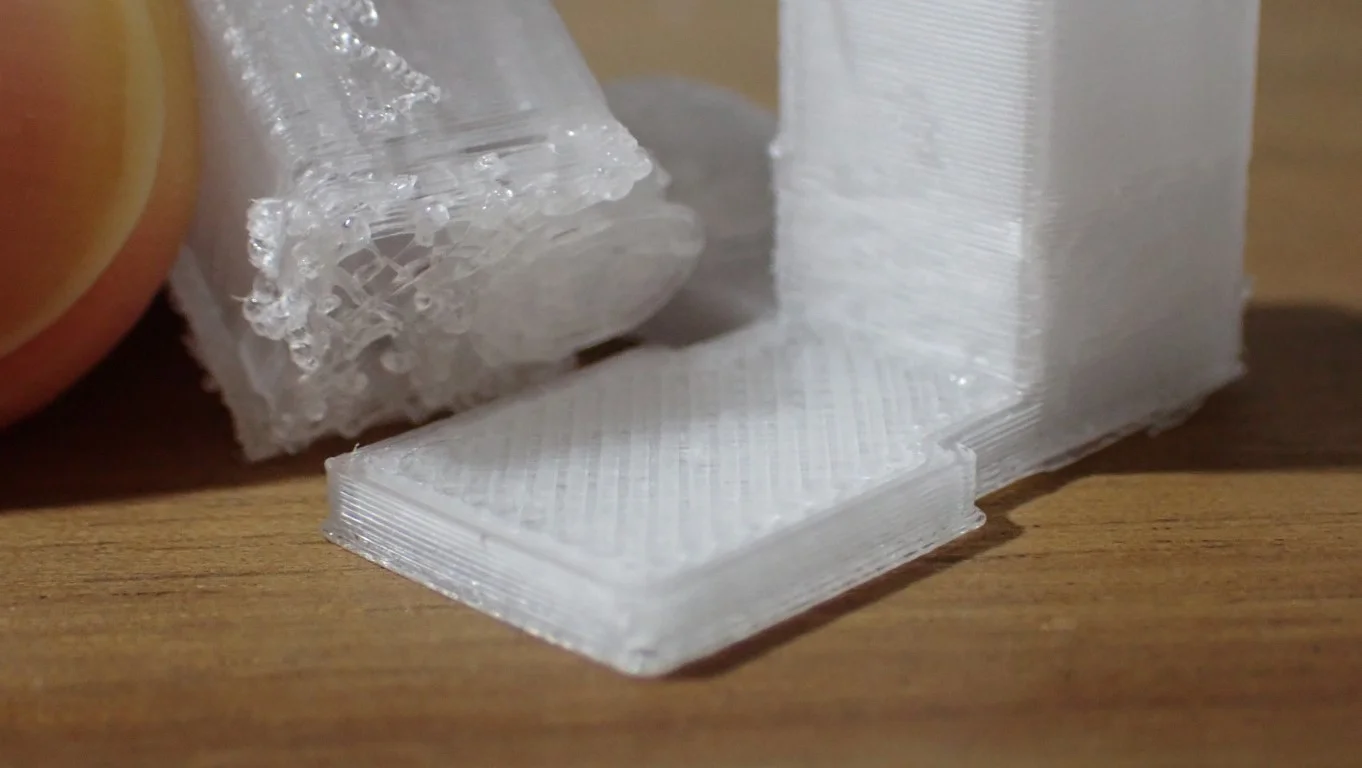
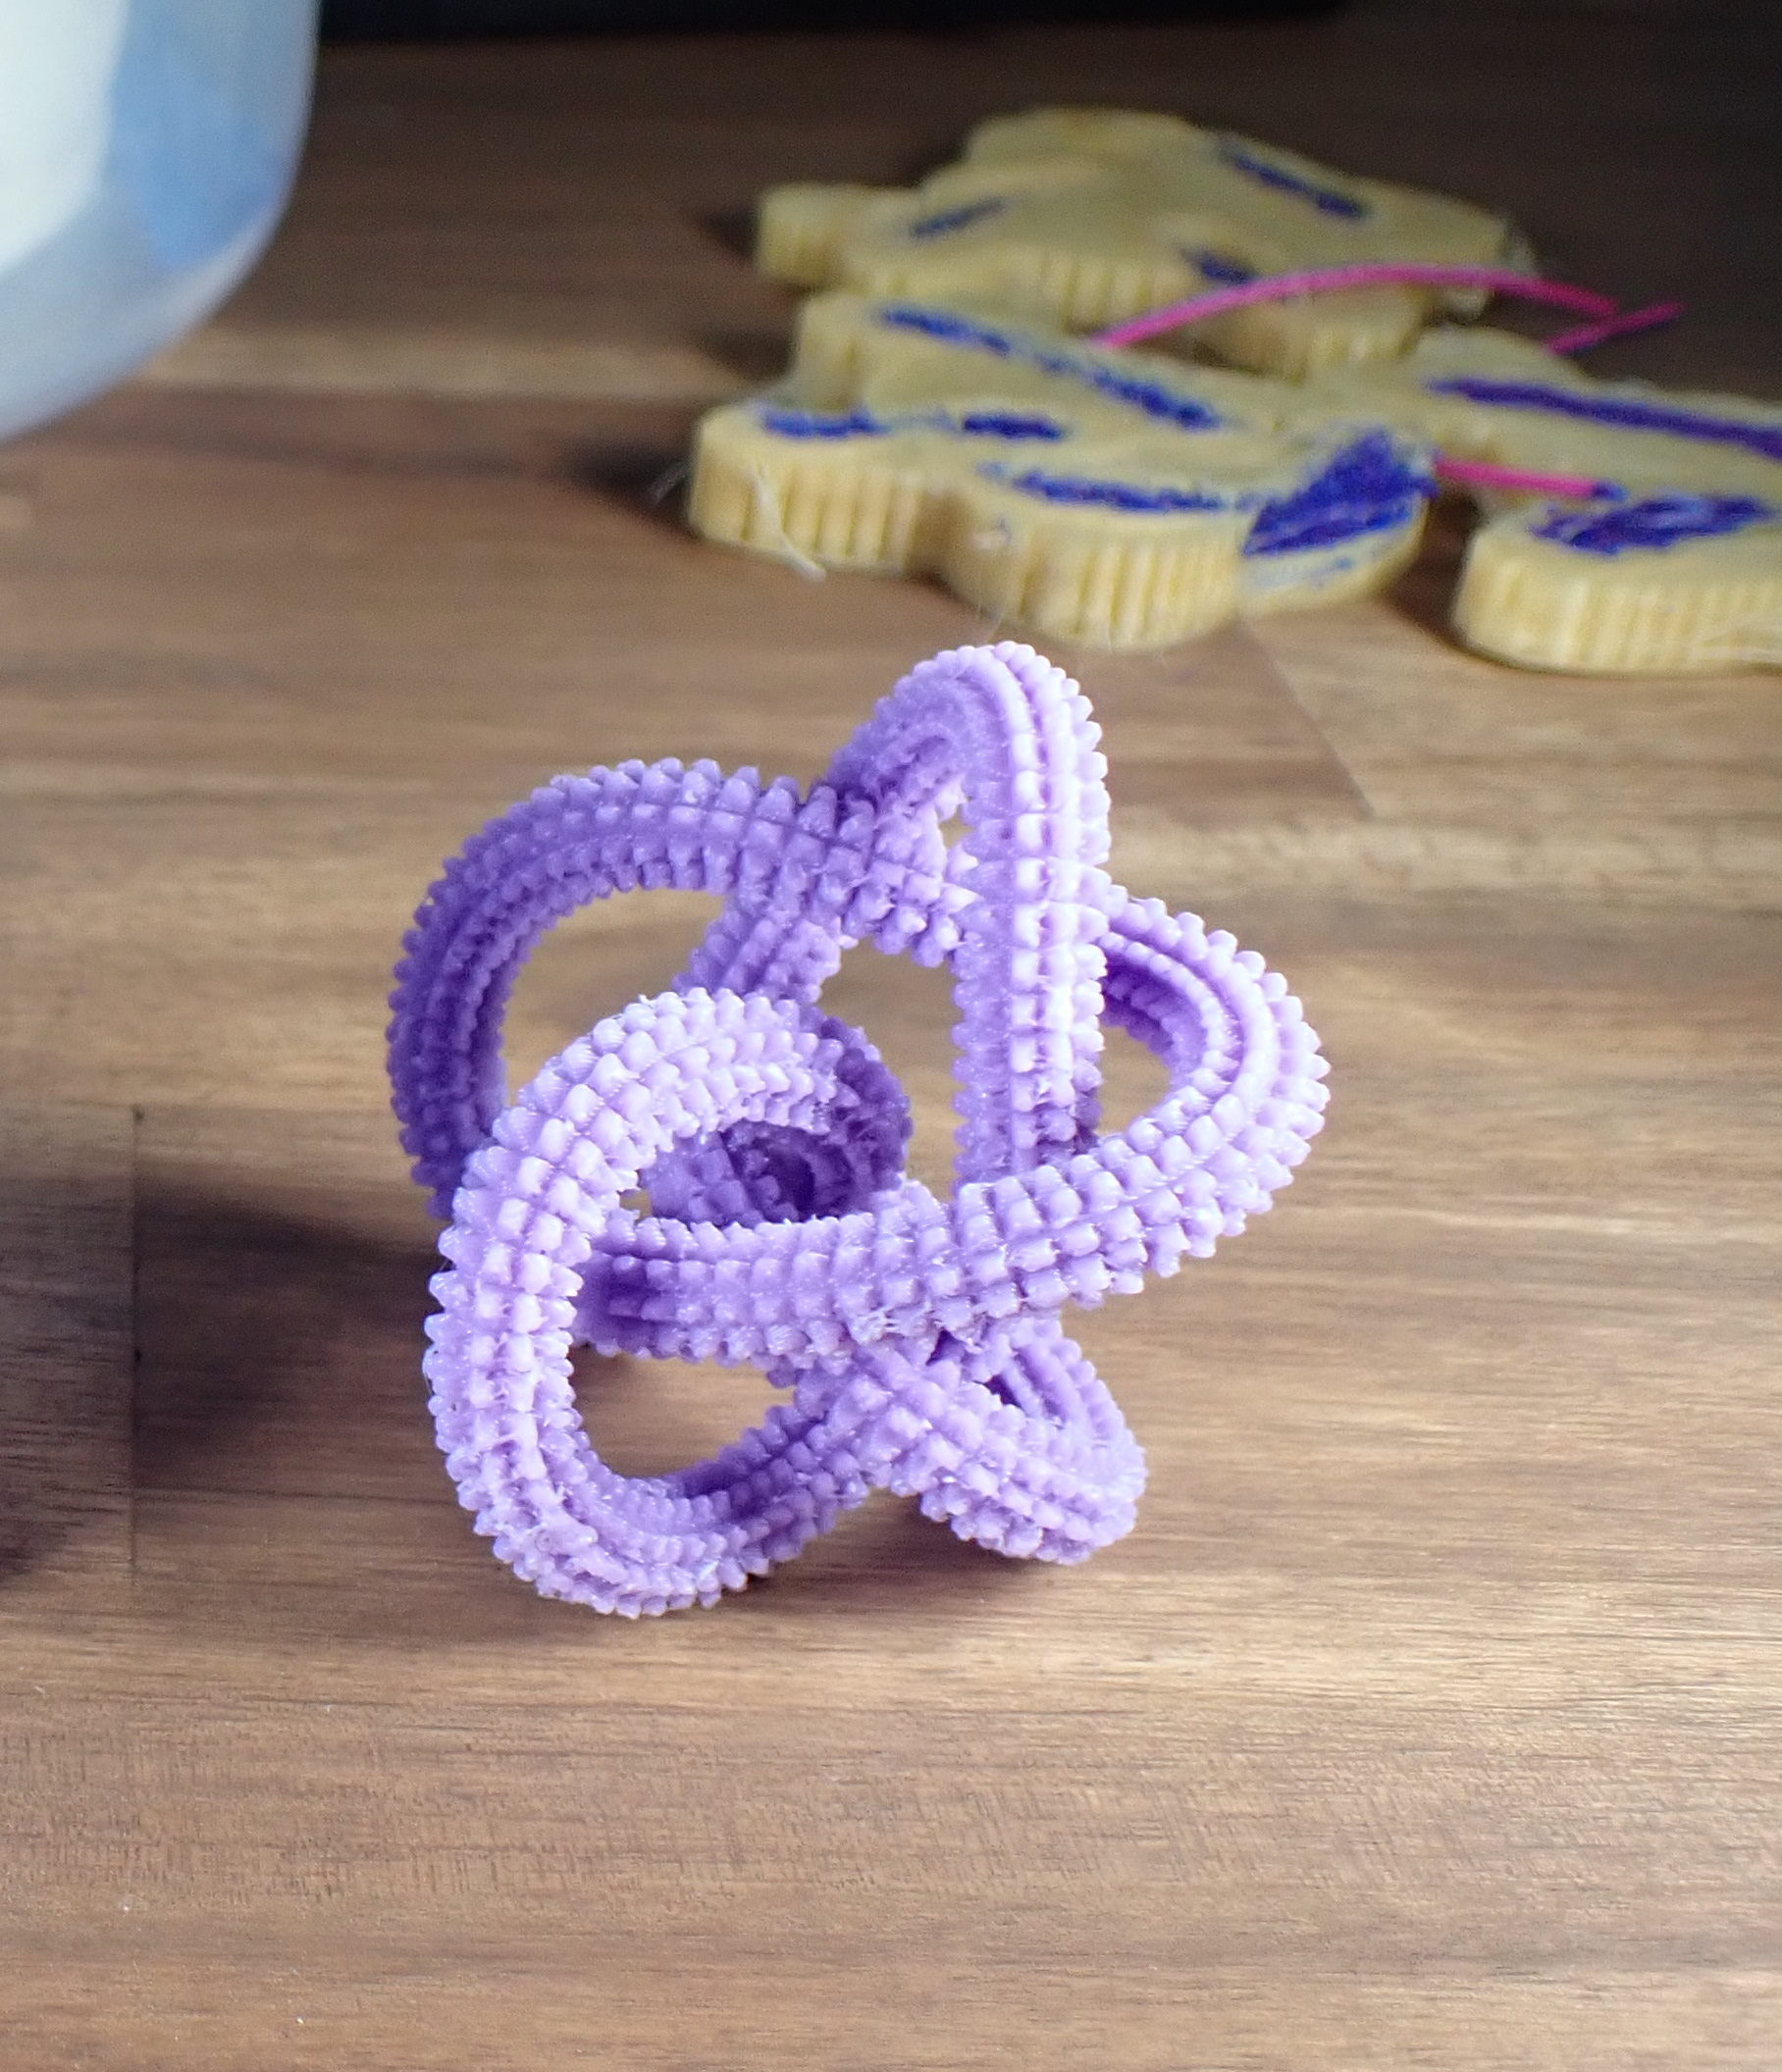
The key to this advancement lies in using different materials for the model and its supports. For instance, printing a PETG part with PLA supports or vice versa is highly effective. These two plastics have distinct properties; they don’t adhere strongly to each other, which makes support removal easy. When you use PLA as a support structure material for a PETG part, the support structures can literally fall off, leaving a spotless finish on the printed part. This method sidesteps the need for manual intervention and intricate post-processing, ensuring a smoother print surface.
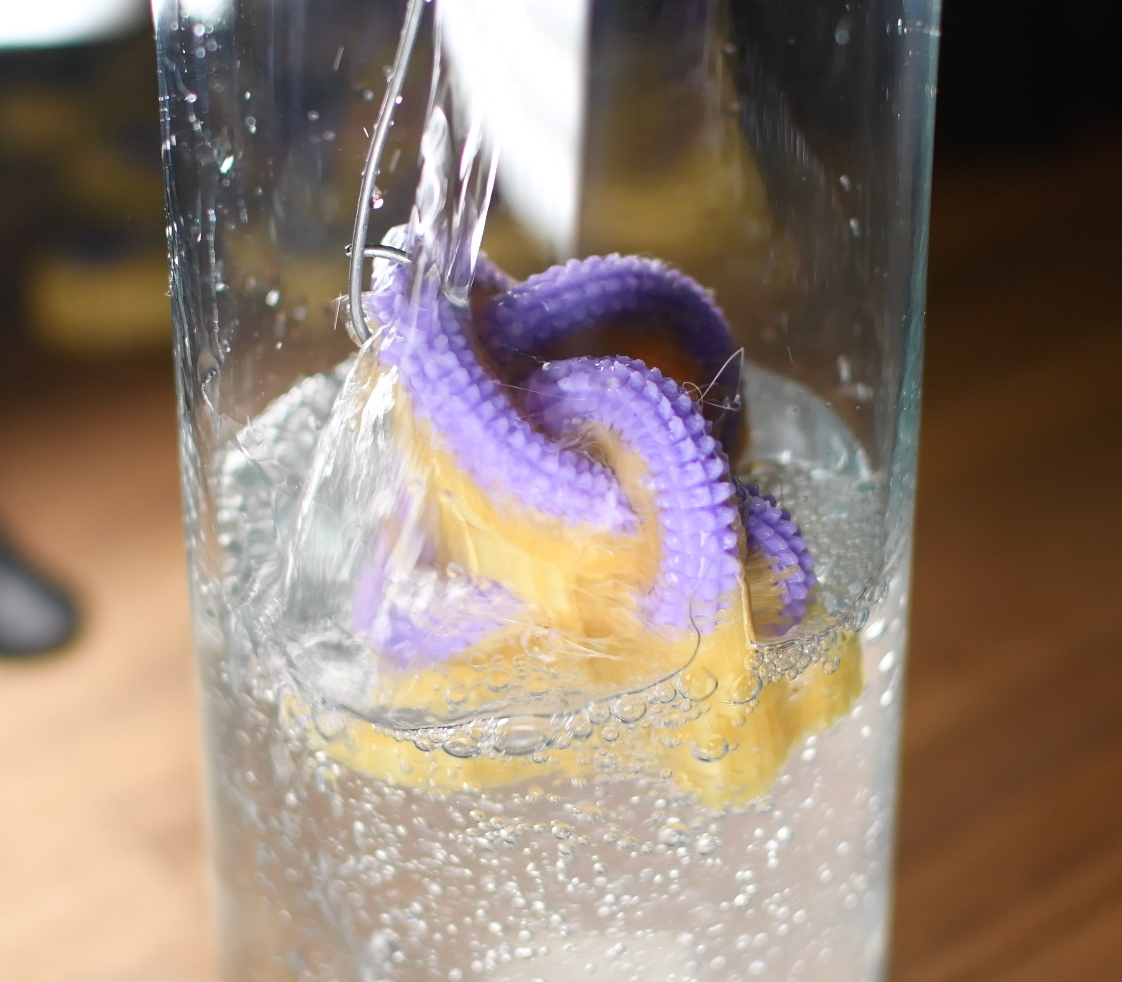
Soluble support structures that are made from soluble print material like PVA, are ideal for organic structures that require supports. Soluble materials, designed to dissolve in certain solvents or warm water, offer a convenient way to remove supports without risking damage to the actual model. This way, you can print objects with fine details that would otherwise be impossible to support.
Conclusion
With the techniques for removing support structures in this article, you should be well-equipped to get smooth printing results.
If you have not already done so, you should definitely try using the heat gun or hair dryer method – because it works every time (if you are careful)!
Disclosure: This website is the property of Martin Lütkemeyer and is operated by Martin Lütkemeyer. Martin Lütkemeyer is a member of the Amazon Services LLC and other Affiliate Programs. These are affiliate advertising programs designed to enable websites to earn advertising revenue through advertising and linking to Amazon.com and others. Links marked with * are affiliate links.
