
- Wet Filament: Prevention, Symptoms & Drying - July 18, 2024
- Sovol SV08 – Best PrusaSlicer Settings & Profile - June 26, 2024
- Sovol SV08 – Best Orca Slicer Settings & Profile - June 26, 2024
Disclosure: Links marked with * are Affiliate Links. I earn from qualifying purchases if you decide to make a purchase through these links – at no additional cost for you!
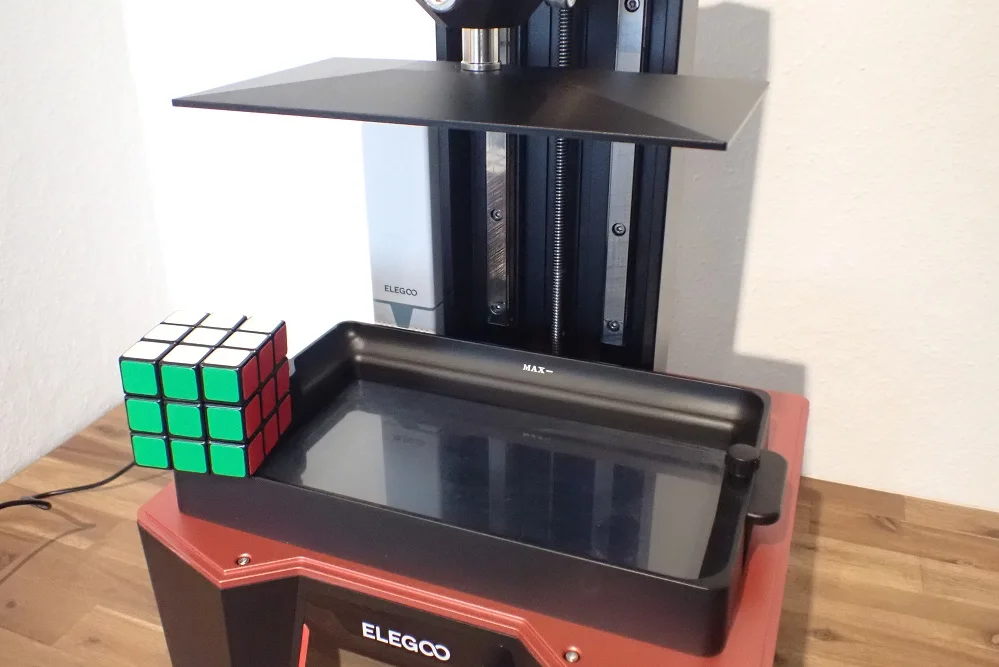
The Elegoo Saturn 2 8K* is a large format resin 3D printer with impressive accuracy. In this hands-on review, I test it in detail and show you what print quality you can expect.

Check Price at:
There is now a successor. I have tested it and it is even better than the Saturn 2: Elegoo Saturn 3 (+Ultra) – Review from a Miniature Painter
Table of Contents:
- 1 Key Takeaways
- 2 Who Should Buy the Elegoo Saturn 2 8K?
- 3 Technical Specifications > Elegoo Saturn 2 8K
- 4 Scope of Delivery > Elegoo Saturn 2 8K
- 5 Setup > Elegoo Saturn 2 8K
- 6 Features > Elegoo Saturn 2 8K
- 6.1 8K / 28.5 µm XY Resolution
- 6.2 10 µm Z-Resolution / Layer Height
- 6.3 Fresnel Collimating Light Source (FCLS)
- 6.4 Large Print Volume
- 6.5 Textured Print Bed
- 6.6 Activated Carbon Air Filter
- 6.7 Easy Print Bed Levelling
- 6.8 Double Z-Axis
- 6.9 Color Touch Screen
- 6.10 Slicer
- 6.11 Resin Tank with Max. Filling Line & Pouring Corner
- 6.12 9H Tempered Glass to Protect the LCD Screen
- 6.13 USB Stick on the Side
- 7 Handling > Elegoo Saturn 2 8K
- 8 Noise Level > Elegoo Saturn 2 8K
- 9 Power Consumption > Elegoo Saturn 2 8K
- 10 Print Speed > Elegoo Saturn 2 8K
- 11 Print Quality – Practical Test > Elegoo Saturn 2 8K
- 12 Useful Accessories > Elegoo Saturn 2 8K
- 13 Elegoo Saturn 2 8K vs. Phrozen Sonic Mighty 8K
- 14 Elegoo Saturn 2 8K vs. Anycubic Photon M3 Plus
- 15 Conclusion: Is the Elegoo Saturn 2 8K worth it?
- 16 Similar 3D Printers
Key Takeaways
- Large print volume: 218.88 x 123.12 x 250 mm
- High accuracy: 0.01 mm in Z direction and 0.0285 mm (28.5 μm) in XY direction
- Air filter included
- Very stable construction with double Z-axis and strong print bed support
Who Should Buy the Elegoo Saturn 2 8K?
The Elegoo Saturn 2 8K is worthwhile for everyone who wants to print either large resin 3D prints in one piece or many smaller objects at once with a high accuracy. Thanks to the easy operation, it is very suitable for beginners and is also interesting to professionals due to its reproducible and reliable print quality.
PRO:
- 8K resolution (28.5 μm pixel size)
- 0.01-0.2 mm layer height
- Large print volume
- Air filter
- Simple print bed leveling
- Compatible with ChiTuBox
- Double Z-axis
- Fast printing speed
CON:
- USB slot on the side
Technical Specifications
> Elegoo Saturn 2 8K
DEVICE
- Technology: MSLA Photocuring
- Size: 305.9 x 273 x 567.3 mm (L x W x H)
- Weight: 11 kg
- Operation: 3.5-inch touch screen
PRINTING
- Print volume: 218.88 x 123.12 x 250 mm (L x W x H)
- Light source: COB light source (405 nm)
- XY pixel size: 0.0285 mm (28.5 μm)
- Resolution: 7680 x 4320 pixel
- Layer height: 0.01-0.2 mm
- Printing speed: 30-70 mm/h
SOFTWARE
- Slicer: ChiTuBox
- Connectivity: USB
Check Price at:
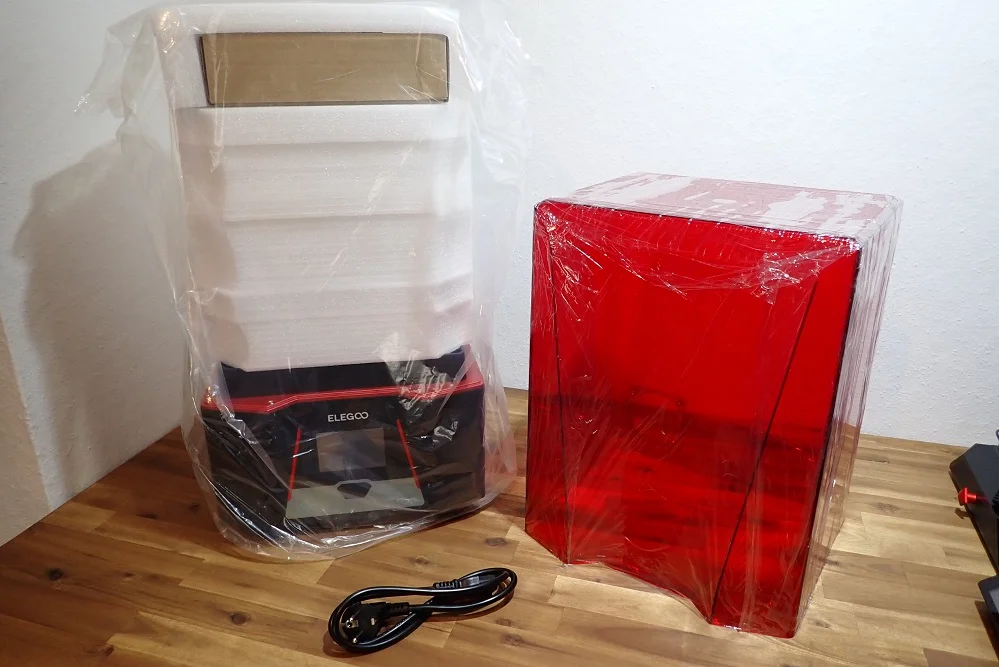
Scope of Delivery
> Elegoo Saturn 2 8K
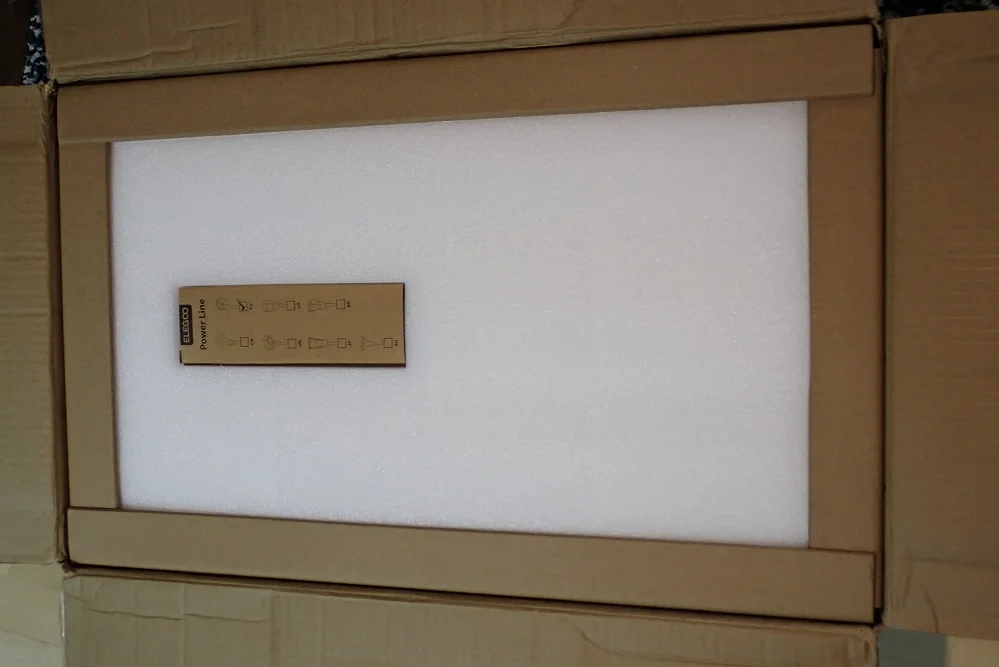
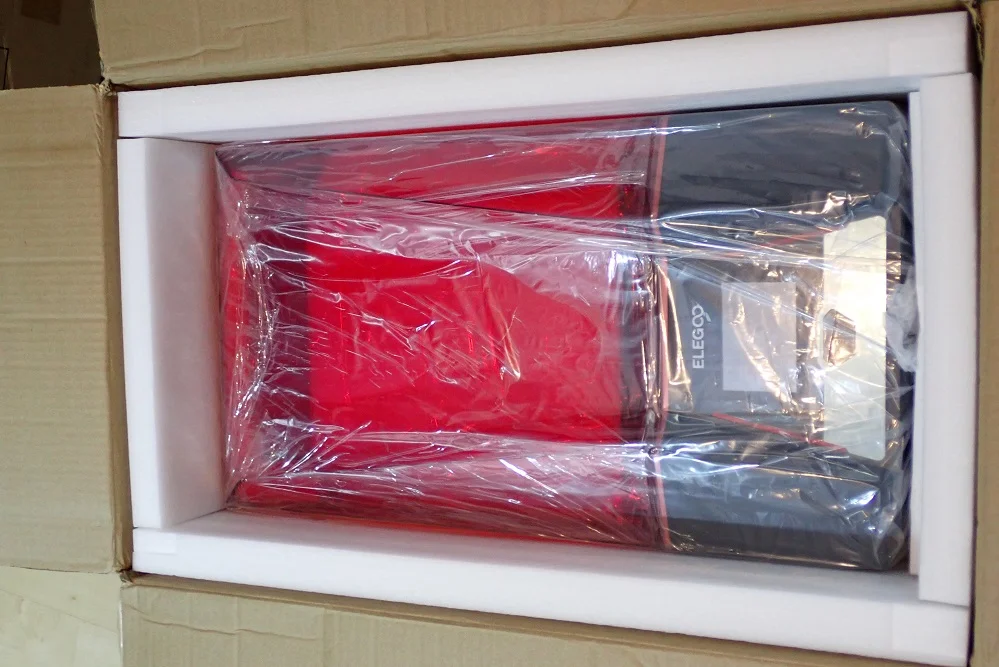
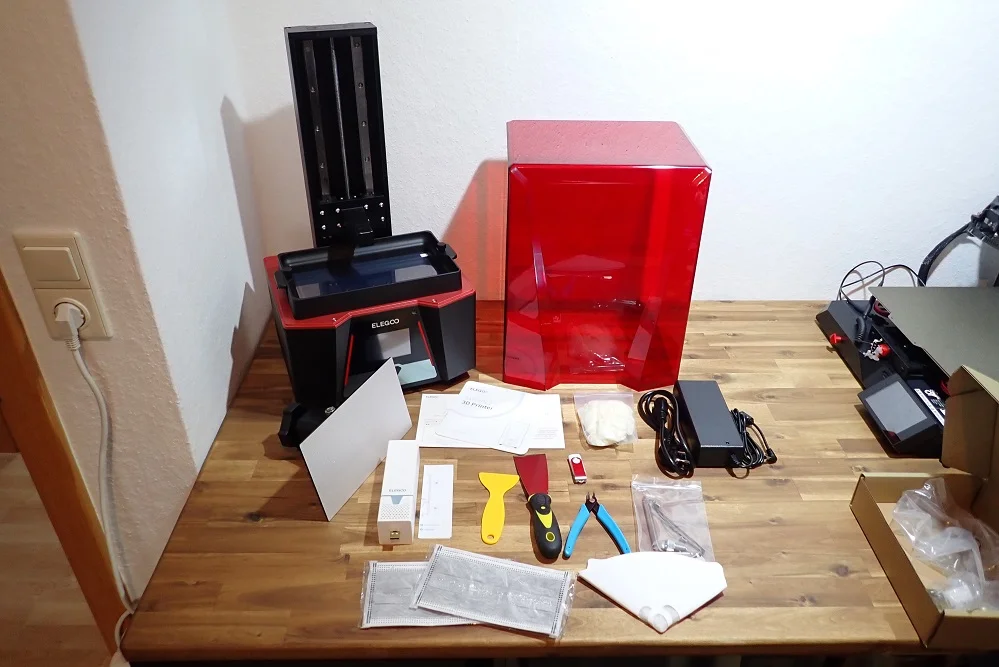
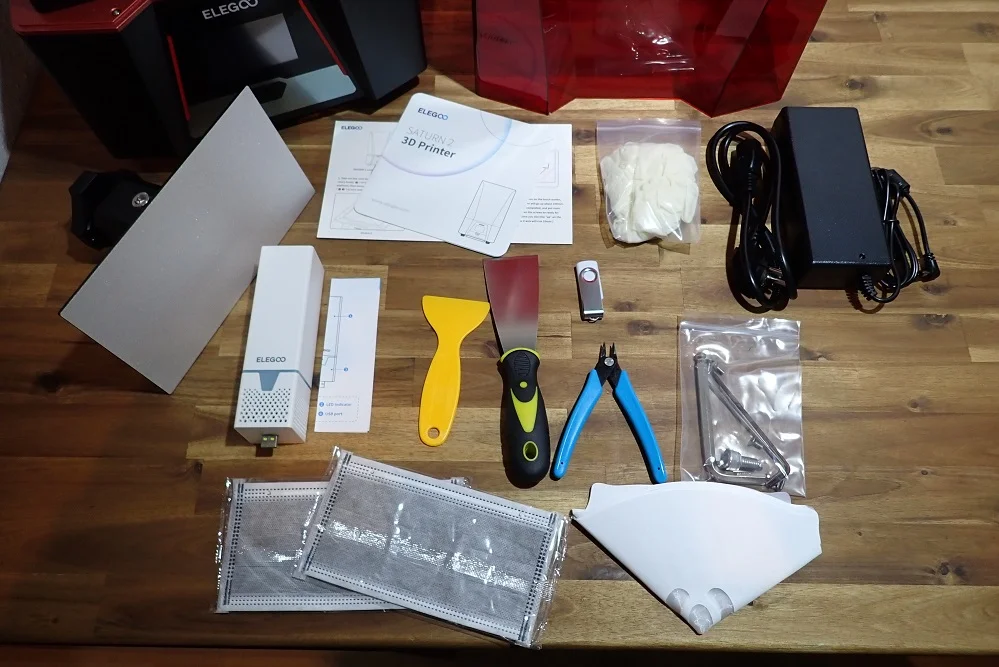
Despite the imposing size of the Elegoo Saturn 2 8K, the package it comes in is not so big that it becomes too bulky. The precious cargo inside is also very well protected by reinforcing braces on the edges and enough foam to secure all moving parts in the package.
The tools, instructions and other small items are cleverly packed in a small box above the print bed in the UV-protective hood to save even more space.
The Elegoo Saturn 2 8K comes with almost everything you need for your first 3D print. The only thing missing is resin for printing, paper towels and a solvent for the resin used for cleaning (either isopropyl alcohol or water).
Included with the Elegoo Saturn 2 8K are the following items:
- Pre-assembled 3D printer
- UV-protective hood
- Print bed
- Resin tank
- Air filter with activated carbon
- Power supply unit with cable
- All the tools you need for assembly and leveling
- Some masks
- Disposable gloves
- Metal spatula for the print bed
- Plastic spatula for the FEP foil of the resin tank
- One-use filter for the resin
- A few spare parts
- Operating instructions
- USB stick:
- Test object
- ChiTuBox Slicer
- Digital instruction manual
Elegoo has several different types of resin on offer. My favorites among them are the water-washable resin* and the plant-based resin*. As the name suggests, you can wash the water-washable resin with water and clean the resin tank with water, eliminating the need for isopropyl alcohol altogether. The plant-based resin, on the other hand, is better for the environment than normal resins, but must also be cleaned with isopropyl alcohol.
But no matter what kind of resin you get, you’ll also need a lot more disposable resin filters or a reusable metal resin filter in the long run. This is the one I’m using at the moment*.
Setup
> Elegoo Saturn 2 8K

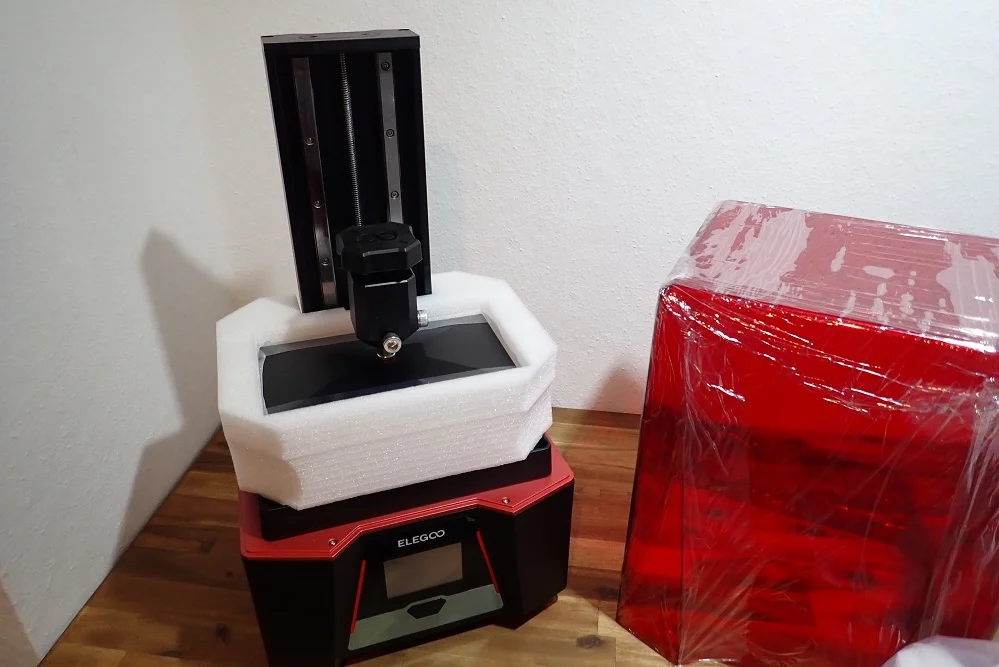
The assembly of the Saturn 2 8K is mainly divided between unpacking the printer and leveling the print bed. The individual components of the printer are very well packaged and covered with protective films to prevent scratching.
Also included is an air filter with activated carbon. Since the fumes from 3D printer resin are toxic, this is an excellent feature and should be included in every resin 3D printer in my opinion. During assembly, you will need to assemble the air filter and plug it into the USB slot inside the enclosure.
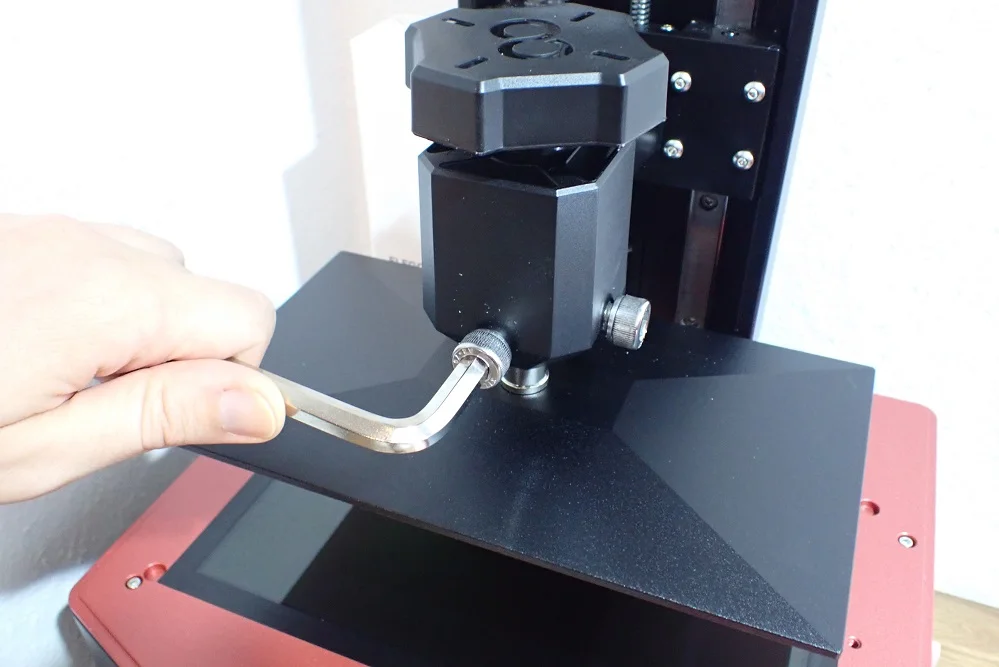
Before you can level the print bed, you must remove the protective films from the print bed and the LCD screen. After that you only need the following steps to level the print bed:
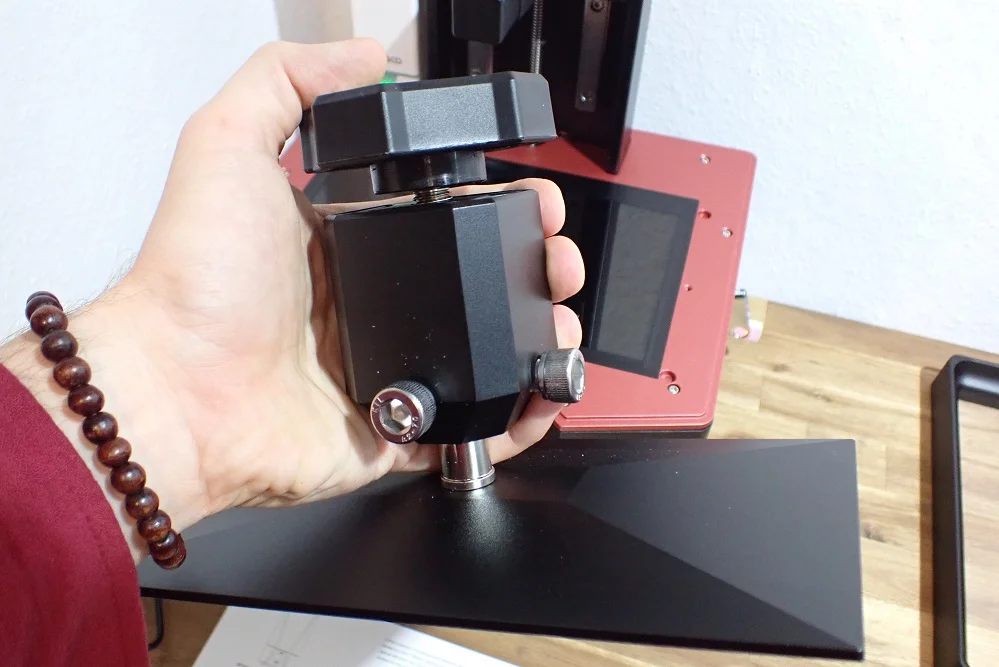
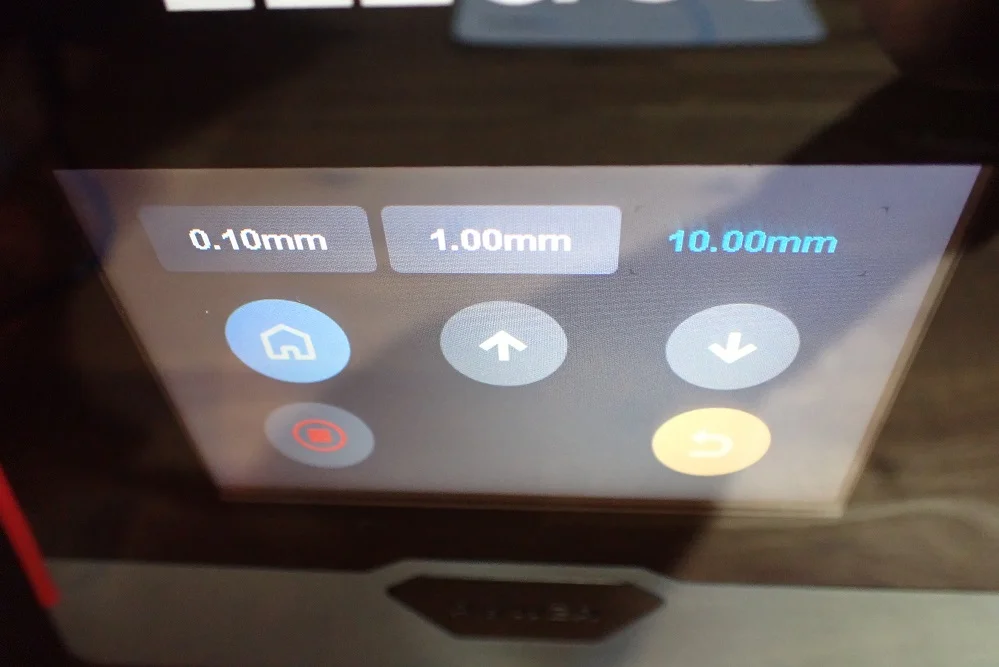
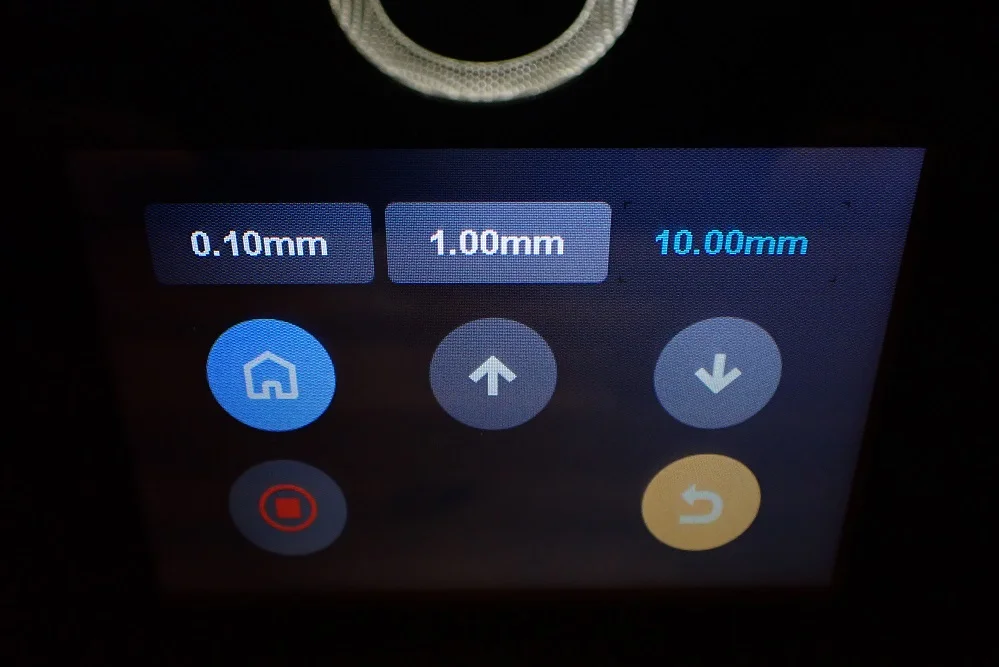
- Move the Z-axis up a good bit via the menu so that you can mount the print bed.
- Mount the print bed to the Z-axis with the large screw at the top of the print bed.
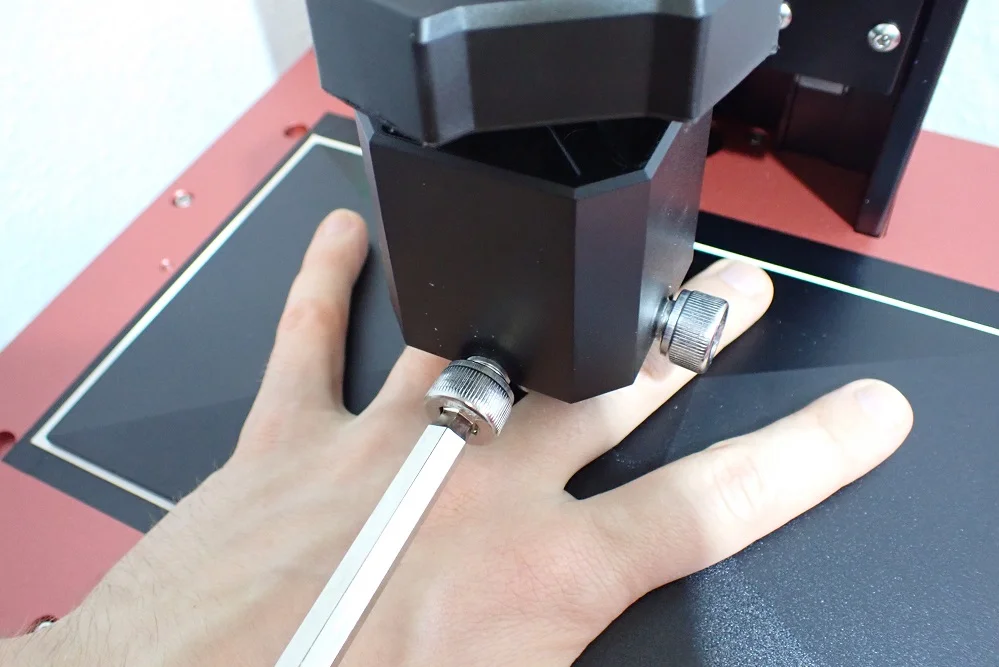
- Use the hexagonal wrench to loosen the two screws of the print bed so that the plate can move freely.
- Place the enclosed leveling paper on the LCD screen.
- Move the print bed to the home position via the menu. You don’t have to worry about the print bed crashing into the LCD screen, because you loosened it before and it will give way.
- Tighten the two screws while pressing the print bed onto the LCD screen with light pressure.
- Use the menu to define the new Z0 position.
- Move the Z-axis back up a good bit so you can insert the resin tank.
By having the paper between the print bed and the LCD screen, the home position is now the thickness of the paper away from the LCD screen. The ingenious thing about this type of print bed leveling is that the tilt of the print bed is perfectly aligned with the LCD screen. You don’t have to adjust the distance at several points as you do with filament 3D printers.
After you have leveled the print bed and reinstalled the resin tank, you can start printing your first object. Simply fill the resin tank with your chosen resin up to the maximum fill line and start printing.
If you have problems with your 3D print sticking to the FEP film of the resin tank instead of the print bed, you should repeat the print bed leveling. It may also be that you need to reduce the adhesion of the FEP film. For this purpose, PTFE lubricant can be used, which does not negatively influence the quality of your print. Just take a drop of it, spread it on the FEP film and dry everything with a paper towel. I use this PTFE lubricant* for each of my resin 3D prints.
Check Price at:
Features
> Elegoo Saturn 2 8K
Besides a few luxury features like the built-in air filter, the Saturn 2 8K limits itself to the most important things and tries to perfect them. And it manages to do that quite well!
8K / 28.5 µm XY Resolution
Besides the large print volume, probably the best feature of the Saturn 2 8K is the high resolution in the XY direction. The 8K screen with a resolution of 7680 x 4320 pixels results in a pixel size of 28.5 µm for its area. This is extremely good for this large print volume and would have been utopian just a few years ago.
With this high accuracy, even the smallest details can be represented very well. It is therefore possible to print even very large objects with an extremely high surface accuracy. Some time ago you had to decide whether you wanted to print either small and accurate or large and inaccurate. But now there are devices like this 3D printer that combine both into one device.
In my test prints, I was very surprised at the quality. I compared them to the results of the Phrozen Sonic Mini 8K and to the naked eye I could not see any differences. The Sonic Mini 8K has an even better accuracy of only 22 μm, but a much smaller print volume.
10 µm Z-Resolution / Layer Height
A big problem of earlier resin 3D printers was the visible steps on the object. Nowadays, however, there is an edge smoothing (anti-aliasing) that you can set in the slicer and very small layer heights of only 0.01 mm.
If you set this small layer height, you can only recognize the individual steps if you either have eagle eyes or use a magnifying glass. As soon as you set a small edge smoothing, you won’t be able to see them anymore. But you don’t have to worry that the smoothing will blur details, it’s very subtle and preserves all the details on the surface.
The only disadvantage of this small layer height is that it also takes much longer. If you compare a 3D print with a layer height of 0.05 mm with one with a layer height of only 0.01 mm, the printing time is five times as long. Quality always has its price.
Fresnel Collimating Light Source (FCLS)
A Fresnel collimating light source is an optical component used to produce a collimated beam of light. It usually consists of a lens element and a reflector and is often used in conjunction with laser diodes or other light sources to produce a strong and focused beam.
This technology is now also used in 3D printing to make the exposure of UV resin even more precise and intensive. The more intense the UV rays are, the more energy penetrates the resin and can be used for curing.
The Saturn 2 8K’s Fresnel Collimating Light Source has 64 UV LEDs and can cure most 3D resin types in 1-3 seconds per layer. Compared to the 8-12 seconds of older UV sources of resin 3D printers, you can print much faster with this. The wavelength is still 405 nm, which is compatible with most resins.
Another advantage of this light source is that its beams are extremely parallel and, according to Elegoo, have a light uniformity of 92%. This means that the individual light beams do not blur together as much, which leads to even more precise prints.
Large Print Volume
The large print volume of the Elegoo Saturn 2 8K Resin 3D Printer is a big advantage over smaller printers. With a print volume of 218.88 x 123.12 x 250 mm (L x W x H), this printer can handle projects of all sizes without you having to cut them up into an unnecessary number of small parts.
While a large print volume is a great advantage, it also has the disadvantage of having to refill the resin tank during printing for very large projects. This can be time-consuming and frustrating, especially if you are in the middle of a project and run out of resin without realizing it.
However, this should be rare to non-existent as the Saturn 2 8K’s resin tank is very large and you hollow out the objects in the slicer to save resin anyway.
If you have to add resin in between, make sure that you shake the bottle well beforehand and slowly pour in the resin. This way you avoid currents in the resin that could tear off filigree supports and make sure that the resin is homogeneous so that no stripes occur. And as always, don’t forget your mask and gloves.
Textured Print Bed
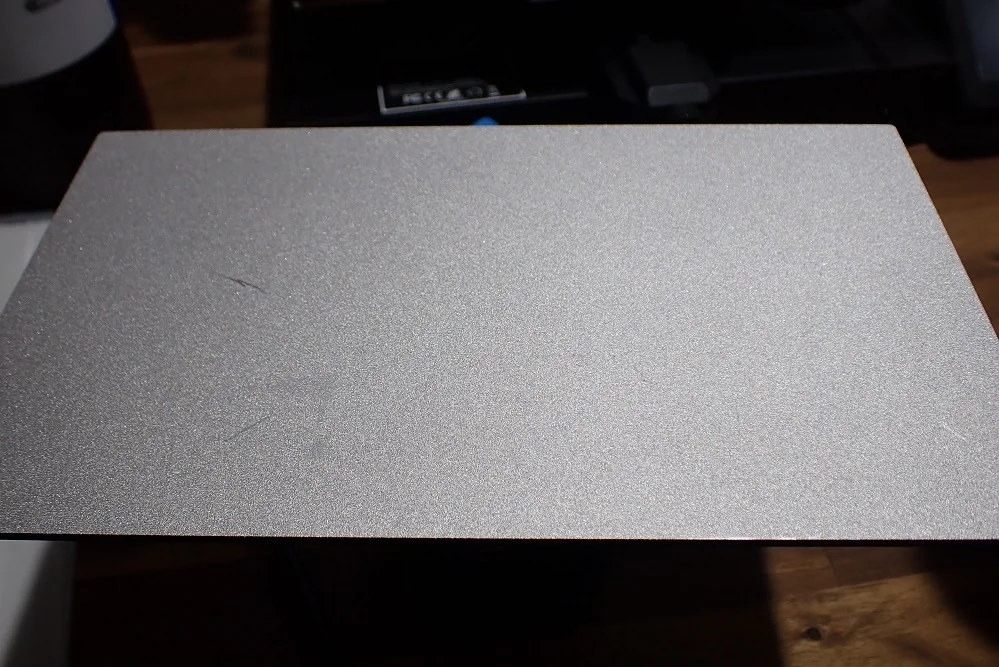
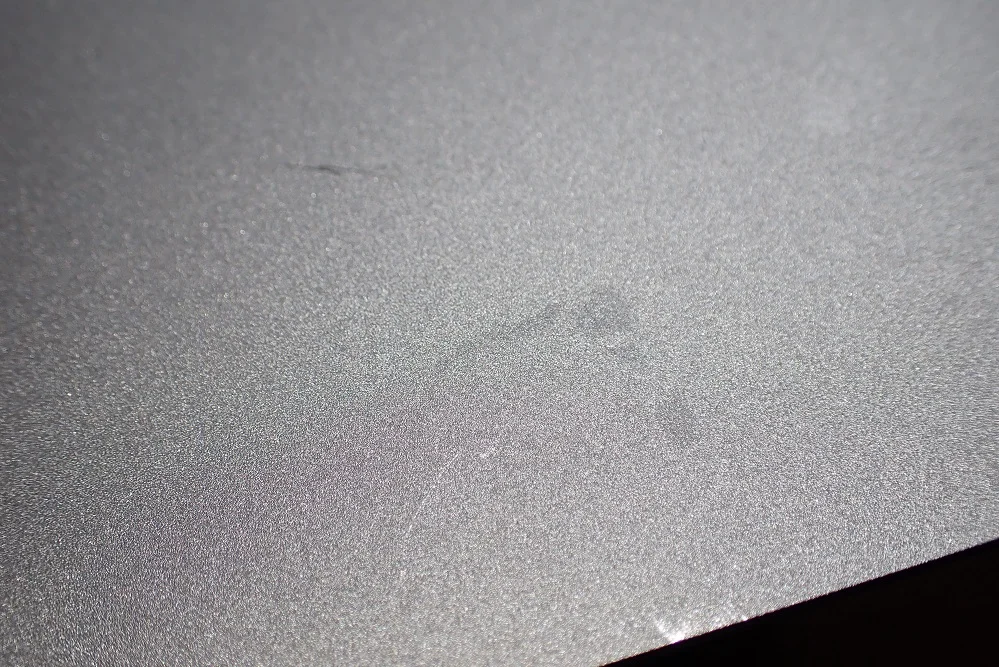
A textured print bed is a very handy feature of a resin 3D printer. The texture helps hold the print in place, resulting in fewer errors and higher print quality. In addition, a textured print bed makes it easier to remove the finished print from the bed.
The 225 x 129 m print bed is sandblasted and thus has a slightly rough surface. It thus offers very good adhesion and foundation even for very large and heavy prints.
After some time, the surface will wear a little due to the metal spatula. But if you are careful, these defects are reduced to small spots and have no influence on the print bed adhesion. I have already tested several 3D printers with such a print bed and even after hundreds of printing hours and an almost blank print bed, the print bed adhesion was still good enough.
Activated Carbon Air Filter


It is known that 3D resin releases toxic gases when printed, which can be harmful to both the user and the environment. Therefore, it is important that you always wear a mask when printing with resin and ensure that the room is well ventilated.
Some resin 3D printers have built-in air filters that extract most of the toxic gases from the air through activated carbon filters. The solution that Elegoo has followed with the Saturn 2 8K is a modular system with a separate filter. The filter is plugged in via a USB slot in the back of the enclosure and thus supplied with power.
I find this solution very good because you can easily access the carbon filter to be able to easily replace the activated carbon after some time. In addition, you do not need to charge a battery, as is the case with other mobile activated carbon filters.
In my opinion, every resin 3D printer should have air filters. Many users underestimate the negative effects of 3D resins on their health.
Easy Print Bed Levelling

The print bed leveling of resin 3D printers is generally easier than the leveling of filament 3D printers. Unlike filament 3D printers, you don’t have to fine-tune the print bed with multiple screws, and you don’t have nearly as many potential points of failure.
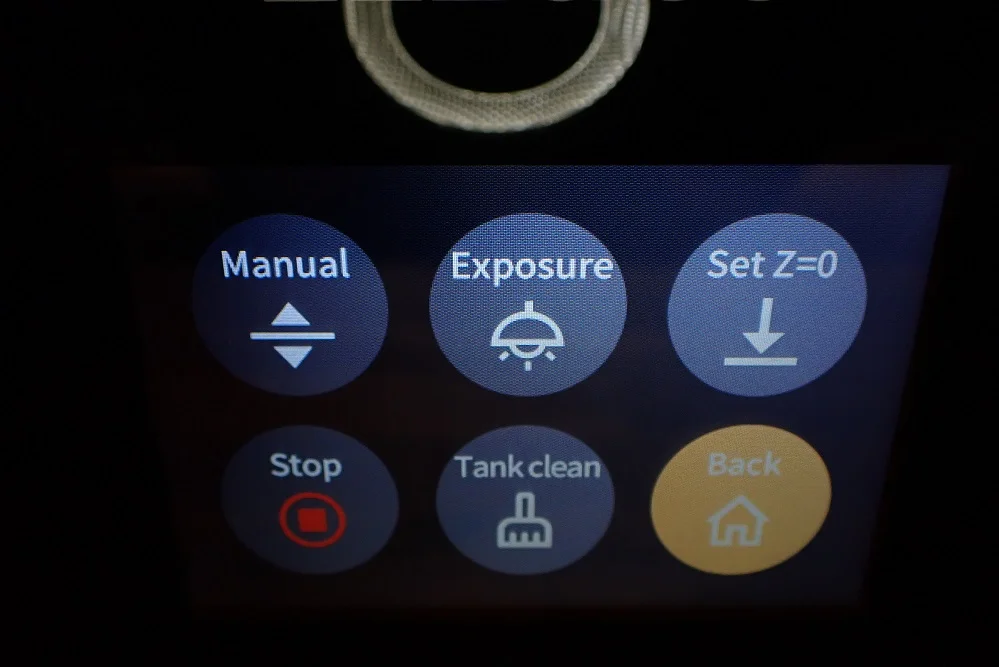
To level the print bed of the Saturn 2 8K all you have to do is loosen the two screws on the print bed suspension, place a piece of paper on the LCD screen, let the print bed move to the home position, fix the screws again and then define the new Z0 position in the menu.
Because the print plate can swing freely and can also yield in the Z-direction, it takes on exactly the same inclination as the LCD screen when you screw it back down. The piece of paper is only there to leave some space between the print bed and the LCD screen for the FEP foil of the resin tank.
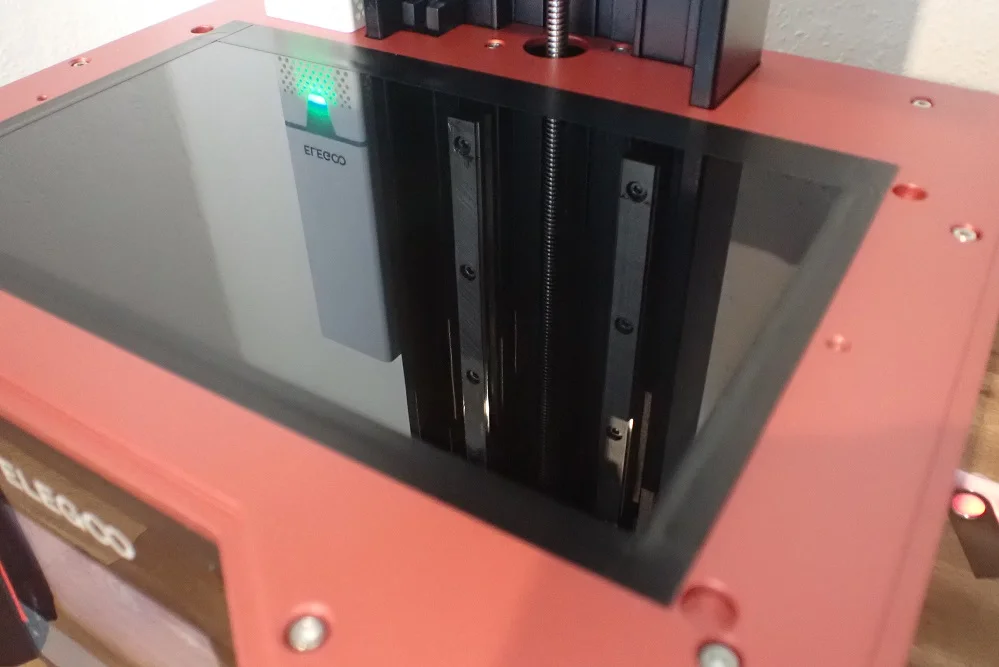
Double Z-Axis
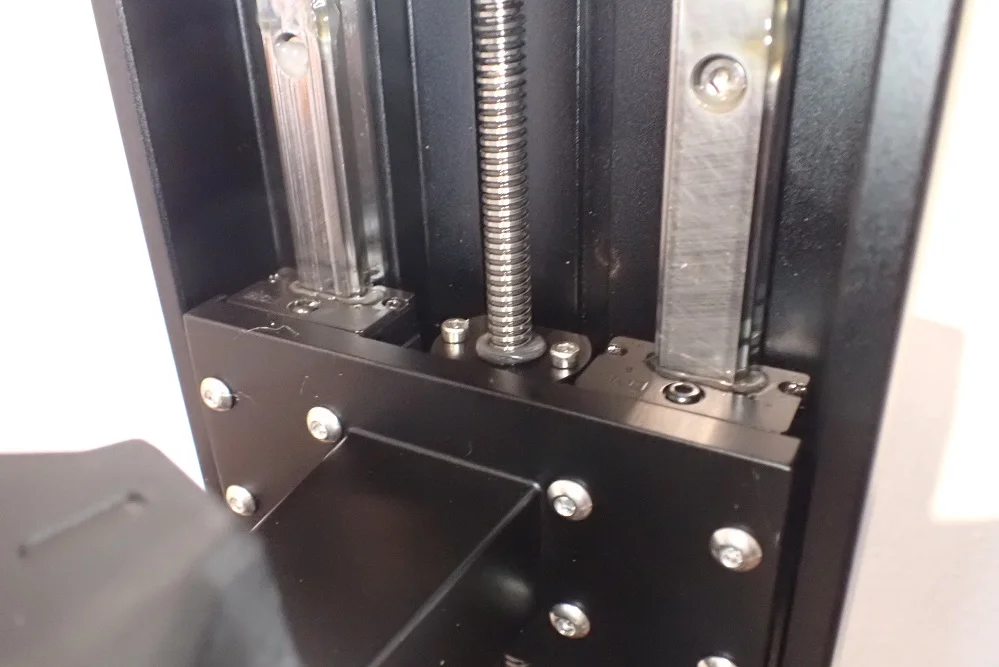
Like most other large format resin 3D printers, the Saturn 2 8K has a double Z-axis guide. This dual Z-axis stabilizes the Z-axis and reduces potential vibration during movement. It also increases positioning accuracy and allows for precise positioning to within 0.01mm.
Color Touch Screen
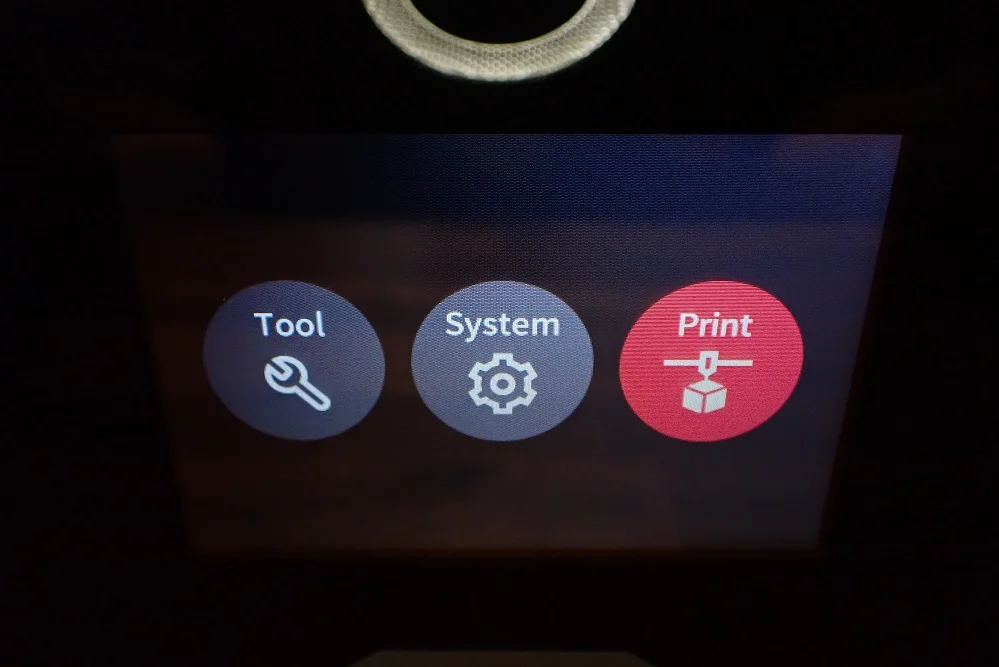
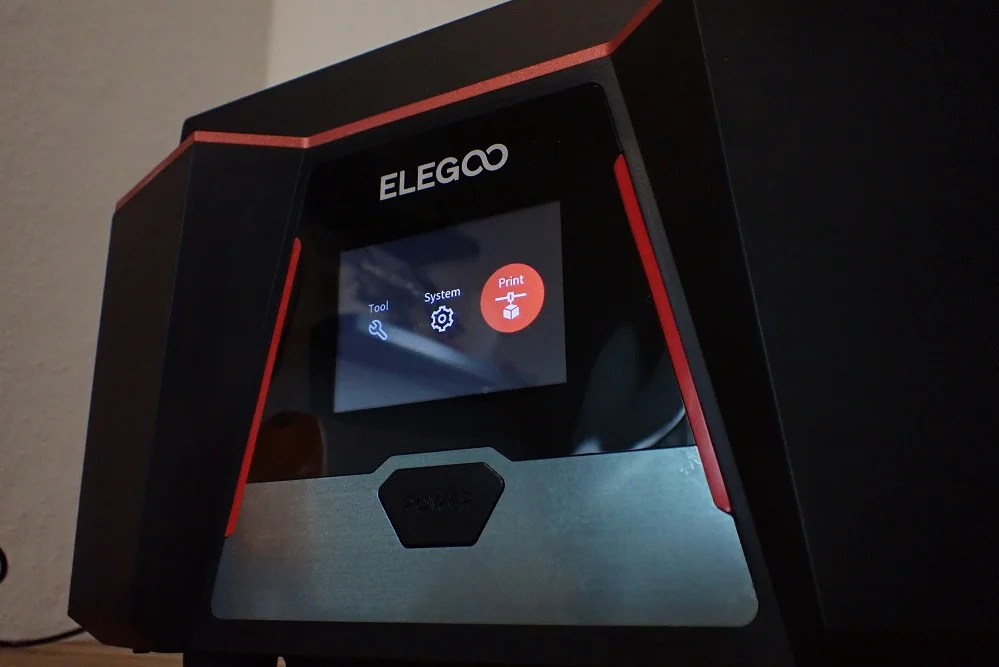
The Elegoo Saturn 2 8K also has a touchscreen display. This is a 3.5-inch touchscreen that is used to control the printer. The interface is easy to use and provides all the information you need to get started.
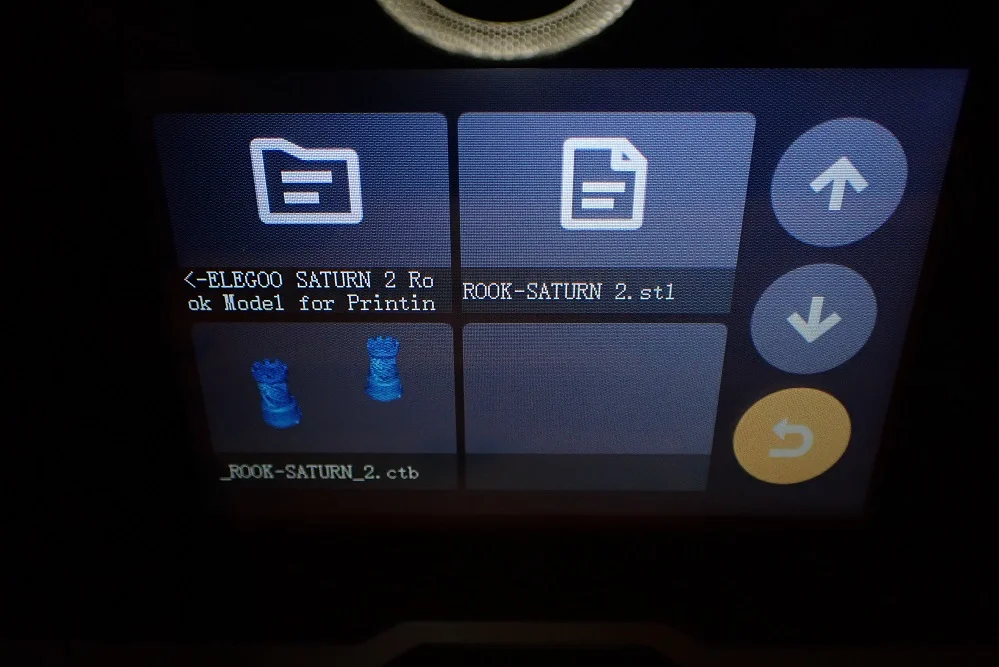
The touchscreen doesn’t even need to be bigger, as it can display all the important settings in a convenient size. For resin 3D printers there are also not too many options that you have to set on the printer itself. The only important thing here is the control of the print bed leveling, the program for cleaning the resin tank and the selection of the print objects.
When you select the print objects, you will also see small thumbnails so that you have a small picture of the object next to the name to distinguish it from the others.
During printing, the screen shows you the progress of the print with an image of the current layer being exposed. It also gives you an estimate of how long the print is expected to take.
Slicer
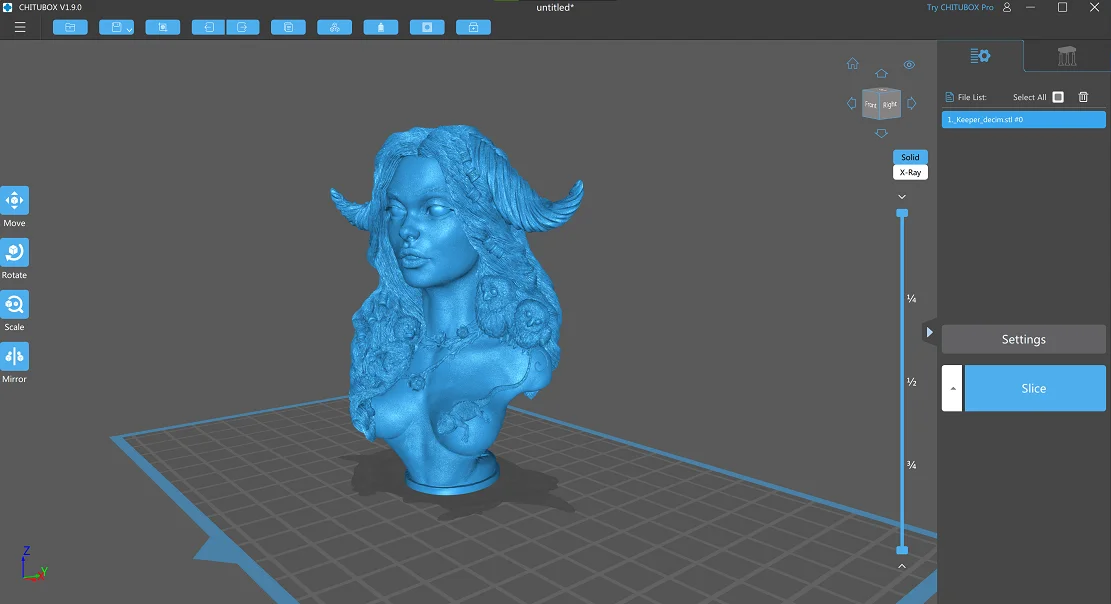
Elegoo recommends ChiTuBox as a slicer. I myself use ChiTuBox for all my resin 3D printers. This slicer software offers all the features you need for a resin 3D print and is very easy to use.
You can use the Saturn 2 profile for the Saturn 2 8K. The profile fits very well and delivers very good results, as you will see below in my tests. You only need to adjust or calibrate the exposure time for the resin you are using.
I myself calibrate every combination of resin and 3D printer anew to get the best possible print quality. For this, I use the resin test matrix (link to the object). With this test matrix, you can see exactly if the exposure time is too high or too low.
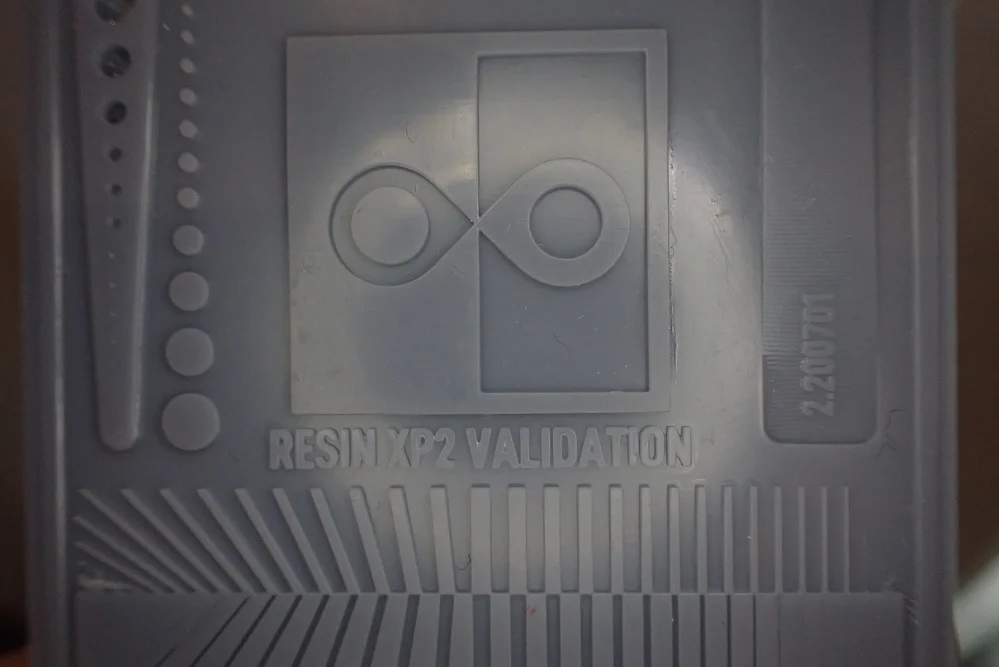
The details on the surface are arranged in such a way that you can easily recognize an overexposure by the fact that the squares in the lower area overlap or the tips in the middle do not touch exactly at one point. On the other hand, you can also easily detect underexposure because the squares at the bottom opposite each other should touch exactly at the corners. If there is still some space in between, you have to increase the exposure time.
In my test, I had taken the values for the exposure time from another printer and printed the test matrix. The exposure time was 2 seconds and was a bit too high. With 1.8 seconds as exposure time I then got a perfect result.
Learn to print perfect details:
Resin 3D Printer Calibration: Step-by-Step Guide
Resin Tank with Max. Filling Line & Pouring Corner
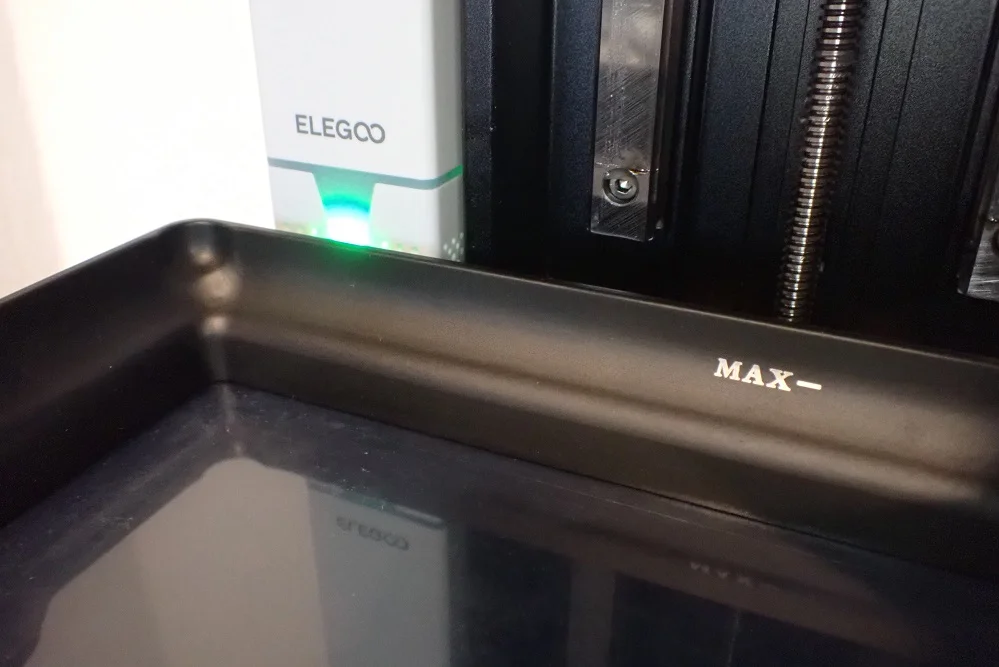
Probably the two most unspectacular features of the Saturn 2 8K are the pouring corner and the maximum fill line of the resin tank. Nevertheless, they are very practical!
Nowadays every resin 3D printer has a resin tank with these two functions, but without them, it would be much more difficult to estimate the maximum amount of resin that can be poured in and to pour the resin back into the bottle after printing.
I don’t know if you’ve experienced it also but a spilling resin tank is no fun…
9H Tempered Glass to Protect the LCD Screen
Every owner of a new resin 3D printer is worried about the expensive LCD screen and the quality of his prints that can suffer from scratches. To protect the precious LCD screen, Elegoo has installed a protective glass with a hardness of 9H.
Tempered glass with a hardness of 9H is scratch-resistant and can protect the LCD screen of your Elegoo Saturn 2 8K from scratches or other damage. The 9H hardness level is only one degree below the hardness of diamonds, so you can be sure that your LCD screen is well protected.
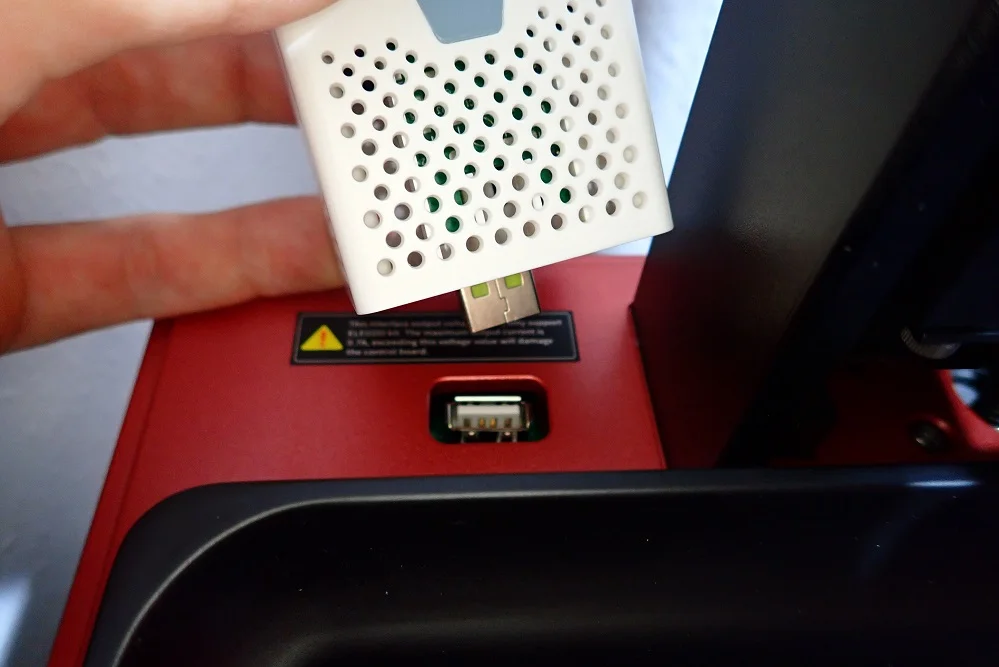
USB Stick on the Side
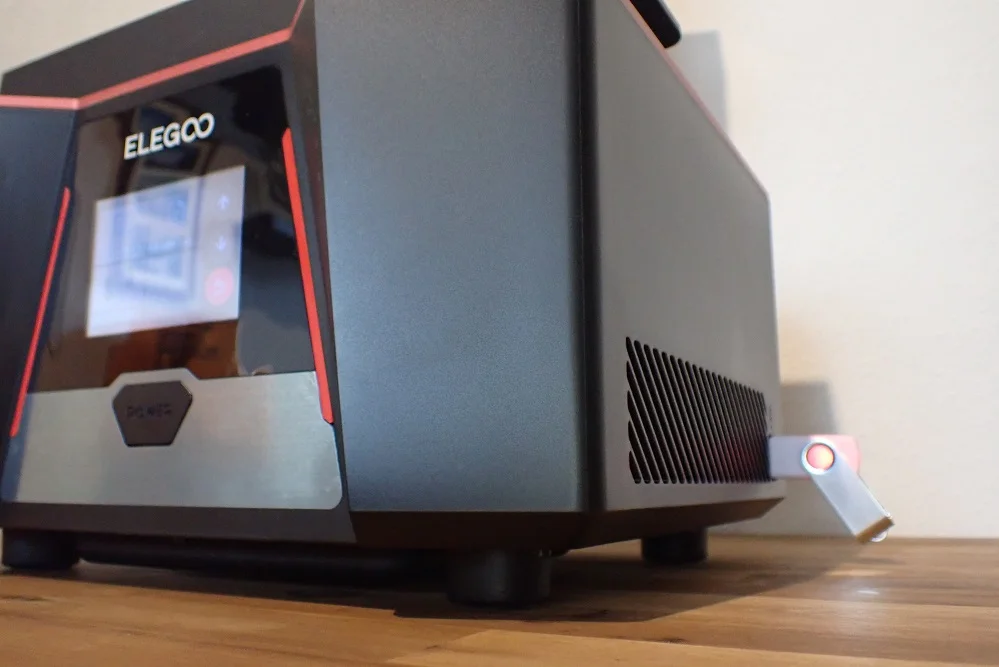
Unfortunately, the USB slot on the Saturn 2 8K is on the right side. This somewhat hinders a space-saving installation of the 3D printer and makes it a bit awkward to insert the USB stick when it is placed on the side of something else for space reasons.
At least this prevents the ventilation from being covered and the printer from overheating.
Check Price at:
Handling
> Elegoo Saturn 2 8K

The printing process for the Saturn 2 8K is no different than any other resin 3D printer. If the Saturn 2 8K is your first 3D printer and you are not familiar with the process, the steps are roughly explained below.
Level the print bed: To start a 3D print with the Elegoo Saturn 2 8K, you must first level the print bed as described above. Without leveling, there is a risk that the print bed will crash into the LCD screen, you will get a bad print bed adhesion or the object will not stick to the print bed at all. However, you will rarely have to repeat the leveling process and you will be able to complete several print jobs without having to re-level.
Apply PTFE lubricant (optional): It may happen with some combinations of and print bed surface, resin and the respective FEP film that the cured resin prefers to adhere to the FEP film than to the print bed. Since you cannot increase the adhesion of the print bed with adhesives in resin 3D printing, you have to reduce the adhesion of the FEP film instead. You can do this with a drop of PTFE lubricant by carefully spreading it evenly on the FEP film with a paper towel.
Pour in the resin: Next, you need to fill the resin into the tank. The maximum fill line of the resin tank is hard to miss on the Saturn 2 8K. When pouring the resin, be sure to do so slowly and evenly. This will prevent unnecessary air bubbles that can form if you pour too quickly. These air bubbles will eventually rise to the surface, but depending on the temperature of the resin, this can take a few minutes. In the worst case, these air bubbles can cause small defects in the first layers of your print.
Slicing the object: If you don’t have a sliced object yet, now is the time to do it. Remember to hollow out the objects to save resin and punch a drain hole. This way you can drain off excess resin inside after printing and also wash out the inside. If the wall thickness is high enough, the object is still stable and you save a lot of resin.
Start printing: Now you can start printing and wait for the result. It doesn’t hurt to check in between or to add resin if you are printing a very large object.
Washing the objects: After printing, the first thing you need to do is remove the finished objects from the print bed and wash them. Depending on the resin you used, you can do this with alcohol or water. In this process, you can also remove the supports from the objects.
Clean the print bed: First roughly remove excess resin from the print bed and then pour the remaining resin into the resin tank. You can roughly wipe off the film that remains on the print bed and then wash it off with the respective solvent. The surface of the print bed should be free of resin residue so that the next print can run smoothly.
Pour back excess resin: There will be plenty of resin left in the resin tank. You can pour this resin back into the bottle to reuse it next time. Use a special resin filter to keep the quality after pouring and filtering as high as before the print. You can reuse the resin until it is used up.
Clean the resin tank: The large resin tank of the Saturn 2 8K needs to be cleaned of the last remnants at the end. You can wipe away the coarse remains with paper towels and wash off the last remains with the respective solvent. The resin tank should then be free of residue and dry before being put back into the 3D printer. If resin has stuck to the FEP film, you can soak the tank with the respective solvent overnight. After that, it should be easy to remove the remains.
Curing the objects: The best comes at the end. Now you can reap the fruits of your labor and cure the objects completely with UV light. Make sure that you do this evenly from all sides.
Noise Level
> Elegoo Saturn 2 8K
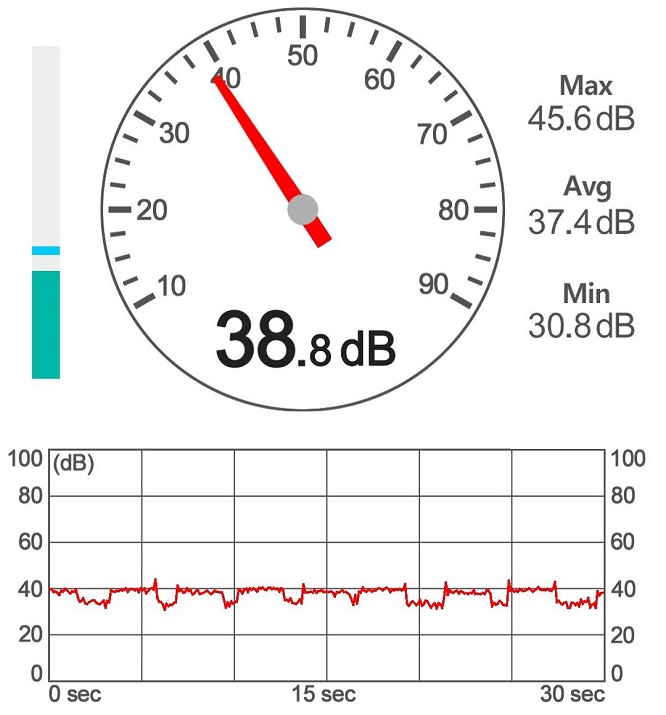
The noise level of resin 3D printers is generally very low. The Saturn 2 8K also comes despite its powerful light source and the large LCD screen on very good values. I measured the volume at a distance of 30 cm from the printer for 30 seconds during printing.
The average volume was 37.4 decibels, the maximum 45.6 decibels and the minimum 30.8 decibels. This volume is comparable to a quiet room in which a quiet conversation is taking place on the other side of the room. So you can still talk to someone or concentrate on your work without difficulty.
But since you shouldn’t be in the same room as a running resin 3D printer anyway, I find the volume relatively irrelevant, although it is very low in this case. The positive aspect is that it is no longer audible in an adjacent room when the door is closed.
Power Consumption
> Elegoo Saturn 2 8K
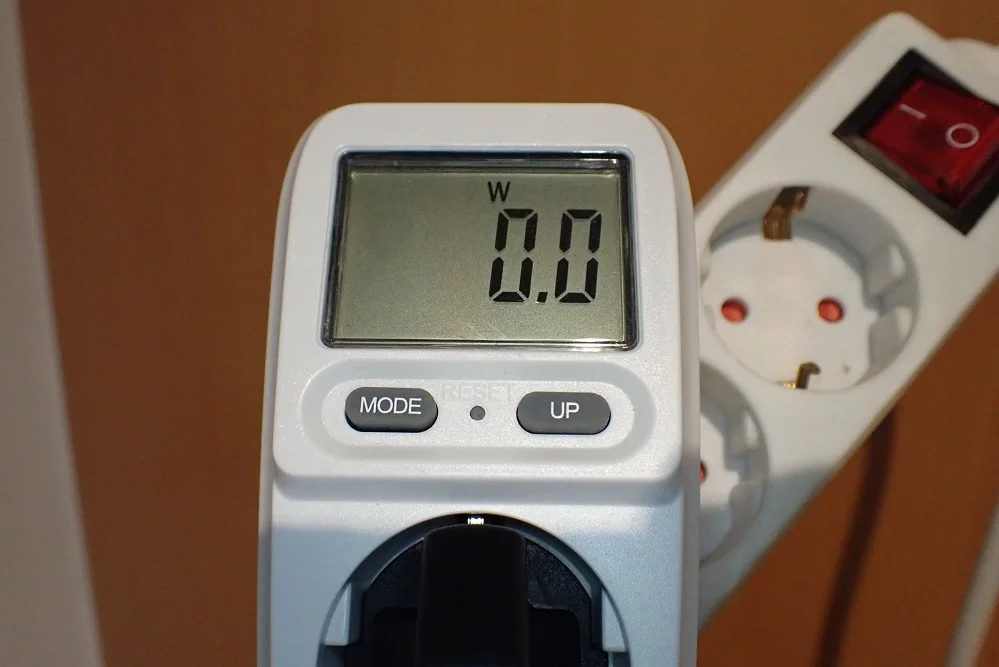

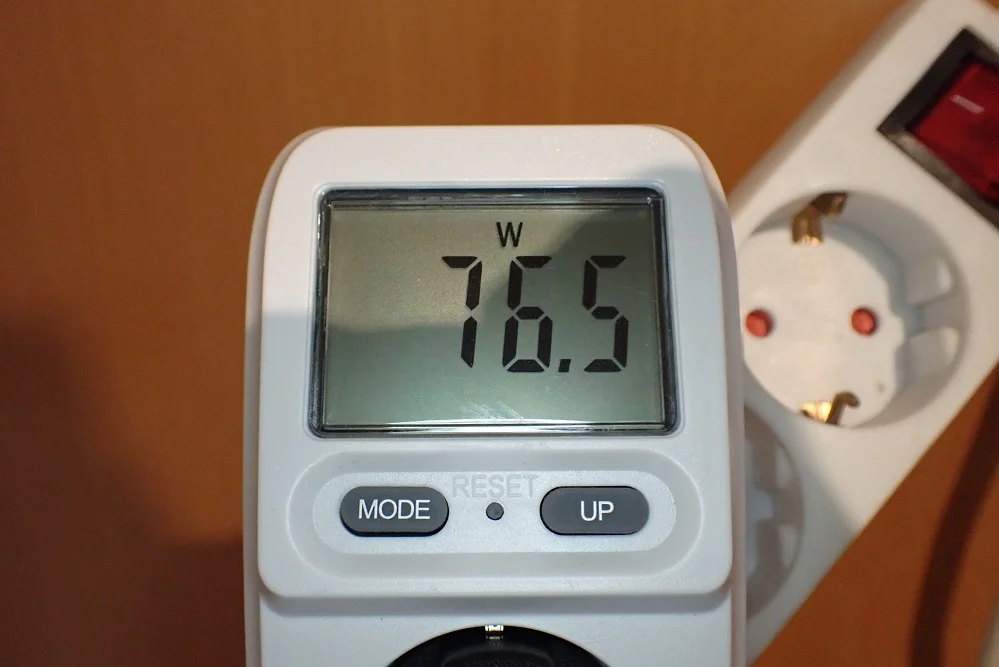
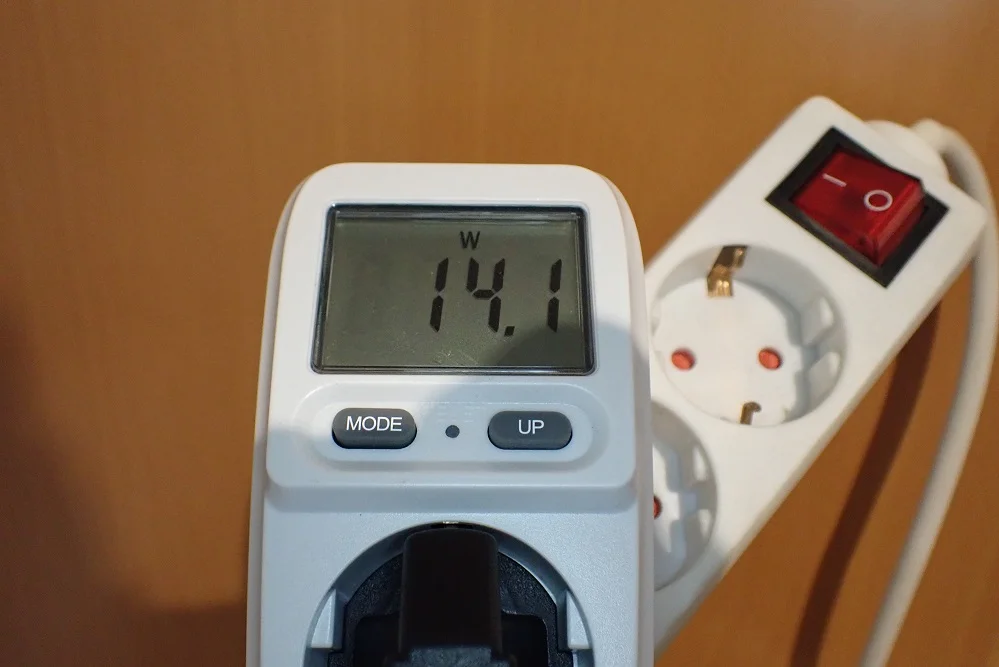
The Saturn 2 8K’s power consumption is surprisingly low for its size. Given the powerful light source, I would have expected more. Here are my readings:
- Switched off: 0 W
- Z-axis moves: 14 W
- Exposure: 77 W
- Idle: 8 W
If you compare this with a large format filament 3D printer, the power consumption is really low. There, the consumption can sometimes rise above 300 W when the print bed is heated up.
With the Saturn 2 8K’s low power consumption, it’s not too bad if a print takes 1-2 days!
Print Speed
> Elegoo Saturn 2 8K
Elegoo specifies a print speed of 30-70 mm/h for the Saturn 2 8K. The range is quite large, as the print speed of a resin 3D printer depends on a number of factors.
These factors include the type of resin used, the size and complexity of the object to be printed, and the desired accuracy. In general, however, resin printers are slower than other types of 3D printers. This is because the resin must be carefully cured layer by layer with UV light.
The stronger the light, the shorter the exposure times can be. Unlike the old LCD screens, today’s monochrome LCD screens are a lot faster. The Saturn 2 8K’s FCLS light source is very strong, curing most resin types within 1-3 seconds per layer.
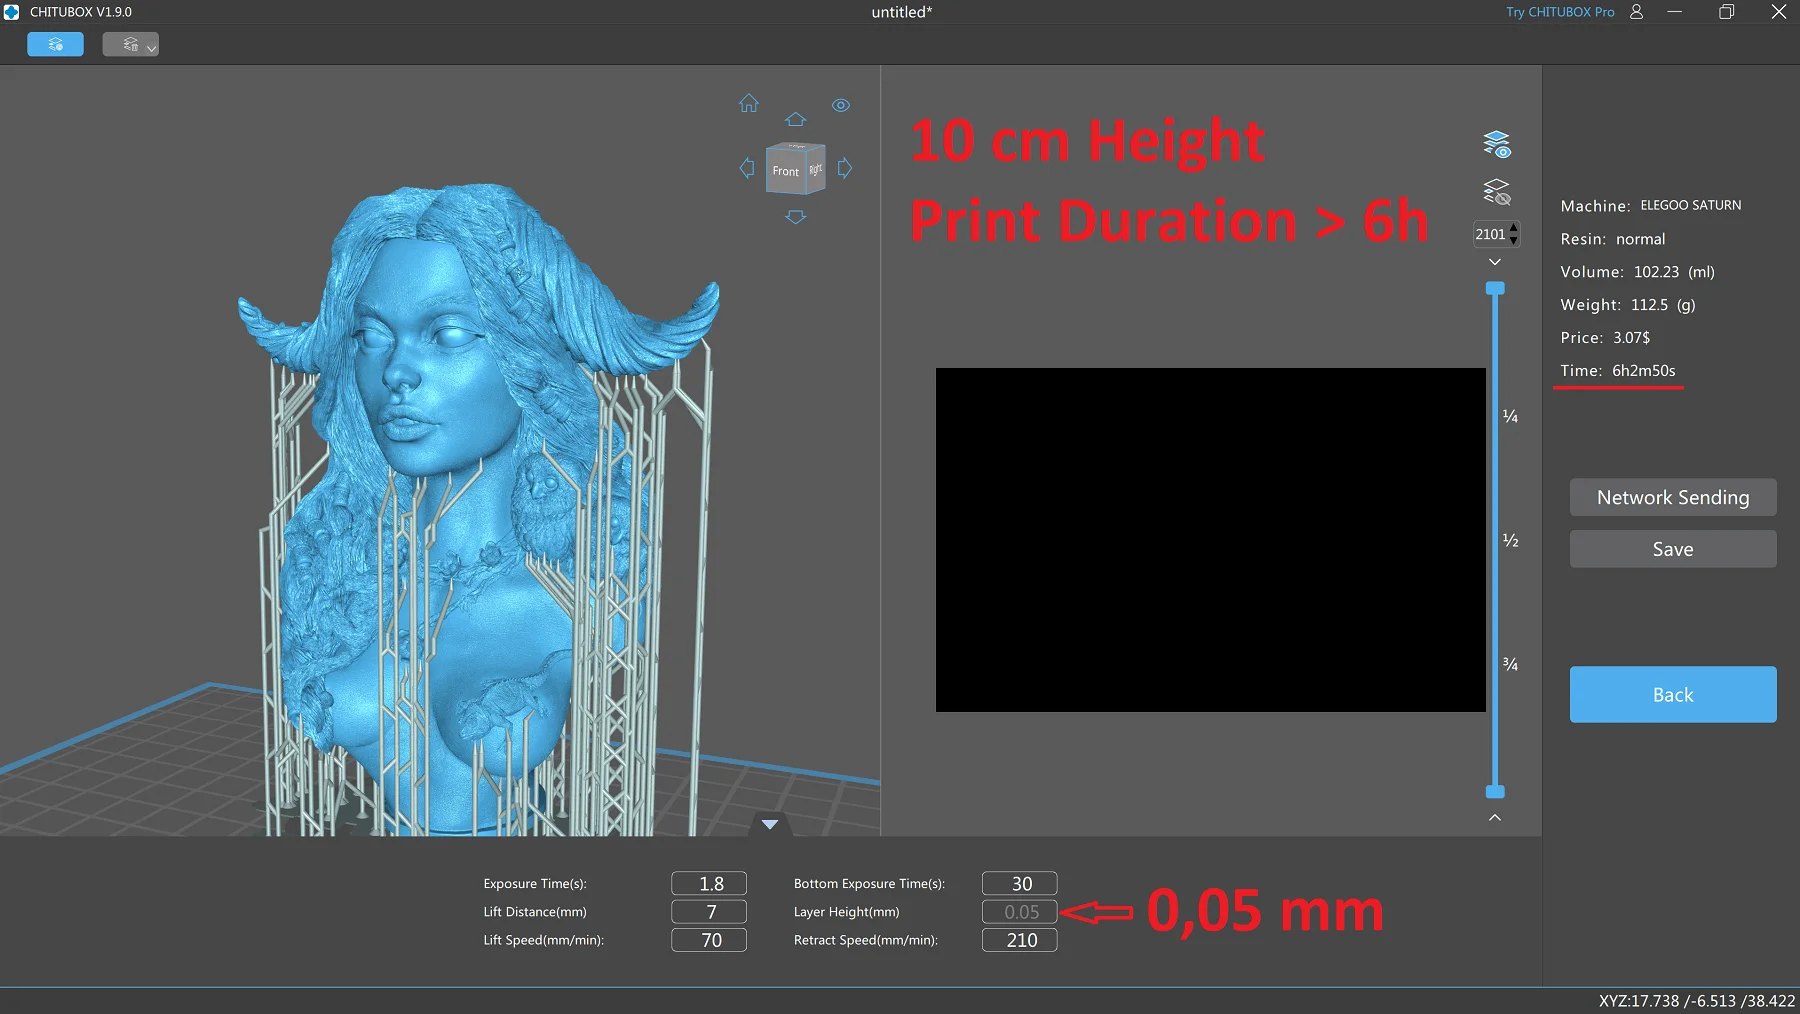
Here are examples with the exposure time perfect for my resin (1.8 seconds):
- Duration of print: 6h2m50s
- Size of the model: 10 cm
- Exposure time: 1.8 s
- Layer height: 0.05 mm
- Duration of print: 30h4m50s
- Size of the model: 10 cm
- Exposure time: 1.8 s
- Layer height: 0.01 mm
As you can see, the printing time or the printing speed is strongly dependent on the accuracy. Since I like to paint my printed models, I always print with the highest accuracy of 0.01 mm. Therefore my print jobs sometimes take several days. Especially with the large print volume of the Saturn 2 8K, you should keep this in mind. The printing time for resin 3D printing should not be underestimated.
Since the print time can be so long, you also need to maintain consistent conditions in the 3D printer room. If the temperature differences between day and night are too great, you will get horizontal lines on your print. The resin behaves differently depending on the ambient temperature.
You should also note that you should only enter the room in which the printer is working while wearing a mask during printing. Although the Saturn 2 8K is equipped with an air filter, it does not filter 100% of the pollutants from the air.
Print Quality – Practical Test
> Elegoo Saturn 2 8K
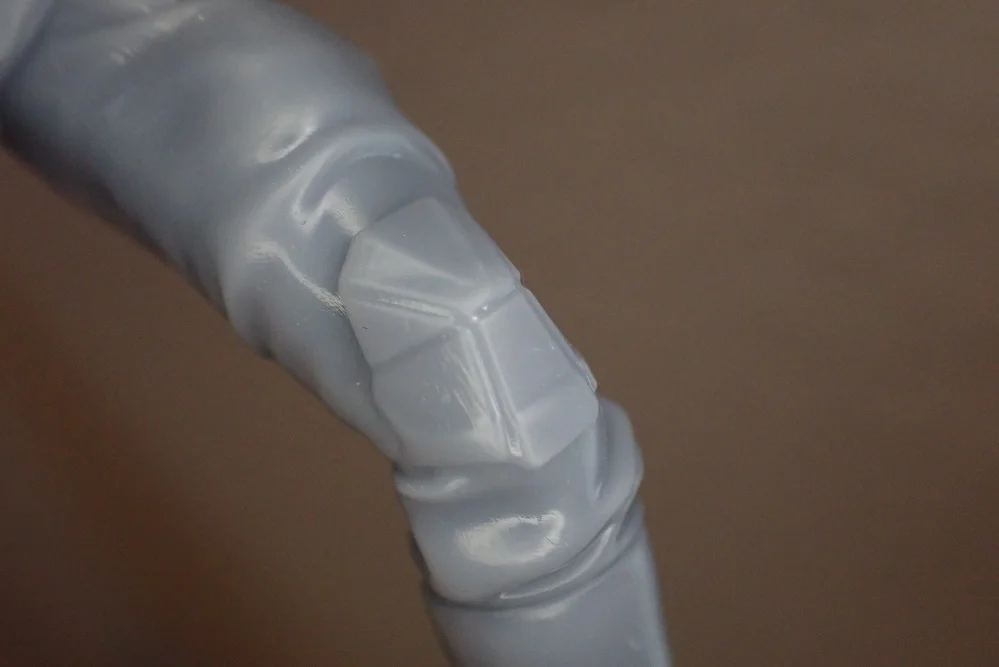


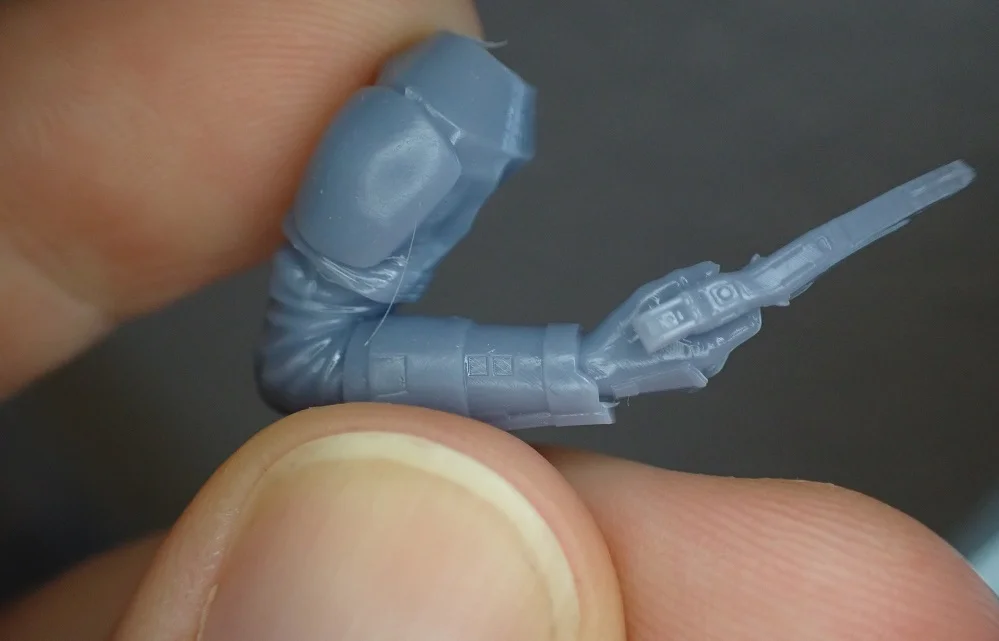
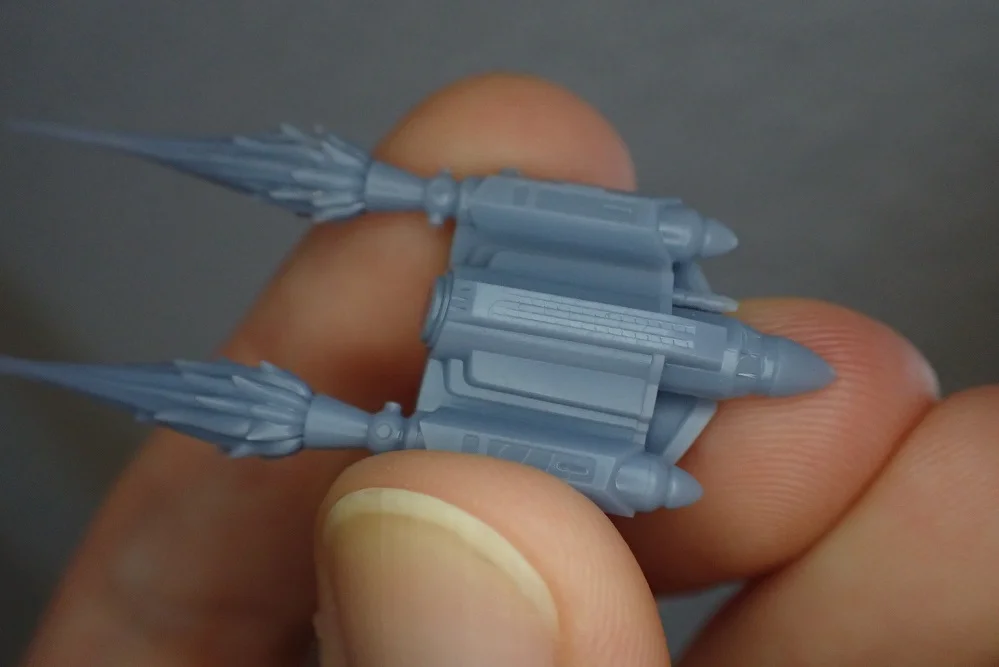
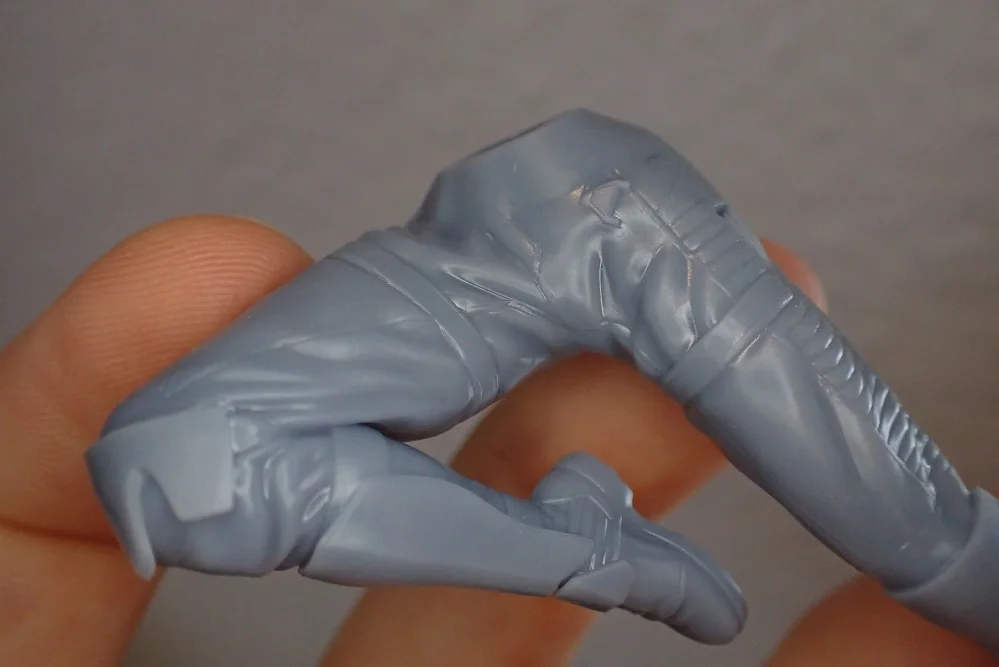
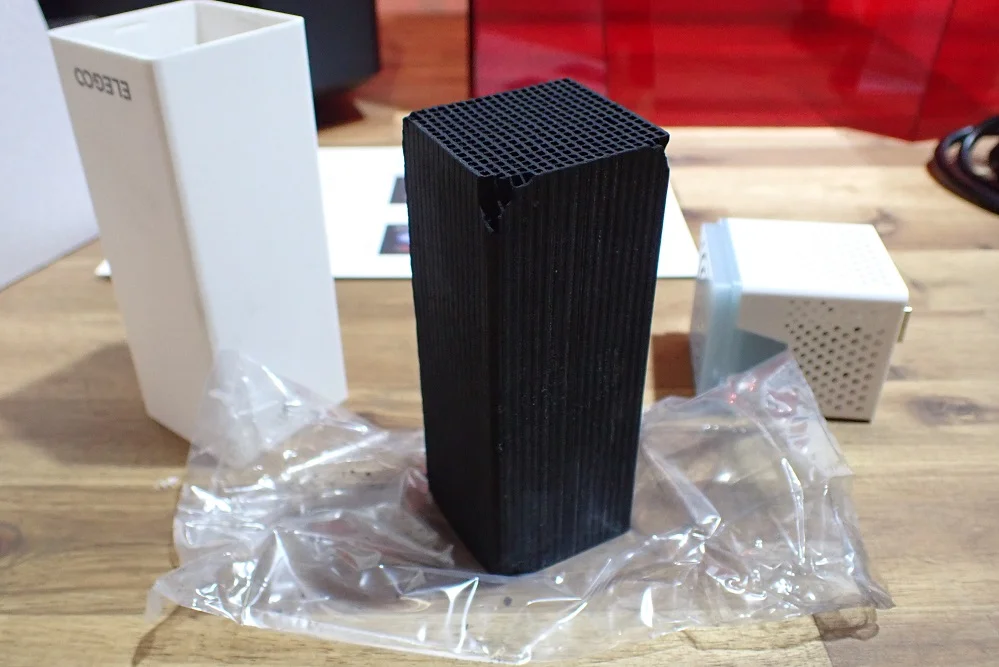
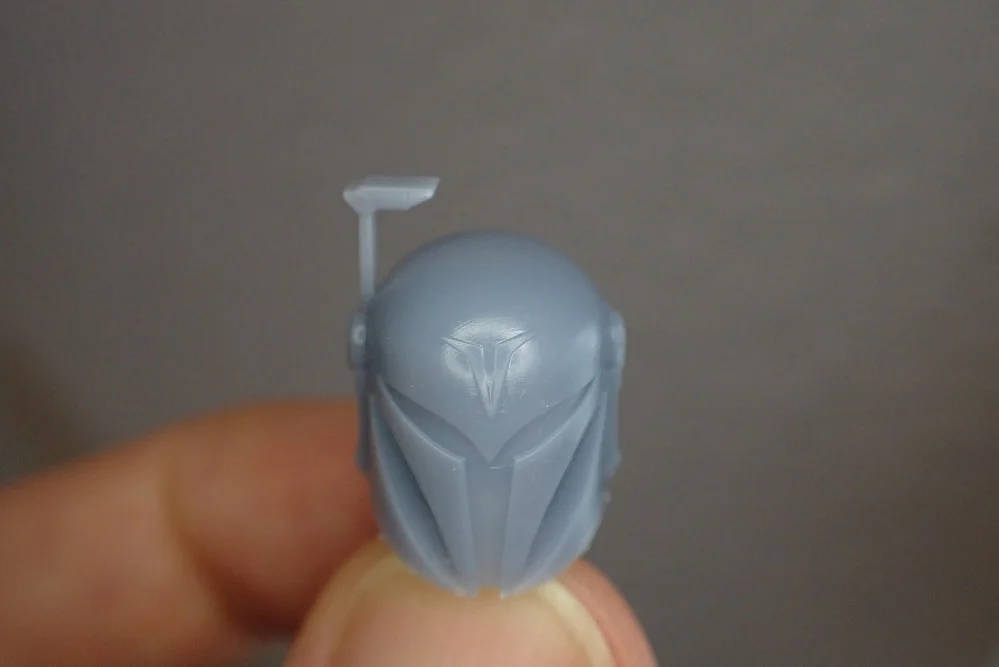
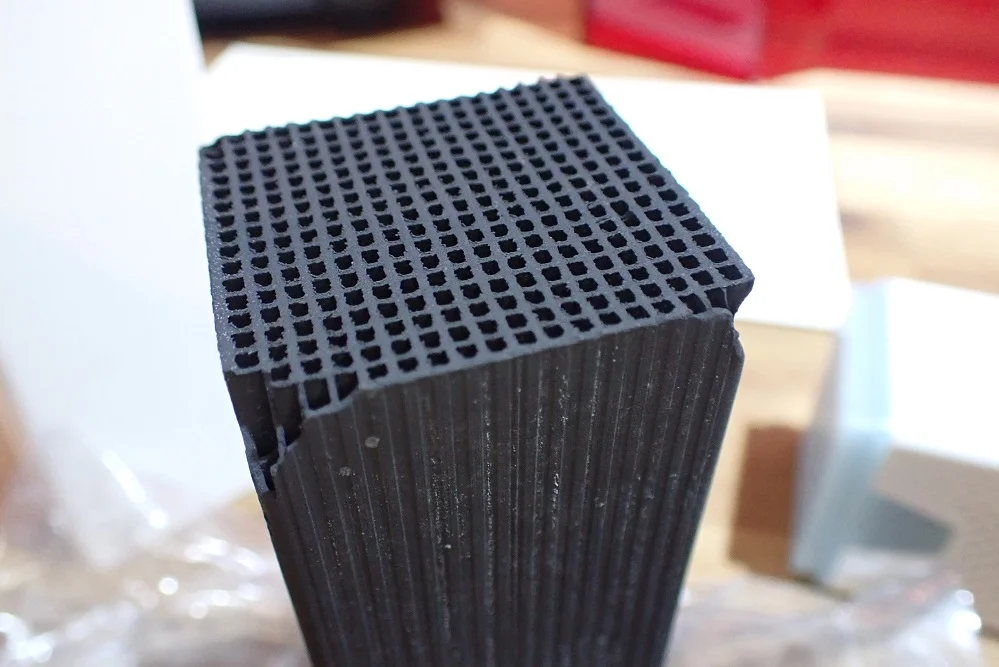
Since I paint my printed resin objects myself, the surface quality is very important to me. Therefore, I made a few test prints with a layer height of only 0.01 mm. I wanted to check the impressive XY accuracy of 28.5 μm in this practical test.
For this, I printed the Bo-Katan diorama statue (link to the object). The quality of the printed parts is really amazing and they reach the quality of high-quality injection molded parts. With the Saturn 2 8K, I will never need to buy overpriced figures again!
I only set a slight edge smoothing to make the already very small steps of 0.01 mm even more inconspicuous. The result is completely smooth surfaces with still very well preserved details. You can see this best on the helmet. It is completely round and without any visible steps.
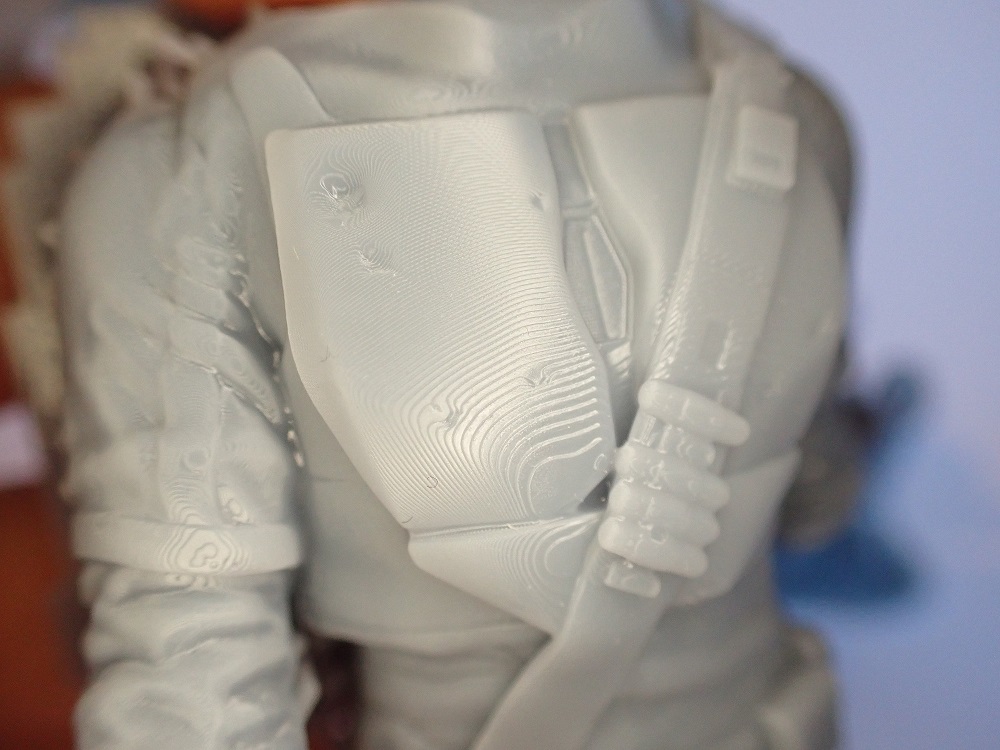
The only rework I need to do on this object will be smoothing out support residue here and there that didn’t come off 100% perfectly.
A tip for removing supports: Dip the washed objects briefly in hot water. Then the hardened resin softens a bit and the supports can be removed much better and with fewer defects! Be careful with fine details on the object, however, because these also become softer through the hot water and could accidentally deform or break off completely.
Check Price at:
Useful Accessories
> Elegoo Saturn 2 8K
There are a few accessories that can make the Saturn 2 8K even better to use. One of the best tools for the laborious process of washing and curing resin prints is a Wash & Cure Station, which takes most of the work out of the process.

Check Price at:
The Elegoo Mercury X Wash & Cure Station* is a great tool when using the Saturn 2 8K. It is very large and can cure objects up to 260 mm high. The station has two modules, one for washing and one for curing. They can each be operated by a rotary knob. Especially the curing module is cleverly designed, as it not only rotates 360° around the object and irradiates it evenly with UV light, but it also cures the bottom of the model.
Similar to a resin 3D printer, the curing station is equipped with a protective hood that blocks 99.9% of UV rays to protect your eyes. And the water tank can also be sealed airtight.
Also, it is important that you use a high quality resin. There are many different types of resins on the market: water-based, plant-based, or regular. Whichever type you choose, you’ll need the right solvent to go with it.
With water-soluble resins, this is very easy because they are soluble in tap water as the name suggests. You can clean the finished prints afterward with tap water and also remove the resin residues on the print bed and the resin tank with water.
However, make sure that the water-soluble resin and its dissolved components in the water must also be disposed of properly. Everything you need to know about this can be found in this article about the proper disposal of 3D resin.
For the other resins, you will need isopropyl alcohol* to wash off the parts and clean your 3D printer.
You should also stock up on masks, disposable gloves and plenty of paper towels. As mentioned at the beginning, a reusable resin filter* is also useful to avoid having to buy new disposable filters over and over again.
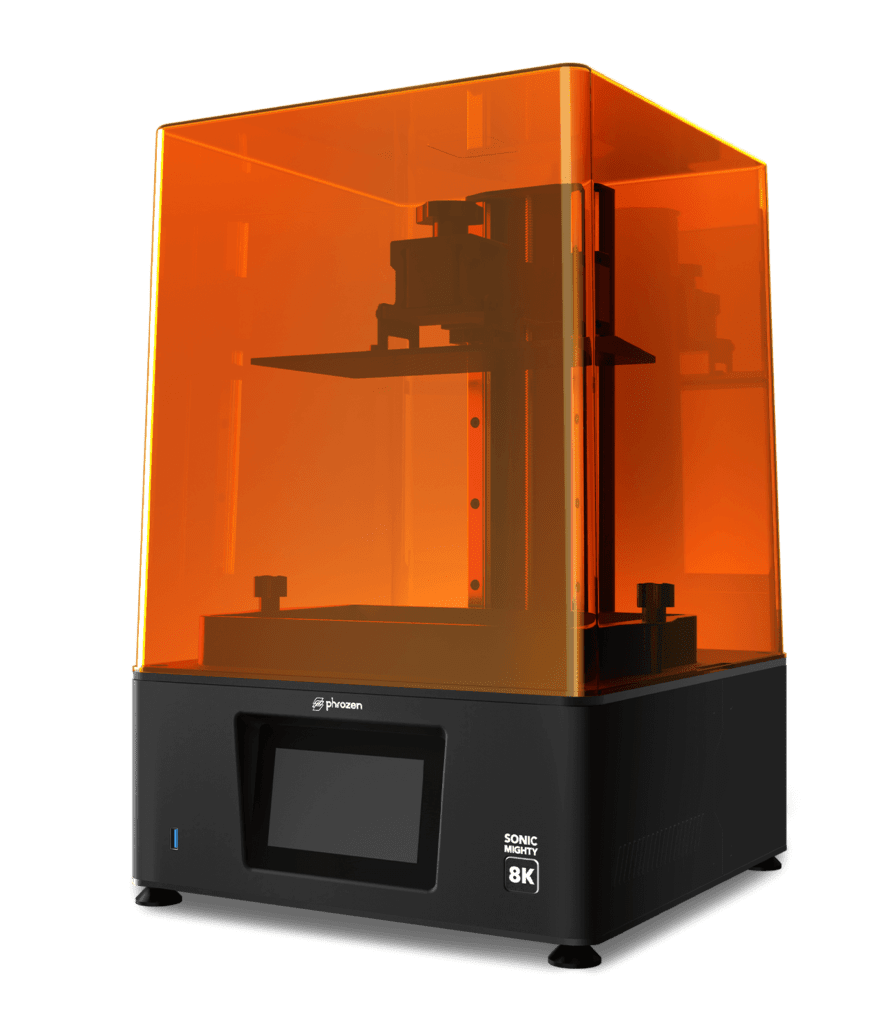
Elegoo Saturn 2 8K vs. Phrozen Sonic Mighty 8K
Check Price at:
It seems as if Elegoo and Phrozen have conspired – relatively simultaneously, the two manufacturers have each launched a large-format 8K resin 3D printer.
The Phrozen Sonic Mighty 8K* is similar to the Saturn 2 8K from Elegoo in many details. They have almost identical accuracies and print volumes. The following lines compare the individual features.
| Saturn 2 8K | Sonic Mighty 8K | |
|---|---|---|
| XY resolution: | 28.5 μm | 28 μm |
| Z resolution / layer height: | 0.01 mm | 0.01 mm |
| Print volume: | 218.88 x 123.12 x 250 mm | 218 x 123 x 235 mm |
| Print bed surface: | Sandblasted | Laser cut |
| Air filter: | Yes | No |
| Resin pump: | No | No |
| Double Z-axis: | Yes | Yes |
| Touchscreen: | 3.5” | 5” |
| Slicer: | ChiTuBox | ChiTuBox |
| Communication: | USB | USB |
XY resolution: The XY resolution of the two printers is virtually identical. The Elegoo Saturn 2 8K has a pixel size of 28.5 μm and the Phrozen Sonic Mini has a pixel size of exactly 28 μm. Both printers have the same resolution, but the Saturn 2 8K has a slightly larger LCD screen. It is fractions of a millimeter larger in both directions. Both the small difference in pixel size and the difference in print bed area are so small that they do not affect the purchase decision.
Z resolution / layer height: The two printers are also virtually identical when it comes to layer height. Both can achieve a minimum layer height of 0.01 mm. However, the Mighty 8K can print slightly thicker layers with 0.3 mm instead of 0.2 mm.
Light source: Both 3D printers have a monochrome LCD screen. This allows high print speeds to be achieved. Elegoo states a range of 30-70 mm/h for the Saturn 2 8K, Phrozen states 70 mm/h for the Sonic Mighty 8K. Here, the Saturn 2 8K is slightly ahead.
Print volume: The Saturn 2 8K has a print volume of 218.88 x 123.12 x 250 mm (L x W x H), which corresponds to about 6.7 liters. The Sonic Mighty 8K only comes in at about 6.3 liters with its 218 x 123 x 235 mm. So with the Saturn 2 8K you can print slightly higher objects.
Print bed surface: The print bed surface of the Saturn 2 8K is sandblasted and has a surface that resembles fine sandpaper. The Sonic Mighty 8K has a laser cut surface with a regular pattern. I have had good experiences with both print bed surfaces so far.
Air filter: A big advantage of the Saturn 2 8K over the Sonic Mighty 8K in my eyes is the activated carbon filter that is mounted in the housing. 3D Resin is toxic and releases harmful gases when printed. So having such an activated carbon filter helps you protect yourself from that. In my practical test, the effect of the filter was clearly felt – the air hardly smelled of resin at all.
Print bed leveling: The print bed leveling is the same for the 3D printer. It is very simple for both models and done within a few minutes.
Double Z-axis: A double Z-axis is a must for large format resin 3D printers. Without it, they could not achieve the high positioning accuracy and vibration-free performance. Therefore, both models also have this feature.
Touchscreen: At 5 inches, the Sonic Mighty 8K’s touchscreen is slightly larger than that of the Saturn 2 8K at just 3.5 inches.
Slicer: Both 3D printers are operated with ChiTuBox.
Elegoo Saturn 2 8K vs. Anycubic Photon M3 Plus

Check Price at:
Anycubic also has a comparably sized resin 3D printer with high printing accuracy.
| Saturn 2 8K | Photon M3 Plus | |
|---|---|---|
| XY resolution: | 28.5 μm | 34 μm |
| Z resolution / layer height: | 0.01 mm | 0.01 mm |
| Print volume: | 218.88 x 123.12 x 250 mm | 197 x 122 x 245 mm |
| Print bed surface: | sandblasted | laser cut |
| Air filter: | Yes | No |
| Resin pump: | No | Yes |
| Double Z-axis: | Yes | Yes |
| Touchscreen: | 3.5” | 5” |
| Slicer: | ChiTuBox | ChiTuBox, Photon Workshop |
| Communication: | USB | USB, App |
XY resolution: the resolution and XY pixel size of the Photon M3 Plus is 34 μm, but not quite as good as the Saturn 2 8K’s 28.5 μm.
Z-resolution / layer height: For the Z-resolution, both 3D printers are identical with a minimum of 0.01 mm.
Light source: The light source of the Saturn 2 8K is equipped with 64 powerful LEDs, the Photon M3 Plus has only 40 LEDs. Nevertheless, a monochrome LCD screen is also installed here, which guarantees fast curing of the individual layers.
Print volume: The print volume of the Photon M3 Plus is about 5.9 liters, which is slightly smaller than the Saturn 2 8K’s 6.7 liters. So if you want to print very large objects, you are better off with the Saturn 2 8K.
Resin pump: An ingenious feature of the Photon M3 Plus is the automatic resin pump. The 3D printer automatically notices when the resin is running low and refills the resin tank. So you don’t have to get up at night to refill resin! The Saturn 2 8K does not have this feature.
Cloud operation: The Photon M3 Plus can also be operated via the Anycubic Cloud App. So you can also start the printer from your smartphone and monitor the print status.
Print bed surface: The print bed surface of the Photon M3 Plus is laser engraved, that of the Saturn 2 8K is sandblasted. In my eyes, there is no difference in print bed adhesion.
Air filter: The Saturn 2 8K has an air filter with activated carbon that connects to the printer inside the case. The Photon M3 Plus does not have an air filter, but you can buy air filters with integrated batteries separately from Anycubic. The advantage of Anycubic’s air filters is that they are mobile, but you don’t need to charge the Saturn 2 8K’s air filter as it is powered by the printer itself.
Print bed leveling: With both 3D printers, print bed leveling is very easy, done within minutes, and rarely needs to be repeated.
Double Z-axis: A double Z-axis is a must for such large resin 3D printers and has now, fortunately, become standard. Both devices have a double Z-axis.
Touchscreen: The Photon M3 Plus’s touchscreen (5 inches) is slightly larger than the Saturn 2 8K’s (3.5 inches).
Slicer: Anycubic Resin 3D printers can be used with ChiTuBox as well as with Anycubic Photon Workshop.
Conclusion: Is the Elegoo Saturn 2 8K worth it?
The Elegoo Saturn 2 8K* is a large format resin 3D printer with extremely good accuracy. You can print even very large objects in one piece with an excellent surface quality.
If the following features of a resin 3D printer are important to you, the Saturn 2 8K is definitely worth your while:
- Large print volume
- Very good print quality
- Built-in air filters
- Easy operation
As you’ve read in this article, this 3D printer has a few other features that are very handy, but these four cornerstones are usually the ones that influence purchasing decisions the most. Since it scores very well on all of these points and also offers very good value for money, the Saturn 2 8K is worth it for anyone who cares about these features!
Check Price at:
Similar 3D Printers
Phrozen Sonic Mighty 8K
The Phrozen Sonic Mighty 8K* is a large format resin 3D printer with a resolution of 8K. This means that it has a pixel size of only 28 μm with a print volume of 218 x 123 x 235 mm.
Check Price at:
Anycubic Photon M3 Plus
The Anycubic Photon M3 Plus* has an XY pixel size of 34 μm and a print volume of 197 x 122 x 245 mm. It can be operated via Anycubic Cloud App and has a smart resin pump that automatically refills resin.
Check Price at:
Disclosure: This website is the property of Martin Lütkemeyer and is operated by Martin Lütkemeyer. Martin Lütkemeyer is a member of the Amazon Services LLC and other Affiliate Programs. These are affiliate advertising programs designed to enable websites to earn advertising revenue through advertising and linking to Amazon.com and others. Links marked with * are affiliate links.
