
- Wet Filament: Prevention, Symptoms & Drying - July 18, 2024
- Sovol SV08 – Best PrusaSlicer Settings & Profile - June 26, 2024
- Sovol SV08 – Best Orca Slicer Settings & Profile - June 26, 2024
Disclosure: Links marked with * are Affiliate Links. I earn from qualifying purchases if you decide to make a purchase through these links – at no additional cost for you!
With the Cura Wire Printing mode, only the outer shell of the object is printed with a wire structure. The result is a transparent object with a net-like surface.
You can adjust the wire structure to make it denser or even more transparent. With the right settings you can make it more stable.
Find out where to find this fascinating mode, which settings are important for it and how to avoid misprints in this detailed guide.
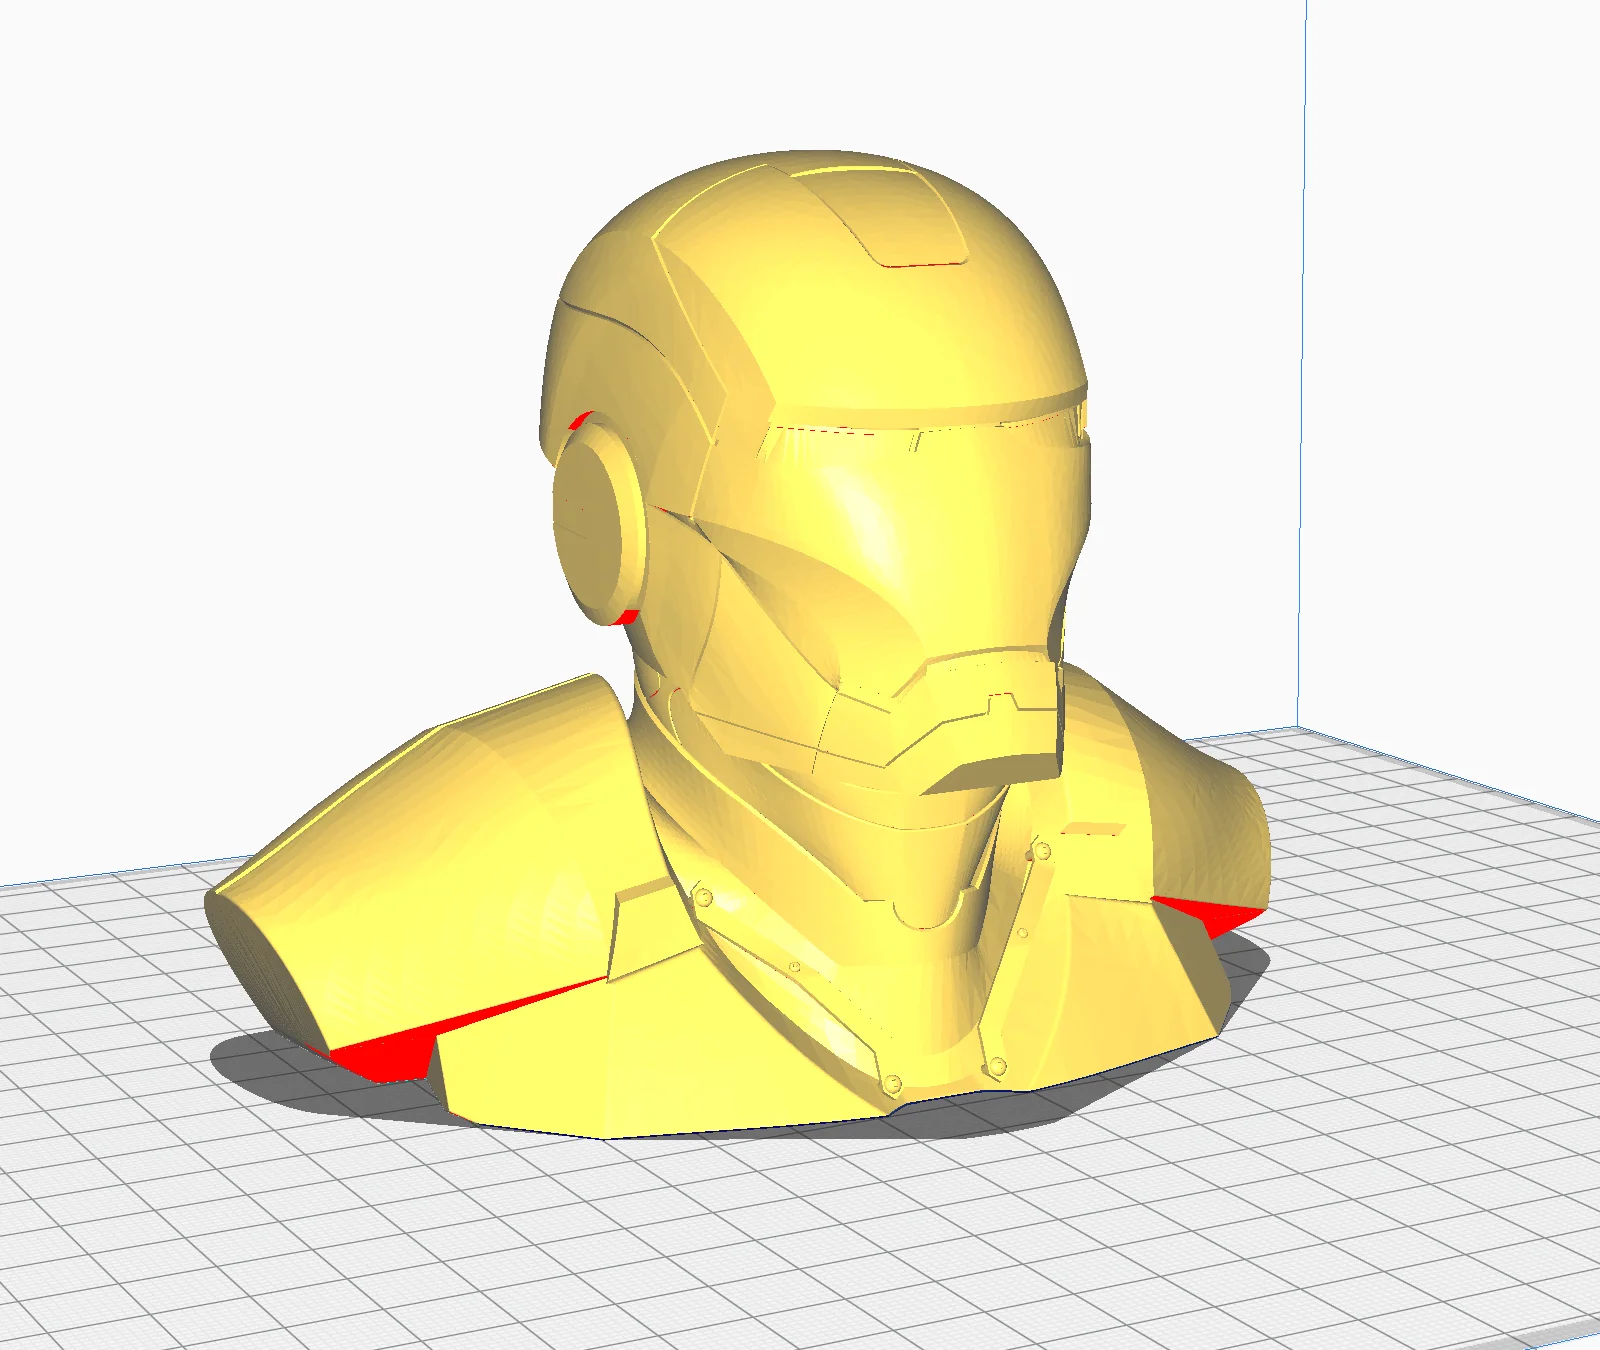
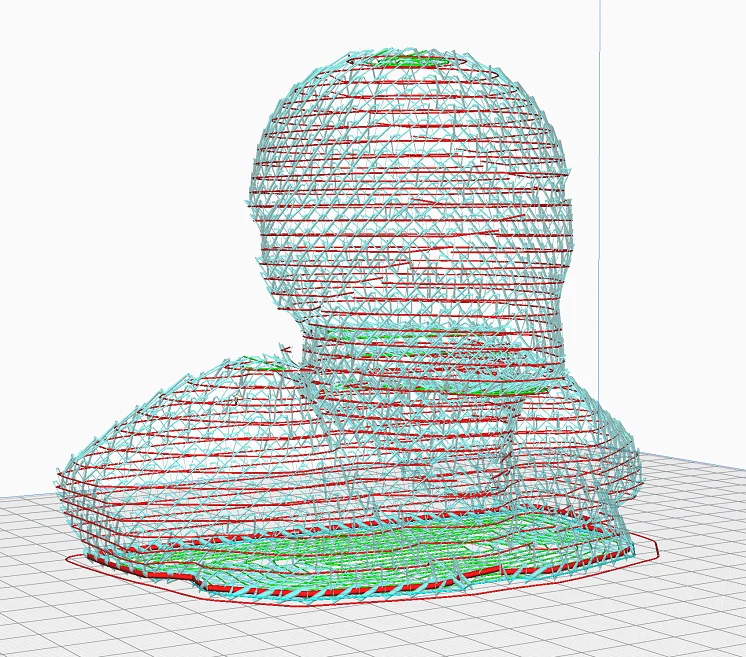

Table of Contents:
- 1 How Does Wire Printing in Cura Work? > Cura Wire Printing
- 2 Where to Find Wire Printing in Cura > Cura Wire Printing
- 3 No Preview? > Cura Wire Printing
- 4 Printing Temperature > Cura Wire Printing
- 5 Cooling > Cura Wire Printing
- 6 Stability > Cura Wire Printing
- 7 Print Bed Adhesion > Cura Wire Printing
- 8 Test Prints > Cura Wire Printing
- 9 Settings in Detail > Cura Wire Printing
How Does Wire Printing in Cura Work?
> Cura Wire Printing
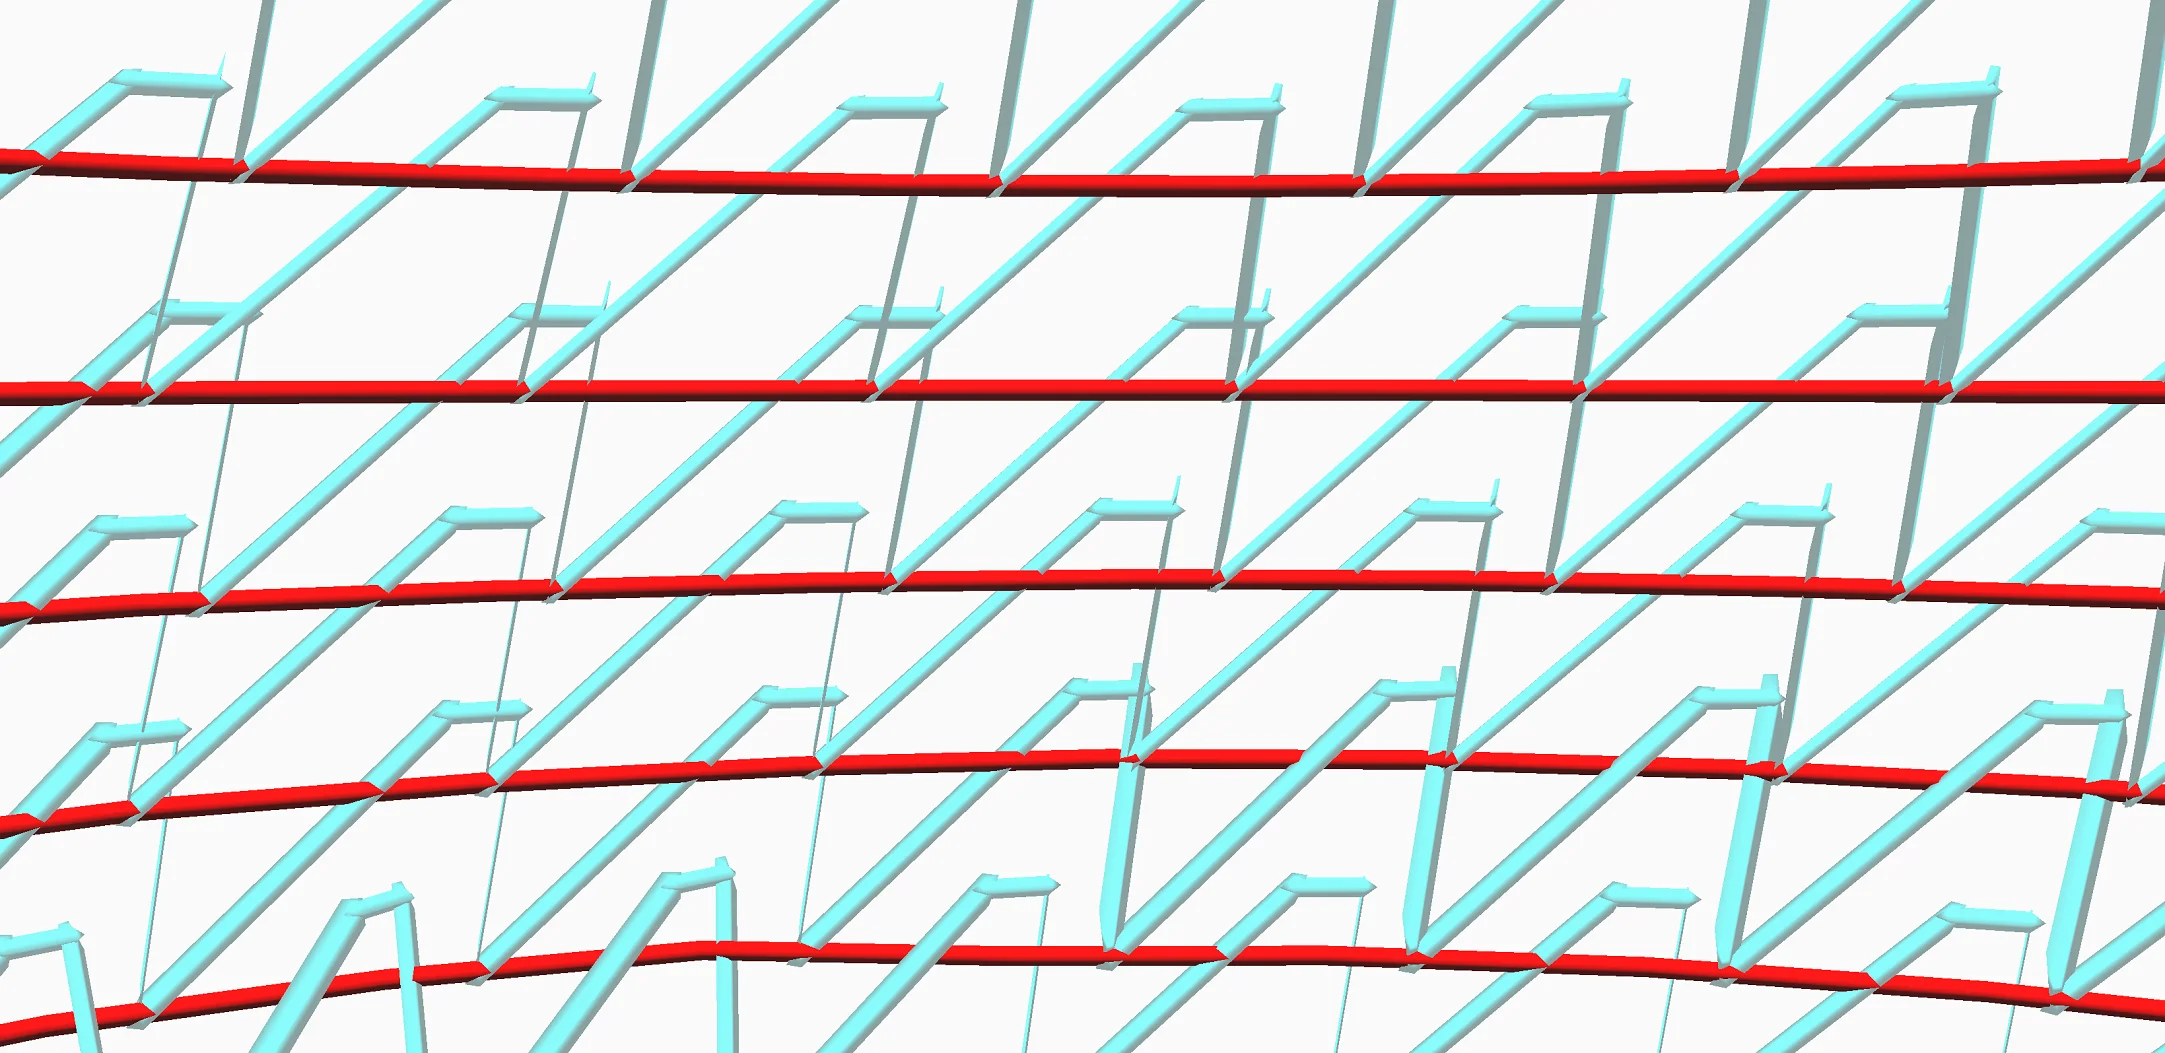
With wire printing in Cura, the object used is printed as if you had drawn it with a 3D pen. The nozzle connects the horizontal layers, which are several millimeters apart, with filament tips that look like saw teeth.
Depending on how you adjust the settings, the object will be more transparent or denser. Many default settings in Cura are overwritten by the wireframe. For example, you can no longer specify an infill and the values for the outer walls are also partially overwritten.
The resulting object is transparent and not very stable. Besides the aesthetically interesting aspects, the advantages of this method are the low filament consumption and the fast printing time.
Where to Find Wire Printing in Cura
> Cura Wire Printing
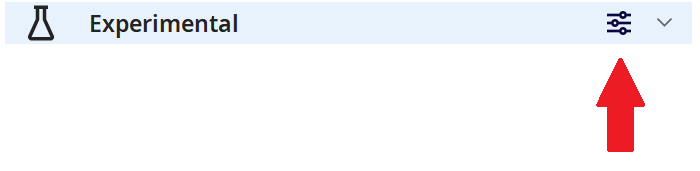
You can find the Cura Wire Printing mode under the experimental print settings. If you do not see this option, it is hidden. By default, many of the less-used settings in Cura are hidden until you manually turn them on. You can click on the settings icon for each drop-down menu in the print settings and select all available settings there.
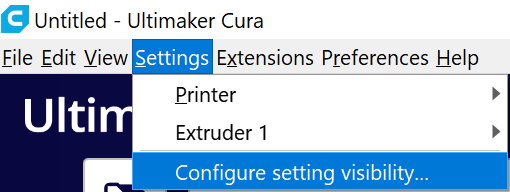
You can also change the visibility of the print settings via the settings menu bar.
No Preview?
> Cura Wire Printing


If you have sliced an object with the wire printing mode, you will not see a proper preview as you are used to. You can still open the sliced and saved file with Cura and preview it.
Various warnings in Cura point out that the displayed preview only shows the theoretical path of the filament. In reality, the path is strongly influenced by gravity and will not be so regular.
However, the preview is a good indication of how dense your object will be. You can change the settings based on this. The preview also shows you how the principle of the wire structure works.
Printing Temperature
> Cura Wire Printing

The printing temperature has a big influence on how well your wire print will turn out.
The higher the printing temperature, the more the filament flows. On the one hand, this improves the adhesion between the individual filament wires, but on the other hand, the filament can be pulled down too far by gravity.
I recommend you first use the default temperature of your filament and then adjust the temperature for possible defects.
If you get extremely poor adhesion between the horizontal lines and the saw teeth, you should increase the temperature. If the filament is pulled down too much and is too liquid, you should decrease the print temperature.
Cooling
> Cura Wire Printing
Another important setting is the part cooling. It controls how fast the liquid filament solidifies in the air after extruding.
If the cooling is too strong, the filament may not bond well enough. If the cooling is too weak, the filament will flow too far and could affect the stability or cause the next higher horizontal line to not meet a sawtooth tip.
In principle, cooling behaves in the same way as the printing temperature. Finding the right balance between printing temperature and cooling is the key to perfect results in this mode. As with the printing temperature, you should start with your default values and adjust depending on your results.
Stability
> Cura Wire Printing
As you can imagine, the stability of a traditionally printed object is much higher than objects with a wire structure. You can still increase the structural stability in the wire printing mode. In principle, you have three options for this:
- Increase line width and/or layer height: If you increase the line width and/or the layer height, more filament will be extruded per line. As a result, the individual wires have a thicker diameter and are therefore more stable.
- Reduce connection height: This setting can be found under the options that appear when you activate wire printing (more about the individual options at the end of the article). The value you enter determines the distance between the horizontal lines. The smaller the distance, the denser the mesh structure and therefore the greater the stability.
- Decrease nozzle clearance: This setting also only appears once you have activated wire printing. It is a bit confusing, but with smaller values it causes the angle of the saw teeth to become more acute, resulting in more saw teeth between the horizontal lines. This gives you more stability as more material is extruded and the density increases.
Print Bed Adhesion
> Cura Wire Printing
In Cura’s wire printing mode, the bottom of the object is also printed with a wire structure. It is not possible to print a Raft or Brim. This will result in you either having far too poor print bed adhesion or too good.
Since the base consists only of single lines, the print bed adhesion must be good enough to withstand the further course of the print. A glass bed, such as the Ender 3 V2 has, is ideal for this.
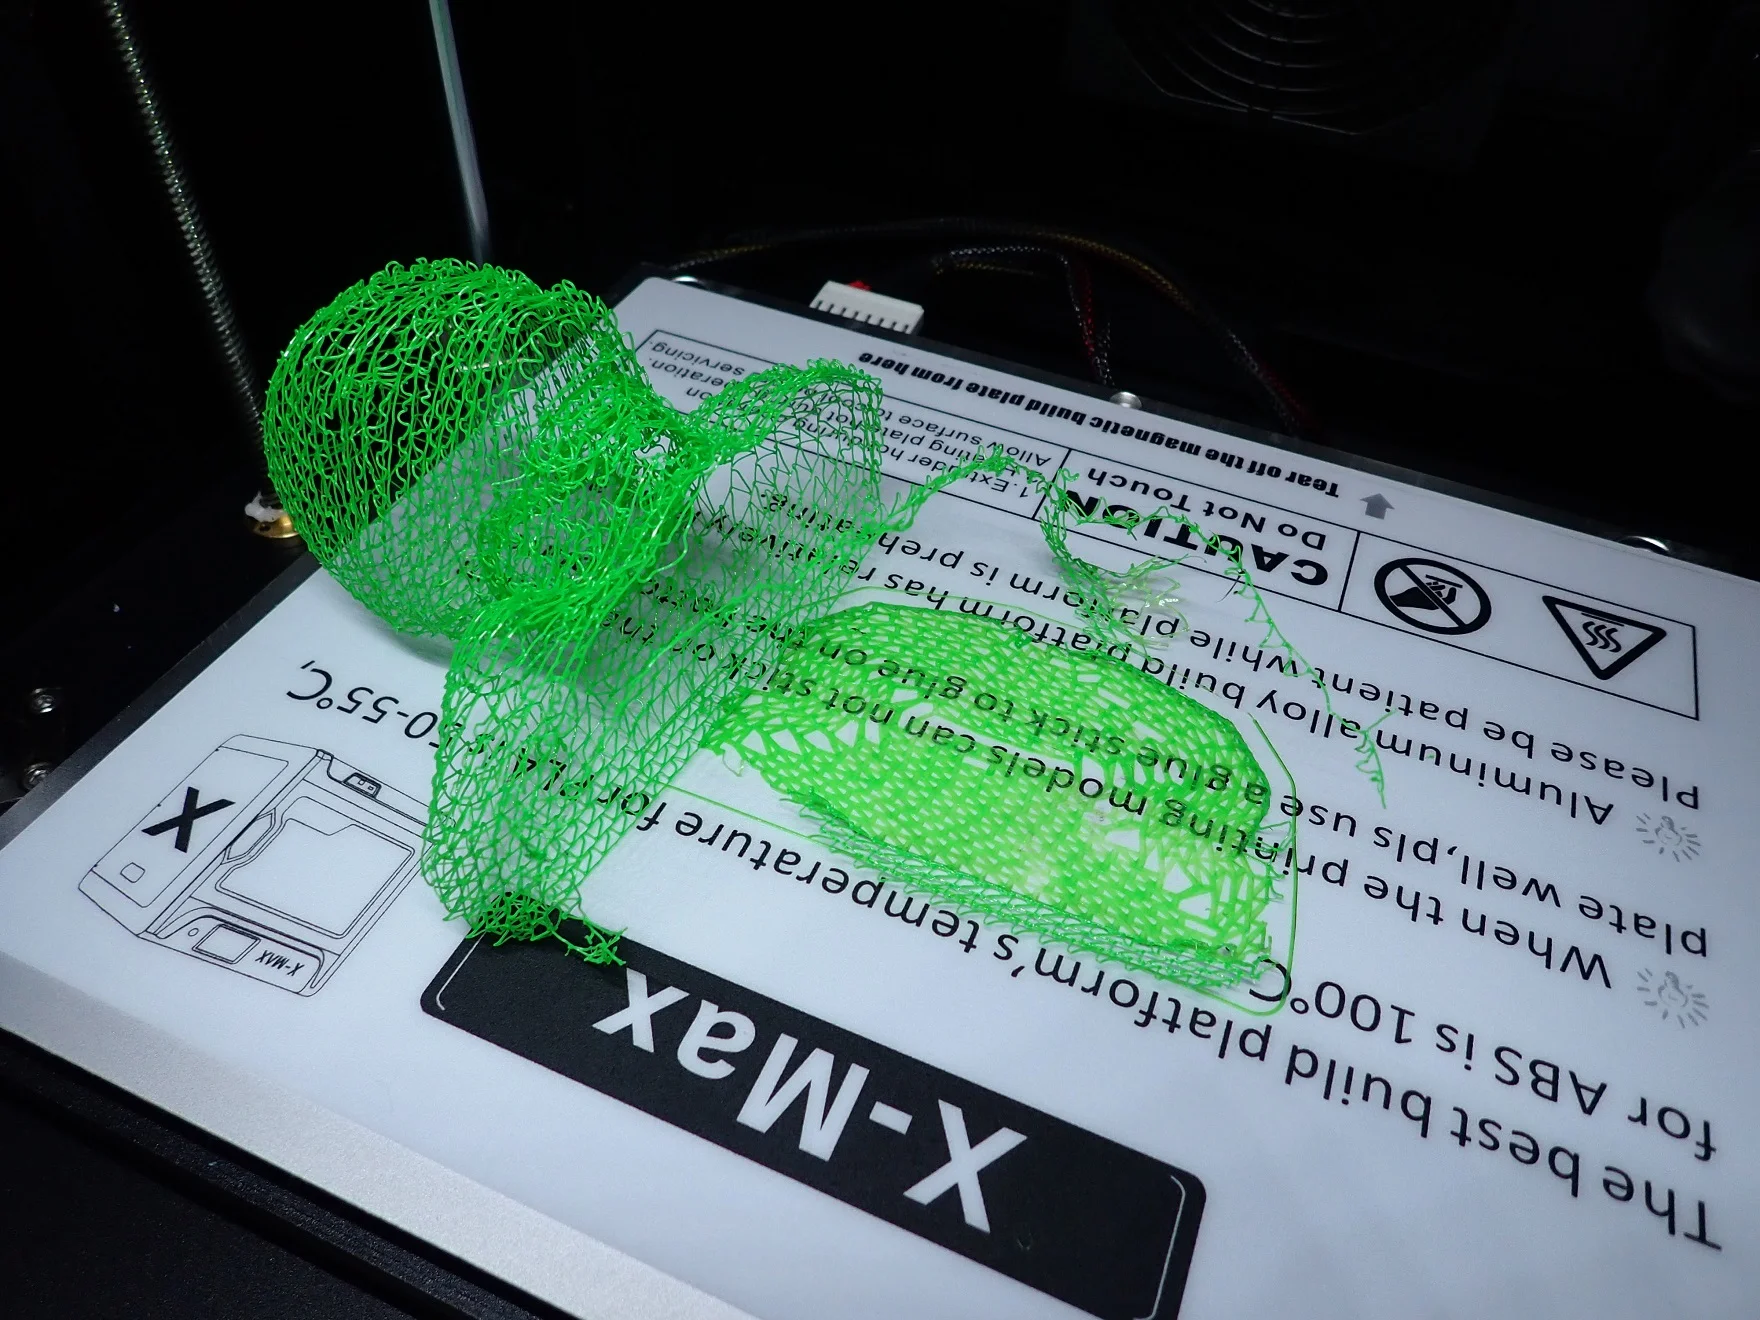
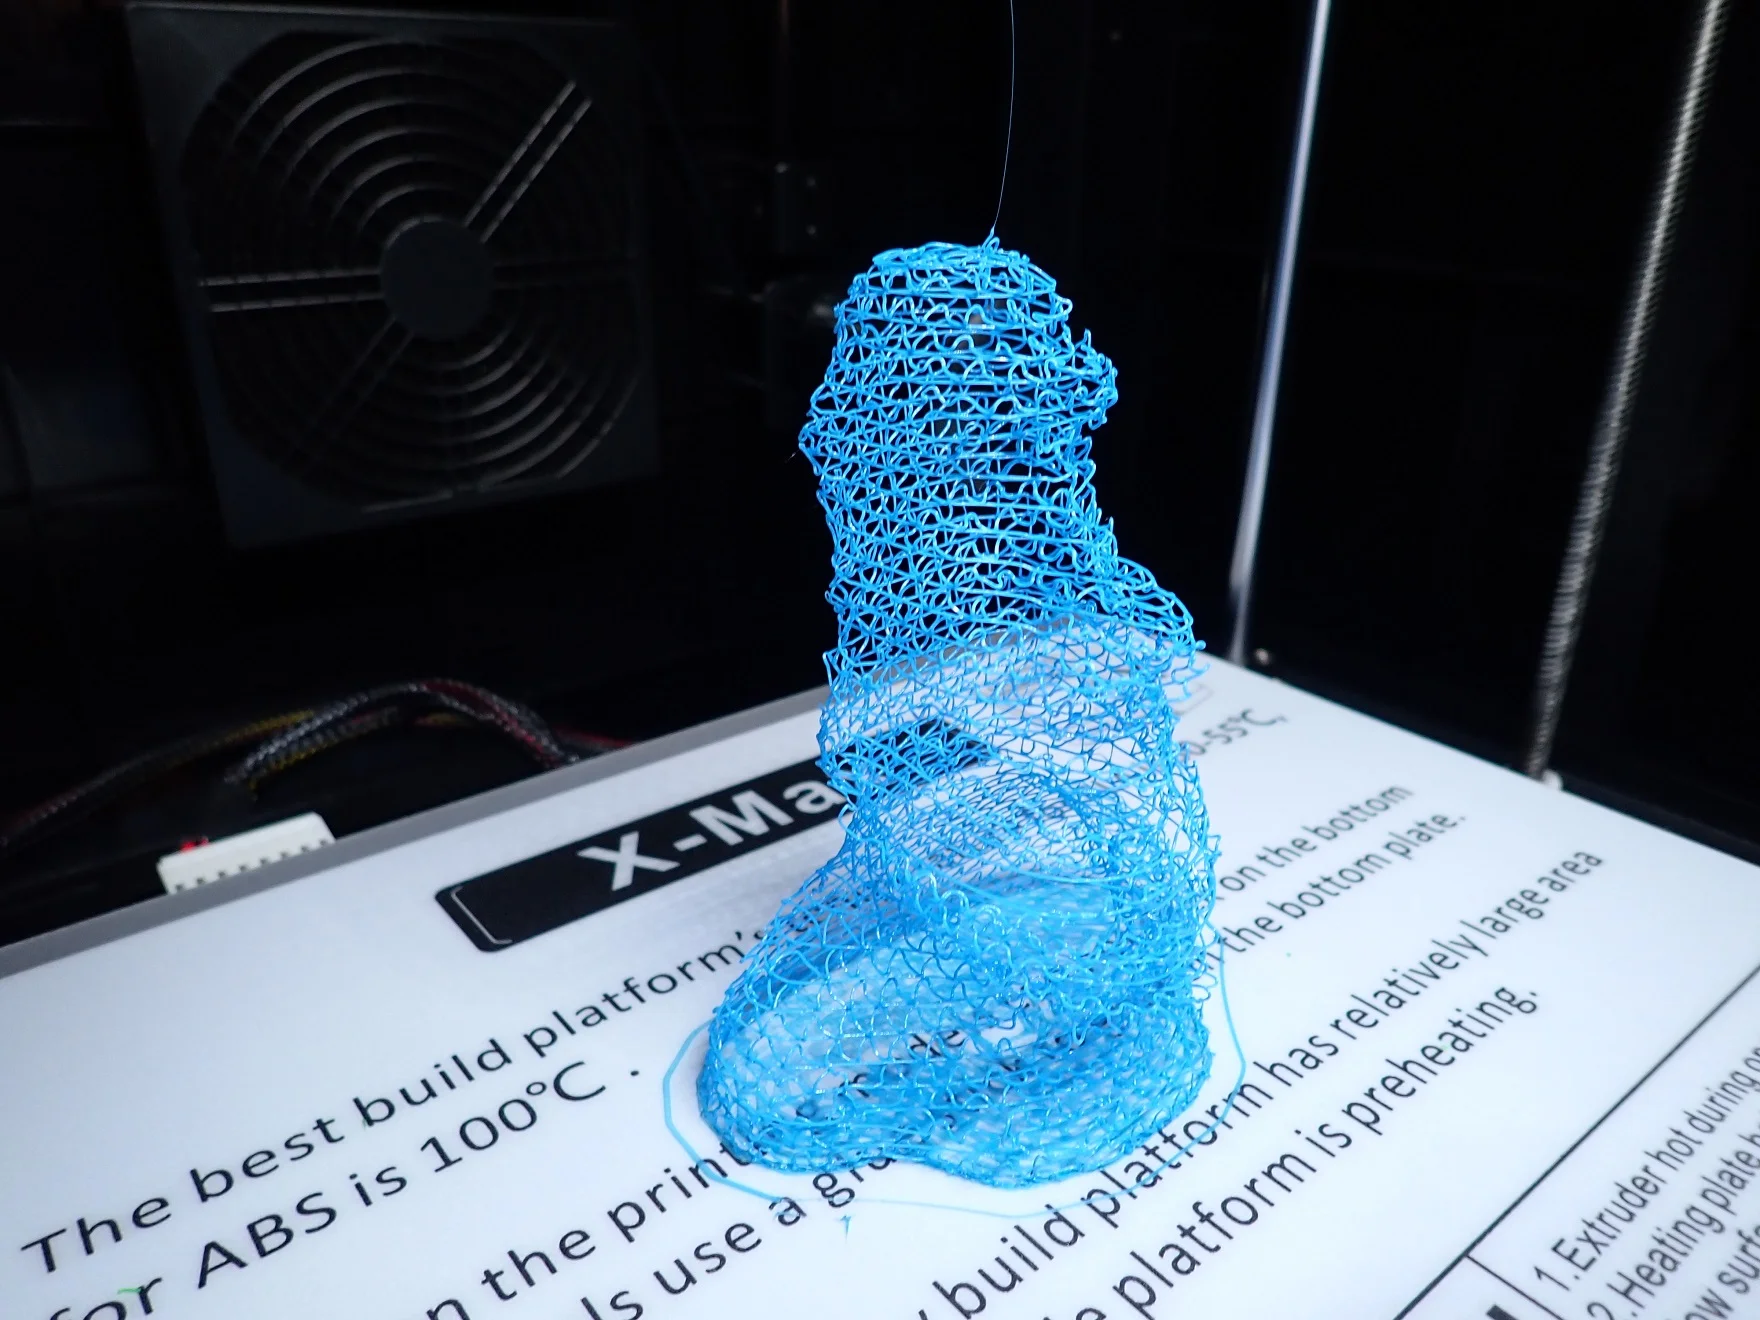
Magnetic print beds with extremely good adhesion, such as the X-Max, may create too strong a print bed adhesion. Removal of the print object could then be almost impossible without causing damage.
Test Prints
> Cura Wire Printing
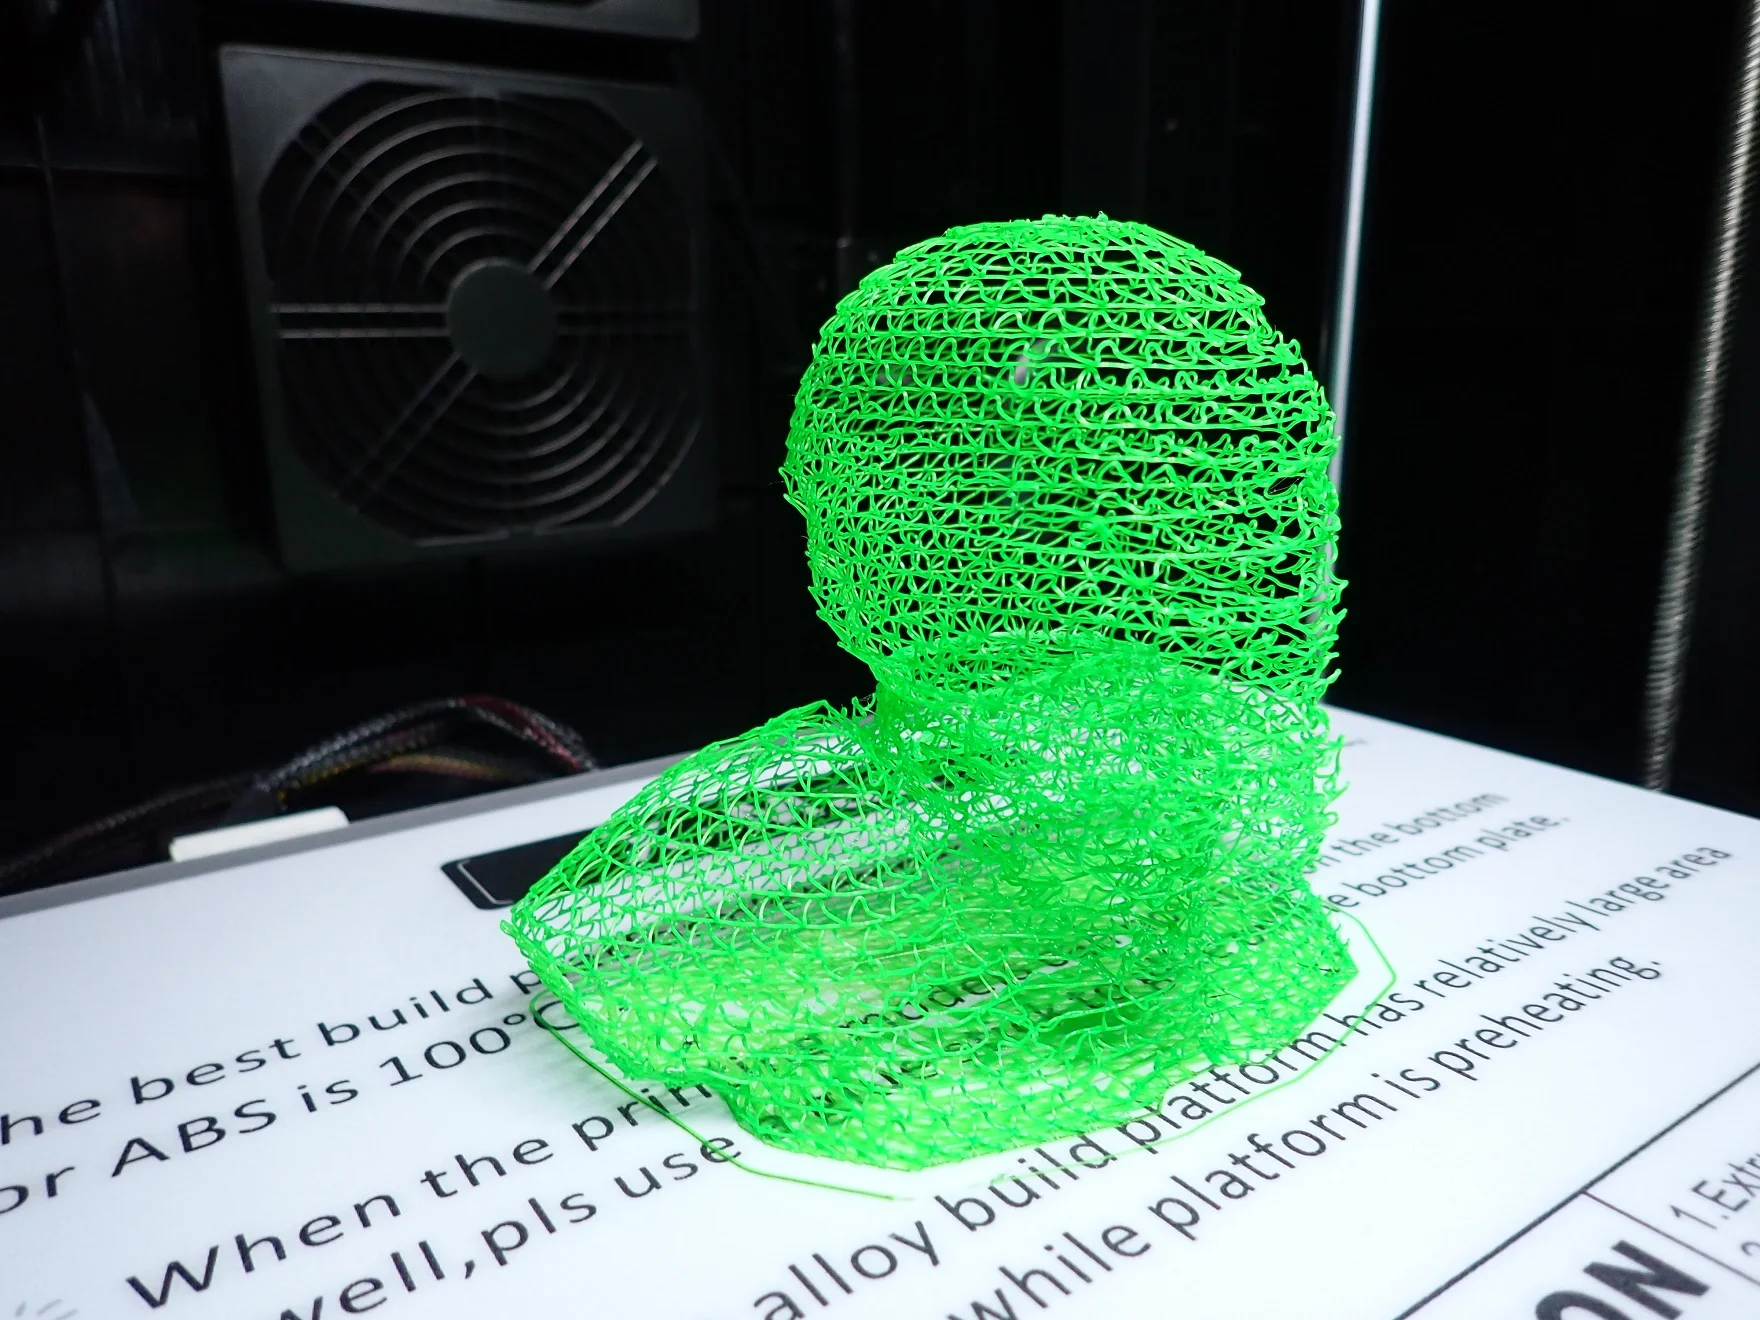
To demonstrate and test wire printing in Cura, I printed several Iron Man busts (link to model) and some Easter Island heads (link to model).
I printed the objects on an X-Max, an Ender 3 V2 and a CR-6 SE to test the effects of other hardware on the settings.
There were very few problems overall with this mode. The default settings in Cura are a very good starting point. However, it has always been possible to further optimize the result.
When I used only the default settings, holes or generally poor adhesion of the saw teeth to the horizontal layers occurred more frequently. In all cases, slightly increasing the printing temperature and adjusting the shape of the saw teeth was the solution.
Settings in Detail
> Cura Wire Printing
The settings for Wire Printing in Cura are constantly changing. In the beginning, there was only a checkbox to enable or disable the option. Now (Cura 4.11.0) this mode is still under the experimental settings, but there are a lot of settings to optimize the result. Most of the time, however, the default settings are already perfect for most printers. If you still want to change the shape of the wire structure, you can find all the settings you need here.
Connection Height: The connection height is the most important of all settings for the wire structure. This is the height between two horizontal lines. The higher you set this value, the further apart the horizontal lines are and the more transparent the object becomes. If you decrease the connection height, the density will increase.
Roof Inset Distance: Here you specify the distance of the roof to the circumference of the object. The smaller this value, the closer the roof will be printed to the outer shell.
Speed: You can specify the speed for different directions of movement and parts of the object. The slower the nozzle moves, the longer the liquid filament has time to solidify. If your filament is too liquid to solidify in the air, reducing the speed may help (as will a lower print temperature or a higher cooling rate).
Flow: The flow indicates the amount of extruded material (parallel to the extrusion width). You will have calibrated this value with your 3D printer at some point in the beginning. For a wire print, you can change this value for the horizontal and vertical lines to make the lines wider or thinner.
Delay: This is another option to help solidify the liquid filament. When delaying a movement, the nozzle stays in place for a short time before moving on. This gives the liquid filament some time to solidify. So if you can’t get a handle on the problem with cooler temperatures, more cooling, or a slower speed, the delay is still a good option.
Ease movement: Slow upward movement can improve adhesion between layers.
Fall Down: With this value, you specify the distance how far the filament falls down after an upward extrusion. The specified value is then compensated.
Drag Along: After the Nozzle has moved up, it will move down diagonally. This creates a sawtooth pattern for each layer. However, while the nozzle is moving diagonally down, it will pull slightly on the filament already printed on the now upright filament. The value you specify here will be compensated.
Strategy: There are a total of three different strategies to connect the horizontal planes: Retract, Knot, and Compensate. When retracting, nothing is compensated and Cura hopes that the next horizontal layer runs exactly along the tips of the saw teeth. But since not all saw teeth are shaped the same, there might be gaps here or some filament grinding happens.
In the knot strategy, knots are printed at the tips of the saw teeth so that the next horizontal line will stick to it no matter what.
Compensating includes the deformation of the individual saw teeth, which gives the highest chance of an even result.
Straighten Downward Lines: Here you specify the percentage of the diagonal line that should be covered by a horizontal line and thus be supported. This can be used to lessen the sinking of the diagonal line.
Roof Fall Down: Here the distance the roof drops is estimated and compensated for. If you find that the roof drops more in your print, you can adjust this value here to get better results.
Roof Drag Along: Since the roof, depending on the shape, will give a little, the distance is compensated here that the filament is pulled down.
Roof Outer Delay: To be able to print the roof perimeters better, you can increase the delays here.
Nozzle Clearance: Here you specify the nozzle distance to the horizontal downward lines. The higher this value is, the flatter the angles become, resulting in fewer and fewer saw teeth.
Disclosure: This website is the property of Martin Lütkemeyer and is operated by Martin Lütkemeyer. Martin Lütkemeyer is a member of the Amazon Services LLC and other Affiliate Programs. These are affiliate advertising programs designed to enable websites to earn advertising revenue through advertising and linking to Amazon.com and others. Links marked with * are affiliate links.
