
- Wet Filament: Prevention, Symptoms & Drying - July 18, 2024
- Sovol SV08 – Best PrusaSlicer Settings & Profile - June 26, 2024
- Sovol SV08 – Best Orca Slicer Settings & Profile - June 26, 2024
Disclosure: Links marked with * are Affiliate Links. I earn from qualifying purchases if you decide to make a purchase through these links – at no additional cost for you!
Cura is one of the most popular slicers for 3D printers. It’s free and offers many features to help you perfect your 3D printing results. One of these features is “Pause at Height”.
The “Pause at Height” feature in Cura allows a 3D printer to be programmed to pause at a specific height or layer. With this feature, you can print multi-colored objects with only one nozzle.
In this detailed guide you will learn what you can use this feature for, where you can find it and how to make the right settings. I also show you the most common problems and alternatives to the “Pause at Height” feature.
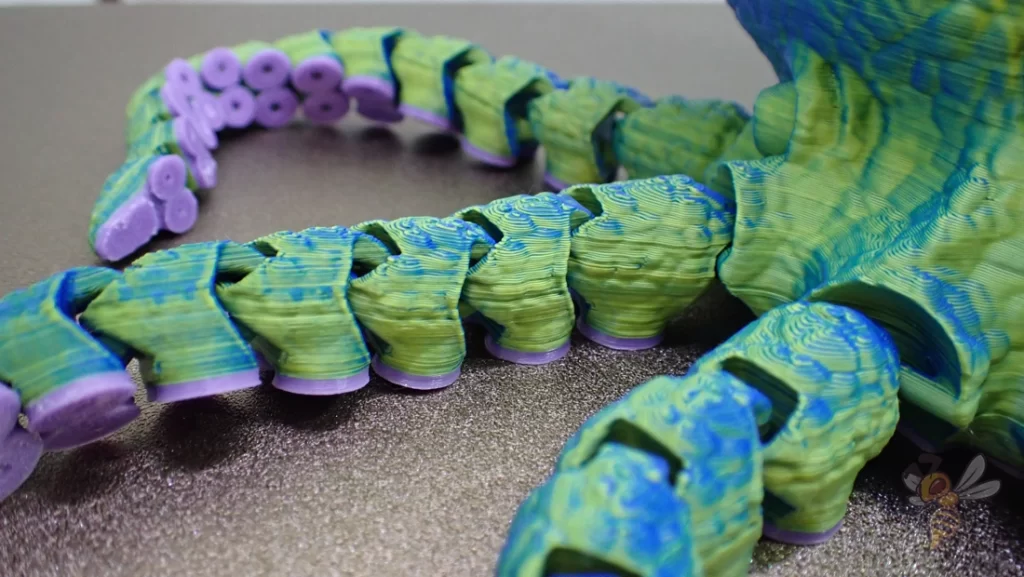
Table of Contents:
Where To Find The Feature – Cura Pause at Height / Layer
The “Pause at Height” feature can be found in Cura under the “Extensions” tab → “Post-Processing” → “Modify G-Code”. There you click “Add a script” and then select “Pause at Height”.
- Set all print settings and slice the object
- Open the “Extensions” tab at the top of the Cura toolbar.
- Select “Post-Processing” from the dropdown menu
- Click on “Modify G-Code”
- Click on “Add a script” in the window that opened
- Select “Pause at Height” from the list of all available scripts
The location of this function is not very intuitive. Therefore, many users do not find these settings right away. One would rather expect them to be under the print settings.
The scripts, however, are there so that you can set special functions for printing after you have already made the print settings. Therefore, they are in a separate place to emphasize their specificity.
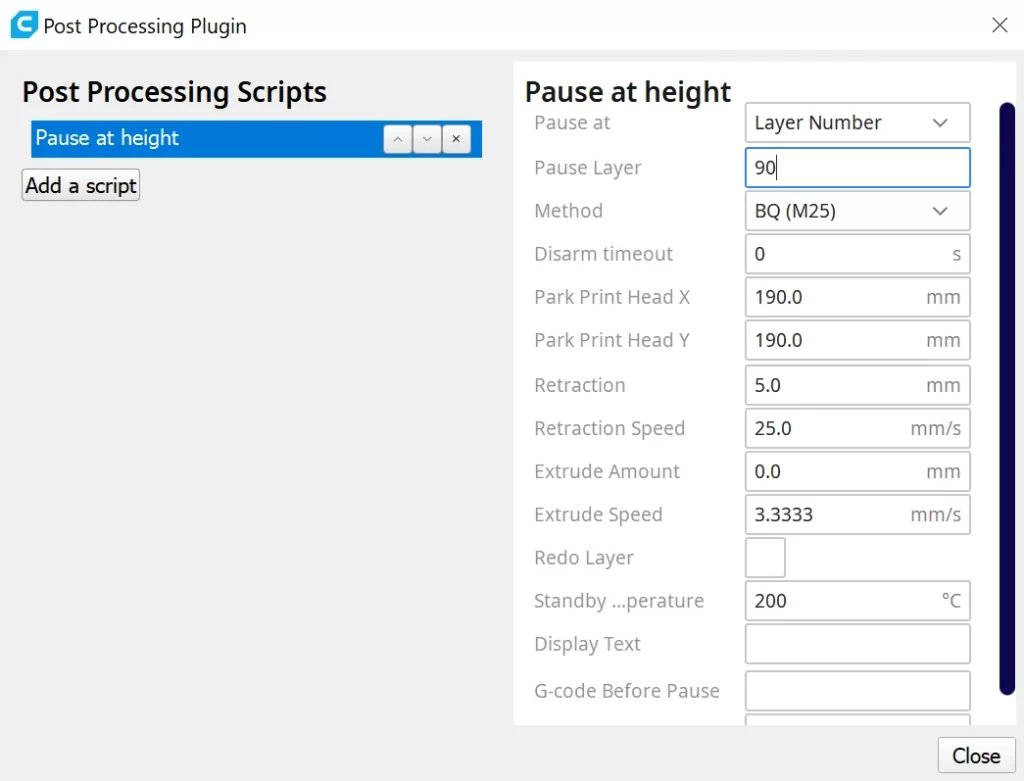
Once you have selected the script to pause at a certain height or layer, you will be presented with many different settings that you need to set correctly.
You can program multiple scripts at once. Multiple pauses at a certain height or layer are also possible. Just add the script again.
The Right Settings – Cura Pause at Height / Layer
The script “Pause at Height” has many settings with which you can set the pause individually. Each of the settings has a different function, which makes this script very versatile but sometimes complicated.
But what do the individual settings do and which parameters are most useful? In the following list, you will learn everything you need to know about the individual settings.
Pause at
The first and most important setting you need to define is the unit in which you specify the height for the pause. With the “Pause at” dropdown menu, you can set whether you want to pause at a certain height in millimeters or at a certain number of layers.
- Height: This setting is used to measure the height of the pause in millimeters. The height “0 mm” corresponds to the print bed.
- Layer number: Here you can specify a specific number for the already printed layers after which the pause should be made. This setting can be more practical because you can look at the individual layers on the sliced model. This way you can often determine the height of the pause better than with a millimeter specification.
After you have sliced the object, you can preview the individual layers. With the slider on the right side, you can move through the layers and select the layer where you want to insert the pause.
Sometimes it is easier to determine the correct height for the pause this way than with a millimeter specification. If you have modeled the object yourself, you will probably know the height of the pause in millimeters. Therefore, Cura gives both options to give all users the choice.
Method
With this setting, you determine how the G-code is written by the script. There are now many different options to make the script compatible with as many 3D printers as possible.
Depending on which 3D printer and firmware you are using, you will need to fill in the appropriate option here.
If you are not sure which option is right for you, I recommend printing a simple test object where you create several pause scripts and select a different method each time. This test will cost you 20 minutes of your life, but you will know which option is right for you.
In your test, you should work your way down from the top and select the top options for the first pauses. For many devices, the default option “Marlin M0” is already the right selection.
Disarm timeout
With the “Disarm timeout” you can set the time after which all stepper motors should be deactivated. This allows you to move the print head or the print bed or pull the filament out of the extruder during the pause.
Park Print Head X and Y
With this setting, you can determine to which X and Y coordinates in millimeters the printhead should move when the pause has started.
This can be useful for several reasons. If you maintain the printhead temperature during the pause, the printhead should not be left directly over the object. The radiated heat could reach the filament. If the filament gets too warm, it could warp.
Also, it is convenient to have the print head in a different location than the object when you want to change filament during the pause. When changing filament, you will want to extrude some filament to get the last bit of filament out of the nozzle.
If the printhead is above the object, you would extrude onto the object. By parking the printhead somewhere else, you avoid this.
Retraction
Retraction defines the length in millimeters of how far the filament is retracted into the nozzle after the start of the pause. With this setting, stringing and oozing can be avoided like during normal printing.
During the pause, this also causes the pressure in the nozzle to be reduced. This prevents unnecessary extrusion of filament during the pause.
Without a retraction during the pause, you would get a messy blob when resuming the print.
I got the best results with 2 to 6 mm, whereby this value depends strongly on the used 3D printer and filament.
If you want to change the filament during the pause, you don’t need to set a retraction here, because you take the filament out completely anyway.
Retraction Speed
As you can probably guess, the “Retraction Speed” setting determines the speed at which the filament is retracted during a retraction.
I would advise you to keep the default setting of 25 mm/s here. Only with flexible filaments, you might get better results if this speed is a bit lower.
If you change the speed, you must do so carefully and in small steps, otherwise, you run the risk of clogging the nozzle.
Extrude Amount
This setting determines how much filament is extruded after the pause before the actual printing process is resumed. You specify this value in millimeters. It is roughly based on the retraction length.
If you have changed the filament during the pause, you can automatically extrude the old filament residues with the new filament. When changing the filament, you can also manually extrude the filament until only the new color comes out of the nozzle. In this case, you do not need to have the filament extruded automatically.
Extrude Speed
With this setting, you change the speed at which the previously defined length of filament is extruded. This value is given in mm/s and you can choose the same speed as in your other print settings.
Redo Layer
With this checkbox, you can tell the 3D printer to repeat the last printed layer.
This can help increase the adhesion between the two layers that are printed before and after the pause.
Standby Temperature
You can set the temperature of the nozzle during the pause with this setting. If you have a very long pause, you could use this to cool down the nozzle.
Mostly it is the case that the nozzle should stay at the standard temperature of the print. So you have the possibility to change the filament during the pause.
The temperature you specify here is maintained continuously, so the temperature before printing, during the pause and after printing can remain the same.
Display Text
With this option, you can define a text to be shown on the display of the 3D printer when the pause starts.
This is especially recommended if you have several pauses in your print. This way you don’t lose track of what you want to do in each pause.
G-Code Before/After Pause
To add a little more customization to the pause settings, Cura has added the “G-Code Before/After Pause” options.
Here you can define an individual G-code to be executed before or after the pause.
An example is the G-code that makes your 3D printer beep.
Display for Active Scripts

Once you have set up a script in Cura, you will see a warning next to the slice and save button.
Since Cura keeps your last settings even if you close the program and open it again, the scripts are also kept. Here you can directly see whether you have set a script or not.
This will prevent you from accidentally using the “Pause at Height” script on your next 3D print.
Common Problems – Cura Pause at Height / Layer
Stringing/Oozing
A common problem with the “Pause at Height” script is stringing or oozing.
If the 3D printer stops extruding filament during the pause, there is still some pressure in the nozzle. With the correct retraction setting, you can prevent more filament from being extruded from the nozzle. This way you avoid unwanted stringing or oozing.
Finding the right setting for the retraction is sometimes not so easy. It is best to start from 5 mm and go in small steps in one direction or the other to find the right setting.
Ender 3 Problems with Pause at Height
Some Creality 3D printers, including the Ender 3, sometimes have problems with the “Pause at Height” feature.
This is because some 32-bit motherboards are not able to interpret the G-code M0 correctly. You can either choose another method for the pause or enter a custom G-code.
The M25 command in the G-code should also pause Creality’s 3D printers with the newer 32-bit motherboard.
If the individual input in Cura does not work, you can also change the G-code manually in the text editor.
Alternatives – Cura Pause at Height / Layer
If the “Pause at Height” script in Cura doesn’t give you the results you want, there are a few other options.
Filament Change in Cura
In Cura, there is now a script to change filament. This works similar to the “Pause at Height”.
You can set the layer at which the printer should stop to change the filament. You can also set the position of the print head and the retraction.
I have already tried both scripts and personally, I like the “Pause at Height” script better, because you can adjust a lot more settings here.
Complete Guide:
Cura Filament Change | Script & G-Code | Step by Step Guide
Filament Change or Pause Directly at the 3D Printer
Some 3D printers with the Marlin firmware can also change filament or pause during printing. You can find the settings for this on the display of the 3D printer itself during printing.
- Filament Change: When changing filament, the printer runs a complete script and moves the print head to a specific location. Sometimes it will extrude some material or pull the filament completely out of the extruder. In some versions, the display may also guide you through the entire process, telling you when to do what.
- Pause: If you pause the printer with the appropriate button on the display, this is exactly what happens. The printer simply stops exactly where it is. Sometimes it moves to a certain position.
The disadvantage of this method is that you have to choose the time of the pause manually during printing. If you are a little too early or too late, you will miss the right layer for the pause.
Disclosure: This website is the property of Martin Lütkemeyer and is operated by Martin Lütkemeyer. Martin Lütkemeyer is a member of the Amazon Services LLC and other Affiliate Programs. These are affiliate advertising programs designed to enable websites to earn advertising revenue through advertising and linking to Amazon.com and others. Links marked with * are affiliate links.
