- Wet Filament: Prevention, Symptoms & Drying - July 18, 2024
- Sovol SV08 – Best PrusaSlicer Settings & Profile - June 26, 2024
- Sovol SV08 – Best Orca Slicer Settings & Profile - June 26, 2024
Disclosure: Links marked with * are Affiliate Links. I earn from qualifying purchases if you decide to make a purchase through these links – at no additional cost for you!
In this comprehensive review of the Creality Ender-3 V3 SE*, we delve into the intricacies of this 3D printer, designed to cater to both beginners and seasoned enthusiasts. We’ll explore its assembly, key features, print quality, and overall performance, providing insights into how it stands out in the competitive world of 3D printing.
Whether you’re just starting your 3D printing journey or looking to add to your collection, this review aims to give you a detailed understanding of what the Ender-3 V3 SE has to offer.
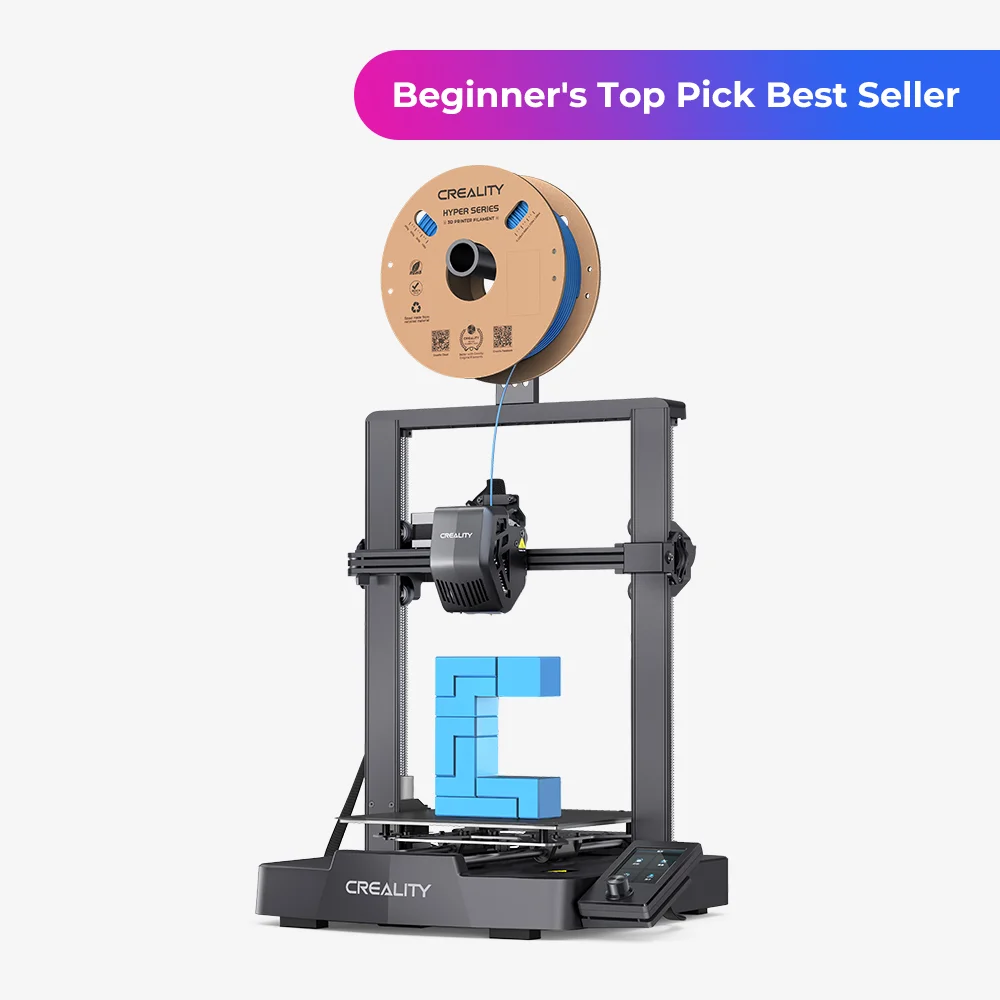
The Creality Ender-3 V3 SE is a budget-friendly, beginner-oriented 3D printer with advanced features like automatic bed leveling and a direct drive extruder.
Build Volume: 220 × 220 × 250 mm
Speed: max. 250 mm/s
Extruder: “Sprite” Direct Drive
Print Bed: PC Spring Steel
Leveling: Automatic
Nozzle Temp.: 260 ℃
Bed Temp.: 100 ℃
Pros:
✓ Beginner friendly
✓ Fully automatic bed leveling
✓ Fast
✓ Good print quality (after calibration)
Cons:
× No filament sensor
× No Touchscreen
× No PEI print bed
Table of Contents:
Review Summary
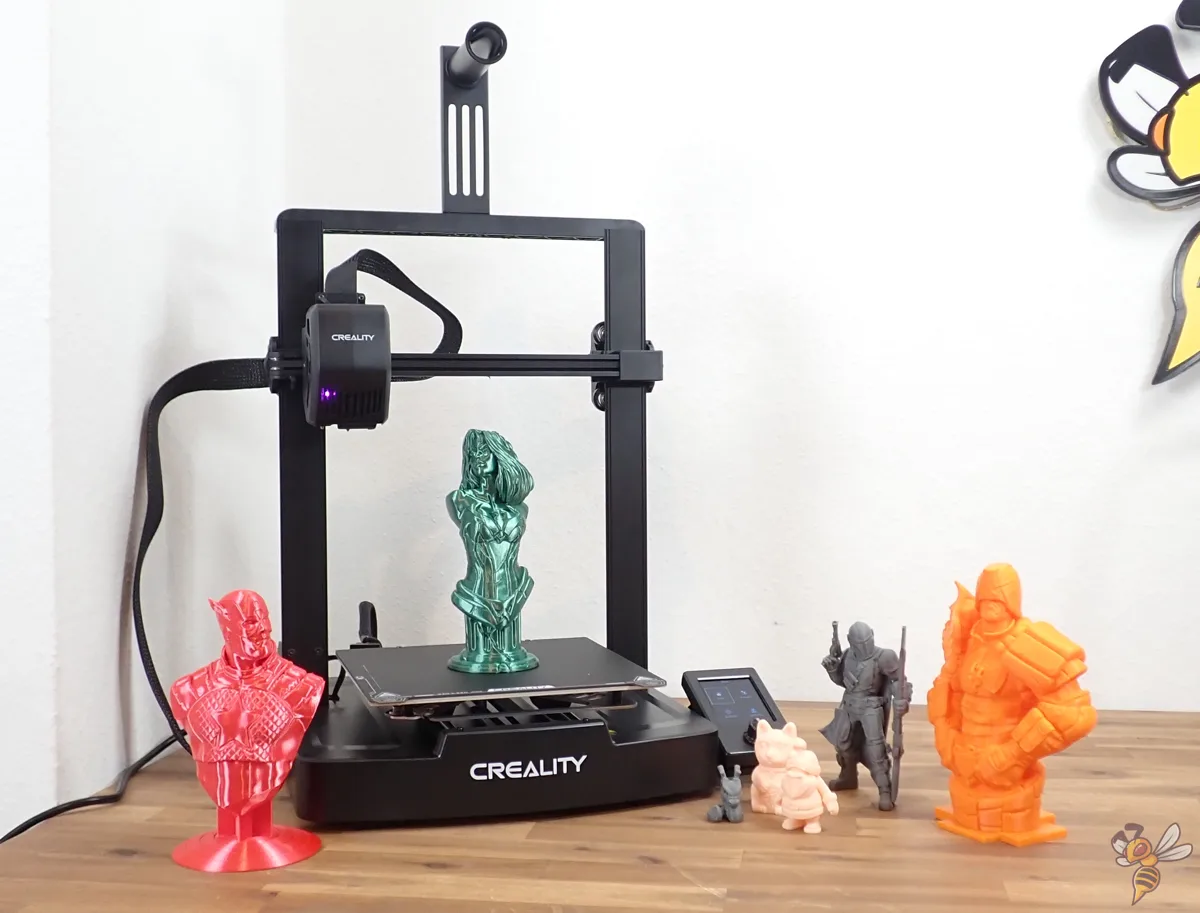
The Creality Ender-3 V3 SE marks a successful continuation of the Ender-3 series, embodying an impressive blend of user-friendliness and advanced features, making it an ideal choice for beginners. Its partial pre-assembly and straightforward setup process, combined with a price point that doesn’t break the bank, present it as a perfect entry point for those new to 3D printing.
Key features such as the Sprite Direct Drive Extruder and auto bed leveling are a new standard that is very welcomed. The printer maintains the classic Ender-3 design with added stability improvements like dual Z-axis lead screws and a linear rail motion system.
While the Ender-3 V3 SE does have a fast print speed and a flexible print bed, achieving the highest level of print quality does require some fine-tuning and calibration. Adjusting settings such as print speed, temperature, and retraction can significantly improve outcomes, especially for complex models or demanding materials like TPU.
In summary, the Creality Ender-3 V3 SE is an excellent choice for beginners looking for a low-budget entry into 3D printing, offering a good balance of price, performance, and user-friendly features. It requires some tweaking to unlock its full potential, but this process is part of the learning experience in 3D printing.
TIP: Learn how to calibrate your 3D printer to get perfect results every time in my 3D printing course: FDM 3D Printing: The Comprehensive Course from A to Z
(The course teaches everything you need to know for FDM 3D printing in over 60 lessons. The course will get beginners up to my level in no time!)
With the foundational aspects covered, let’s dive into the practical review of this 3D printer, examining its performance in real-world applications.
Unboxing & First Impressions
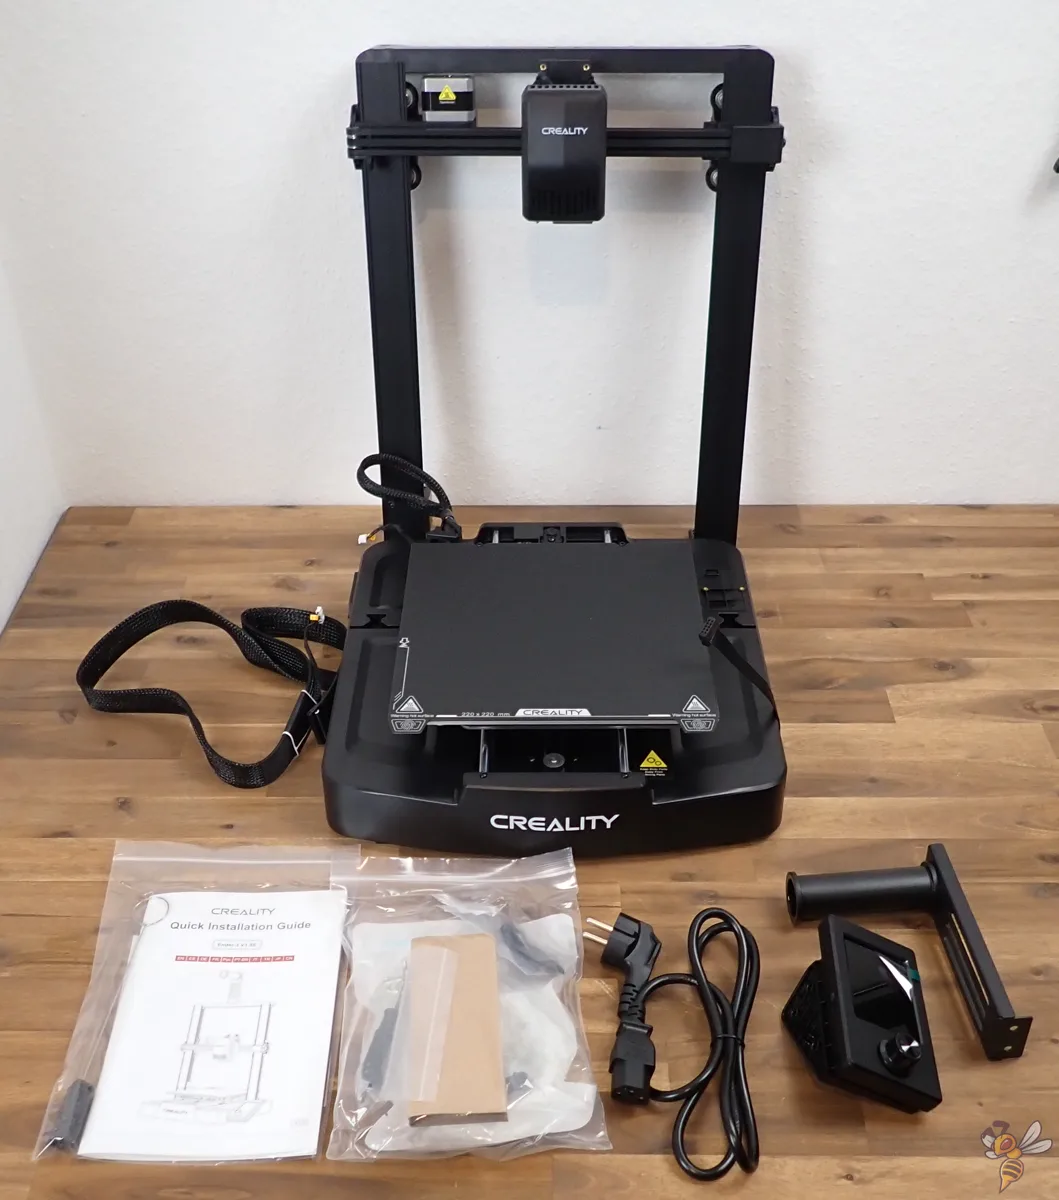
Unboxing the Ender-3 V3 SE, the first thing that strikes you is its partially pre-assembled nature. Each module is meticulously packed, ensuring excellent protection against any transit damage. As you unpack, the classic Ender-3 design is instantly recognizable, providing a sense of familiarity for those acquainted with this line of 3D printers.
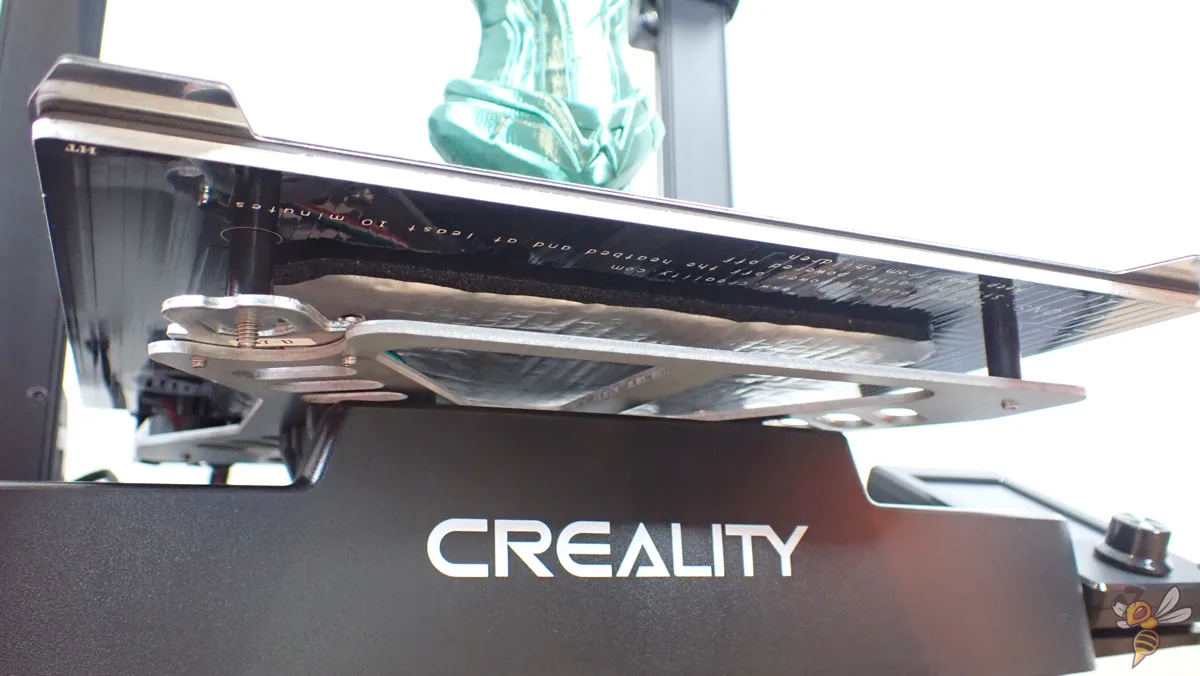
A standout aspect during the unboxing is the absence of manual leveling screws under the print bed. This indicates the printer’s fully automatic bed leveling feature, a significant upgrade that promises ease of use and efficiency, especially for beginners.
The package includes the following:
- Printer base
- Frame with X-axis and print head
- Display
- Filament holder
- All necessary screws and tools for assembly
- Comprehensive manual
- Nozzle cleaner
- Spare parts
- 20 meters of PLA filament
- Side cutters
- SD card
- SD-to-USB adapter
Setup
Setting up the Ender-3 V3 SE is a breeze, even for those who aren’t technically inclined. Arriving partially pre-assembled, the entire setup process takes no more than 15 minutes from unboxing to your first print, making it a great choice for beginners.
There are only 13 screws in total with which you have to connect the various modules. Then all you have to do is plug the cables into the correct slots. The cables are already routed and labeled so that they cannot be plugged in incorrectly.
Overall, this 3D printer assembly is one of the quickest and easiest I have ever seen! You can tell that Creality has experience in developing user-friendly 3D printers.
Features
The Ender-3 V3 SE embodies the classic design elements characteristic of the Ender-3 series, combining functionality with a sleek aesthetic. At its core, the Cartesian 3D printer moves just like the original. But it has a lot more features to give good print quality without much preparation.
Sprite Direct Drive Extruder

The Creality Ender-3 V3 SE features the Sprite Direct Drive Extruder. This extruder is Creality’s first direct drive design and has been incorporated into various printers since 2021, including the Ender 3 series.
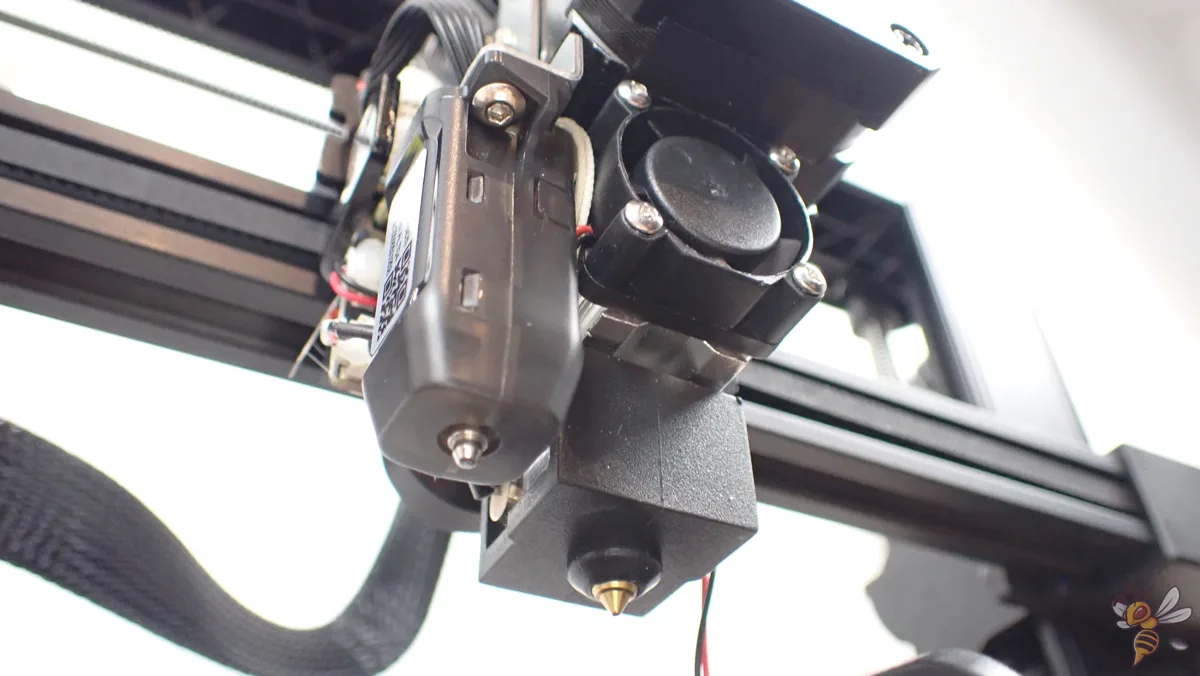
It stands out for its compact, lightweight structure that reduces the overall weight of the print head, enhancing the printer’s performance, speed, and reliability.
The key advantages of the Sprite Direct Extruder include:
- Improved Print Quality: The direct drive mechanism enhances the printing of parts with intricate details and small features, ensuring higher dimensional accuracy and print quality.
- Flexibility with Materials: It offers superior support for a range of materials, particularly flexible ones like TPU.
- Reduced Stringing and Jamming: The direct drive system is less prone to stringing and jamming compared to traditional Bowden extruders, leading to smoother print surfaces and fewer print failures.
- Integrated Hot End and Extruder Assembly: The extruder and hot end are combined into a single unit, which streamlines the filament path and reduces the need for high retraction values. This integration also makes printing with TPU much easier.
Fast Print Speed
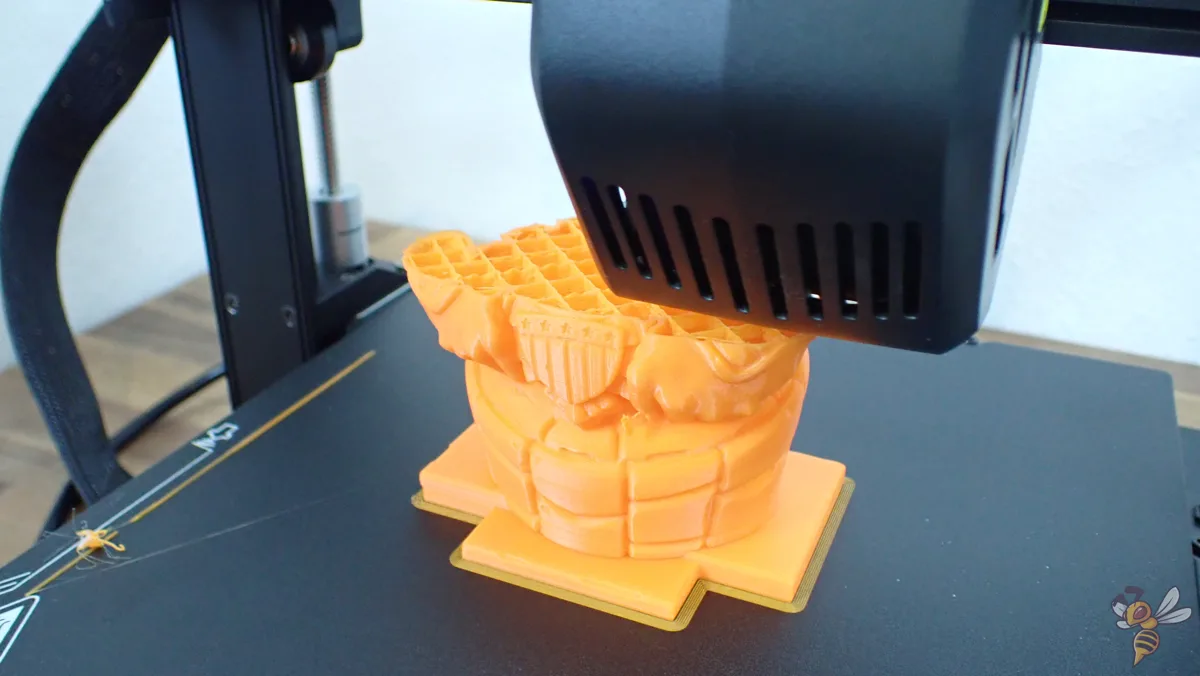
The Creality Ender-3 V3 SE impressively showcases fast print speeds, a crucial feature for efficient 3D printing. This printer supports a maximum printing speed of 250 mm/s, paired with a maximum acceleration of 2500 mm/s². This high-speed capability significantly reduces printing time, making it a standout choice for projects that require quick turnaround without compromising on print quality.
In real-world applications, while the theoretical maximum speed is 250 mm/s, the typical printing speed often ranges closer to 150 to 200 mm/s. This variance is influenced by factors such as the type of material used, layer height, and nozzle size.
Despite its high-speed potential, the Ender-3 V3 SE maintains excellent print quality, which is surprising at this price tag. This balance of speed and quality is facilitated by features like the direct drive extruder and input shaping, which contribute to a more controlled and precise printing process. This combination of speed, precision, and quality makes the Ender 3 V3 SE an attractive option, especially considering its affordable price point.
Flexible Print Bed
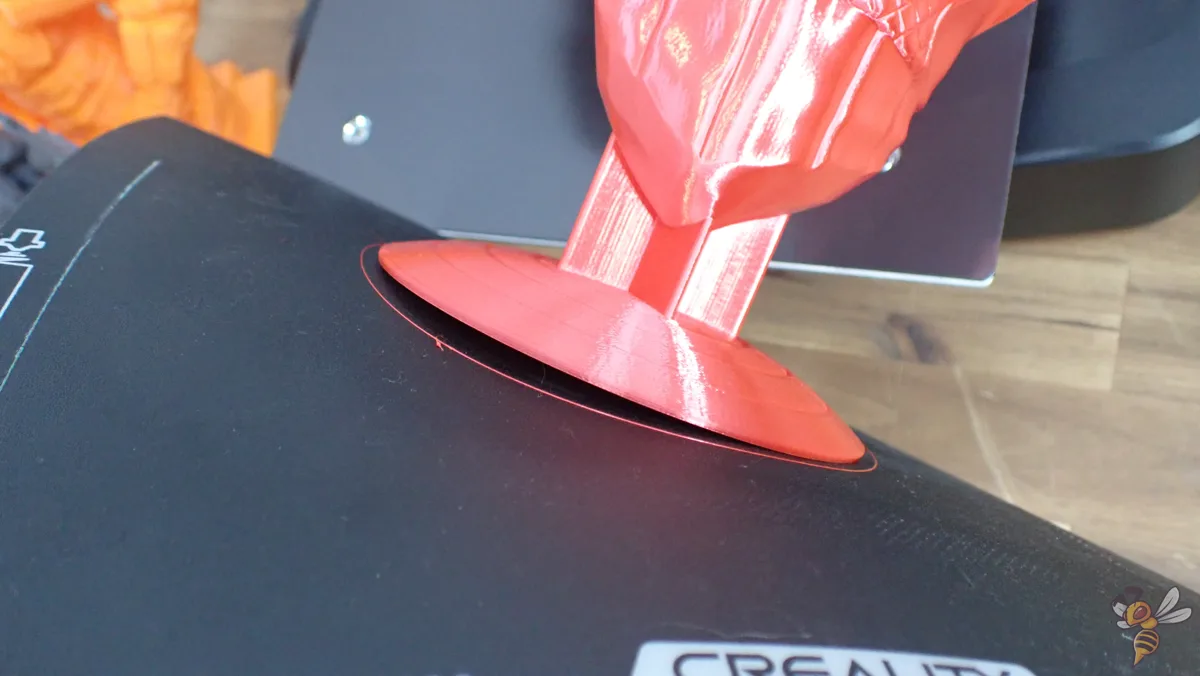
The Creality Ender-3 V3 SE’s flexible print bed is a notable feature. This bed, a removable PC-coated stainless-steel sheet, is designed to provide a strong adhesive surface for various printing materials.

It is surprisingly sticky, which is beneficial for maintaining the print’s stability during the printing process. However, I had some adhesion issues on smaller first layers, where I needed some glue to ensure optimal adhesion. I would actually prefer a PEI print bed.
However, the print bed’s design is very user-friendly, featuring two protruding surfaces on the front for easy handling and two cavities on the back for precise repositioning.
Automatic Bed Leveling

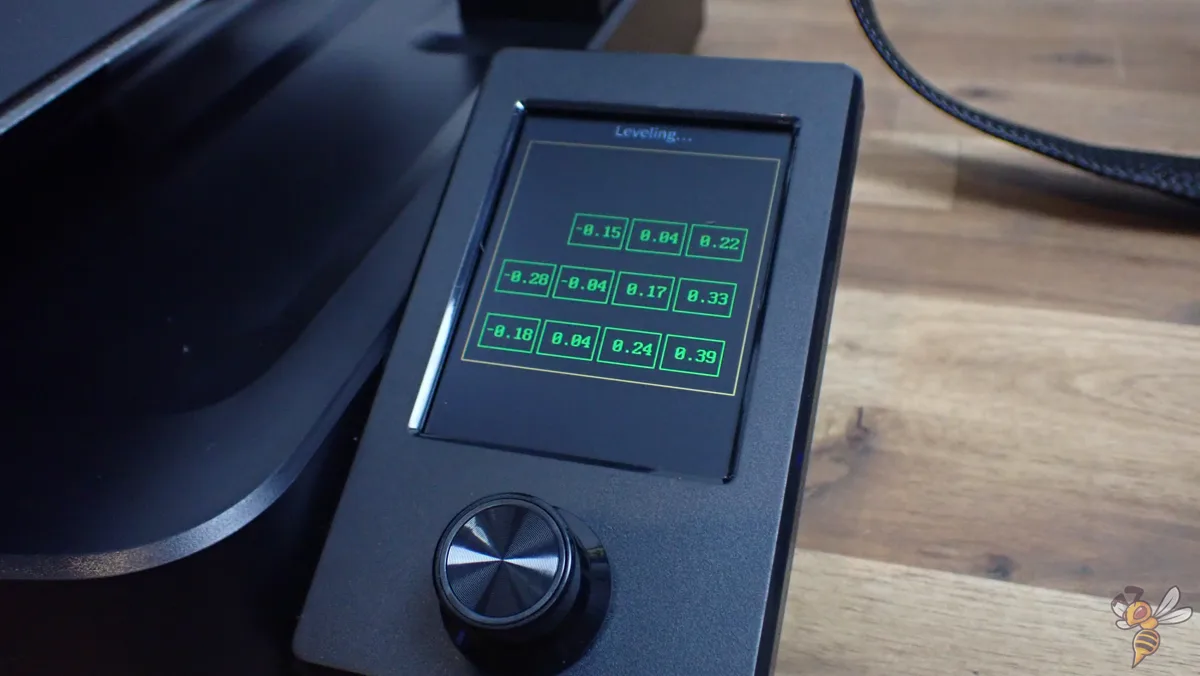
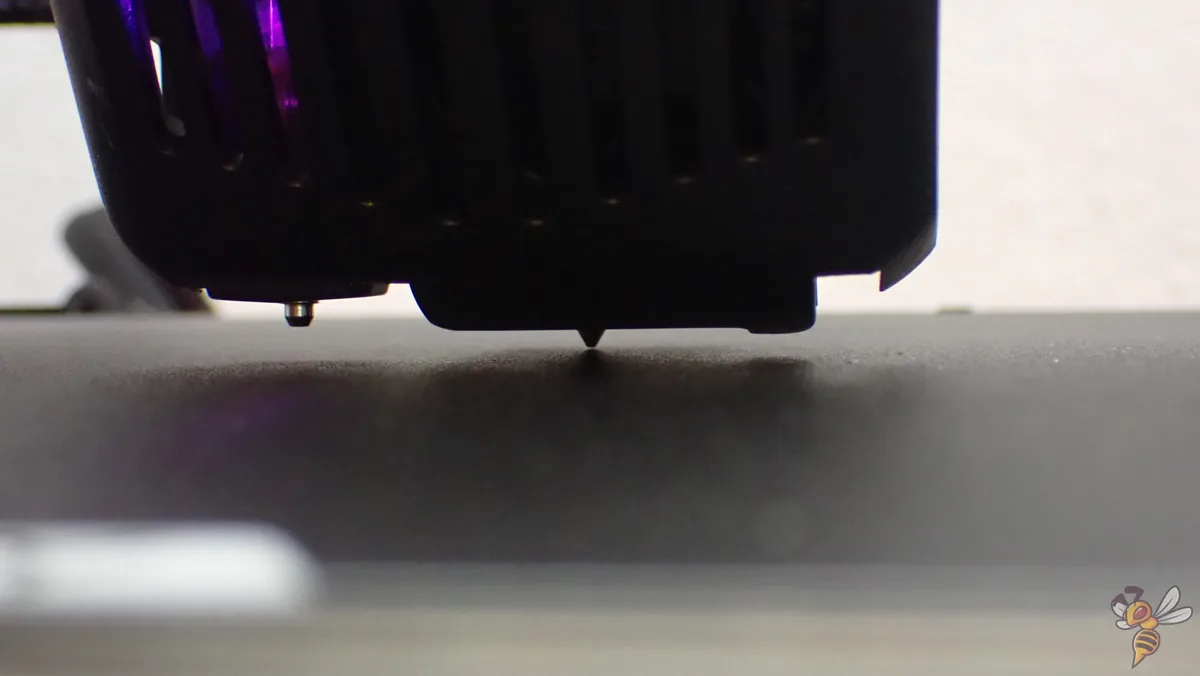
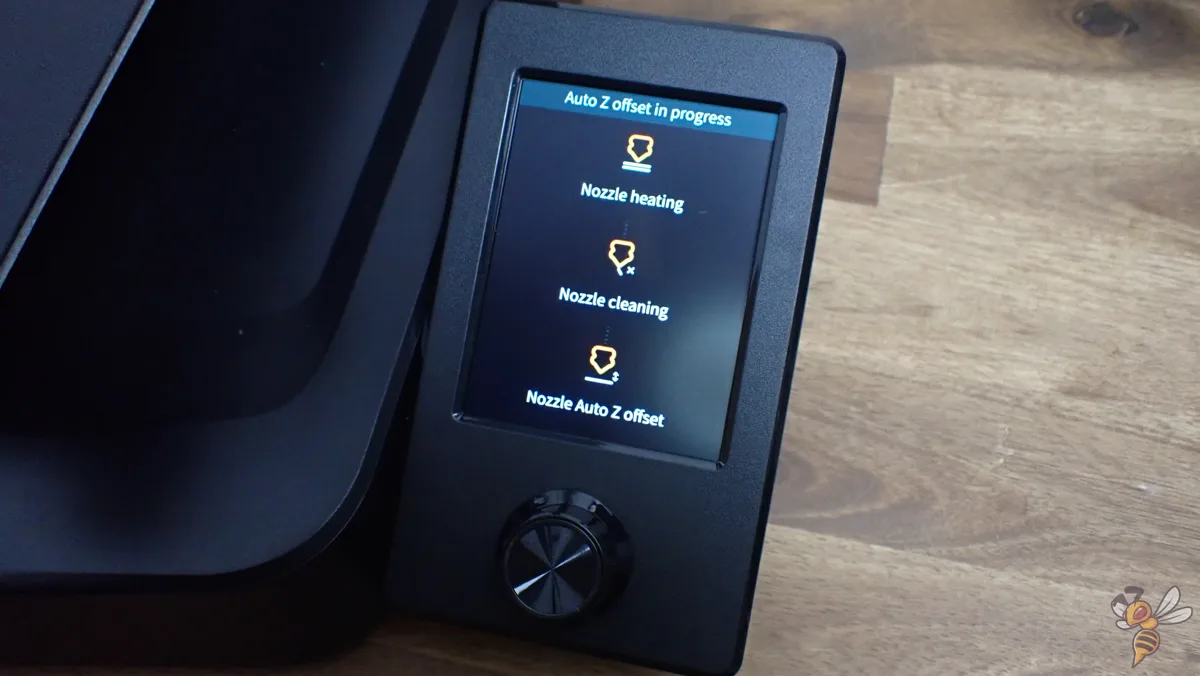
The automatic bed leveling feature of the Creality Ender-3 V3 SE greatly enhances the 3D printing experience, particularly in terms of ease of use. There are no screws under the bed. The 3D printer levels the bed all by itself!
This feature ensures that the print bed is perfectly level before each print, which is crucial for achieving high-quality prints. Automatic bed leveling is a significant upgrade from manual leveling, which can be tedious and less precise. It is very nice to see that this features is now a standard, even in low-budget 3D printers.
Key aspects of the automatic bed leveling in the Ender-3 V3 SE include:
- Ease of Use: The automatic bed leveling simplifies the setup process, making it more accessible, especially for beginners. It removes the need for manual adjustments, saving time and reducing the learning curve for new users.
- CR-Touch: The Creality CR-Touch is an automatic bed leveling sensor that precisely measures the tilt of a 3D printer’s print bed, ensuring optimal adhesion and print quality by adjusting the Z-axis height dynamically during the initial layer of printing.
- Strain-Based Z-Offset Calibration: The printer incorporates strain sensors for precise Z-offset calibration. This means the printer can automatically compensate for any minor discrepancies in the level of the print bed, ensuring a perfect first layer every time. This means that the leveling is completely hands-free!
- Visual User Interface: The Ender 3 V3 SE’s user interface dynamically displays the progress of the auto bed leveling, along with other printing parameters. This feature allows you to effectively monitor and manage the printing process, making it more user-friendly and efficient.
Overall, the automatic bed leveling feature of the Ender 3 V3 SE is a major factor in its appeal, particularly for those who value ease of use and consistency in print quality. This advanced feature, combined with the printer’s other capabilities, positions the Ender-3 V3 SE as a strong contender in its price range and makes it perfect for beginners.
LCD Screen Interface with Knob


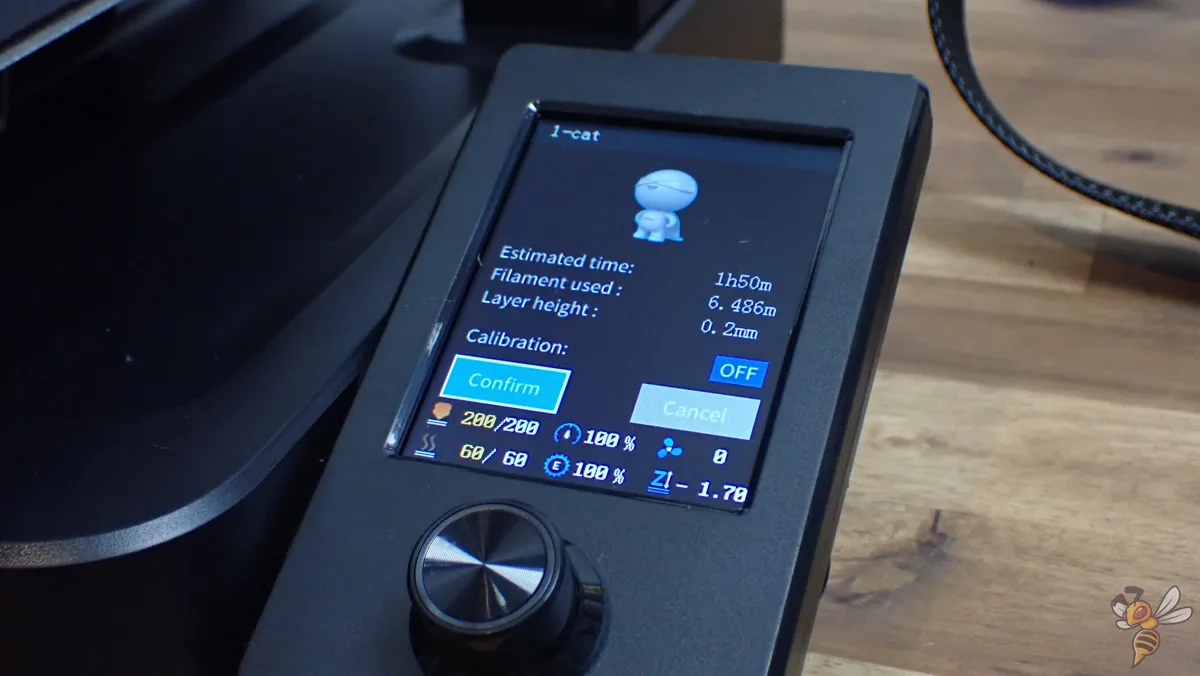
The LCD screen interface of the Creality Ender-3 V3 SE, combined with a rotary knob, presents a practical, though not flawless, user experience.
The interface is clean and intuitive, making it straightforward to navigate through various settings and options. Powering up the printer and selecting a language leads directly into the 3D printing process, underscoring the user-friendly nature of the interface.
However, the screen is not a touch display, and relies solely on the rotary knob for navigation. This design choice simplifies the interface, but can make navigating through menus slightly less efficient.
A notable missing element is a dedicated back button, which would expedite moving through the interface. Although this is not a significant drawback, it’s an area where the interface could be improved for an even smoother user experience.
Filament Holder
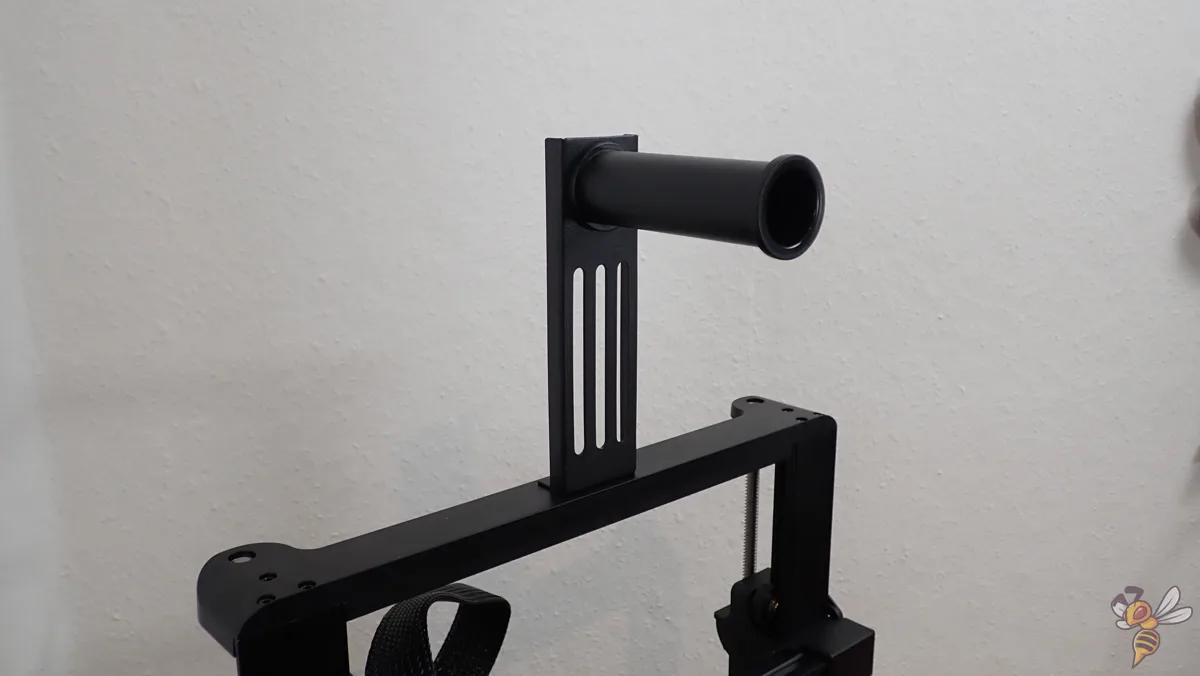
The filament holder on the Creality Ender-3 V3 SE serves its purpose but comes with limitations, especially when considered in the absence of a filament runout sensor. The holder is top-mounted on the gantry’s rail, a common design in 3D printers, which feeds the filament directly into the extruder. This positioning makes the printer notably tall but saves on horizontal desk space, a benefit for users with limited workspace.
However, the absence of a filament runout sensor on the Ender 3 V3 SE is a point of critique. Such sensors are standard in many of Creality’s higher-end models and can be a valuable addition, especially for long or unattended prints.
The sensor detects when the filament is empty or broken and pauses the print, allowing for filament replacement without ruining the print.
The Ender-3 V3 SE’s lack of this feature means users need to be vigilant about how much filament is left on the spool to avoid print failures. However, the option to upgrade the printer with a runout sensor is available for those who require this functionality.
Y-Axis Linear Shafts & Dual Z-Axis Screws
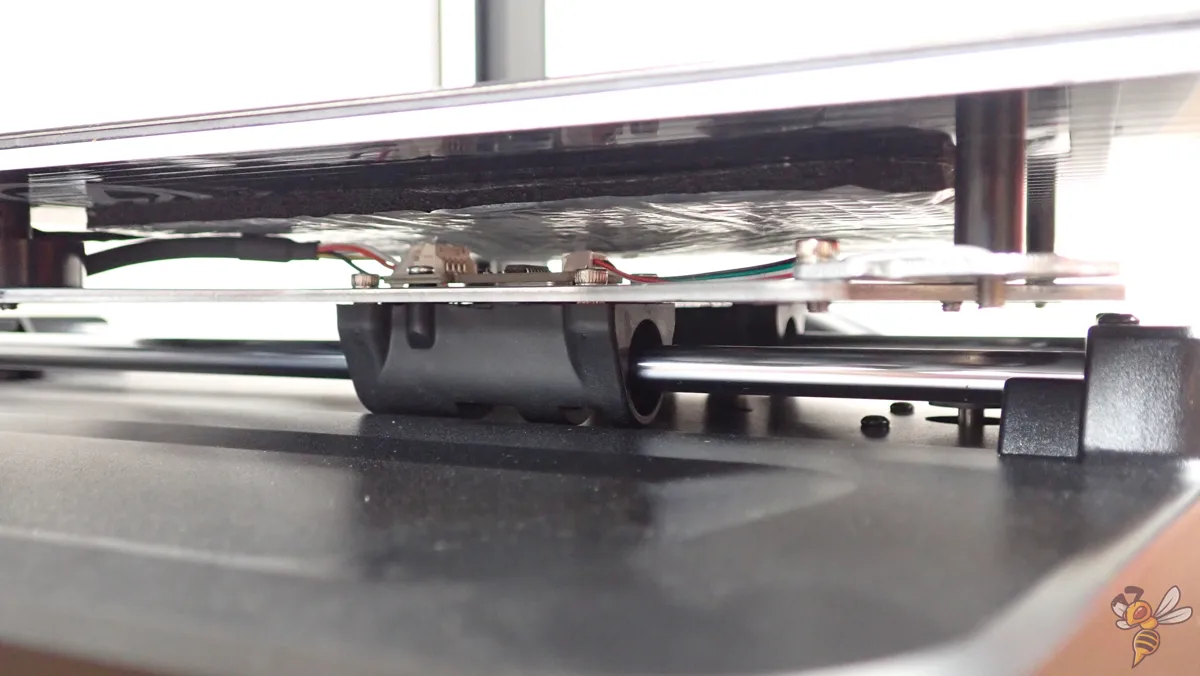
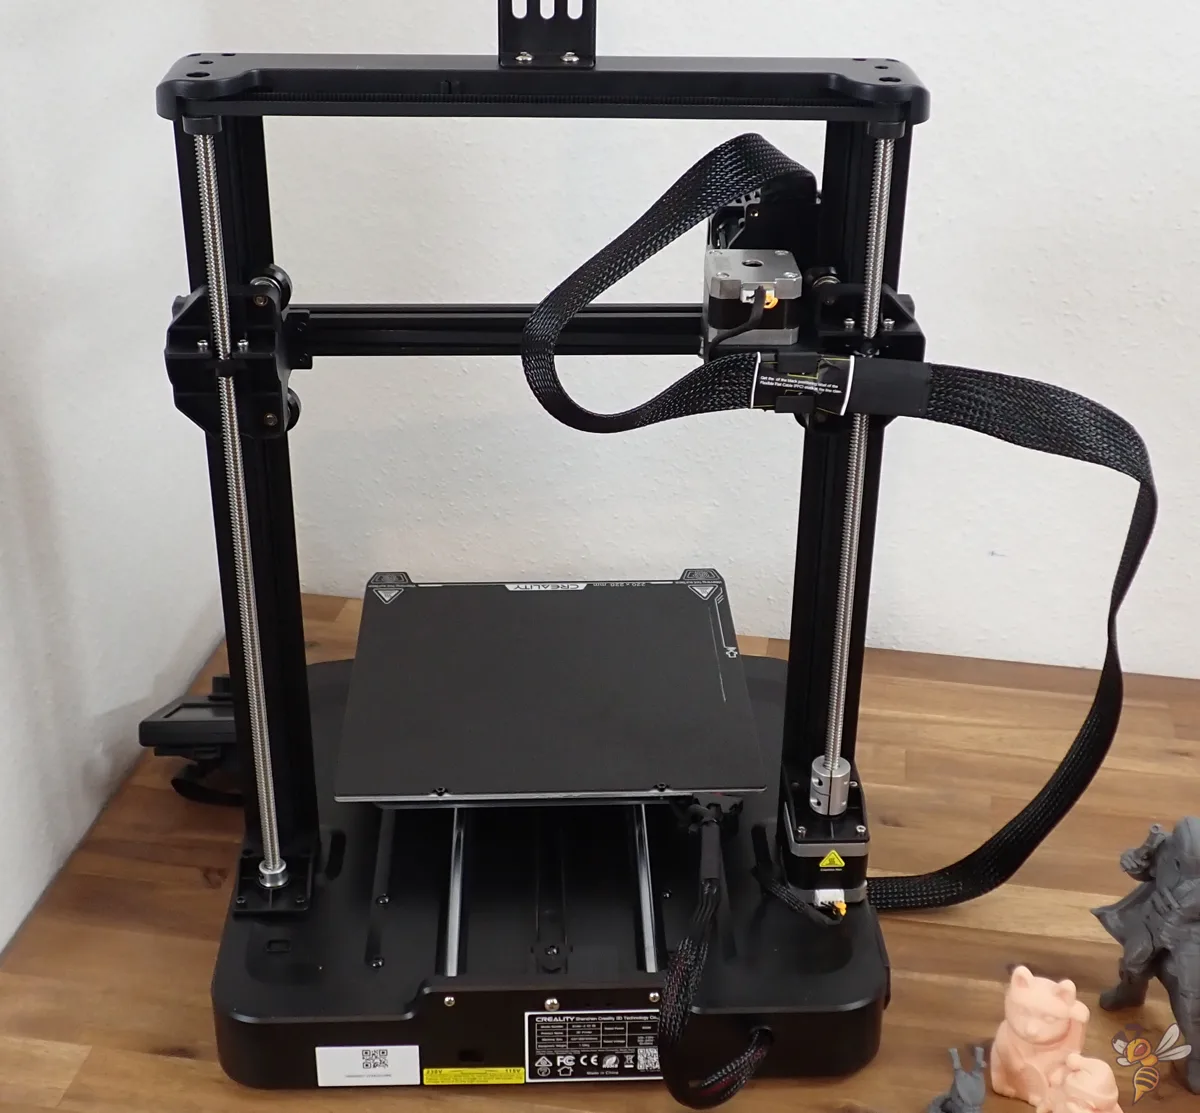
The Creality Ender-3 V3 SE has a combination of Y-axis linear shafts and dual Z-axis screws, enhancing both the stability and precision of the printing process.
The Y-axis of the printer utilizes a pair of 8 mm thick linear shafts, made from strong, wear-proof steel. This robust construction ensures that the build platform is carried steadily, contributing significantly to the overall print quality. These shafts are designed to withstand constant wear, making them durable and reliable for long-term use.
Additionally, the printer features dual lead screws on the Z-axis. This dual screw design plays a crucial role in stabilizing the print bed, especially during high-speed printing, which the Ender-3 V3 SE is capable of achieving (up to 250 mm/s). The combination of these features results in more stable and accurate prints, a critical factor for any 3D printing enthusiast or professional.
However, it’s important to note that the Y-axis linear shafts require regular maintenance, specifically lubrication, to ensure smooth and uninterrupted operation. Regular lubrication of these shafts prevents wear and tear, extends the life of the printer.
Slicer
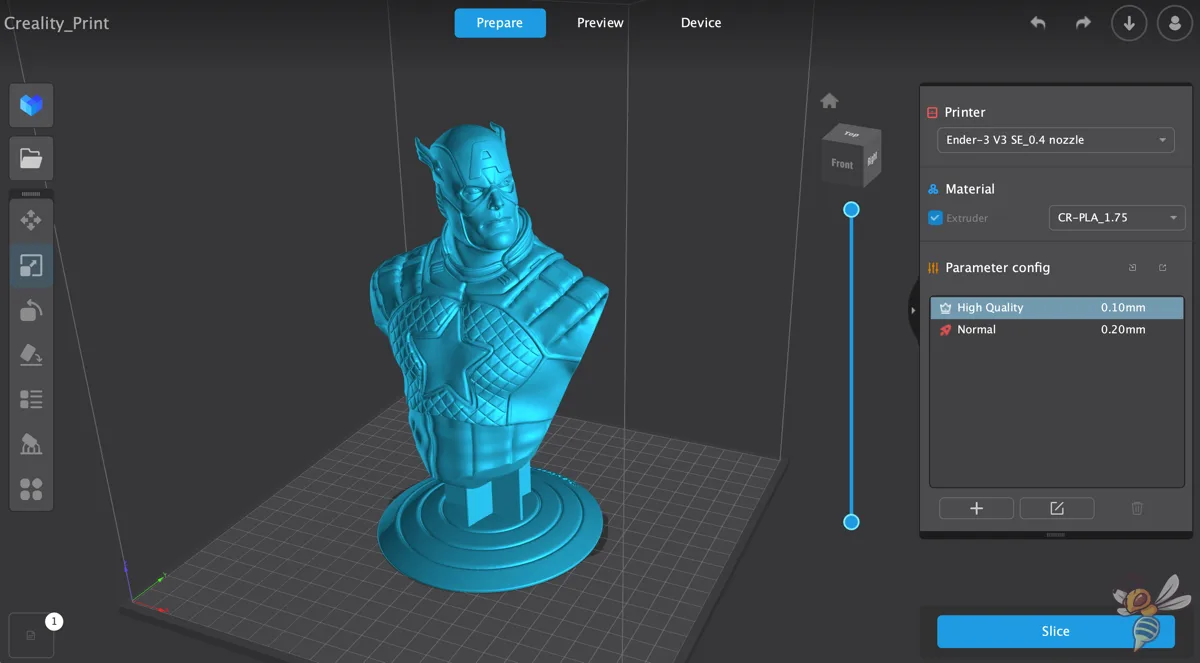
Choosing the right slicer software is a critical part of the 3D printing process for the Creality Ender-3 V3 SE. Out of the box, the printer is compatible with most standard slicers, and the included SD card comes with Creality Print, Creality’s own slicer based on Cura.
Creality Print is user-friendly, making it a good starting point for beginners in the entry-level market. It offers a streamlined user interface and integrates well with the printer’s features, like the direct drive extruder, automatic bed leveling, and the sticky print bed.

However, many experienced users like me prefer to use more established slicers like Cura. Customizing a profile for the Ender-3 V3 SE in Cura allows for greater control over print quality and advanced features. This customization involves calibrating settings to align with the printer’s capabilities, such as its print speed, print surface dimensions, and the performance of the sprite direct extruder.
I show you my settings in this article: Best Ender-3 V3 SE Cura Settings for Quality Results
Creating a custom Cura profile for the Ender-3 V3 SE involves calibrating parameters like print speed, layer height, print temperature, and retraction settings. This can lead to improved print quality, especially for more complex prints or when using materials like TPU. It’s important to note that while Cura offers advanced options, it might require a learning curve for those new to 3D printing.
In summary, while Creality Print provides a solid starting point for new users of the Ender-3 V3 SE, Cura offers more in-depth control and customization, catering to the needs of more experienced users seeking to optimize print quality.
Print Quality
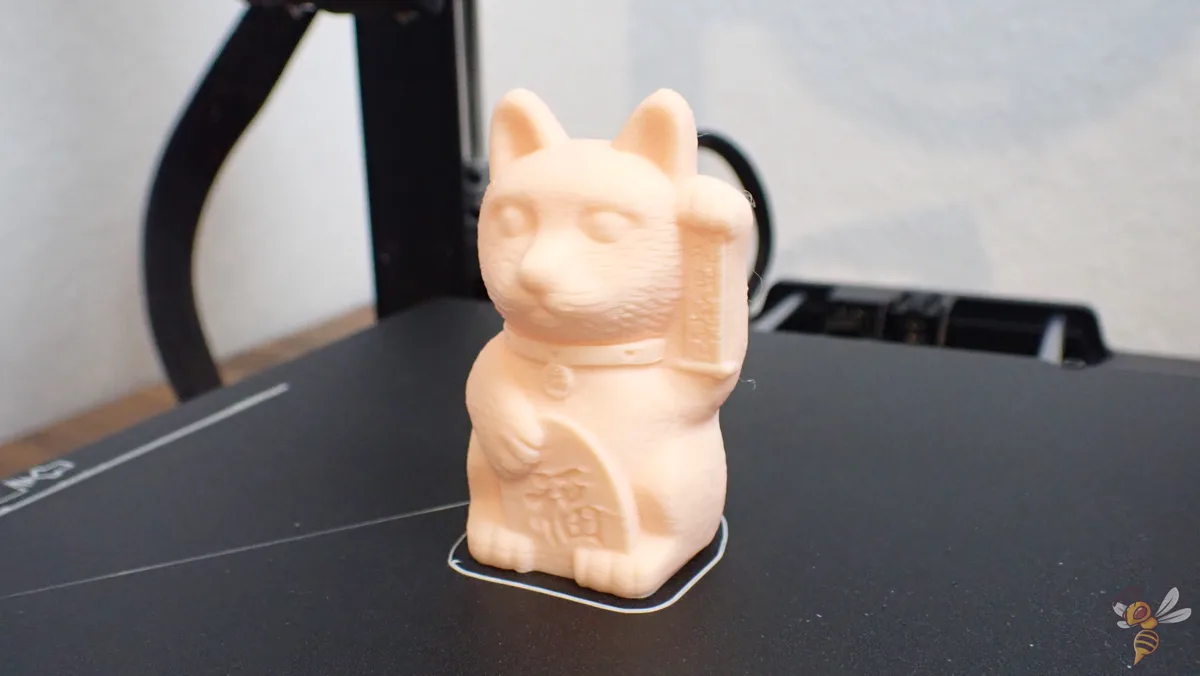
To test the print quality, I first printed the prepared test prints on the SD card. This is always a great way to see if something is fundamentally wrong in terms of assembly or settings. In my case, the result was flawless and I could start with the first actual tests for print quality.
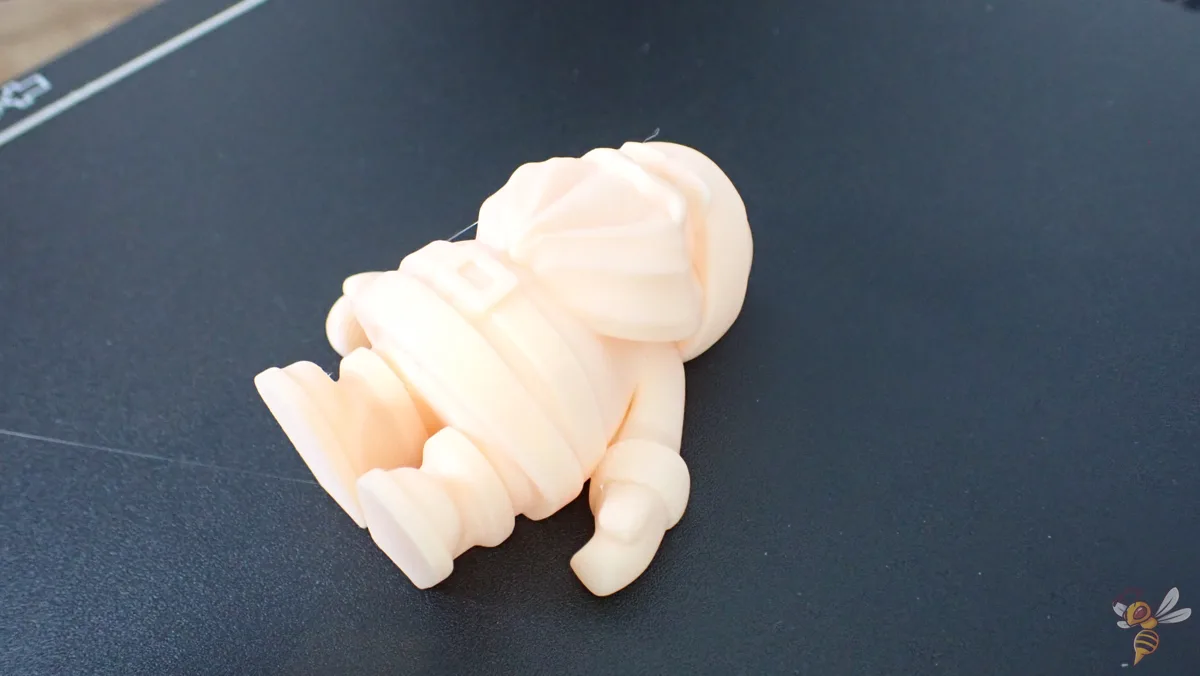
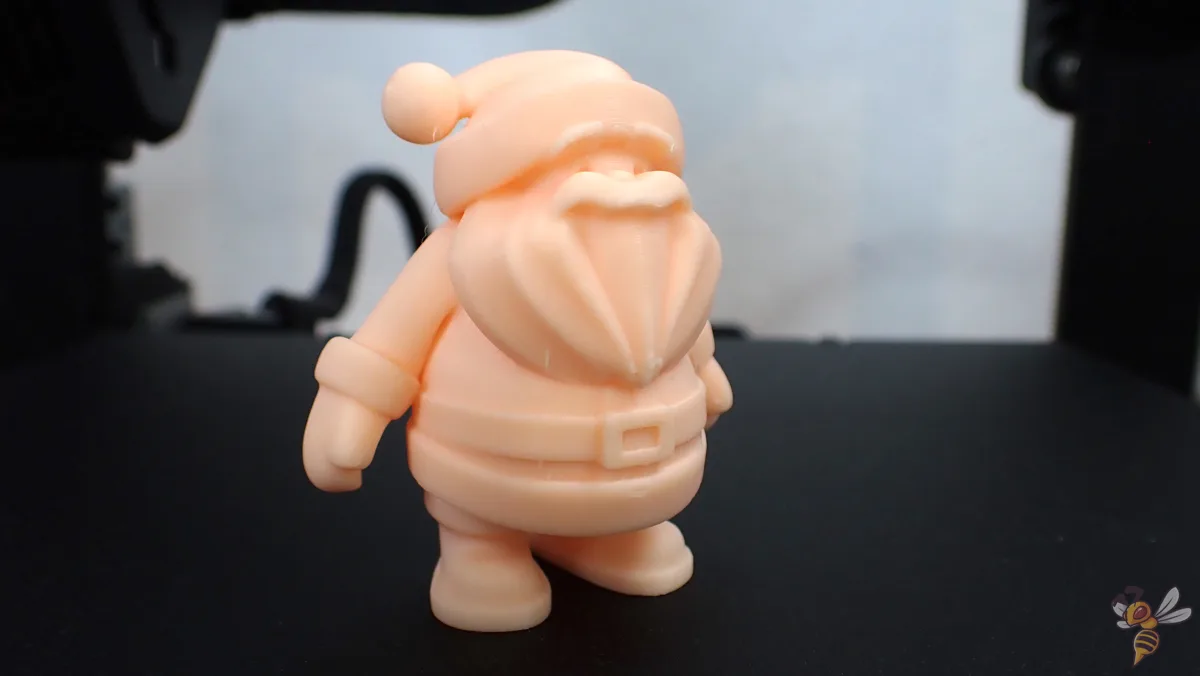
The first test was a lying Santa Claus. The model is not very demanding and was therefore printed almost perfectly. From here on, I printed all objects with a layer height of 0.1 mm.

Next, I printed the Cali Dragon, which is a popular calibration object for FDM 3D printers. Apart from some stringing, the result was surprisingly good. Therefore, I calibrated the print temperature and retraction a bit until this print error was fixed.
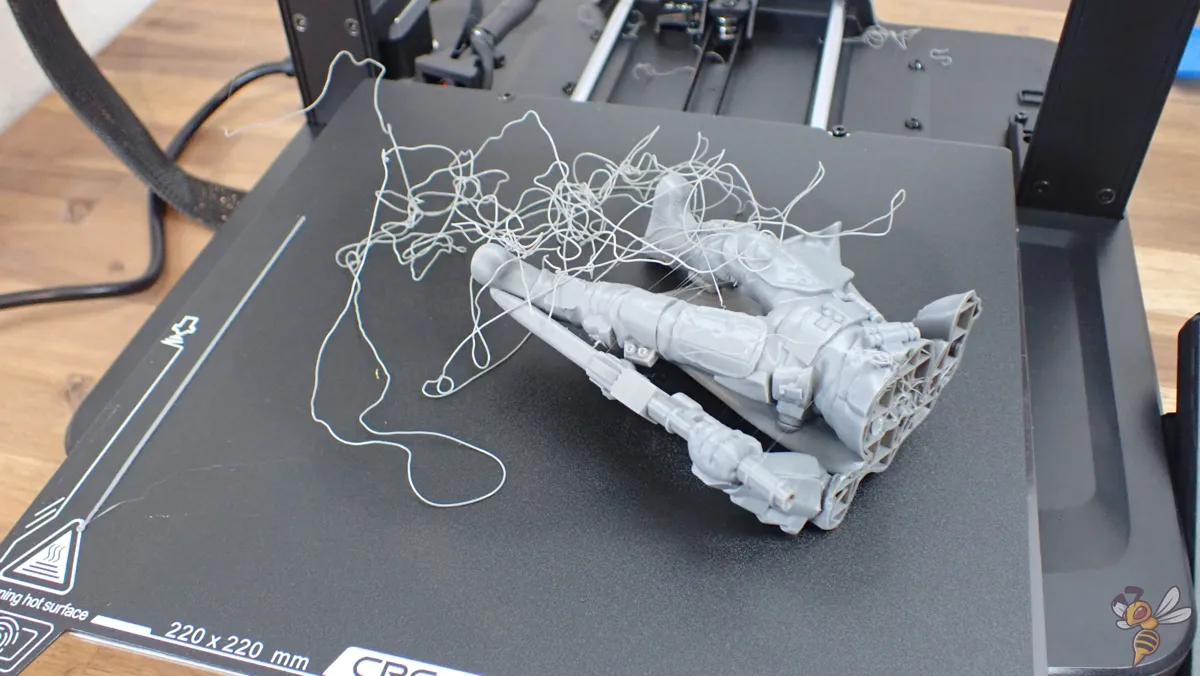
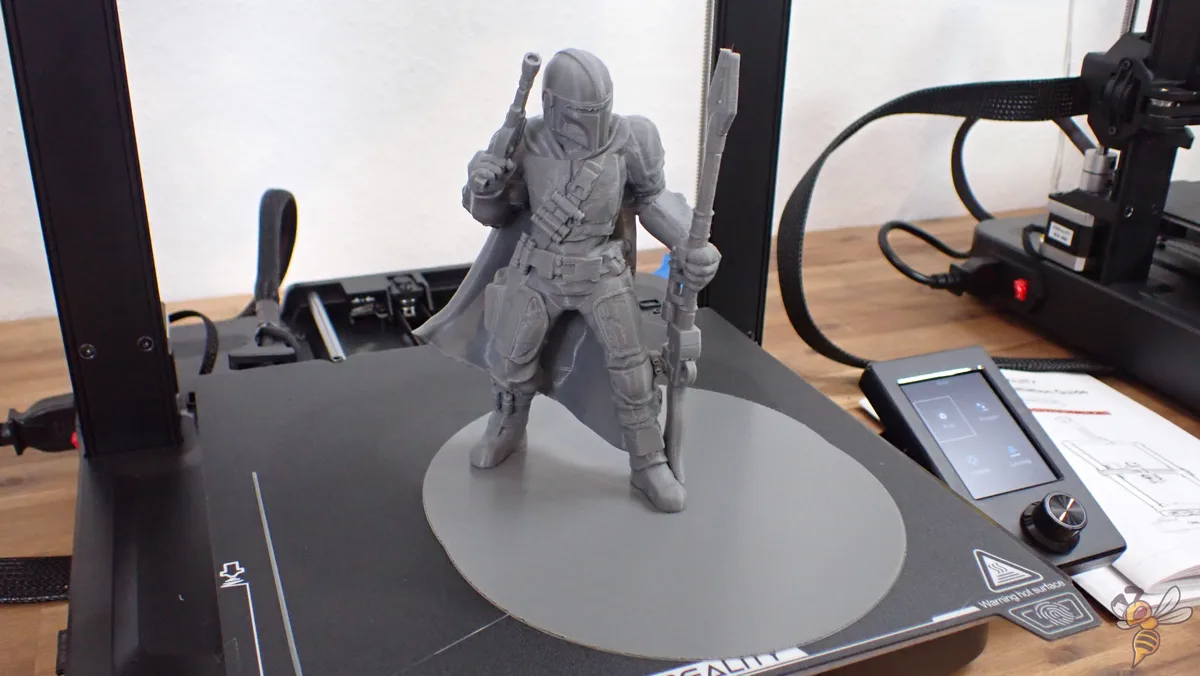
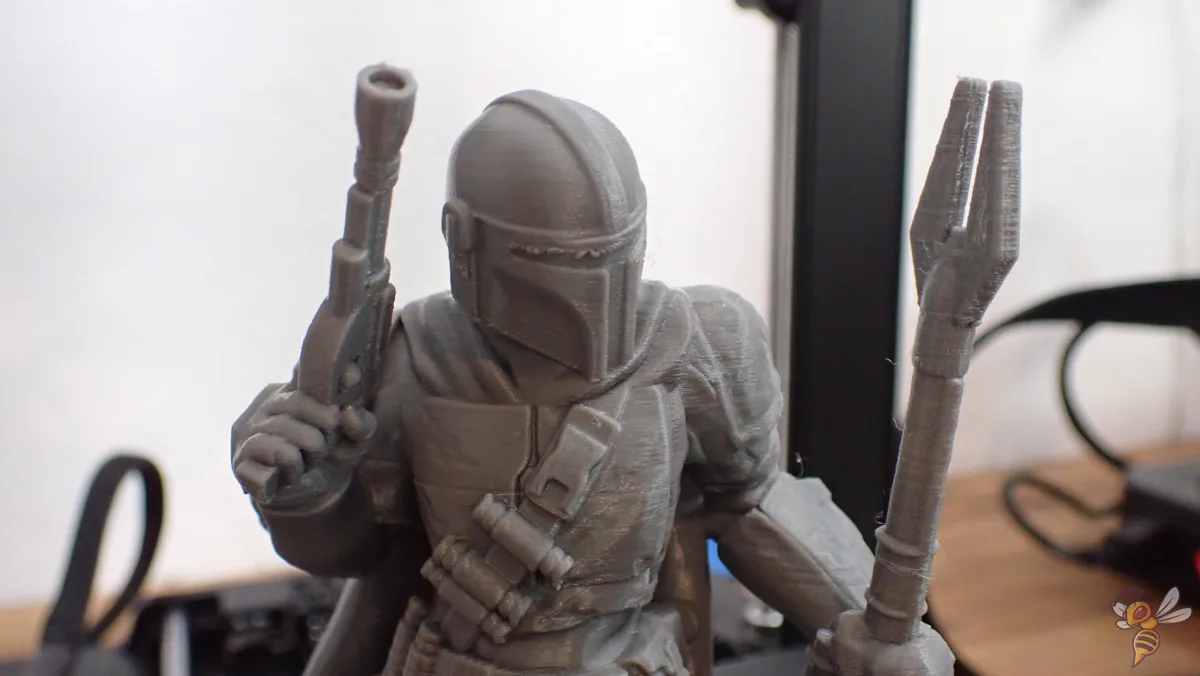

After that, I ventured into a more complex model, a Mandalorian statue, which can be printed without supports. With this object, I had difficulties with bed adhesion. The back leg was not recognized as the first layer for some unexplained reason, causing the brim to be created only at the front foot. The adhesion was not sufficient, so I had to use a large raft.
With the raft, the adhesion was good enough and the result turned out very well. Some overhangs were not perfect, but considering the price range of the printer, the overall quality is very good. To print the overhangs better, I activated the bridge settings in Cura.

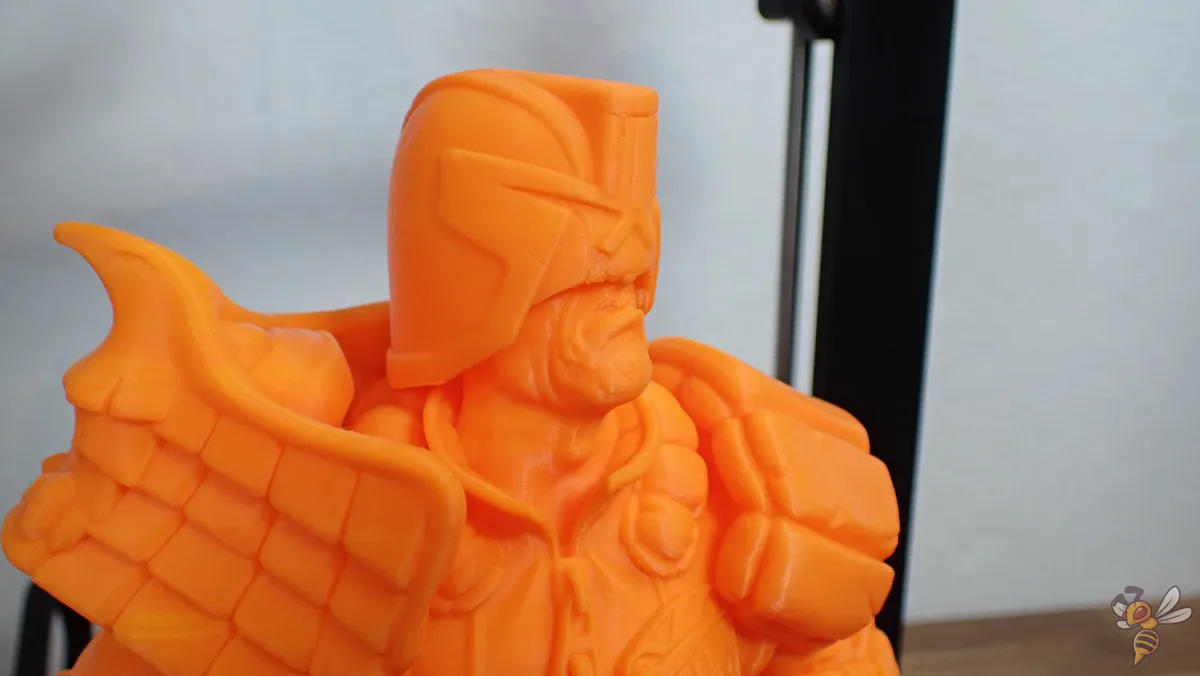

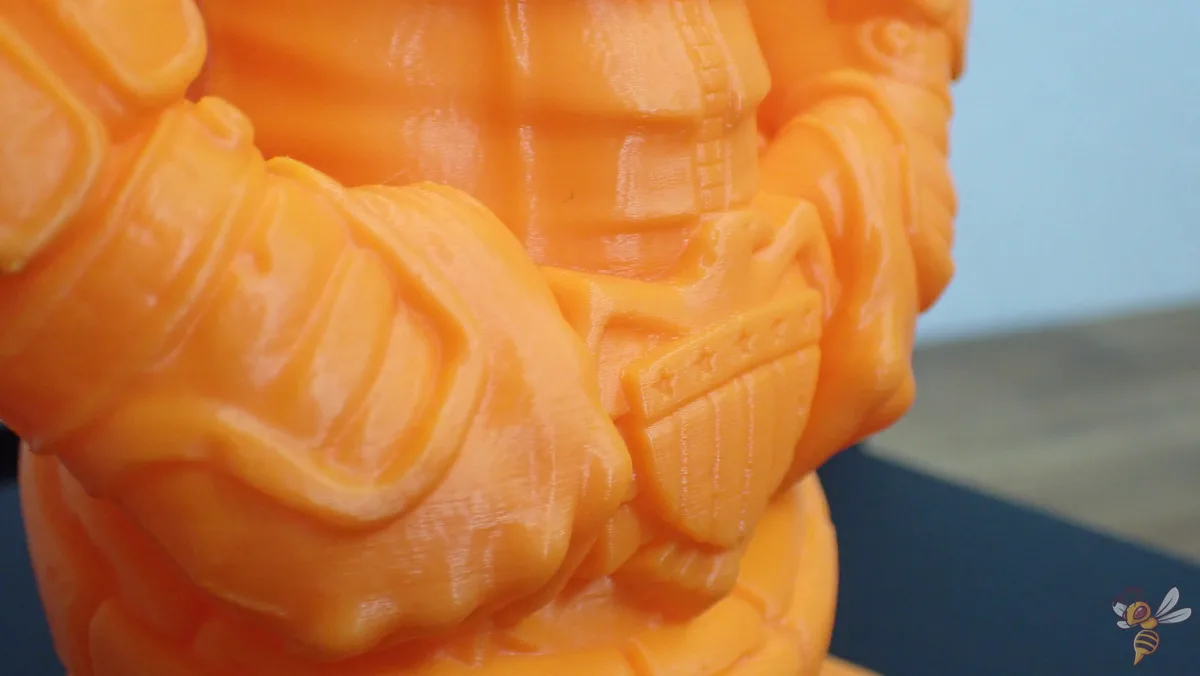
The next test object was a bust of Judge Dredd. After adjusting the print settings, the print quality was satisfyingly perfect. The overhangs were also printed better this time.
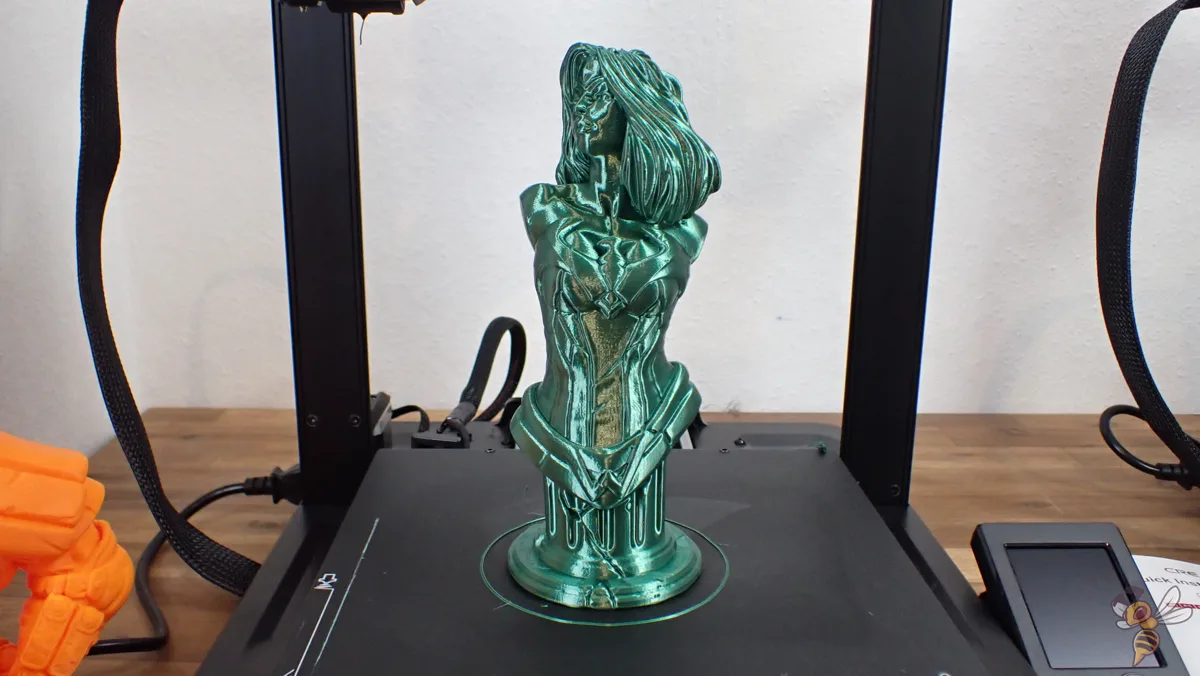


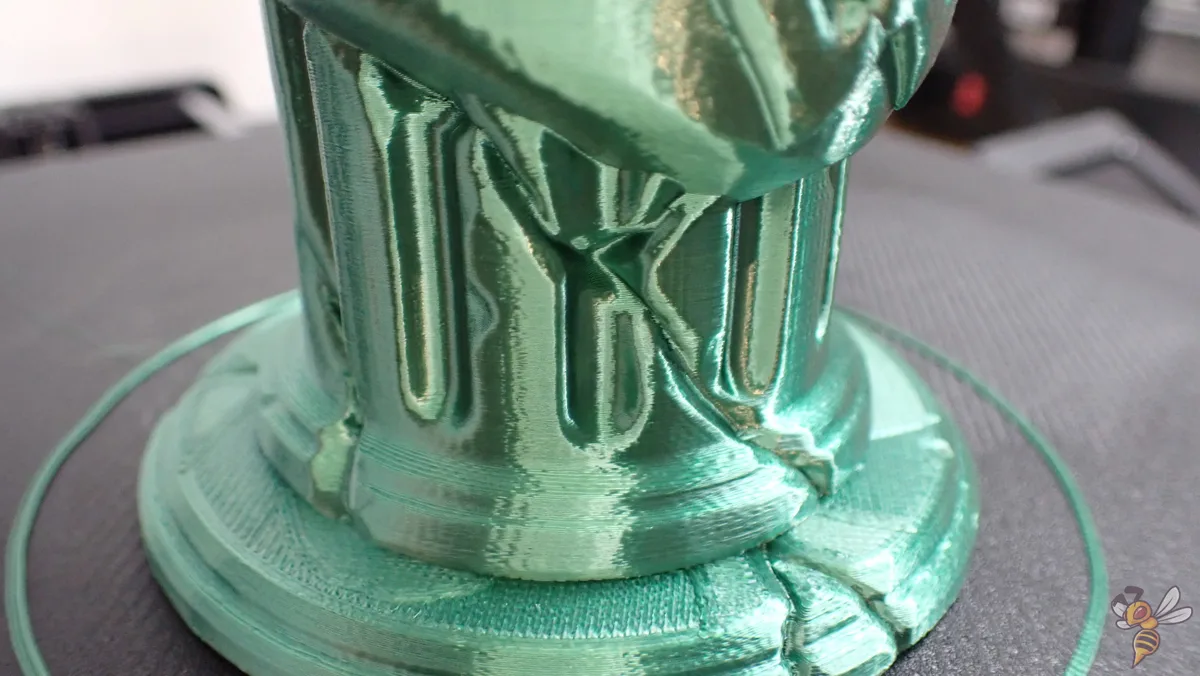
Next, I printed a bust of Wonder Woman. I didn’t change any of the print settings and the result turned out as good as perfect. For a printer in this price range, the quality is really outstanding.

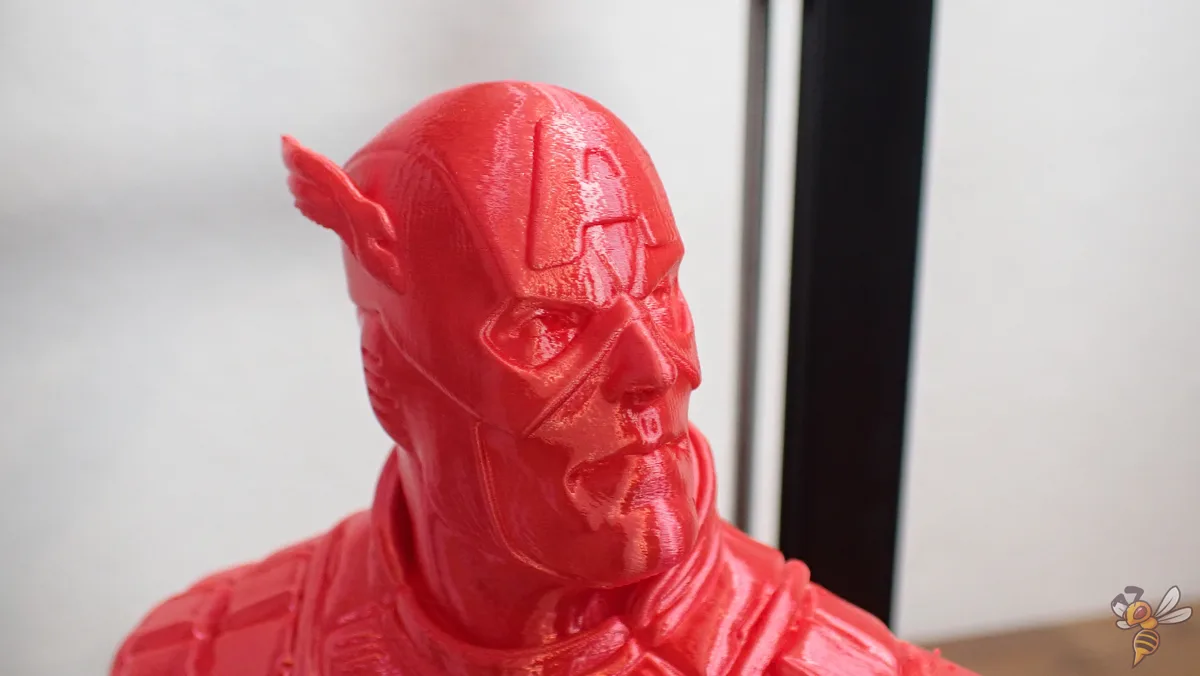

Finally, I printed a bust of Captain America and increased the speed a little more. Until then, I had been printing at a speed of 180 mm/s and wanted to see if the print settings would still yield good results at a higher printing speed. I increased the print speed to 220 mm/s and was able to achieve the same nearly perfect print quality.
My tests of print quality show that while the Ender-3 V3 SE does not deliver perfect results immediately after assembly, with a bit of personal calibration, it certainly does.
Ender-3 V3 SE vs. KE
Here’s a detailed comparison table for the Creality Ender-3 V3 SE and Ender-3 V3 KE 3D printers:
| Feature | Ender-3 V3 SE | Ender-3 V3 KE |
|---|---|---|
| Year Released | 2023 | 2023 |
| Build Volume | 220 × 220 × 250 mm | 220 × 220 × 240 mm |
| Technology | FDM | FDM |
| Physical Size | 349 × 364 × 490 mm | 433 × 366 × 490 mm |
| Bed Material | PC Spring Steel | PEI Spring Steel |
| Extruder Type | Direct Drive | Direct Drive with upgraded all-metal hotend |
| Hot-end Type | Standard | Upgraded, more powerful heater core |
| Auto Leveling | CR-touch | CR-touch |
| Assembly Time | 15 minutes | 15 minutes |
| Linear Rail System | On Y Axis | On X and Y Axis |
| Display Screen | 3.2” Color Knob Screen | 4.3″ Color Touch Screen |
| Filament Detector | No | Yes |
| Dual Z-axis | Yes (1 motorized) | Yes (2 motorized) |
| File Transfer | SD Card, USB-C Cable | USB drive, LAN, Creality Cloud APP |
| Supported Filaments | PLA, PETG, TPU | PLA, PETG, ABS, TPU, ASA |
| Heatbed Temperature | 100℃ | 100℃ |
| Nozzle Temperature | 260℃ | 300℃ |
| Max. Printing Speed | 250 mm/s | 500 mm/s |
| Typical Printing Speed | 180 mm/s | 300 mm/s |
| Max. Acceleration | 2500 mm/s² | 8000 mm/s² |
| Nozzle Diameter | 0.4 mm (default) | 0.4 mm (default) |
| Layer Height | 0.1 – 0.35 mm | 0.1 – 0.35 mm |
| Printing Accuracy | ± 0.1 mm | ± 0.1 mm |
| Filament Diameter | 1.75 mm | 1.75 mm |
| Slicing Software | Creality Print, Cura, Simplify3D | Creality Print, Cura, Simplify3D |
The Ender-3 V3 KE stands out with its upgraded features such as the all-metal hotend and more powerful heater core, touch screen, and advanced firmware.
The KE supports a wider range of filaments and offers higher print speeds and temperatures, making it suitable for more demanding printing tasks.
The Ender-3 V3 SE, while more affordable and offering a similar build volume, lacks some of these advanced features but still provides excellent value for its price point.
If the Quality of Life features such as the touchscreen or the filament sensor are not important to you, and you can plan a little more time for your 3D printing projects, the SE is great! I was able to achieve the same print quality with it as with the KE!
The Creality Ender-3 V3 SE is a budget-friendly, beginner-oriented 3D printer with advanced features like automatic bed leveling and a direct drive extruder.
Build Volume: 220 × 220 × 250 mm
Speed: max. 250 mm/s
Extruder: “Sprite” Direct Drive
Print Bed: PC Spring Steel
Leveling: Automatic
Nozzle Temp.: 260 ℃
Bed Temp.: 100 ℃
Pros:
✓ Beginner friendly
✓ Fully automatic bed leveling
✓ Fast
✓ Good print quality (after calibration)
Cons:
× No filament sensor
× No Touchscreen
× No PEI print bed
Disclosure: This website is the property of Martin Lütkemeyer and is operated by Martin Lütkemeyer. Martin Lütkemeyer is a member of the Amazon Services LLC and other Affiliate Programs. These are affiliate advertising programs designed to enable websites to earn advertising revenue through advertising and linking to Amazon.com and others. Links marked with * are affiliate links.

