- Wet Filament: Prevention, Symptoms & Drying - July 18, 2024
- Sovol SV08 – Best PrusaSlicer Settings & Profile - June 26, 2024
- Sovol SV08 – Best Orca Slicer Settings & Profile - June 26, 2024
Disclosure: Links marked with * are Affiliate Links. I earn from qualifying purchases if you decide to make a purchase through these links – at no additional cost for you!
With the Bluer Plus* (or “BLU-5”), Two Trees brings a large-format 3D printer to the market that offers many useful features.
The Bluer Plus from Two Trees has a print volume of 300 x 300 x 400 mm, automatic print bed leveling and several useful features that make it interesting for beginners. It is mostly pre-assembled and includes everything for first test prints.
You can find out how the Bluer Plus performs in the practical test in this detailed review. In addition to its features, I’ll also cover things like the scope of delivery, assembly, and its print quality.
Table of Contents:
- 1 Key Takeaways
- 2 Who Should Buy the Bluer Plus?
- 3 Advantages & Disadvantages > Bluer Plus Review
- 4 Technical Specifications > Bluer Plus Review
- 5 Scope of Delivery > Bluer Plus Review
- 6 Setup > Bluer Plus Review
- 7 Features > Bluer Plus Review
- 7.1 Automatic Print Bed Leveling Through a 3DTouch
- 7.2 Magnetic PEI Print Bed
- 7.3 Double Z-axis & Stable Gantry
- 7.4 Efficient Cabling due to RJ45 Connectors
- 7.5 4.3” Touch Screen & Intuitive Menu
- 7.6 MKS Robin Nano Motherboard
- 7.7 Filament Sensor
- 7.8 Transparent Dual Drive Extruder
- 7.9 Automatically Adjusting V-Slot Wheels
- 7.10 Quiet TMC2209 Stepper Motor Driver + Loud Fans
- 7.11 Resume Print Function
- 7.12 Easy Setup
- 7.13 Belt Tensioners
- 7.14 Large Print Volume
- 8 Heat Up Times > Bluer Plus Review
- 9 Noise Level > Bluer Plus Review
- 10 Print Speed > Bluer Plus Review
- 11 Operation > Bluer Plus Review
- 12 Slicer > Bluer Plus Review
- 13 Print Quality > Bluer Plus Review
- 14 Is The Bluer Plus Worth It?
Key Takeaways
- 300 x 300 x 400 mm print volume
- 0.1 mm resolution
- Nozzle up to 260 °C
- Print bed up to 100 °C
- Automatic print bed leveling
- Flexible, removable PEI print bed
- Easy operation and assembly
Who Should Buy the Bluer Plus?
The Bluer Plus is suitable for beginners and advanced users. It is easy to use and easy to set up. It is worthwhile for anyone looking for a large format 3D printer with many practical features and automatic print bed leveling.
Advantages & Disadvantages
> Bluer Plus Review
PRO:
- Automatic print bed leveling
- Magnetic PEI print bed
- Filament sensor
- Resume Print Function
- Stable construction
- Easy operation
- Large print volume
CON:
- Print bed heats up slowly (approx. 5.5 minutes to 60 °C)
- Loud fans
Technical Specifications
> Bluer Plus Review
DEVICE
- Technology: FDM
- Size: 405 x 505 x 646 mm
- Weight: 12,5 kg
- Operation: 4.3” LCD touch screen
- Print volume: 300 x 300 x 400 mm
- Layer thickness: 0.1 – 0.4 mm
- Accuracy: 0.1 mm
- Printing speed: max. 200 mm/s
- Extruder: Bowden extruder
- Nozzle quantity: 1
- Max. nozzle temperature: 260 °C
- Max. print bed temperature: 100 °C
- Filament diameter: 1.75 mm
- Filaments: PLA, ABS, TPU, PETG, etc.
- Print bed leveling: automatic
- Filament sensor: yes
SOFTWARE
- Slicer: Cura (recommended), Repetier-Host, IdeaMaker
- Operating system: Windows, MacOS
- Connectivity: MicroSD card, USB
Scope of Delivery
> Bluer Plus Review
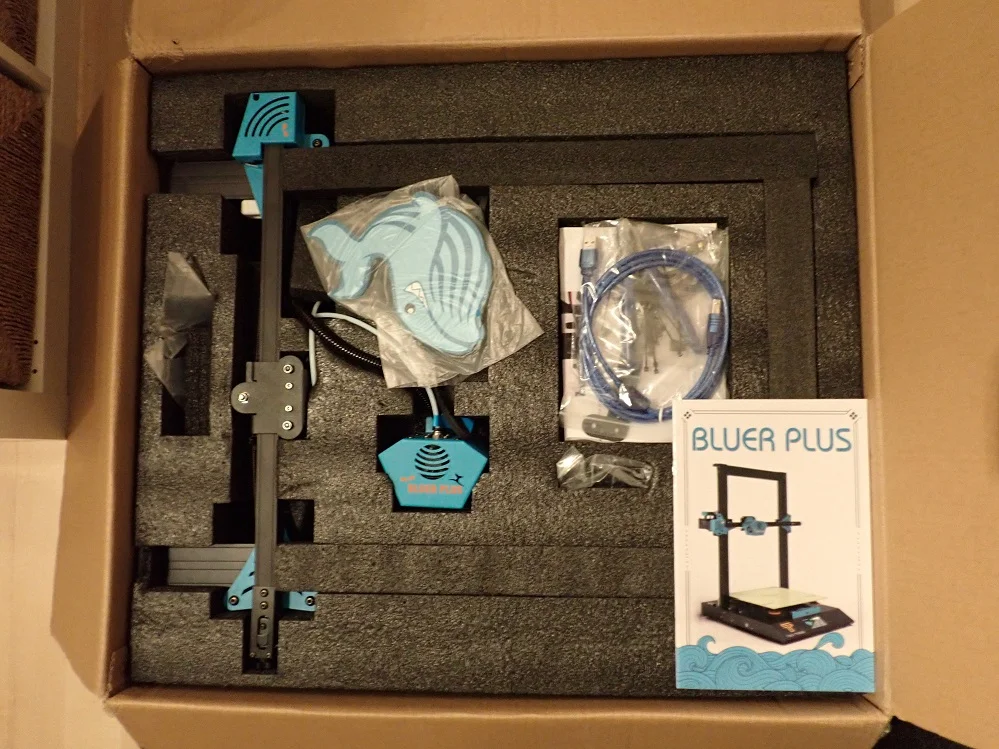
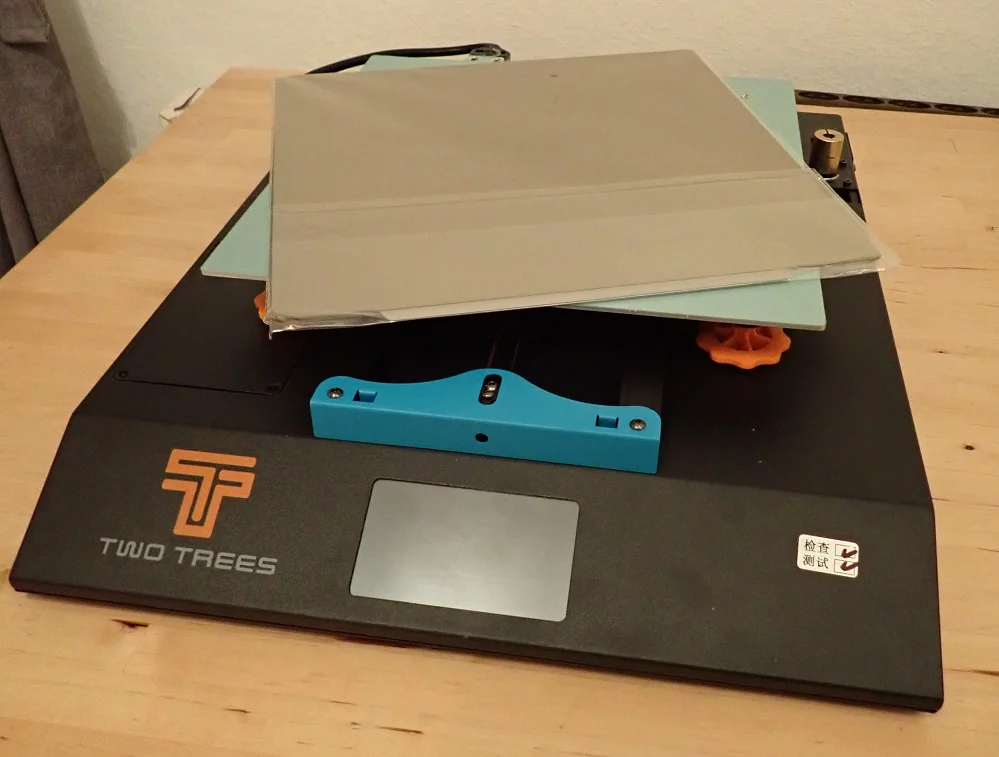
Since the Bluer Plus is a large printer and is mostly pre-assembled, it also comes in a relatively large package. However, the package is packed very efficiently and thus still small enough that you can carry it alone.
All parts inside the package are protected with foam and transport damage should not occur during normal handling.
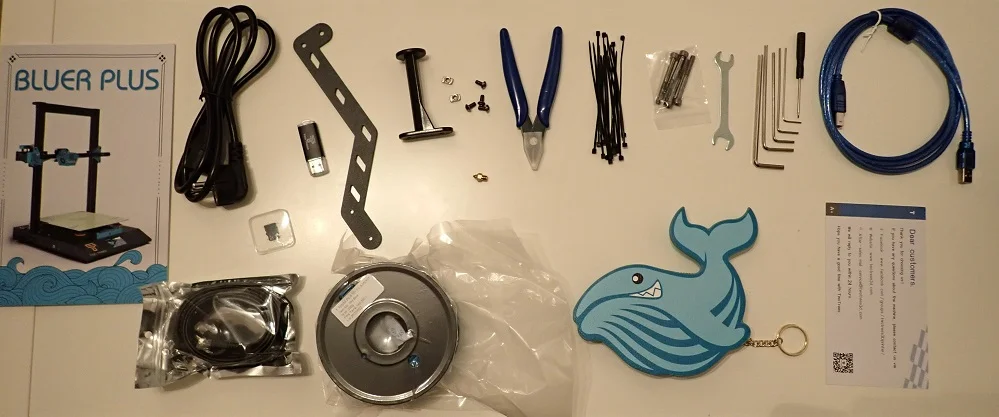
Everything you need for assembly and your first test print is included. As usual from most other manufacturers, some PLA filament (200 g) is included. This is enough for your first test prints, but you should get more filament when you buy the printer, so you don’t run out right away (I tested the printer mainly with the PLA filament from Eryone and can highly recommend it).
Included with the Bluer Plus is the following:
- Pre-assembled frame with double Z-axis, X-axis extruder and loose print head
- Pre-assembled printer base with the print bed
- 200 g of PLA filament
- Filament holder
- Power and connection cable
- Required tools
- MicroSD card with USB adapter
- Whale bag
Setup
> Bluer Plus Review
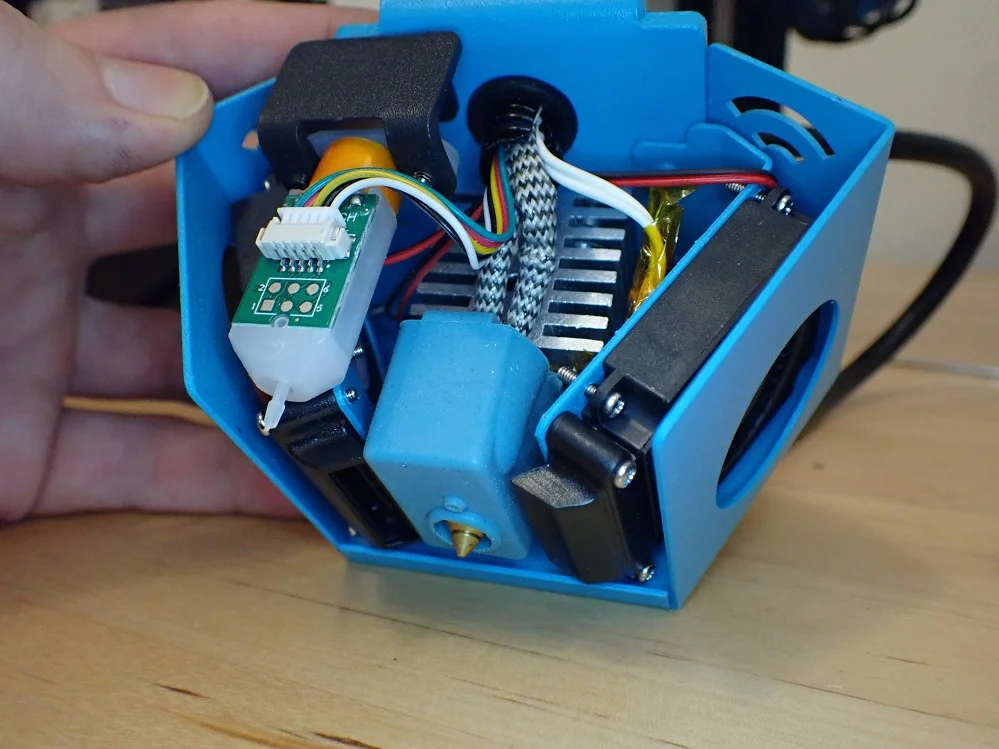
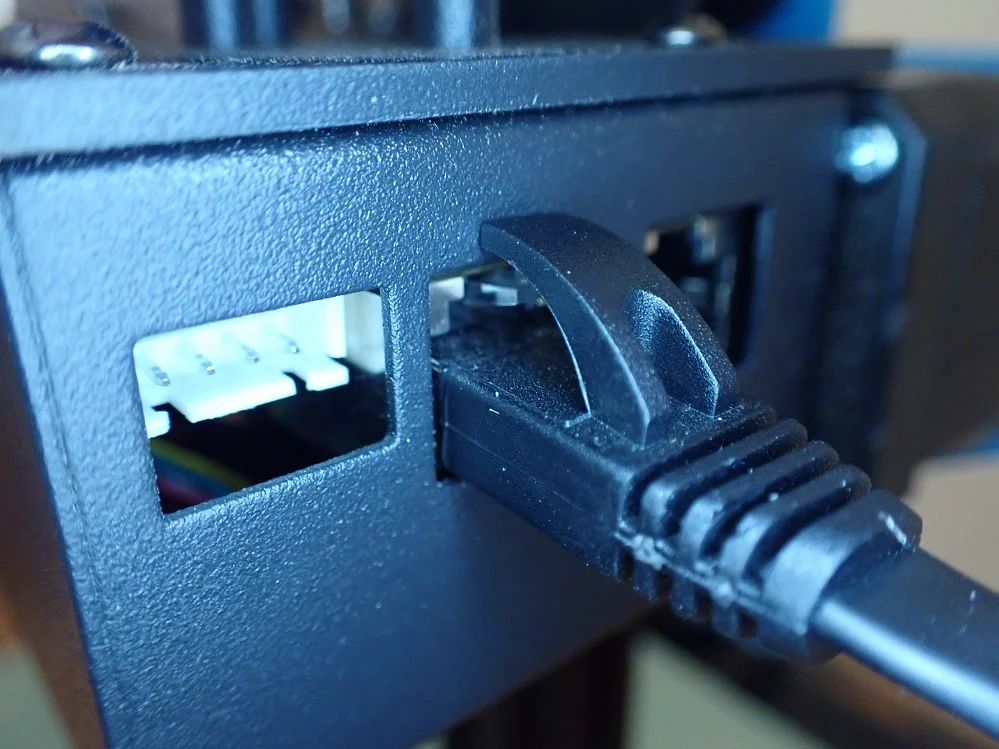
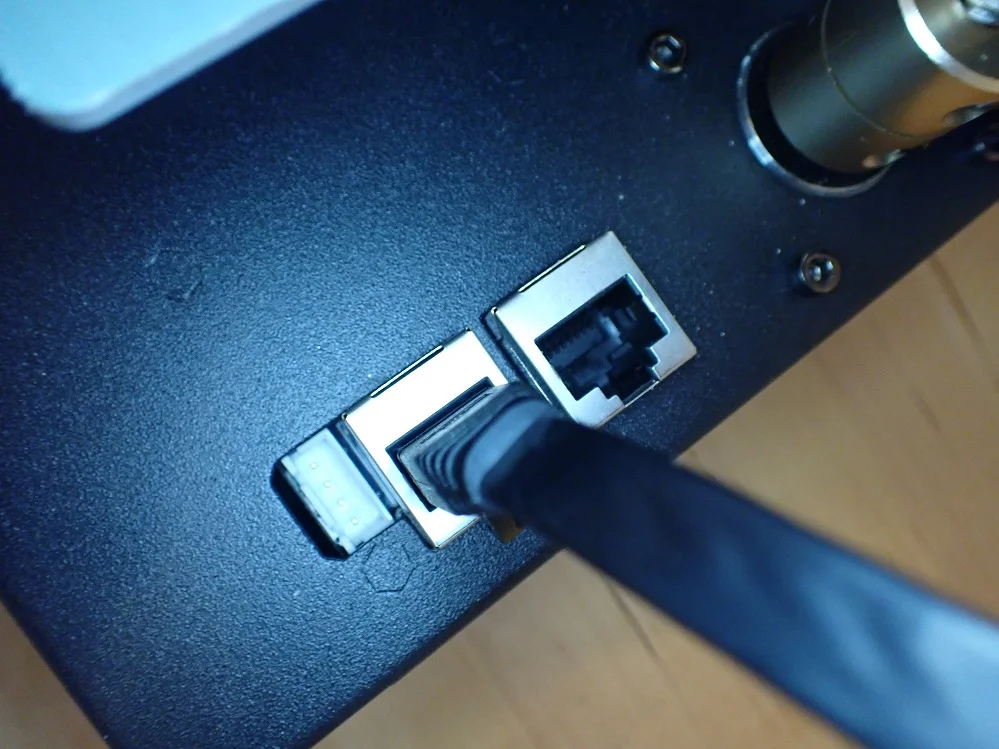
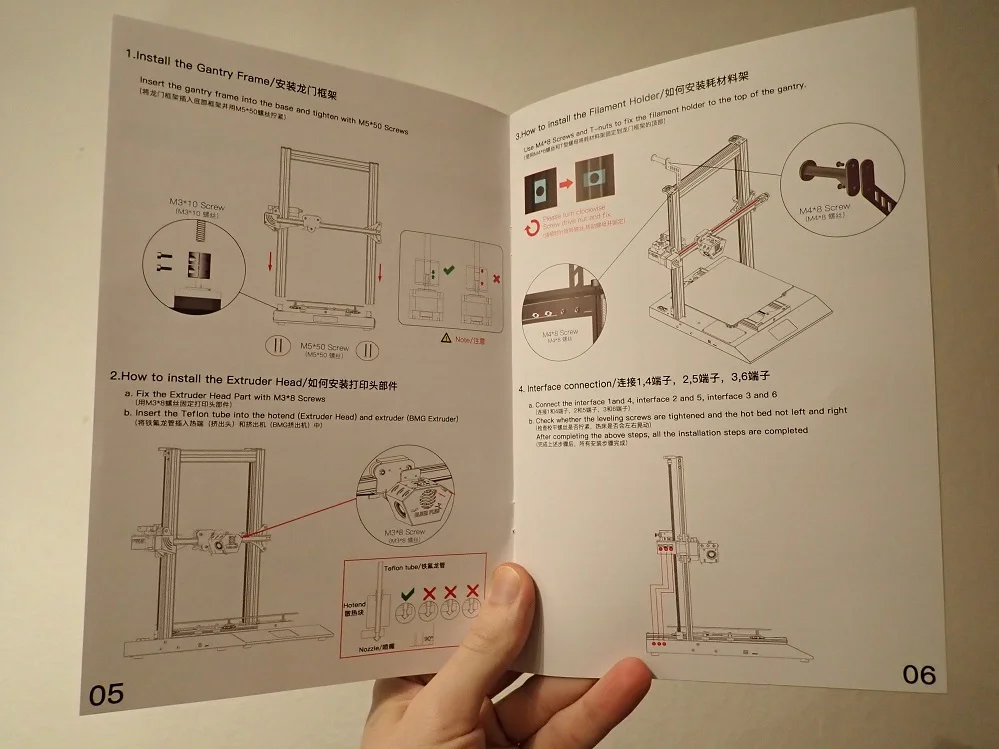
Since the Bluer Plus is mostly pre-assembled, the assembly is in principle very simple and done in 5 steps:
- Connect the Z-axis to the base: Here, the frame is fixed to the base with four screws and the two rotary screws of the Z-axis are coupled to the stepper motors.
- Mount the printhead on the X-axis: Although the extruder is already connected to the extruder with its cables and PTFE hose, it still needs to be mounted to the X-axis. For this, you only need two screws.
- Mount the filament holder: The filament holder is mounted directly on the frame and aligned so that the filament can be fed directly into the filament sensor and extruder.
- Connecting the cables: The individual components are connected with network cables on the Bluer Plus. This simplifies assembly and results in a more elegant design than the colorful cables made of individual wires familiar from other 3D printers.
- Gluing the print bed to the printing plate: The PEI magnetic print bed consists of the PEI surface itself, the magnetic substrate and the printing plate. You have to glue the magnetic surface to the printing plate.
My printer had a lot of screws loose on the pre-assembled parts of the 3D printer. I’m pretty sure this shouldn’t normally be caused by shipping, as the parts are very well packaged. On the other hand, I could tell from the filament still in the nozzle that some sort of quality assurance was done. Due to the loose screws on the X-axis and the print bed, it would not have been possible to print at all.
The only explanation I have for this is that the screws were not tightened strongly enough and then actually came loose during transport. Since this is all a bit strange and especially very unlikely, this should be an isolated case.
Print Bed Leveling
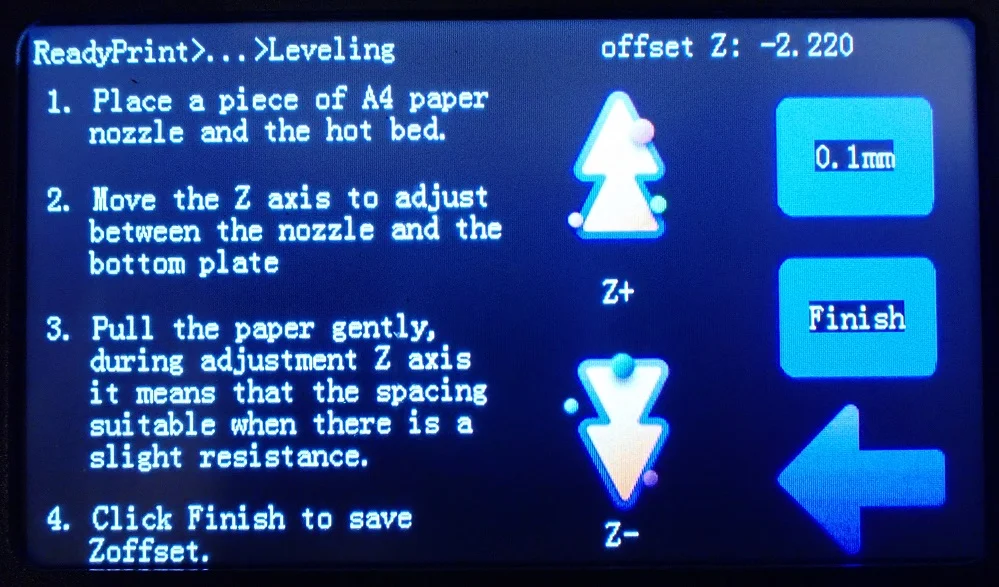
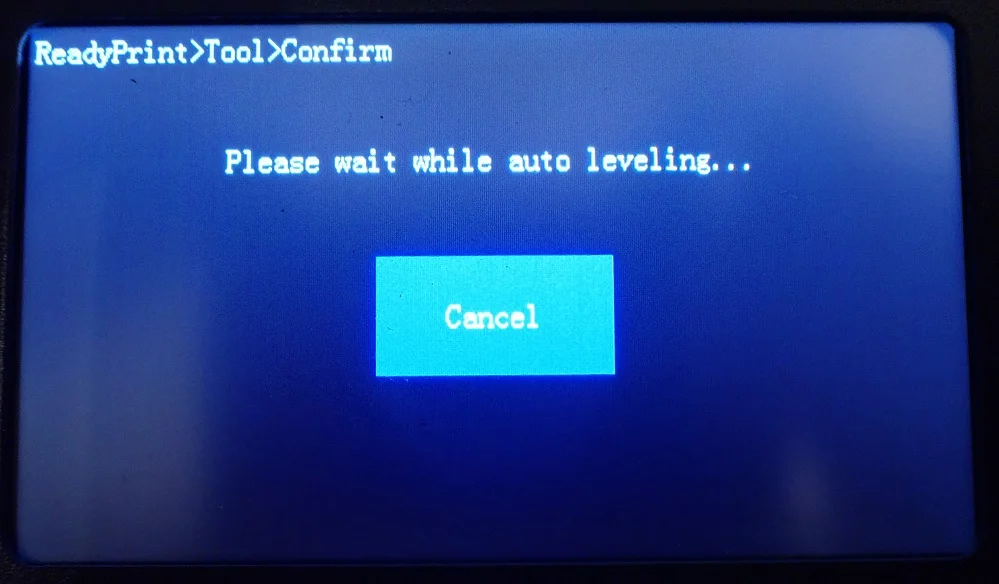
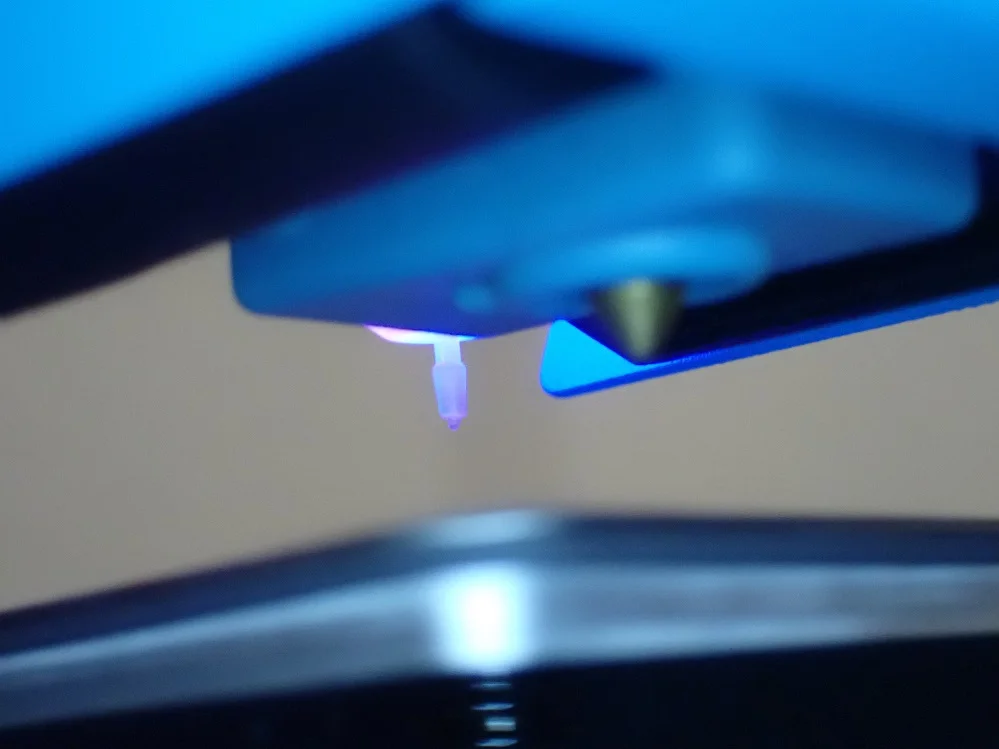
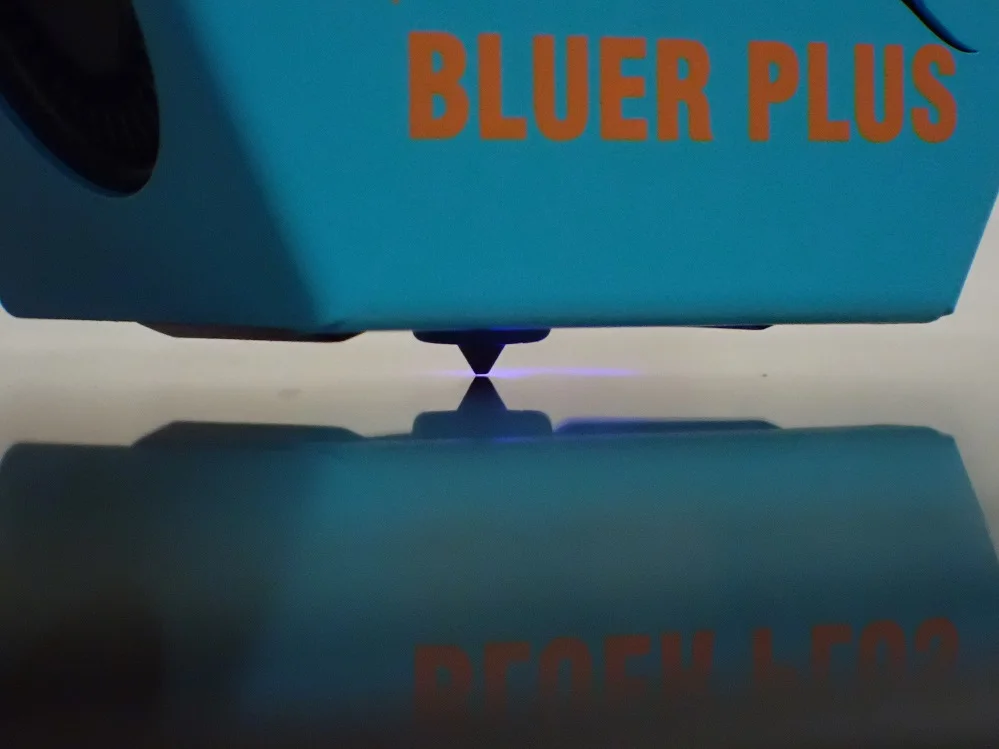
The Bluer Plus has a 3DTouch that allows it to automatically level its print bed. Before using this feature, I manually leveled the print bed once.
I would recommend this for every 3D printer with automatic print bed leveling. After delivery, the print bed is usually either completely misaligned or so crooked that the leveling sensors could have difficulties.
You can read how to level a 3D printer manually in this article: 3D Printer Print Bed Leveling | Manual & Automatic
After doing the manual print bed leveling, I used the menu to start the automatic leveling, which worked fine.
Features
> Bluer Plus Review
The Bluer Plus* is packed with useful features that make your life easier. Not only does it include automatic print bed leveling and a filament sensor, but it also includes other useful features that also improve the print result.
Automatic Print Bed Leveling Through a 3DTouch
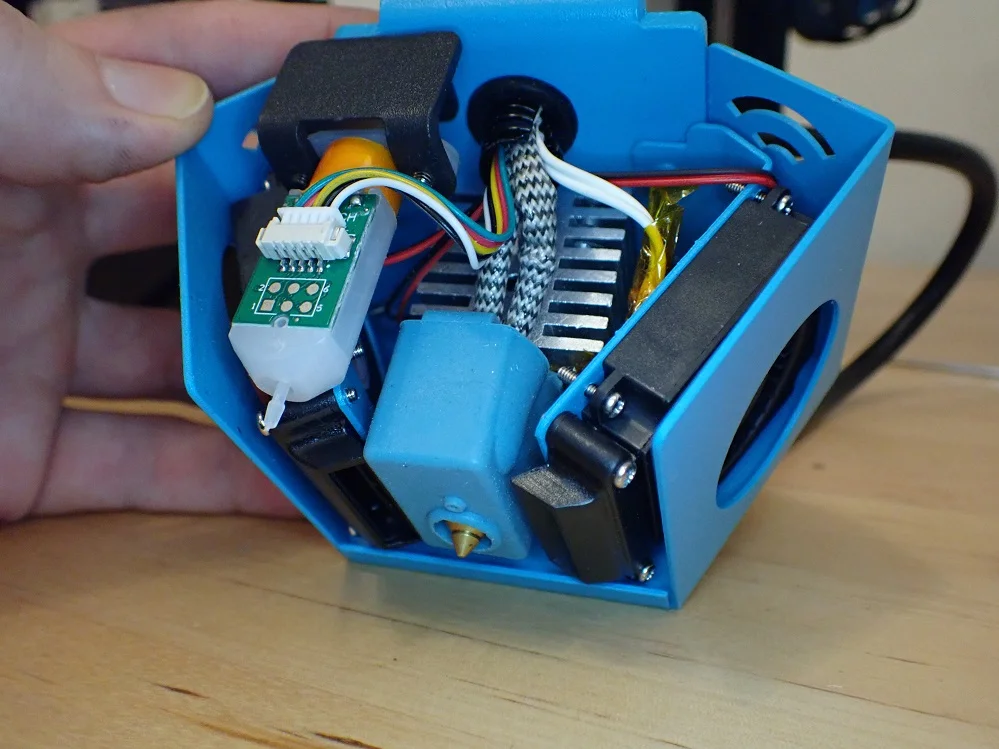

The built-in 3DTouch is already pre-assembled and is automatically connected to the mainboard via the internal cabling.
You can start the automatic print bed leveling via the menu. The printer then moves to several points on the print bed to measure the distance between the nozzle and the print bed.
The resulting inclination of the print bed is compensated for during printing. Since the print bed is very large, many points have been added to the print bed to improve accuracy. Nevertheless, this automatic print bed leveling does not take very long and should be repeated after a few prints to increase the accuracy.
If you ever need to level the print bed manually, this is made easier by the large turning screws under the print bed.
Magnetic PEI Print Bed

The magnetic PEI print bed is really very large at 300 x 300 mm and allows printing of large objects.
The print bed can be removed from the magnetic printing plate, which makes it very easy to remove the finished print object – a very convenient feature, especially for beginners!
Since the removable print bed is flexible, you can simply bend the print bed, which causes the print object to release as if by itself. This feature is fortunately becoming more and more common and is extremely practical in my opinion.
Print bed adhesion is also excellent and only rarely needs to be supported with an adhesive such as Magigoo, and only for very delicate first layers.
The only downside to the print bed is that you have to glue the magnetic surface to the printing plate yourself. However, this is as easy as sticking a sticker on to something and should not cause any difficulties.
Double Z-axis & Stable Gantry


An unstable frame and vibrations are the arch enemies of large 3D printers. With the first large 3D printers, you had to help yourself and stabilize the frame with self-printed parts. Fortunately, manufacturers now know how to make even large frames stable without the price skyrocketing.
The Bluer Plus has two Z-axes where the rotary screws at the upper end are each secured with a ball bearing and connected with a toothed belt. This greatly increases the stability of the Z-axis, prevents vibration and ensures that the two axes move smoothly.
Due to this design, the print quality is consistent over the entire height.
Efficient Cabling due to RJ45 Connectors
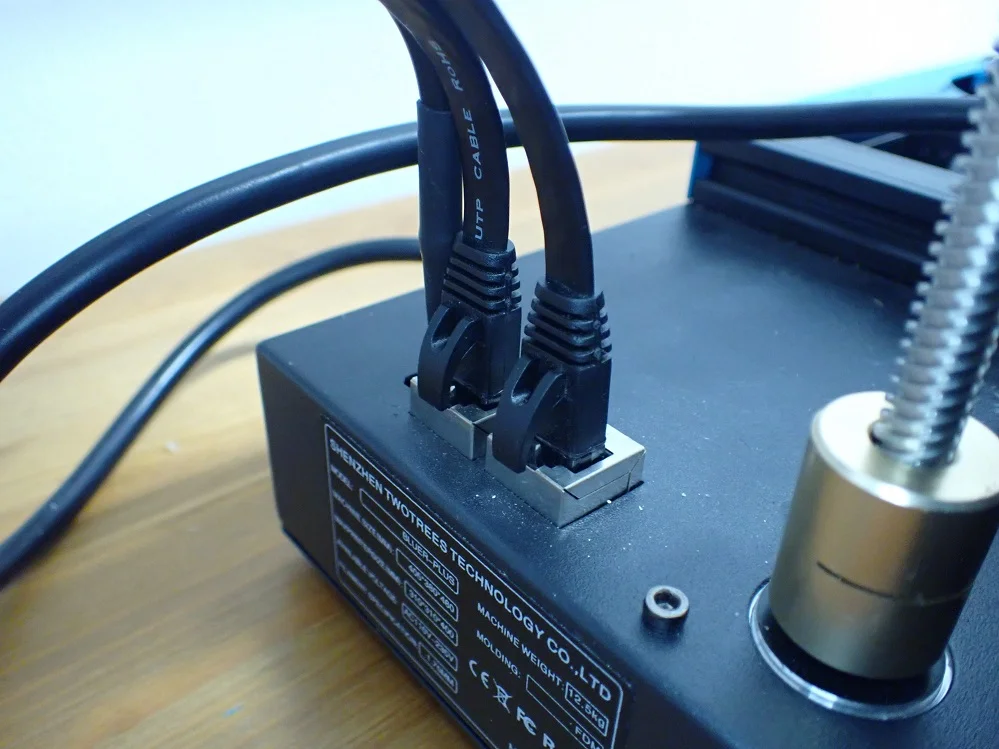
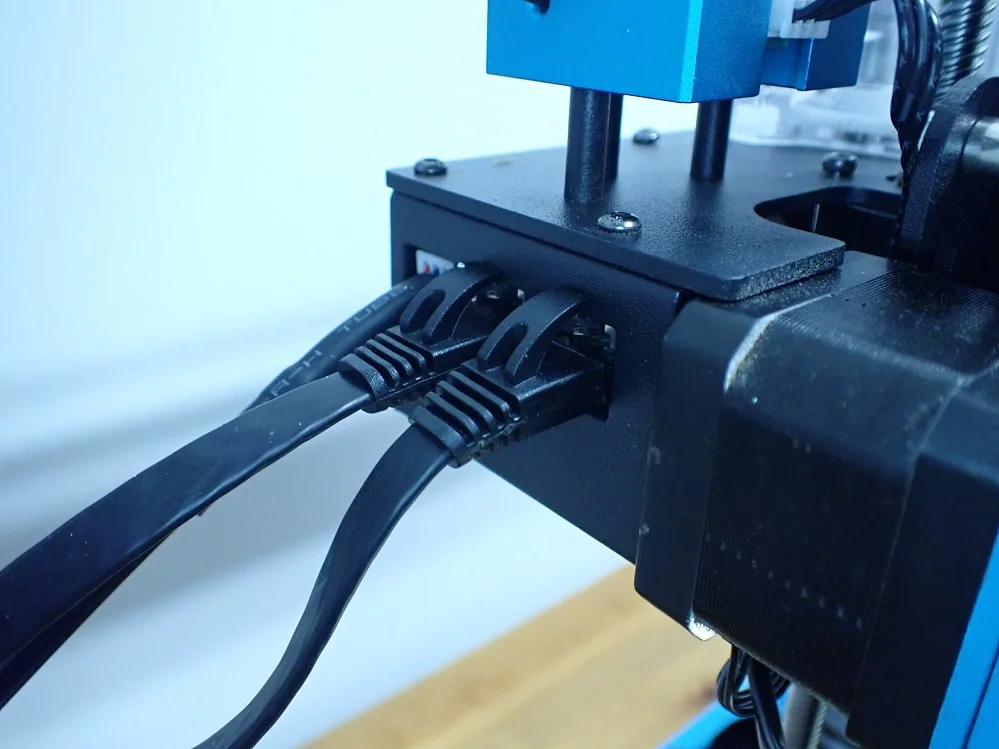
With many low-budget 3D printers, the cabling often seems very improvised and has to be attached in an elaborate way so that it doesn’t get tangled up with moving parts. Two Trees has taken a slightly different approach with the Bluer Plus, which I very much approve of.
The connection between the base and the X-axis with the print head and the stepper motors is made via RJ45 connections. This means that you only have to plug in very few connectors yourself and the design remains minimalistic and tidy. You can tie the three cables together with the included cable ties.
The many smaller connections, e.g. to the filament sensor and the individual stepper motors are already pre-assembled and plugged in.
Before you start the printer, however, you should check that the cables do not come into contact with moving parts. In my case, a cable from a stepper motor prevented the X-axis from moving in the Z-direction.
4.3” Touch Screen & Intuitive Menu
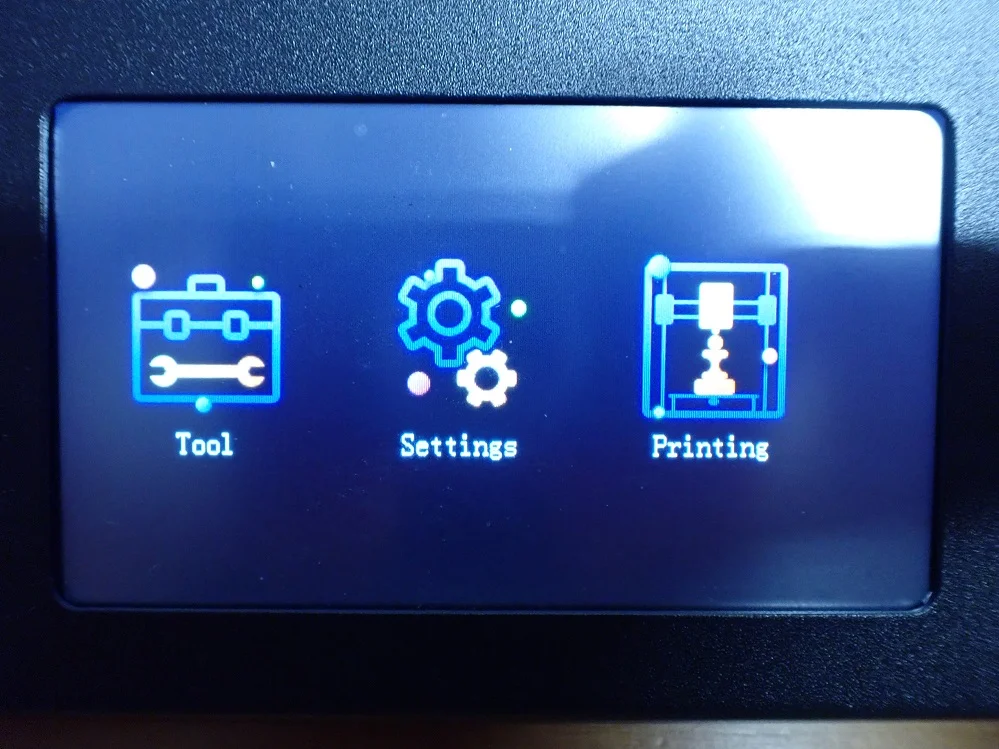

The 4.3” color touchscreen guides you quickly through an intuitive menu to all important functions and settings of the 3D printer. During printing, the touchscreen automatically turns off and reactivates when you touch it to save some power.
MKS Robin Nano Motherboard
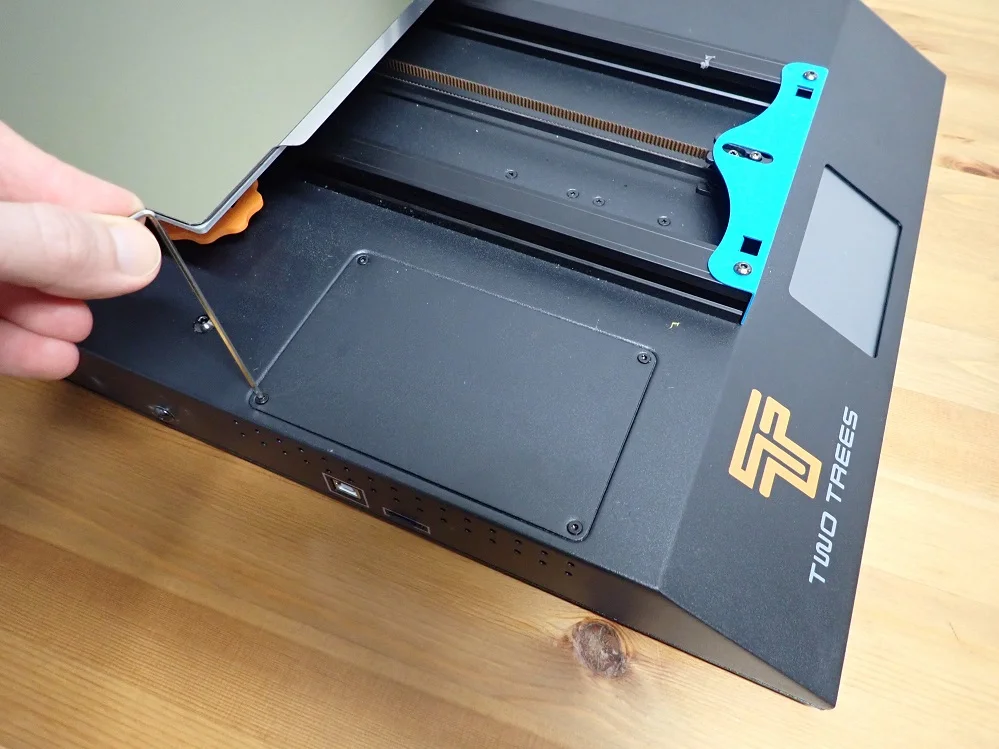
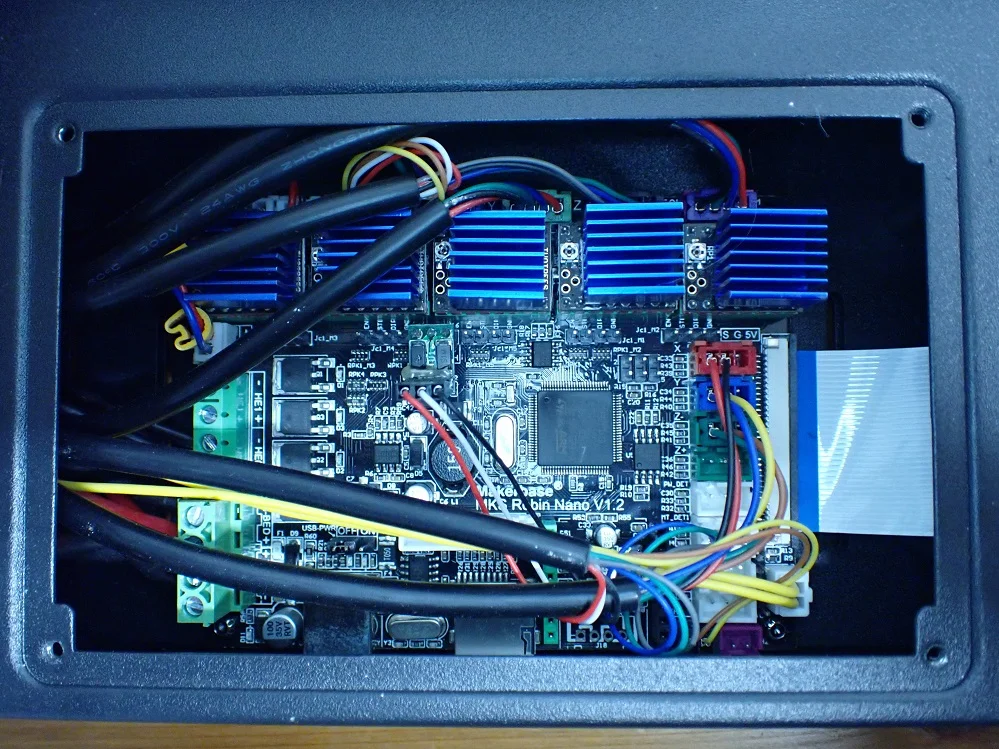
The MKS Robin Nano V1.2 motherboard is hidden inside the Bluer Plus. All cables come together here and there is still room for one or the other upgrade. For example, you could use the WiFi module* to operate the 3D printer via the WLAN.
The mainboard is very easy to reach, as it is mounted directly under a removable plate. If you ever need to access the mainboard, you don’t have to turn the entire 3D printer upside down and disassemble it halfway like with other devices.
The cooling of the motherboard looks a bit ridiculous in the large case but is quite sufficient to keep it cool. During all my test prints, which sometimes lasted more than 15 hours at a time, the motherboard did not overheat and the stepper motor drivers did not malfunction due to too high a temperature.
Filament Sensor

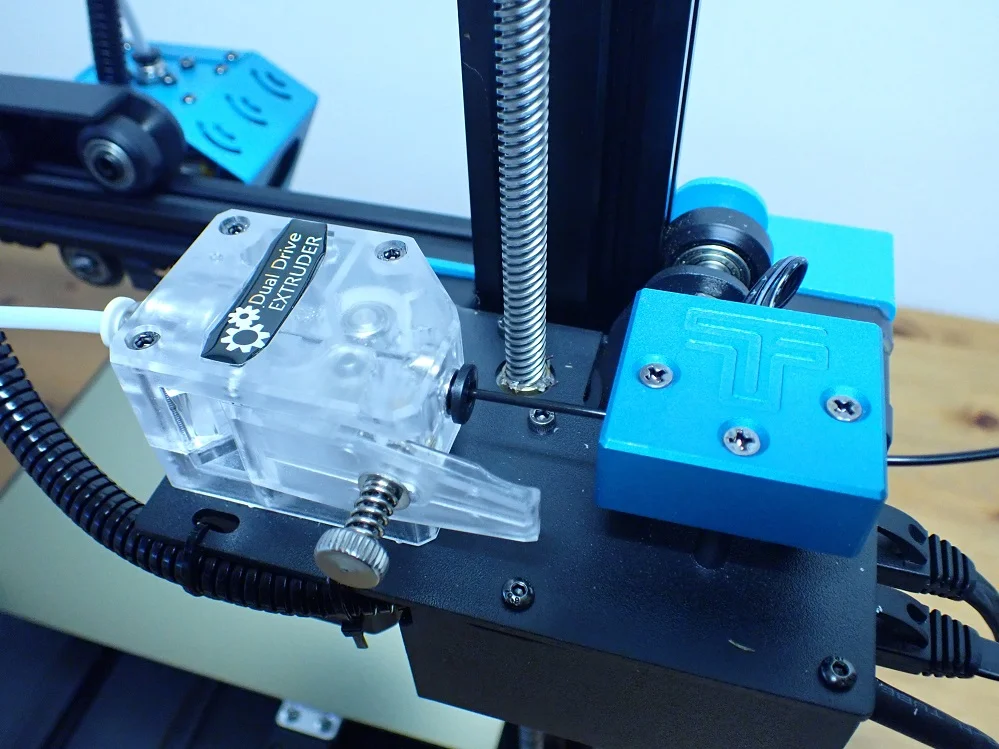
The filament sensor is located directly in front of the extruder. It is the same blue as the other design elements. The filament sensor lets the printer know when the filament is running low.
Instead of continuing to feed filament that may be fixed to the spool, or continuing to print without filament, it stops printing so you can reload.
What I find very pleasant about this filament sensor is that the filament almost never gets stuck inside. With some other filament sensors, it’s more common that the filament gets stuck on some inner part and you have to straighten it out almost perfectly before you can push it through. Other than that, the filament sensor works just like all the others and I haven’t had any problems with it.
Transparent Dual Drive Extruder
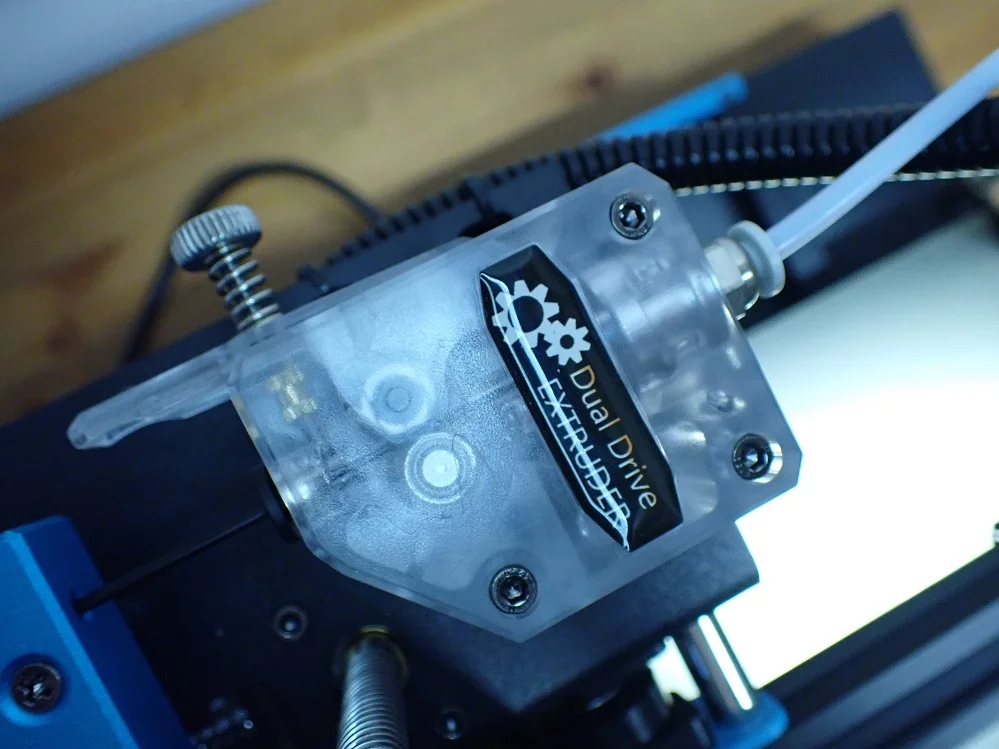
The installed Dual Drive Extruder (Bowden) has two gears to drive the filament. This gives it a little more control over the filament than a single drive extruder.
Through the transparent housing, you have a view of the inside and through the screw on the lever, you can adjust the clamping force.
Just as with the filament sensor, I find it very nice that the extruder is hardly susceptible to crooked filaments. Even very sharply cut and bent filament does not jam inside and can be pushed through the extruder without any effort. Little things like that add up and make using the 3D printer much more enjoyable.
The extruder is connected to the print head via a PTFE Bowden tube, which in my case was much too long. I cut it to the right size and made sure that the end is as straight as possible so that there is no gap. The PTFE material limits the maximum temperature of the nozzle, but it is still sufficient to print all standard filaments properly.
Automatically Adjusting V-Slot Wheels

In order for the axes to run properly, all wheels must be firmly seated in the slots of the frame. The wheels of the Z-axis are equipped with a spring that presses them against the Z-axis with constant pressure. This way you don’t have to tighten the wheels because they can never be loose.
I find this feature extremely interesting and hope that it will spread to other manufacturers. It prevents a common reason for vibrations.
Unfortunately, this feature is only limited to the Z-axis, the wheels on the printhead and print bed are not supported by such springs. In my case, this feature would have been particularly worthwhile, as I had to manually tension almost all of the wheels on the printhead and print bed, as they had apparently come loose during transport.
Quiet TMC2209 Stepper Motor Driver + Loud Fans
TMC2209 stepper motor drivers are installed on the mainboard. These drivers are very quiet and therefore widely used as a popular upgrade to make a 3D printer quieter.
If Two Trees had also installed better fans, the Bluer Plus would have been really quiet. Unfortunately, the fans are of poor quality and therefore quite loud and short-lived.
If you are going to use the Bluer Plus for a long time, you will definitely have to replace one or the other fan in the long run. When that time comes, you should switch directly to quieter fans. If the printer has already convinced you after the first few hours of use, you could also upgrade directly to better fans. That’s exactly what I’m going to do!
Resume Print Function
The resume print function has become a widespread standard and even low-budget 3D printers have this feature. However, it has not become any less practical, as you can save a lot of time and money if an unplanned power failure should actually occur.
With the Resume Print feature, the 3D printer remembers the progress of the print and continues printing at the same point as soon as power is restored.
I tested the function on the Bluer Plus and unplugged the power connector during operation. After plugging it in and resuming printing, only a small blob of excess filament was visible at the point of interruption. Since this was inside the object, it was completely irrelevant to the subsequent quality of the object.
Easy Setup
Due to the fact that the Bluer Plus is mostly pre-assembled, the assembly is very easy and done in a few steps. The main components of the printer are pre-assembled, so even beginners can complete the assembly in a few minutes. There is very little room for error and even the wiring is done in less than a minute.
Belt Tensioners
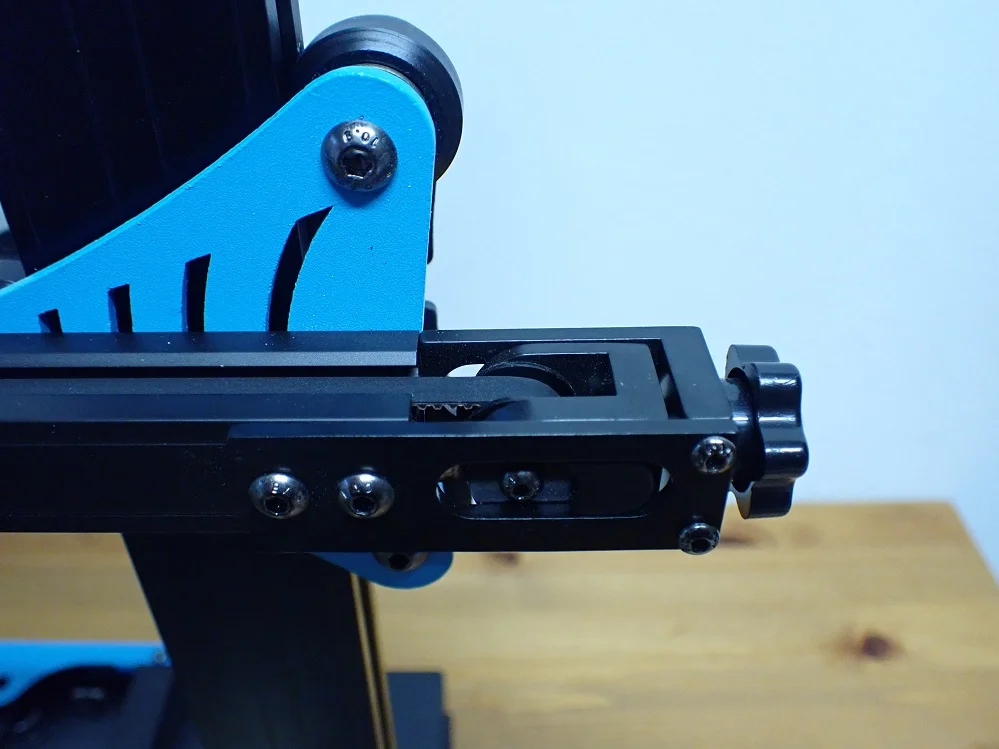
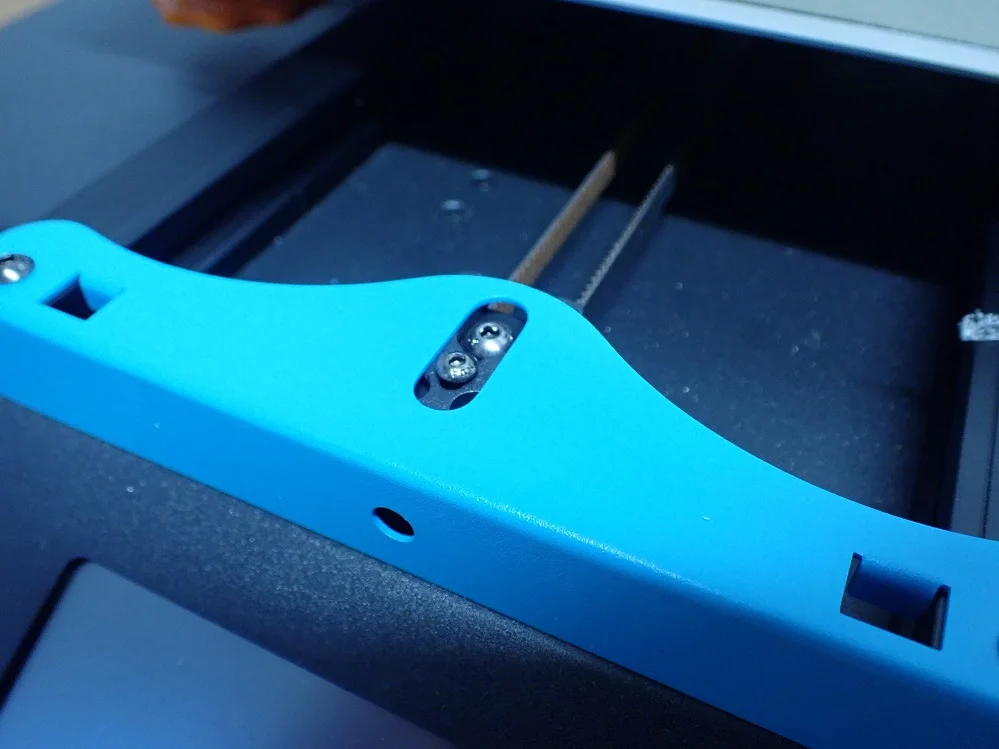
The toothed belts of the X and Y axis can be easily tensioned without having to disassemble parts of the 3D printer. A rotary wheel is attached to the X-axis with which you can tension the toothed belt and the toothed belt of the Y-axis can be tensioned via a screw.
Such features are especially good for beginners, since tensioning the belts is very important for vibration-free and accurate movement of the printhead and print bed. The belt should be tight enough to make a high-pitched sound when flicked with a finger, but not so tight that it could rip. On my printer, the timing belts were already perfectly taut.
Large Print Volume
One of the most obvious features of the Bluer Plus is its enormous print volume. At 300 x 300 x 400 mm, the print volume is very large and allows you to print even large objects in one piece.
The Bluer Plus has a print volume of 36 liters, which is almost exactly 3 times larger than that of the popular Ender 3 V2 (12.1 liters at 220 x 220 x 250 mm).
But even if you don’t need the large print volume so often for large objects, the large print area of 300 x 300 mm is practical if you want to print many small objects at the same time.
Heat Up Times
> Bluer Plus Review
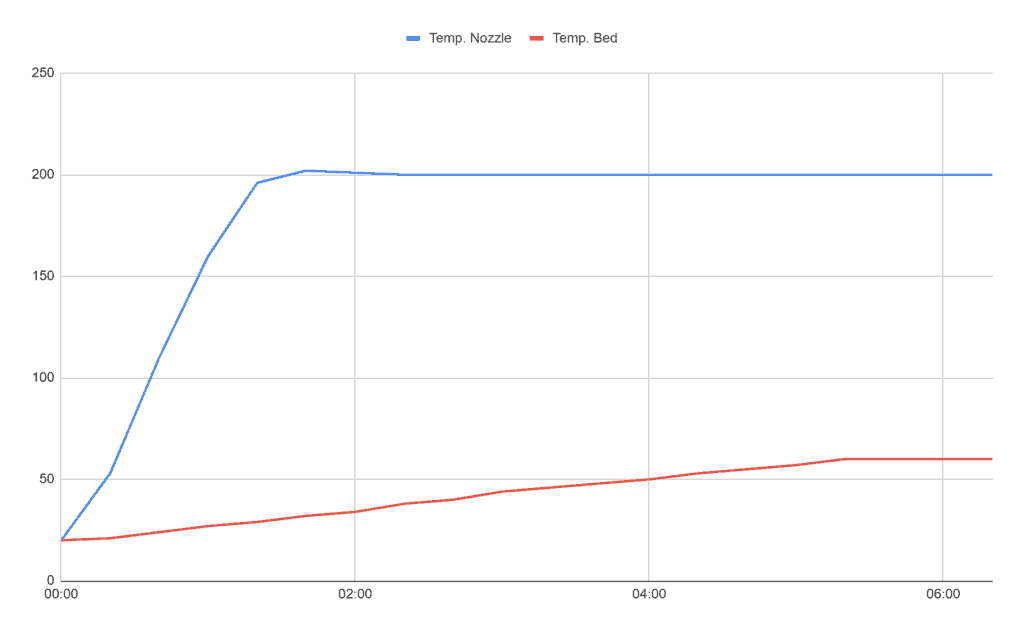
The Bluer Plus needs about 2 minutes to heat up the nozzle to 200 °C. This is quite normal and comparable to other 3D printers.
However, the very large print bed needs about 5.5 minutes to reach 60 °C. This is very long and will be attributable to the sheer size. The temperature sensor for the print bed is not located on top of the print bed, but underneath it. To make sure that your selected temperature has really reached the PEI surface, you should wait one or two minutes longer.
Like most other 3D printers, the Bluer Plus starts printing as soon as the selected temperature is reached. Sometimes this results in poor print bed adhesion because the print bed is not warm enough yet. So you should always preheat the temperature and wait a bit before you start printing.
| Time | Temp. Nozzle | Temp. Bed |
|---|---|---|
| 00:00 | 20 | 20 |
| 00:20 | 53 | 21 |
| 00:40 | 110 | 24 |
| 01:00 | 160 | 27 |
| 01:20 | 196 | 29 |
| 01:40 | 202 | 32 |
| 02:00 | 201 | 34 |
| 02:20 | 200 | 38 |
| 02:40 | 200 | 40 |
| 03:00 | 200 | 44 |
| 03:20 | 200 | 46 |
| 03:40 | 200 | 48 |
| 04:00 | 200 | 50 |
| 04:20 | 200 | 53 |
| 04:40 | 200 | 55 |
| 05:00 | 200 | 57 |
| 05:20 | 200 | 60 |
| 05:40 | 200 | 60 |
| 06:00 | 200 | 60 |
| 06:20 | 200 | 60 |
Noise Level
> Bluer Plus Review
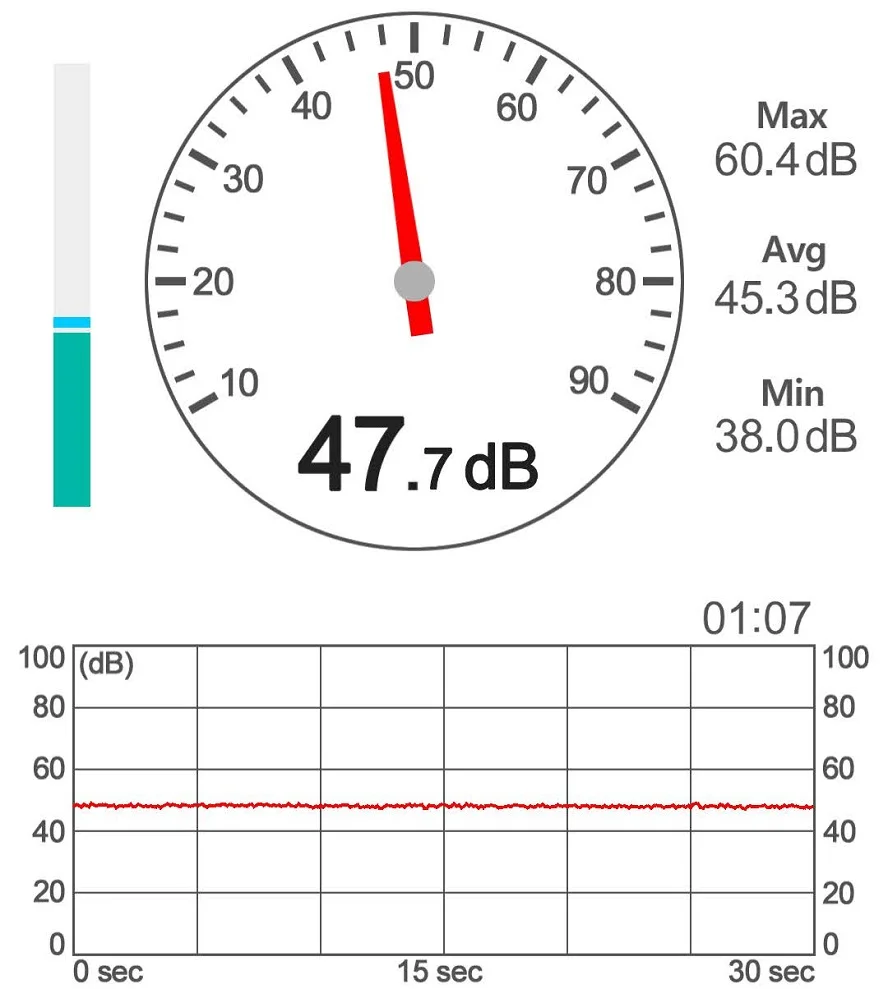
The noise level of the Bluer Plus is relatively loud at around 45 decibels. The main cause of this is the fans in the case. The stepper motors are very quiet, so the volume during operation is not much louder than during standby mode. So one of the most useful upgrades for the Bluer Plus is quieter fans!
Print Speed
> Bluer Plus Review
As is so often the case, the manufacturer’s specifications for maximum print speeds are utopian and the realistic print speed is further below that. I have achieved the best results with 50 mm/s.
Operation
> Bluer Plus Review
Operating the Bluer Plus is very easy. It is therefore very suitable for beginners. Its many quality-of-life features, such as the automatic print bed leveling, the smooth filament sensor and extruder, and the intuitive menu, make operation very simple and frustration-free.
Slicer
> Bluer Plus Review
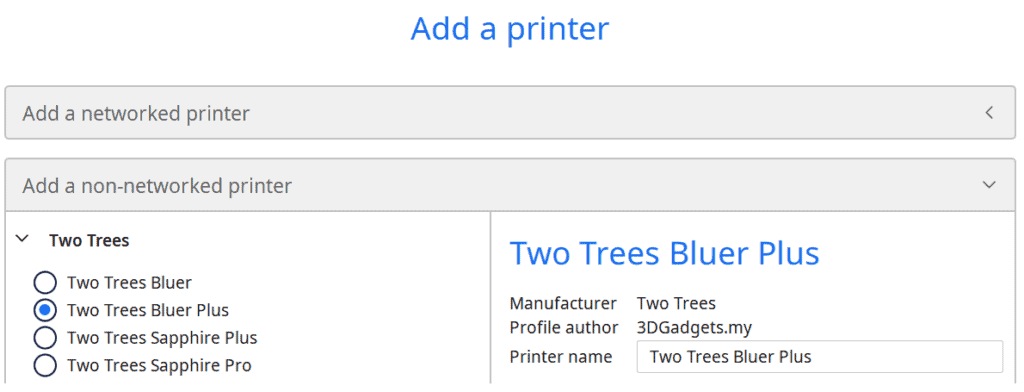

The Bluer Plus is compatible with many slicers. I have operated it with Cura. In Cura there are prefabricated standard profiles for it that require very little optimization.
There are the following preset profiles in Cura:
- Super Quality – 0.12 mm
- Dynamic Quality – 0.16 mm
- Standard Quality – 0.2 mm
- Low Quality – 0.28 mm
The different profiles are suitable for different applications. If you need high quality, the lower layer thicknesses are of course more suitable than the thicker ones. However, if you are only printing functional parts where surface quality is of secondary importance, you can use thicker layers to save a lot of time.
I printed all my print quality tests in the Super Quality setting at 0.12 mm layer thickness.
Print Quality
> Bluer Plus Review
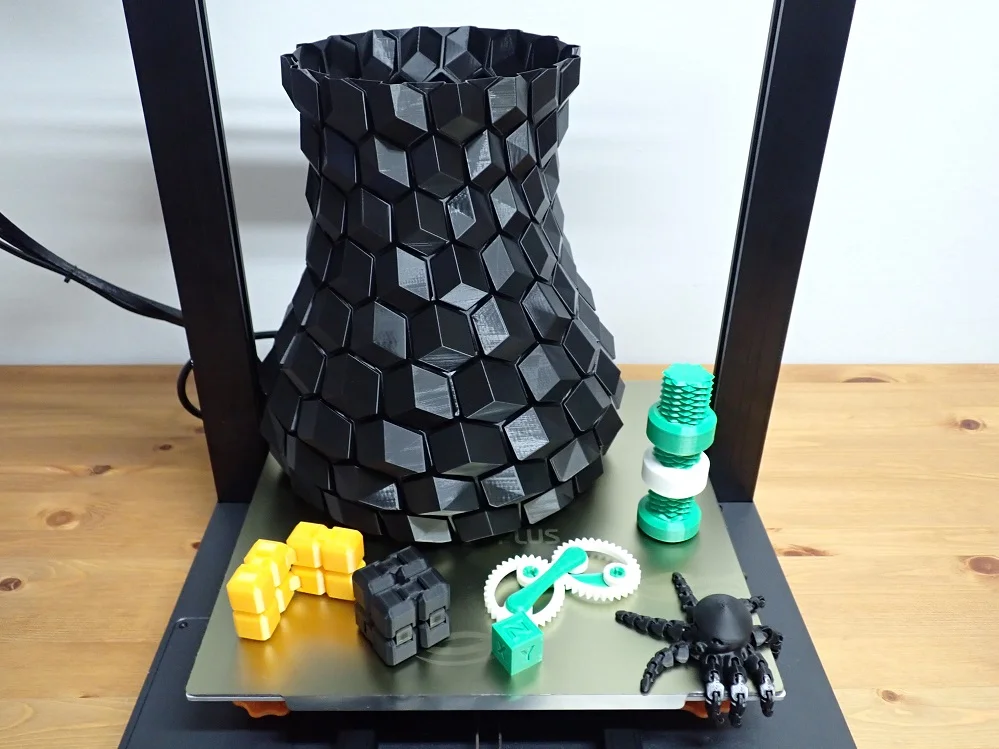
The Bluer Plus has a print quality of 0.1 to 0.4 mm. In Cura there are prefabricated profiles from 0.12 mm to 0.28 mm. The following models were all printed with 0.12 mm.
I adjusted the default profile a bit here and there to improve the print quality. As with any new 3D printer, the first task is to calibrate it and optimize the slicer profile with it. This includes the temperature tower, a retraction test and calibration of the extrusion.
To test the dimensional accuracy of a 3D printer, I like to print mechanical parts, since deviations there are not only noticeable visually but also in function.
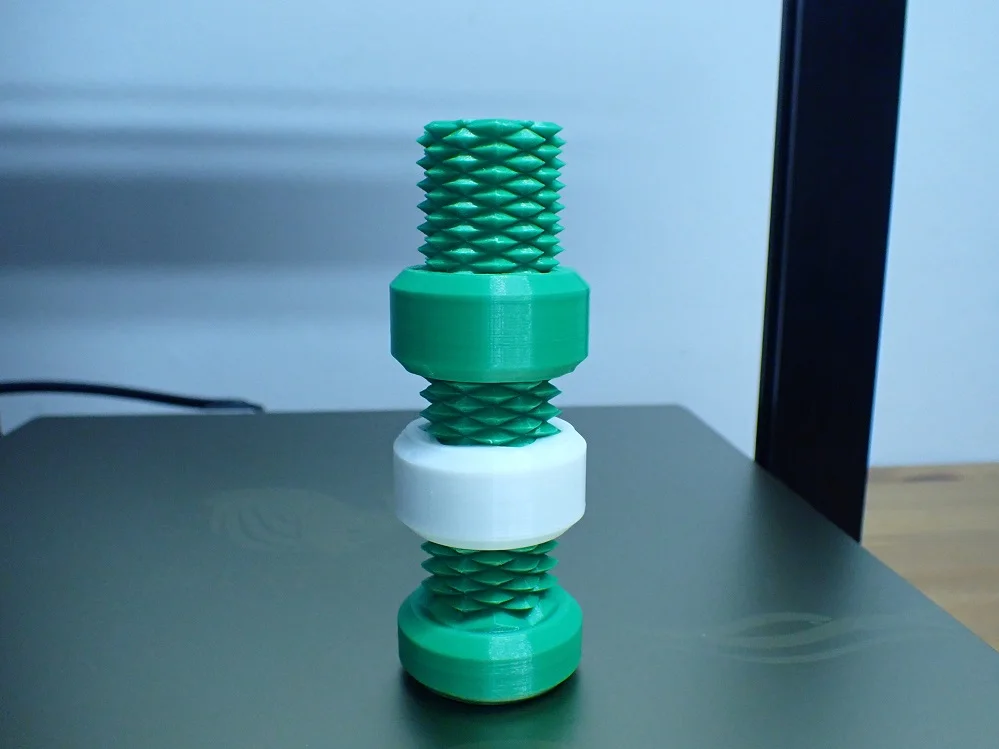
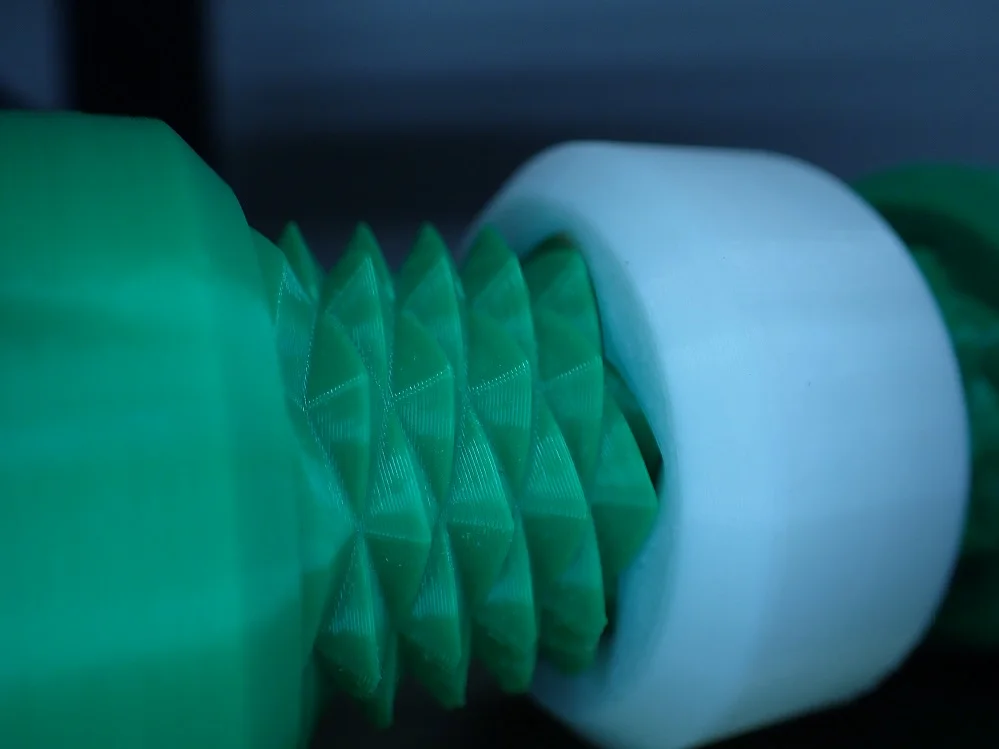
Two way screw: This screw with a double thread not only looks cool, it is also very important here that every detail was printed perfectly. If even one of the tips is not printed correctly, the thread will catch.
The one nut that go with it turns to the left and the other one to the right. Here and there, a small blob was printed at the tip of the thread due to some over-extrusion. But after one or two rotations with the nut over this part of the thread, these blobs were removed and no longer an obstacle to the function.
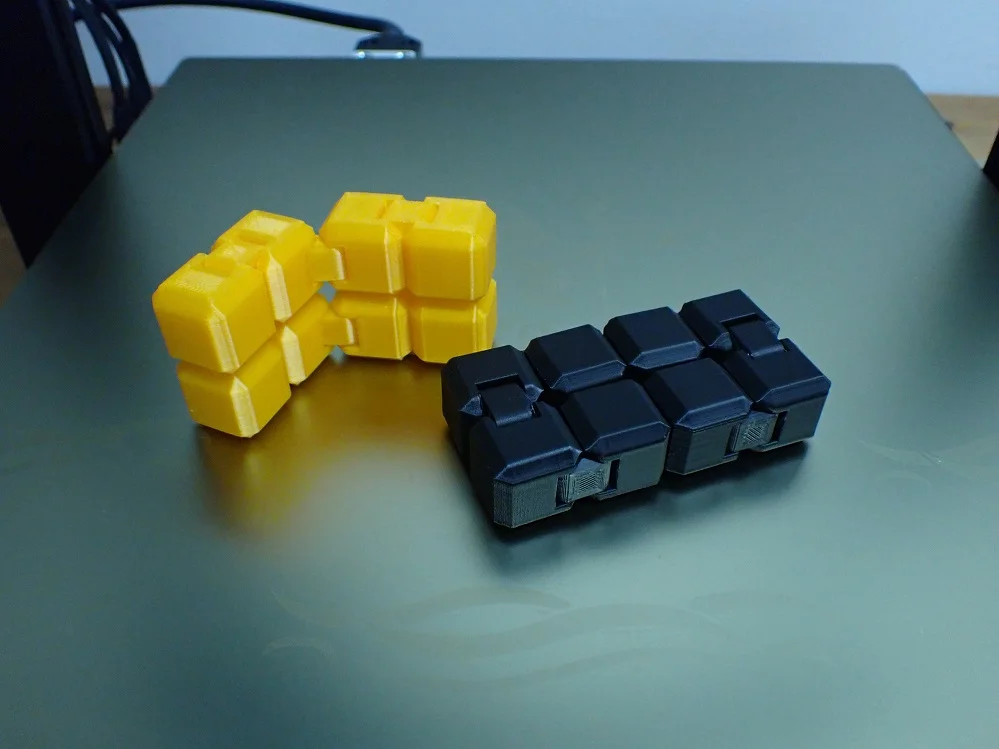
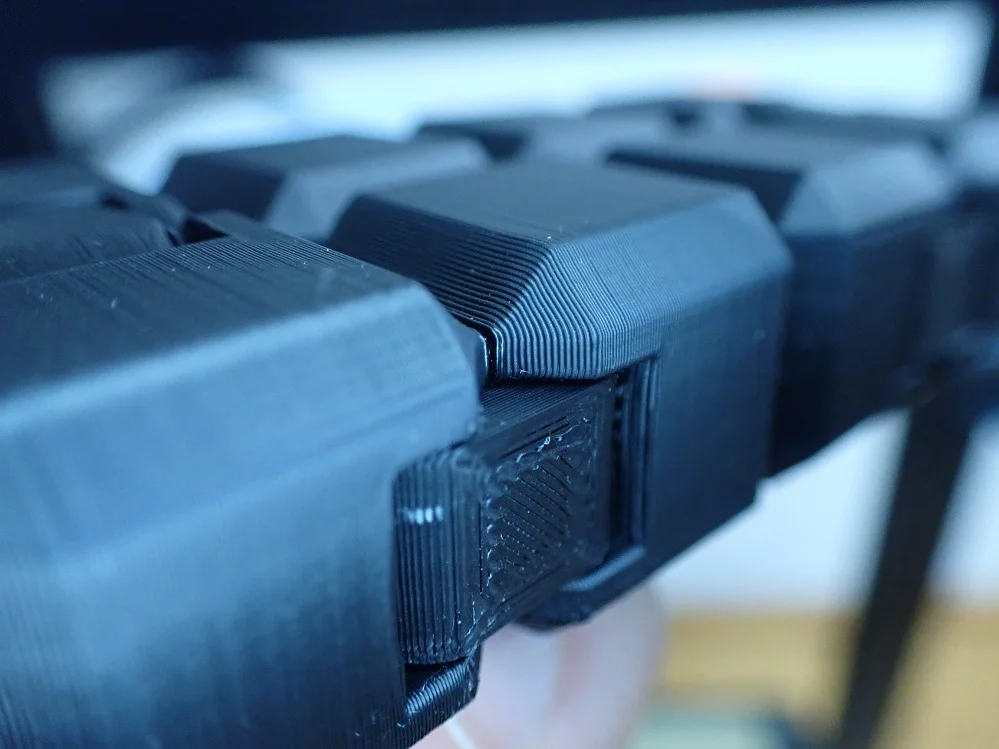
Infinity Cube: The Infinity Cube can be printed in one piece. If the extrusion is not calibrated accurately, the individual moving parts will bind together and become immobile. So this model is a good test to check the extrusion.
I tested the Infinity Cube with two different types of filament, once with PLA and once with PETG. In both cases, the result was positive and the function was flawless in each case.
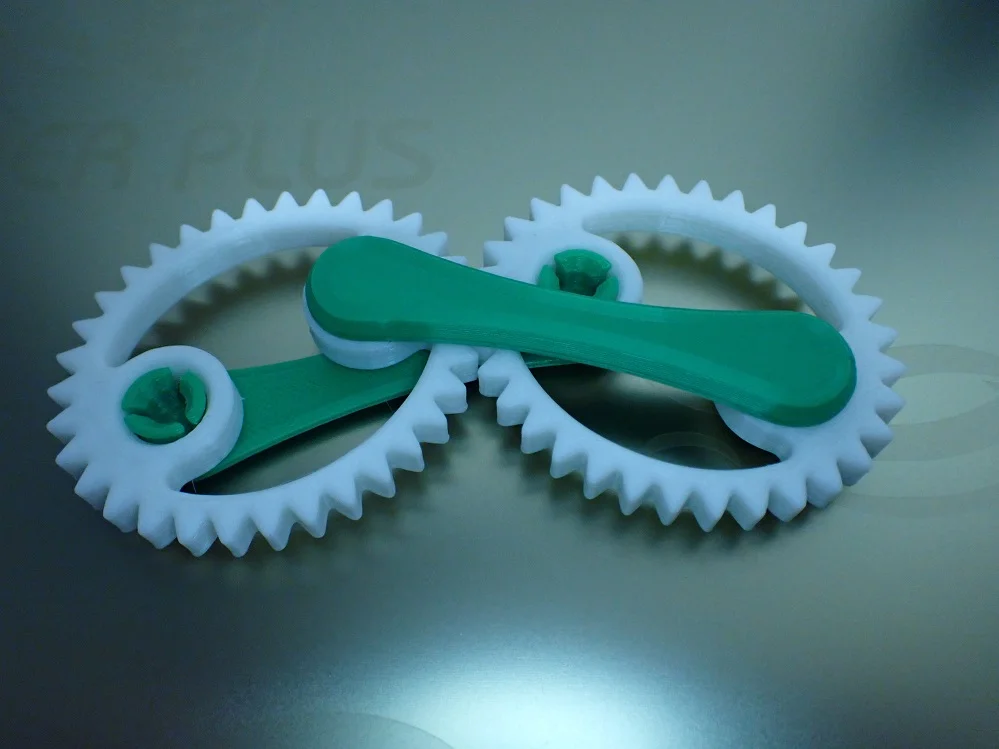
Elliptical gears: The elliptical gears are not quite as challenging to print. Nevertheless, it’s nice to see that they were printed flawlessly and that the function is perfectly given.
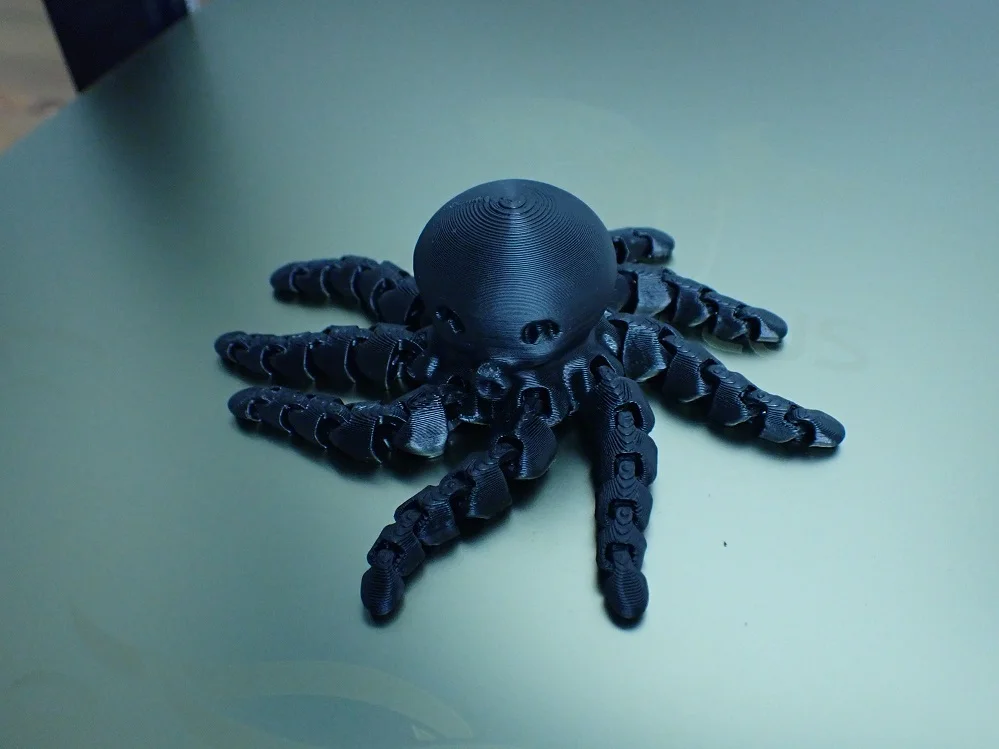
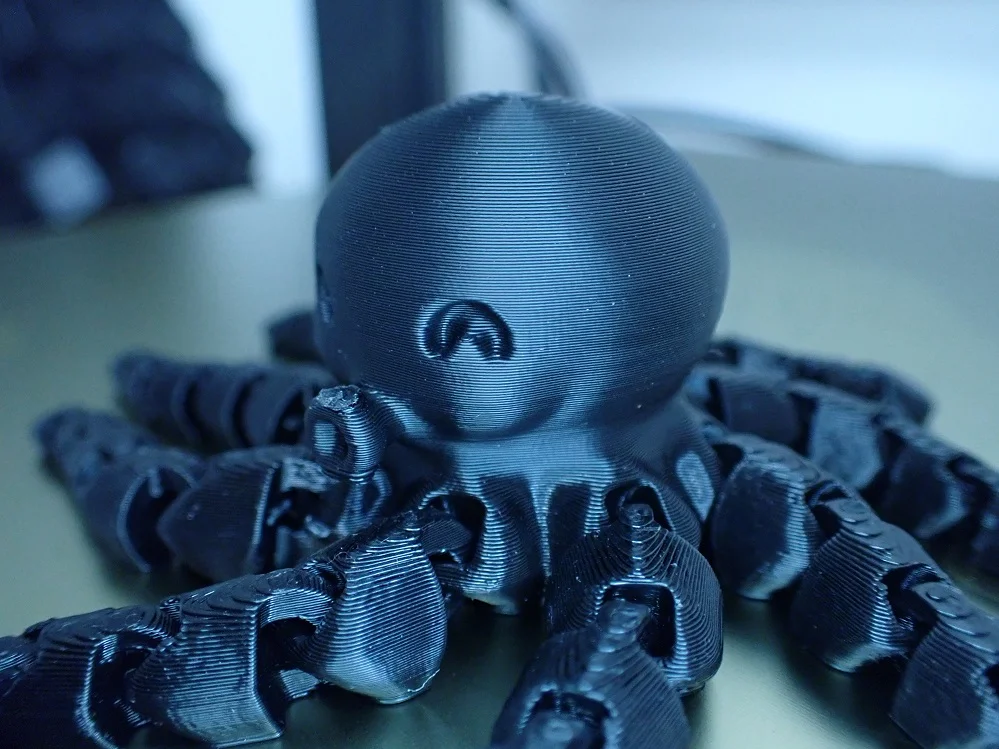
Mini Octopus: This flexible octopus is one of the most popular objects on Thingiverse. The model is pretty cool and it can be printed in one piece. It is important that the individual joints are printed so accurately that they do not become stiff and can move freely. A very nice test of the 3D printer’s accuracy. With a few exceptions, like the top and bottom of the mouth opening, the Octopus was printed flawlessly.
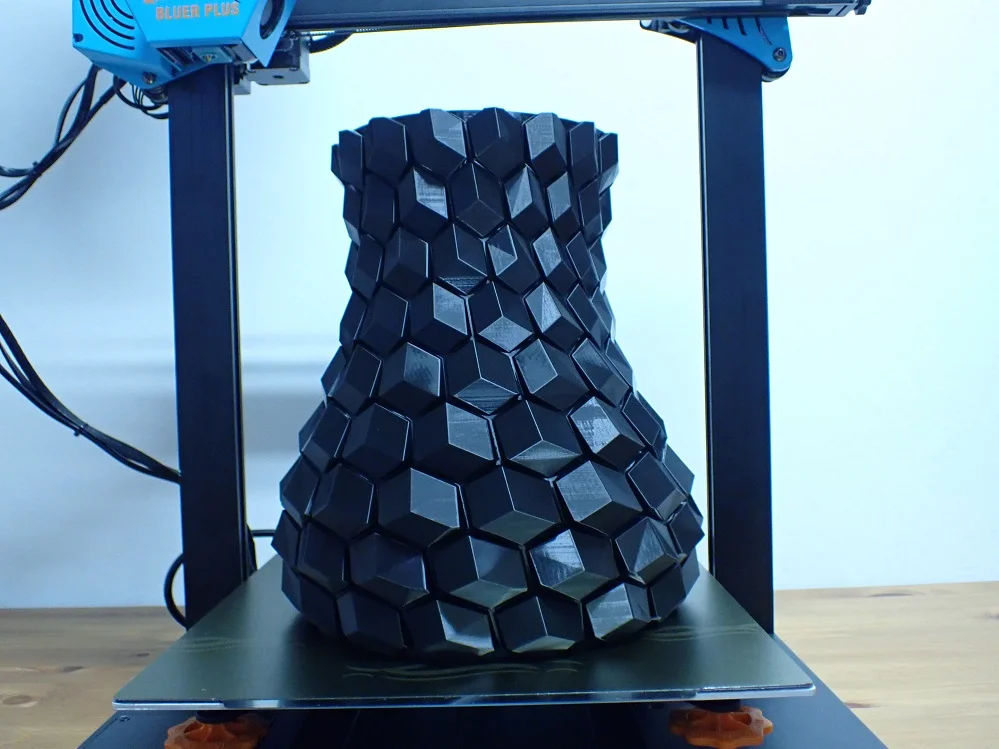
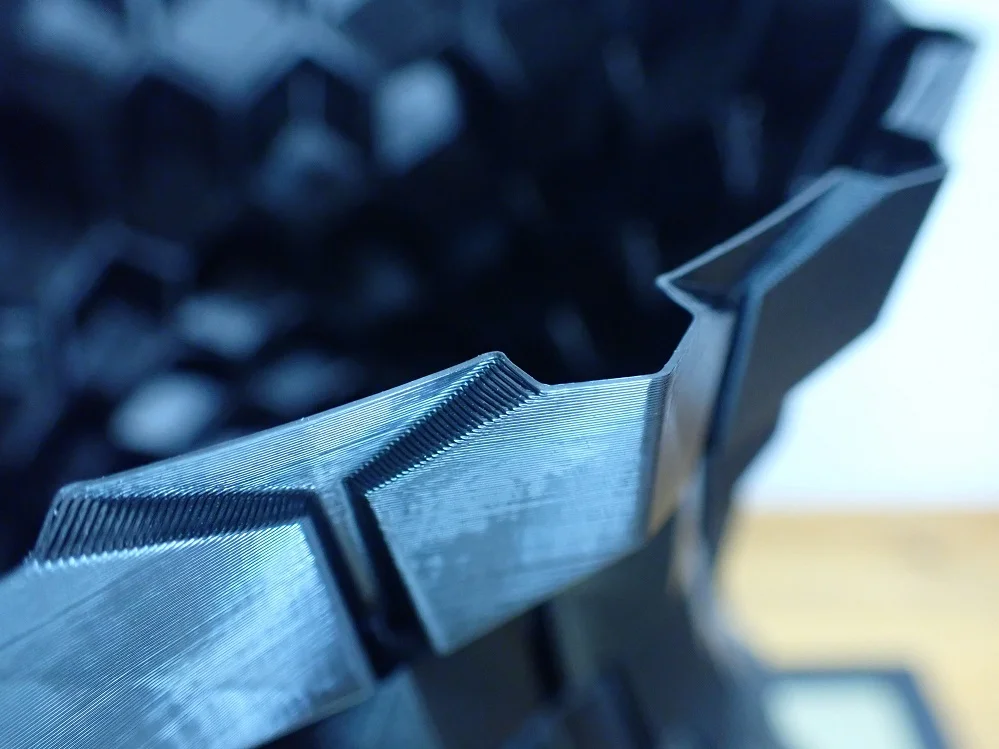
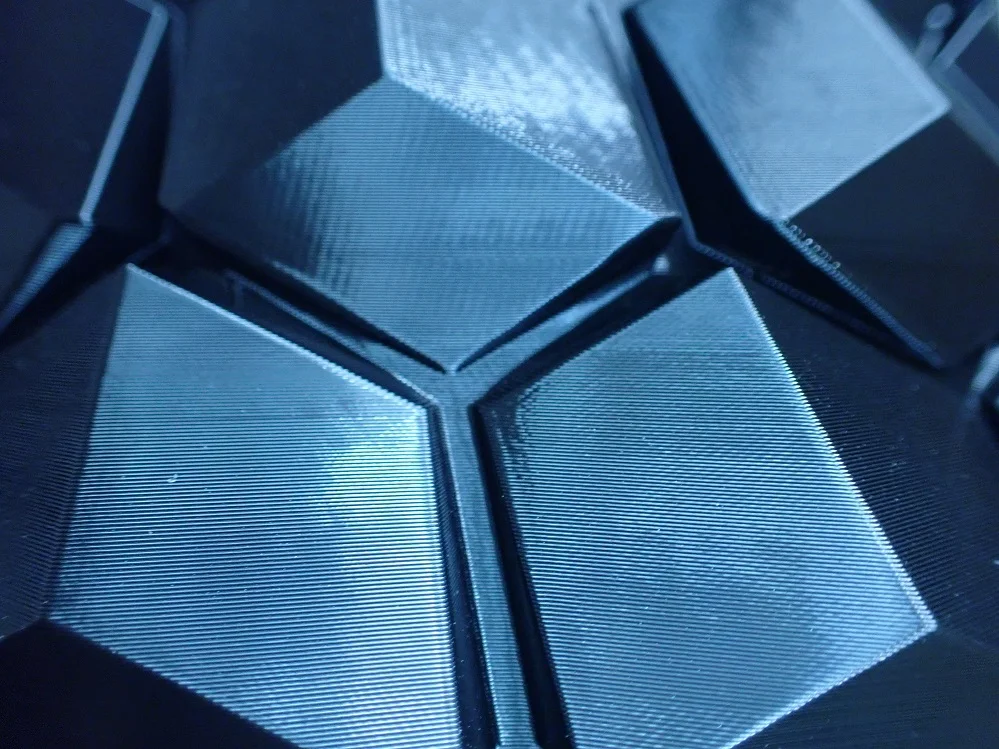
Vase: Of course I had to try the vase mode once to use the print volume as much as possible. This honeycomb vase was printed in one piece and took more than 15 hours. The quality is quite impressive and the surface is as good as perfect.
Is The Bluer Plus Worth It?
If you’re looking for a large-format 3D printer with lots of handy features, the Bluer Plus* is definitely worth checking out.
The only weaknesses I noticed were the relatively high noise levels and the slow heating of the print bed. I don’t find the latter so bad, and waiting a few minutes longer until you can start printing shouldn’t hurt anyone.
However, I was a bit disappointed with the noise level, as quieter fans wouldn’t raise the price too much. If you don’t mind the volume or don’t mind replacing the fans with better ones, the Bluer Plus is a very good large-format FDM 3D printer for beginners!
Disclosure: This website is the property of Martin Lütkemeyer and is operated by Martin Lütkemeyer. Martin Lütkemeyer is a member of the Amazon Services LLC and other Affiliate Programs. These are affiliate advertising programs designed to enable websites to earn advertising revenue through advertising and linking to Amazon.com and others. Links marked with * are affiliate links.

