
- Wet Filament: Prevention, Symptoms & Drying - July 18, 2024
- Sovol SV08 – Best PrusaSlicer Settings & Profile - June 26, 2024
- Sovol SV08 – Best Orca Slicer Settings & Profile - June 26, 2024
Disclosure: Links marked with * are Affiliate Links. I earn from qualifying purchases if you decide to make a purchase through these links – at no additional cost for you!
The Sonic Mini 8K S from Phrozen* is the successor of the Sonic Mini 8K – my favorite resin 3D printer for detailed miniatures until now. When I started printing miniatures with the previous version back then, I was amazed at the high print quality. But what’s better about the Mini 8K S?
In this hands-on review, I’ll show you the Sonic Mini 8K S in detail. While I’ve tested a lot of resin 3D printers and printed tons of miniatures with them, I will describe the Mini 8K S from a newbie’s perspective.
First, I’ll give you a brief overview of the design and specifications of the Sonic Mini 8K S. After that, I’ll show you its scope of delivery, how it’s set up, and then go into more detail about each feature.
Of course, at the end of the review, I’ll also show you what kind of print quality you can achieve with it. After the conclusion at the end of the article, you’ll also find a few alternatives to the Mini 8K S, in case you don’t want to decide right away.
Who should buy the Sonic Mini 8K S?
The Mini 8K S is the ideal entry-level resin 3D printer for anyone who wants to print highly accurate, yet small objects. It’s perfect for small miniatures with perfect surface quality.
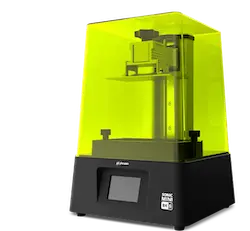
The Phrozen Sonic Mini 8K S is ideal for miniatures. Highly accurate, no nonsense, affordable. Perfect for the hobby.
LCD Resolution: 8K (7500 × 3273)
LCD Size: 7″
XY Resolution: 22 μm
Layer Height: 0,01-0,3 mm
Build Volume: 165 × 72 × 170 mm
Speed: max. 80 mm/h
Pros:
✓ Excellent resolution
✓ Easy to use
✓ Short curing times
Cons:
× Small build volume
× No air filter
Review Copy Disclosure
Elegoo provided me with the printer for testing. I did not promise Elegoo anything more than that. Money did not flow and my opinion of the printer was not influenced. Elegoo did not read this article until after it was published.
Table of Contents:
- 1 A brief overview of the Sonic Mini 8K S
- 2 Packaging and scope of delivery of the Sonic Mini 8K S
- 3 How to assemble the Sonic Mini 8K S
- 4 Print bed of the Sonic Mini 8K S and leveling
- 5 Print volume of the Sonic Mini 8K S
- 6 Touchscreen of the Sonic Mini 8K S and its menu
- 7 Resin tank of the Sonic Mini 8K S with snap-in function
- 8 Light source of the Sonic Mini 8K S and its resolution
- 9 Connection options of the Sonic Mini 8K S
- 10 Sonic Mini 8K S linear guidance and z-axis stability
- 11 UV protective hood of the Sonic Mini 8K S and its weight
- 12 Slicers compatible with the Sonic Mini 8K S
- 13 Test prints and calibration of the Sonic Mini 8K S
- 14 Smell of the Sonic Mini 8K S
- 15 Noise level of the Sonic Mini 8K S during printing
- 16 Print speed of the Sonic Mini 8K S
- 17 Print quality of the Sonic Mini 8K S (pictures of 3D prints)
- 18 Operating the Sonic Mini 8K S & ease of use features
- 19 When will the Sonic Mini 8K S become obsolete?
- 20 Is the Sonic Mini 8K S the right 3D printer for you?
- 21 Phrozen Sonic Mini 8K S vs. Sonic Mini 8K
A brief overview of the Sonic Mini 8K S
The Sonic Mini 8K S* is a resin 3D printer from Phrozen. Phrozen mainly makes 3D printers for home use with great value for money. However, they are also well suited for small businesses and self-employed individuals.
The Mini 8K S is one of the cheapest products in the range, but that doesn’t mean it’s bad. It’s just that it’s pretty small. You can check out the current price via my links.
The Sonic Mini range stands out because it focuses on the essentials: print quality. If that’s your main criterion, the Sonic Mini 8K S is the one for you. An XY resolution of just 22 μm is a dream for those who want to print objects with minute details.
For injection-molded-like surface details without visible steps, the Mini 8K S’s XY resolution of 22 μm with the minimum layer height of 0.01 mm is ideal. Your printed miniatures will look like they came from Games Workshop!
This high accuracy comes from the fact that the built-in LCD screen has a resolution of 7500 × 3273 pixels on only 165 × 72 mm. Converting the pixels to the size of the LCD screen results in the tiny pixel size in the XY direction of 22 μm.
In fact, with resin 3D printers, it’s not just the resolution that matters, but also the actual size of the screen. Even if you see a huge resin 3D printer with a 12K resolution, its accuracy may still be worse than that of the Mini 8K S.
Another important factor in accuracy is the minimum layer height that can be achieved. The Sonic Mini 8K S can achieve layer heights as low as 0.01 mm. The steps that result are barely visible to the naked eye, if at all. As soon as you set a slight edge smoothing in the slicer, the surface becomes so smooth that you can’t see the steps even with a magnifying glass.
The biggest drawback of the Mini 8K S is of course its small print volume. Depending on what you plan to do with your resin 3D printer, this may be the biggest influence on your purchase decision.
If you just want to print small miniatures as accurately as possible, the Mini 8K S is ideal. If you want to directly print 20 miniatures at once, or a large miniature in one piece, you should look for a larger 3D printer (like the Saturn 3*).
As you may have noticed, I’m mainly talking about printing small miniatures for tabletop games as an application. Of course, there are other applications for resin 3D printers. Depending on what you want to use it for, the printing volume is the most important feature besides printing accuracy.
For resin 3D printers, the price increases significantly if you want to have a larger print volume with the same pixel size. However, the print volume of the Sonic Mini 8K S is not that small. With a volume of 165 × 72 × 170 mm, you can already accommodate a lot and also print the one or other larger miniature or other object in one piece.
By the way, the print volume of the Mini 8K S is almost exactly two liters. This might give you a better idea of how large the objects you can print with the Mini 8K S can be.
My quick take on the Sonic Mini 8K S is this:
Phrozen is known for making very durable 3D printers. Along with the high accuracy and ease of use, the Mini 8K S will serve you well for a very long time for your hobby or profession.
However, there are many resin 3D printers with similar specifications to the Sonic Mini 8K S. As usual, there is a lot of competition in this division in the market.
The biggest competitor to the Mini 8K S is probably the Elegoo Mars 4* with an XY resolution of only 18 μm, a print volume just about the same, and an included air filter. Further down in this article, you’ll find a detailed comparison of these two 3D printers.
Among all its competitors, the Mini 8K S is not a clear loser, but it’s not a clear winner either. All 3D printers differ somewhat in their specifications and performance. In any case, you won’t go wrong buying the Sonic Mini 8K S and your purchase decision between it and its competitors will probably depend entirely on the current price.
Packaging and scope of delivery of the Sonic Mini 8K S
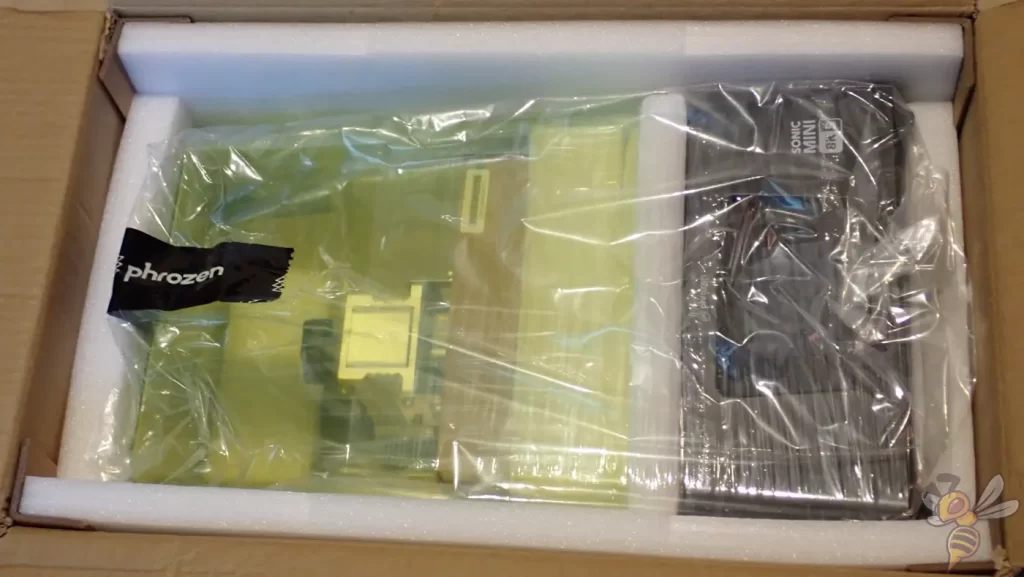
As you would expect from Phrozen, the Mini 8K S is well packaged and is protected from vibration and shipping damage by matching foam pieces. Also, the hood is separated from the rest of the 3D printer by foam to prevent the two parts from rattling together during transport. All the accessories and the print bed are sandwiched between the foam and the z-axis.
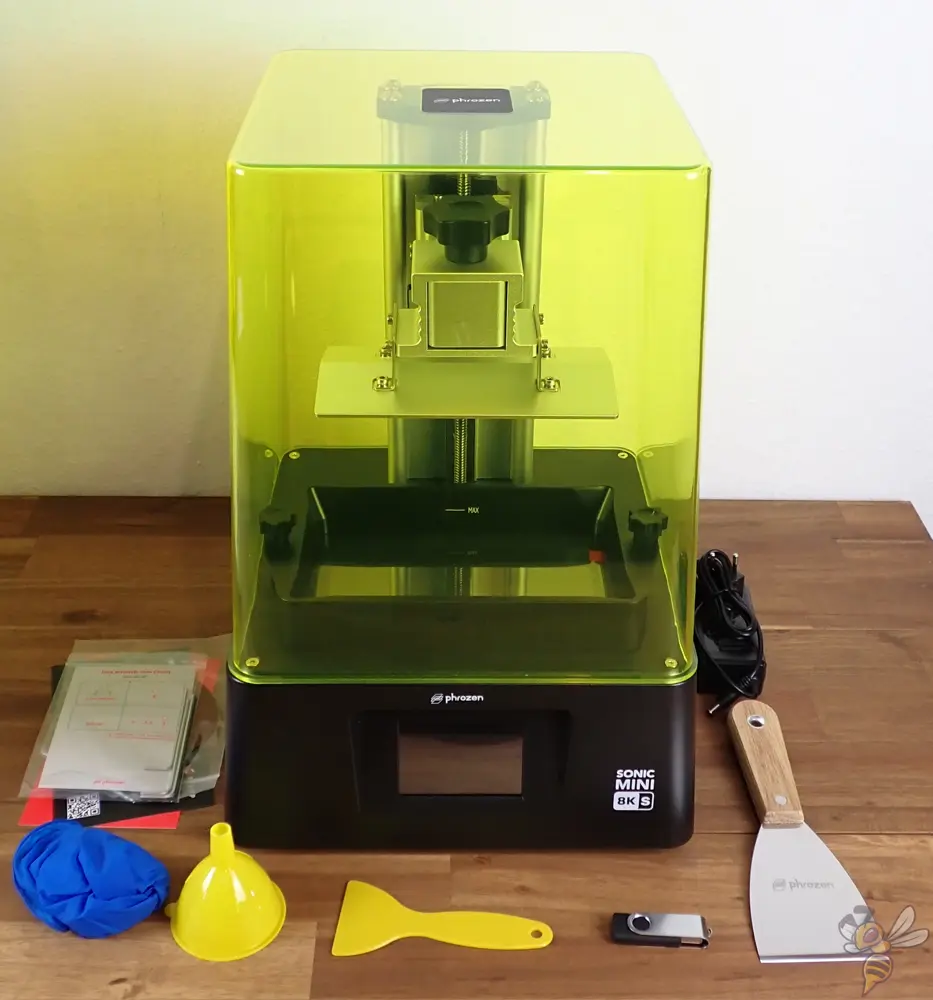
In addition to all the components of the 3D printer, the Sonic Mini 8K S comes with all the necessary tools and a few more accessories for operation.
If you don’t want to scratch your print bed right away, you should put the metal spatula directly aside and not use it for the Mini 8K S. Every resin 3D printer I’ve tested so far comes with such a spatula, although you can tear deep scratches into the print bed with just one motion. It makes much more sense to use the plastic spatula for this.
Actually, I find it positive that there are no masks included in the delivery. Normally, manufacturers deliver resin 3D printers with simple surgical masks. However, these masks do not protect you at all from the toxic gases of liquid resin and isopropyl alcohol.
So you should definitely order a mask together with the printer. I use this one*. At the bottom of this article, you’ll find some more useful tools and supplies that you’ll need when printing with resin.
How to assemble the Sonic Mini 8K S
Assembling the Mini 8K S doesn’t take much longer than unpacking it. The 3D printer comes completely pre-assembled. Basically, you just need to remove all the protective films and then you can start leveling the print bed.
Print bed of the Sonic Mini 8K S and leveling
The print bed is 165 × 72 mm and has a very fine but rough surface to provide a good grip for the first layer.
However, how the surface looks in detail does not have as big an impact on print bed adhesion as most people think. It’s much more important how long the first layers are exposed and how the movement speeds are set.
In any case, I have not had any misprints during my testing where poor print bed adhesion was the cause.
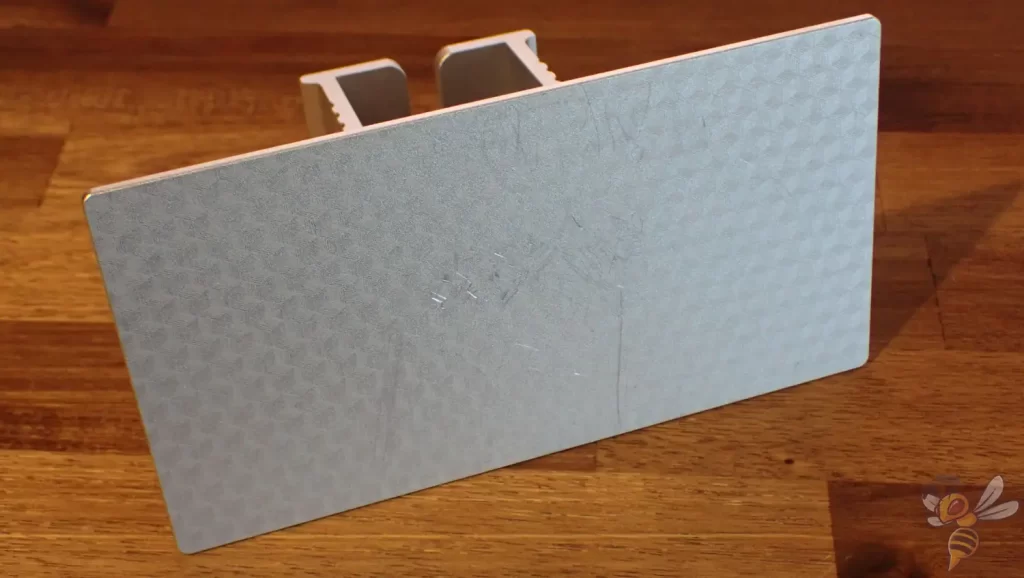
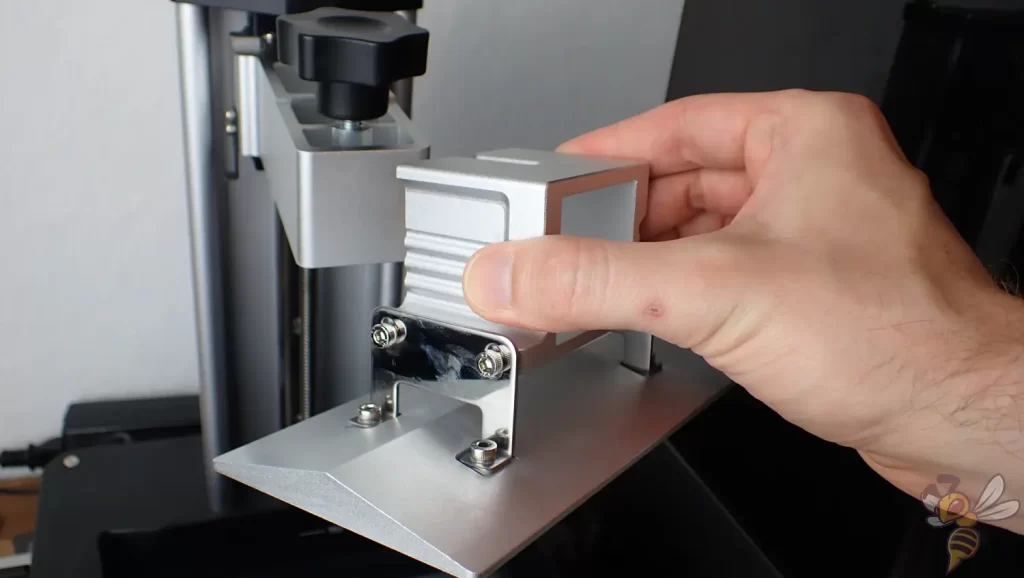
The print bed is very susceptible to scratches. Therefore, you should not use the metal spatula! As you can see in the picture above, scratches occur immediately. If you want to use the print bed for a long time and maintain the print bed adhesion, you should use a spatula with a material that is softer than the print bed. The plastic spatula included in the package is suitable for this purpose.
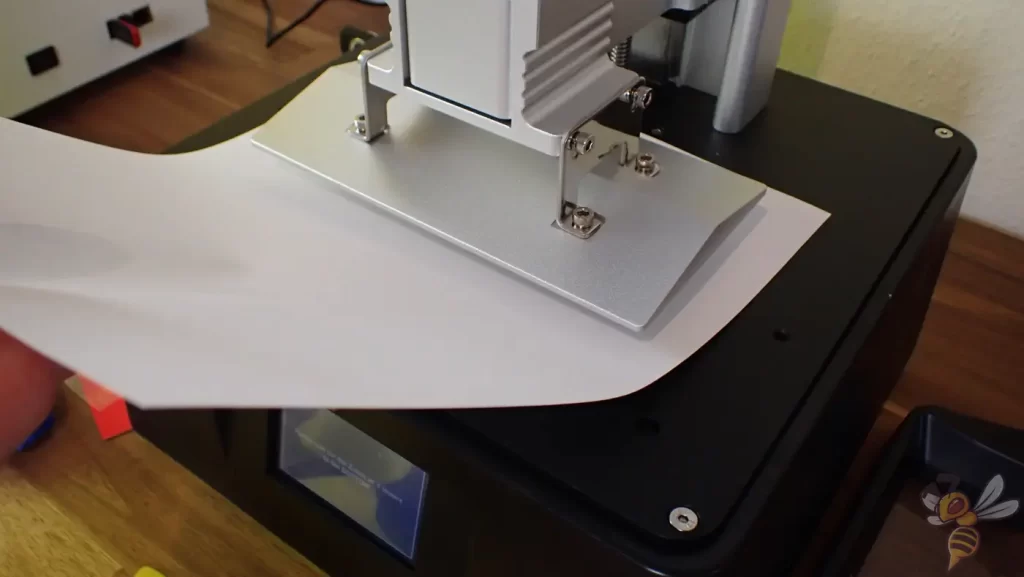
As is common with resin 3D printers right now, leveling the print bed is done by using a piece of paper and tightening the screws on the print bed suspension.
Phrozen has chosen to suspend this print bed in four places. To level the print bed, you need to loosen the four screws, press the print bed firmly onto the paper manually, and then tighten the four screws. This will ensure that the print bed is parallel to the LCD screen and has a distance to it of about 0.1 mm.
If you’ve never leveled a resin 3D printer before, this process can be a bit frustrating until you get the print bed set up correctly. When you move the paper between the print bed and the LCD screen, there should be some friction. The friction should also be the same on the left and right sides of the print bed.
Sometimes the height of the print bed can warp a bit if you don’t tighten the screws alternately and diagonally in succession.
Once you get the hang of it, print bed leveling is quick. A big advantage of the Mini 8K S is that the pressure bed suspension is very stable. As long as you don’t put a lot of force on the print bed, it won’t move. Therefore, you rarely have to re-level the print bed.
Automatic print bed leveling would be nice, of course, but would significantly increase the price. In my opinion, this would be an unnecessary feature with a poor price/performance ratio and I’m glad that the Mini 8K S is manually leveled.
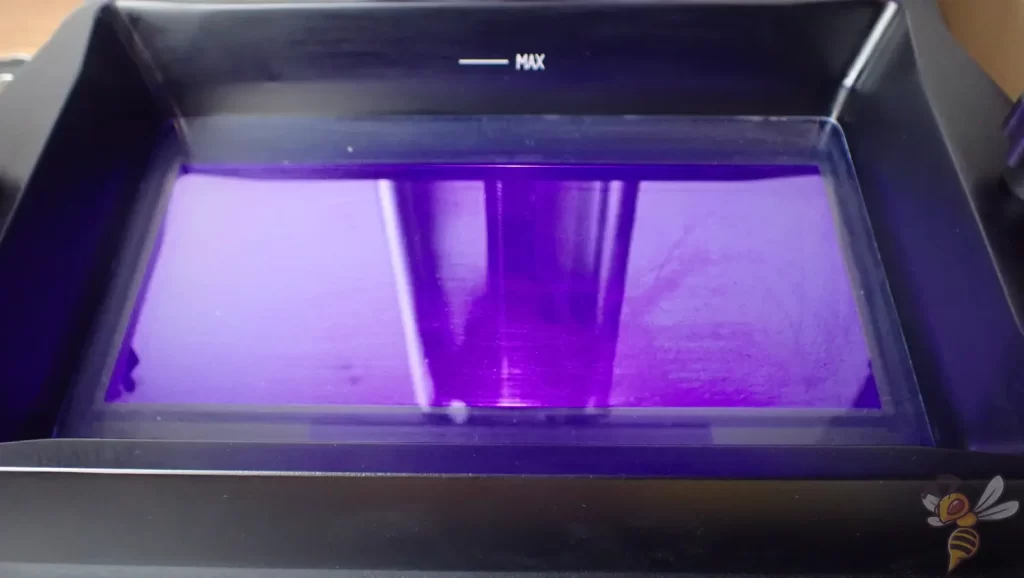
Print volume of the Sonic Mini 8K S
The print volume of the Mini 8K S is 165 × 72 × 170 mm, which is approximately 2 liters. So the print volume is not very large, but still large enough for many hobbyist applications or for jewelers, for example.
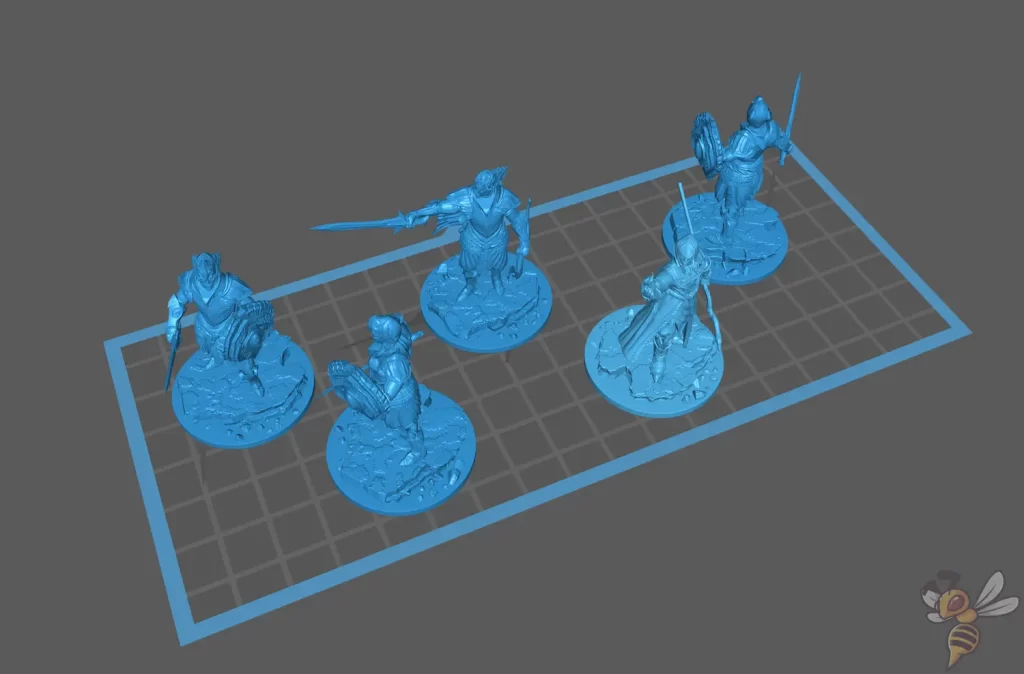
I like to paint miniatures, for which the Mini 8K S is ideal. In the picture above, there is room for five miniatures to be printed at the same time. I can get by with that for a relatively long time until I need more miniatures to paint.
I don’t know about you, but I often suffer from the “shiny object syndrome” in my hobby. I tend to print too many miniatures that I don’t even manage to paint. In the end, the unused pile of miniatures, or “pile of shame”, gets bigger and bigger. A smaller print volume helps me keep this quirk in check.
So if you mainly print small objects like I do, the print volume will actually benefit you because it’s easier to clean, among other things. Large objects can often be easily divided into several parts and don’t necessarily require a large print volume.
However, if you need to print huge objects in one piece or want to increase the number of pieces per print in the commercial sector, a larger print volume would of course be an advantage.
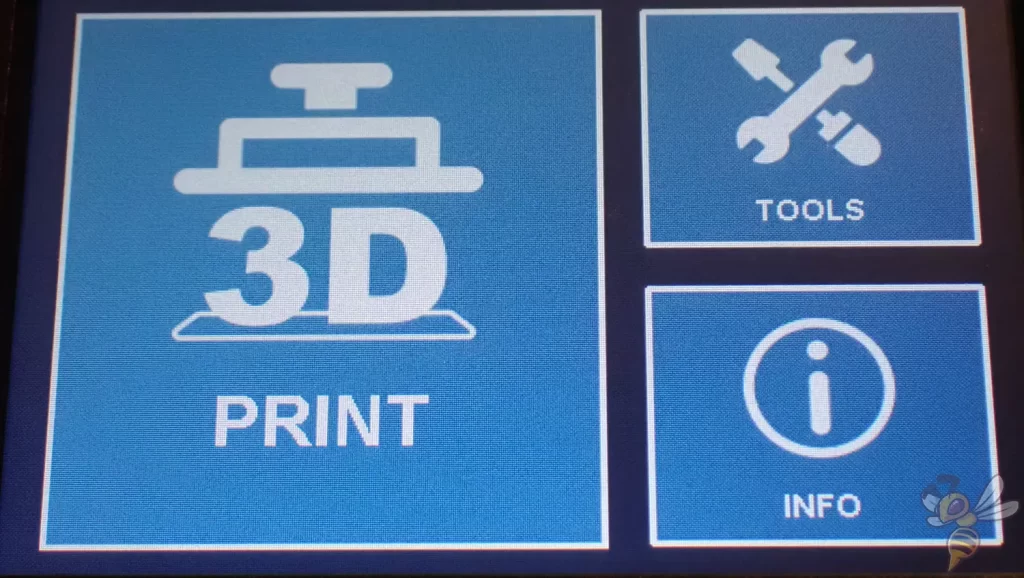
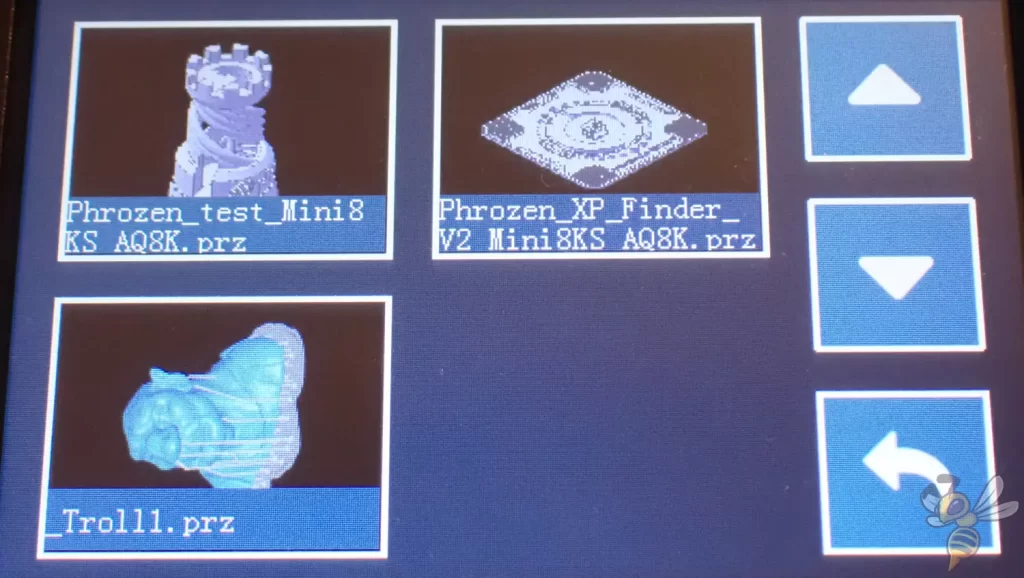
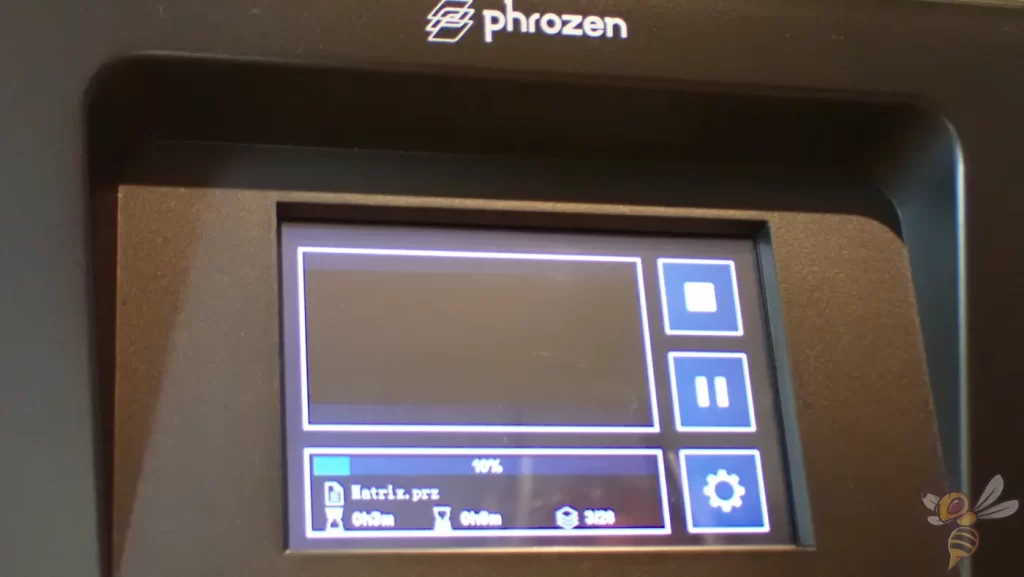
The 3.5″ touchscreen does water should – no more and no less. The menu has a simple structure. The print files are displayed with small preview images to distinguish them from each other more quickly.
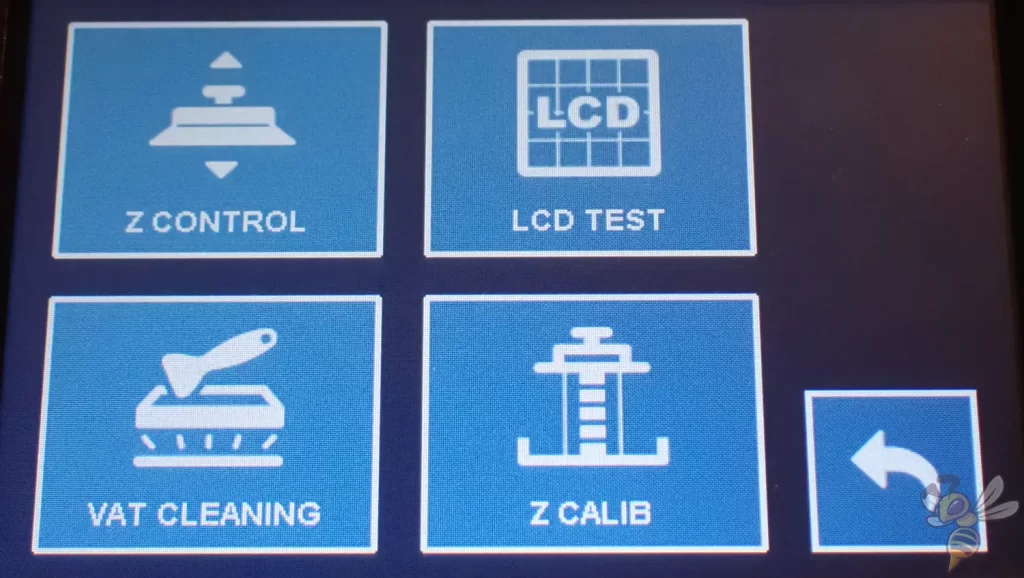
The other functions, such as moving the z-axis, testing the LCD screen, cleaning the resin tank and print bed leveling are also quickly found.
Resin tank of the Sonic Mini 8K S with snap-in function
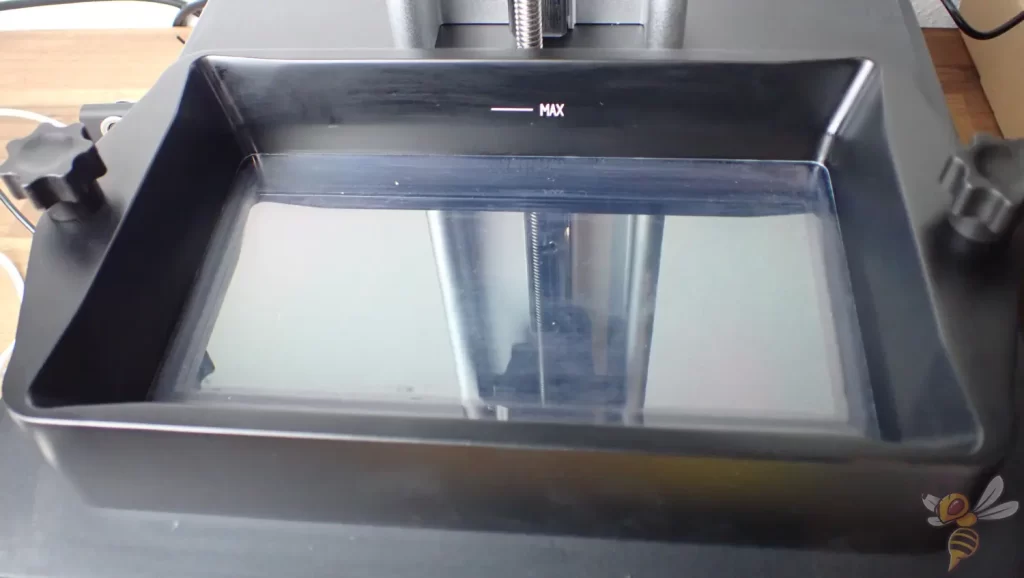
The resin tank has dimples in the frame at all four corners to pour the excess resin back into the bottle after printing.
With some resin 3D printers, there is only one of these, which can lead to an unnecessary number of steps in handling. Since it is especially important not to make a mistake when handling resin, it is very convenient not to have to rotate the full resin tank in between.
Also very convenient are the four screws on the bottom of the resin tank. There are matching holes in the base of the Mini 8K S so that the resin tank can snap into place there. This makes it much easier to screw it on with the two screws. You don’t have to spend ages looking for the holes for the screws.
The other advantage of this is that you can place the resin tank on a smooth surface without the risk of scratching the FEP film. Because of the four screws, there is always some space between the FEP foil and your work surface.
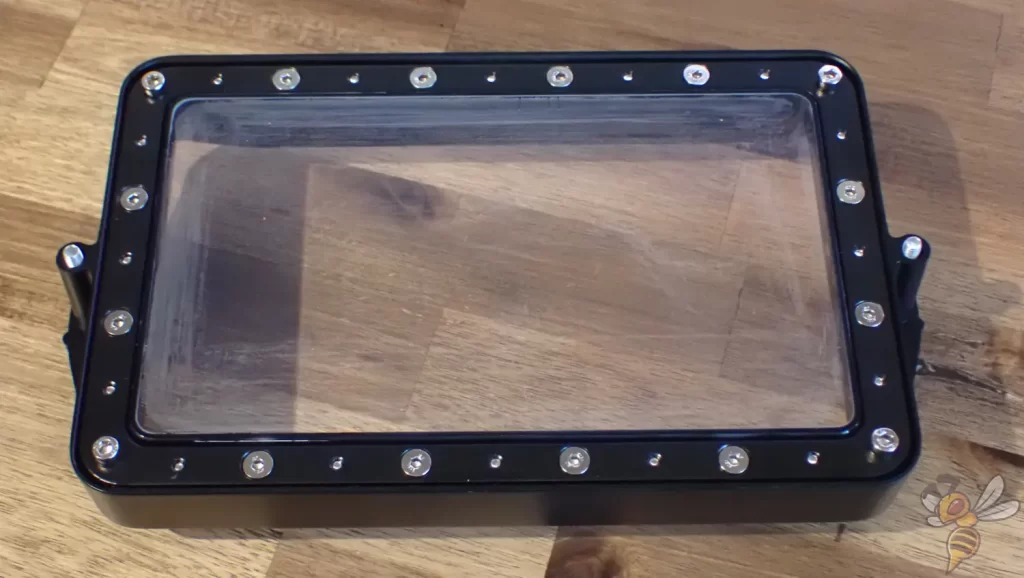
If the FEP foil is scratched or torn, you can replace it. To do this, loosen the screws under the resin tank, remove the old FEP film, insert a new one and screw it in place.
This all sounds much more difficult than it really is. Still, of course, you should take care of your FEP film to delay replacement as long as possible.
Most accidents where the FEP film is damaged are due to poor print bed adhesion. If the object falls off during printing or the first layers adhere to the FEP film and not to the print bed, you have done something wrong in the settings. The first layers should be exposed long enough to adhere well to the print bed. Otherwise, you can also use some PTFE lubricant to reduce the adhesion of the FEP film.
Light source of the Sonic Mini 8K S and its resolution
The light source of the Mini 8K S is a“Linear Projection LED Module“. Here, the light is not directed directly onto the LCD screen, but via a mirror. This is supposed to have the advantage that the beams hit the LCD screen in a better controlled and more homogeneous way. A high resolution is of no use if the light intensity is not the same everywhere and the object hardens differently.
The resolution is 7500 × 3273. Transferred to the 7″, this results in a pixel size of 22 μm. While there are now more accurate resin 3D printers, such a small pixel size would have been utopian just a few years ago.
Connection options of the Sonic Mini 8K S
Compared to other modern resin 3D printers, the Mini 8K S has relatively few, or to be more precise, exactly one connectivity option. There is a USB slot on the left side of the 3D printer.
It also cannot be connected to a network via WiFi. Nor can you connect it to your computer or network via LAN cable. So file transfer is completely manual with a USB stick.
Since this is how I operate all my resin 3D printers, this is not a disadvantage for me. But if you like to send your sliced objects directly to your 3D printer over the network, you will miss this feature.
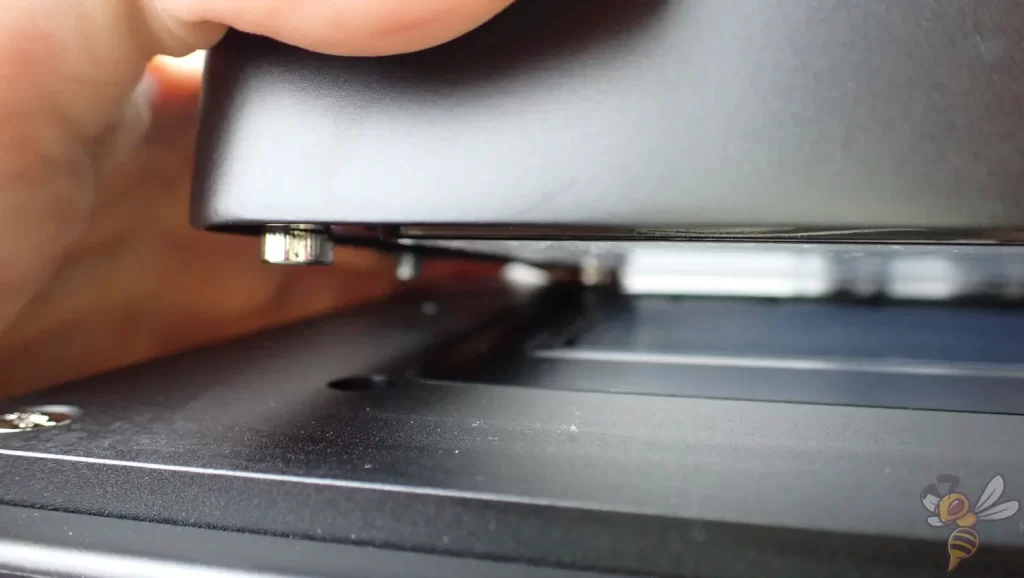
Sonic Mini 8K S linear guidance and z-axis stability
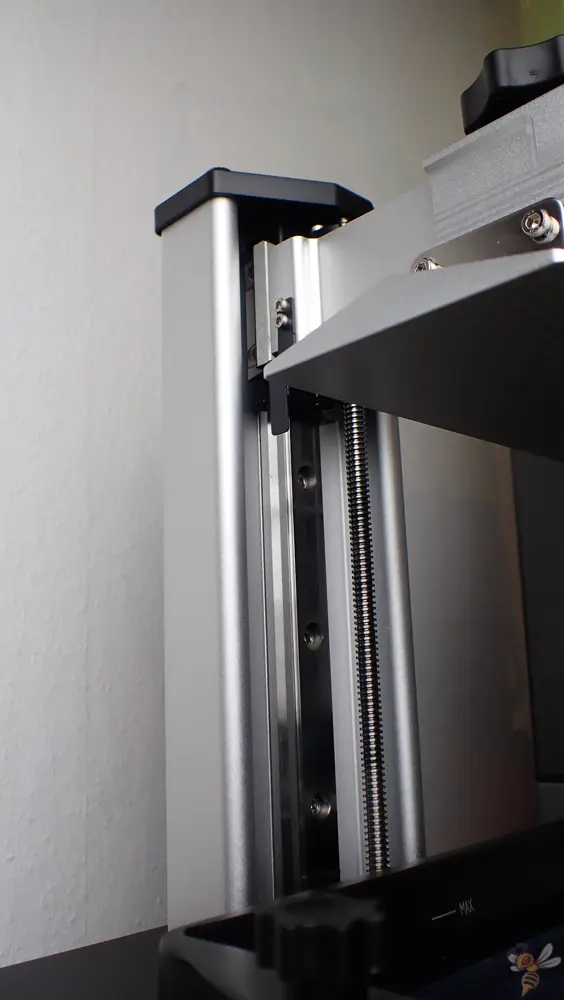
At first, I was a little skeptical that the Mini 8K S, with its single linear guide, would be able to print as accurately in the z-direction as its predecessor with two.
At second glance, however, you can see that the design is relatively cleverly solved and the guide screw is placed a bit away from the linear guide. This provides more stability, which is needed for the very small layer heights of 0.01 mm.
My Mini 8K S has been very stable so far and I have not had any problems with an unstable mounted z-axis. How it looks with very large objects that use the complete print volume in the z-direction, I cannot say. But my guess is that the stability is sufficient even at the very top of the print volume and is similar, if not as good, as it was at the beginning.
A double z-axis is in principle only useful for larger resin 3D printers, where not only the print volume in the z-direction is larger, but also the print bed itself is heavier.
UV protective hood of the Sonic Mini 8K S and its weight
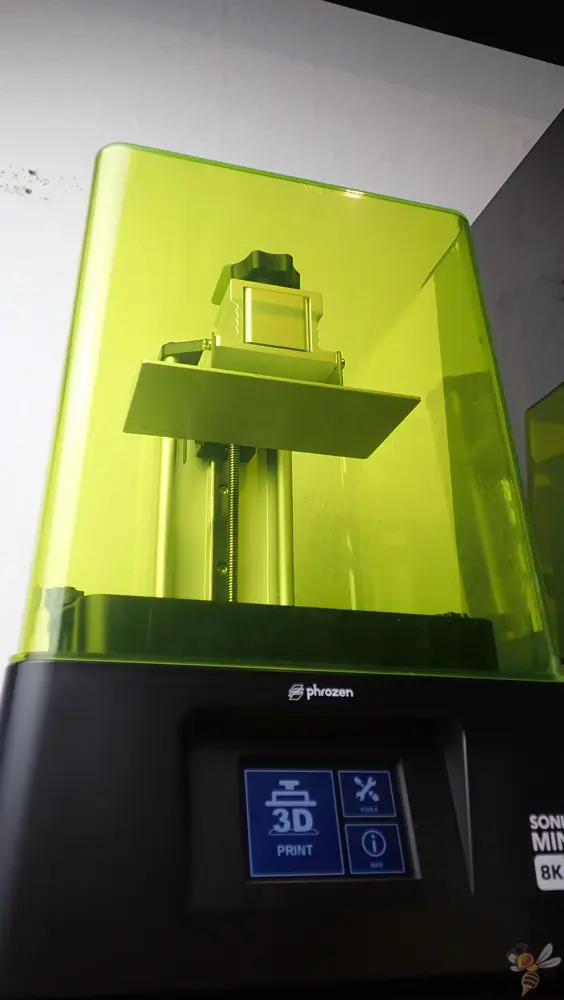
The amazingly transparent UV protective hood is made from a single casting and weighs just one kilogram. It’s nothing special, but it’s still better than many other protective hoods that are made of several plexiglass parts and are much heavier as a result.
Slicers compatible with the Sonic Mini 8K S
The Mini 8K S is compatible with ChiTuBox, Lychee, and VoxelDance Tango. Since I have been using my resin 3D printers exclusively with ChiTuBox, this comes in handy.
Handling ChiTuBox takes a little getting used to as a newbie, but it’s not very difficult to learn. It is important that you lift your objects a bit off the build area so that the first layers are not too wide (they are exposed for an extra long time so that they adhere well to the print bed).
For larger objects, you should also hollow out the object to save resin. Don’t forget to punch a hole in the object from which the resin can flow out. There is also a function for this at the top of the toolbar.
The generation of supports is also straightforward in ChiTuBox. You can even set or remove the supports individually if you think some places need less support or to give more support to particularly fragile parts of the object.
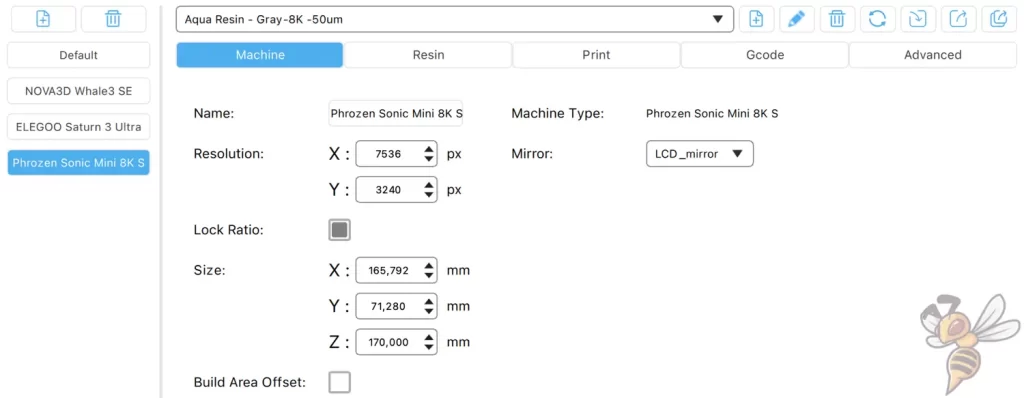
Since I tested the Mini 8K S before its release, the regular version of ChiTuBox didn’t yet have a pre-built default profile with the device settings like the resolution or the print volume. However, Phrozen was kind enough to give me a suitable profile (which will be available in later versions of ChiTuBox).
This meant I didn’t have to deal with the device properties or calibrate the print bed speeds. The preset values were optimal. I only had to calibrate the exposure time to get the best out of the print quality.
Test prints and calibration of the Sonic Mini 8K S
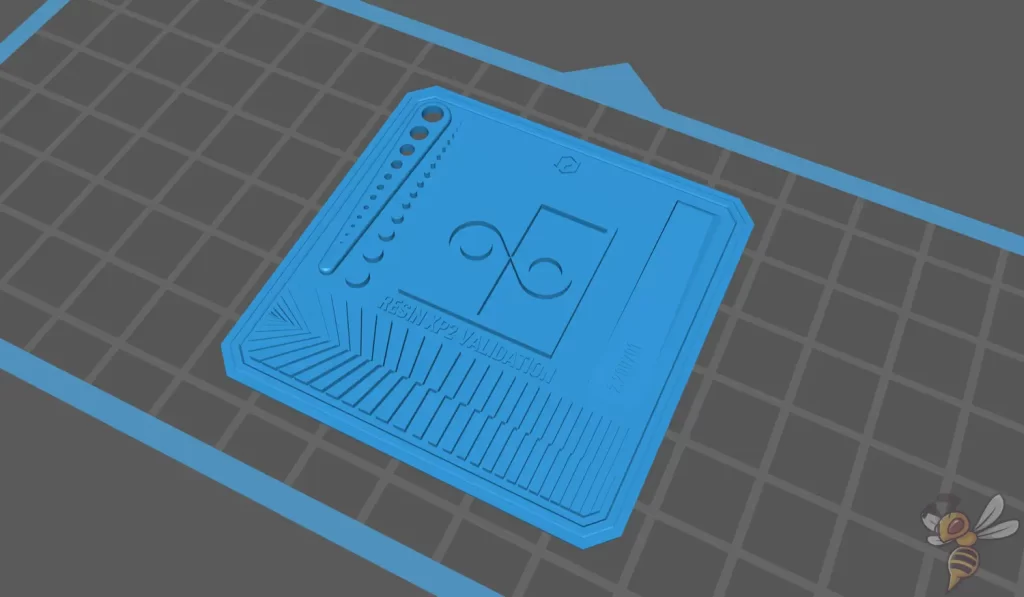
When calibrating resin 3D printers, it mainly comes down to exposure time. There is the exposure time for the first layers and for the rest of the model.
The first layers should be exposed much longer and so that they become very hard and adhere well to the print bed. The rest of the layers have to be exposed exactly so long that not too much and not too little resin is cured. Otherwise, details can be swallowed up.
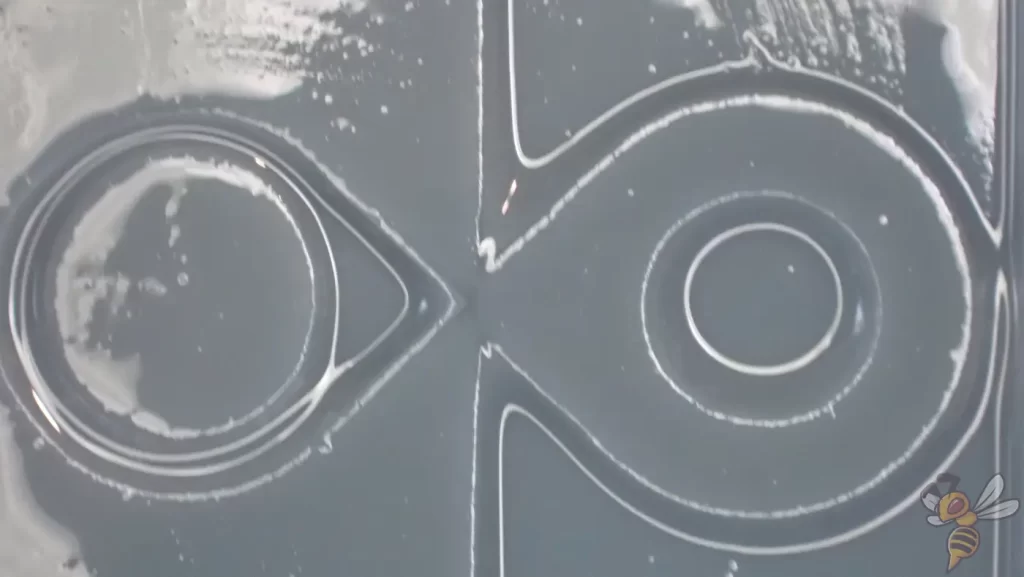
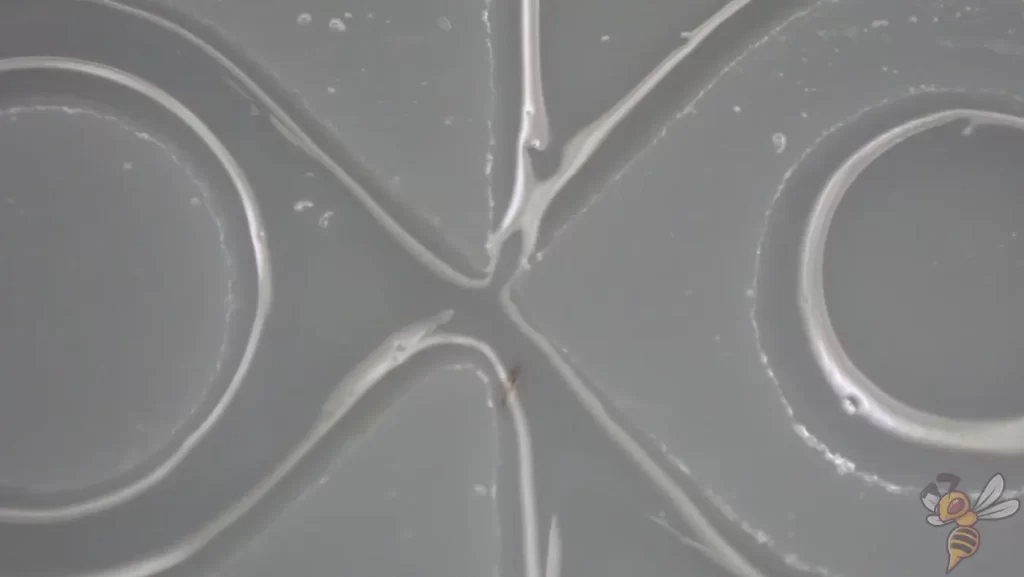
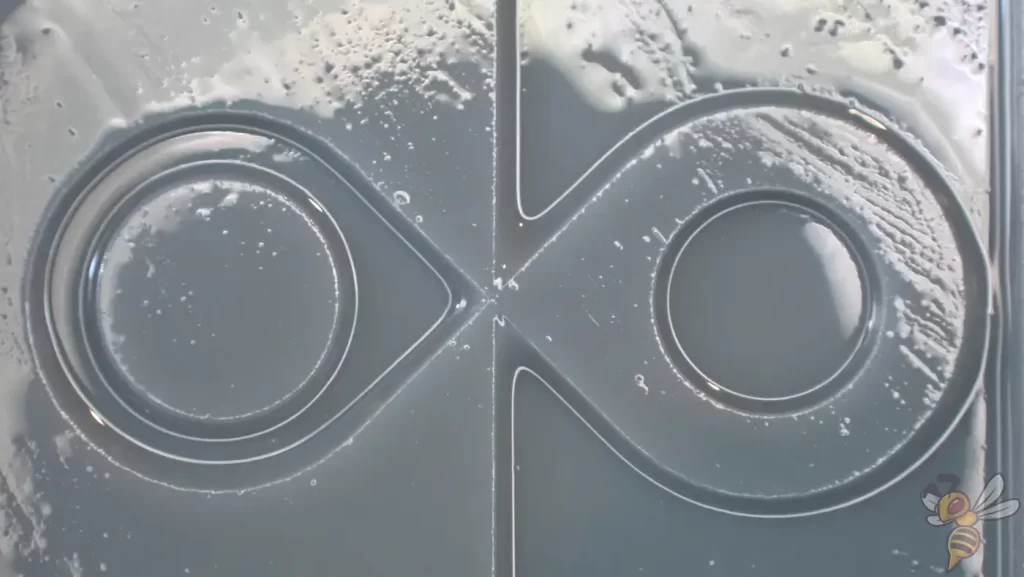
I calibrated the Mini 8K S with the Resin Validation Matrix. This calibration object consists of different structures that are built up differently depending on the exposure time. If the exposure time is too long, certain structures are too wide and vice versa.
It’s not very helpful to give you the exposure time that got me good results because the value depends a lot on several things. On the one hand, it is important which resin you use, on the other hand, factors like room temperature are also important.
It is always best to start from the rough guide values for the exposure time of the manufacturer of your resin and print one of the many available test prints. After the first test print, you will immediately see if your exposure time is too high or too low. It usually takes no more than two to three test prints to calibrate the exposure time.
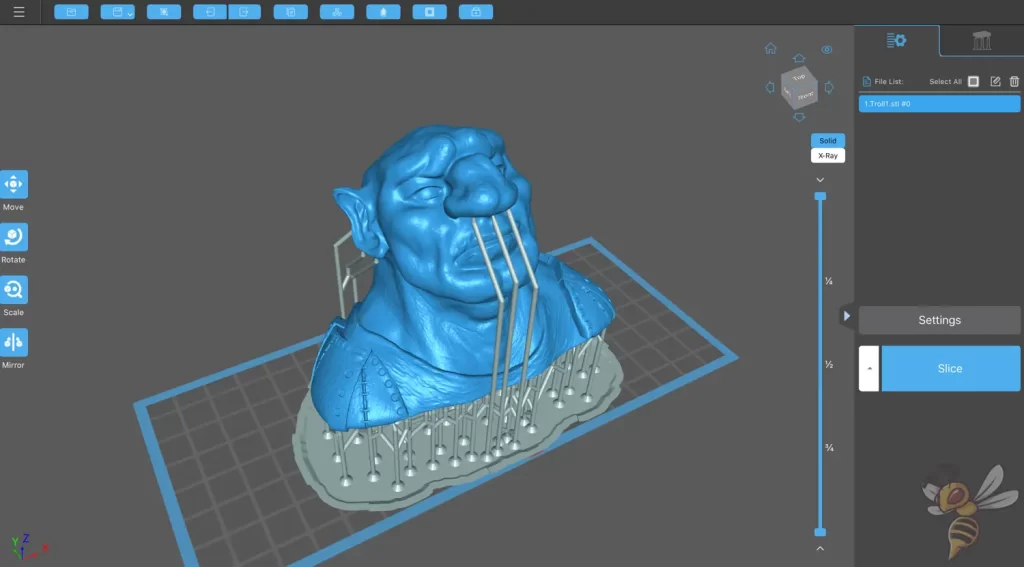
After calibrating the exposure time, I could have still optimized the speeds. In my experience, this can save another 5 to 20% of print time on some 3D printers. However, this is not worth the effort to me personally and I left the settings as they were. Because I wanted to finally print my self-created troll bust!
Smell of the Sonic Mini 8K S
Liquid resin stinks! And it’s toxic. The room where you use the Mini 8K S should have good ventilation. During printing, ventilation with colder or warmer air from outside is not recommended, as the temperature differences can negatively affect the printing result.
However, after printing and post-processing, you will need to heavily ventilate the room to remove the worst of the odor. Therefore, I now no longer use a resin 3D printer without an activated carbon filter. Unfortunately, the Mini 8K S does not have its own air filter, but you can order some separately*.
If such an air filter is placed in the enclosure of the Mini 8K S, the harshest odor is caught directly at the source. I also placed an air filter next to the 3D printer.
The difference is very noticeable. Without the air filter, the smell settles like a layer on all objects in the room and fades only after several days. With the air filters, strong ventilation is enough.
Noise level of the Sonic Mini 8K S during printing
The Mini 8K S prints relatively quietly, with noise levels of up to 35 decibels. This volume is comparable to a refrigerator or whispering. Aside from the fact that you shouldn’t be in the same room as a currently working resin 3D printer for any length of time anyway, the Mini 8K S is really quiet.
There’s also thankfully no beeping at the end of each layer like some other resin 3D printers I’ve tested.
Print speed of the Sonic Mini 8K S
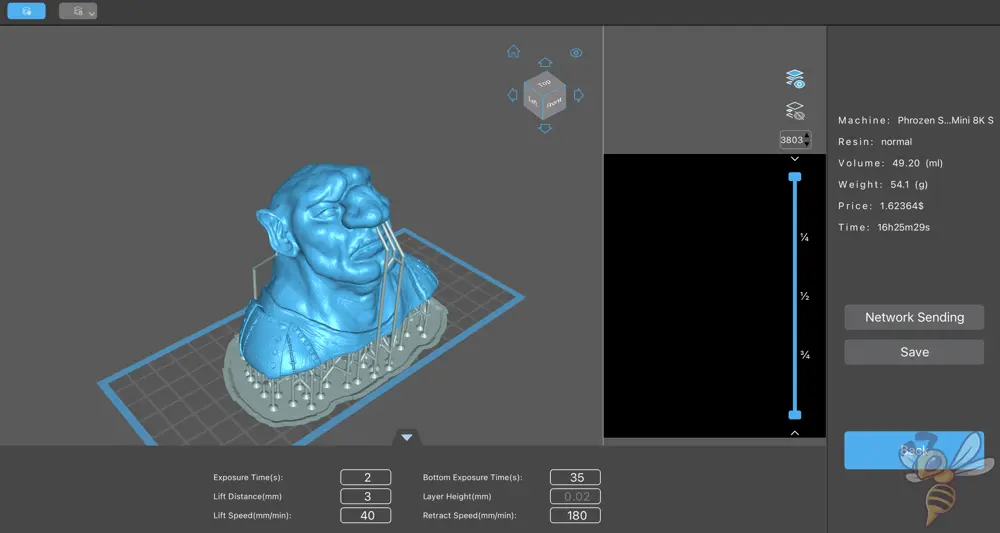
The print speed of the Mini 8K S is as good as most other 3D printers in its class. I printed the bust pictured above with a layer height of 0.02 mm and an exposure time of 2 seconds within 16.5 hours.
Most projects with a layer height of only 0.01 mm and fast curing resin are printed within 15 to 20 hours.
Since I usually set my resin 3D printers in the afternoon and run them overnight, I am relatively indifferent to the print speed for most projects. However, if you’re printing very tall objects and don’t want to wait several days for your object, it’s worth optimizing the speed.
An object that uses the full height of the print volume and is printed at the smallest possible layer height of 0.01 mm will take more than 70 hours with an exposure time of 2 seconds and unadjusted speed settings.
However, the printing speed can still be optimized:
- The movement speed of the print bed can be calibrated.
- There are resins that cure particularly quickly.
- A greater layer height of 0.05 mm and edge smoothing in the slicer are useful for large objects.
By taking these measures, you can print even objects that completely use the print volume within 10 to 12 hours!
Print quality of the Sonic Mini 8K S (pictures of 3D prints)
Printing itself with the Mini 8K S is the same as with any other resin 3D printer: fill in the resin, start printing, wait, wash the printed object with isopropyl alcohol and cure it with UV light.
After the calibration objects (see above), I directly started my troll bust with a layer height of 0.02 mm. The print ran for 16.5 hours. I didn’t have a single misprint, the entire printing process ran absolutely smoothly.

I was a bit hasty after printing my troll bust and already started applying the first layers of paint, even though I hadn’t taken any photos of the print result yet. Therefore, the skin of the troll is already primed. Nevertheless, you can see the details on the face and ears quite well.
Even the small pores on the face and other skin turned out exactly as I modeled them in the 3D object.
Not too long ago, this level of detail was exactly what I wanted and now with modern resin 3D printers like the Mini 8K S, it is possible to make such details at home!
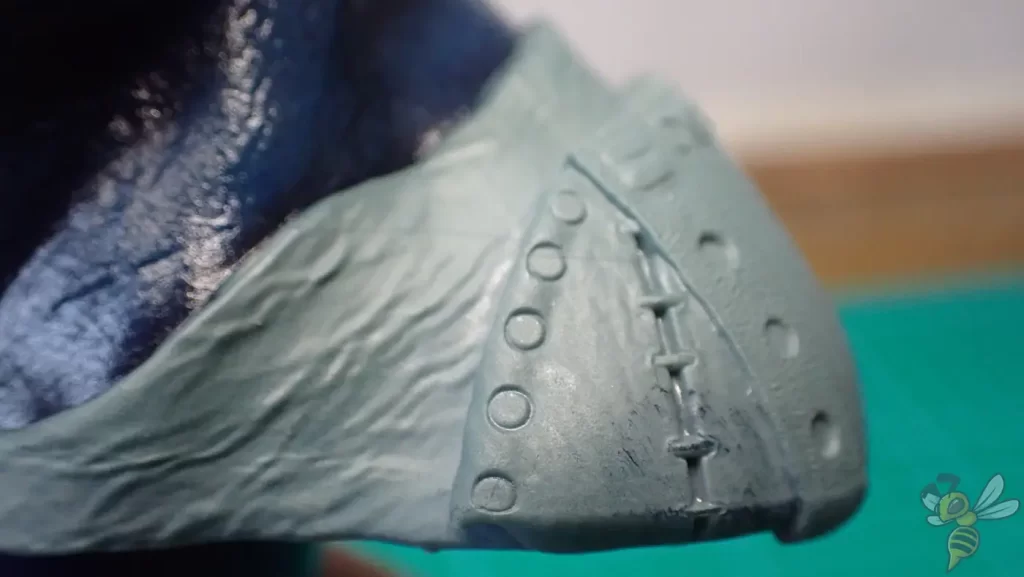
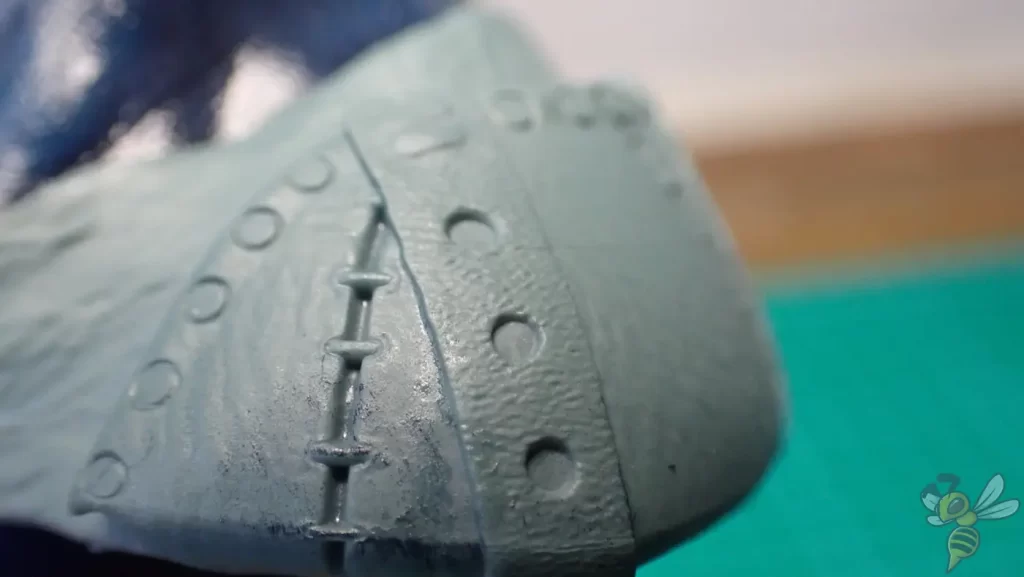
Also very impressive is the fabric and leather shoulder plates. The small pleats and seams have the same level of detail after printing as in the 3D model.
For someone who mainly wants to print smaller or medium-sized objects with minute details, the Mini 8K S is ideal.
Operating the Sonic Mini 8K S & ease of use features
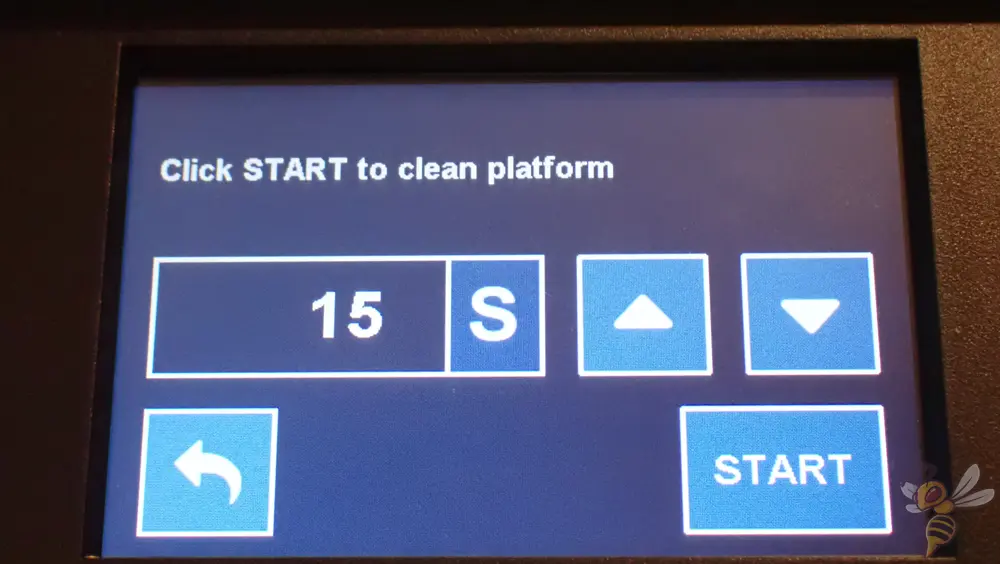
The Mini 8K S is lacking in ease-of-use-features. It is mainly about achieving high accuracy at the lowest possible price. Aside from the features necessary to print, there is only a cleaning function for the resin tank. This cures any remaining resin in the tank so that it can be removed more easily and without residue.
The features of the Mini 8K S are reduced to the basic functions to save costs. There is no air filter, no automatic print bed leveling, only one connection option, and no other bells and whistles. In return, the basic functions are implemented in a very user-friendly way.
Since I received a pre-release version, there was no instruction manual included. But what I’m used to from Phrozen so far, it should however explain the setup easily understandable.
What I would like to see in the future is information in the included documentation on how to properly calibrate the 3D printer settings. While there are occasionally good test objects included, there is no mention of what to look for in these test objects.
Earlier in this review, I already discussed calibrating the exposure time. You can find more information about it in this article: Resin 3D Printer Calibration: Step-by-Step Guide
When will the Sonic Mini 8K S become obsolete?
The question of when a resin 3D printer will be obsolete made a lot of sense a few years ago. There, it sometimes made sense to wait another six months for a better 3D printer to hit the market. However, the resolutions of modern 3D printers are so good that there is little room for improvement for some of the most popular use cases.
With the Mini 8K S’s 22 μm pixel size, you can print even tiny objects and retain almost all the detail. For many applications, it doesn’t make much sense to wait for a better 3D printer.
However, there are now resin 3D printers with a much larger print volume and even better print quality. But then the price will be higher.
If you want to print small to medium-sized objects, such as miniatures or jewelry, you will be happy with the Mini 8K S for years!
If you’re looking for a 3D printer with the same accuracy but a larger print volume, you should check out my review of Elegoo’s Saturn 3: Elegoo Saturn 3 (+Ultra) – Review from a Miniature Painter
Is the Sonic Mini 8K S the right 3D printer for you?
What I really liked about the Mini 8K S:
✓ Excellent print quality, especially for miniatures
✓ No unnecessary and expensive “pro” features
✓ Easy to use
✓ Space for air filter in the enclosure
The drawbacks of the Mini 8K S:
× No integrated air filter
× No Wi-Fi connection
The Sonic Mini 8K S from Phrozen* is an excellent resin 3D printer. It absolutely convinced me in this test.
I tested it in this review from the eyes of a newbie who wants to use it to print miniatures for a tabletop game. For this use case, the Mini 8K S is awesome!
If I were to buy a small resin 3D printer with a good print quality, I would choose either the Mini 8K S or the Elegoo Mars 4*. The only deciding factor would actually be the price. I’ve included a little comparison of these two 3D printers further down in this article if you want to learn more about the Mars 4.
The Phrozen Sonic Mini 8K S is ideal for miniatures. Highly accurate, no nonsense, affordable. Perfect for the hobby.
LCD Resolution: 8K (7500 × 3273)
LCD Size: 7″
XY Resolution: 22 μm
Layer Height: 0,01-0,3 mm
Build Volume: 165 × 72 × 170 mm
Speed: max. 80 mm/h
Pros:
✓ Excellent resolution
✓ Easy to use
✓ Short curing times
Cons:
× Small build volume
× No air filter
Phrozen Sonic Mini 8K S vs. Sonic Mini 8K
The Mini 8K S is the direct successor to the Sonic Mini 8K. I also tested this small-format resin 3D printer, with its then-revolutionary high accuracy. Here you can find my detailed review of it: Sonic Mini 8K | Hands-On Test & Review | Is It Worth It?
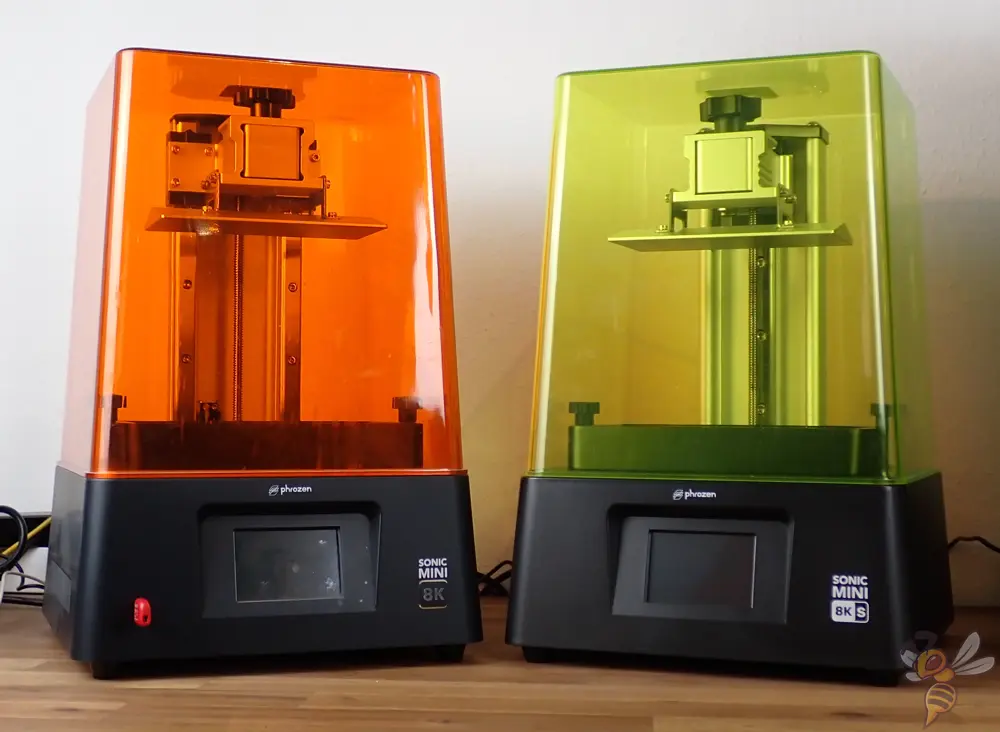
When you see the two 3D printers side by side, the only two features that differ are the color of the UV protective hood and the z-axis. Unlike its predecessor, the Mini 8K S has only one linear guide and not two.
Many have wondered if this isn’t a downgrade. However, as mentioned above, the design of the Mini 8K S’s single linear guide is such that there is still a very high level of stability for the z-axis, and therefore for the print bed. Since I also own its predecessor, I can directly compare the two z-axes.
As one of the first resin 3D printers, the Sonic Mini 8K has a pixel size below 25 μm.
LCD resolution: 8K (7500 × 3240)
LCD size: 7″
XY-resolution: 22 µm
Layer height: 0,01-0,30 mm
Build volume: 165 × 72 × 180 mm
Speed: max. 80 mm/h
Pros:
✓ Very accurate
✓ Easy to use
✓ Short curing times
✓ Double z-axis
Cons:
× Small print volume
× No air filter
× Somewhat loud with max. 45 dB
In my test, there were no differences in print quality between the two 3D printers. The handling and operation is also identical.
The Mini 8K S is thus an overall improvement on its predecessor and considerably cheaper. So, in principle, there is no reason to prefer the Mini 8K over the Mini 8K S.
The only drawback of the newer version is that the print volume is 1 cm smaller in the z-direction. However, I think that this is not a problem for 99% of users.
Disclosure: This website is the property of Martin Lütkemeyer and is operated by Martin Lütkemeyer. Martin Lütkemeyer is a member of the Amazon Services LLC and other Affiliate Programs. These are affiliate advertising programs designed to enable websites to earn advertising revenue through advertising and linking to Amazon.com and others. Links marked with * are affiliate links.
