
- Wet Filament: Prevention, Symptoms & Drying - July 18, 2024
- Sovol SV08 – Best PrusaSlicer Settings & Profile - June 26, 2024
- Sovol SV08 – Best Orca Slicer Settings & Profile - June 26, 2024
Disclosure: Links marked with * are Affiliate Links. I earn from qualifying purchases if you decide to make a purchase through these links – at no additional cost for you!
If you know how, replacing the hotend of the Anycubic Mega S can be done within 10 to 20 minutes. In this article, you will learn the individual steps in detail.
To replace the hotend of the Anycubic Mega S, open the case, unplug all cables, unscrew the four hotend screws on the top of the case, and pull the filament tube out of the extruder. Before you do this, of course, you must have removed the filament and unplugged the power cord.
Table of Contents:
- 1 Step 1: Heat the Nozzle to 200 °C
- 2 Step 2: Remove Filament
- 3 Step 3: Let the Hotend Cool Down
- 4 Step 4: Move Z-axis Up
- 5 Step 5: Switch off the Mega S
- 6 Step 6: Open the Hotend Case
- 7 Step 7: Remove Case and Fan
- 8 Step 8: Pull Filament Tube from Extruder
- 9 Step 9: Unplug the Hotend Cable
- 10 Step 10: Unplug the Cable
- 11 Step 11: Unscrew and Remove the Hotend
- 12 Step 12: Install New Hotend
- 13 Step 13: Check Extrusion
- 14 Step 14: Leveling the Print Bed
Step 1: Heat the Nozzle to 200 °C
First, the old filament in the hotend must be removed. To do this, heat the nozzle to 200 °C.
Step 2: Remove Filament
Once the filament is liquid in the nozzle, you can either pull it out via “Filament Out” in the filament menu or by hand.
There is a lever on the extruder that you can pull back. This takes away the friction of the extruder on the filament, so you can pull the filament out by hand.
Step 3: Let the Hotend Cool Down
So that you don’t burn your fingers in the further process, you should now let the hotend cool down again.
In the “Tools” submenu, press “Cooling”. The target temperatures of the print bed and extruder are automatically set to 0 °C.
Step 4: Move Z-axis Up
It is advisable for the following process to move the Z-axis up a bit so that you have more space to work with.
In the “Tools>Move Axis” submenu, press 10 mm at +Z until you are about halfway along the Z-axis.
Step 5: Switch off the Mega S
Every time you tinker with an electrical device, you must unplug it. Before you do this, however, you should turn off the 3D printer properly. Make sure that the hot end has cooled down before you do this.
Step 6: Open the Hotend Case
To remove the hotend, you have to pull out two connectors inside the case. However, you can only access these connectors if you remove the case.
The case is fixed with four screws: Two at the front top and two at the back bottom.
Step 7: Remove Case and Fan
Now the case is only hanging on the two cables for the fans. You can simply pull them out to release the case.
If you’re wondering why the hotend fan looks different on mine than it does on yours, it’s because I swapped it out with a quiet NF-A4x10 FLX fan from Noctua*. If you want to know how I did it and what other fans you can swap out, you should check out this article.
Step 8: Pull Filament Tube from Extruder
Next, we take care of the tubing in which the filament is fed from the extruder to the hotend.
With a little pressure on the black insertion, and a simultaneous pull on the hose, it can be released and pulled out quite easily.
Step 9: Unplug the Hotend Cable
Before you can completely remove the hotend, you have to unplug the two cables in the case.
If this is the first time you are replacing the hotend (and I think it will be, otherwise you wouldn’t be reading this guide), you will notice that there is silicone stuck to the left connector.
This is due to production and you don’t have to worry if you remove the silicone.
Step 10: Unplug the Cable
To get better access to the screws of the hotend in the next step, unplug the cable guide from the hotend case.
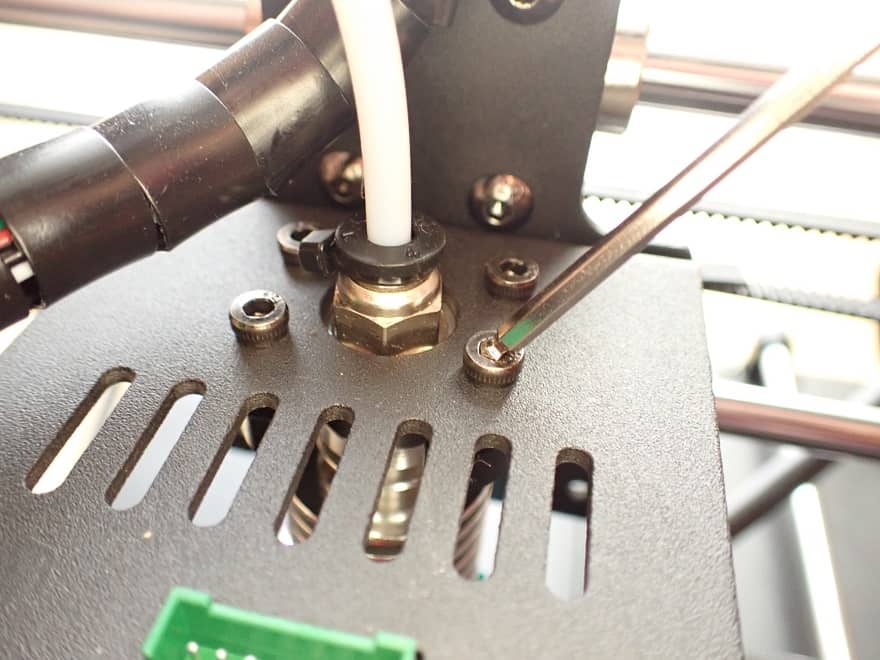
Step 11: Unscrew and Remove the Hotend
The hotend is only fixed with 4 screws. While loosening the last screw, you should hold the hotend firmly, otherwise it could fall onto the hotbed and damage it.
After that, you can pull out the hotend and frame it as a trophy above your bed if you like.
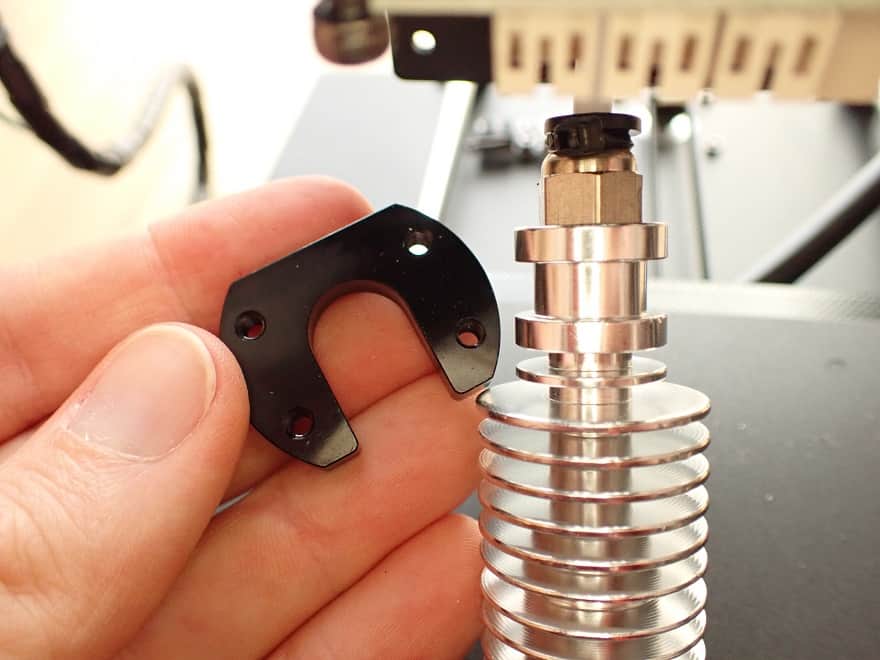
Step 12: Install New Hotend
Installing the new hotend will be very easy now that you have removed the old one. Basically, you only have to do all the steps backwards again.
To install the new hotend on your Mega S you have to follow these steps:
- Feed filament tube through the case and cable guides to the extruder.
- Insert the filament tube into the extruder as far as it will go.
- Screw the hotend to the case (make sure that the cables point to the front).
- Plug in the hotend cable.
- Plug in fan cable.
- Mount the case.
- Plug in cable with green connector.
Step 13: Check Extrusion
To know if your operation was successful, you can now turn on the 3D printer and check the extrusion.
To do this, feed the new filament through the extruder to the nozzle and start the extrusion process via the filament menu with “Filament In” (heat up first, of course).
If the 3D printer displays the temperature correctly and the filament is pushed out of the nozzle, the operation was successful!
Step 14: Leveling the Print Bed
As with most operations on a 3D printer, you will need to re-level the print bed.
The smallest differences in height can cause the nozzle and the print bed to collide. Leveling is essential to ensure a good first layer.
If you want to see exactly how to level the print bed on the Mega S and what you can optimize to make it less work, you can check out this article.
Disclosure: This website is the property of Martin Lütkemeyer and is operated by Martin Lütkemeyer. Martin Lütkemeyer is a member of the Amazon Services LLC and other Affiliate Programs. These are affiliate advertising programs designed to enable websites to earn advertising revenue through advertising and linking to Amazon.com and others. Links marked with * are affiliate links.
