- Wet Filament: Prevention, Symptoms & Drying - July 18, 2024
- Sovol SV08 – Best PrusaSlicer Settings & Profile - June 26, 2024
- Sovol SV08 – Best Orca Slicer Settings & Profile - June 26, 2024
Disclosure: Links marked with * are Affiliate Links. I earn from qualifying purchases if you decide to make a purchase through these links – at no additional cost for you!
If you want to change the filament on your Anycubic Mega S*, you need to follow a few steps.
To change the filament on the Anycubic Mega S, you must first heat up the nozzle. Only then can you remove the old filament. The extruder has a lever with which you can take the friction off the filament. Then you can push the filament in and out by hand.
How to do this in detail and what you have to pay attention to, you will learn in this step-by-step guide.
Table of Contents:
When to Change the Filament?
You have to change the filament whenever you want to use a different color or material.
It is also advisable to store the filament after each print if you do not want to print for several days. This way you protect it from moisture.
And then you have to change it even if it’s the same filament roll when you start printing again.
So if you want to remove your filament after a print or then reinsert it, you can also use this step-by-step guide by simply ignoring the relevant steps.
How to Change the Filament Step by Step
Step 1: Heat up the Nozzle
In order to remove the old filament, it must first be heated up in the nozzle.
If you don’t do this, a small amount of filament will stick in the nozzle and you won’t be able to pull out the old filament.
Therefore, you must first bring the nozzle to a temperature at which the filament melts.
You can do this in three different ways:
- You enter the temperature for the nozzle manually.
- You use the “Preheat” function for PLA or ABS. Of course, this only works for the filaments mentioned or those that have a similar melting temperature.
- Or you can go directly to the filament menu and press “Filament Out”. If the nozzle is still cold, the Mega S will tell you that it will automatically raise the temperature to melt the filament in the nozzle.
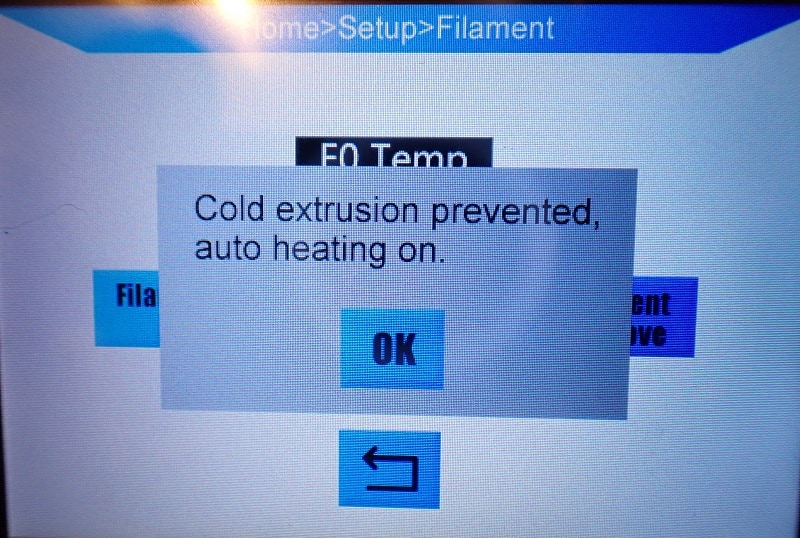
Step 2: “Filament Out” via Menu
Once the temperature at which the filament melts is reached, you can press “Filament Out” in the filament menu.
The extruder will now pull the filament out of the nozzle in the other direction.
The Anycubic Mega S will not stop pulling the filament out until you press “Stop”. You must let the extruder pull the filament out until you can see the end in the partially transparent tube above the print head.
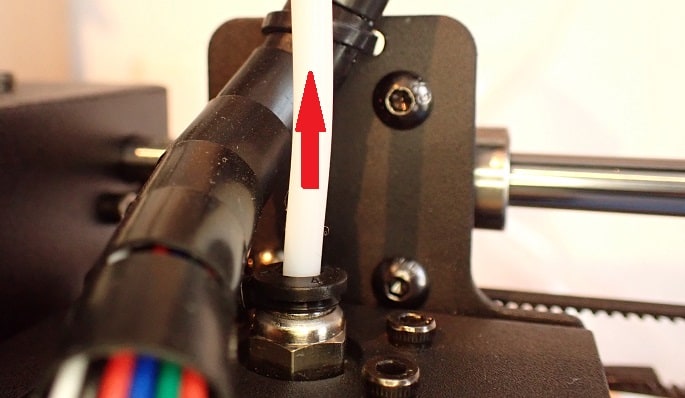
Step 3: Remove Old Filament
Once you can see the end of the filament in the tube, stop pulling it out through the extruder.
From here, you remove the filament by hand.
To do this, you must pull the lever on the extruder backwards to remove the friction on the filament in the extruder.
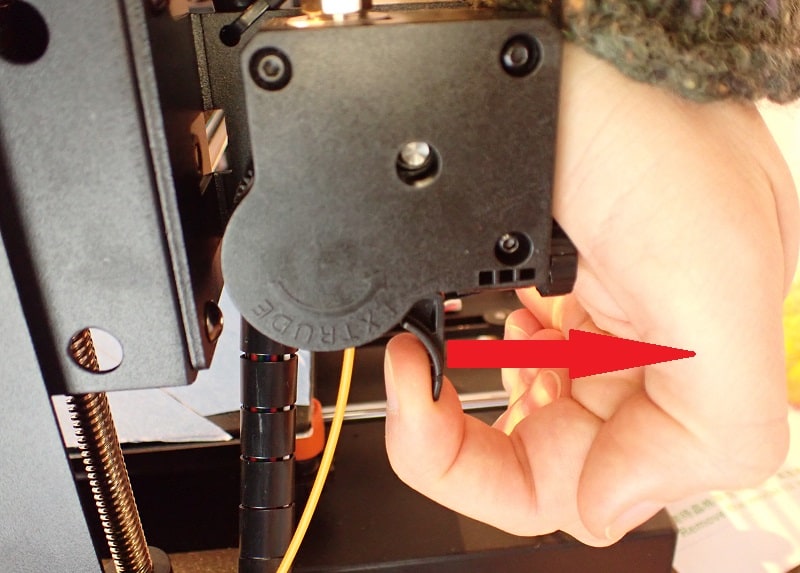
Now you can easily pull out the filament. Make sure that it does not get tangled on the filament spool. It is best if you roll up the spool a bit with your other hand in between.
This prevents the individual filament strands from getting tangled on the spool. Once the filament has come out of the extruder, all you have to do is pull it through the filament sensor.
If you want to use the old filament again, it is recommended to store it properly. The best way to do this is to use a suitable airtight plastic box with some silica gel*.
For my filament spools, I use this box* which pretty much fits any filament spools.
It’s big enough that you can still put a couple of silica gel bags on the bottom to remove the humidity.
If you want to know more about storage and the potential dangers of poor storage, you should check out this detailed guide to filament storage.
Step 4: Insert the New Filament
Now do step 3 the other way around. To insert the new filament, first place the spool on the spool holder and pull the filament end through the filament sensor.
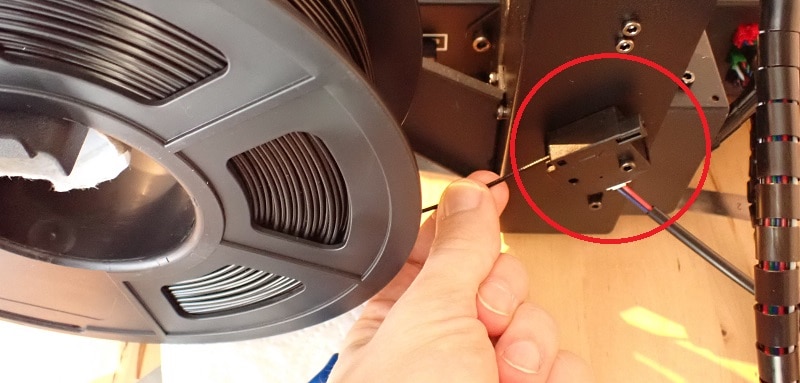
Make sure that the filament comes out from the bottom of the filament spool.
Now you can pull the lever on the extruder back and push the filament in until it stops at the nozzle.
You can therefore push the filament in as far as it will go.
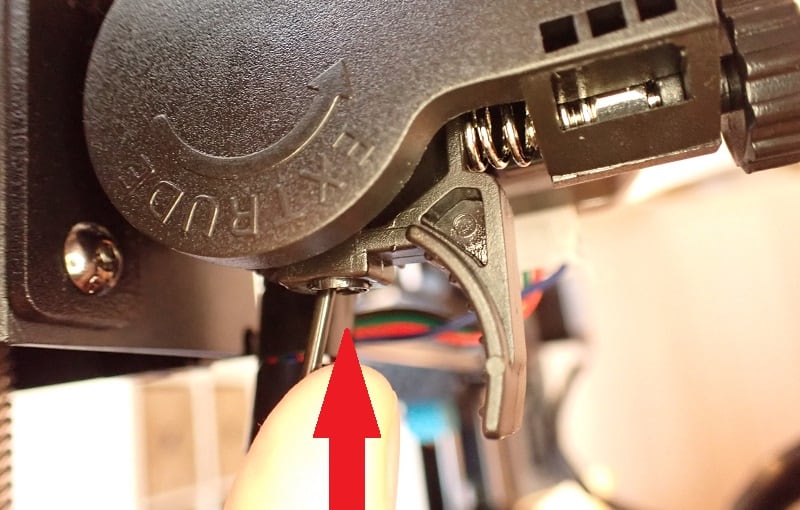
Step 5: “Filament In” via Menu
Once the filament is pushed all the way to the nozzle, you can press “Filament In” in the filament menu.
When the nozzle is no longer heated, the Mega S will automatically heat it up. The “Filament In” command will cause the extruder to push the filament through the nozzle until you press “Stop”.
I always extrude a few centimeters before I press “Stop” to get old filament residues out. If you use very different colors, e.g. first white and then black, it may take a little more filament until all residues are removed from the nozzle.
Once the extruded filament has a homogeneous color, you can press “Stop”.
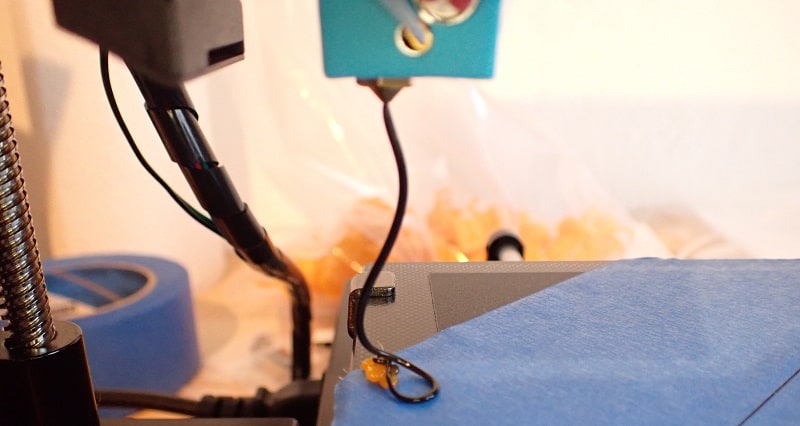
Step 6: Remove the Extruded Filament
Now that the filament is solid and you have stopped the extrusion, you can remove the filament that is hanging out of the nozzle.
You can use tweezers or a tissue for this.
Step 7: Start Printing or Let it Cool Down
Now the filament is ready for printing. You can also just let it cool down if you don’t want to start a print right away.
If you want to start a print immediately afterward and the nozzle remains warm until printing, it is possible that a little filament still flows out of the nozzle.
But that is not a big deal. For this reason, I print a Skirt by default, so that such filament residues are deposited elsewhere and not on my 3D object before the actual printing starts.
Related Questions
Which filaments can be used with the Anycubic Mega S?
With the Anycubic Mega S, you can print most standard filaments. These include PLA, ABS, PETG and TPU.
You cannot print somewhat more demanding filaments such as Nylon* with this printer. The hot end does not get warm enough for this.
How do I store filament correctly?
When storing filament, it is extremely important to protect it from moisture. So you need an airtight container to keep the humidity away from the filament.
It is also a good idea to pack silica gel* in this filament container. Silica gel removes moisture from the surrounding air and thus protects the filament from it.
There are also special storage boxes for filaments that do all this automatically and provide perfect storage. My favorite is this one on Amazon*.

Related Post:
3D Printer Filament Storage: Complete Guide
What are the best settings for PLA on the Mega S?
As long as you’ve made sure your PLA is dry, all you need to do is use the correct slicer settings.
For the extruder temperature, 190 to 220 °C is a good window. You should start at 200 °C and then work your way to the optimum in 5-degree increments.
The temperature for the print bed is between 50 and 60 °C. If you are using a surface such as BuildTak or Blue Tape, you should increase the temperature slightly.
If you want to know exactly, you can read this detailed guide to the best PLA settings for the Anycubic Mega S.
Disclosure: This website is the property of Martin Lütkemeyer and is operated by Martin Lütkemeyer. Martin Lütkemeyer is a member of the Amazon Services LLC and other Affiliate Programs. These are affiliate advertising programs designed to enable websites to earn advertising revenue through advertising and linking to Amazon.com and others. Links marked with * are affiliate links.

