
- Wet Filament: Prevention, Symptoms & Drying - July 18, 2024
- Sovol SV08 – Best PrusaSlicer Settings & Profile - June 26, 2024
- Sovol SV08 – Best Orca Slicer Settings & Profile - June 26, 2024
Disclosure: Links marked with * are Affiliate Links. I earn from qualifying purchases if you decide to make a purchase through these links – at no additional cost for you!
How does a resin 3D printer work? Resin printers intricately craft objects by curing liquid resin with UV light, layer by layer. Resin printers are your best option to create fine features with a smooth surface finish.
In this article, we’ll dissect the inner workings of resin 3D printing, from the science of photopolymerization to the nitty-gritty of the printing process, providing a clear pathway to understanding this 3D printing technology.
Table of Contents:
How Does Photopolymerization Work?
A resin 3D printer can turn liquid resin into a hard object. Photopolymerization is a process where light (UV) turns liquid resin into solid plastic. When UV light hits the resin, it triggers a chemical reaction that links the resin’s molecules together, hardening it layer by layer to form a solid object.
Resin 3D printing utilizes three core photopolymerization technologies for additive manufacturing: SLA, DLP, and LCD:
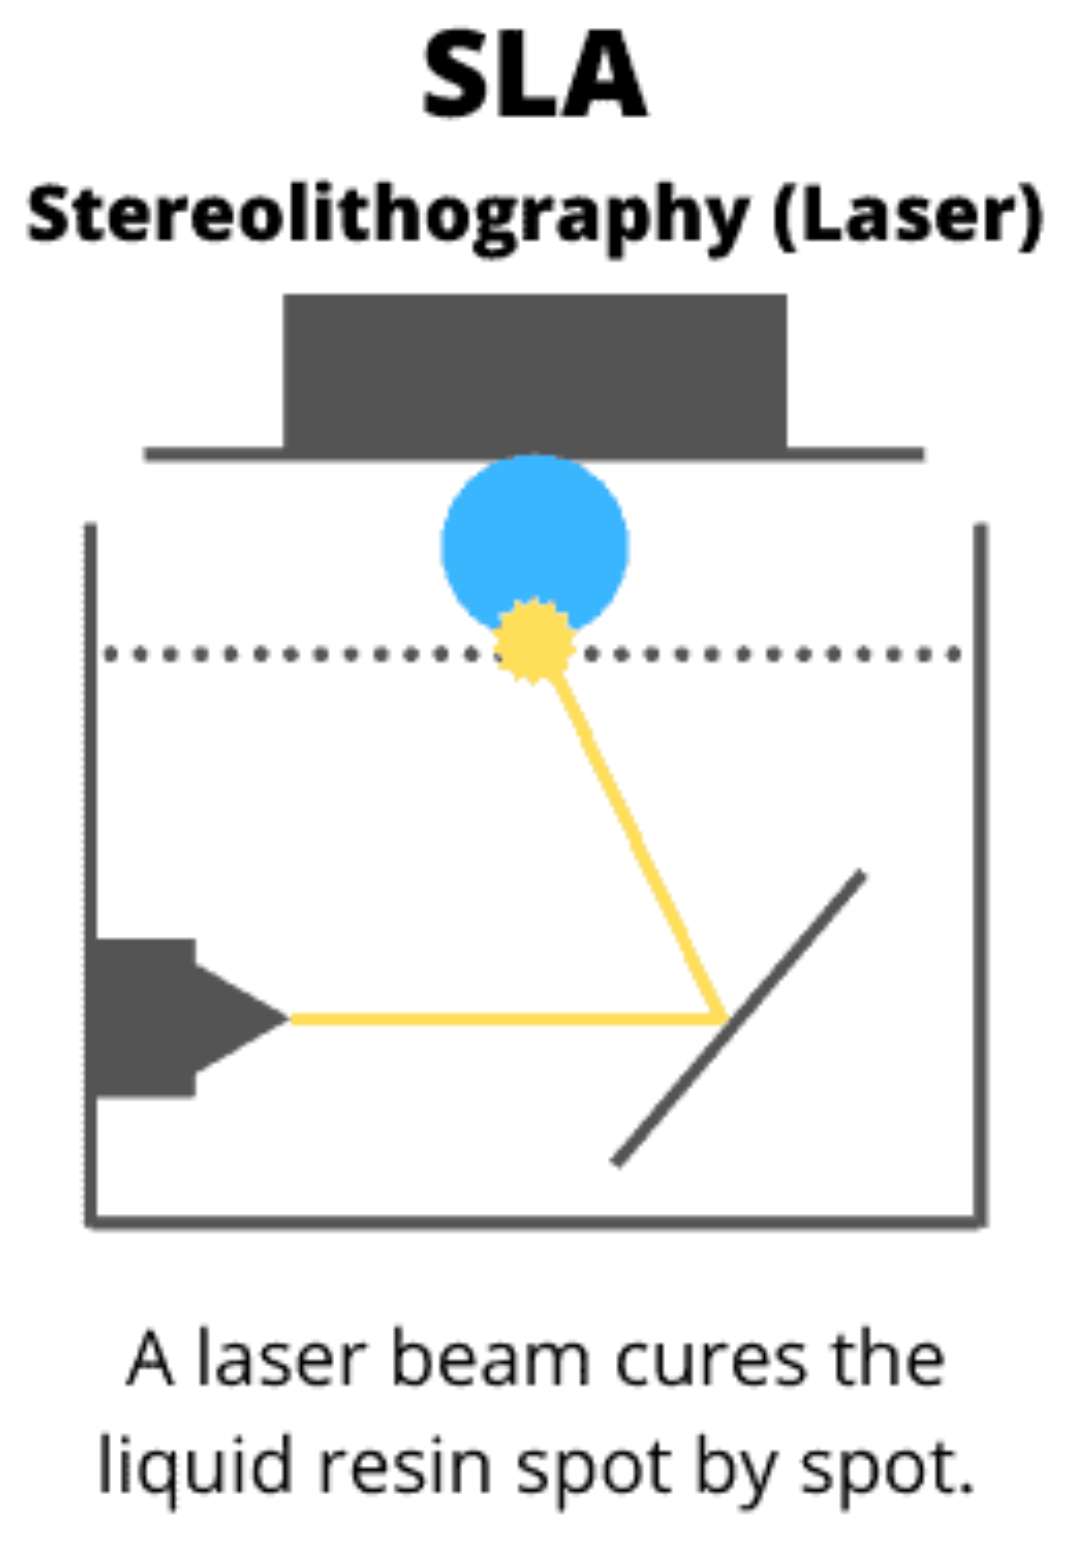
SLA (Stereolithography) uses a UV laser to cure liquid resin into hardened plastic, layer by layer. It’s precise, offering high-quality finishes but is slower and materials can be expensive.
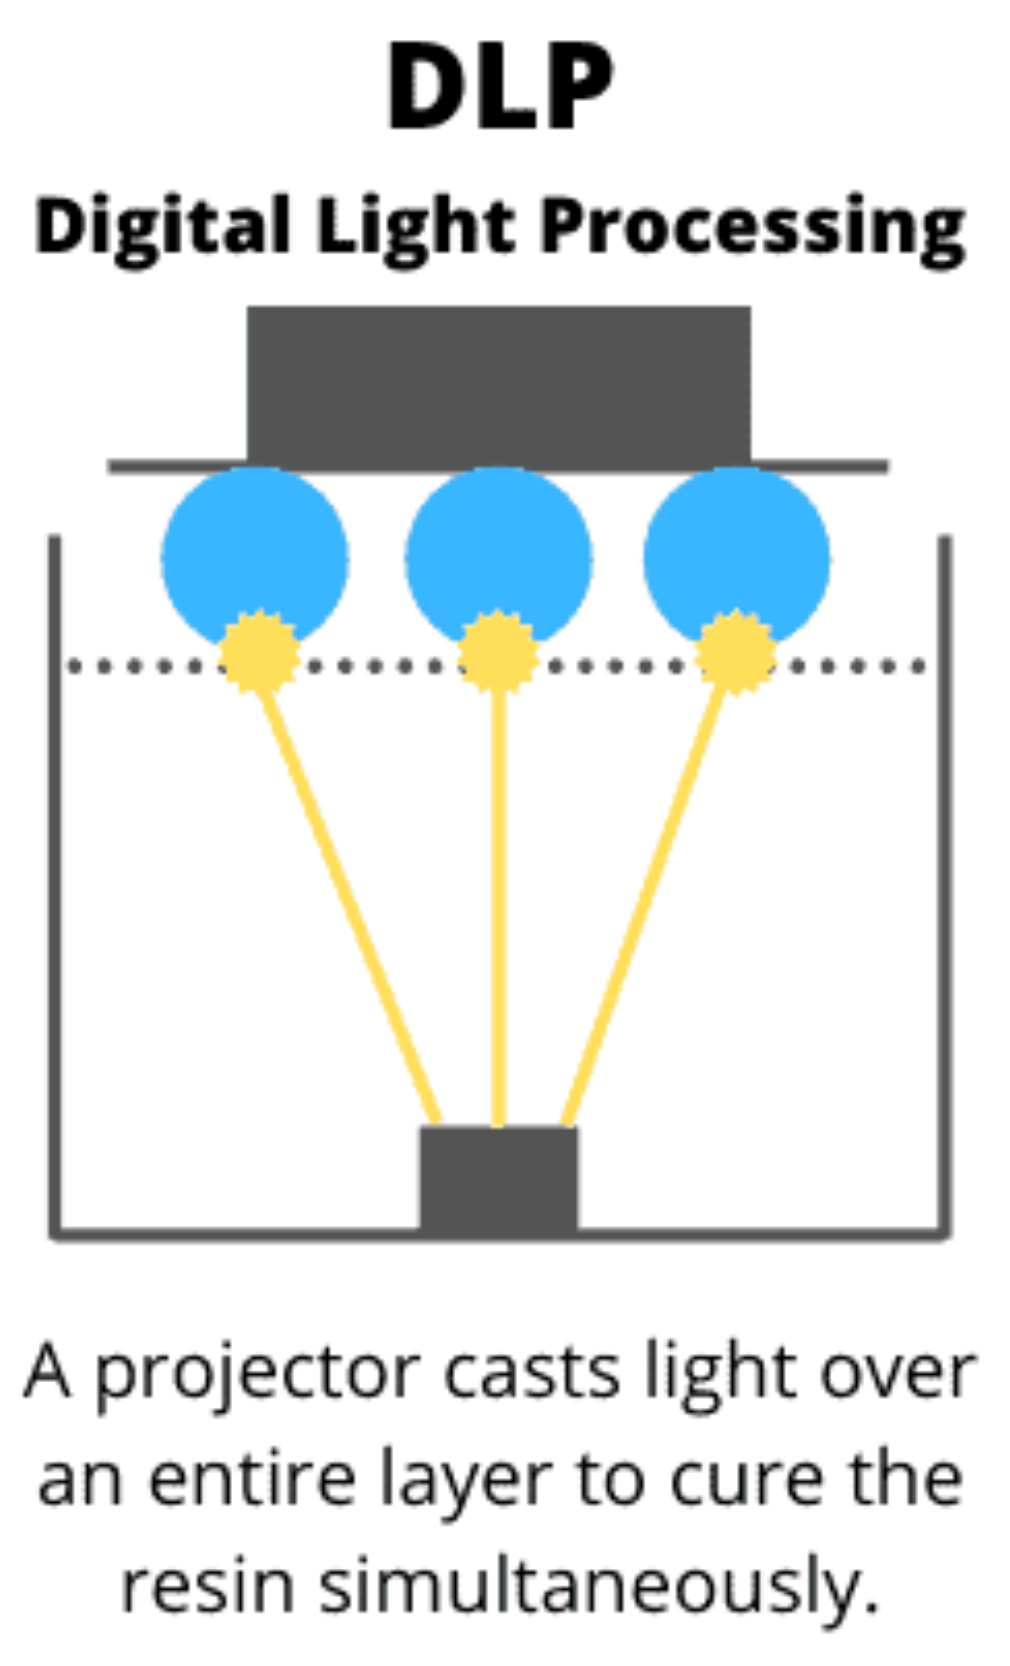
DLP (Digital Light Processing) also cures resin with light, but uses a digital projector screen to cure a whole layer at once. It can cure layers faster than SLA for this reason but can have slightly less detail.
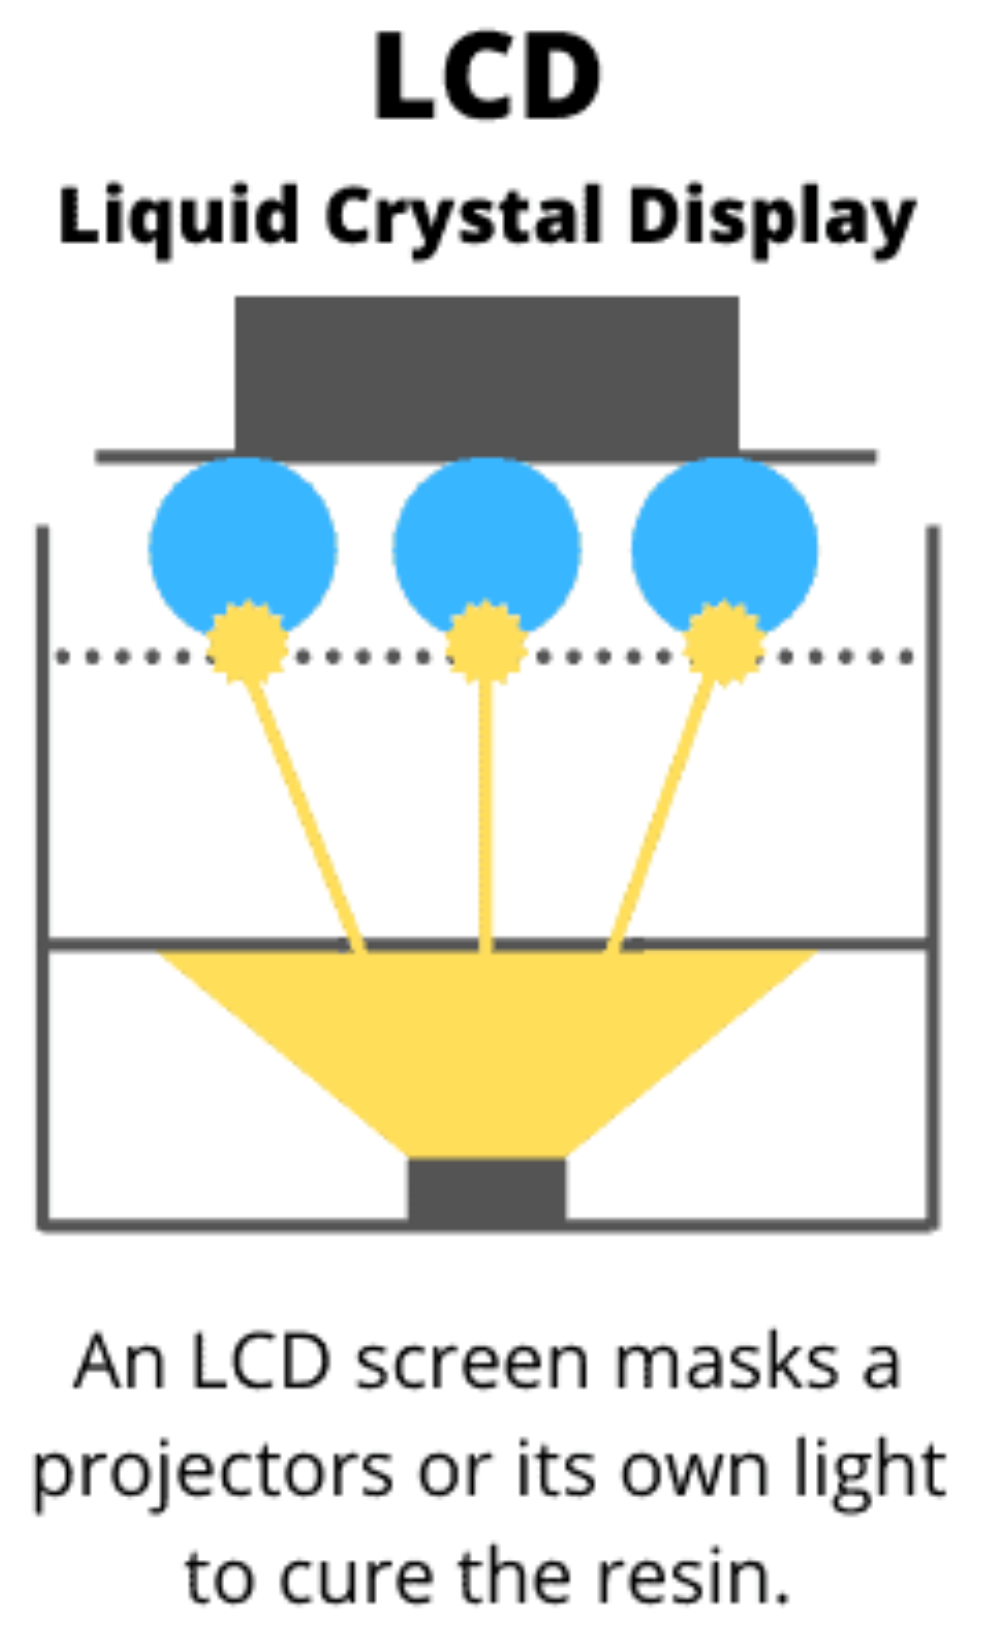
LCD (Liquid Crystal Display) 3D printers use a UV LED light source shining through an LCD panel to cure resin. It’s generally more affordable and faster than SLA, but the LCD screens can wear out and need replacing. LCD resin printing is best for hobby use: it’s affordable, precise, fast, and user-friendly, ideal for beginners.
The Inner Workings of a Resin 3D Printer
Having explored different methods of resin 3D printing, let’s delve into the heart of the matter – the core components of a resin 3D printer.
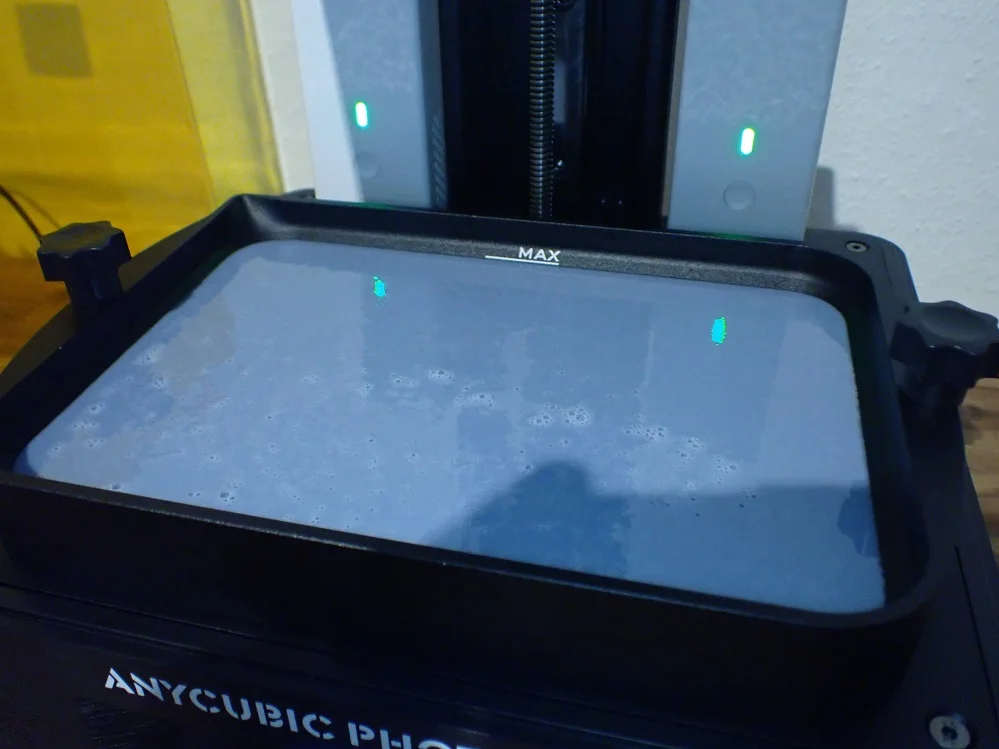
Resin Tank: A resin vat in a resin 3D printer holds the liquid resin. It’s where the light (laser, projector, or LCD) cures the resin layer by layer to create the 3D object. The bottom is transparent to allow light through for curing.
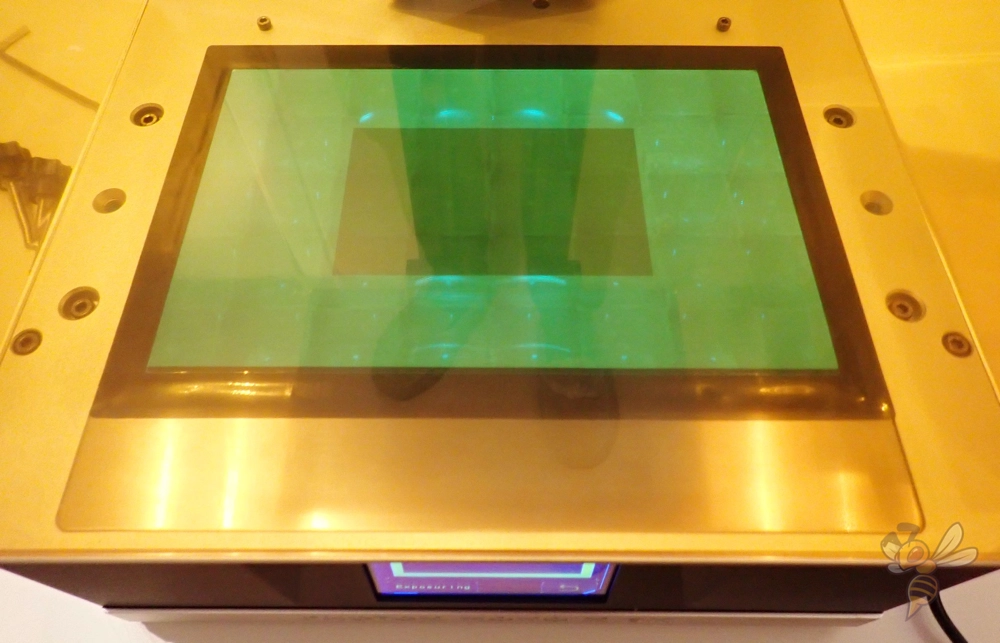
UV Light Source: The UV light processing unit in a resin 3D printer hardens liquid resin, transforming it into solid plastic, layer by layer, to create a 3D object.

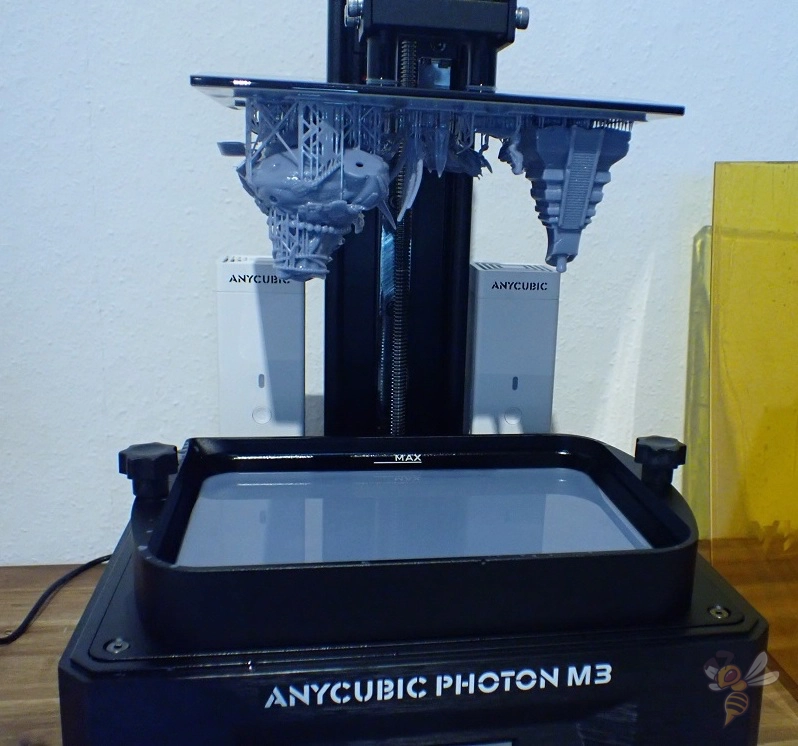
Build Platform: The build platform in a resin 3D printer holds and gradually moves the object being printed upwards, out of the liquid resin tank, as each new layer is cured and solidified by light.
Resin 3D Printing Process: Step-by-Step
- Design: Create a 3D model using computer software or download a suitable object.
- Slice: Use a slicer to prepare the 3D model. Adjust and calibrate the print settings for the best possible print quality.
- Prepare: Load the resin into the printer.
- Print: The printer exposes the resin to UV light, curing it layer by layer.
- Peel: The build platform lifts to separate the cured layer from the tank, then lowers for the next layer.
- Repeat: The 3D printer repeats steps 4 and 5 until the object is fully printed.
- Clean: Remove the resin prints and wash off uncured resin with isopropyl alcohol.
- Cure: Expose the object to additional UV light to harden it further.
- Finish: Remove supports, sand, and post-process as desired.
Sources for this article:
- My years of experience with various resin 3D printers.
- sciensedirect.com “Photopolymerization”
- wikipedia.org “Photopolymer”
- wikipedia.org “Stereolithography”
- wikipedia.org “Digital Light Processing”
- formlabs.com “Stereolithografieverfahren (SLA)”
- phrozen.com “LCD 3D Printing”
Disclosure: This website is the property of Martin Lütkemeyer and is operated by Martin Lütkemeyer. Martin Lütkemeyer is a member of the Amazon Services LLC and other Affiliate Programs. These are affiliate advertising programs designed to enable websites to earn advertising revenue through advertising and linking to Amazon.com and others. Links marked with * are affiliate links.
