- Wet Filament: Prevention, Symptoms & Drying - July 18, 2024
- Sovol SV08 – Best PrusaSlicer Settings & Profile - June 26, 2024
- Sovol SV08 – Best Orca Slicer Settings & Profile - June 26, 2024
Disclosure: Links marked with * are Affiliate Links. I earn from qualifying purchases if you decide to make a purchase through these links – at no additional cost for you!
Want to add variety to your 3D printing projects, save filament, and make them more stable in key places? With variable infill, you can do just that – and even make it happen in Cura with a few tricks!
With variable infill, the infill pattern and density can be changed for different parts of the model. In Cura, variable infill can be achieved by using Support Blockers. Different patterns and densities can be set for the Support Blocker areas.
In this tutorial, you will learn how to use this feature, what are the disadvantages and what are the alternatives.
Table of Contents:
- 1 Where is the Variable Infill Option in Cura?
- 2 How does Variable Infill work in Cura?
- 3 Different Infill Density in One Object in Cura
- 4 Different Infill Pattern in One Object in Cura
- 5 Applications for Variable Infill in Cura
- 6 Save Filament and Time with Variable Infill in Cura
- 7 Variable Infill vs. Gradual Infill in Cura
- 8 Disadvantages of Using Curas Variable Infill
- 9 Variable Infill vs. Lightning Infill
Where is the Variable Infill Option in Cura?
Cura is a great slicing program for 3D printing, but one thing it lacks is the ability to create variable infill directly. However, there is a workaround that you can use to achieve the same effect.
Support Blockers allow you to select specific areas of the model and customize the infill settings. This gives you much more control over the final print and allows you to optimize the strength or weight if needed.
The setup is a bit tedious, but the added flexibility is worth it. But although the process takes a little getting used to, after reading this tutorial you won’t have any problems creating variable infill on your model in Cura.
How does Variable Infill work in Cura?
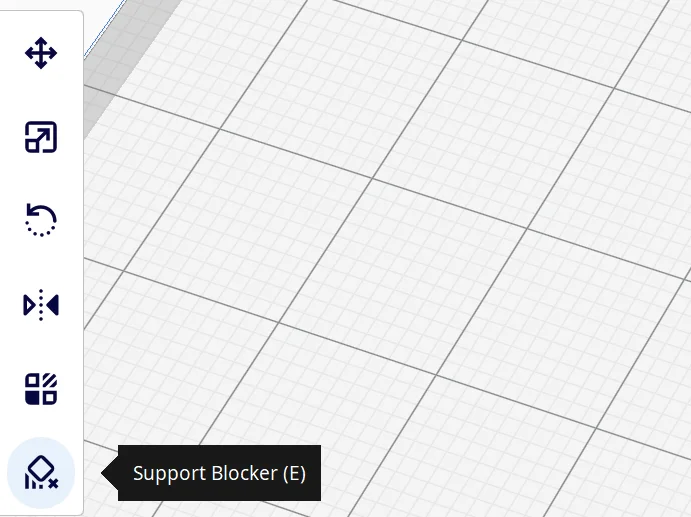
To insert a support blocker you will find a button for the support blocker on the left side of the Cura user interface. If you then click on your object, a small cube will appear for the area of the support blocker. The Support Blocker can be scaled and rotated like an object. You can also move it by clicking with the left mouse button on the symbol and then dragging it with the mouse button pressed.
Once you have set the Support Blocker to the area of the object you want to adjust, you can now make the print settings for the area individually. I will explain how this works in detail for the infill density and the infill pattern in the next two sections.
Different Infill Density in One Object in Cura
Although this method is a small workaround for creating variable infill in Cura, it is very simple once you learn and apply it. It only takes a few steps to adjust the infill density of individual sections of your object.
In this example, we would like to equip the Mini Octopus (link to model) with very sturdy arms. The infill density of the arms and the base of the body should have a density of 20% and the head an infill density of 5%. Proceed as follows:

Step #1: Open the object in Cura and set the infill density for the head in the normal print settings.
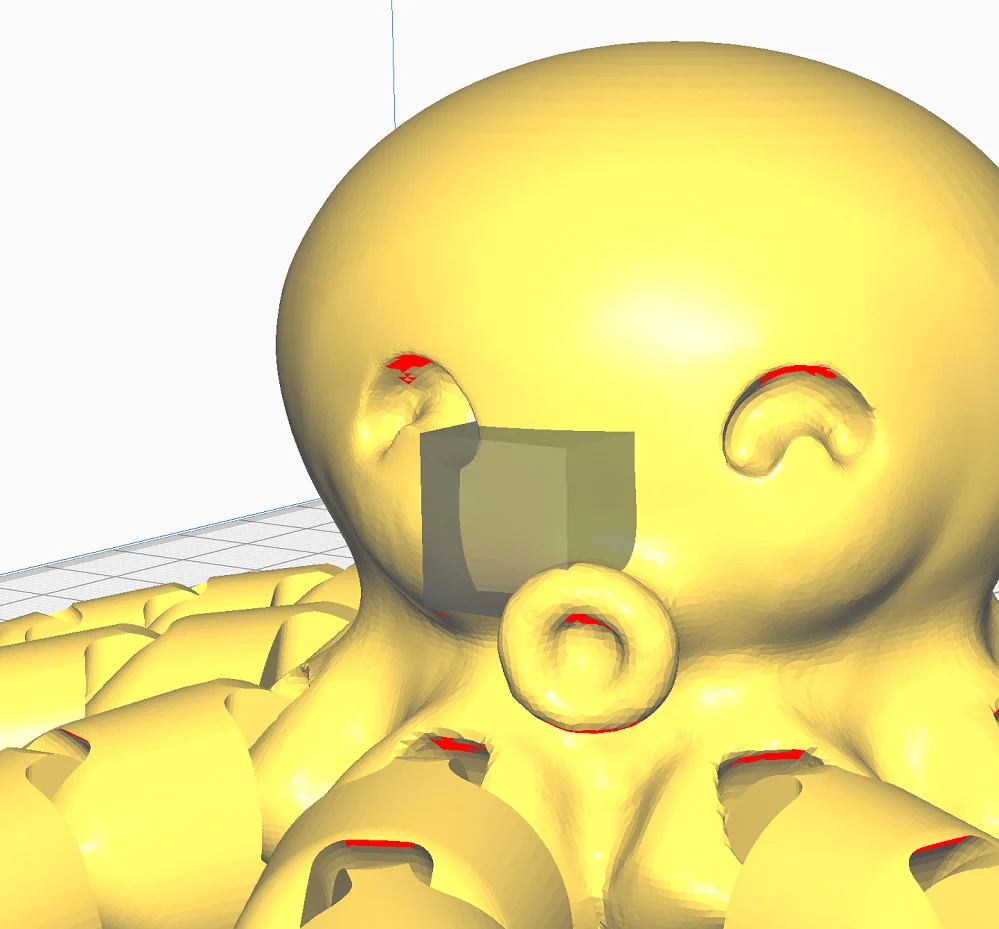
Step #2: Create a Support Blocker: To create a Support Blocker, you need to click on the print object in Cura and click on the Support Blocker icon on the left side of the interface. Then click on your print object. A small cube will appear that represents the area of the Support Blocker.
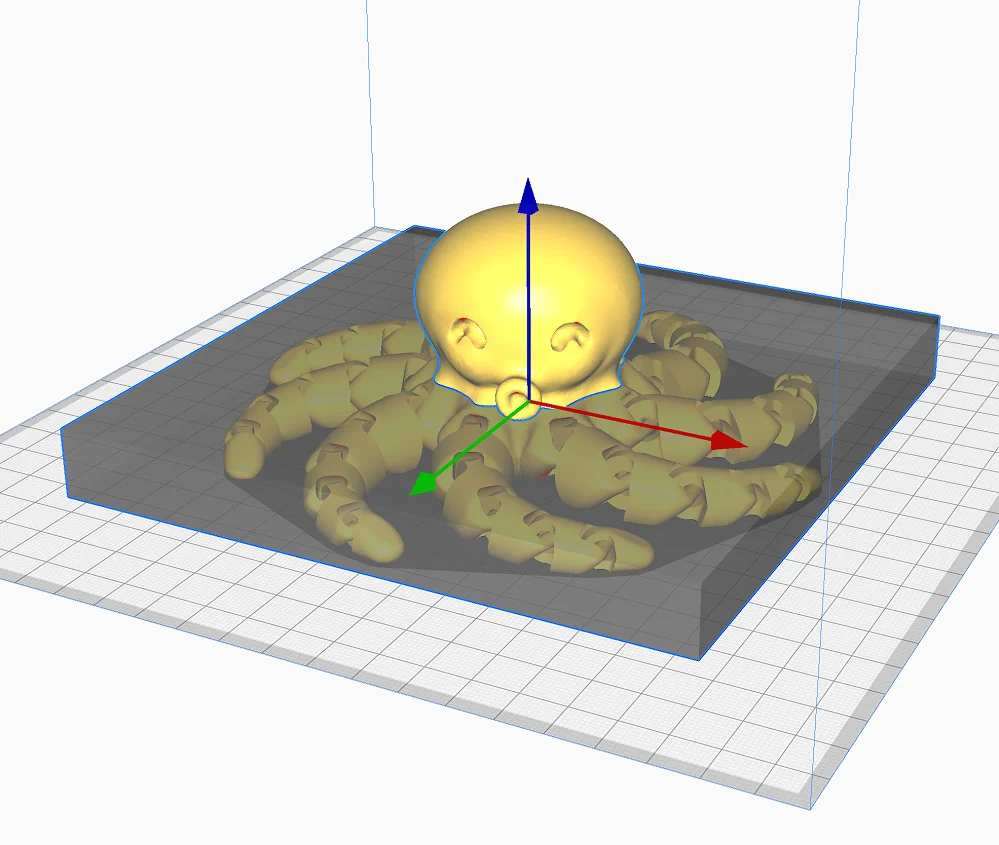
Step #3: Scale and position the Support Blocker: You can modify the cube of the Support Blocker just like a normal print object using the manipulation tools on the left edge of the user interface. You can move, scale and rotate it. It’s best to disable uniform scaling when scaling, so you have a little more freedom in designing the Support Blocker. In this case, I set the Support Blocker very wide and flat so that it covers the entire feet and base of the body.
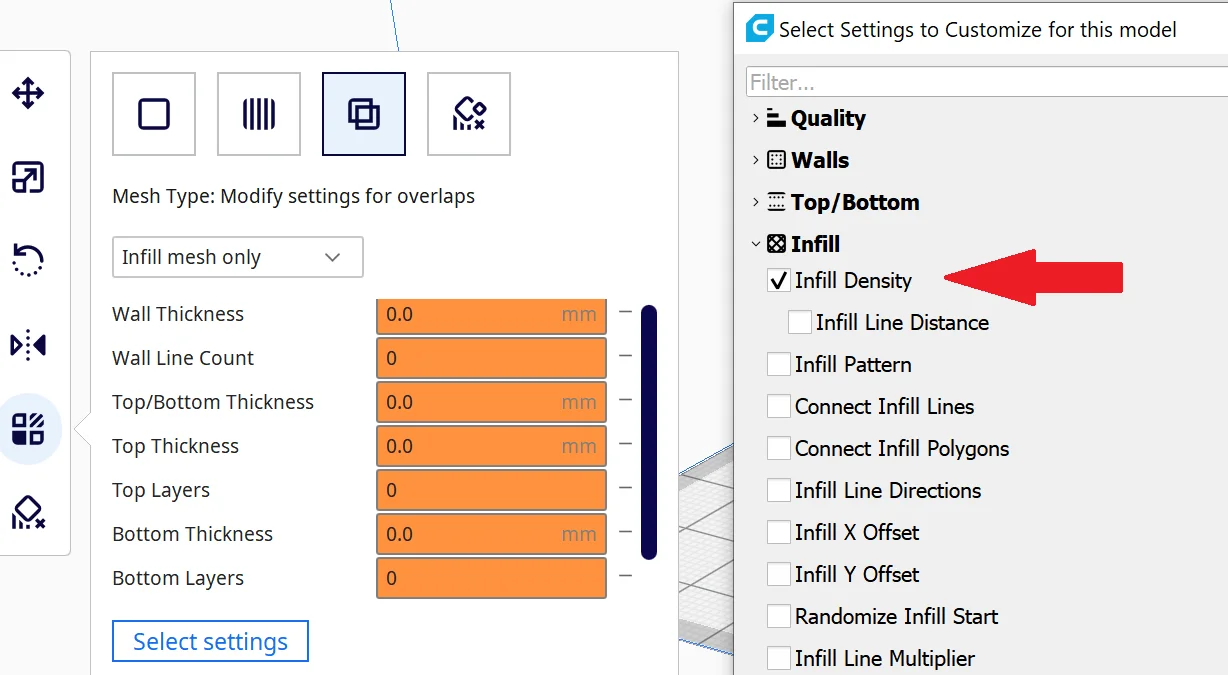
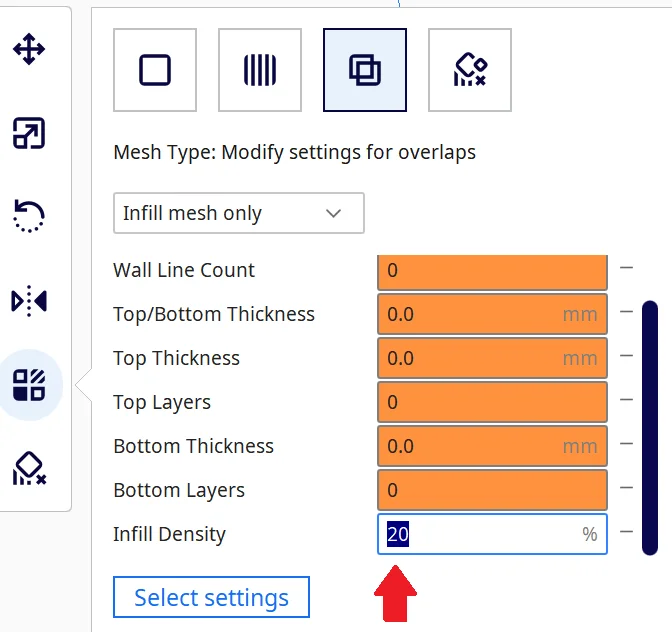
Step #4: Change the infill density for the overlapping area: Select the Support Blocker (click on it) and activate the settings for the overlapping area. Here you need to activate the infill density setting so that it can be displayed and changed. Enter the desired infill density here – in this case 20%.
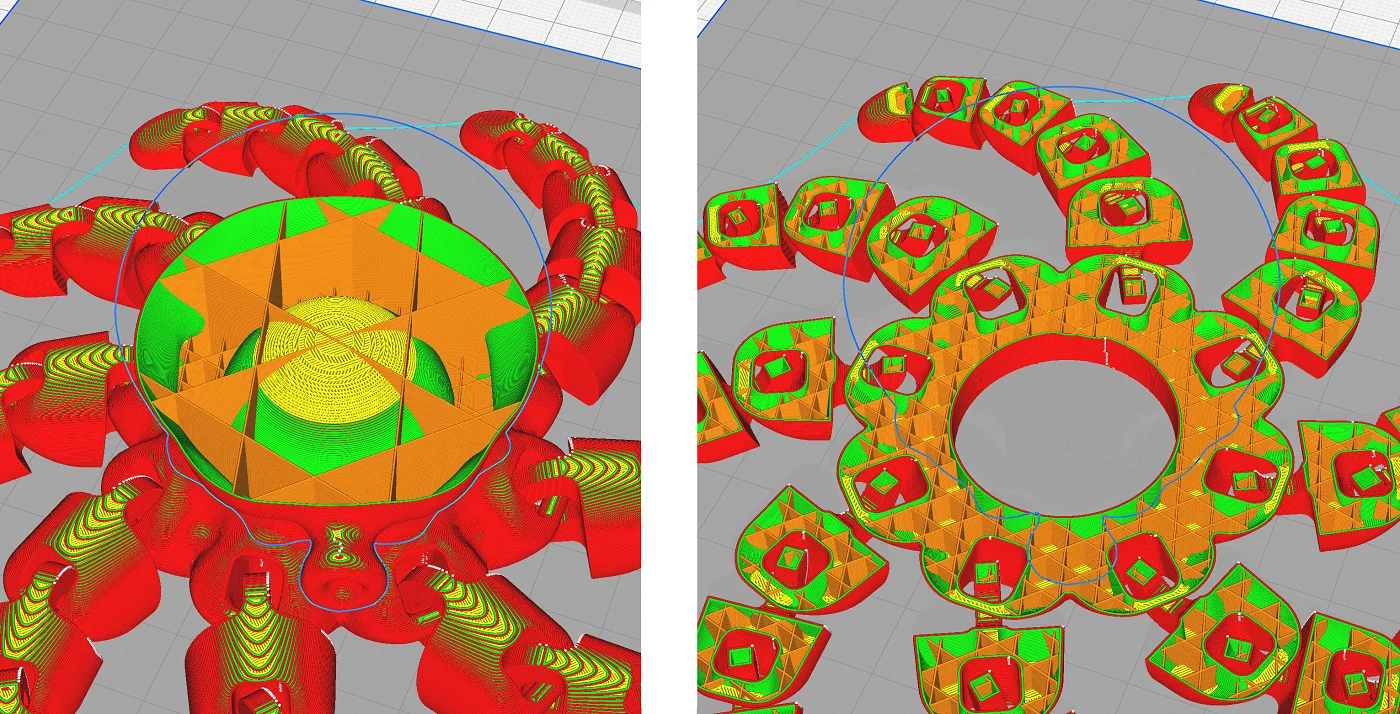
Step #5: Slice the model: When using support blockers and especially a different infill setting, slicing takes a bit longer than normal.
Different Infill Pattern in One Object in Cura
Not only can you use the Support Blocker and the overlapping areas settings to change the infill density of an object in certain places, but you can also manipulate the infill pattern. Basically, you go through the same steps as before, except that instead of selecting the infill density, you select and adjust the pattern in the settings.
In this example, one half of a cube will be printed with the Gyroid infill pattern and the other half with a Tri-Hexagonal infill pattern. The infill density remains the same in each case (you will directly see visually why the Gyroid pattern is more stable).
These are the individual steps for a different infill pattern in an object in Cura:

Step #1: Open the object in Cura and set the basic infill pattern for in the cube in the standard print settings. In this example, the basic infill pattern is the Gyroid pattern.
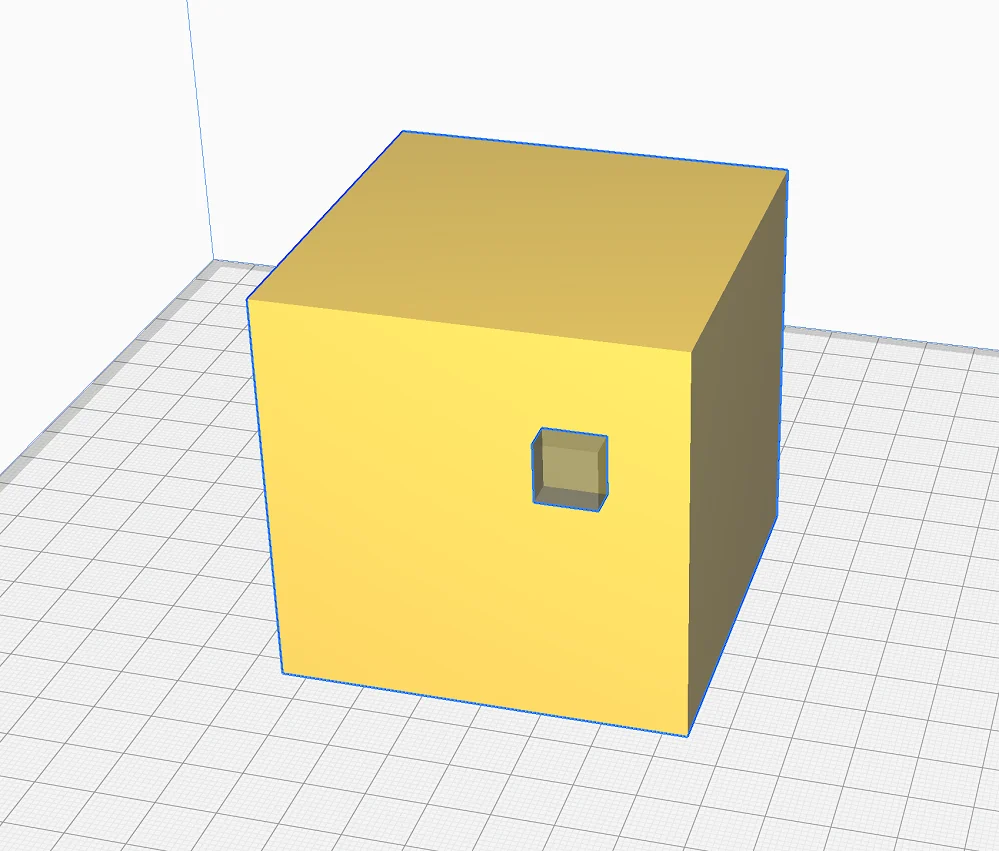
Step #2: Create a Support Blocker: To create a Support Blocker, you click on the print object in Cura and click on the Support Blocker icon in the left part of the user interface. Then click on the print object. A tiny cube will show where the Support Blocker is located.
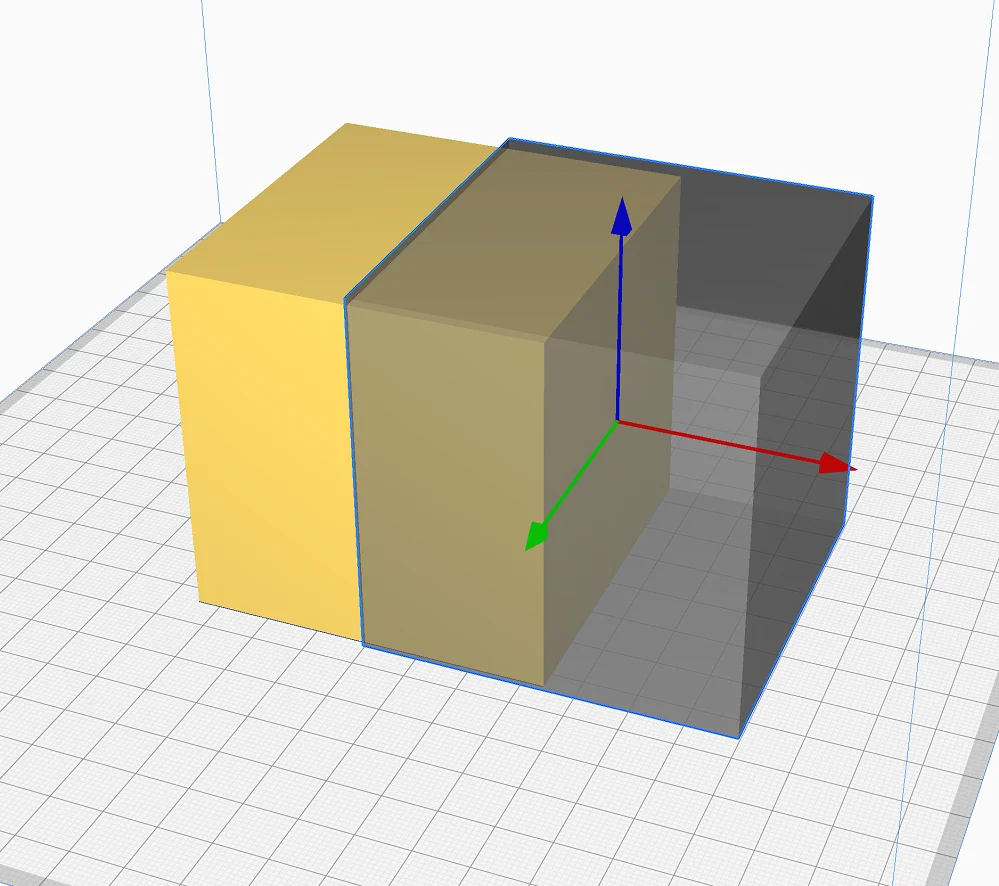
Step #3: Scale and position the Support Blocker: With the manipulation tools on the left side of the user interface you can change the cube of the Support Blocker just like an ordinary print object. You can scale, rotate and move the support blocker. In this example, I made it larger than the original cube and moved it to cover exactly half of the cube.
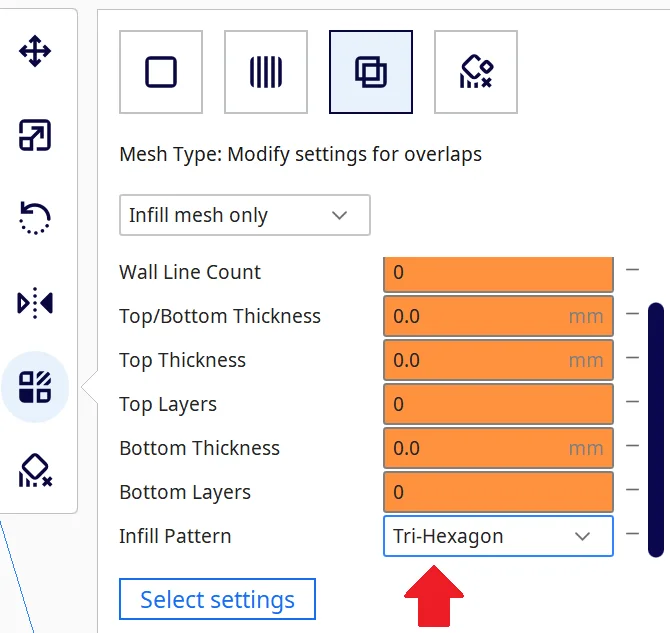
Step #4: Change the infill pattern for the overlapping area: Select the Support Blocker, activate the settings for the overlapping area and activate the setting for the infill pattern in the menu. This will make the setting appear and can be changed. Then you can select the desired infill pattern – in this case Tri-Hexagonal.
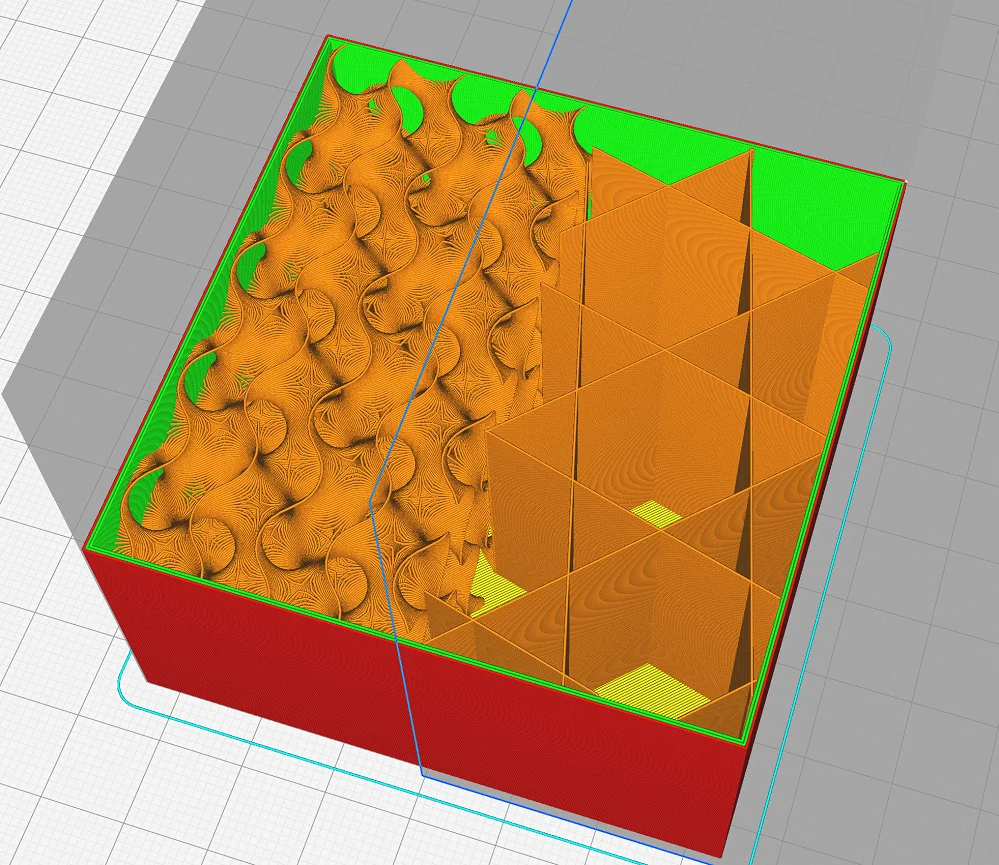
Step #5: Slice the model: In the preview, you can check the result by slicing the cube with the view. You will see that one half is calculated with Gyroid infill pattern and the other with Tri-Hexagonal infill pattern.
Applications for Variable Infill in Cura
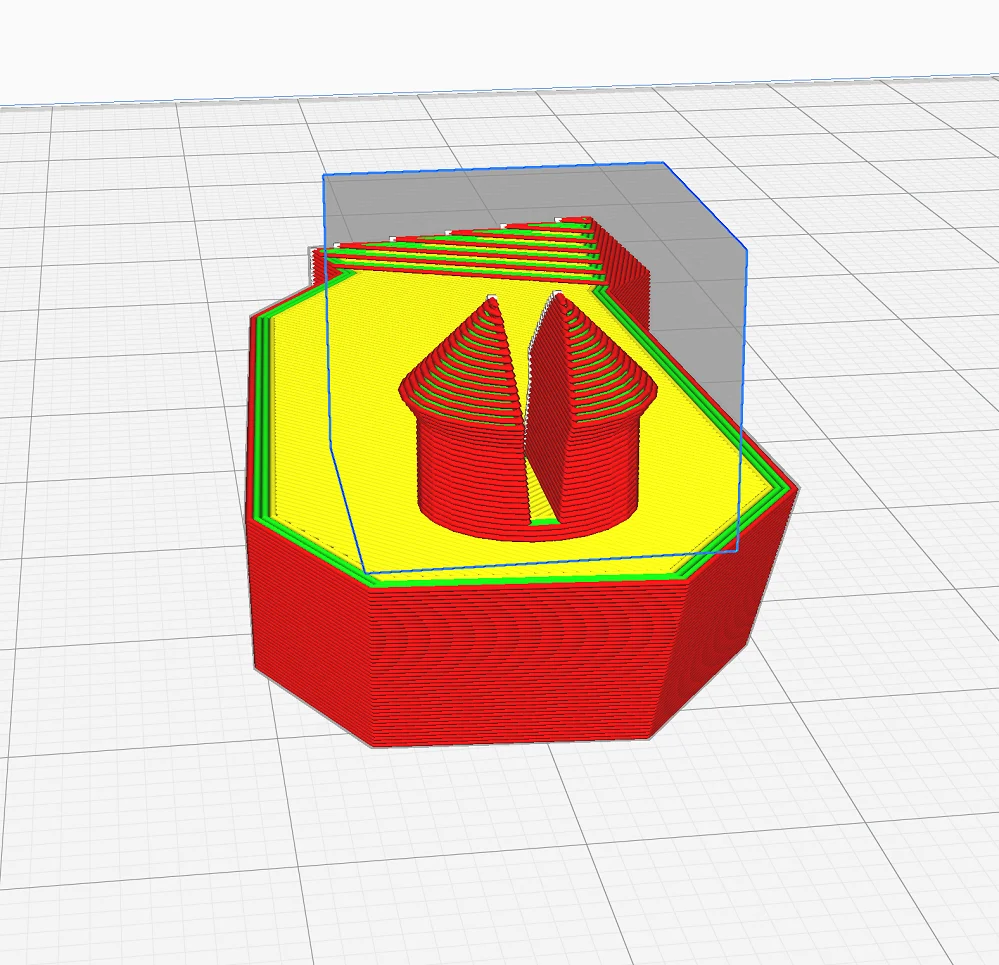
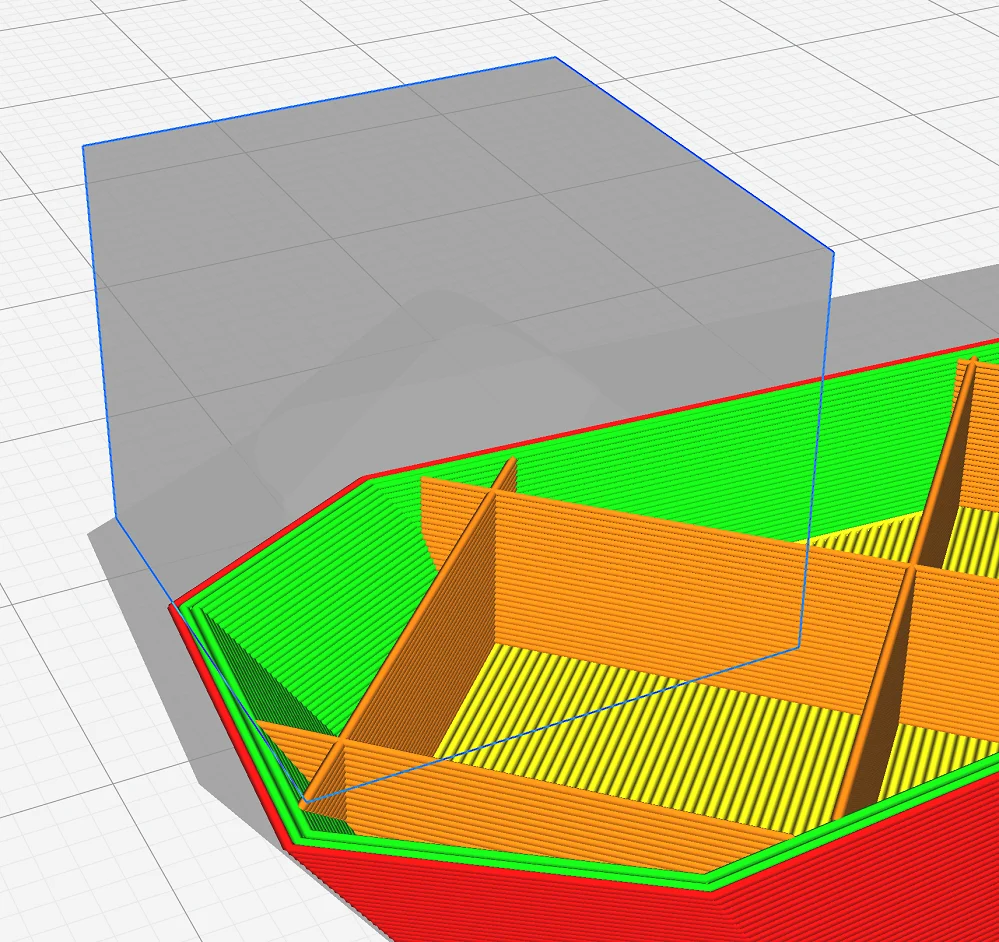
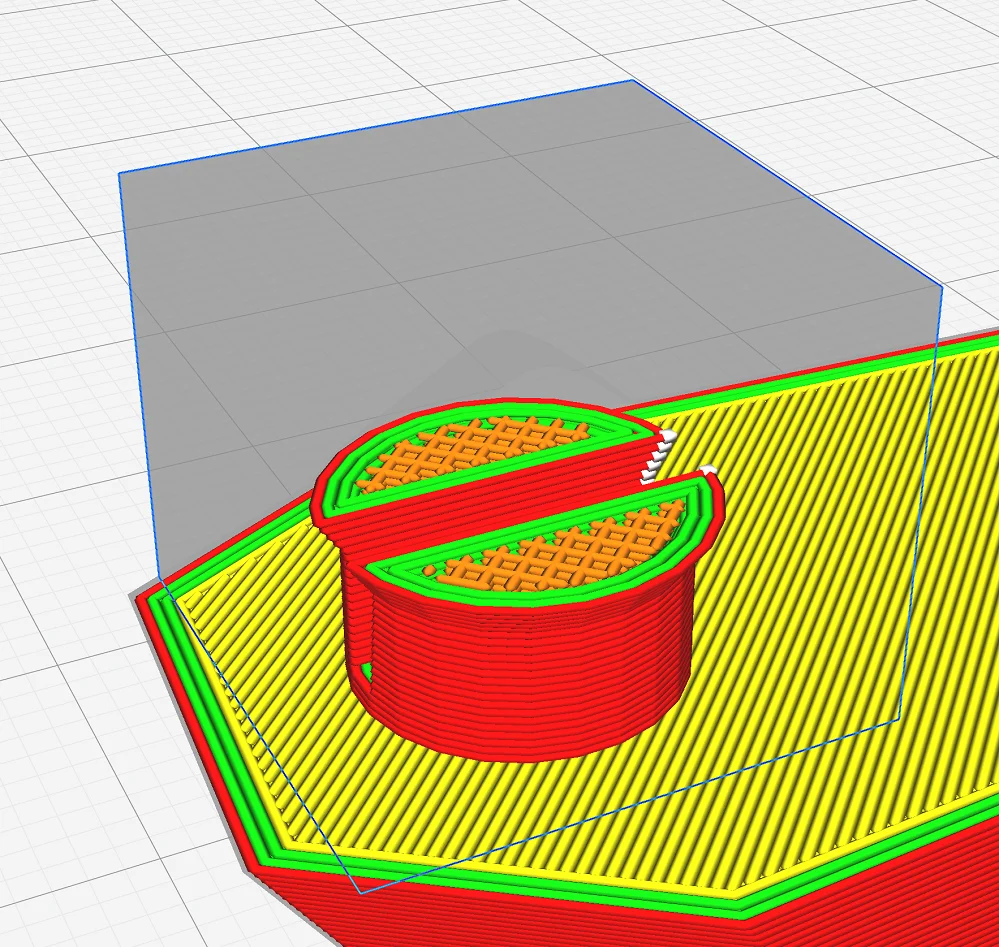
Variable infill is a great way to save filament and print time while still producing high-quality prints.
As you just learned, Cura can be set to produce prints with different infill densities or infill patterns, depending on the requirements of the part being printed. For example, you can choose a higher infill density or a more stable pattern for more mechanically stressed areas of the object and a lower density for areas that don’t need as much strength.
Especially for objects that have to fulfill a mechanical function, a variable infill is very practical to make certain parts of the object stable to withstand greater mechanical forces.
These include, above all, contact points of moving parts such as gears or axles. But also contact surfaces of heavy objects can benefit from a higher density to improve stability.
I myself have made use of this feature several times. In fact, I only print small to medium-sized decorative objects without variable infill. All other objects, i.e. larger decorative objects or those that are to serve mechanical purposes, I always print with variable infill.
Especially for objects with multiple parts that are connected, I set the infill density for the joints to 100%. This makes the areas print solidly and withstand the mechanical forces well. It also increases the durability significantly.
One of the most important reasons that moving parts are printed more stably is that they have a higher infill density. If a part with too low a infill density has been printed, it is much more likely to break under stress than a more solid part. This is especially important for parts that are constantly moving, as they are more stressed than parts that are just standing. And so you don’t have to print the entire part solid, you can save valuable filament and time with the variable infill in Cura.
Save Filament and Time with Variable Infill in Cura
A big advantage of variable infill is the savings in filament and printing time. Without variable infill, you would have to make the entire object as stable as only individual areas should be. This makes the rest of the object much too oversized and consumes too much filament.
So, because less filament is used in areas with lower infill density, you can save a lot on material costs. With variable infill, you can also print faster because the printer doesn’t have to spend as much time in filling the entire inside of the object with an unnecessarily high density of filament.
Variable Infill vs. Gradual Infill in Cura
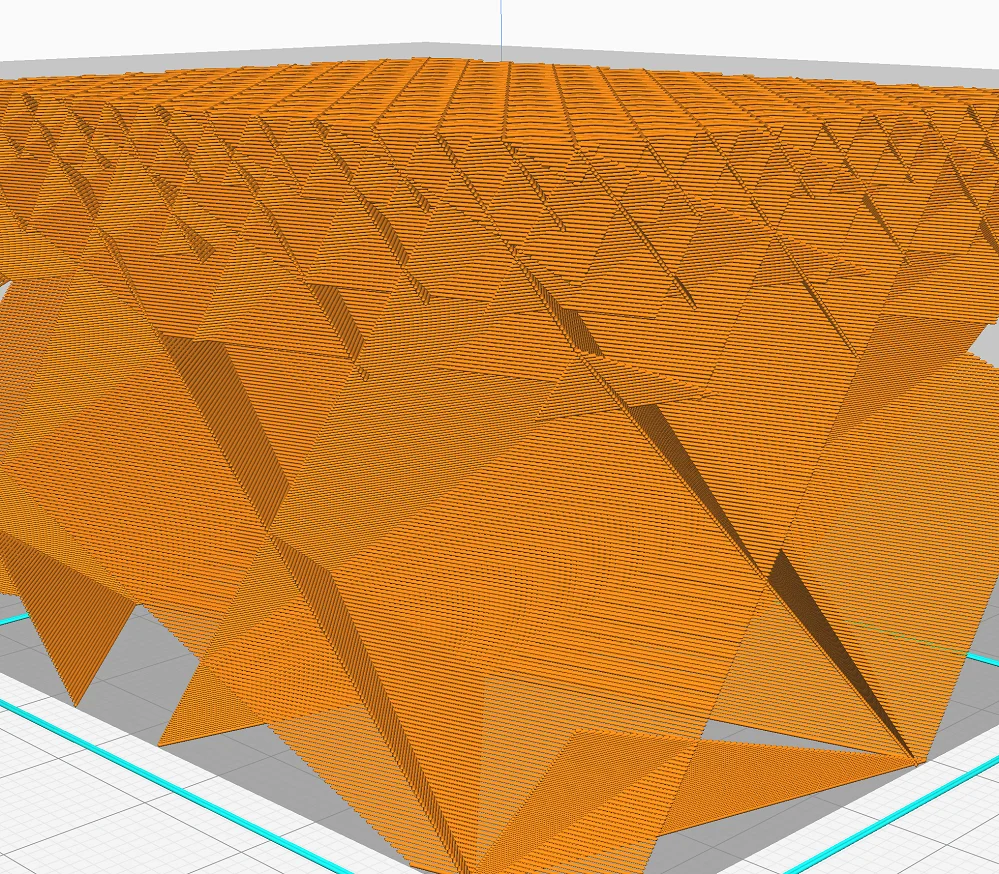
Variable infill in Cura refers to the ability to adjust the percentage of infill or the infill pattern for customizable areas of an object. This can save filament and strengthen particularly stressed areas.
Gradual infill, on the other hand, refers to a special setting in Cura. In gradual infill, the printer slowly increases the amount of infill as it prints higher. The higher you are in the object, the denser the object becomes. However, you can’t customize gradual infill like you can variable infill with a support blocker. You can only set the number and length of steps with which the infill density is increased upwards.
Which option is best for you depends on your requirements. Variable infill is more customizable but is more complex to adjust. Gradual infill changes the infill density in the Z-direction.
But you can apply both types of infill modifications in one object – i.e. gradual infill density in the Support Blocker! So you can activate the print setting of the gradual infill in the area of a support blocker and create a gradual infill in a single area of your object.
How useful the combination of variable infill and gradual infill is, depends on the object. I can well imagine that there are objects for which the combination could make sense. Especially if such objects are mass-produced and every gram of filament is precious and such optimization would pay off.
Disadvantages of Using Curas Variable Infill
In this article, you learned how to create variable infill in an object in Cura. The advantages of lower filament consumption and shorter print time usually outweigh the complicated application.
For some objects, however, the filament savings due to variable infill is very small and does not justify the effort. Especially with standard objects and decorative objects, it is usually not necessary to reinforce individual areas of the object.
Therefore, the use of variable infill in Cura is only worthwhile for mechanically inserted parts that require a spot infill density of 100%. Depending on the objects you print, you may need this function more or less or not at all.
Another, but small disadvantage of the variable infill is the increased computing time that Cura needs for slicing. Especially for large models with multiple support blockers, the slicing time can increase exponentially.
Variable Infill vs. Lightning Infill
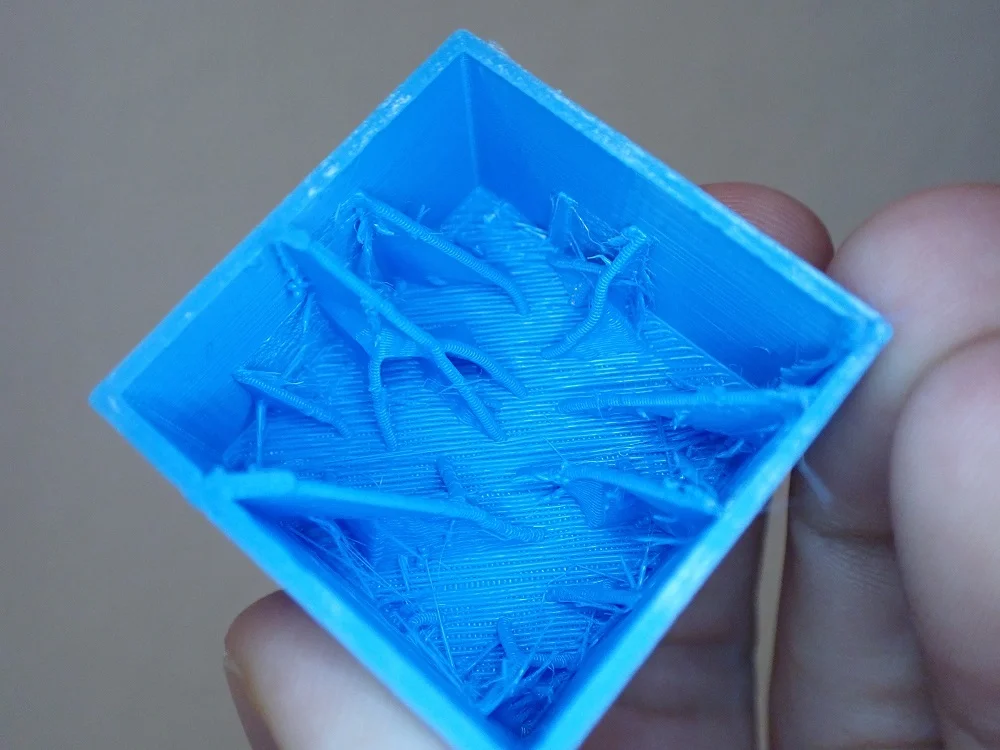
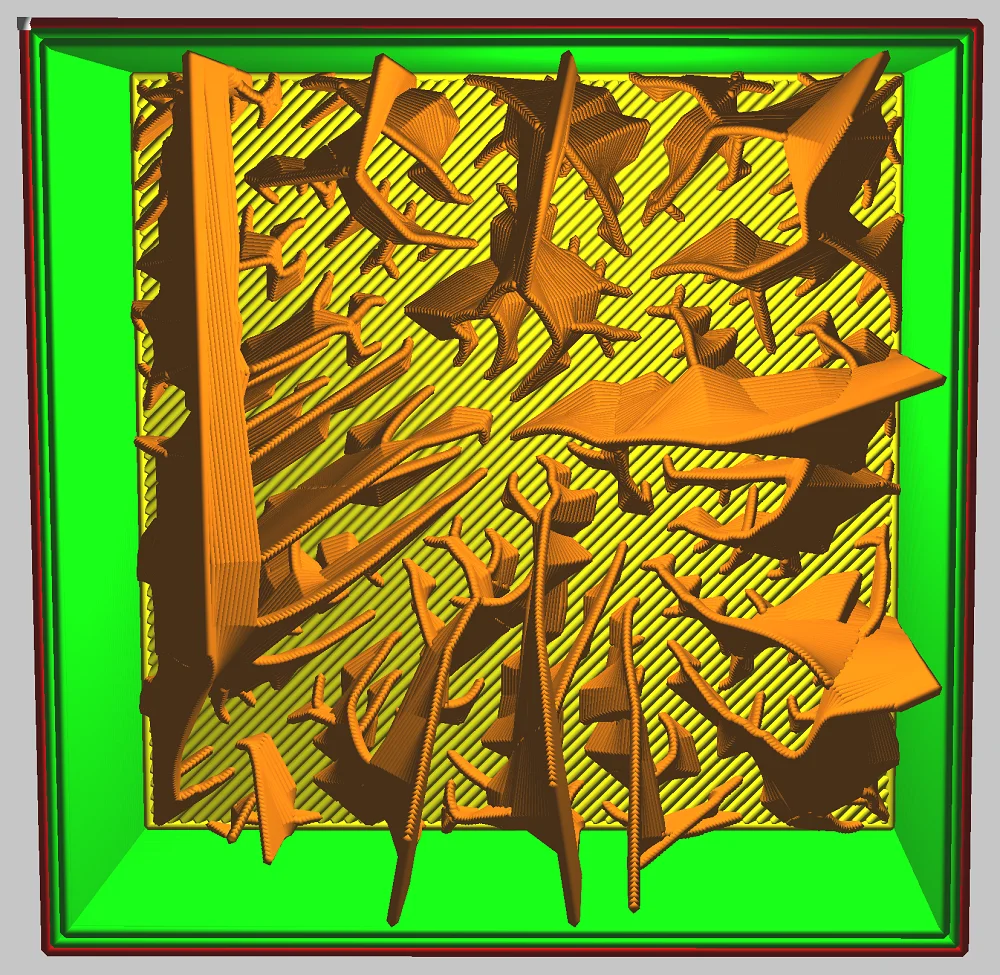
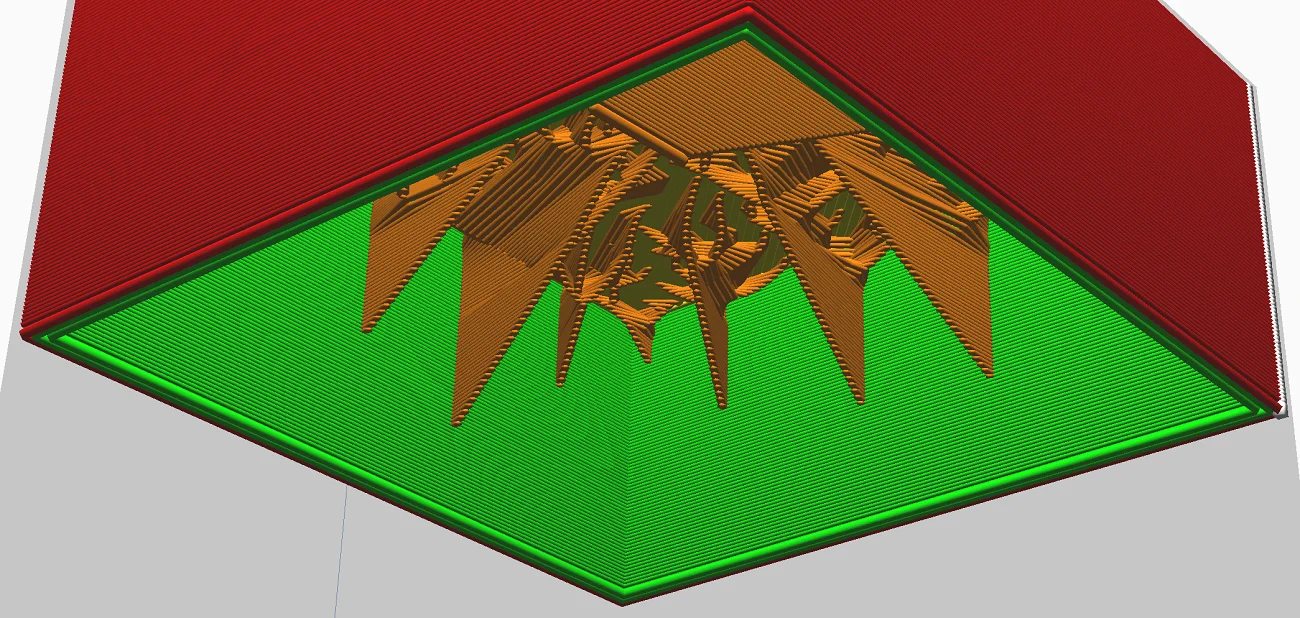
The relatively new lightning infill pattern in Cura looks at first glance like gradual or variable infill. In my eyes, the lightning infill pattern is better than gradual infill and is also great to use in support blockers for selective increases in an object.
The lightning infill pattern becomes denser the higher up you are in the object. This infill pattern is particularly well suited for decorative objects, as it supports the upper layers very well.
In principle, the lightning infill pattern is a better vase mode that allows you to print hollow objects that are closed at the top. The objects are still stable enough so that the top layers don’t collapse. If you want to know more about the lightning infill pattern, you can take a look at this article.
Disclosure: This website is the property of Martin Lütkemeyer and is operated by Martin Lütkemeyer. Martin Lütkemeyer is a member of the Amazon Services LLC and other Affiliate Programs. These are affiliate advertising programs designed to enable websites to earn advertising revenue through advertising and linking to Amazon.com and others. Links marked with * are affiliate links.
