
- Wet Filament: Prevention, Symptoms & Drying - July 18, 2024
- Sovol SV08 – Best PrusaSlicer Settings & Profile - June 26, 2024
- Sovol SV08 – Best Orca Slicer Settings & Profile - June 26, 2024
Disclosure: Links marked with * are Affiliate Links. I earn from qualifying purchases if you decide to make a purchase through these links – at no additional cost for you!
The ability to level a build plate is not only essential for FDM printers, but also for resin printers like the Voxelab Proxima 6.0.
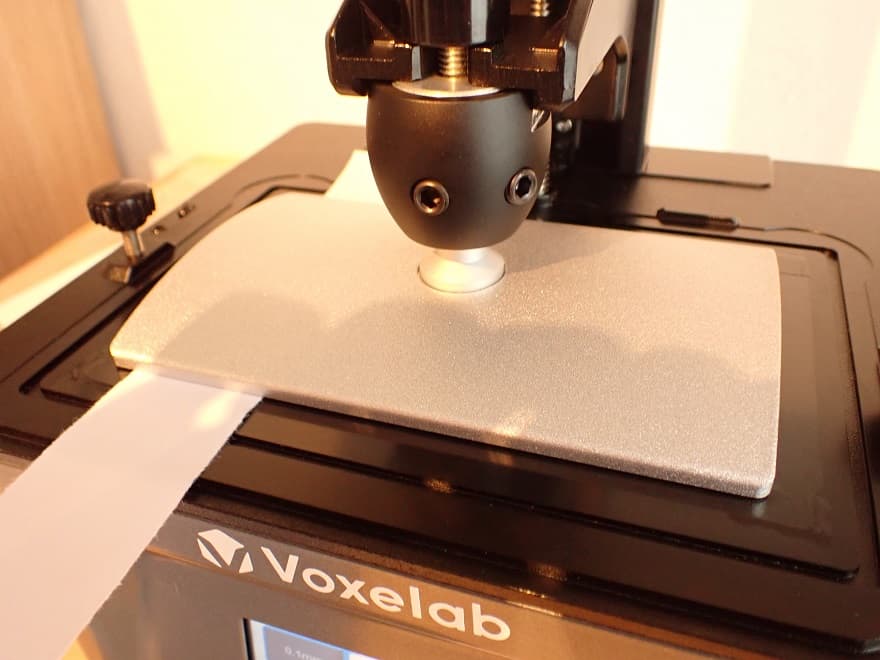
The build plate on the Voxelab Proxima 6.0 is leveled with a piece of paper. To do this, the resin container is removed, the paper is placed on the LCD screen and the zero position of the build plate is set so that the paper can only be moved with a little resistance.
You do not need to re-level the build plate after each print. You only need to do this when you use the printer for the first time, install a new build plate or LCD screen, or if you have a printing error. Especially if the model did not stick to the build plate, you should re-level the build plate.
Table of Contents:
Step 1: Mount the Build Plate
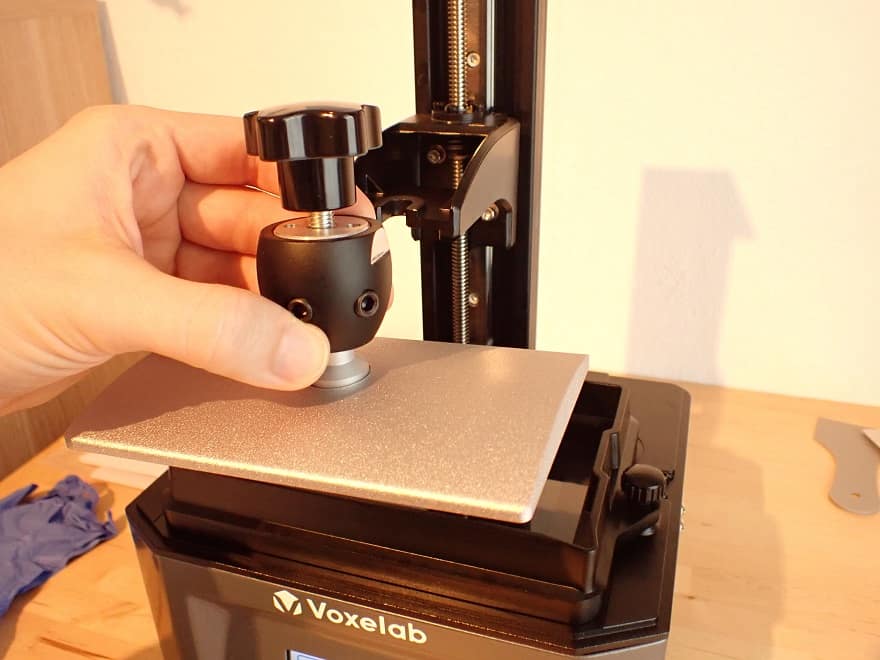
To level the build plate, you must first mount it. It is not mounted when delivered and after each print, you have to remove it anyway to remove the model from the build plate.
The assembly is very simple:
- Turn the clamping knob until the distance is large enough to mount the build plate to the Z-axis.
- Insert build plate.
- Tighten the clamping knob firmly.
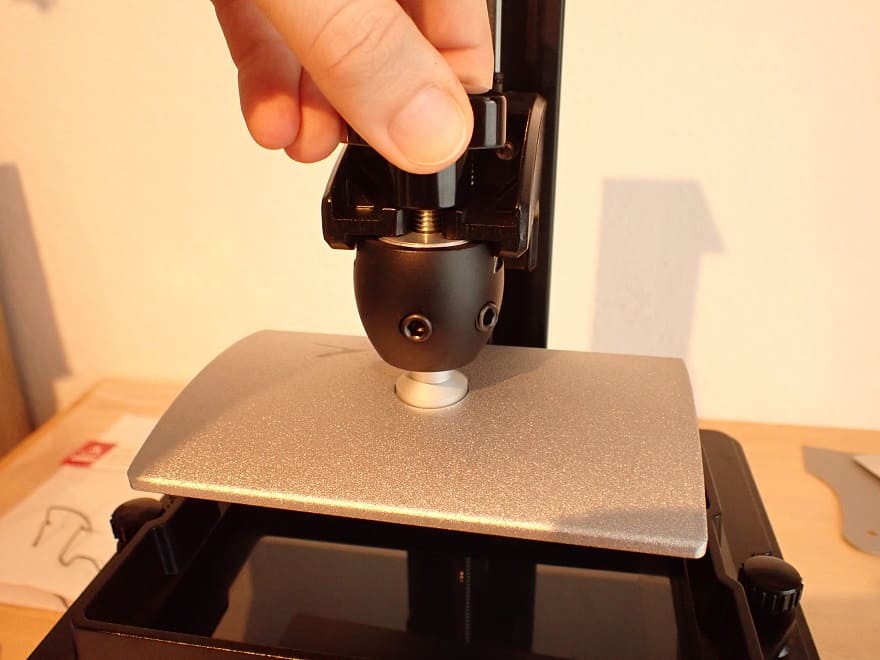
Step 2: Loosen the Leveling Screws
The build plate is equipped with a ball joint. To be able to move this ball joint freely, you have to loosen the two screws – but only so far that they or the ball joint do not fall out! After that, the build plate should be able to move freely.
Step 3: Remove Resin Container
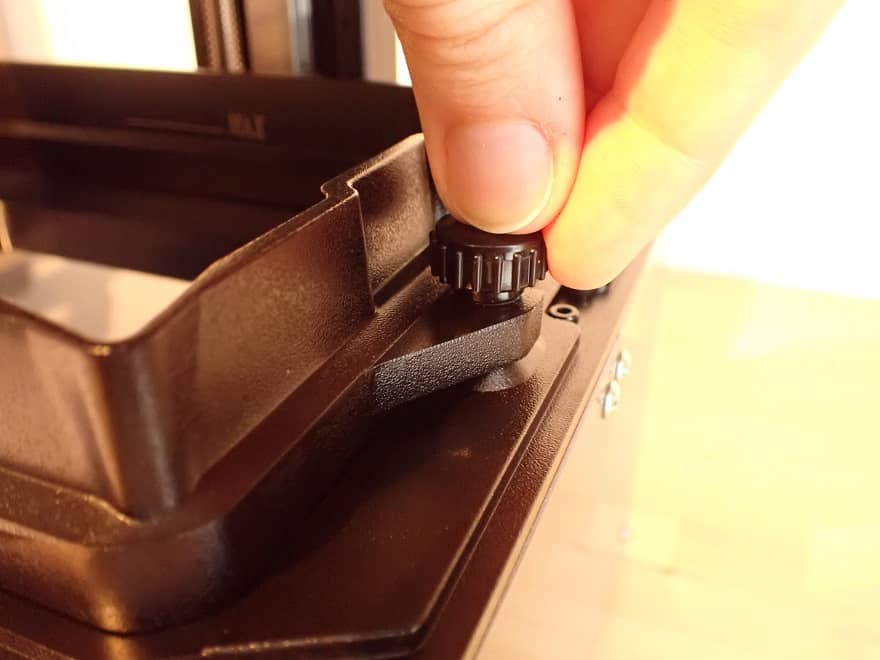
Since you have to access the LCD screen in the next step, you now have to remove the resin container. To do this, loosen the two outer screws and simply take it out.
The bottom of the resin container is a very sensitive FEP film. It should never be damaged. It must also be dust-free before printing. If you do damage it, you can buy a new FEP film – this one* fits the Proxima 6.0.
Step 4: Paper on LCD
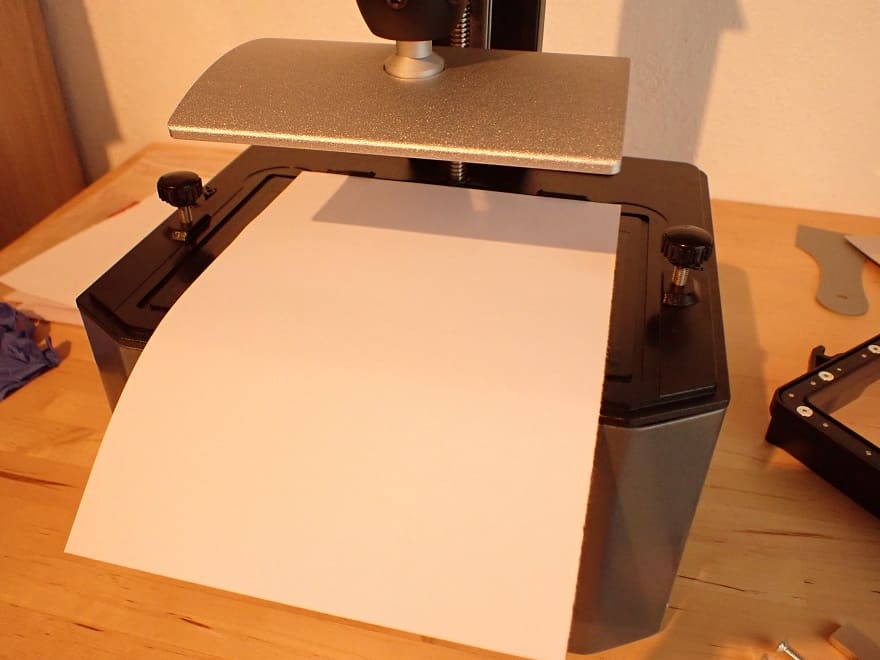
As with FDM 3D printers, the paper method is the fastest way to precisely level the print bed. This method is also recommended by Voxelab.
Contrary to Voxelab’s recommendation, we do not use A4 paper for this, but A5. A piece of A4 paper does not fit between the two rotating screws of the resin container.
Step 5: Move the Build Plate Down
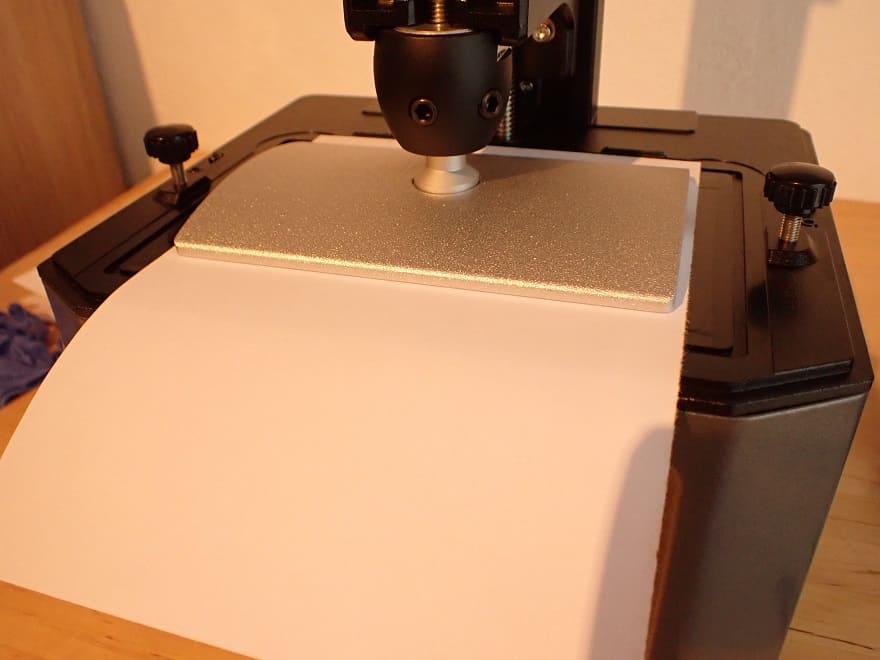
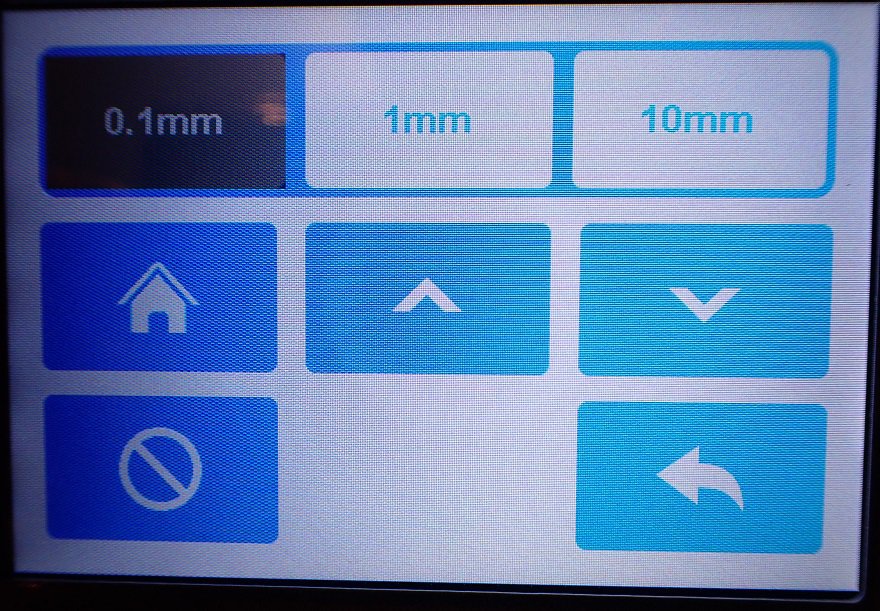
Now you can move the build plate to the home position via the menu.
“Tool” -> “Manual” -> Home icon
When delivered, the home position will still be a good bit above your paper. If you have already leveled your printer, the distance may already be very small.
Step 6: Tighten Leveling Screws

You need a little dexterity for this step. You have to press the build plate down evenly with one hand and tighten the two screws of the ball joint with the other hand.
You should tighten the two screws very carefully one after the other, a little at a time, and not completely in one go. If you first tighten one screw completely and then the other, the build plate may become uneven.
Step 7: Adjust Height with Paper

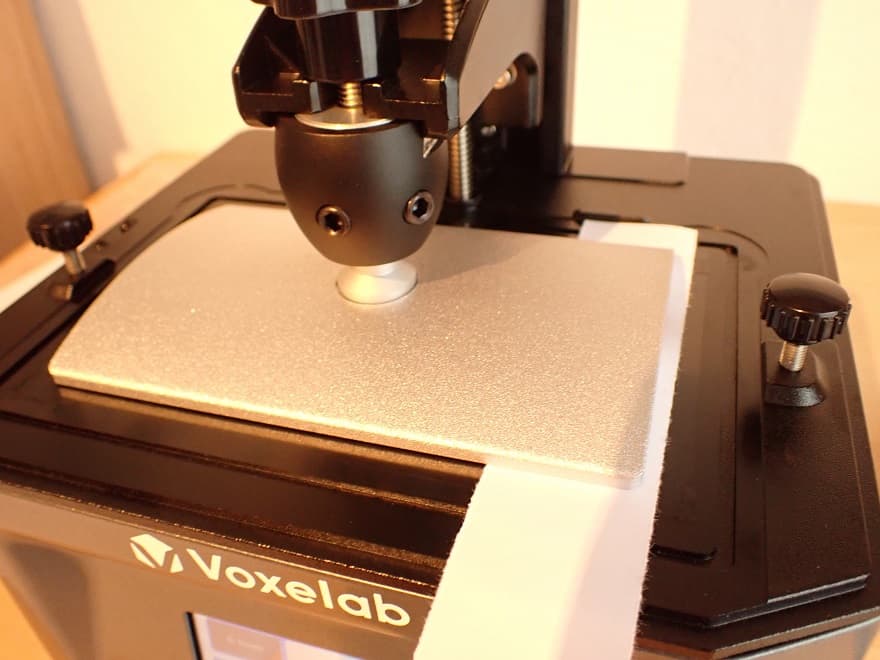
It may be that the height of the build plate changes as the screws are tightened. The goal (and actually the art of leveling) is to adjust the height of the build plate so that the paper between the build plate and the LCD screen can still be moved with some resistance.
The paper must not be able to be moved too easily and it must not get stuck either. A medium resistance when moving is just right.
- If the resistance is too low, move the build plate down by 0.1 mm.
- If the resistance is too high, move the build plate up by 0.1 mm.
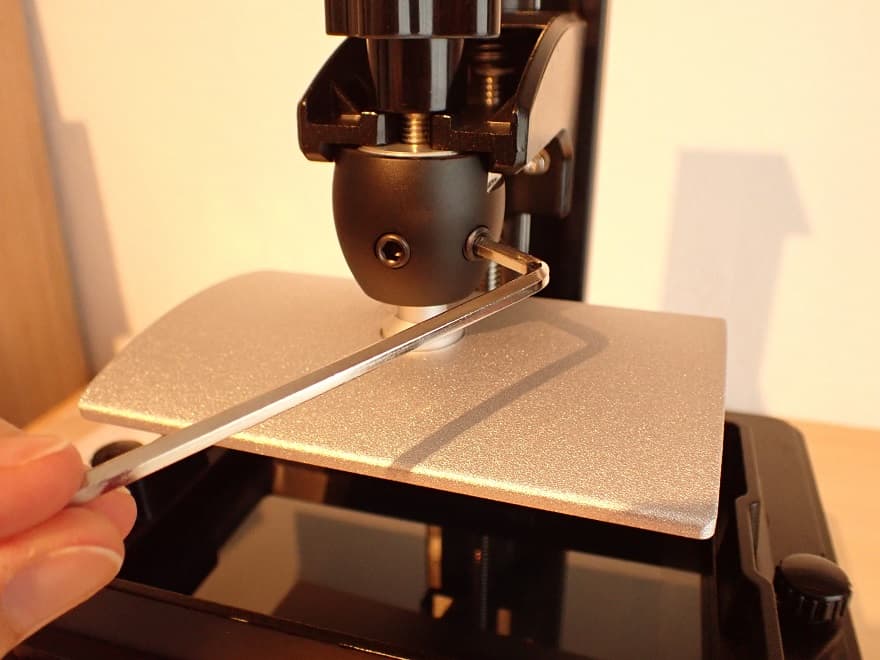
You can test whether the build plate is still a little crooked with a fine strip of paper. Pull this strip back and forth under the build plate at various points and check whether the resistance is the same everywhere.
Step 8: Set the Zero Position
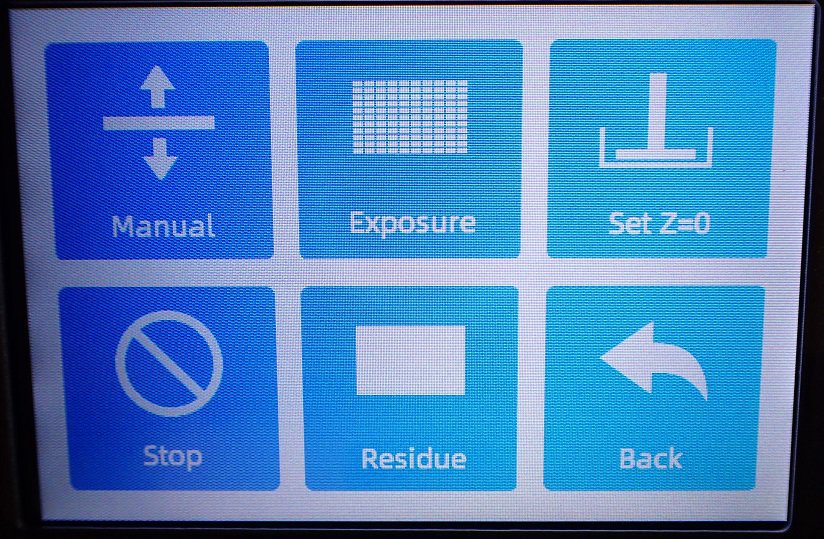
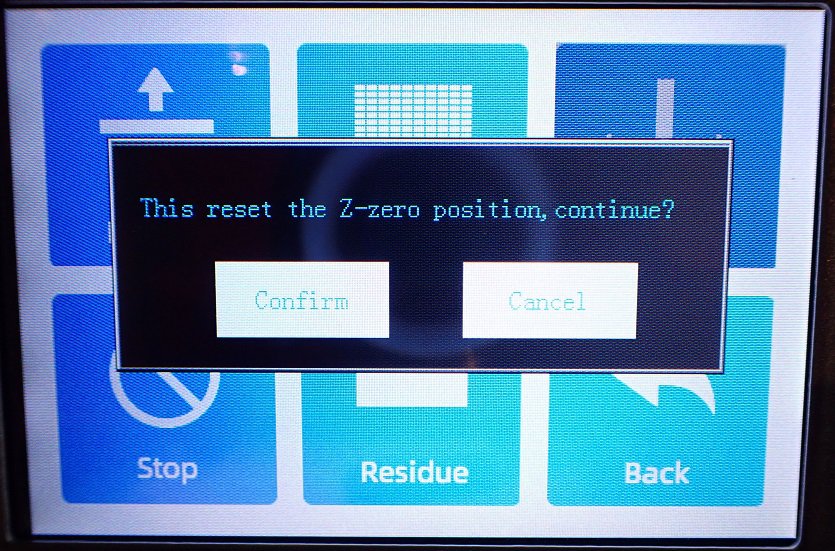
When you have set the height correctly with the paper, go back in the menu and press “Set Z = 0“.
With this command, the 3D printer remembers the zero position and will always find its way back there.
Disclosure: This website is the property of Martin Lütkemeyer and is operated by Martin Lütkemeyer. Martin Lütkemeyer is a member of the Amazon Services LLC and other Affiliate Programs. These are affiliate advertising programs designed to enable websites to earn advertising revenue through advertising and linking to Amazon.com and others. Links marked with * are affiliate links.
