
- Wet Filament: Prevention, Symptoms & Drying - July 18, 2024
- Sovol SV08 – Best PrusaSlicer Settings & Profile - June 26, 2024
- Sovol SV08 – Best Orca Slicer Settings & Profile - June 26, 2024
Disclosure: Links marked with * are Affiliate Links. I earn from qualifying purchases if you decide to make a purchase through these links – at no additional cost for you!
In this article, I will show you step-by-step how to calibrate the E-Steps of your 3D printer. The calibration is compatible with any FDM 3D printer and should not take more than 10 minutes.
During E-Step calibration, a certain amount of filament is extruded. The amount of filament that is actually extruded is compared to the pre-set amount. From this, the new E-Steps are calculated. After calibration, the 3D printer extrudes exactly as much filament as it should.
You can also watch my video about the E-Step calibration:
Table of Contents:
Why Calibrating the E-Steps?

The E-Steps (or Extruder Steps) is a setting in the 3D printer’s firmware that determines how many steps the extruder’s stepper motor has to perform to extrude one millimeter of filament. If the value is too high, too much filament is extruded and vice versa.
E-Step calibration is an important process to improve the precision of your 3D printer. By adjusting the E-Step values, the correct amount of filament is extruded as expected and specified by the slicer. Accurate E-Step calibration results in more consistent layers, higher print quality, and reduces problems such as under- or over-extrusion.
- Why do E-Steps need to be calibrated? The default settings of 3D printers are often not perfectly set when shipped.
- How are the E-Steps calibrated? The quickest way to calibrate the E-Steps is to extrude a certain length of filament, measure the actual distance, and calculate and adjust the new E-Step settings accordingly.
- When do the E-Steps need to be calibrated? Calibration of the E-Steps should be done after assembling the 3D printer or replacing the extruder.
Required Tools for the E-Step Calibration
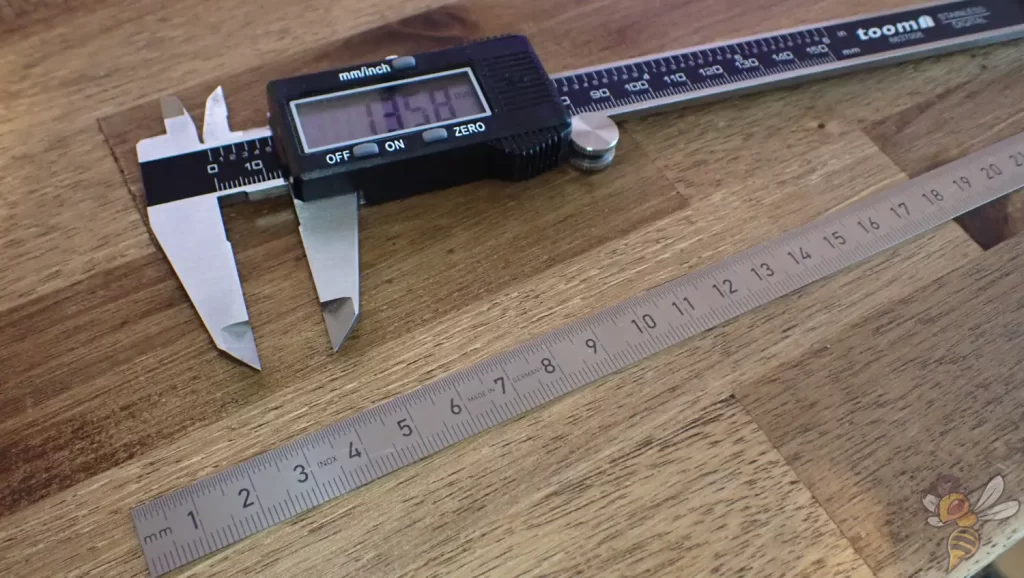
For the calibration of the E-Steps, you don’t need many tools. Most important is a suitable measuring tool to measure the length of the extruded filament. The more accurate, the better.
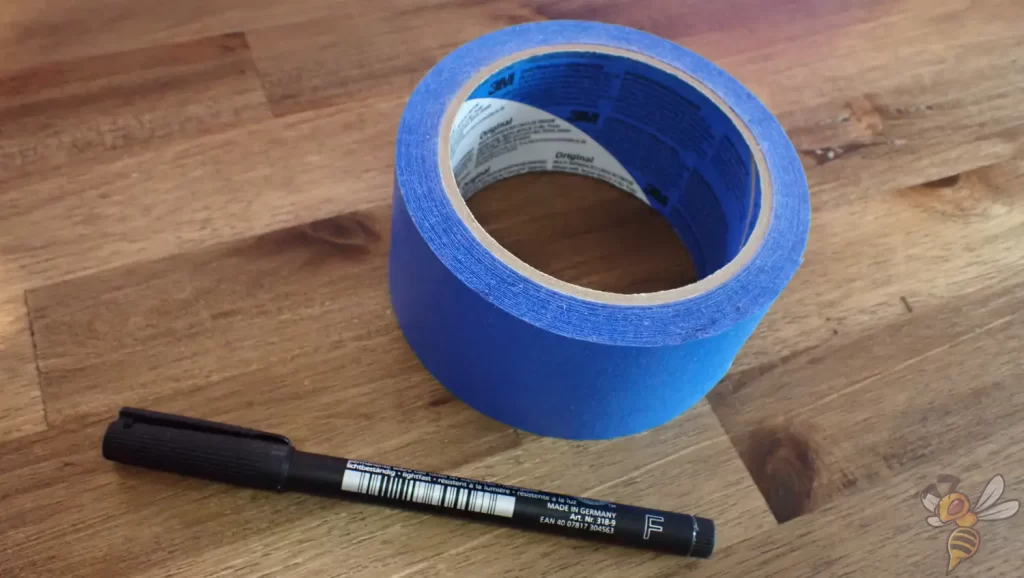
To mark the filament, some tape or a permanent marker is sufficient.
E-Step Calibration Step-by-Step
Here are the steps you need to follow for an E-Step calibration. I explain each of these steps in detail and in a way that makes the calibration compatible with any 3D printer.
- Heat up the hotend
- Load filament
- Mark filament
- Extrude filament
- Measure extruded length
- Get current E-Steps
- Calculate new E-Steps
- Adjusting the E-Steps
- Checking the calibration
Heating up the Hotend
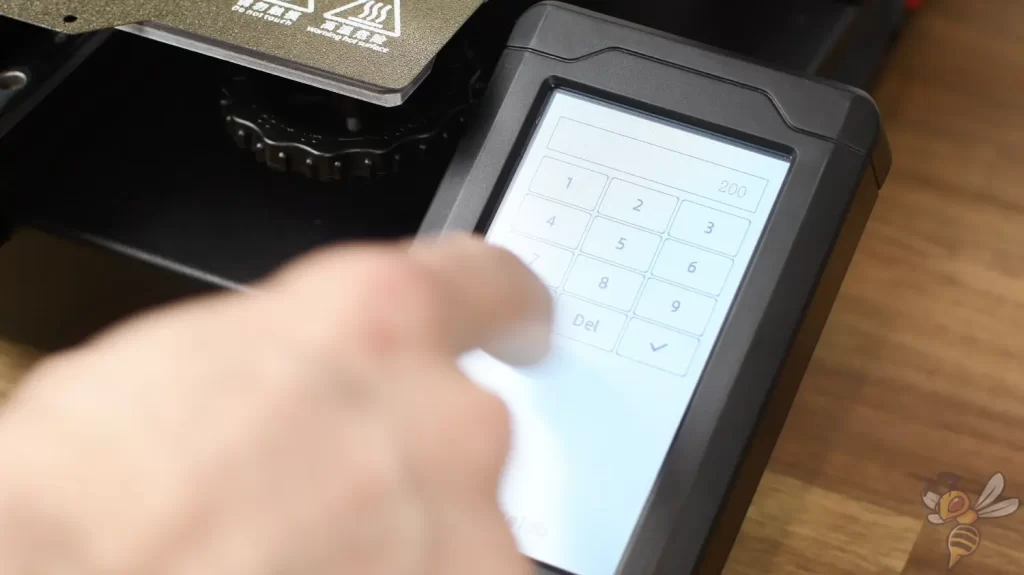
Heat up the hotend to the temperature you will use to print your filament. In this example, I am using PLA and thus using a temperature of 200 °C.
Load Filament
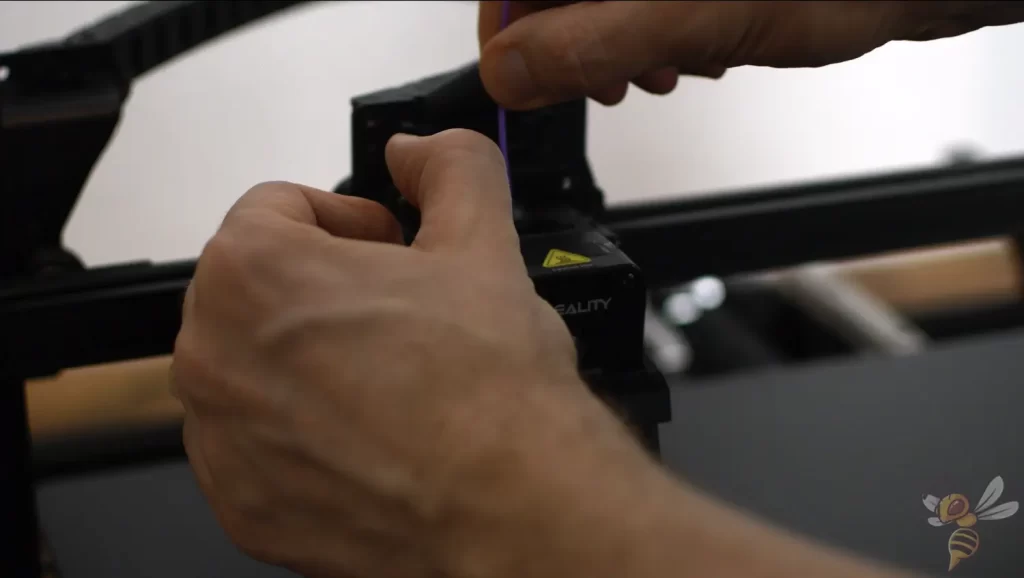
Load the filament as you normally would before printing.
Mark Filament
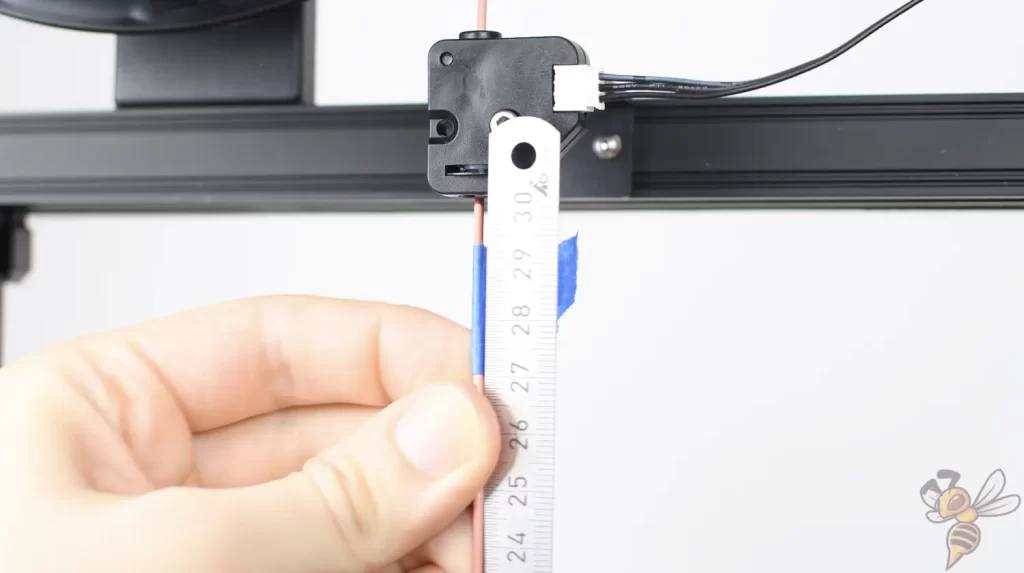
If your 3D printer has a direct drive extruder, next mark the filament as far in front of the extruder as possible. The longer the distance, the more accurate the calibration. Also pay attention to the maximum distance your measuring device can measure.
You can mark the filament either with a pen or with tape. In this example, I marked the filament (coincidentally exactly) 27 cm in front of the extruder.

With a Bowden extruder, you can either do the same, or remove the Bowden tube after the extruder and mark the filament right after the extruder. On my FLSUN Super Racer, for example, it is easier to mark the filament after the extruder and not before.
Extrude Filament
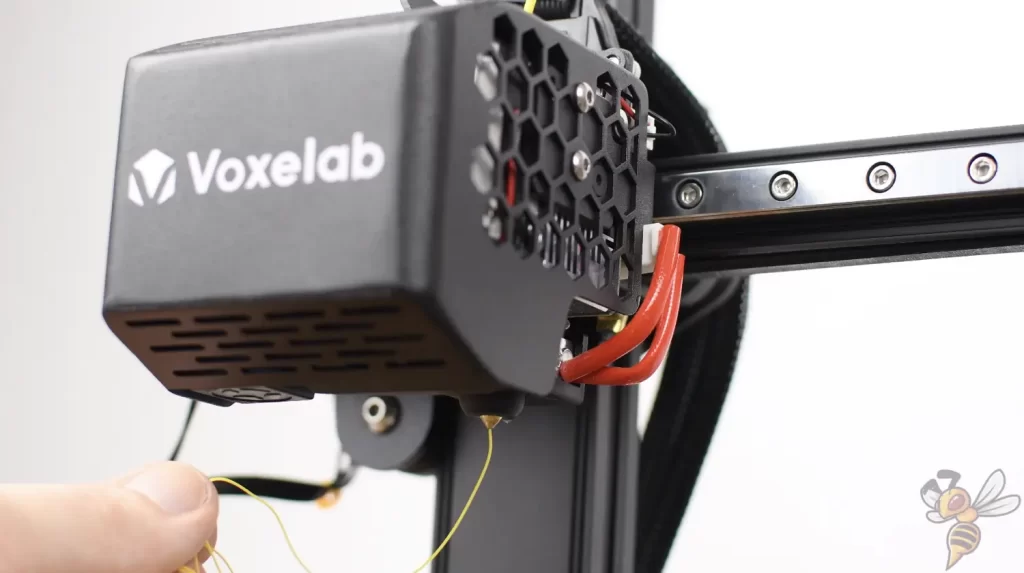
Now extrude a little less filament than your marked distance, if you marked the filament before the extruder. If you marked the filament after the extruder, you can extrude the maximum length you can still measure with your measuring instrument.
On my 3D printer with direct drive extruder, I marked the filament 27 cm before the extruder and extruded 26 cm. With the Bowden extruder, I marked the filament right after the extruder and extruded 29 cm.
Measure Extruded Length

Measure the actual extruded length. Make a note of the value, as you will need it later to calculate the new E-Steps. For a direct drive extruder, the remainder of the filament above the extruder is equal to the marked length minus the actual extrusion length.
In my example, the 3D printer did not extrude 26 cm, but 26.1 cm, which corresponds to a deviation of about 0.4%. This sounds like a relatively small amount at first, but it can cause problems with parts where high dimensional accuracy is important.
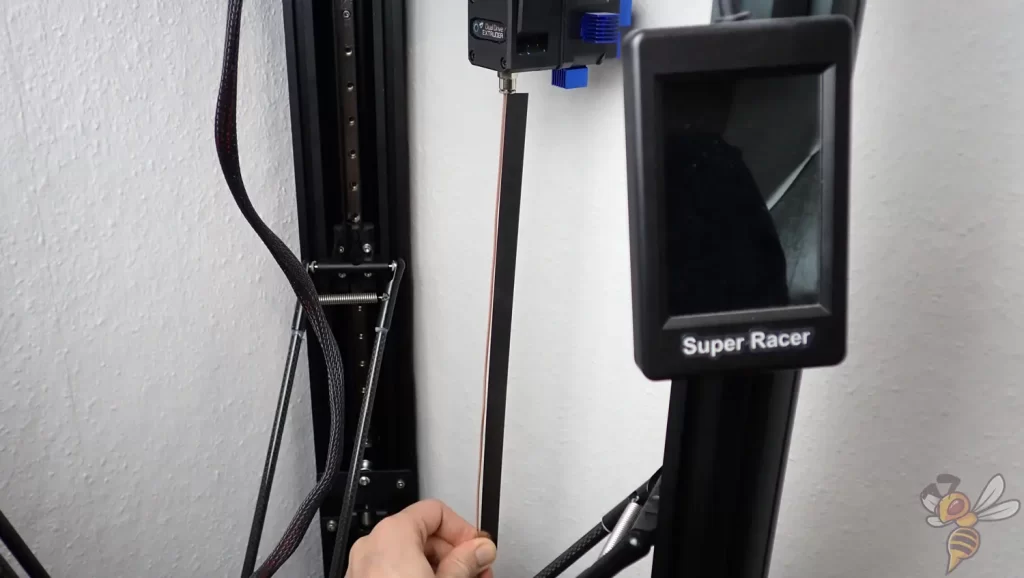
With a Bowden extruder, you only need to measure the extruded length of filament up to your mark.
Get the Current E-Steps
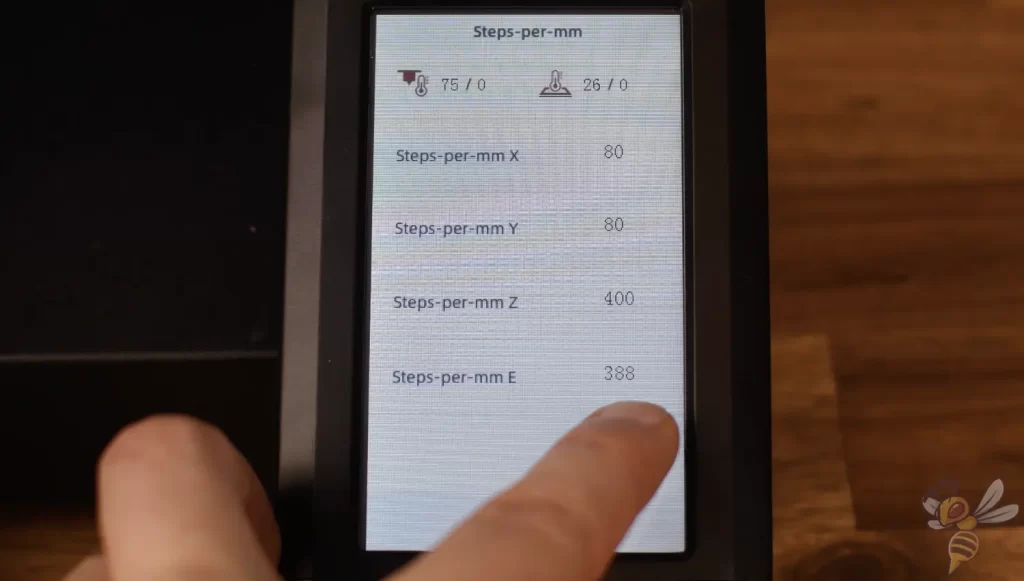
To adjust the E-Steps, you need their current value. With some 3D printers, you can read and change them directly in the menu. However, on most of the 3D printers I have used so far, this was not the case. So, you will probably need another way to read and change the values.
To send the G-code commands to a 3D printer and read out current settings, programs like OctoPrint or Repetier-Host are popular. However, if you don’t want to use them by default to operate your 3D printer, there are other ways that are faster and easier.
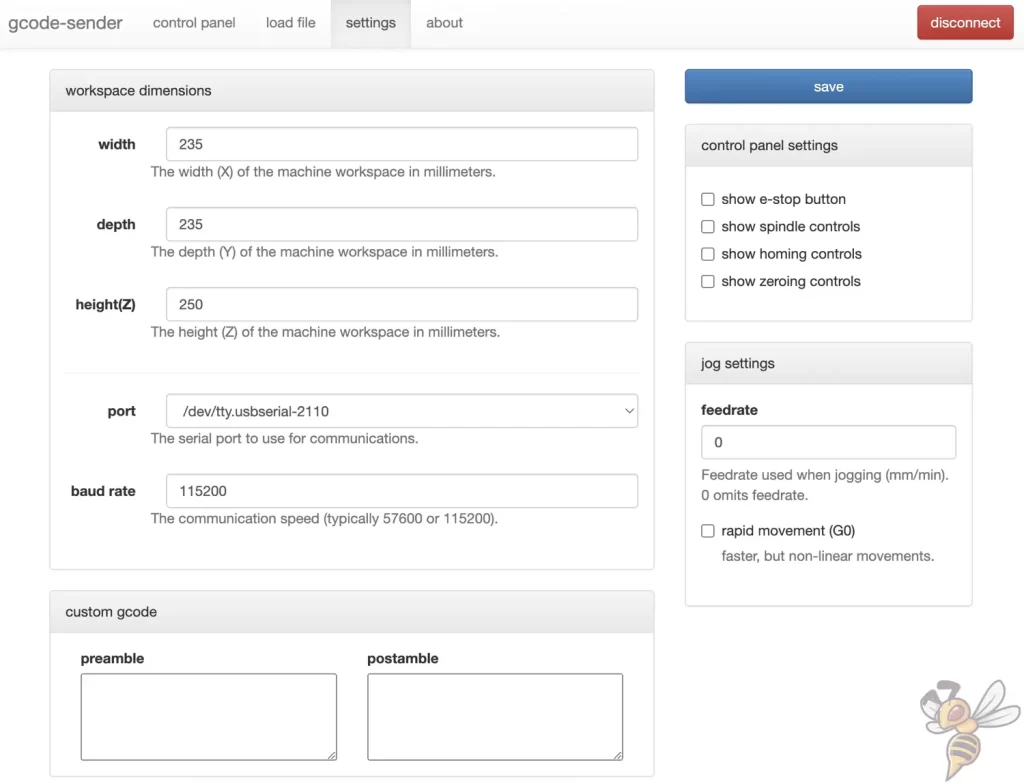
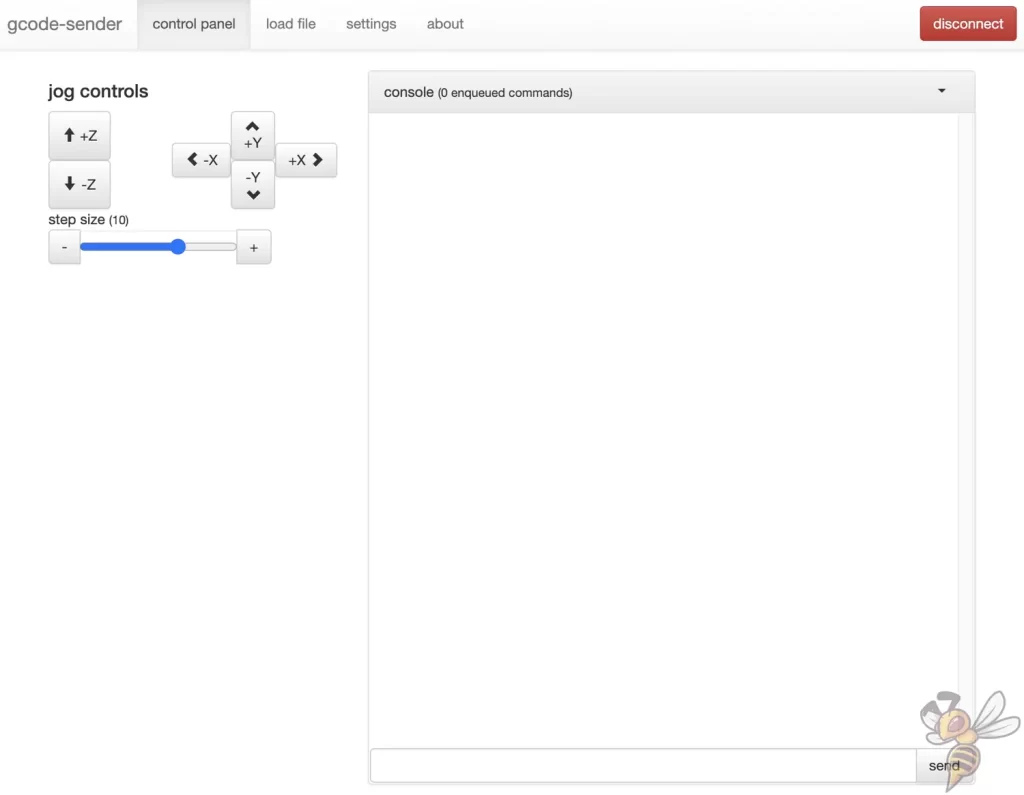
There is an extension for the Chrome browser called G-Code Sender. To use this extension to communicate with your 3D printer, you need to connect it to your computer via cable. In the extensions settings, you specify the port where you have connected the cable and set the baud rate to the maximum.
Now you can enter the command M501 in the control panel and send it to your 3D printer. The 3D printer will then send you back its current settings. Under the settings, you will also find the values for the stepper motors.
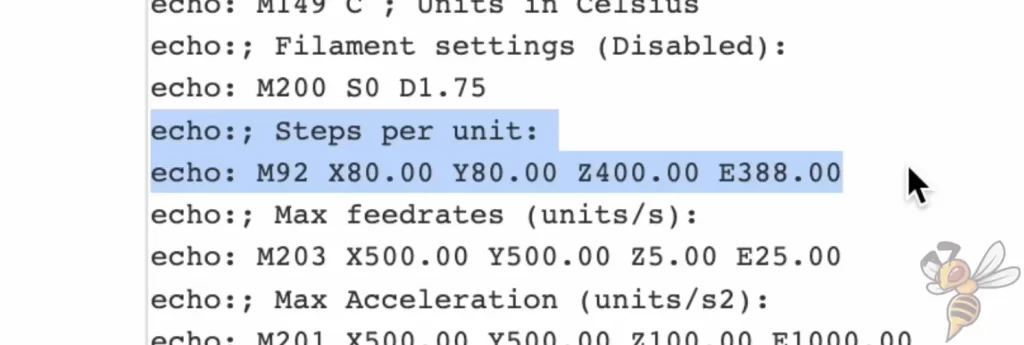
On my 3D printer, the current value for the E-Steps is 388, so the extruder’s stepper motor takes 388 steps to move the filament 1 mm – at least in theory. In practice, we have already seen that it extrudes a bit too much filament. To fix this, we calculate the new E-Steps from the measured and read-out values.
Calculate the new E-Steps
The new E-Steps are calculated from the previous E-Steps multiplied by the ratio of the theoretical extrusion length and the actual extrusion length.
Here is the formula:
Previous E-steps * (theoretical extrusion length / actual extrusion length)
So for my 3D printer, this would result in 388 x (26 / 26.1) ≈ 386.51.
If you don’t want to do the math yourself, here is a calculator where you can enter your values:
Adjusting the E-Steps
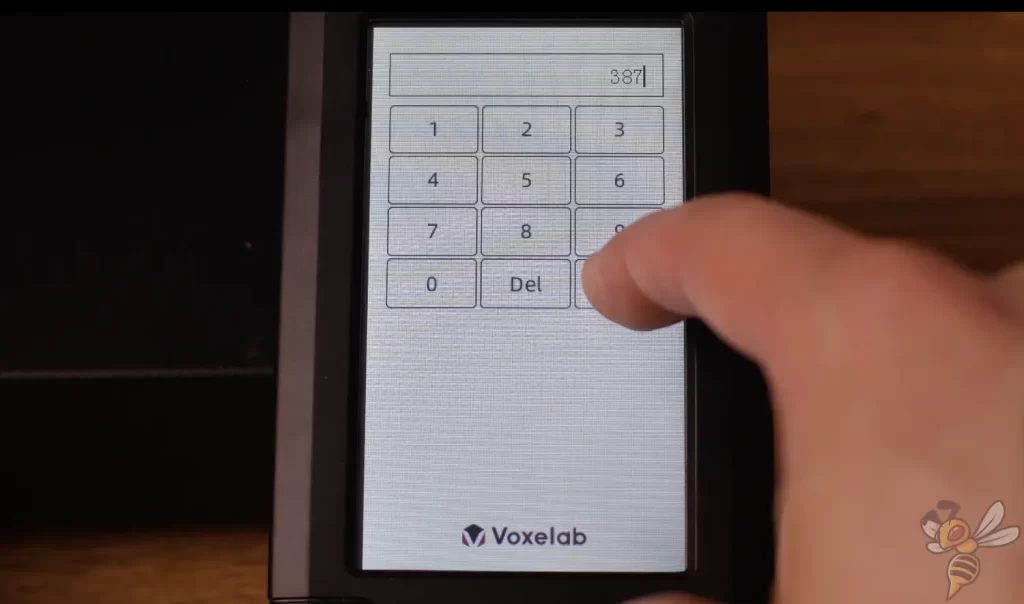
If you have a 3D printer that allows you to change the E-Steps in the menu, you can now enter the new value there.
Otherwise, you have to send a specific G-code command to your 3D printer again. The command is M92 followed by E and the new value of the E-Steps. After that, you have to save the new settings with the command M500.
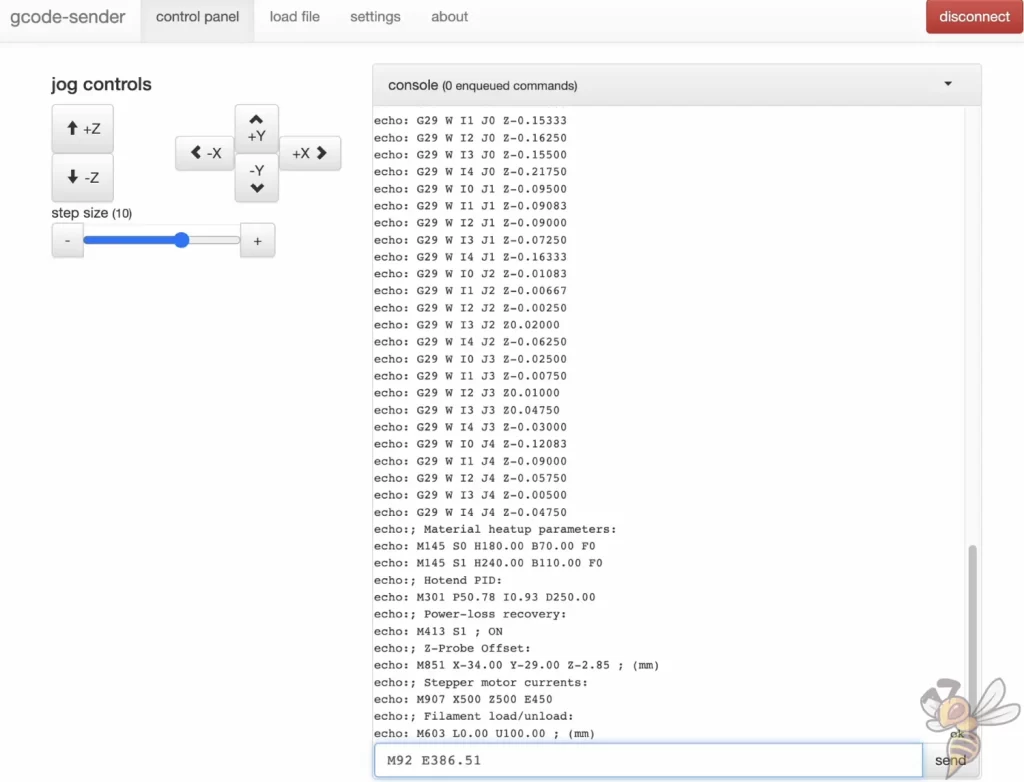
I send the command M92 E386.51 to my 3D printer and save the value with M500. Afterward, I queried the new settings again with M501 to check if everything worked.
Checking the Calibration
If you want to check your calibration, you can extrude filament again and compare the requested length with the actual length. If the lengths are identical, the calibration is complete, if not, repeat the calibration.
Conclusion
As you can see, the E-Steps calibration is done quickly. So, you can increase the precision of your 3D printer relatively quickly and without much effort.
Disclosure: This website is the property of Martin Lütkemeyer and is operated by Martin Lütkemeyer. Martin Lütkemeyer is a member of the Amazon Services LLC and other Affiliate Programs. These are affiliate advertising programs designed to enable websites to earn advertising revenue through advertising and linking to Amazon.com and others. Links marked with * are affiliate links.
