- Wet Filament: Prevention, Symptoms & Drying - July 18, 2024
- Sovol SV08 – Best PrusaSlicer Settings & Profile - June 26, 2024
- Sovol SV08 – Best Orca Slicer Settings & Profile - June 26, 2024
Disclosure: Links marked with * are Affiliate Links. I earn from qualifying purchases if you decide to make a purchase through these links – at no additional cost for you!
The Elegoo Mars 3* is one of the most accurate resin 3D printers. Due to the 4K resolution, it achieves an extremely accurate XY pixel size of only 35 µm. In contrast to its quasi predecessor, the Mars 2 Pro, the print volume was also increased by about 36% to 143.36 x 89.6 x 175 mm.
In this article you will find out how the Mars 3 is operated, what features it has and how its printing results look in practical tests.
Check Price at:
Table of Contents:
- 1 Key Takeaways
- 2 Who Should Buy the Elegoo Mars 3?
- 3 Advantages & Disadvantages > Elegoo Mars 3 Review
- 4 Technical Specifications > Elegoo Mars 3 Review
- 5 Scope of Delivery > Elegoo Mars 3 Review
- 6 Setup > Elegoo Mars 3 Review
- 7 Features > Elegoo Mars 3 Review
- 8 Noise Level > Elegoo Mars 3 Review
- 9 Print Speed > Elegoo Mars 3 Review
- 10 Operation > Elegoo Mars 3 Review
- 11 Print Quality > Elegoo Mars 3 Review
- 12 Slicer > Elegoo Mars 3 Review
- 13 Useful Accessories > Elegoo Mars 3 Review
- 14 Mars 2 Pro vs. Mars 3 > Elegoo Mars 3 Review
- 15 Is the Mars 3 Worth it? > Elegoo Mars 3 Review
- 16 Similar 3D Printers
Key Takeaways
- Ultra fine XY resolution of only 35 µm
- Large print volume – “largest among the small resin 3D printers”.
- Simple operation
- Very good price-performance ratio
Who Should Buy the Elegoo Mars 3?
The Elegoo Mars 3 is suitable for anyone interested in resin 3D printing! It is suitable for beginners and professionals alike due to its high performance, ease of use and relatively low price.
Advantages & Disadvantages
> Elegoo Mars 3 Review
PRO:
- 4K resolution (35 µm pixel size)
- 0,01 mm Layer thickness
- Large print volume
- High printing speed
- New, modern design
- Compatible with ChiTuBox (incl. 1-year license for ChiTuBox Pro)
- Simple print bed leveling
CON:
- Plastic housing
- No WiFi connectivity
Technical Specifications
> Elegoo Mars 3 Review
DEVICE
- Technology: LCD Photopolymerization
- Material: 405 nm Resin
- Assembly: Completely pre-assembled
- Display: 3,5” touch screen
- Size: 227 x 227 x 438.5 mm (L x W x H)
- Weight: 5,2 kg
PRINTING
- Print volume: 143.36 x 89.6 x 175 mm (L x W x H)
- Layer thickness: 0.01 to 0.2 mm
- XY resolution: 4098 x 2560 pixels (4K)
- XY pixel size: 0.035 mm (= 35 µm)
- Z-axis accuracy: 0.00125 mm
- Print speed: 1.5-3 seconds/layer (30-50 mm/h) (depending on the used resin)
- Print bed leveling: manual, assisted
SOFTWARE
- Slicer: ChiTuBox
- Operating systems: Windows, macOS, Linux
- File format: STL
- Connectivity: USB
Check Price at:
Scope of Delivery
> Elegoo Mars 3 Review
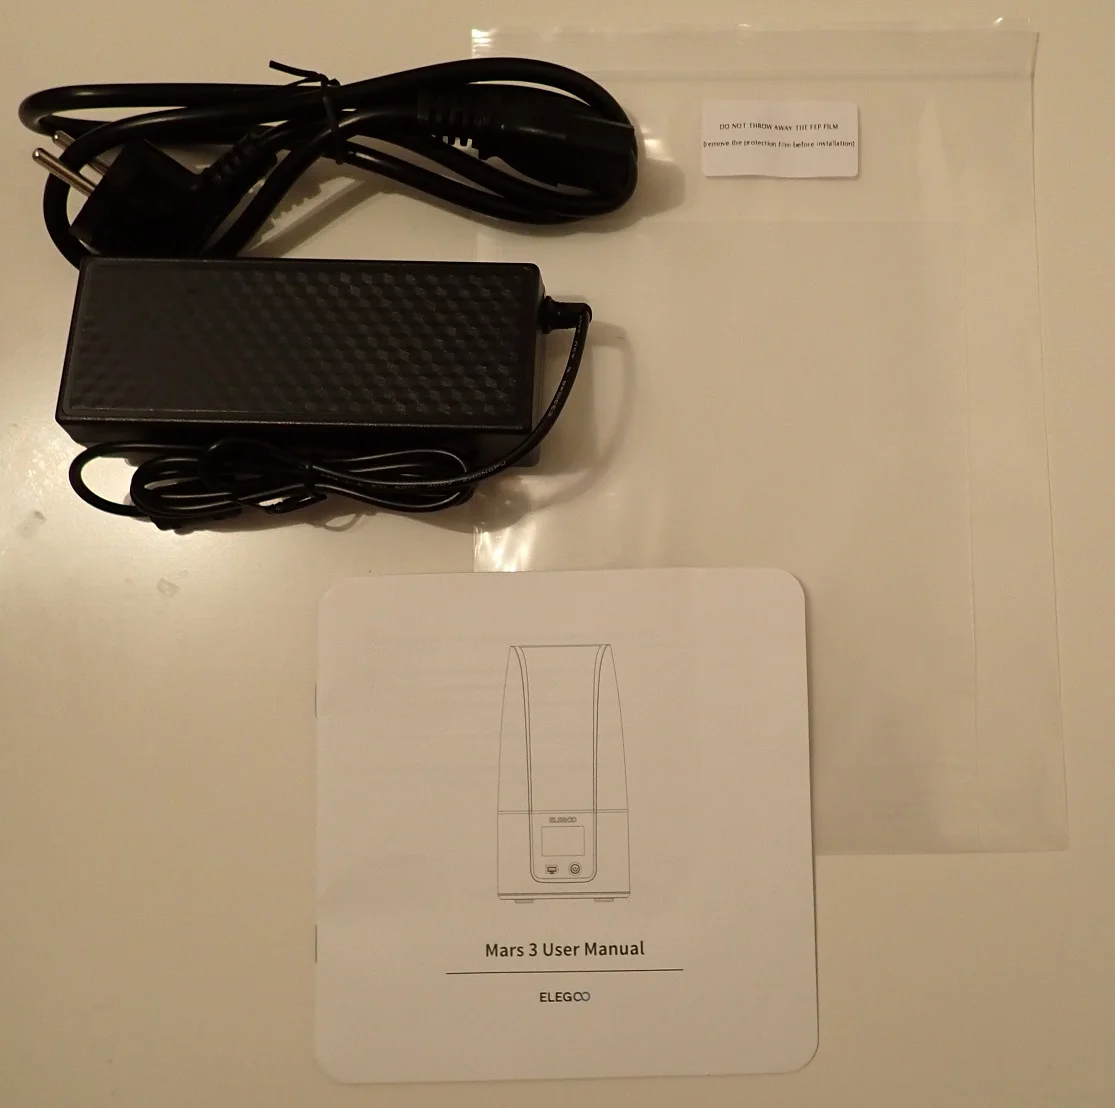
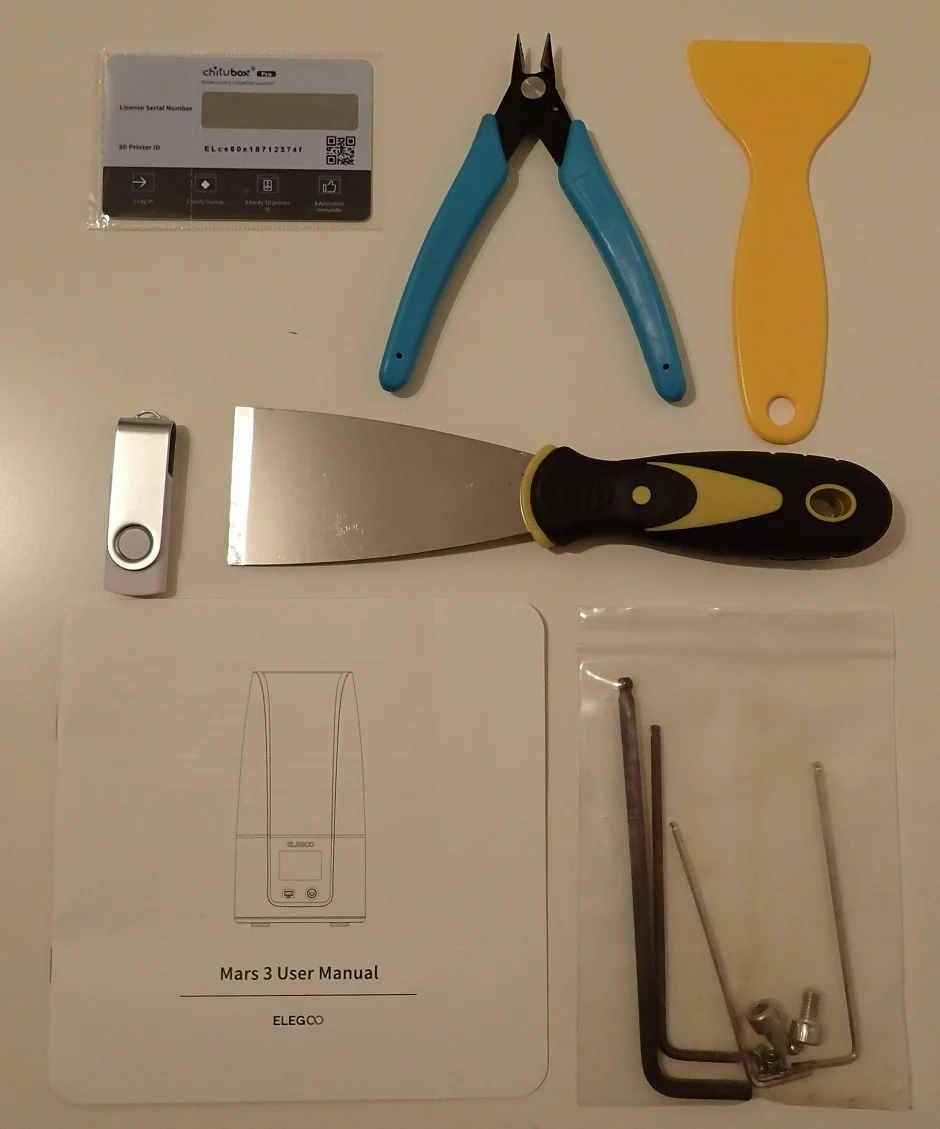
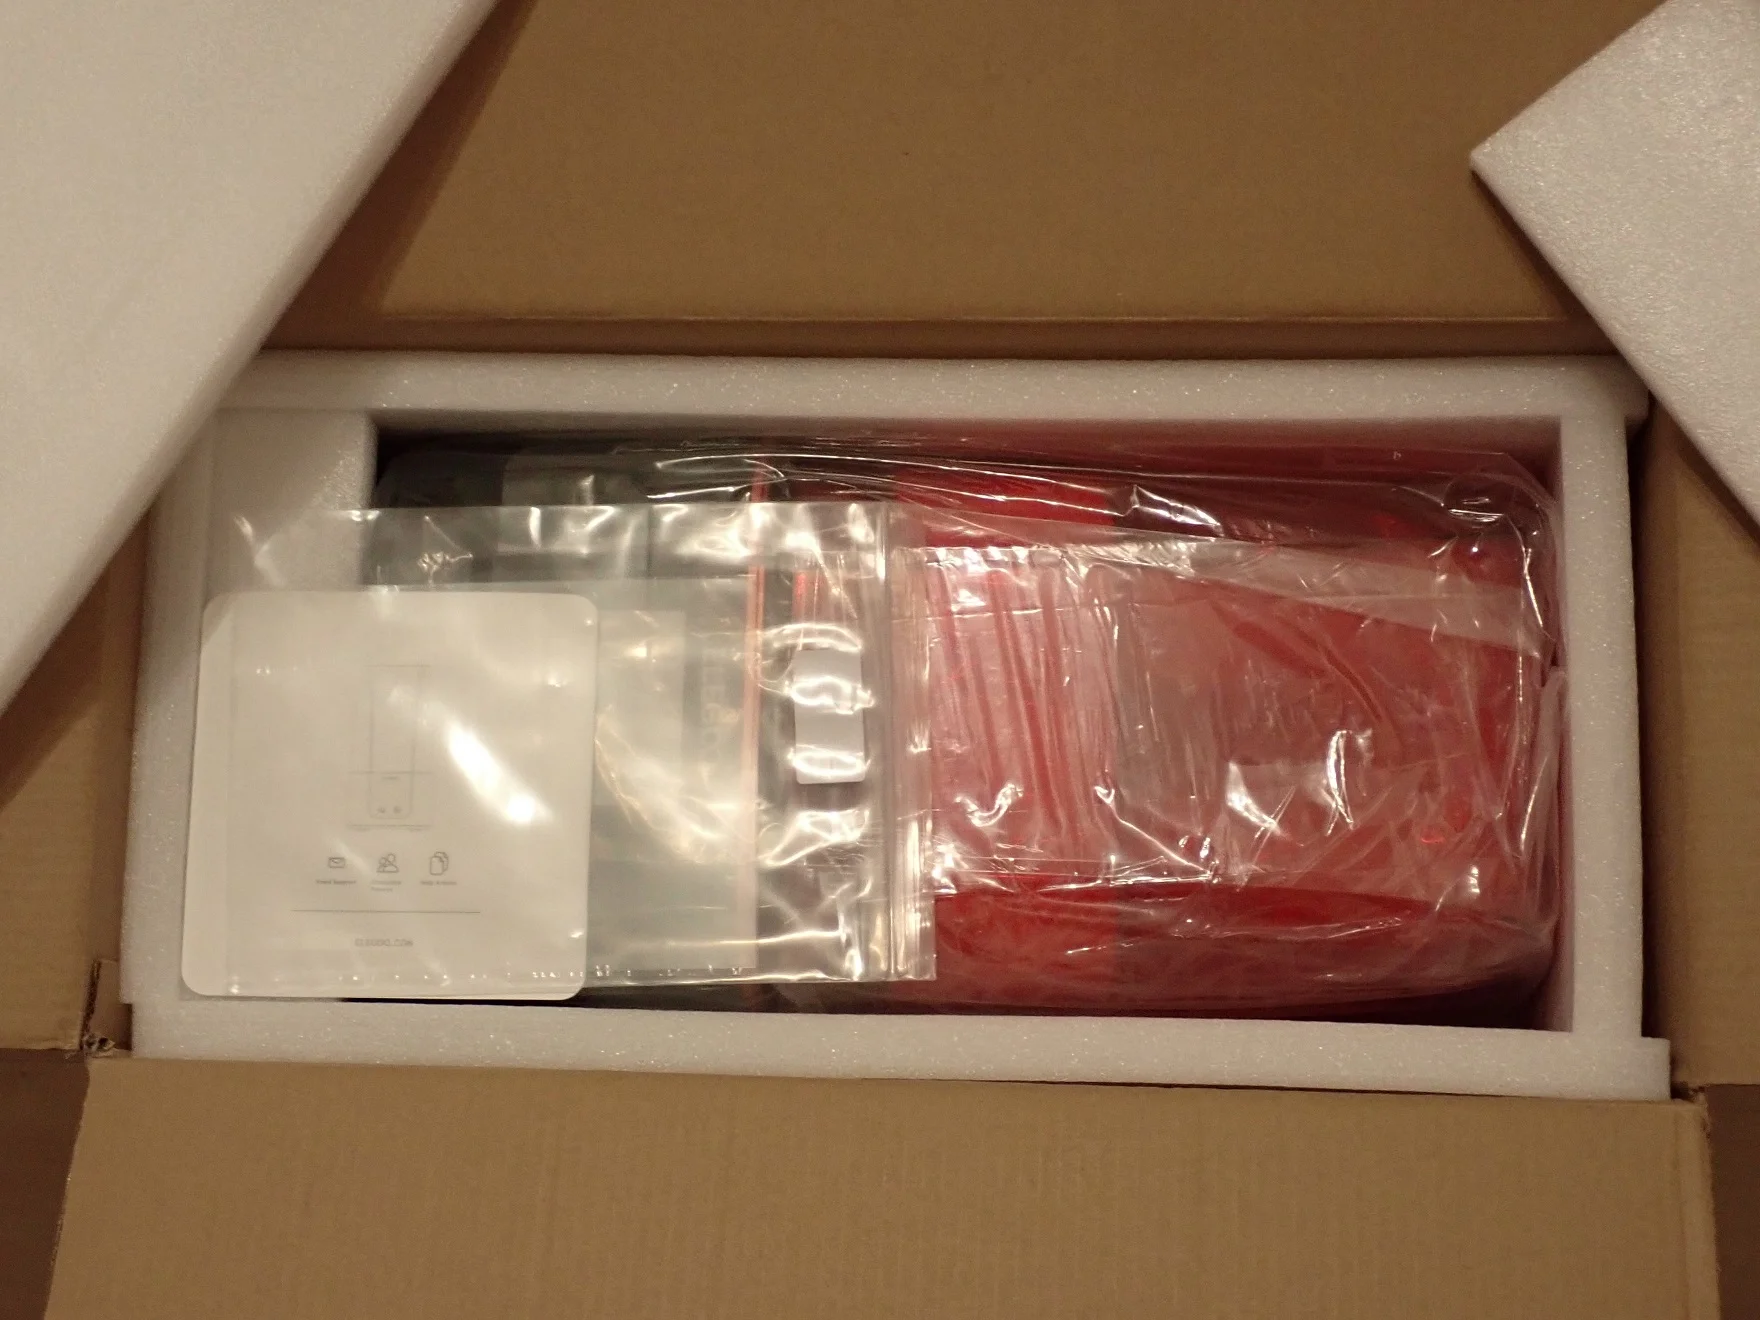
The Mars 3 comes as usual from Elegoo in a very compact but well-protected package. The 3D printer is completely pre-assembled and is protected by foam from transport damage.
The printer is already completely pre-assembled, you do not need to assemble anything yourself. It is virtually “plug-and-play”.
Except for paper towels, resin and isopropyl alcohol, everything you need for your first test print is included. I think it’s very good of Elegoo to already include all the necessary tools and a few of the consumables like gloves, masks and filters. Fortunately, this standard has spread among the resin 3D printer manufacturers.
The following items are included in the scope of delivery:
- The preassembled printer itself
- UV-light impermeable protective cover in transparent red
- Power supply and cable
- Resin vat
- Printing plate
- Metal spatula to release the printed object from the print bed
- Plastic spatula for the resin container
- Disposable gloves
- Masks
- A few disposable resin filters
- Tools and spare screws
- Operating instructions
- USB flash drive:
- sliced test model
- Slicer ChiTuBox Free
- Slicer ChiTuBox Pro
- digital manual
- Mainboard Spec as G-Code
With the Mars 3, you can start your first test print within minutes. The only things that are not included are the following:
- Resin
(The Mars 3 is compatible with 405 nm resin. I can recommend the plant-based resin from Anycubic*). - Lots of paper towels for cleaning
- Isopropyl alcohol* to wash your print objects and to clean your tools and the resin tank.
- UV lamp to cure your prints. Simple nail polish UV lamps* are absolutely sufficient for most objects!
- A reusable resin filter* to save you running costs.
- PTFE lubricant* if your print objects adhere to the FEP film and not to the print bed (a well-distributed drop is already sufficient to prevent adhesion to the FEP film)
You can also get specialized wash & cure stations. Currently, there are very good ones from Elegoo (link to product*) and Anycubic (link to product*).
Setup
> Elegoo Mars 3 Review
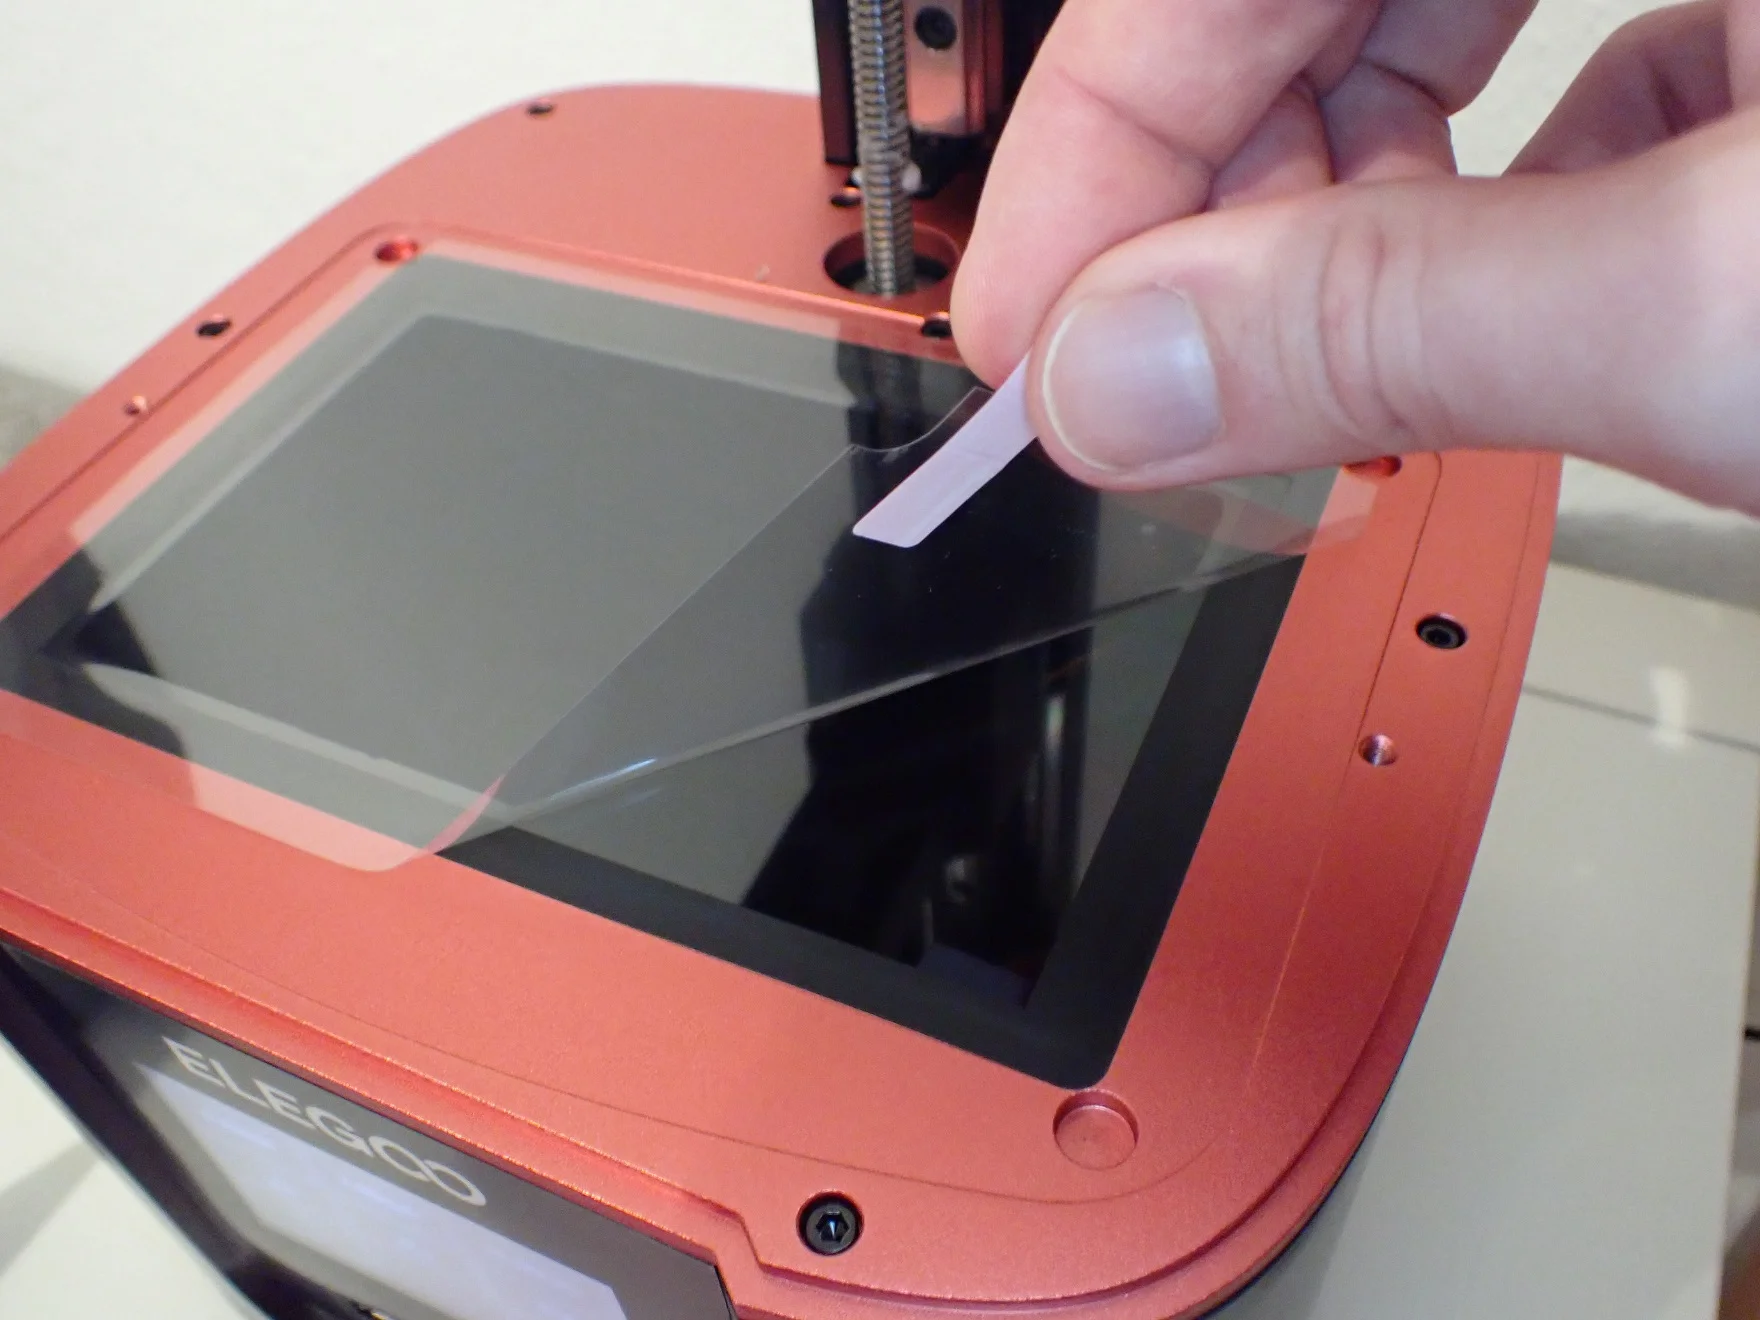
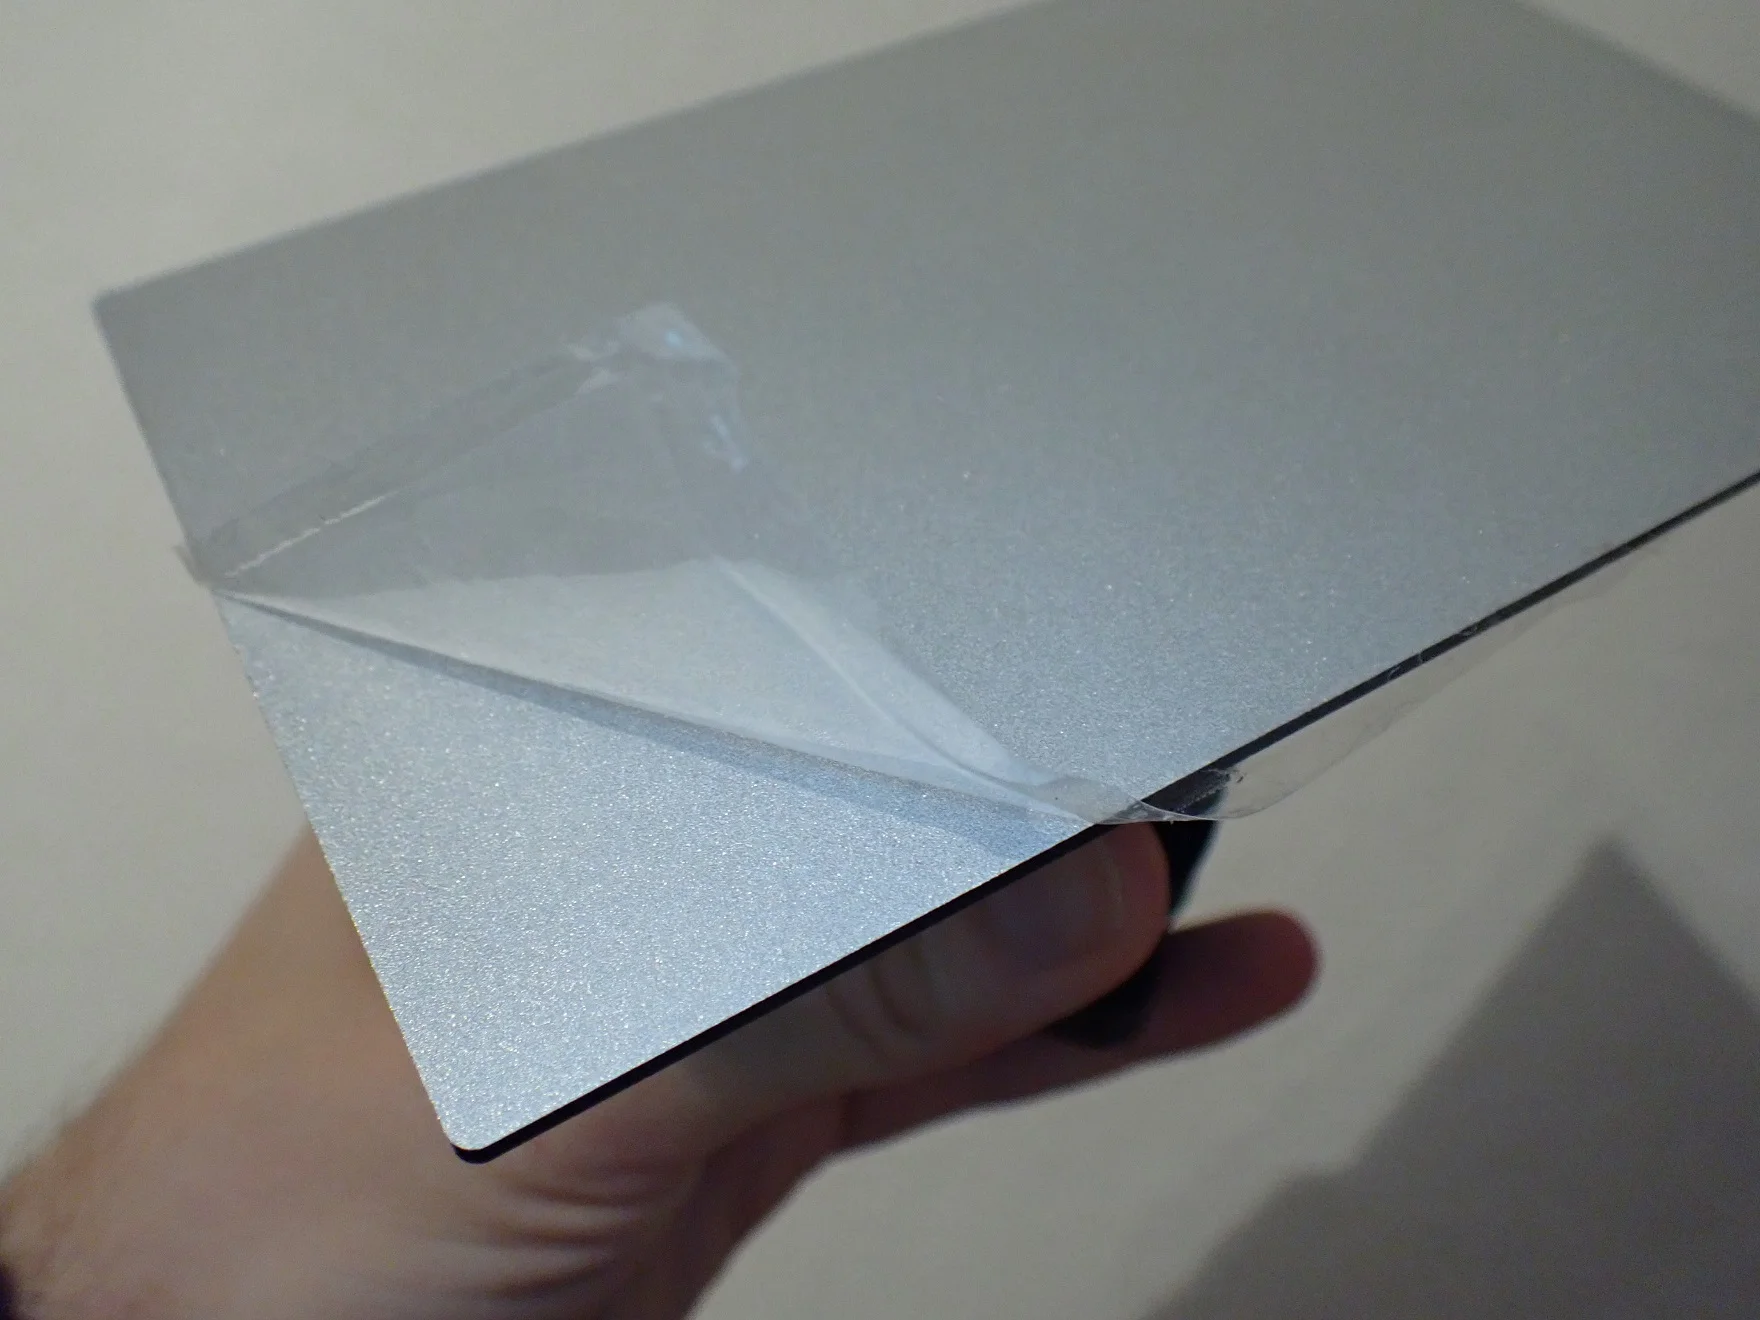
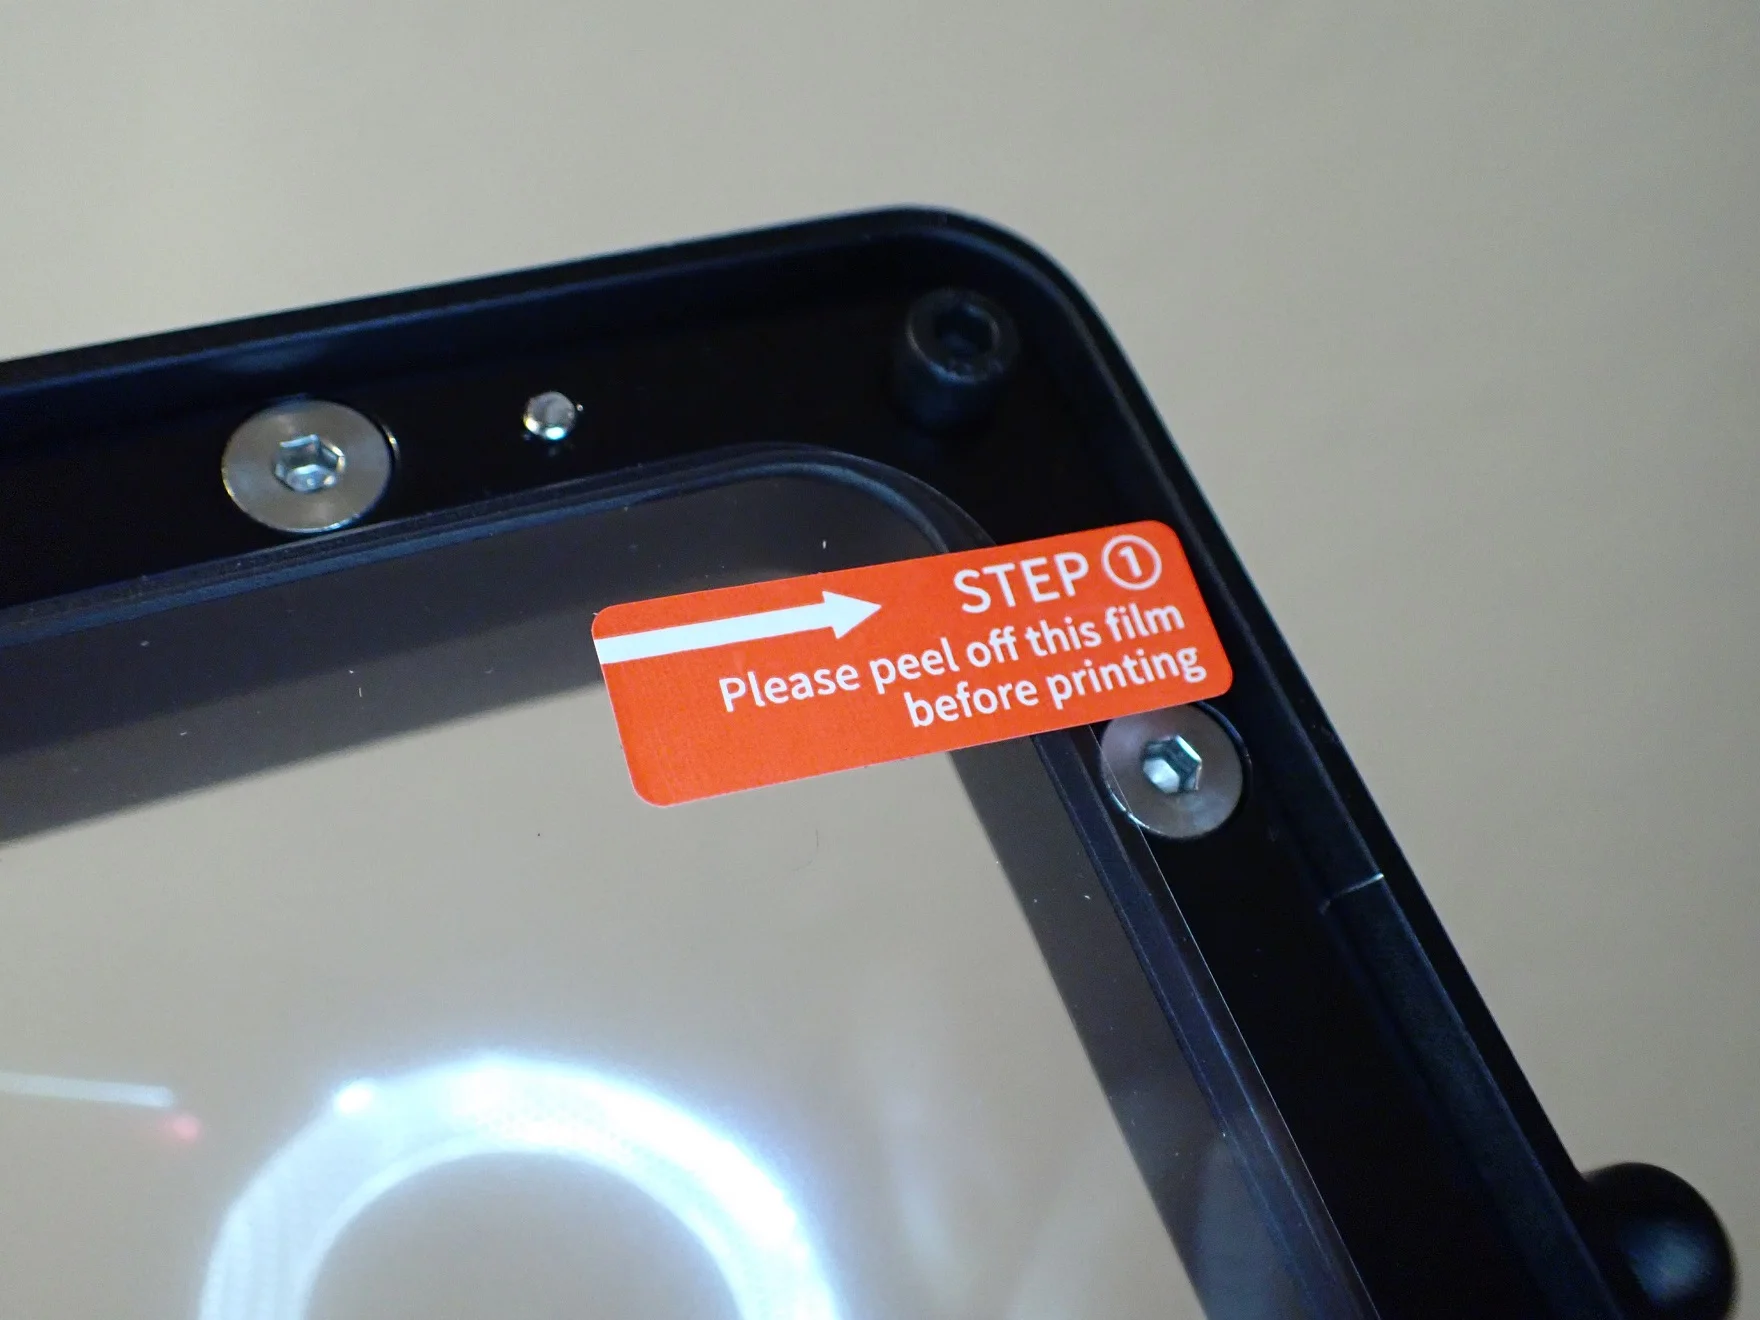
The assembly of the Elegoo Mars 3 is very simple and quick. The enclosed manual explains the complete process in understandable language and with sensibly placed graphics.
The manuals contain all information for the assembly, the leveling of the printing plate, the first test print, how to get the print from the printing plate, how to adjust the slicer ChiTuBox correctly and how to maintain the 3D printer correctly.
With the USB slot and on/off switch located on the front of the 3D printer, you can move it right up against the wall to save space. With a space-saving design that minimizes the horizontal dimensions of the resin container and Z-axis, the Mars 3 can fit anywhere.
However, you should set it up in a place that can be well ventilated. The liquid resin emits toxic fumes which can be harmful to you and other people. Therefore you should always wear at least an FFP2 mask when handling liquid resin and ventilate the room well.
Print Bed Leveling
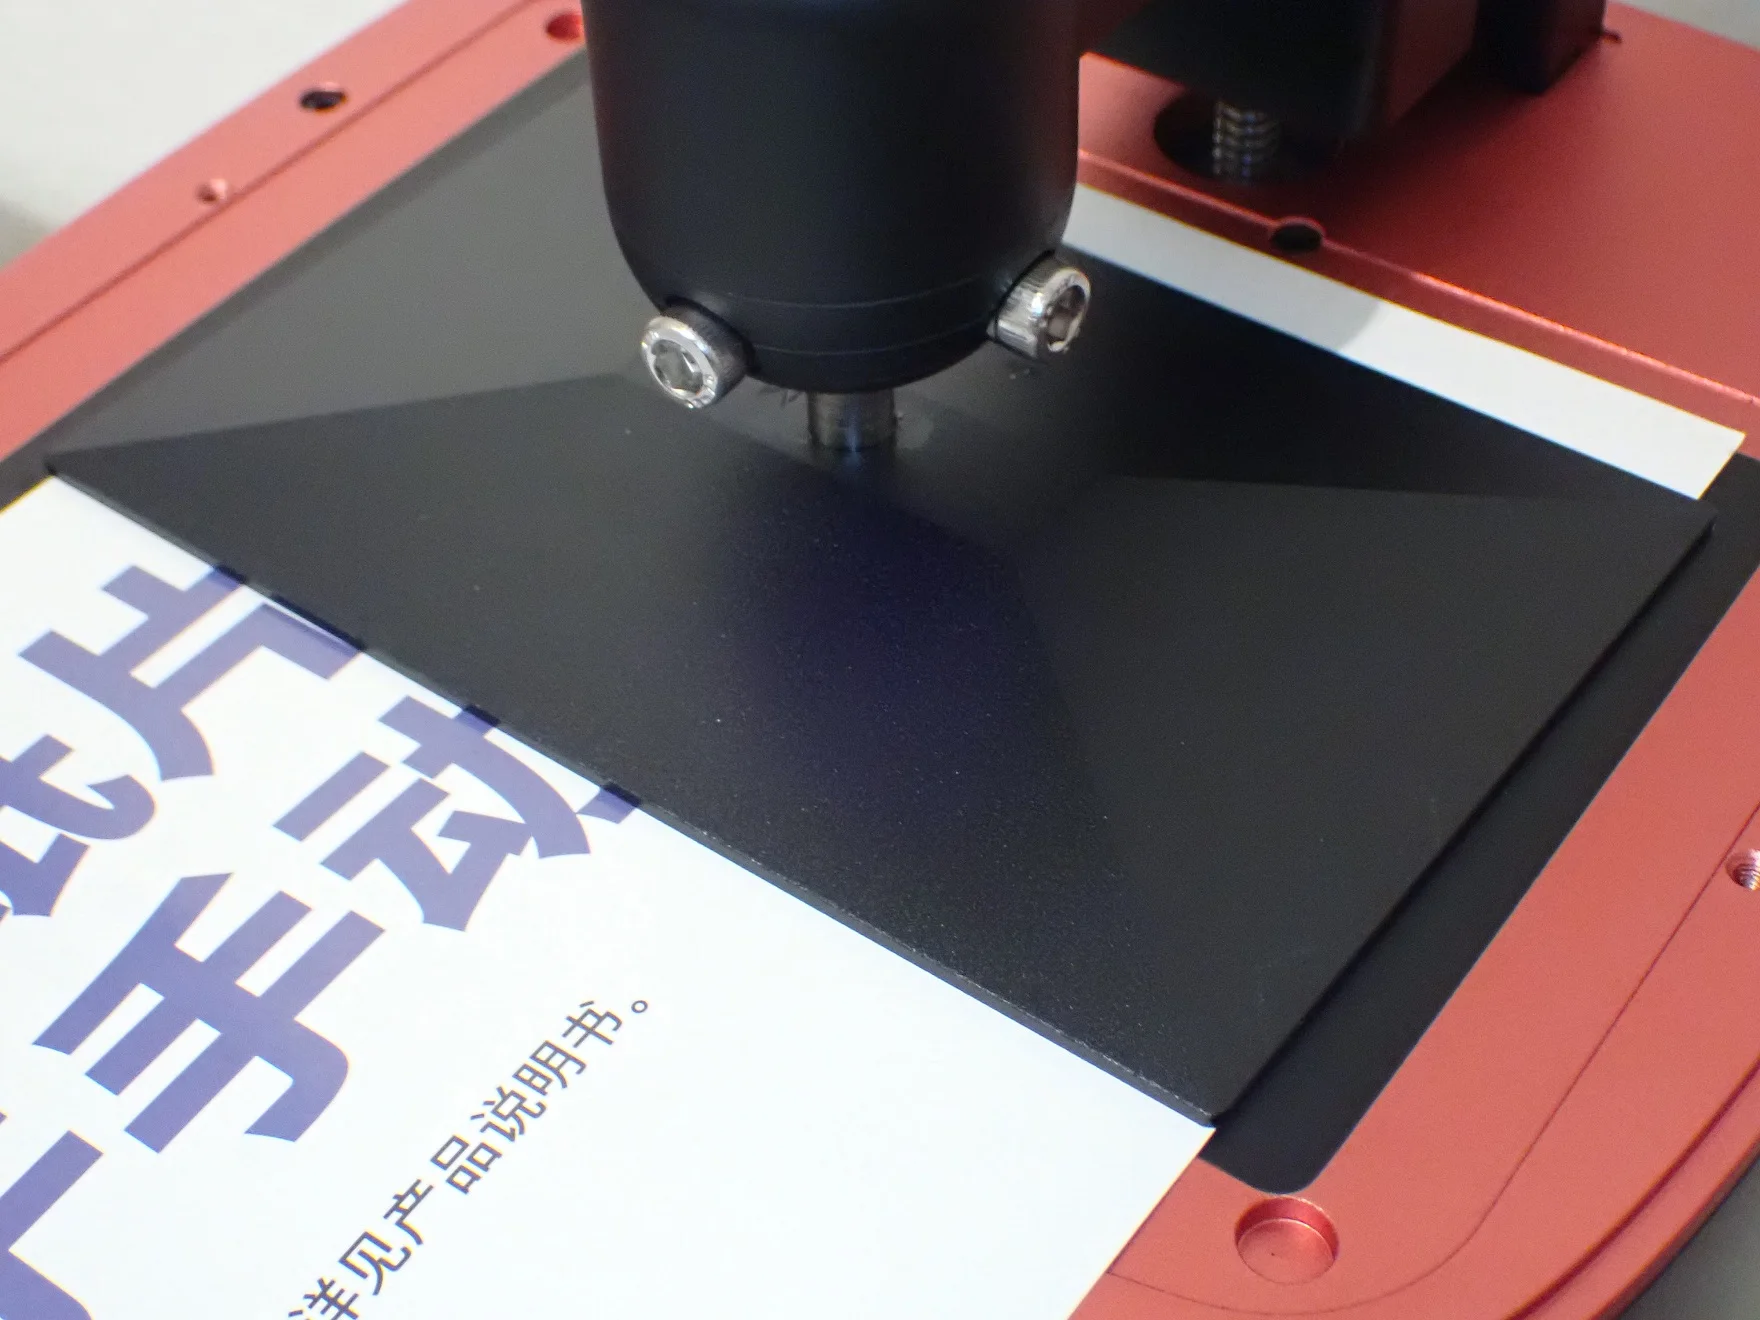
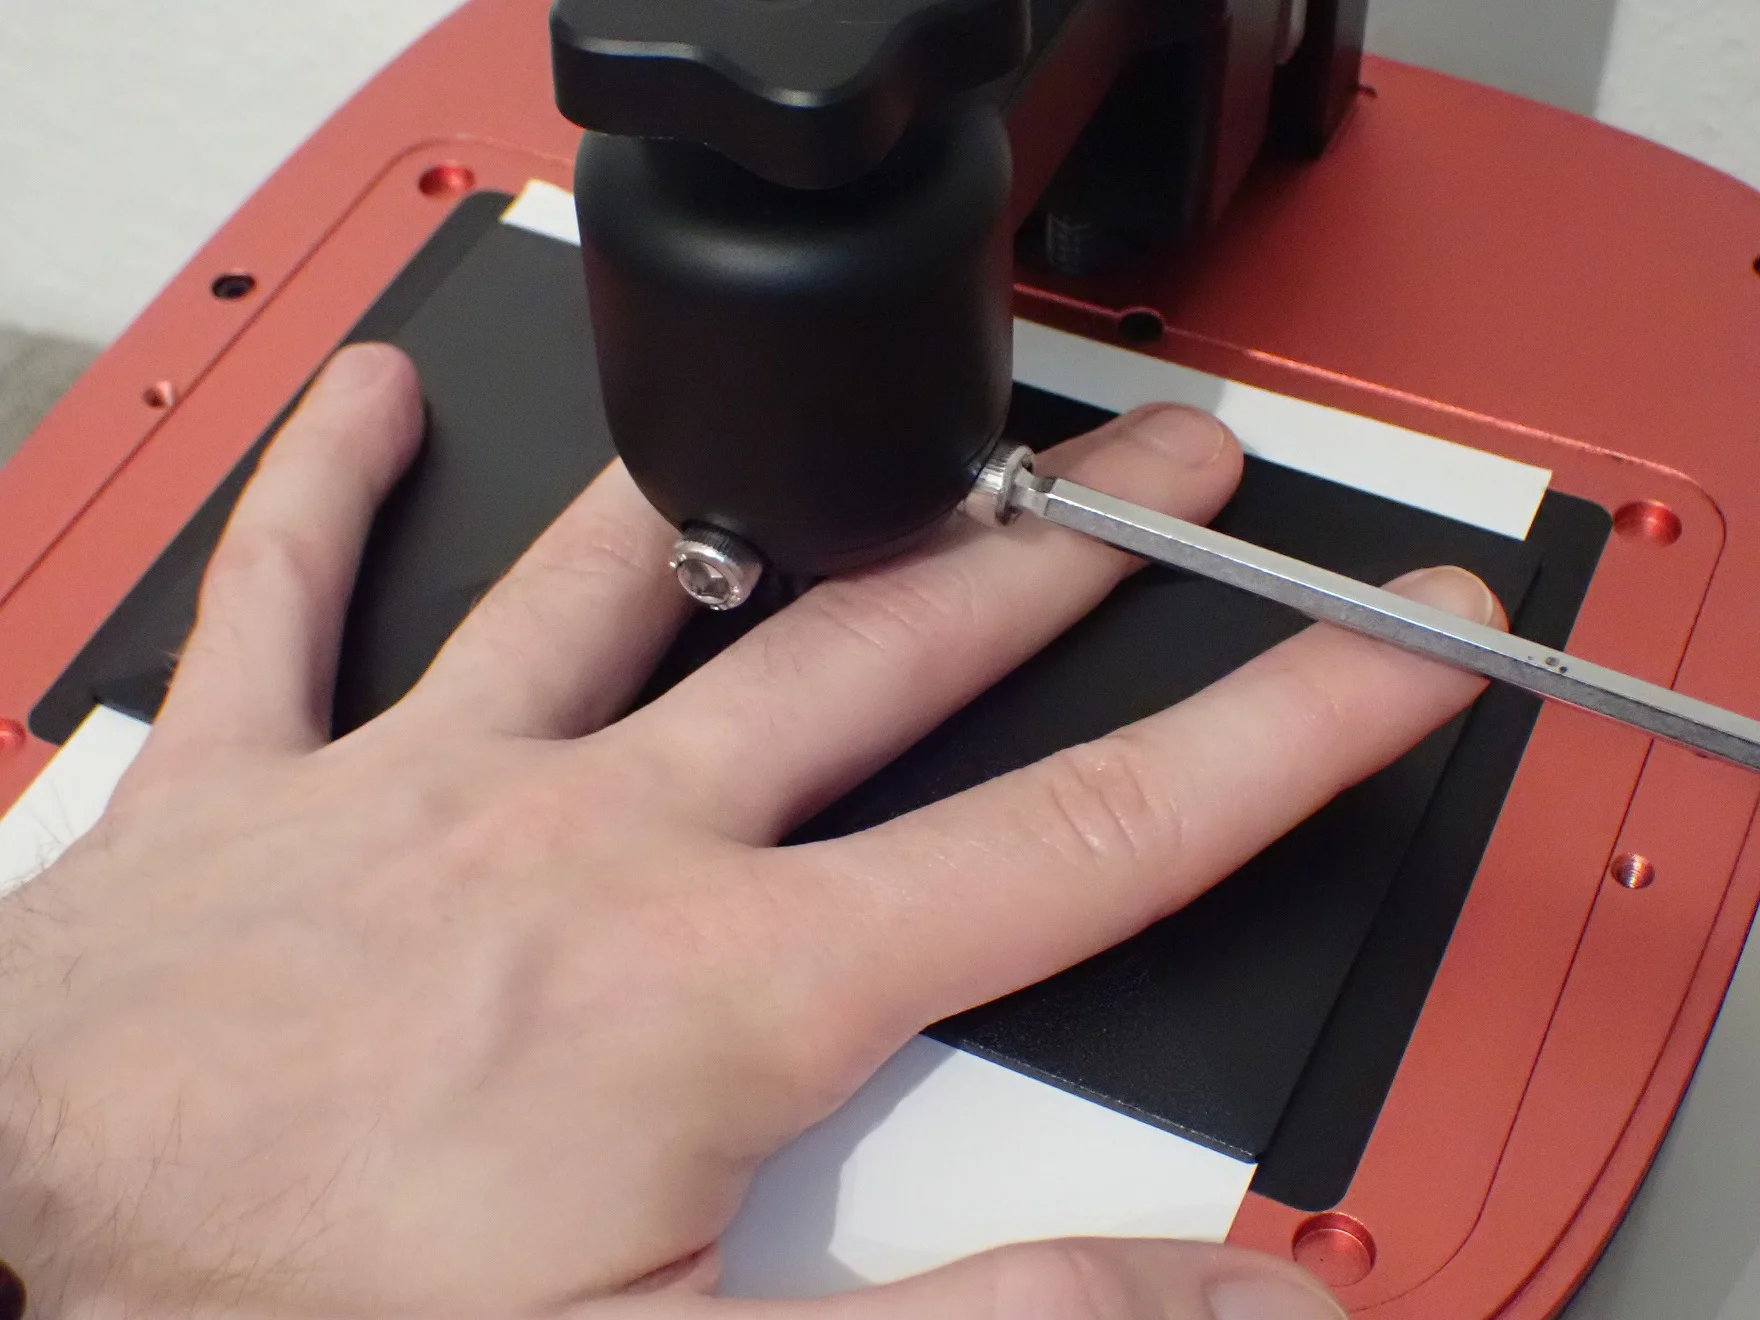
The print bed leveling of the Elegoo Mars 3 is the same as with most modern resin 3D printers for the hobby sector. The leveling is supported by the menu. The inclination of the printing plate is adjusted manually with a paper, the Z0 position is set via the menu.
These are the steps to level the print bed of the Elegoo Mars 3:
- Turn on printer
- Move the Z-axis upwards via the menu
(Tool -> Manual -> Move upwards in 10 mm steps) - Mount the printing plate and screw the rotary knob on the top.
- Loosen the two side screws above the printing plate so that the inclination can be adjusted.
- Remove the resin container if you have not already done so.
- Place a piece of paper on the LCD screen. The paper should cover the screen completely and be about 0.1 mm thick (this is the standard thickness of normal paper).
- Move the print bed to its home position. You can also find the button for this in the menu where you can manually move the axis up or down.
Do not be afraid that the printing plate could collide with the LCD screen and damage it. You have loosened the two screws beforehand, so the printing plate can give way and not cause any damage. - Now comes the only part that needs some practice:
Push the print bed down evenly with one hand and tighten the two screws evenly with the other hand.
This way you define the tilt of the printing plate and adjust it to the tilt of the LCD screen. This method is so simple and fast that you will find it on every resin 3D printer by now. - Now you have to readjust the Z-Home position via the menu. This position has changed slightly due to the alignment of the printing plate. In the menu, you can move the print plate up or down in 0.1 mm steps to adjust the height correctly.
You have found the correct height when the piece of paper can be moved between the LCD screen and the print bed with some resistance.
If you’ve never leveled a resin 3D printer before, this may sound a little complicated. But once you’ve done this process once or twice, it will be routine and easy!
LCD Screen Test
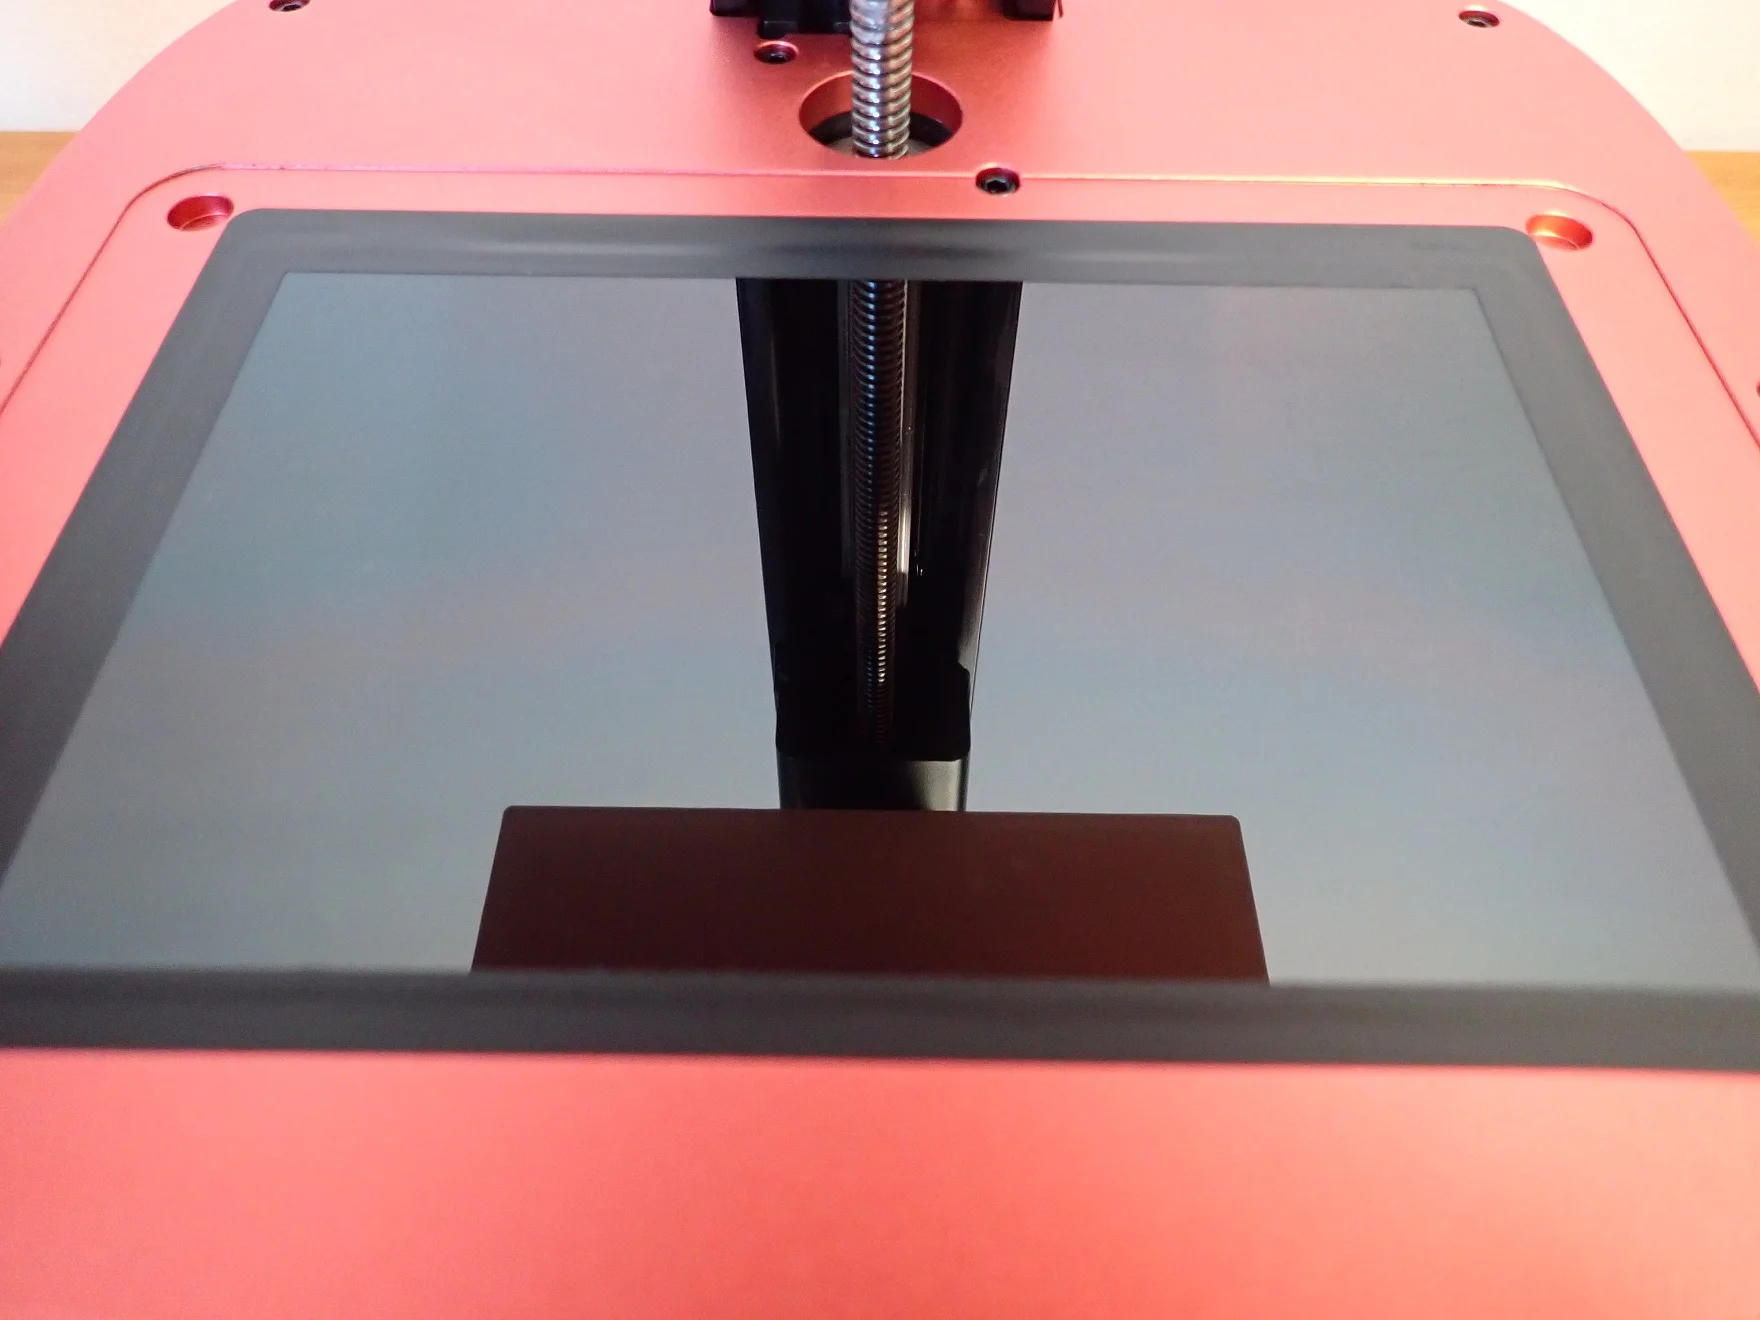
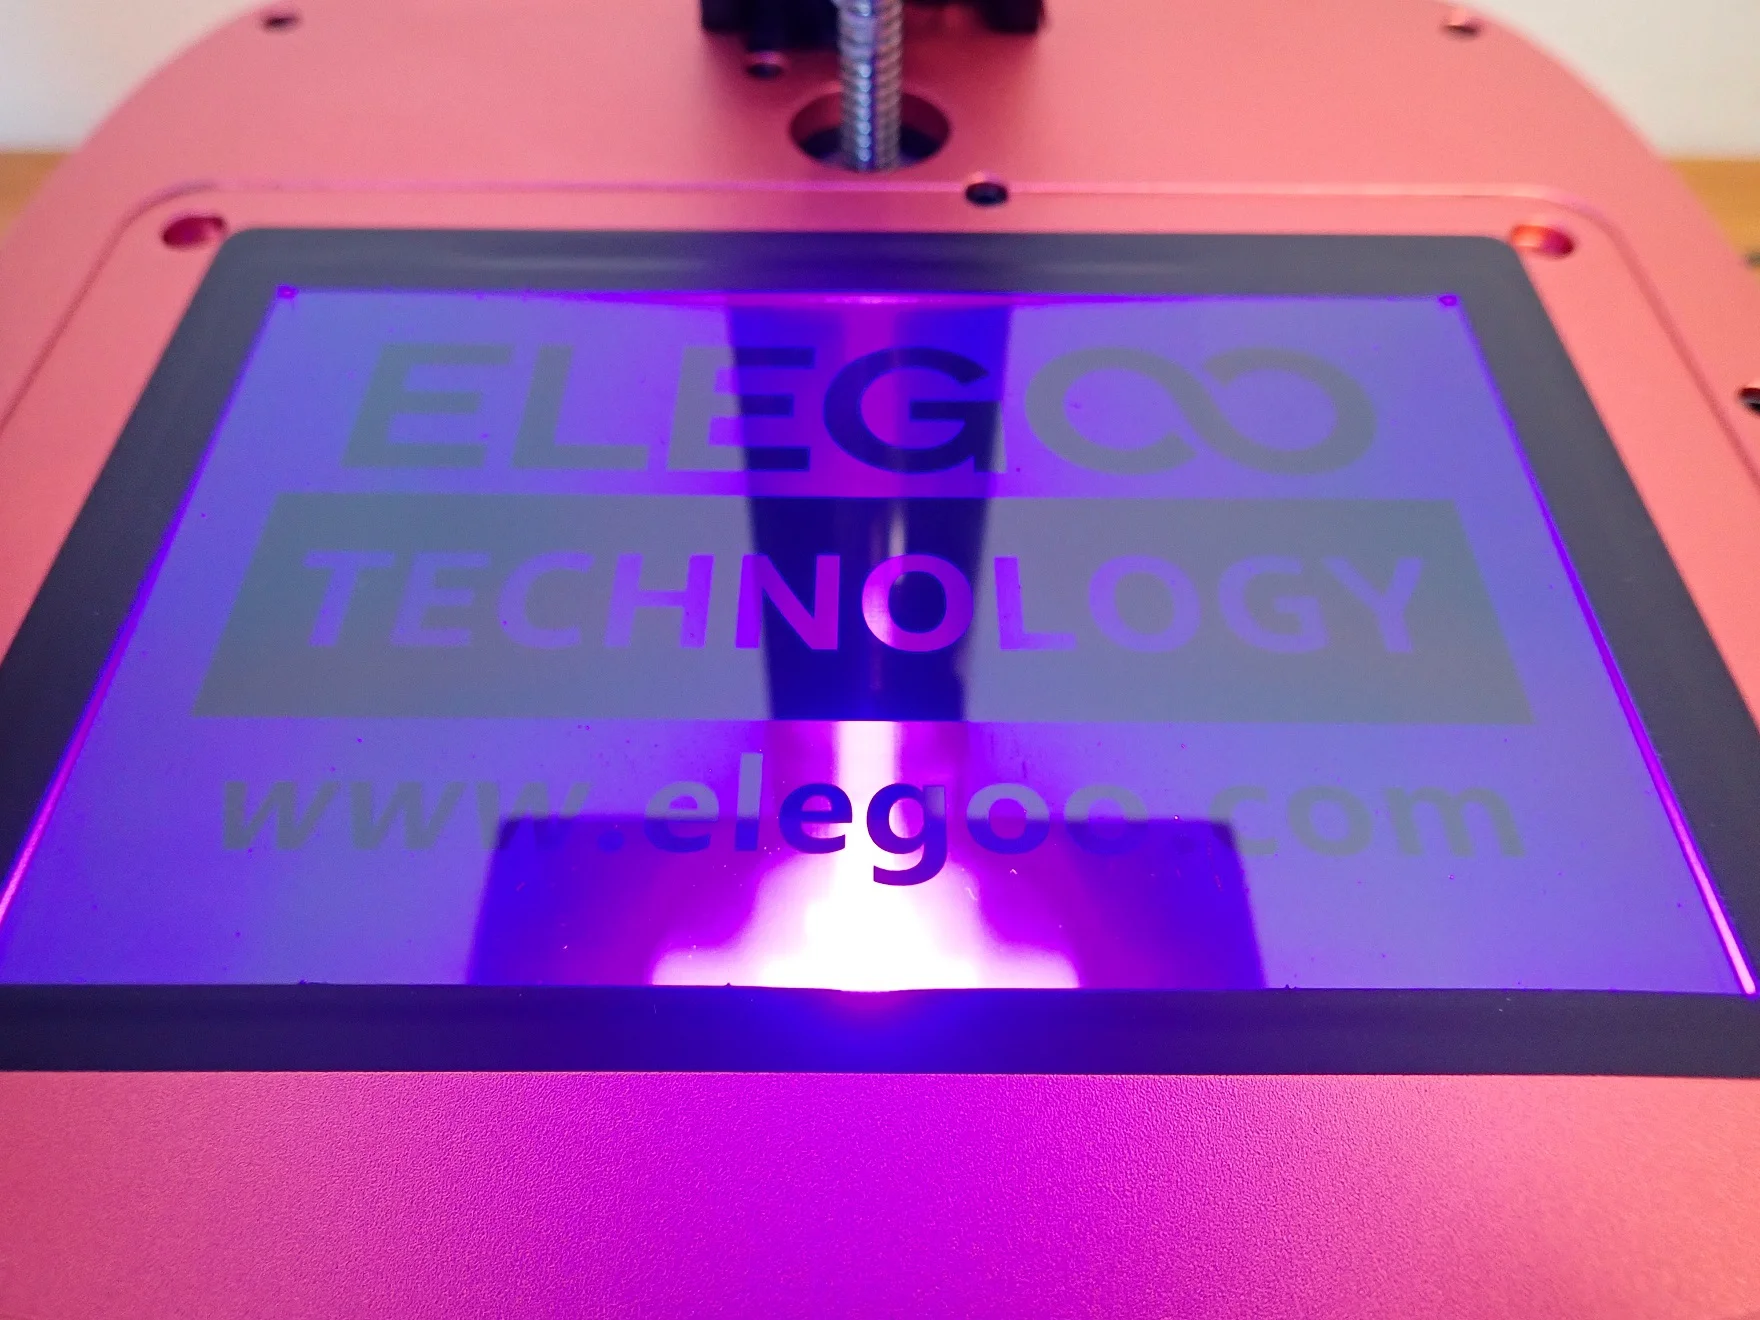
Before you can start printing, you should test the LCD screen. In the menu (Tool -> Exposure) you can set the time how long the test exposure should last. If you can see the complete text “ELEGOO TECHNOLOGY www.elegoo.com ” on the screen, the UV light source is working properly.
Check Price at:
Features
> Elegoo Mars 3 Review
The Elegoo Mars 3 is the perfect complete package for beginners in resin 3D printing. It is fast, very accurate, has a relatively large print volume, comes with a 1-year license for ChiTuBox Pro and has other features that make it interesting for advanced users.
New Design
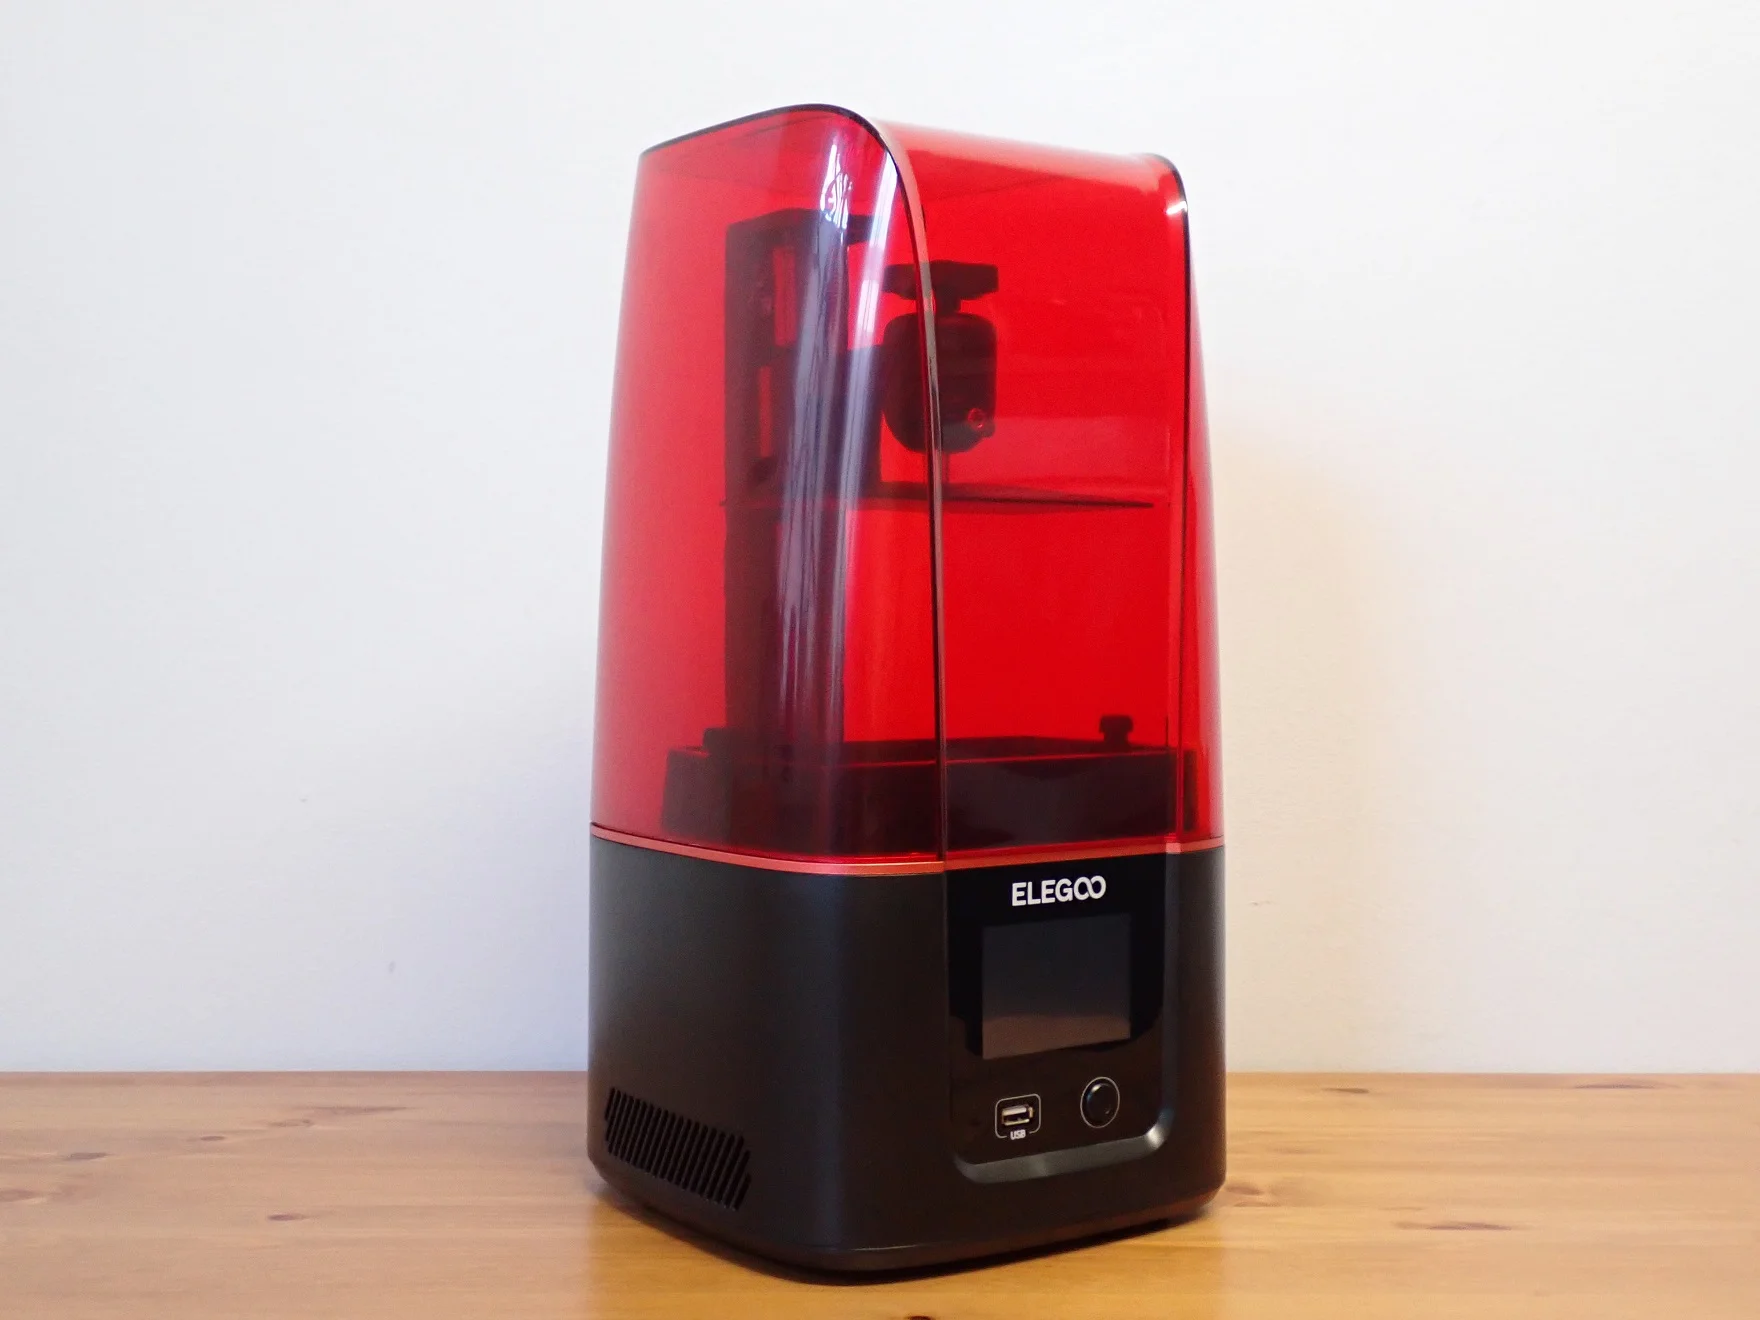
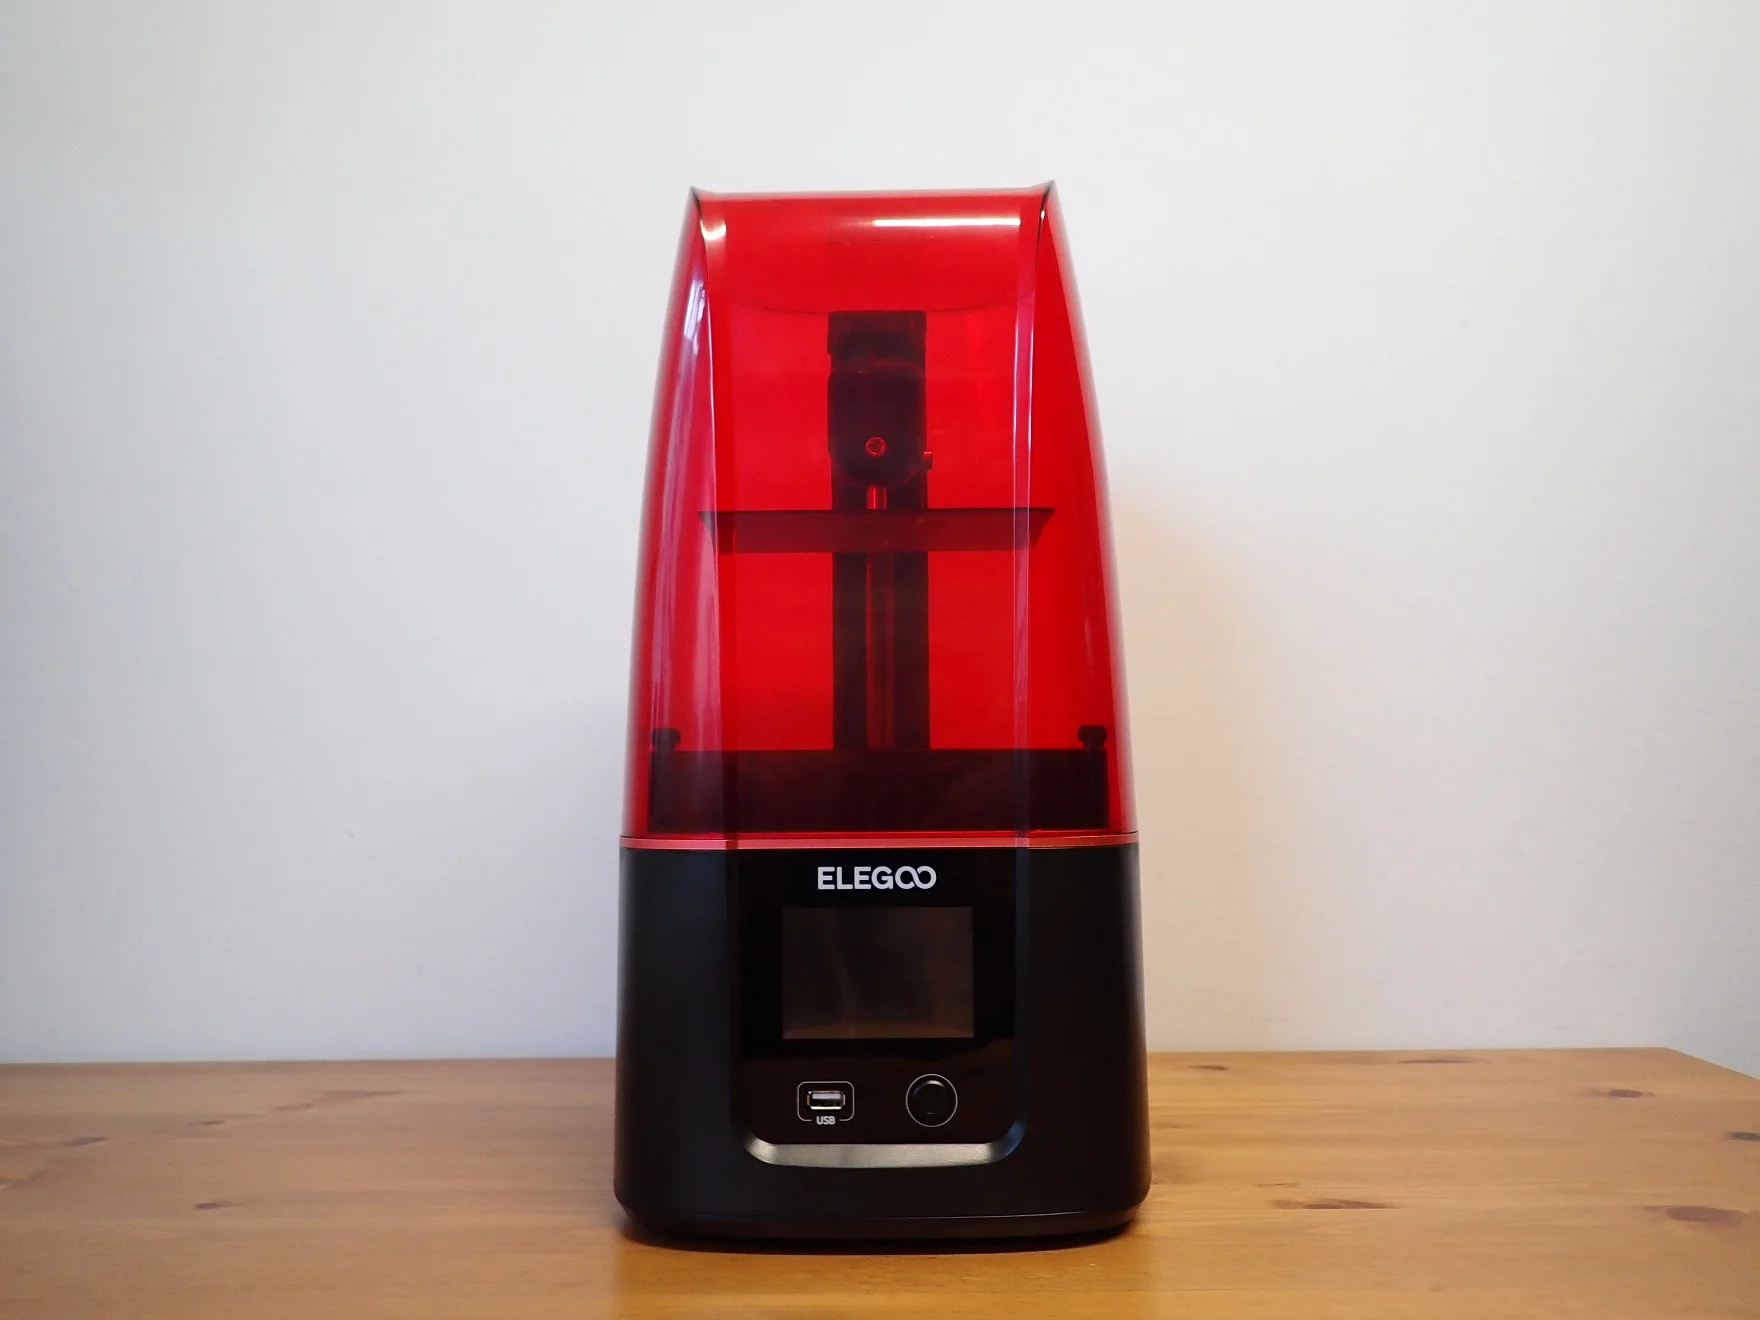
The new rounded design of the Mars 3 is noticeably different from the previous models in the Mars series. The Mars 3’s predecessors were very chunky and angular, where the Mars 3 now looks more rounded and modern.
With this new rounded design, it doesn’t look quite as clunky as its predecessors, although it is slightly larger and offers a greater print volume.
The base of the printer is no longer made of metal but of plastic. However, this is not noticeable for the time being due to the new design and the probably accompanying price advantage and the non-existing negative influences on the performance justify this design change.
What I myself was very pleased about is that all the controls, i.e. the USB slot, the on/off switch and the touchscreen, are placed at the front of the printer. This makes the operation much more comfortable and you can also place the printer in places that are a bit more cramped.
4K Resolution with 35 µm Pixel Size
Since the last great revolution among hobby resin 3D printers, the monochrome LCD screen, the next revolution is now becoming standard: 4K resolution!
With a 4K resolution of 4098 x 2560 pixels, the Mars 3 gets a pixel size of just 35 µm. Not only does it have a larger print area than its predecessor, the Mars 2 Pro, it also has a 15 µm more accurate resolution!
With the monochrome LCD screen, its high resolution and the larger print volume, it gets all 4 criteria of a good resin 3D printer with its low price.
With a 4K resolution and a simultaneous moderate edge smoothing (antialiasing) by the slicer, you get objects that show hardly any traces of the typical steps of 3D printers. The objects resemble injection molded parts!
4K vs. 2K
Compared to FDM 3D printers, resin 3D printers have always been extremely accurate. But again, the higher the resolution, the better the result. The step from a 2K resolution to a 4K resolution is noticeable and at the same time allows a larger print volume without sacrificing accuracy.
A 4K resolution is about one-third better than a 2K resolution. Even though the layer height does not get smaller, the step from 50 µm to 35 µm in the XY plane is clearly noticeable. Smaller details are much better shaped and more defined.
If you want to print miniatures or other objects with fine details, you should always look for high resolution. If XY plane resolution isn’t quite as important to you, 2K resin 3D printers may be better for you, as they are likely to become cheaper with the arrival of 4K printers.
Large Print Volume
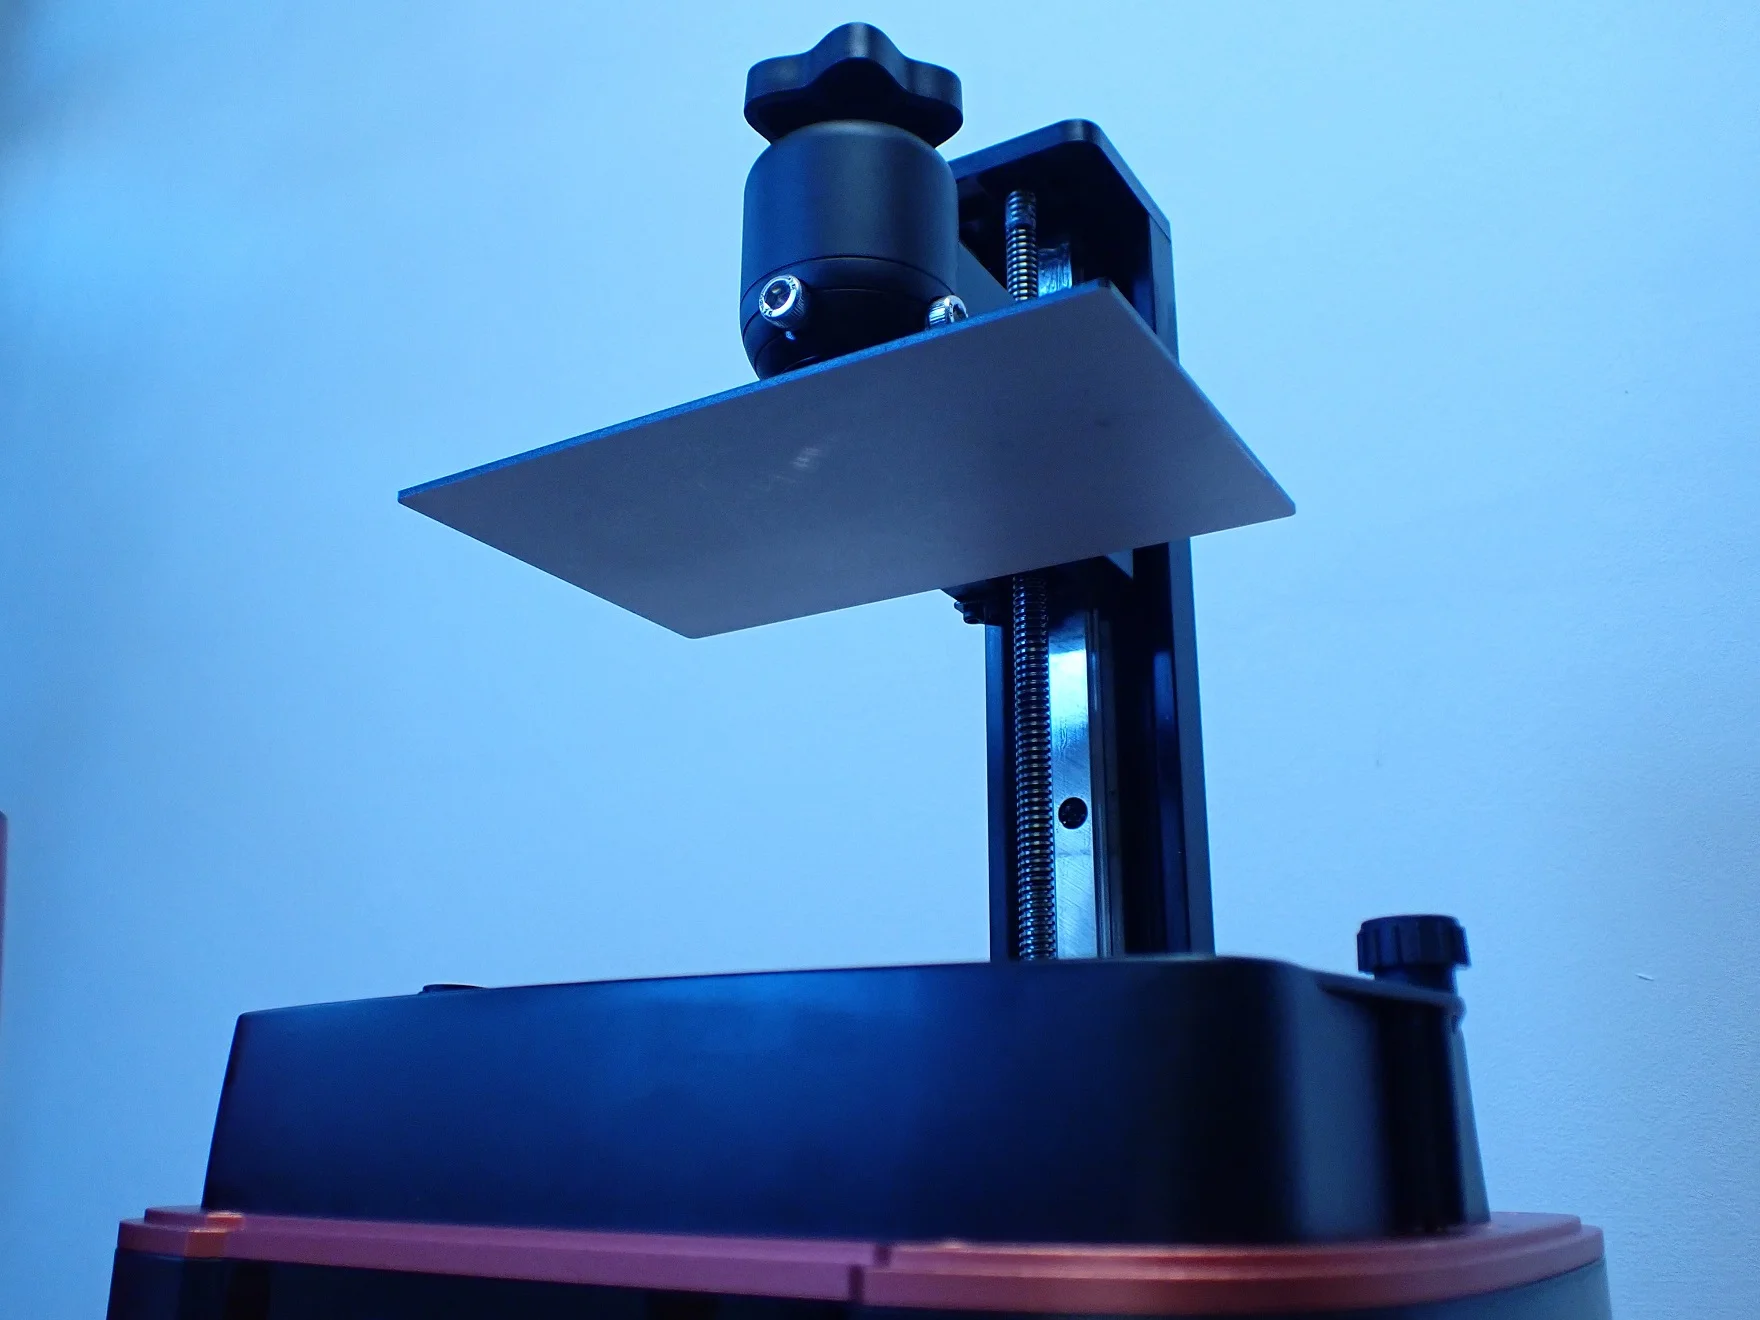
Among the small Hobby Resin 3D printers, the Mars 3 is the largest! Due to its high resolution 4K 6.6 inch screen, it can afford a slightly larger print area and still maintain its very small pixel size.
For comparison, the print volume of the Mars 3 of 143.36 x 89.6 x 175 mm (= 2.25 l) is about 36% percent larger than that of the Mars 2 Pro with 129 x 80 x 160 mm (= 1.65 l).
I noticed that the print volume is significantly larger than its predecessor directly from the dimensions of the resin vat. It is much deeper and can hold more resin, so you do not have to refill during printing.
With this relatively large print volume, you can print medium to large objects in one piece with the Mars 3, in addition to the smallest objects with a high resolution. In terms of print volume, however, it can by no means compete with a large-format 3D printer such as the Anycubic Photon Mono X 6K. But it doesn’t have to, since it’s in a completely different price range. Depending on the field you are in, you may not have a use for such a large printer and are even better served with a small printer like the Mars 3.
COB Light Source
COB stands for Chip-on-Board. This means that the LEDs are located in several groups directly on the circuit board. This results in a higher light output, which is advantageous for resin 3D printers. The curing time is greatly reduced compared to the older SMD technology (Surface Mounted Device).
Another advantage of the new technology is the longer lifespan and the lower heat development. Nevertheless, the heat development is not negligible with the high performance, which is why the Mars 3 has been given a new, more efficient cooling system than its predecessors.
The new cooling system keeps the inside of the 3D printer at an optimal temperature, reduces the noise level slightly and increases the lifetime of the device.
Touch Screen and Menu
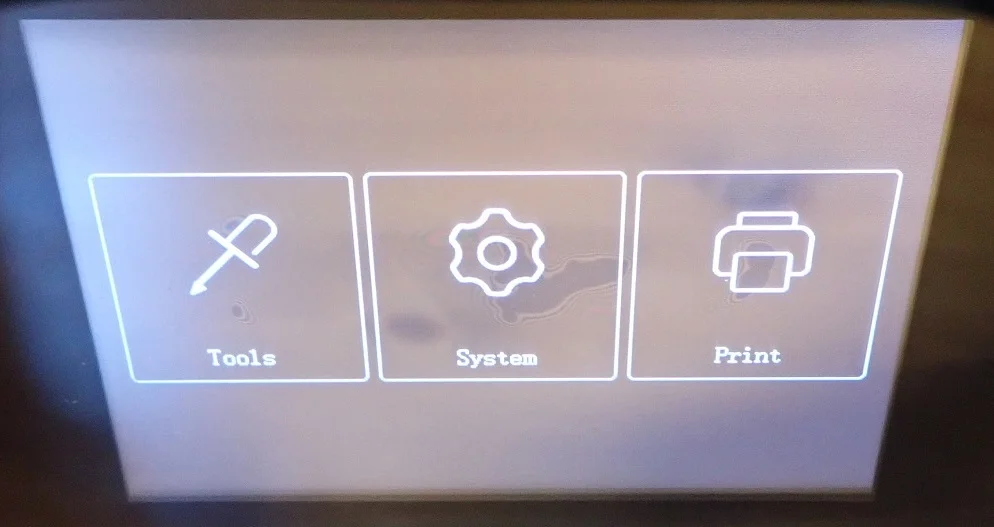
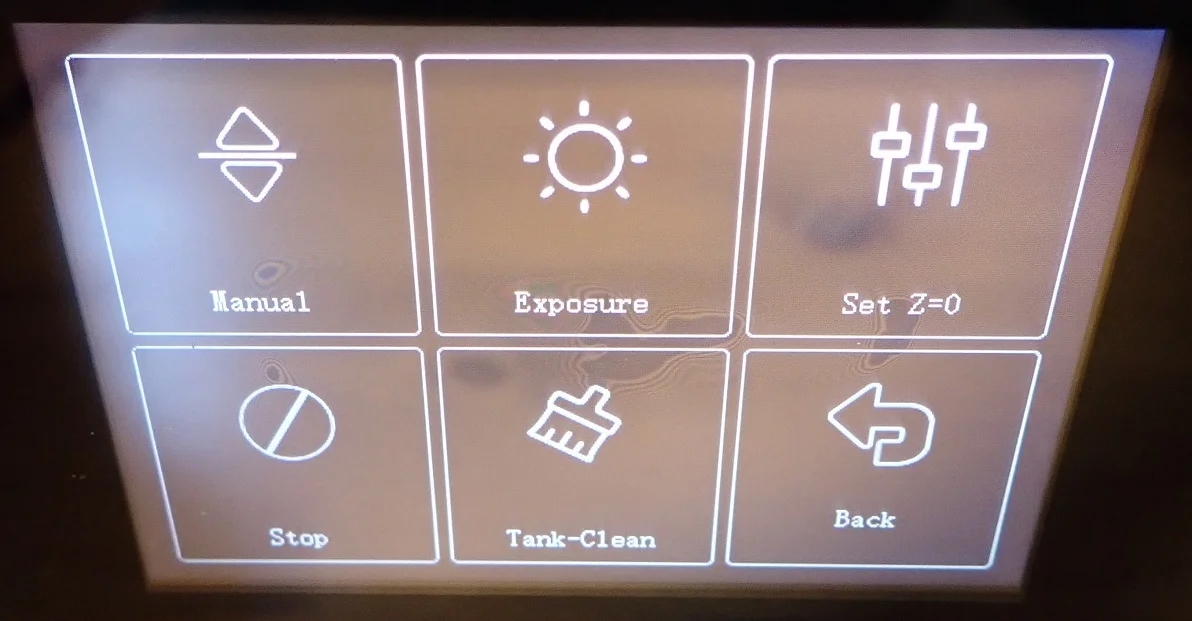
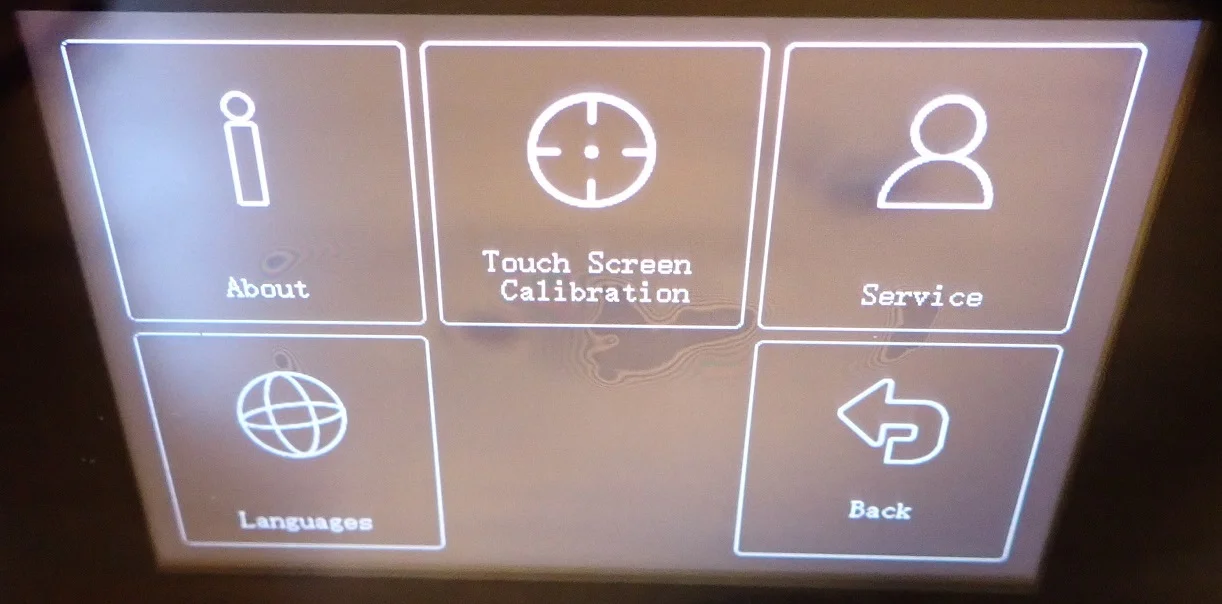
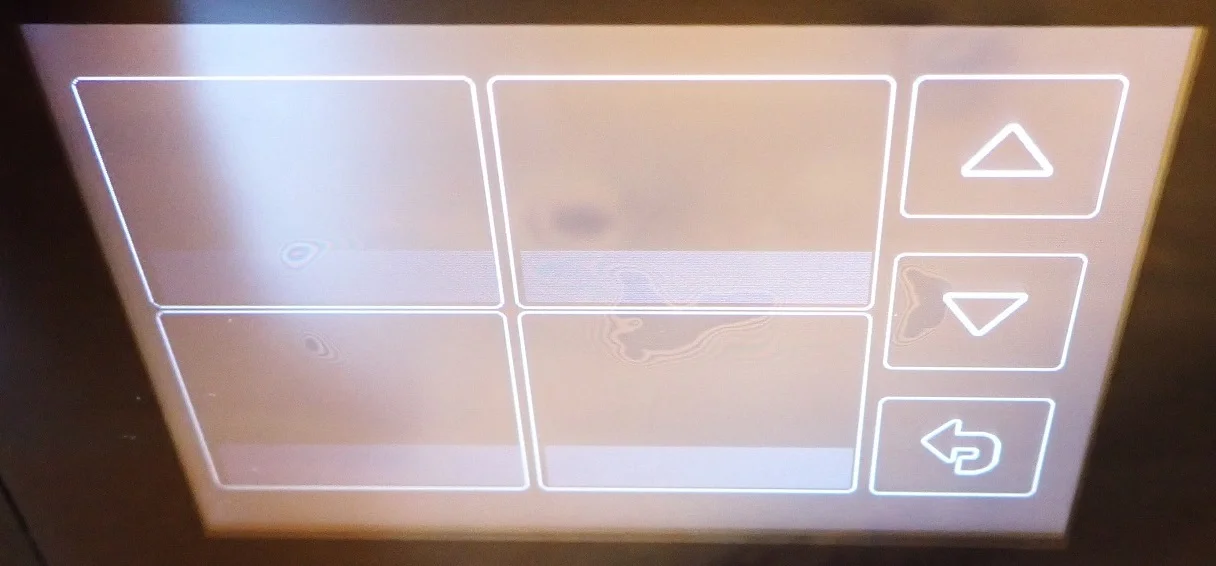
A resin 3D printer does not need a very complicated menu. Therefore, the Mars 3 has a very tidy and intuitively understandable menu which you can operate via the color 3.5-inch touch screen.
The menu is divided into three submenus: Tool, System, and Print. You will only use the System submenu once, if at all, and mainly deal with the other two.
In the Print menu, you can print your objects stored on the USB. To keep a good overview, small preview images of your print files are displayed in this menu.
In the submenu Tool, you can move the Z-axis manually, test the exposure, define the Z-Home position, stop the printer and start the resin tank cleaning program.
(The resin tank cleaning program illuminates the empty resin tank with UV light for an adjustable time. This cures liquid resin residues, which can then be easily rinsed out).
ChiTuBox Pro for 1 year
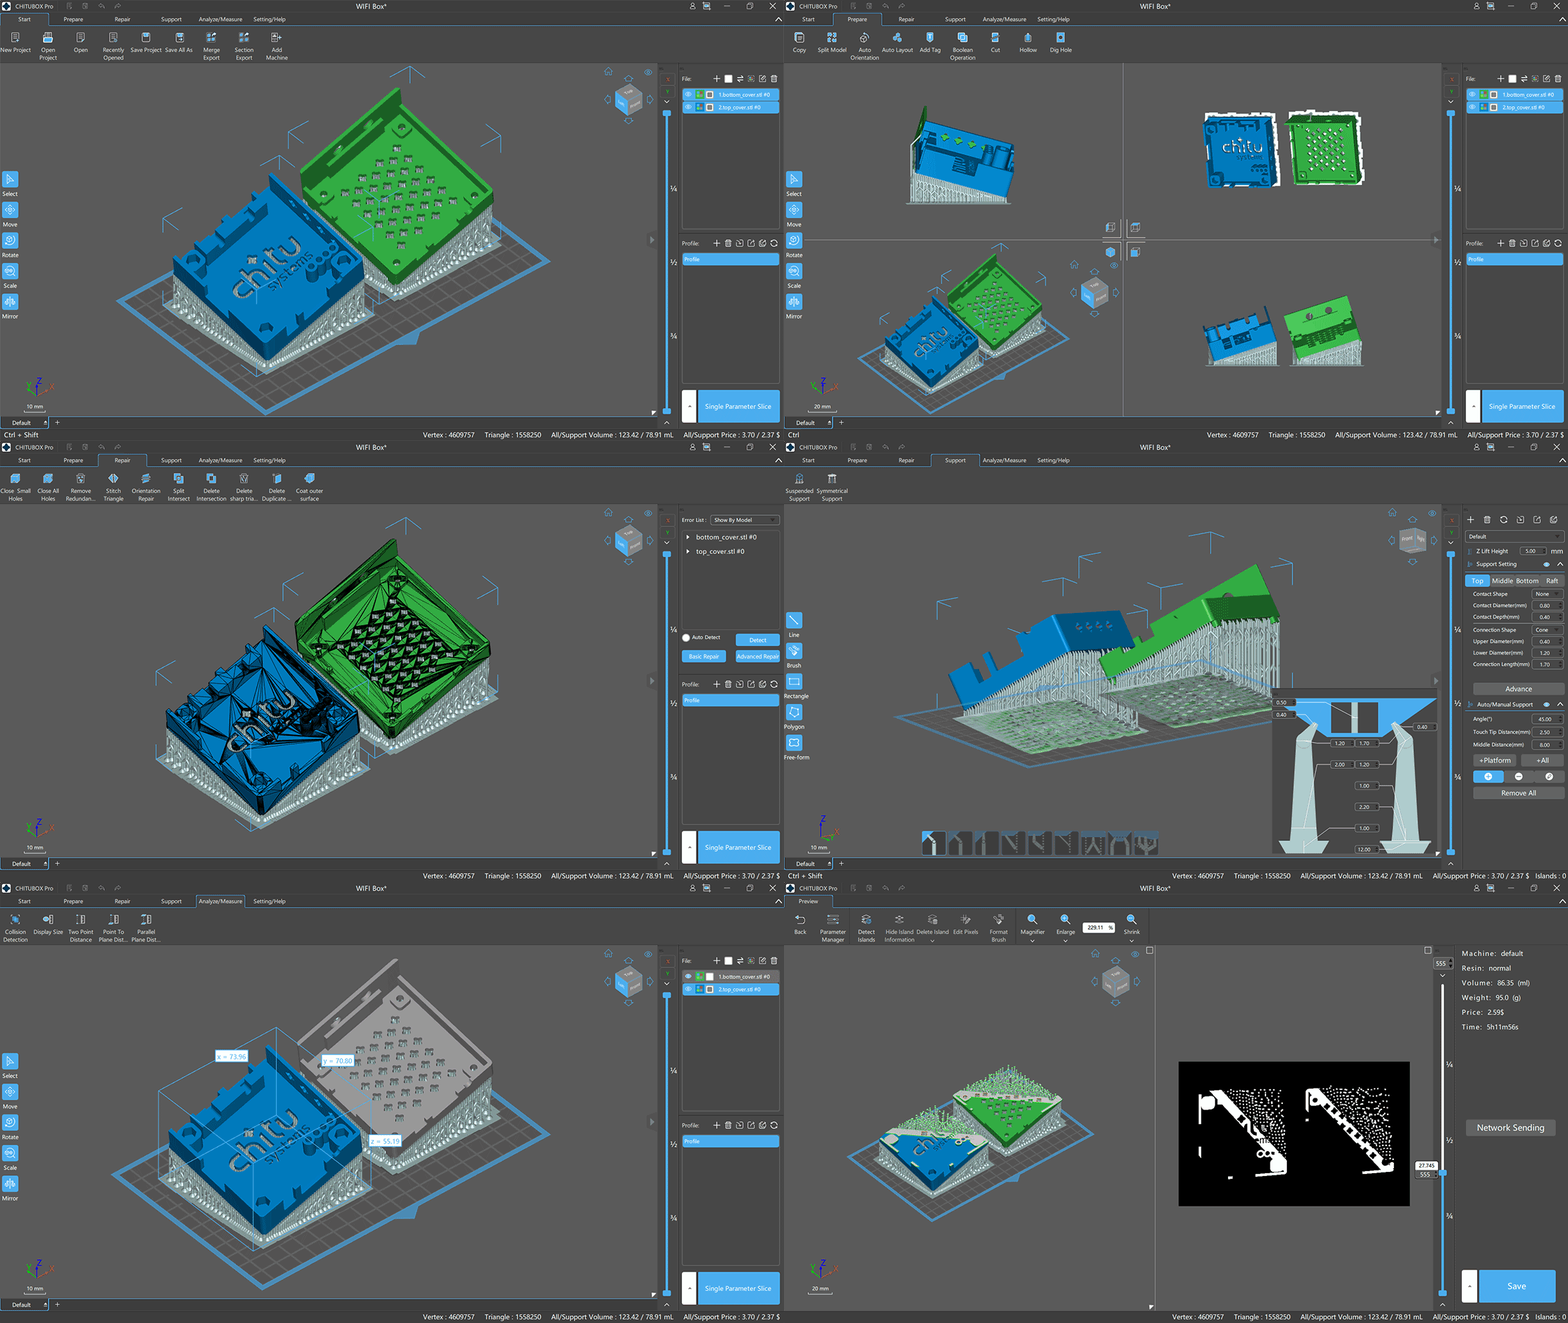
The Pro version for the slicer ChiTuBox normally costs about $170 per year. The Mars 3 comes with a 1-year license for free.
If you are just starting to print with resin, the free version will be enough for you. If you already have some experience and mainly print complex technical structures, the Pro version is interesting for you.
Here is a small overview of the advanced features of the Pro version of ChiTuBox:
REPAIR MODEL: As soon as you load an object in the Pro version, the surface is checked for possible defects. You can then choose whether and how much you want to repair these defects.
ANALYSING & MEASURING: In the Pro version there is a separate tab to analyze your object. For example, you can measure point-to-point and point-to-surface distances. This way you can make sure that all dimensions have been transferred correctly before printing. For more complex technical parts, dimensional accuracy is important for the function.
INDIVIDUAL SUPPORTS: Already in the free version of ChiTuBox, the control over the support structures is very extensive. In the Pro version, this increases several times over. Not only can you adjust the geometry of the individual support structures, but you can also set tree structures, precise angles and branching.
MULTI-PARAMETER SLICE: You can print multiple objects at the same time with the free version. With the Pro version, however, you can use different slicing parameters for the individual objects. This is one of the outstanding features of the Pro version. This allows you to print parts with different properties in one print.
Improved FEP Film
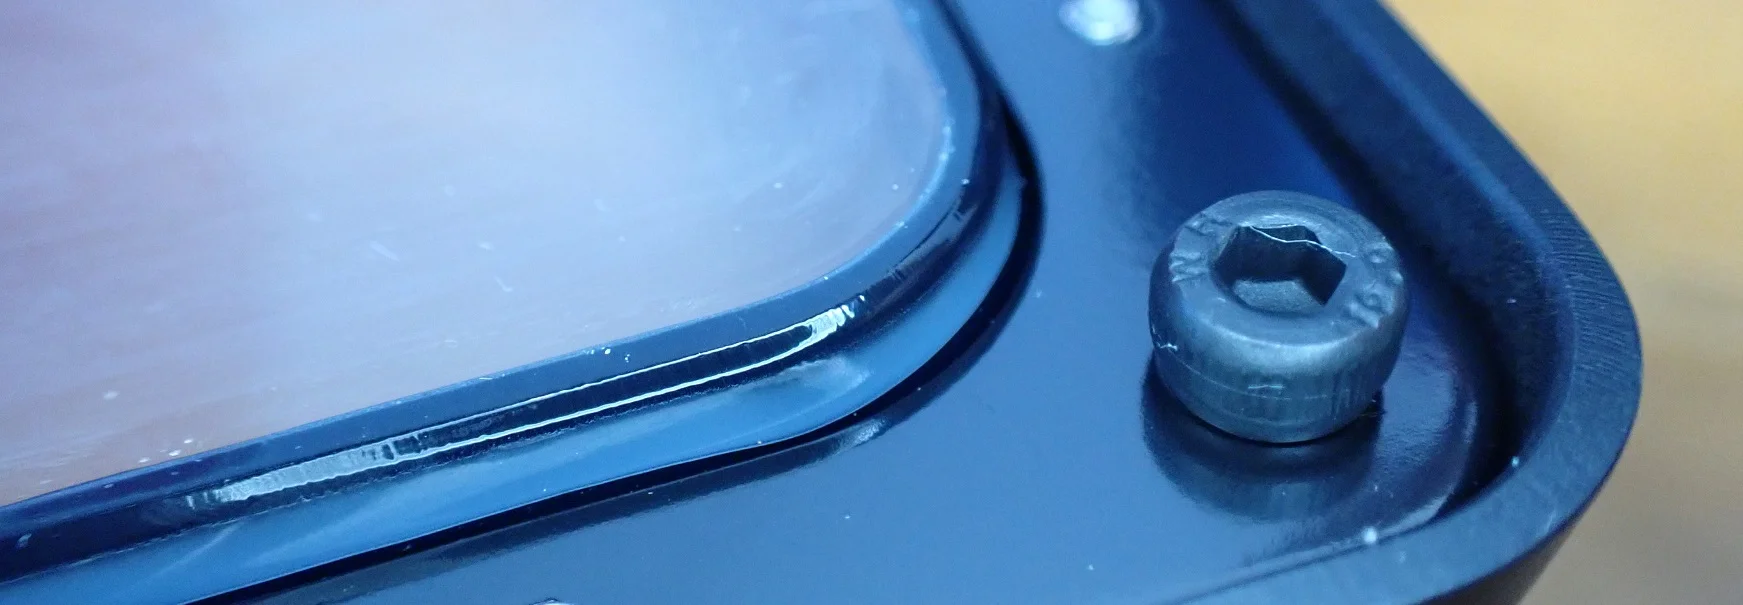
The improved FEP film of the Mars 3 has a thickness of only 0.127 mm. This makes it thinner than most other FEP films, allowing for even better print bed adhesion and more accurate print results.
I have already had the experience with several resin 3D printers that the object can adhere to the FEP film and not to the print bed during printing, despite the correct settings. This depends mainly on the resin you use and the exposure times you set.
I myself use the Eco Resin from Anycubic* with which this almost always happens if I do not use PTFE lubricant*. With the PTFE lubricant, you lubricate the FEP film, which makes the adhesion to this extremely difficult.
To do this, you only need one drop, which you spread evenly over the film. Make sure that no liquid residue of the lubricant remains on the film. Even if the film is no longer 100% transparent, the results will not be negatively affected.
Textured Printing Plate
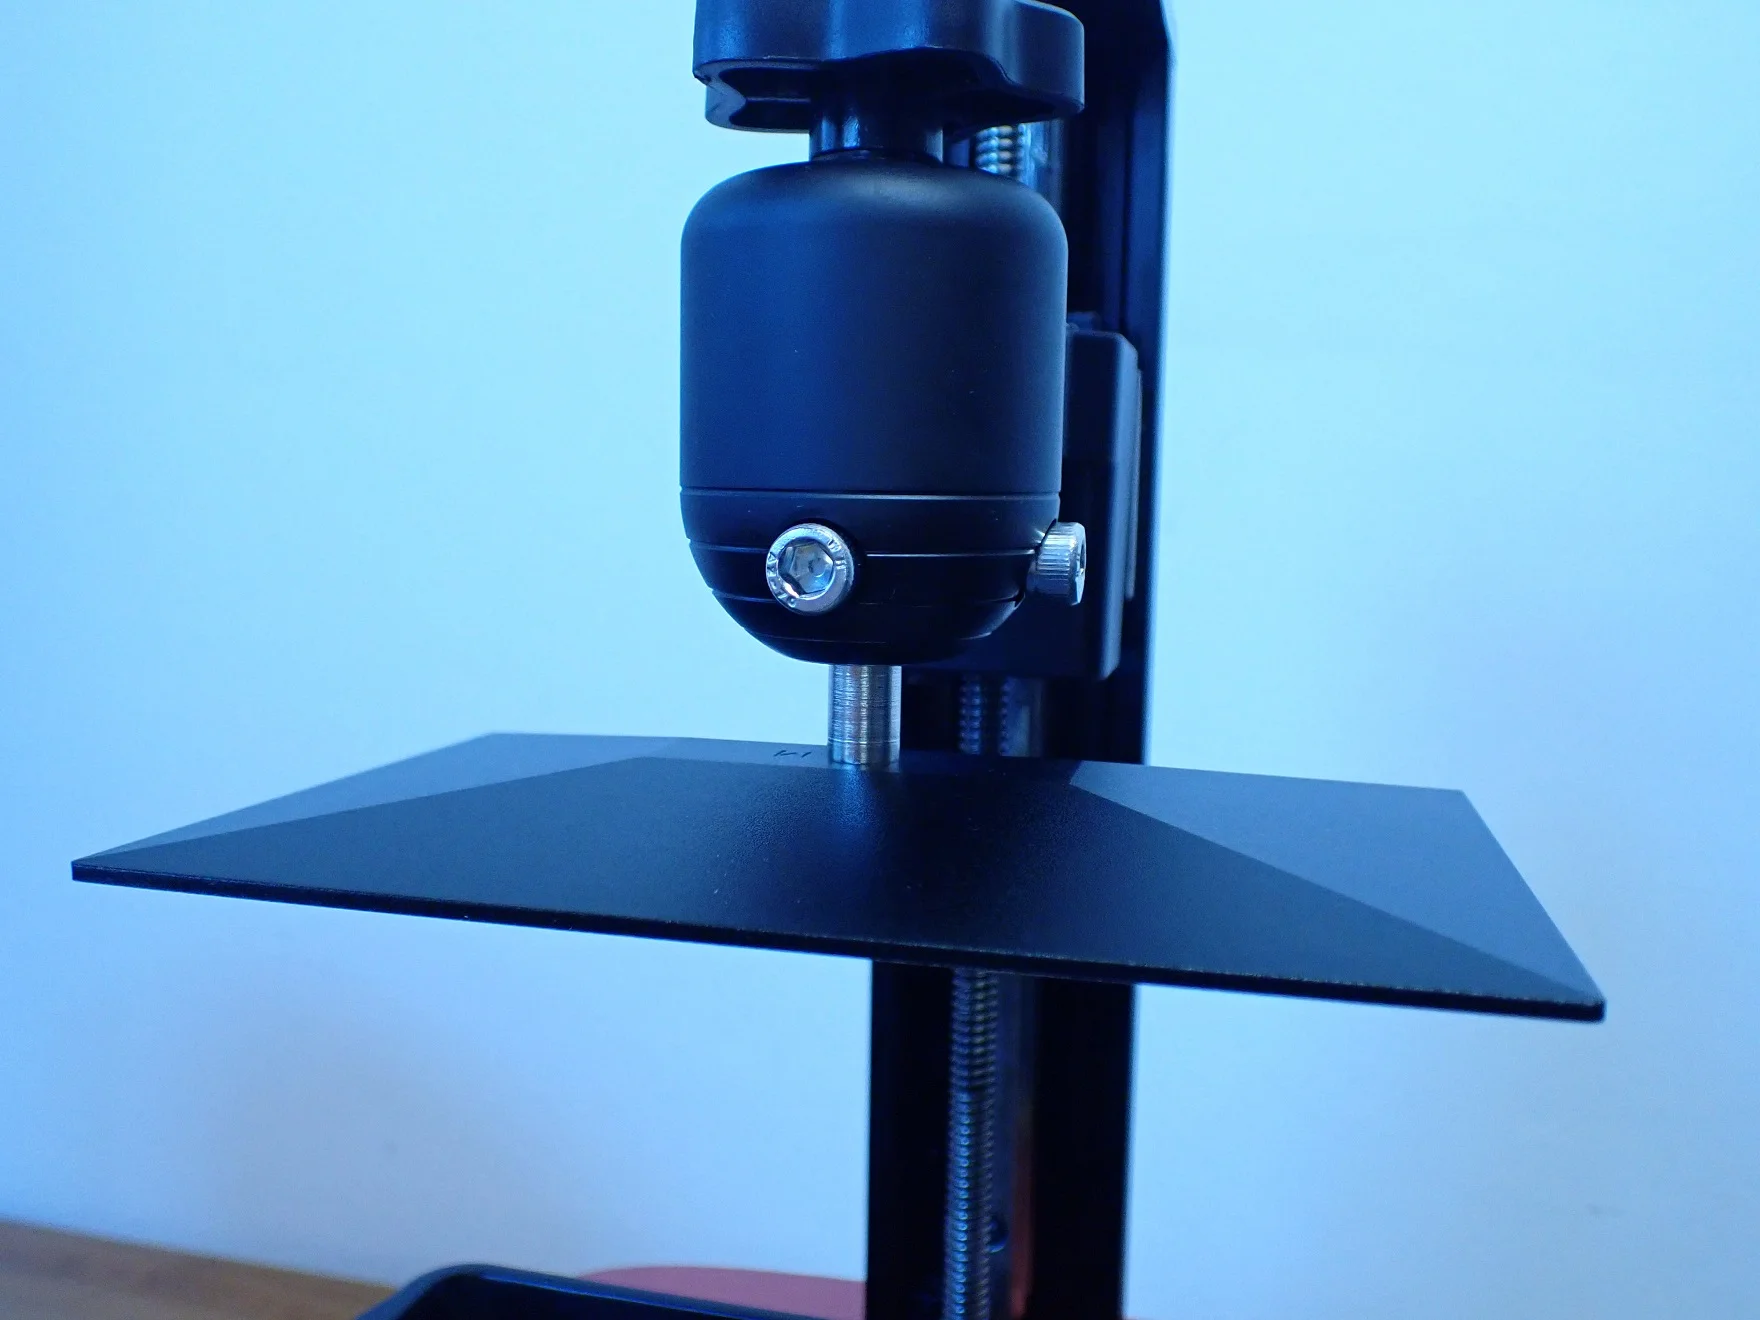
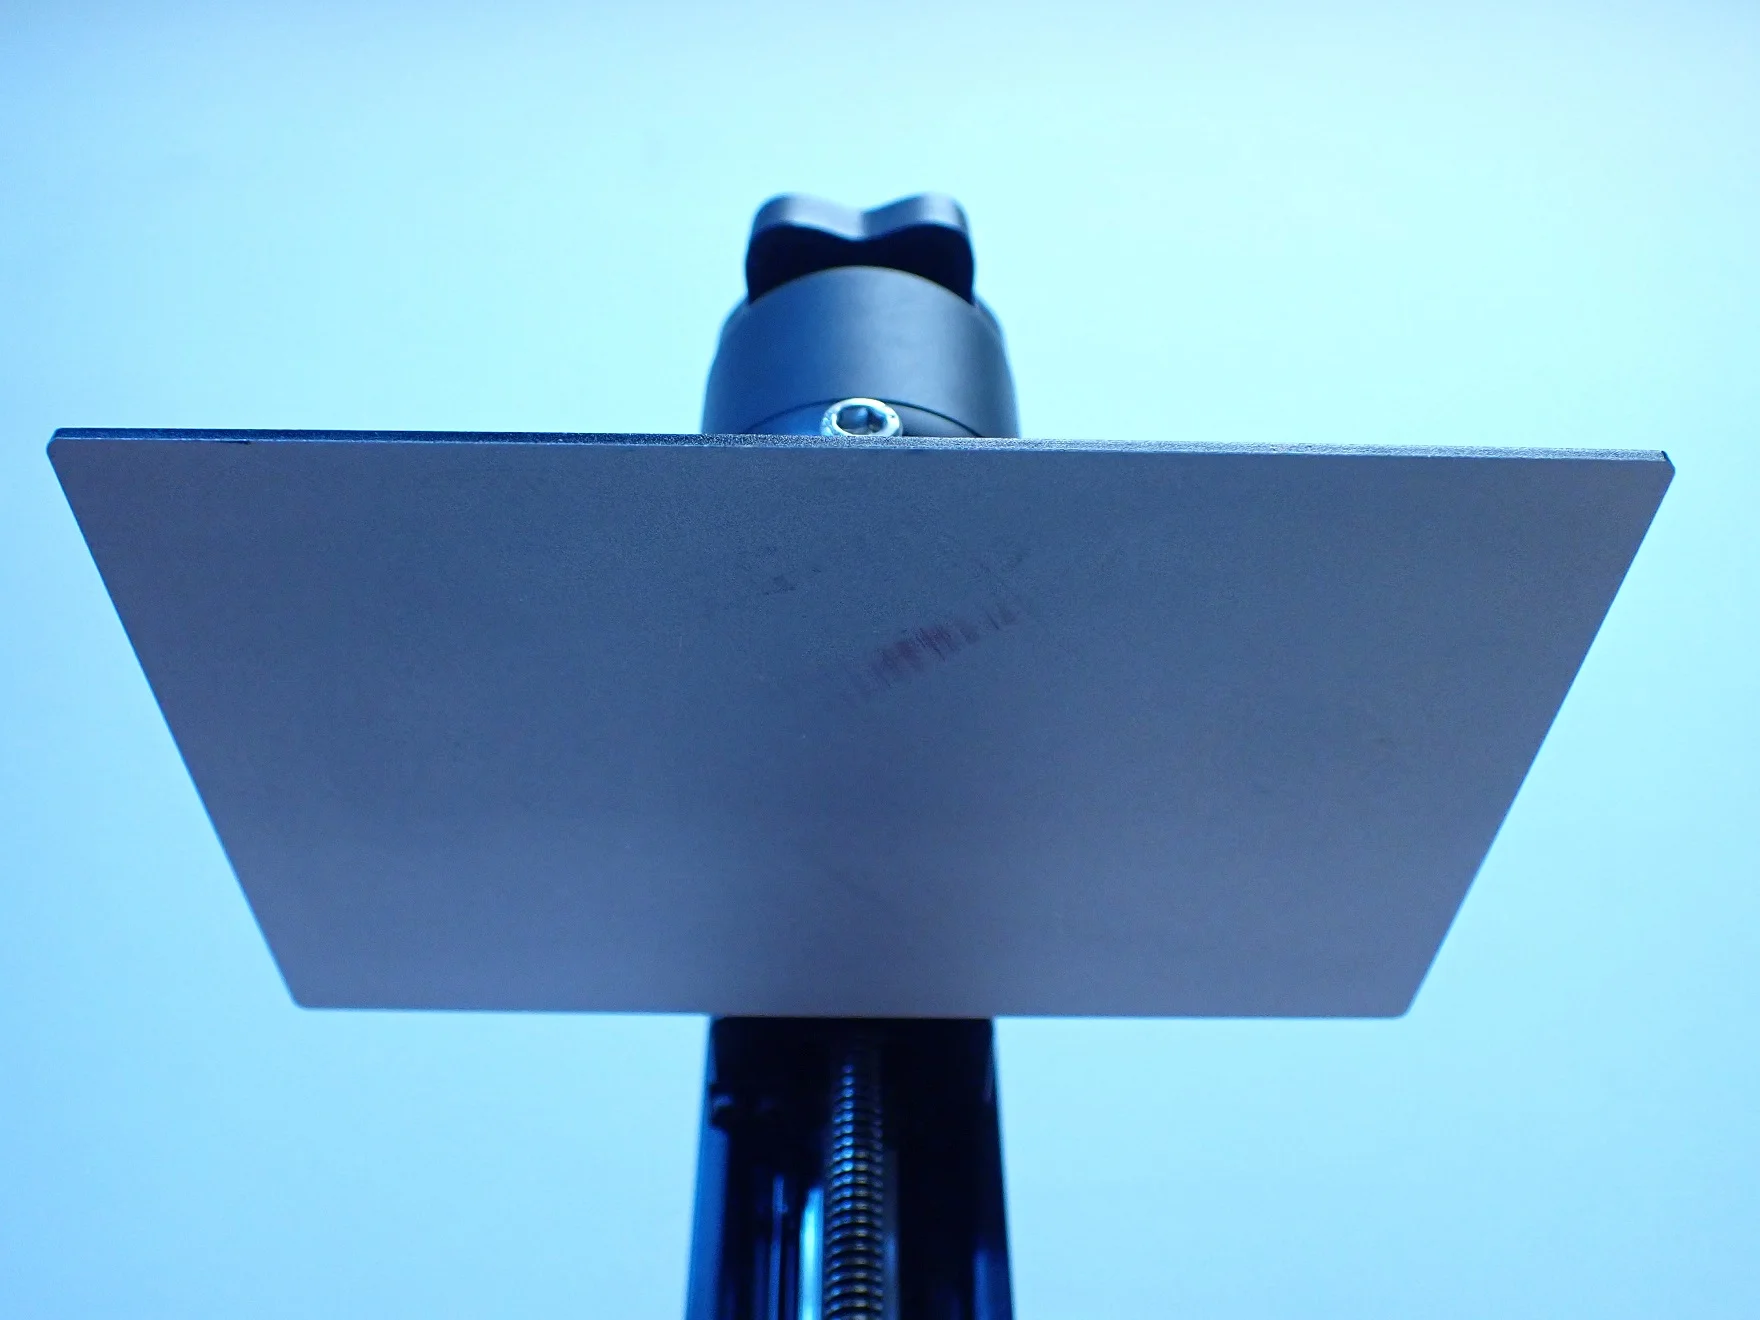
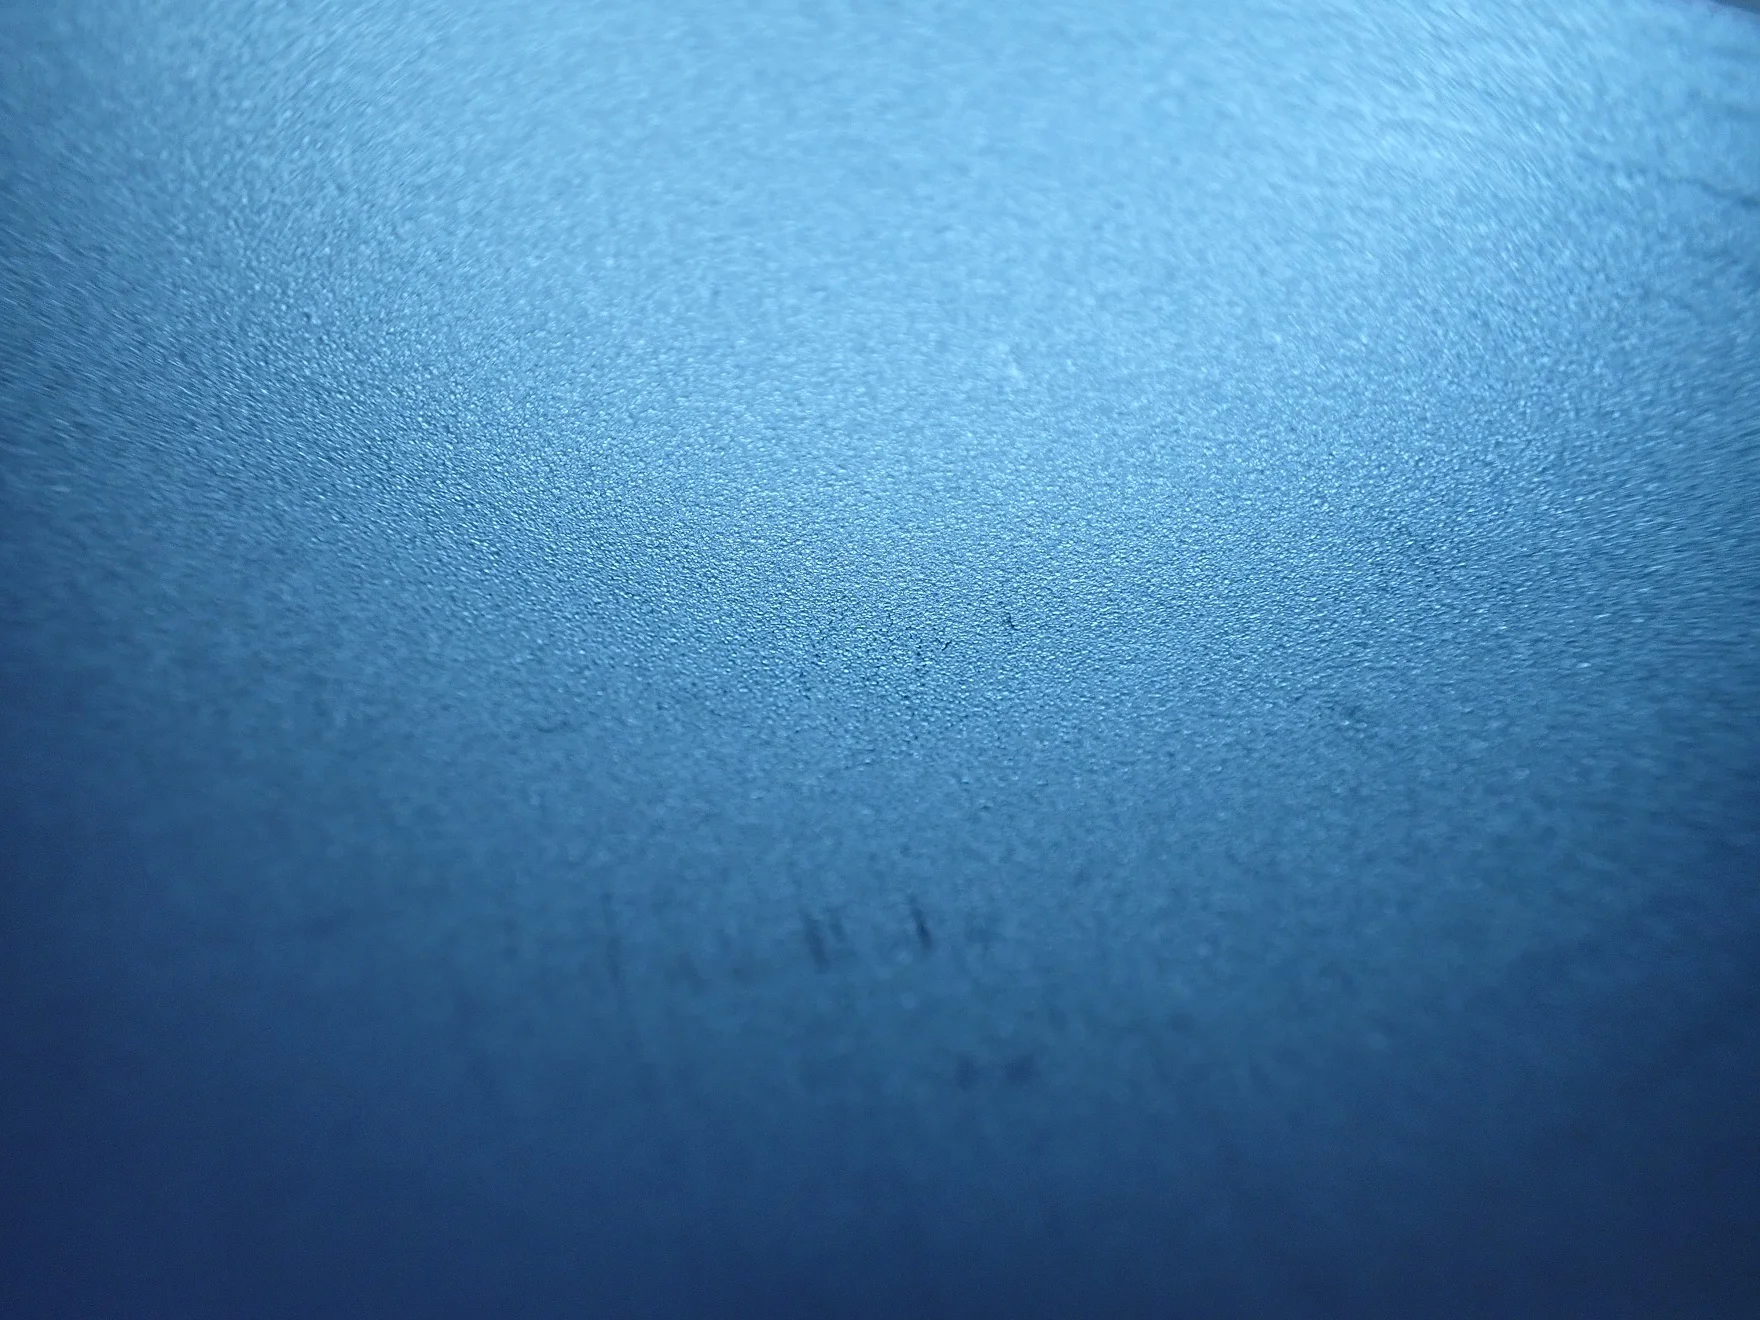
The print plate of the Mars 3 has a rough, sandblasted surface and thus creates an extremely good print bed adhesion. The adhesion is so good that you have to lever the 3D prints with the metal spatula from the printing plate.
However, this means that you will get a few new scratches on the printing plate after each print. This only looks a little unsightly after a while, the print bed adhesion or the accuracy of the first layers is not affected.
The larger the print area, the better the print bed adhesion must be. Due to the larger print area, larger objects can be printed, which in turn generate a higher tensile force when pulling off the FEP film. So far I have not had any problems with such sandblasted printing plates.
High Resin Tank with Max. Filling Line

The resin tank of the Mars 3 is a bit higher than those of its predecessors. This is due to the fact that the print volume in the Z-direction has also become larger. Due to the larger print volume, larger objects are possible, which in turn consume more resin than smaller objects. So that you do not have to refill resin during printing, the edge of the container has been raised.
One face of the container has a fill line for the maximum amount of resin it can hold. If you dump in more than that, the resin can overflow when the print bed and/or print object dips into it. As you can imagine, this would end up in a massive mess. That’s why this fill line is very handy, even if it is a rather boring feature.
A disadvantage of the resin vat of the Mars 3 is the missing pouring corner. With many other resin 3D printers, there is a bulge at one corner that is intended for pouring. This would make pouring the remaining liquid resin much easier and it would not run so much down the edge of the container.
Noise Level
> Elegoo Mars 3 Review
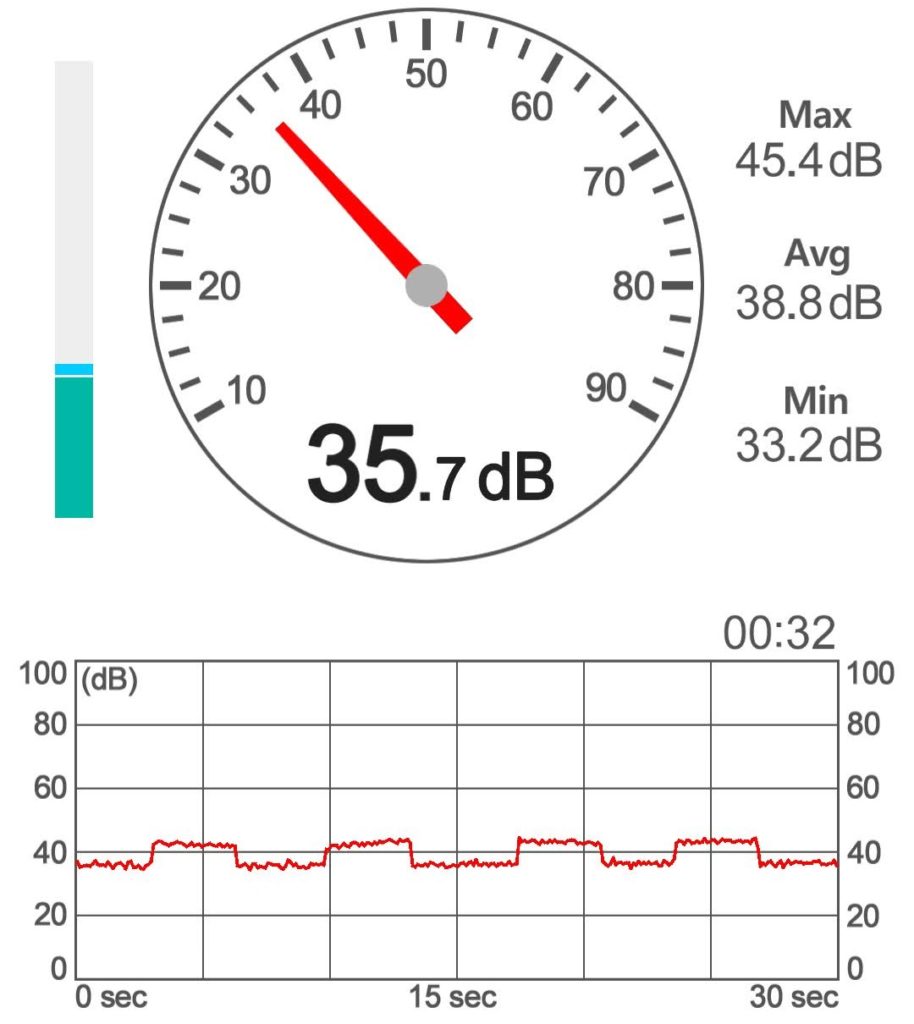
The operating noise levels of the Elegoo Mars 3 are in a normal range of 35 to 45 decibels at a distance of about 1 meter. Here, the fan volume is around 35 decibels and the combined volume of the fans and the moving Z-axis is 45 decibels.
This makes the volume comparable to whispering.
At this low volume, it would be possible to work next to the 3D printer or otherwise concentrate. This is not a good idea, however, as it is best to spend as little time as possible in the same room with liquid resin!
Print Speed
> Elegoo Mars 3 Review
According to Elegoo, the printing speed is 1.5 to 3 seconds per layer. Thanks to the monochrome and very powerful UV light source, the individual layers can be cured very quickly.
But the actual exposure time depends on the resin you use. There are fast curing resins* and those that take a bit longer (like the Eco Resin from Anycubic* that I prefer to use).
However, the printing time per layer does not only depend on the exposure time. It is also determined by the duration of the movements between the individual layers and the layer thickness itself.
The Mars 3 can print layers from 0.01 mm to 0.2 mm thickness. Accordingly, an object printed with a layer thickness of 0.01 mm takes 20 times longer than an object printed with a layer thickness of 0.2 mm. But the longer time is definitely worth it because the details at 0.01 mm are impressive!
If you print with the full resolution of 0.01 mm layer thickness, you should not expect 30 to 50 mm per hour as indicated, but rather 3 to 5 mm per hour. A 5 cm object will then take about 10 hours! However, since you can leave the printer overnight after printing, this is not a problem if you do not need the object as soon as possible.
Operation
> Elegoo Mars 3 Review
UI: The operation of the Elegoo Mars 3 is very simple. The menu is intuitively understandable and simple. The only criticism I have with the operation is that you can not move the Z-axis completely to the maximum by pressing a button.
Instead, you have to move the printing plate up enough in 10 mm increments several times in a row. A button with which you could do this automatically would be very handy.
PRINTING BED: Removing the print object from the printing plate is sometimes a bit difficult, as the print bed adhesion is excellent. It is hardly possible to remove the object from the print bed with the metal spatula without scratching it a bit.
As long as the print bed adhesion does not suffer from these scratches, this is not a problem for now. I have also noticed this with other 3D printers, such as the Mars 2 Pro, but it has never become a problem.
SLICER: I’ve been used to ChiTuBox for a long time. This is the standard slicer with which I supply my resin 3D printers with files. Even the free version is absolutely sufficient to slice prefabricated models. The slicer is easy to use and there are all the important features like generating supports, hollowing objects and punching holes.
What amazed me about the Elegoo Mars 3 is that a 1-year license for the Pro version is included in the price. Normally this costs about $170!
PRINTING: Printing with the Elegoo Mars 3 is very comfortable. The print bed leveling lasts a very long time, so printing is basically just filling the resin container and starting the print.
Washing and cleaning the print objects afterward has nothing to do with the actual device and is just like any other 3D printer.
Check Price at:
Print Quality
> Elegoo Mars 3 Review
The Elegoo Mars 3 has a very good print quality with layer thicknesses of up to 0.01 mm (10 µm) and an XY pixel size of 0.035 mm (35 µm). Slight edge smoothing via the slicer creates objects that are comparable to injection molded parts. Individual layers are not visible.
But even without edge smoothing, the results are really impressive! Where 50 µm pixel size in the XY direction was groundbreaking some time ago and then quickly became the standard, this resolution is now getting even smaller. The move to a 4K screen has definitely been the right decision by Elegoo.
And to be able to test the print quality, I first printed a resin test matrix to calibrate the exposure time. After that, I printed two busts with a lot of details to push the limits of this 3D printer.
I printed all test prints with the Eco Resin from Anycubic*.
Resin Test Matrix
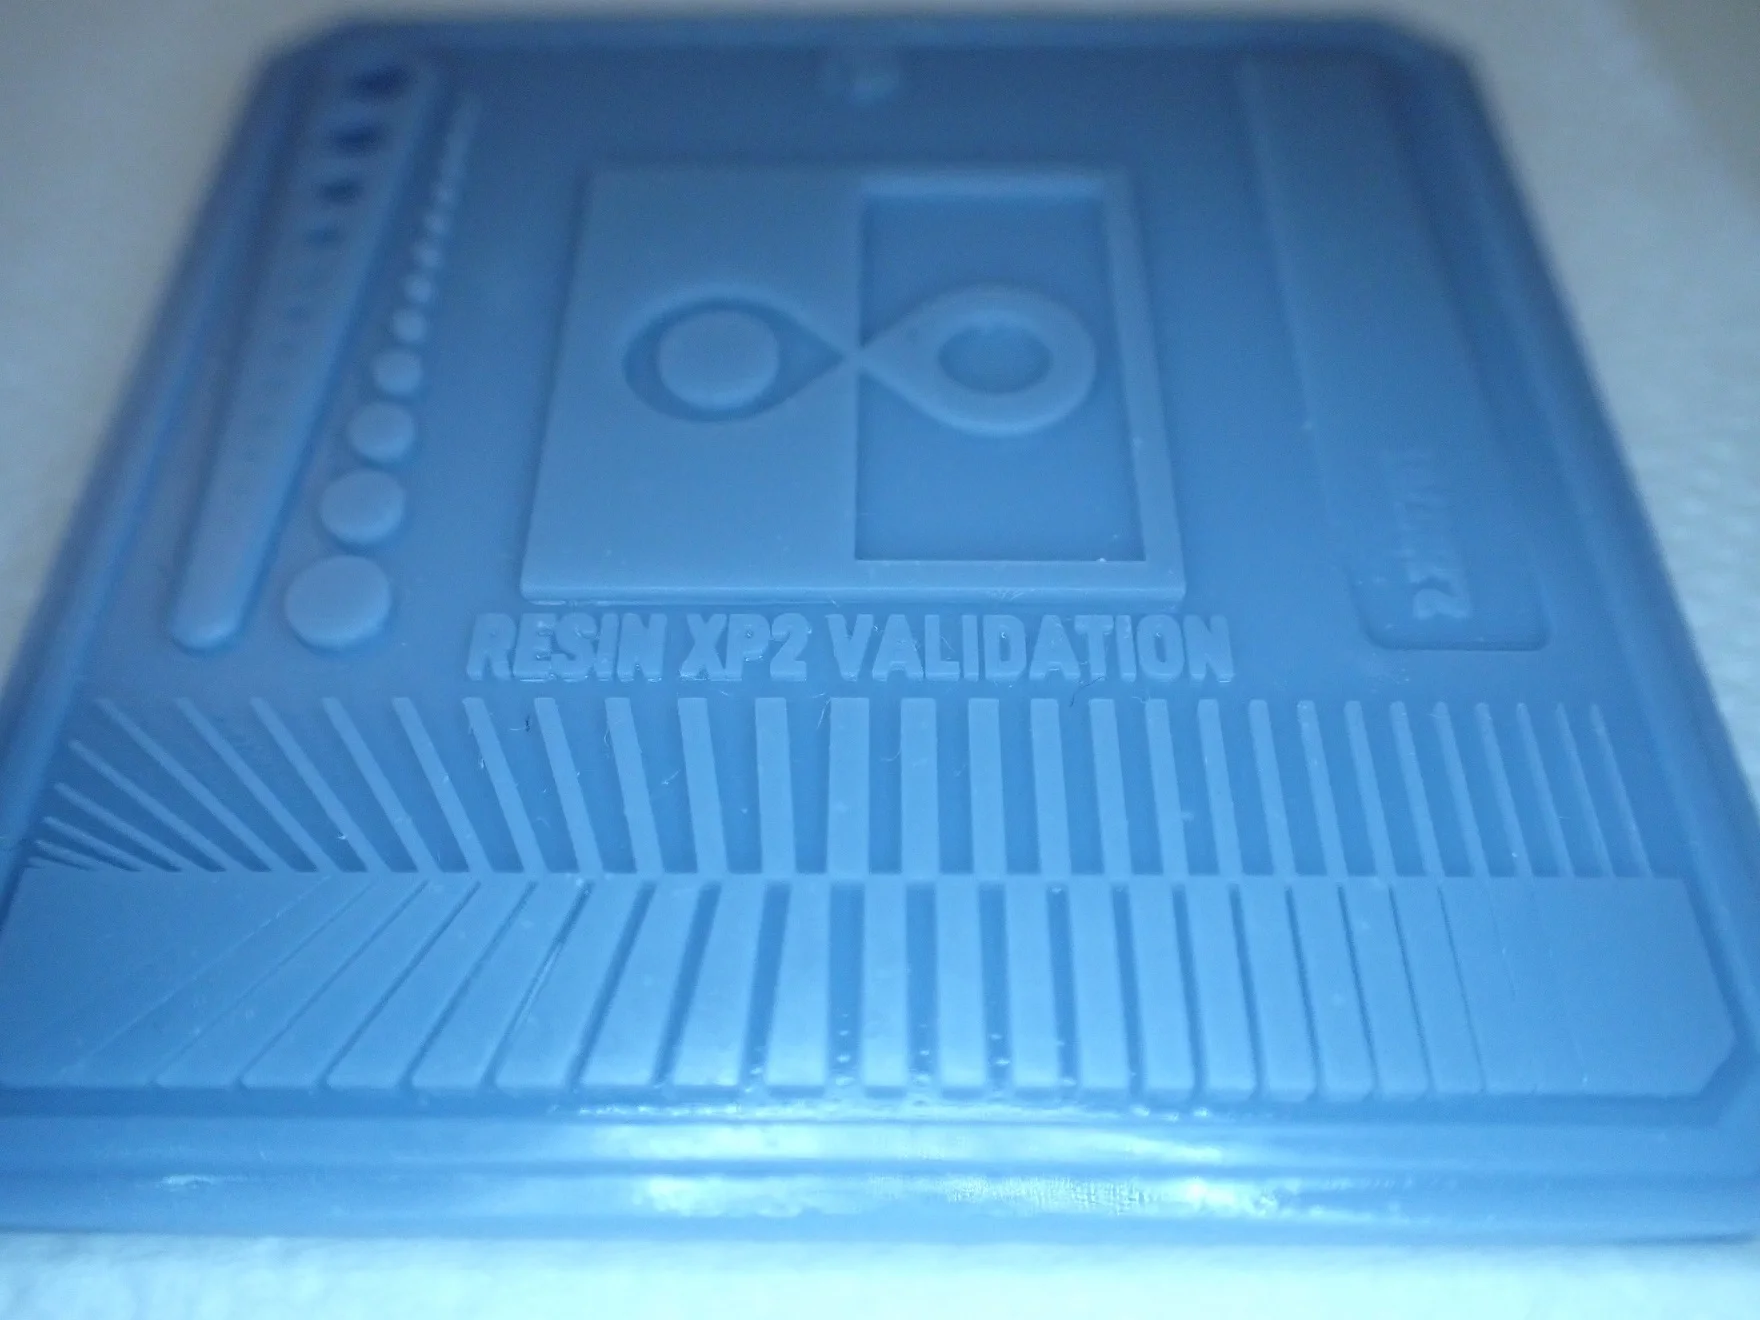
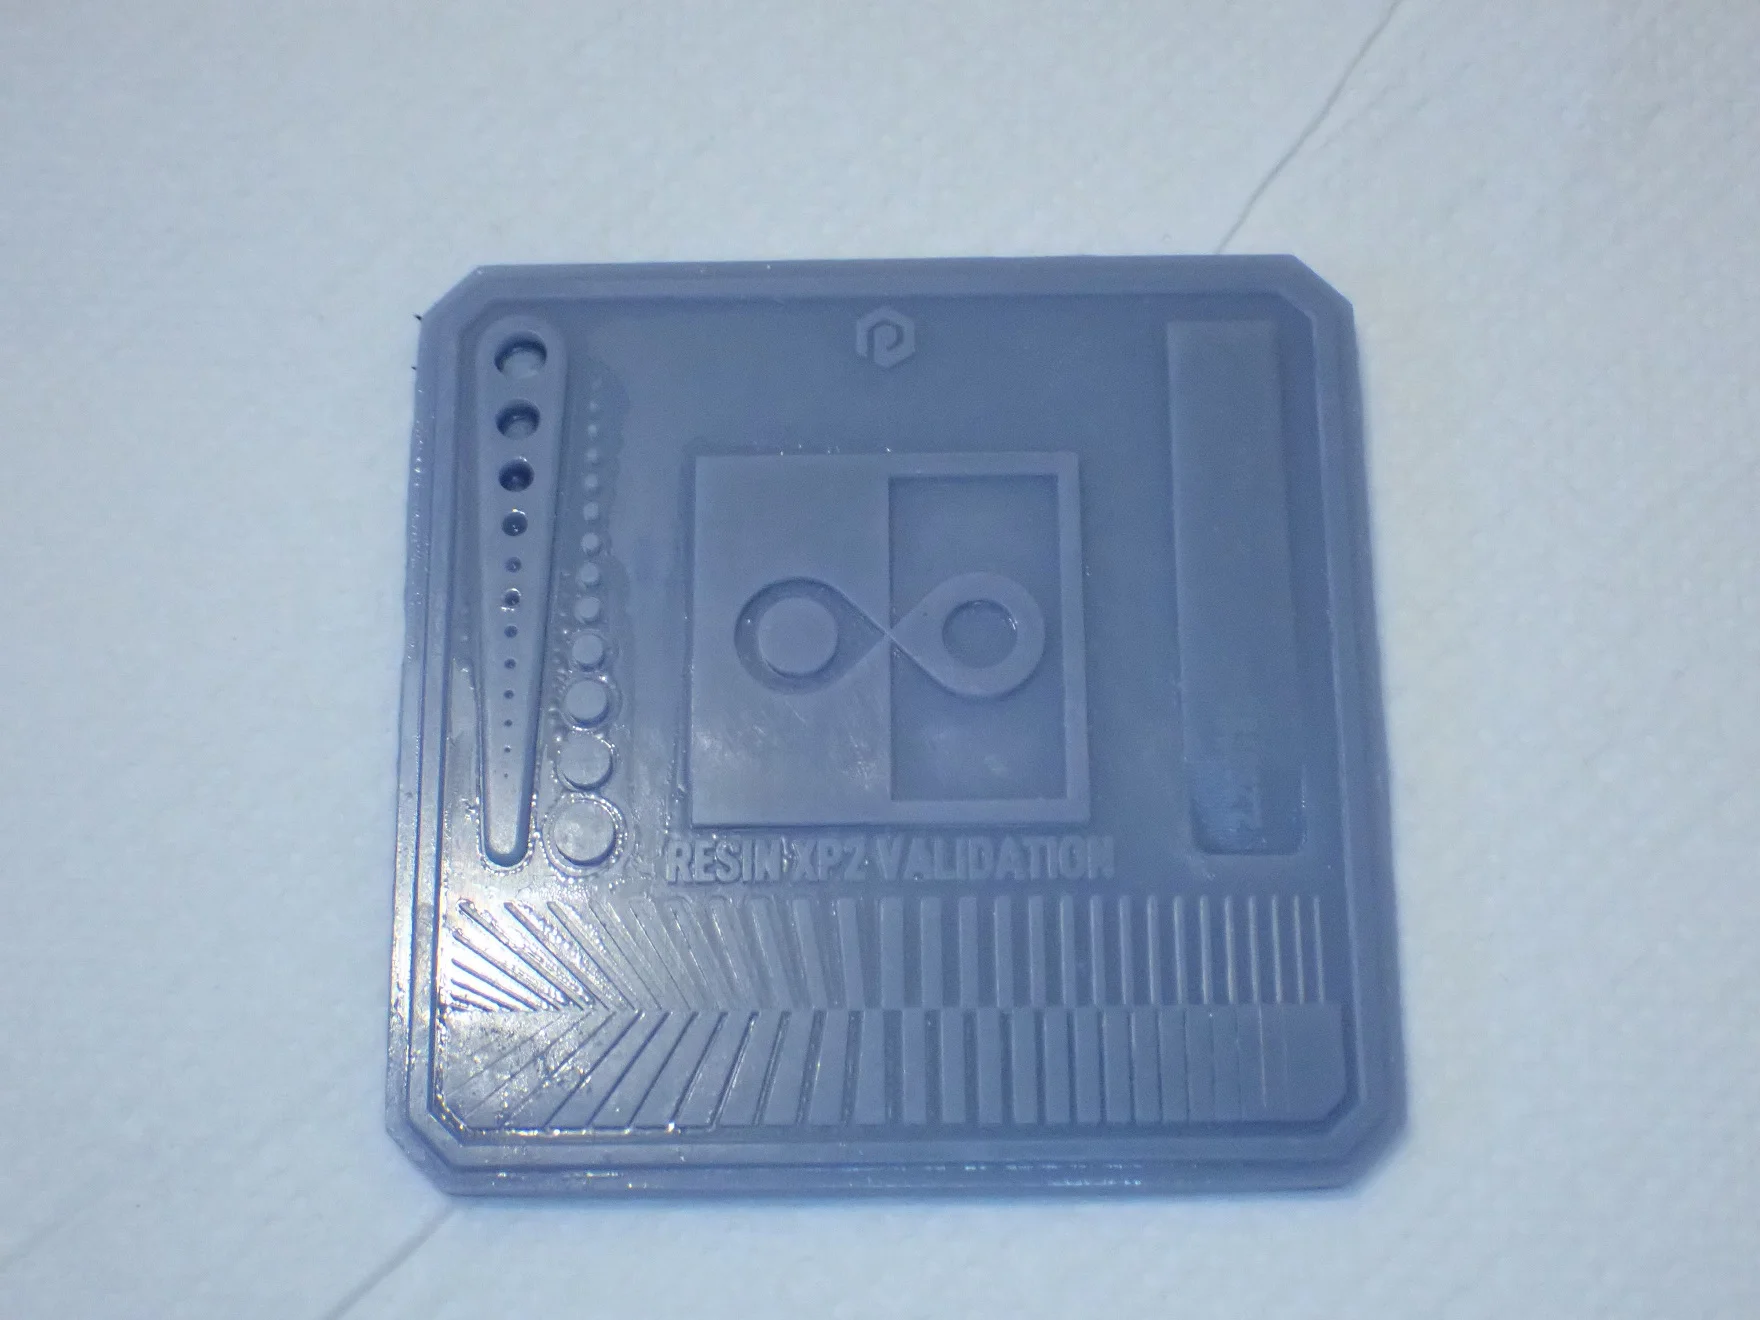
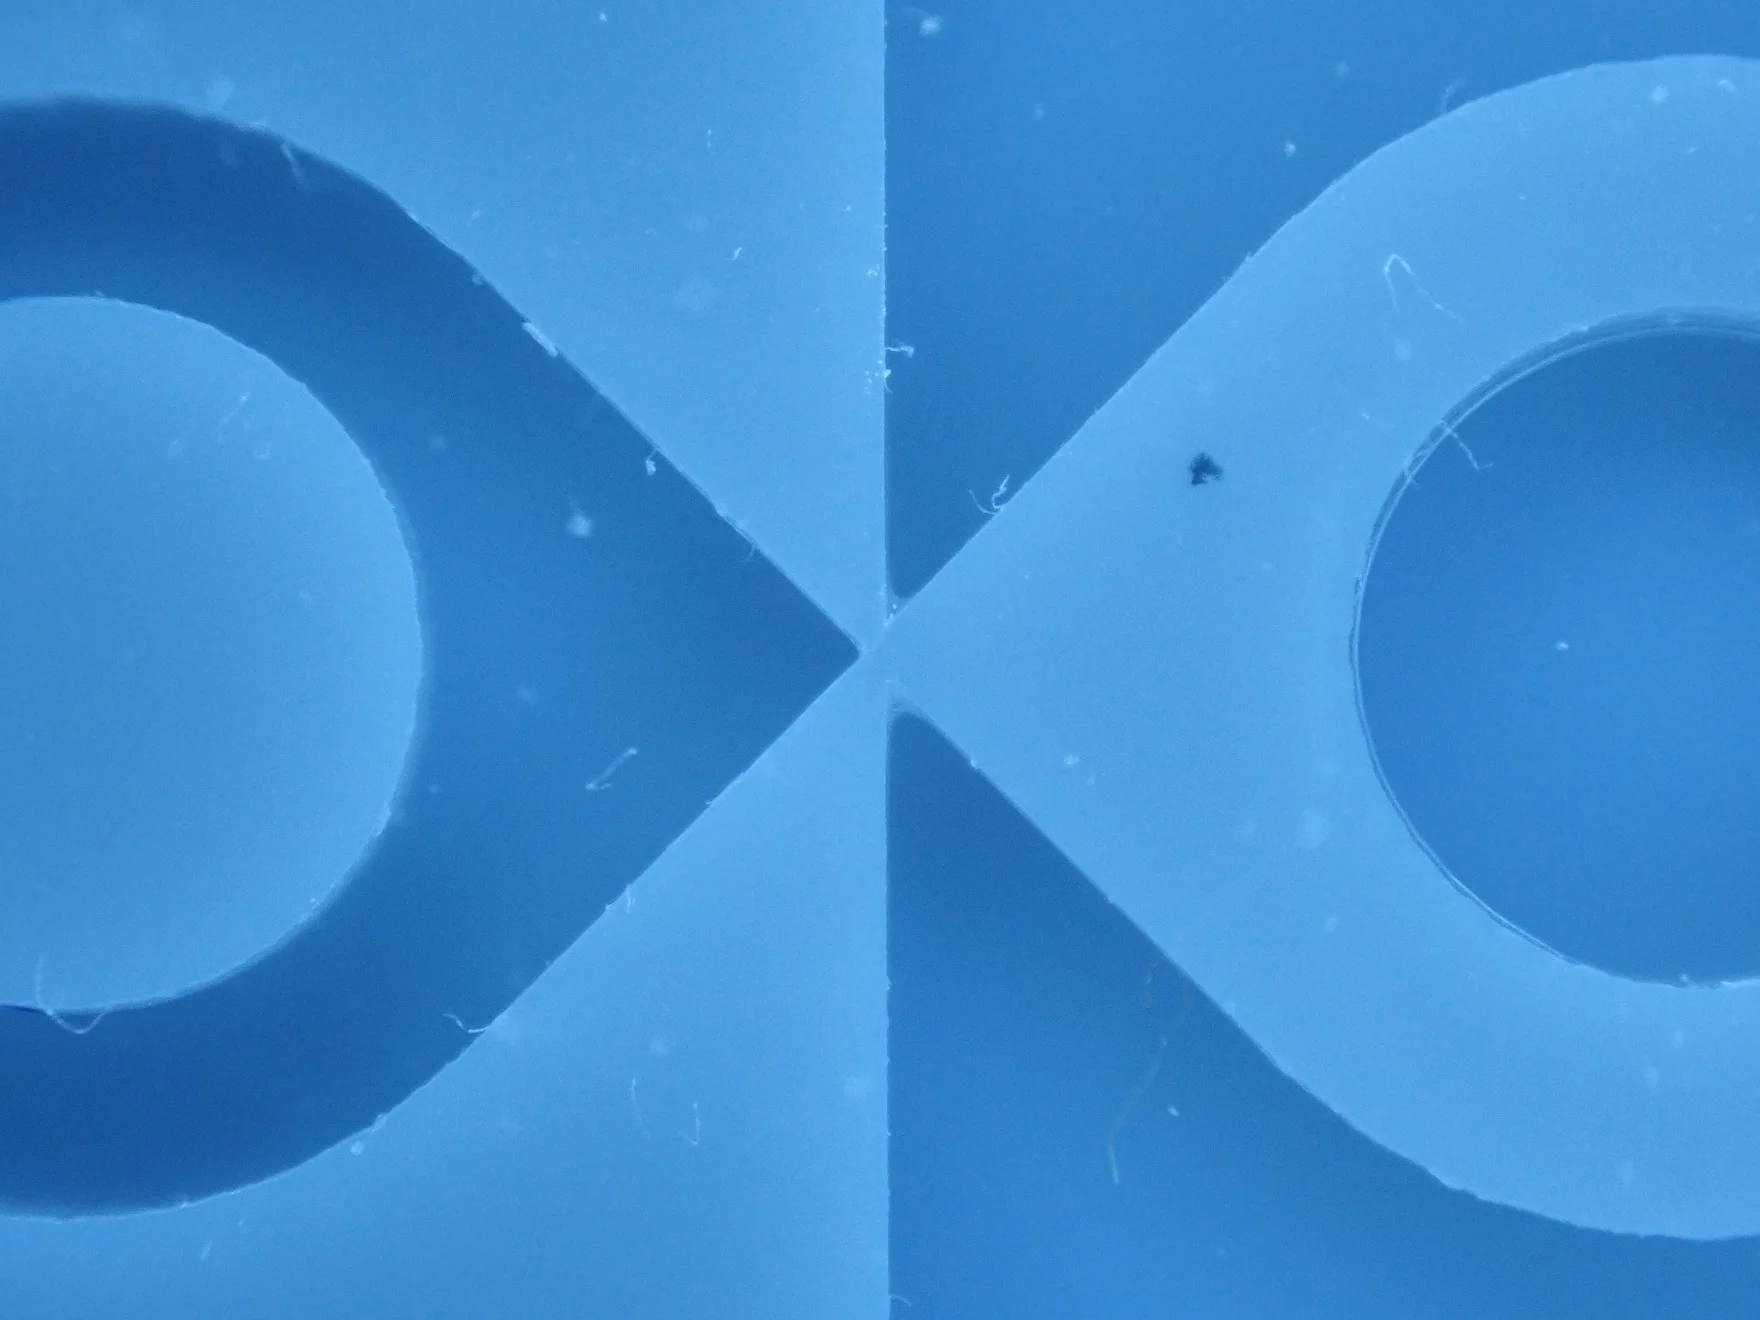
It is always a good idea to print this test matrix first to determine the correct exposure time for your resin and 3D printer combination. Not only is every resin different, but the individual light sources of the 3D printers are different as well.
The recommended exposure times of the resin manufacturers are usually not perfectly matched to your 3D printer. With this test matrix, you can exactly determine whether the exposure time is set too long or too short. The print takes only a few minutes and you can download the model for free at Thingiverse (link to the model).
In principle, you have to make sure that all corners and edges are properly executed and that the two peaks in the middle just touch each other. If the outlines are a bit ragged and the rectangular shapes in the lower area would not fit into each other, the exposure time is too long. If it’s the opposite, the exposure time is too short. This way you can calibrate the exposure time exactly.
I only had to print this test matrix twice, as I was happy with the result of the second print and had set the exposure accurately enough at that point.
Already when printing this test matrix I noticed that the accuracies are really excellent. I could see the text exactly and all edges and corners were precisely executed. After that, I had high hopes for my busts!
Dwarf Bust
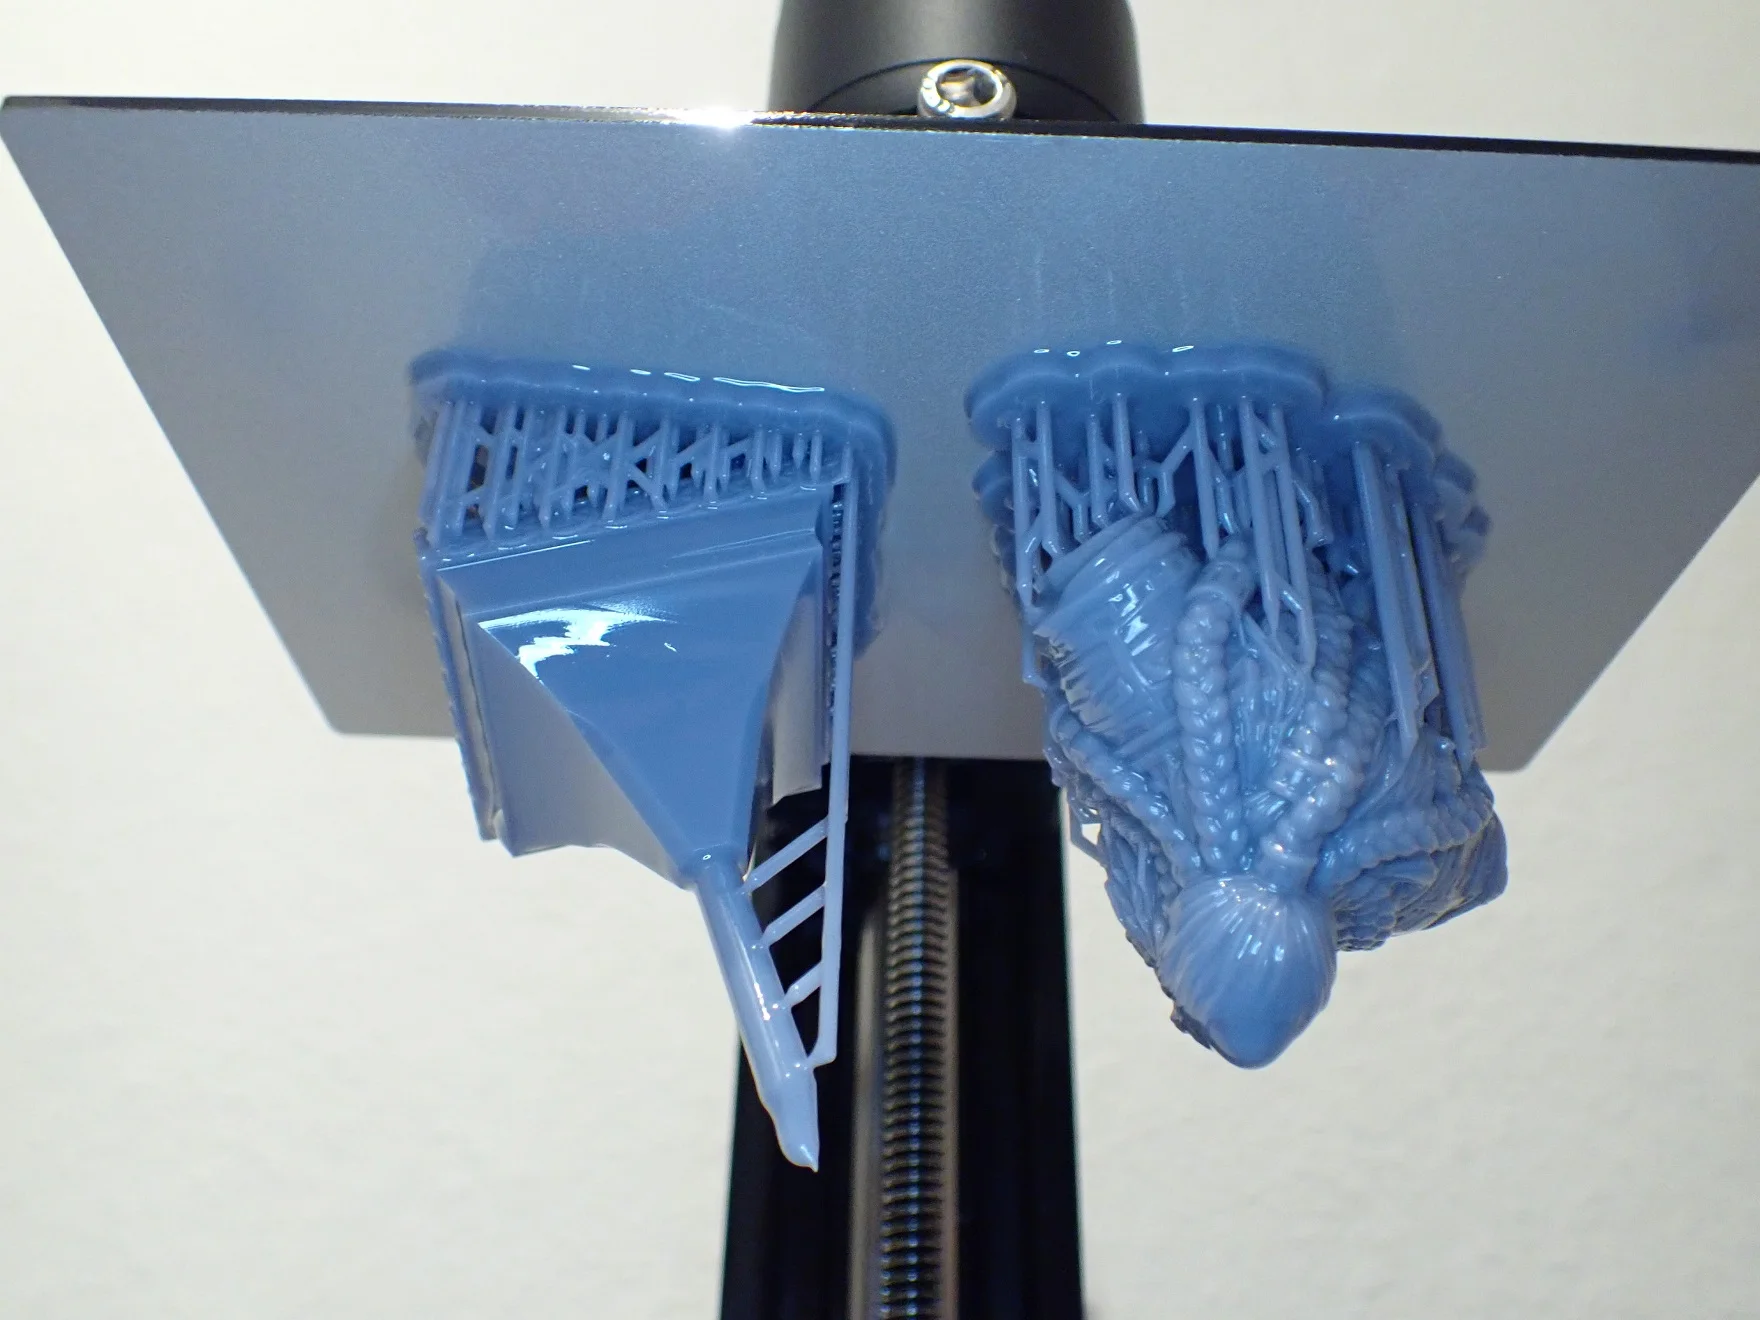
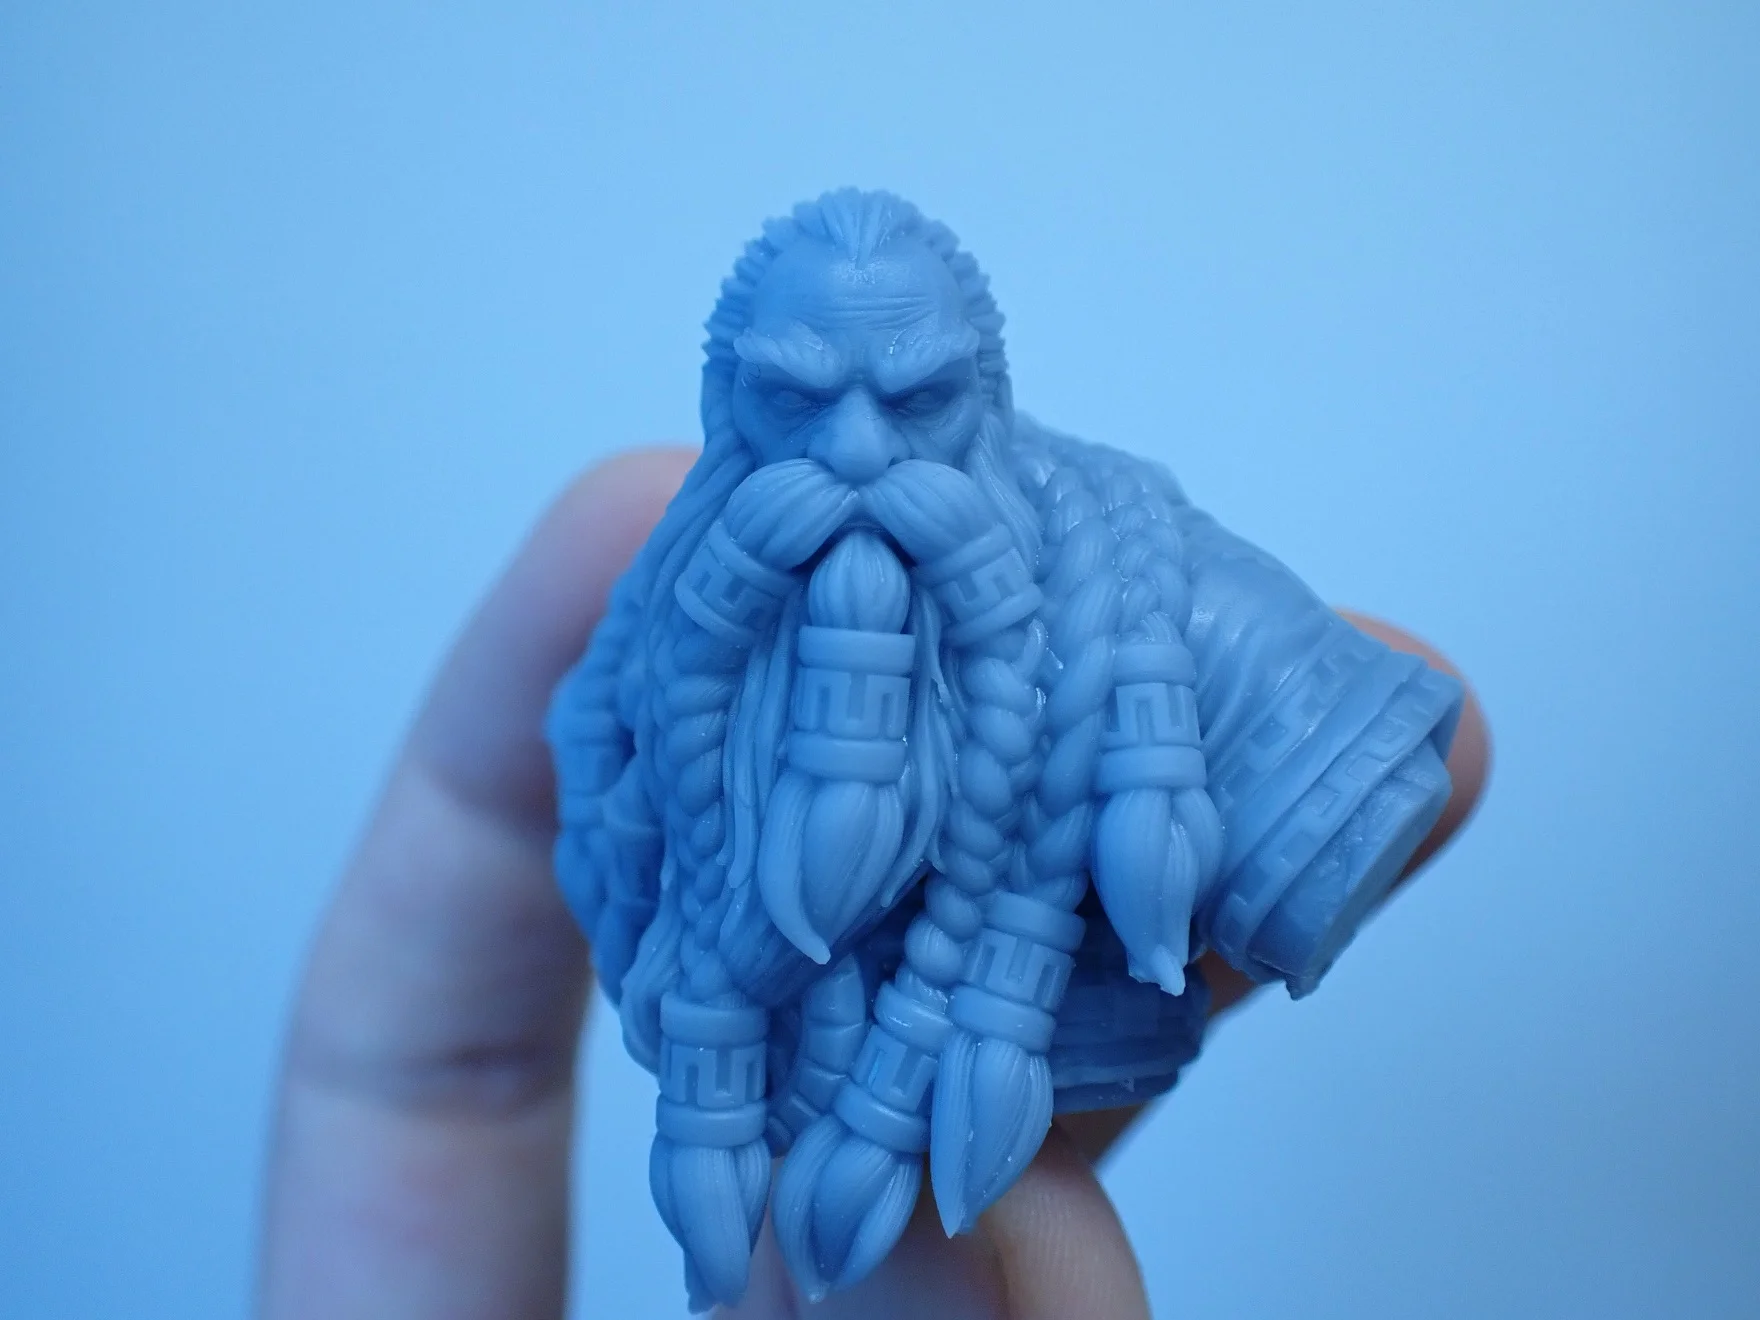
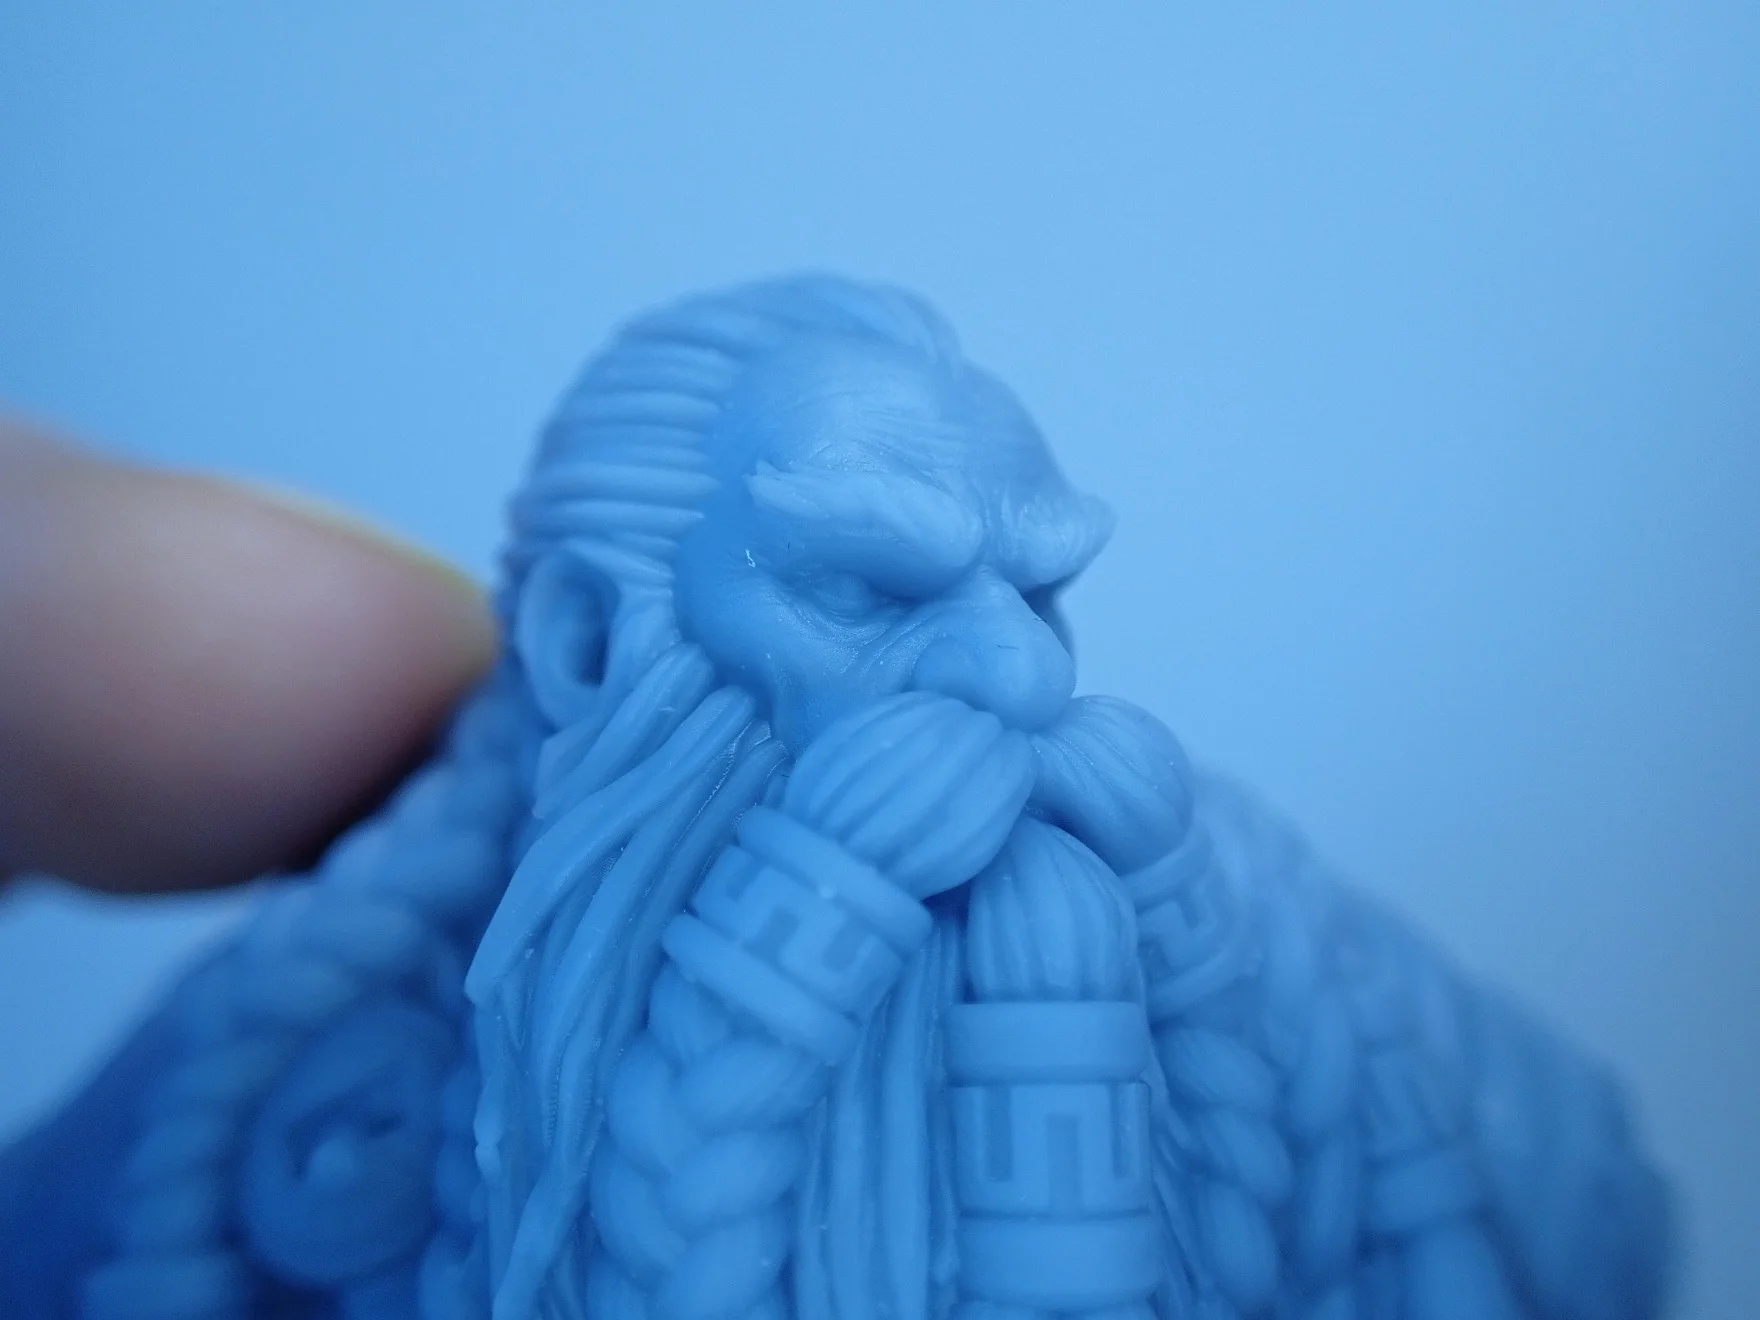
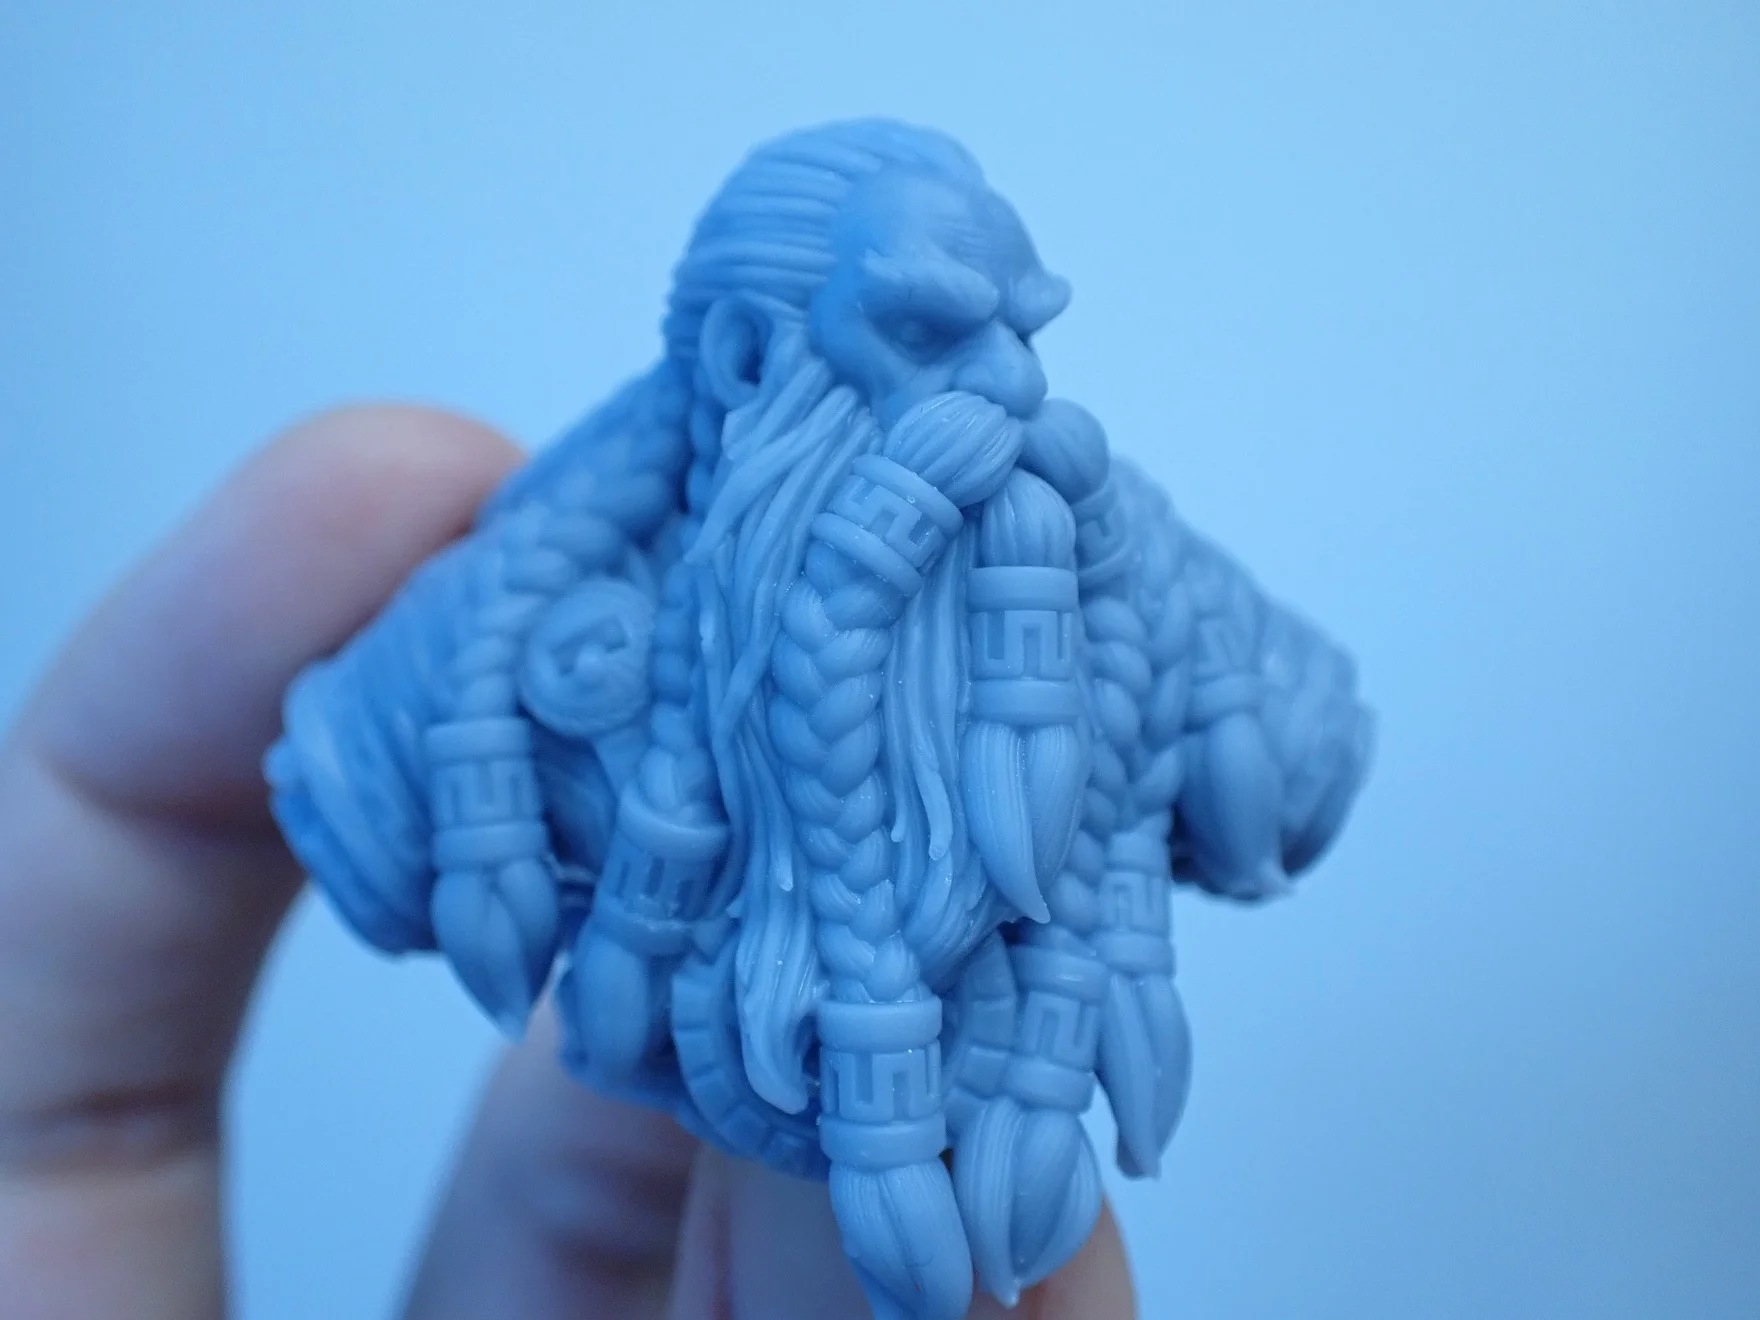
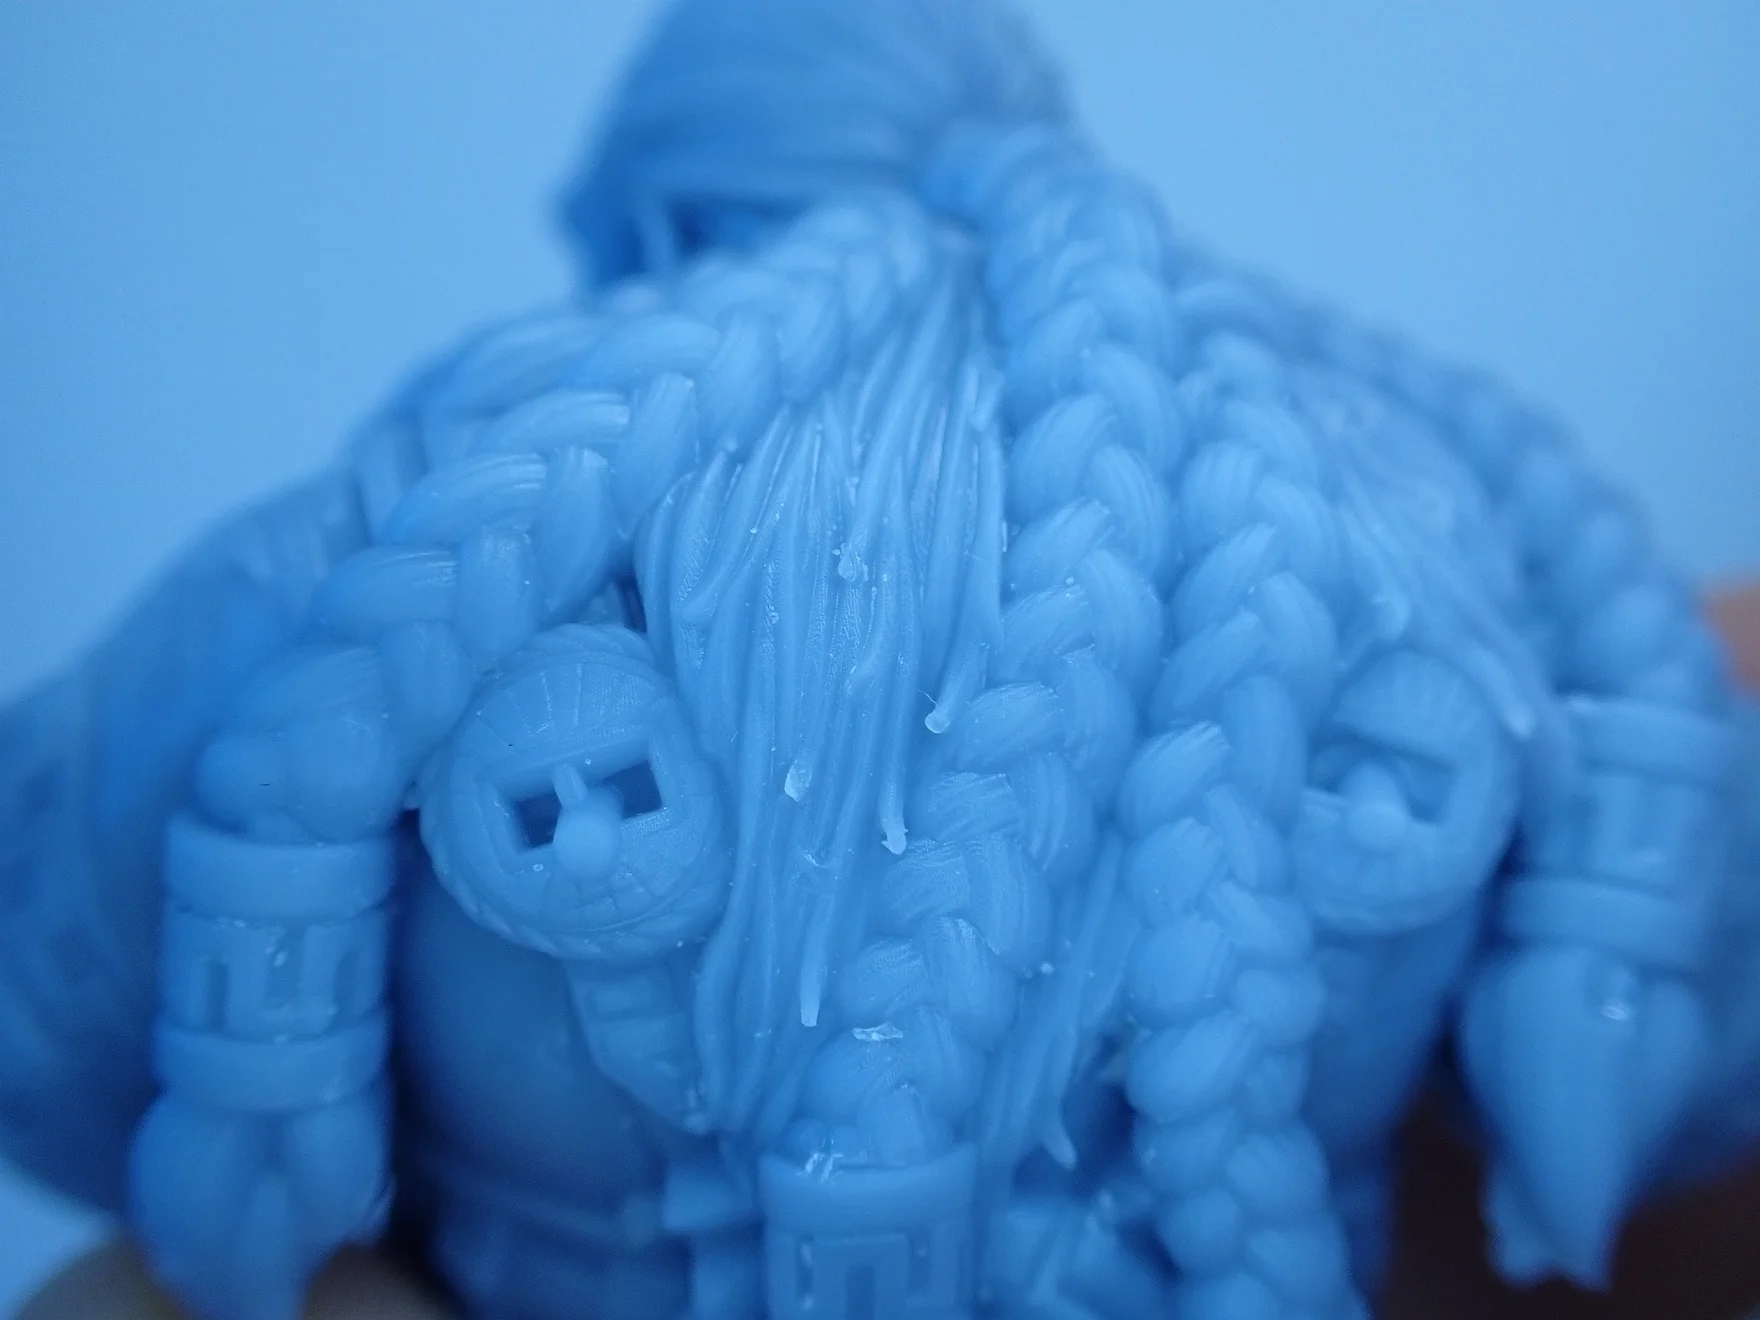
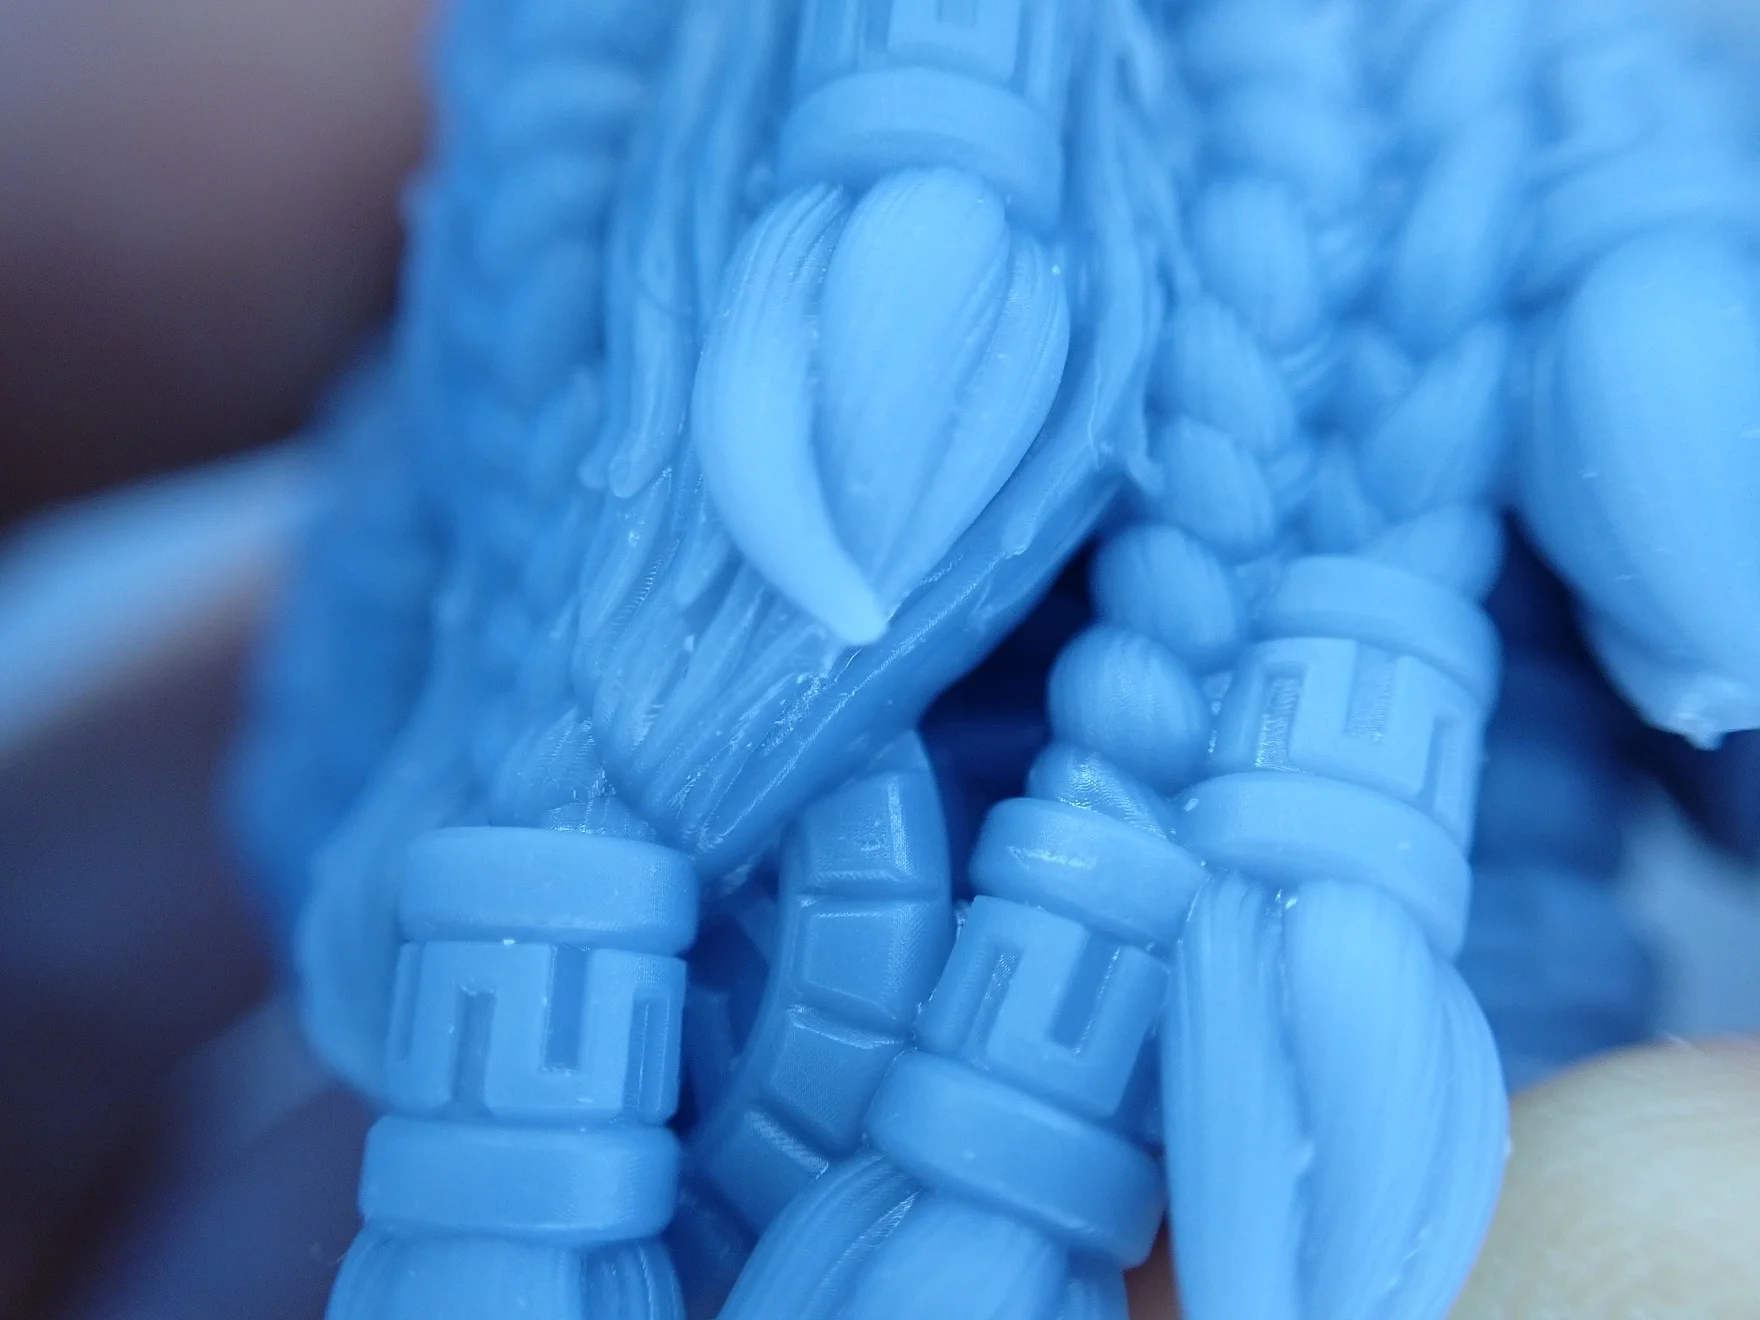
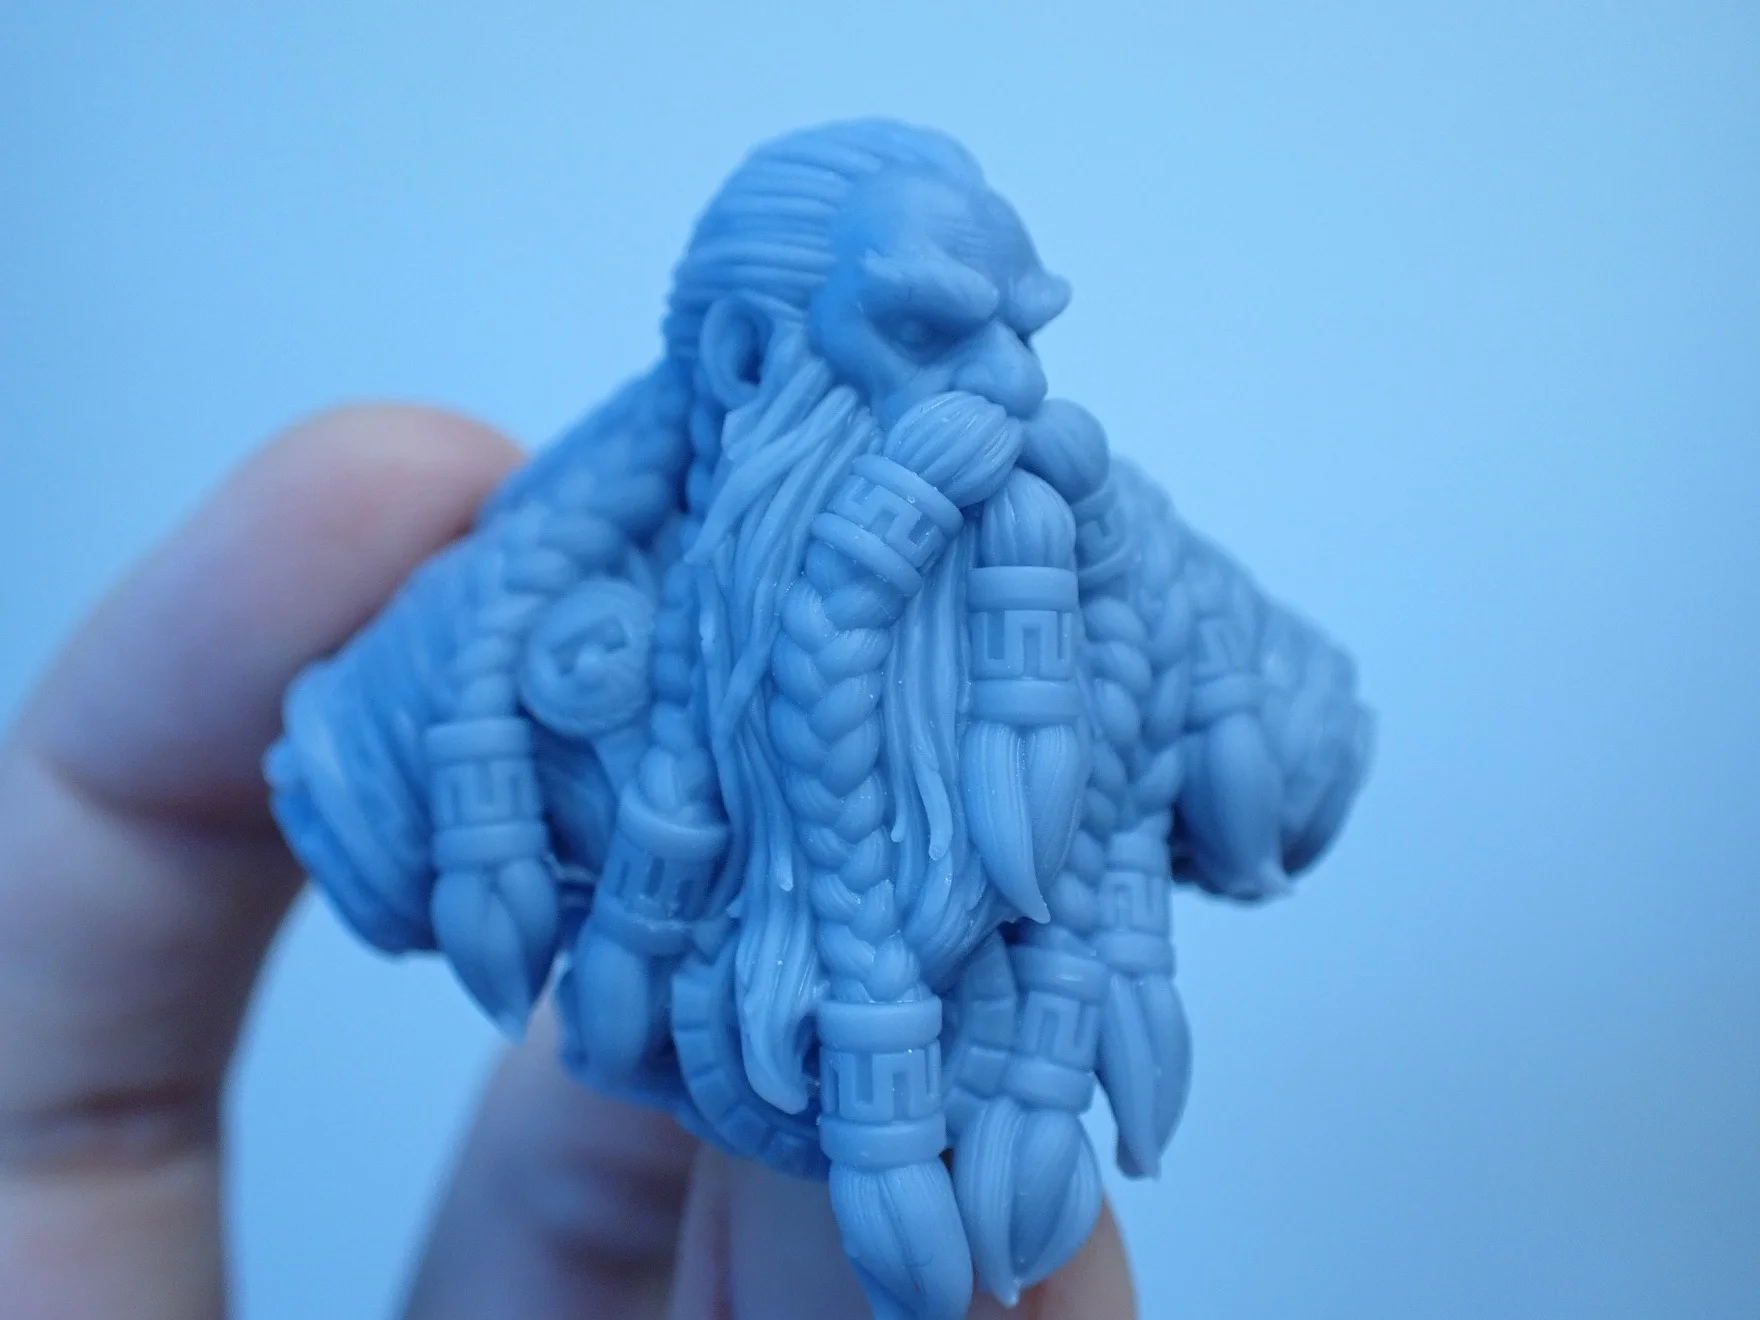
Next, I printed the dwarf bust “Petri” from Daybreak Miniatures on MyMiniFactory (link to the model). I set the layer thickness to 0.01 mm and a medium edge smoothing.
The figure was about 60mm tall with supports and took about 14 hours to print. I saved myself some time by printing the base for the bust at the same time.
After I had taken the finished objects the next day from the printer and washed them off, I was really surprised by the quality! I did not manage to find even one step on the complete object, which is so typical for 3D printing.
Since I had enabled edge smoothing, I was a bit afraid that the finest details might get lost. Fortunately, this was not the case at all. Even single strands of hair have been printed perfectly!
With 3D printers like the Elegoo Mars 3*, a new era for miniature enthusiasts is truly beginning! Buying a 3D printer like this will save you a lot of money in the long run when you compare the cost of printer, resin and STL files to the expensive price of finished models.
Praetorian Bust
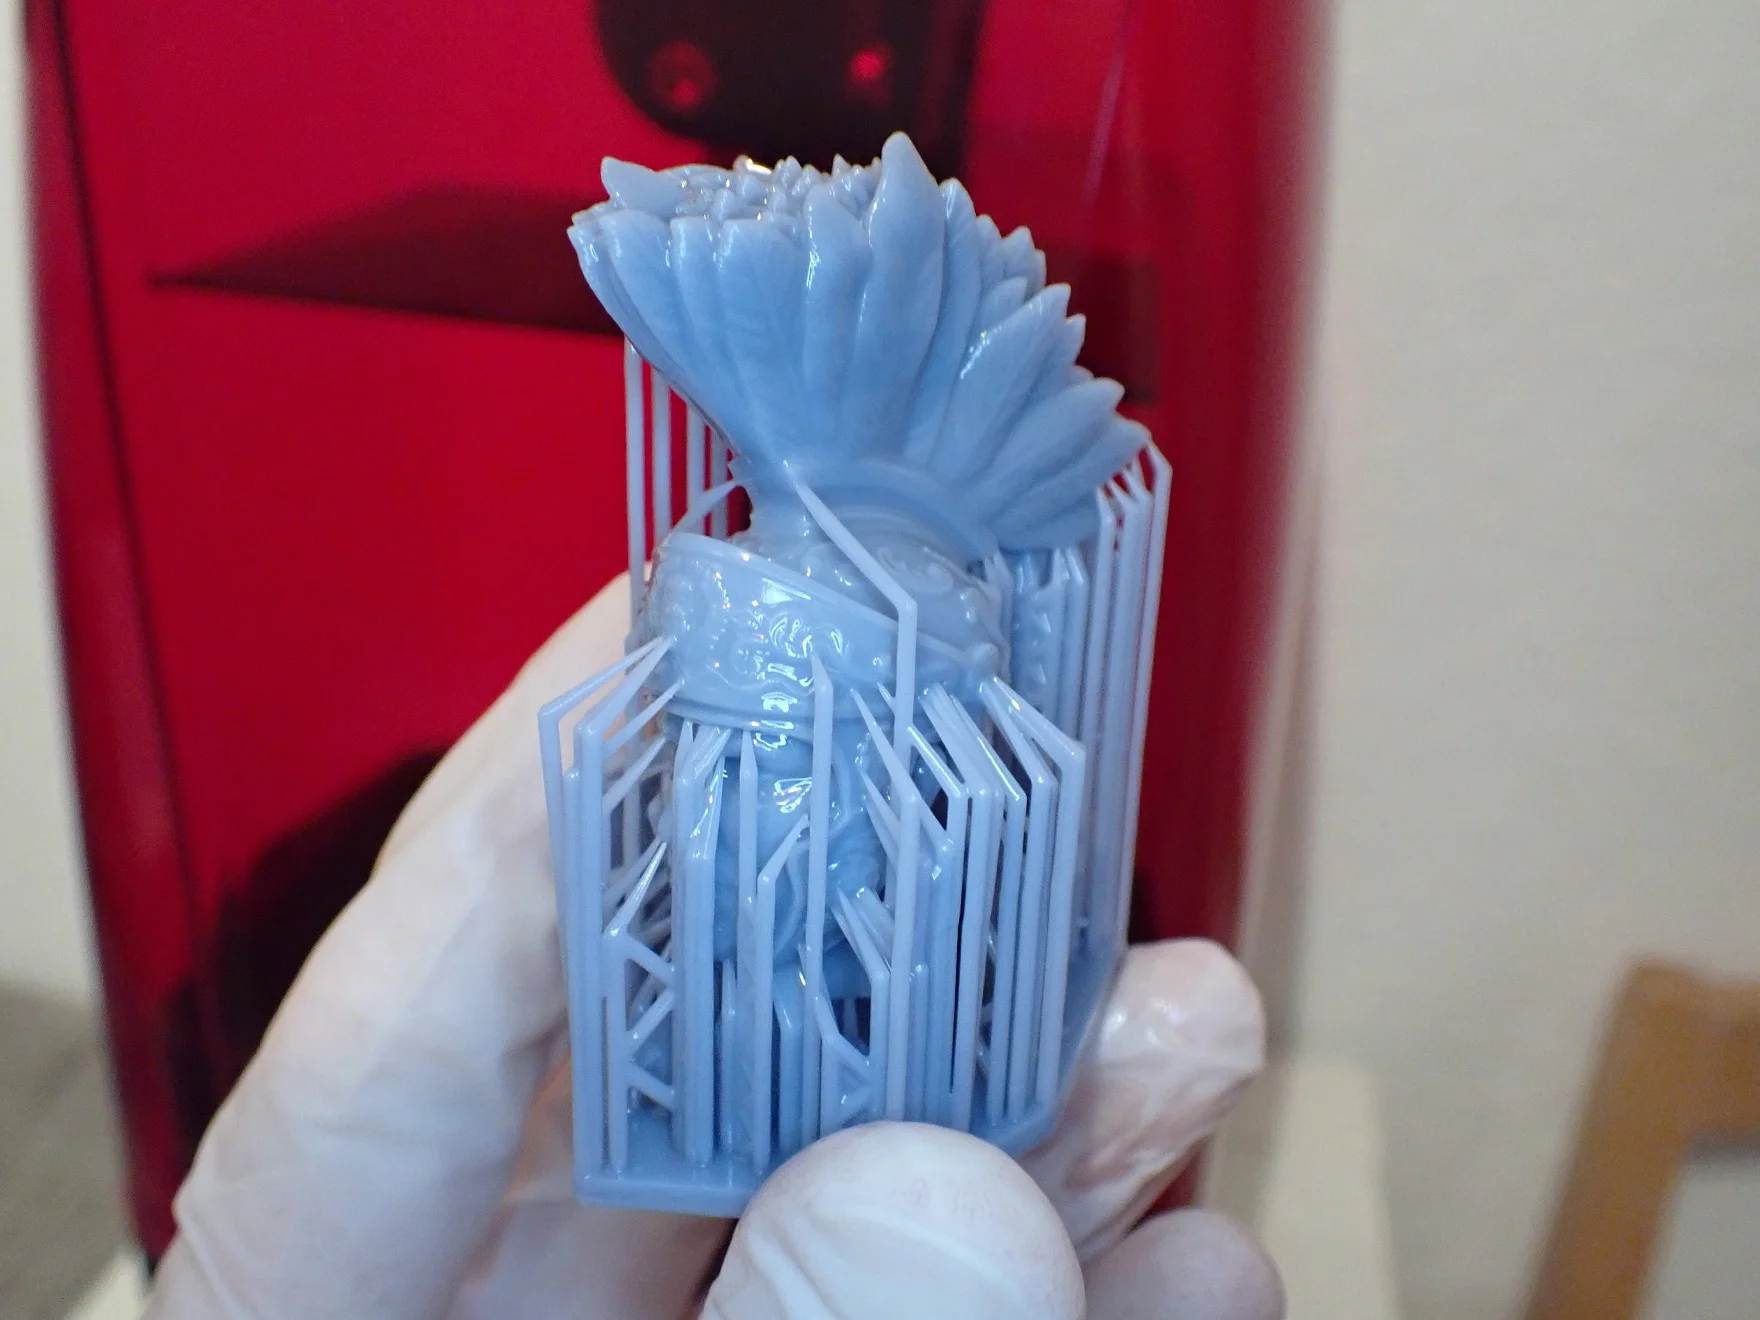
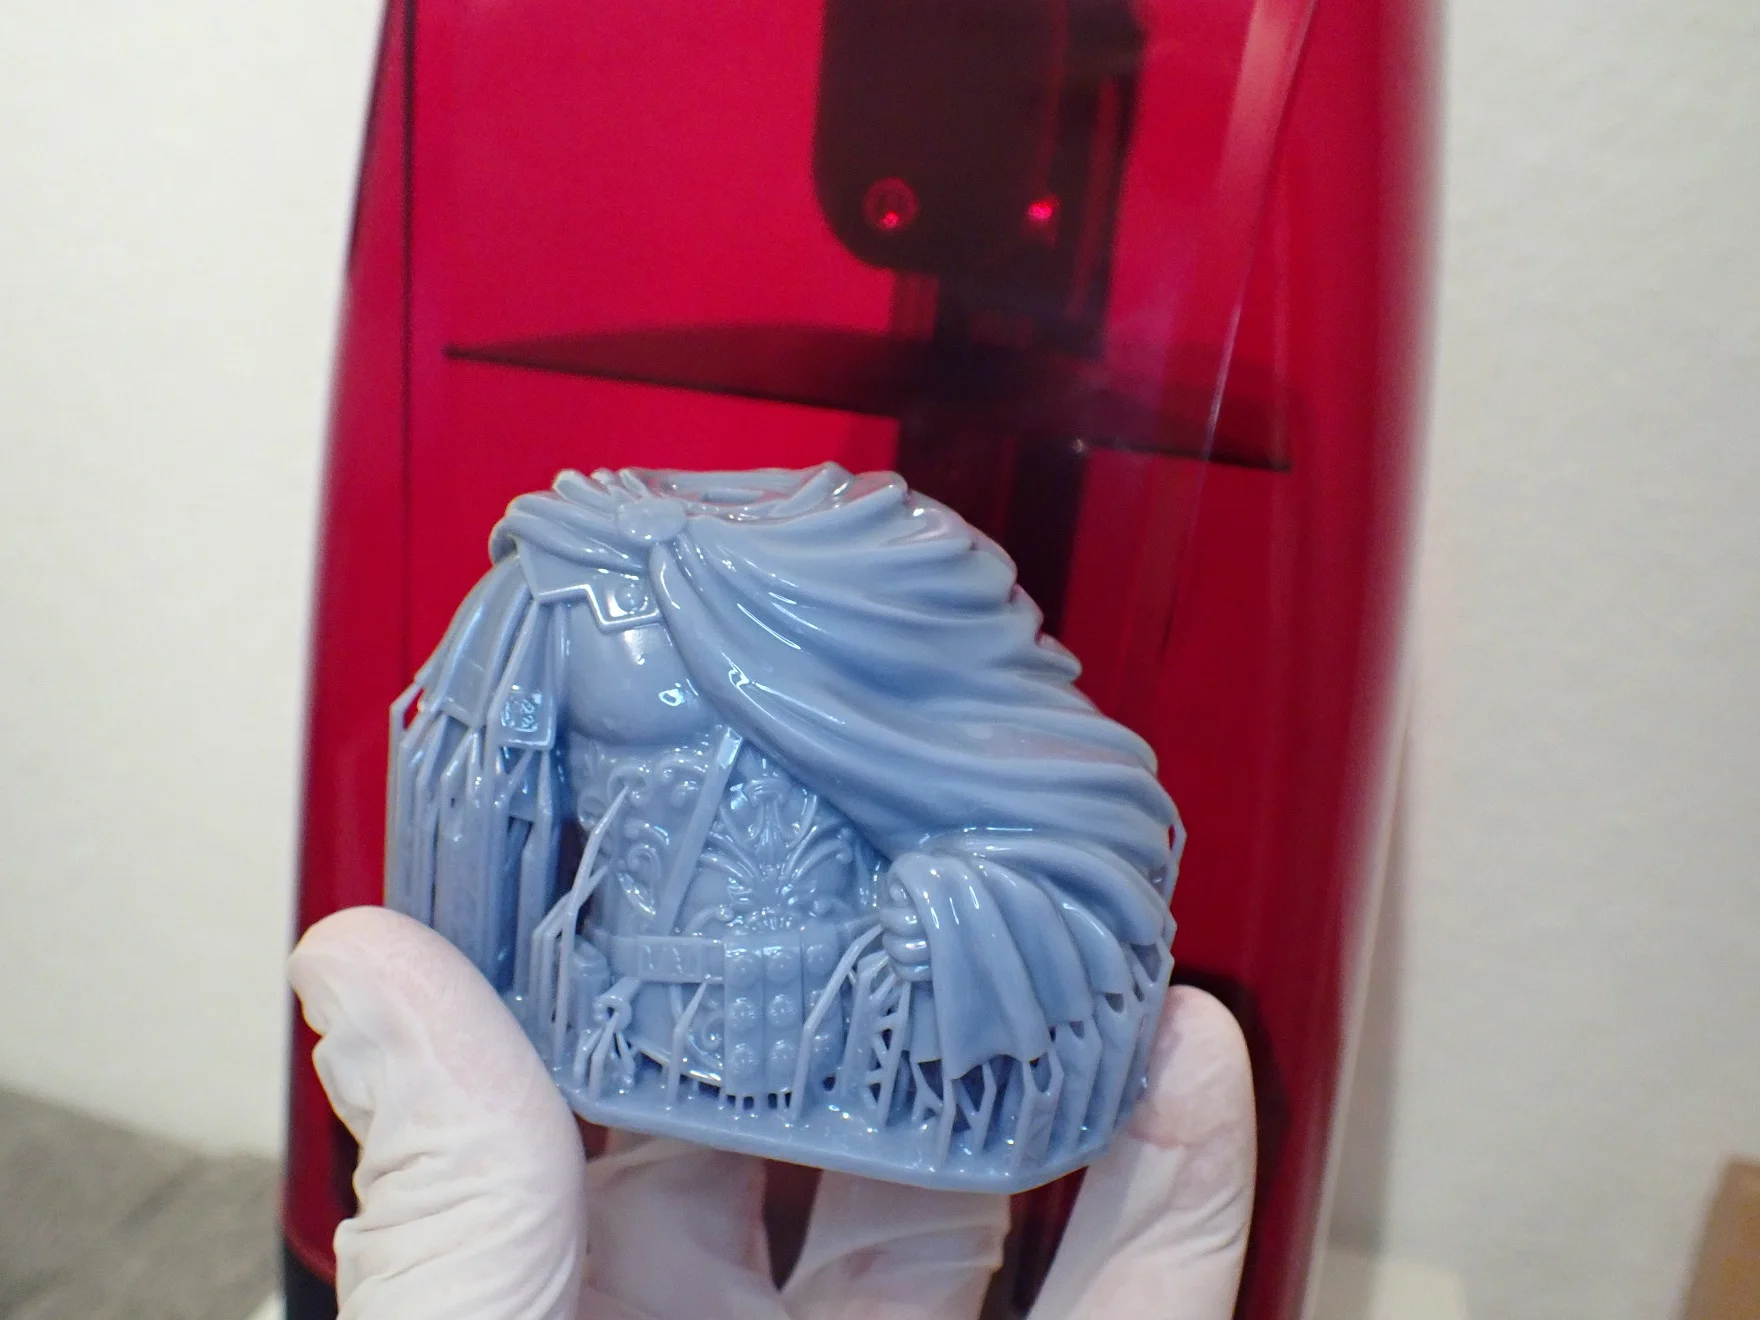
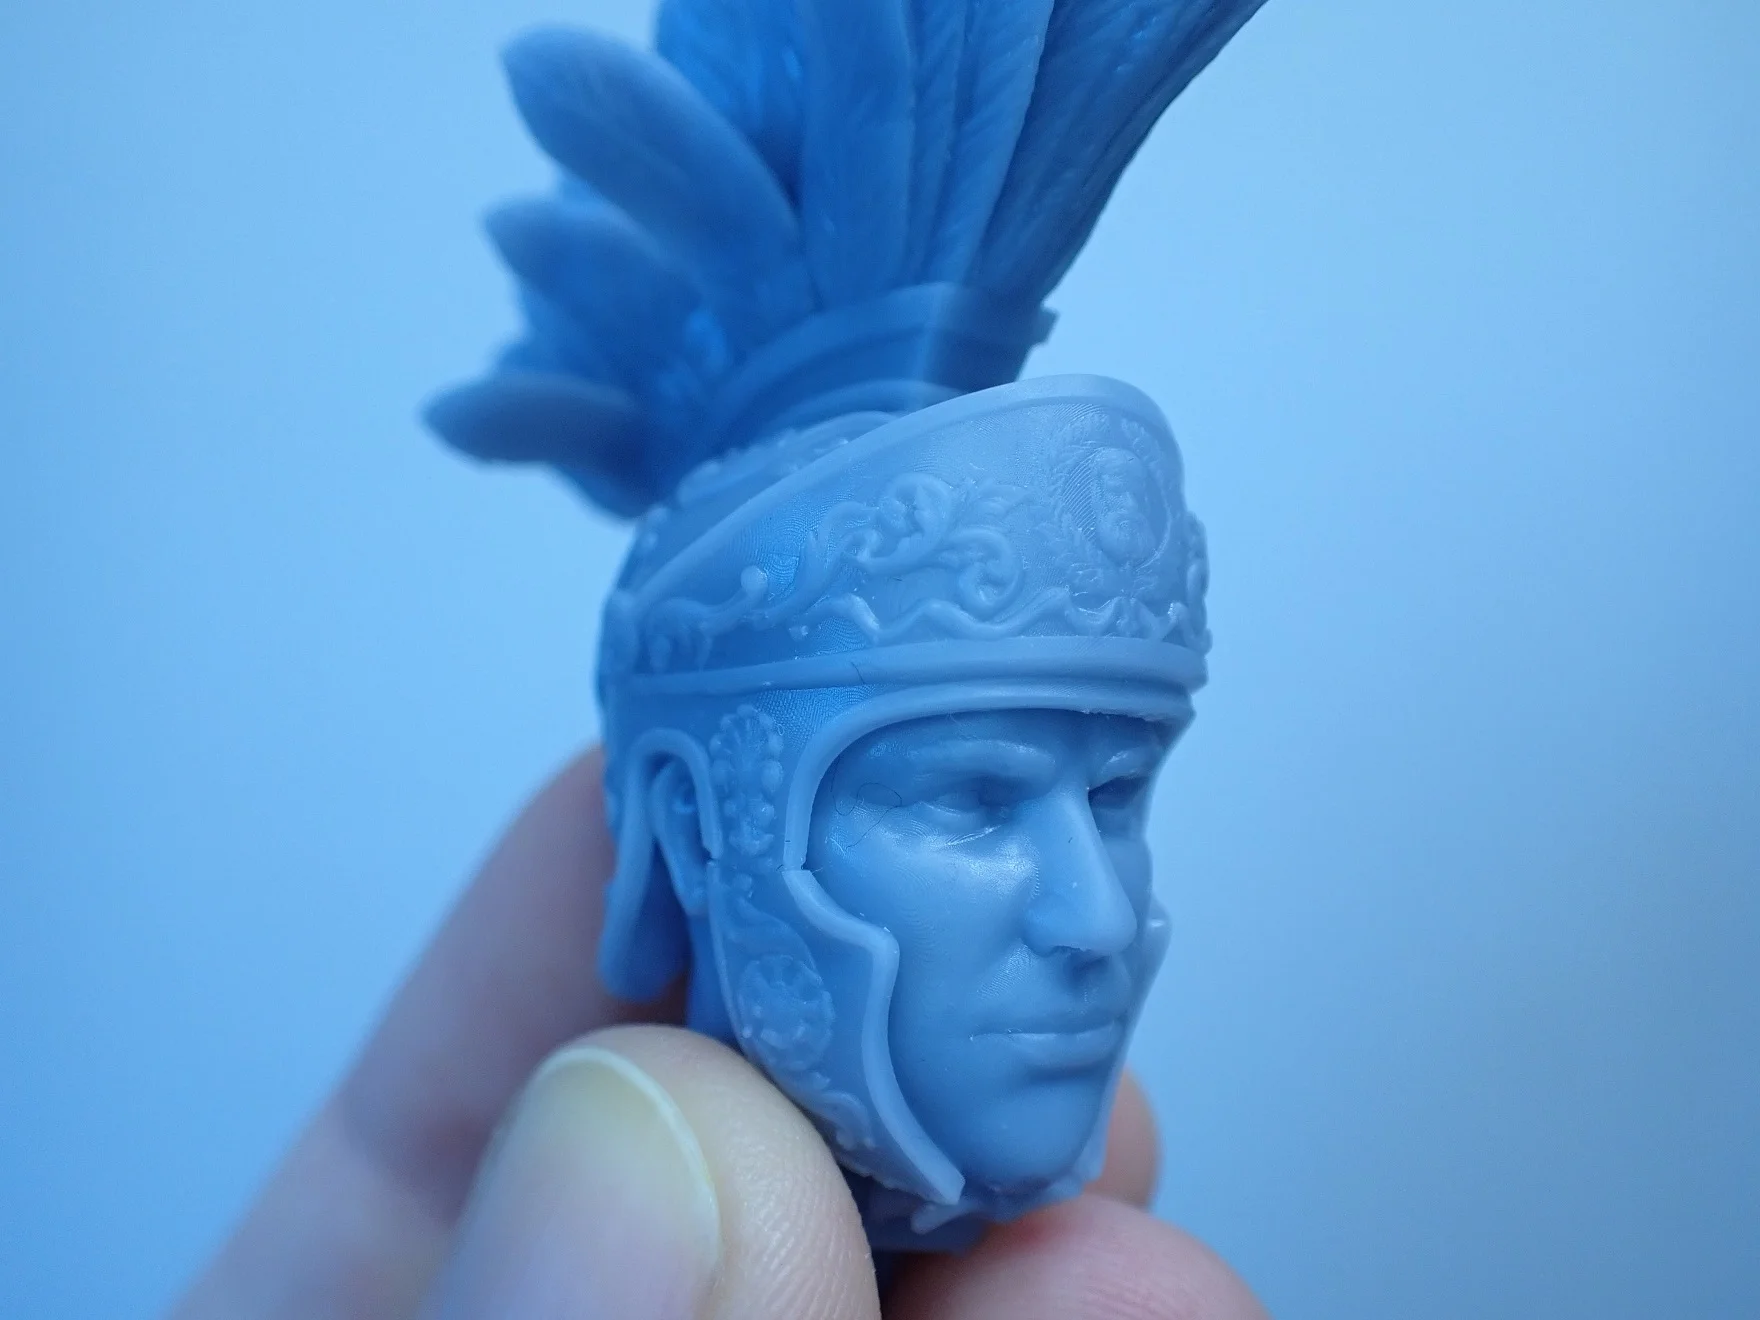
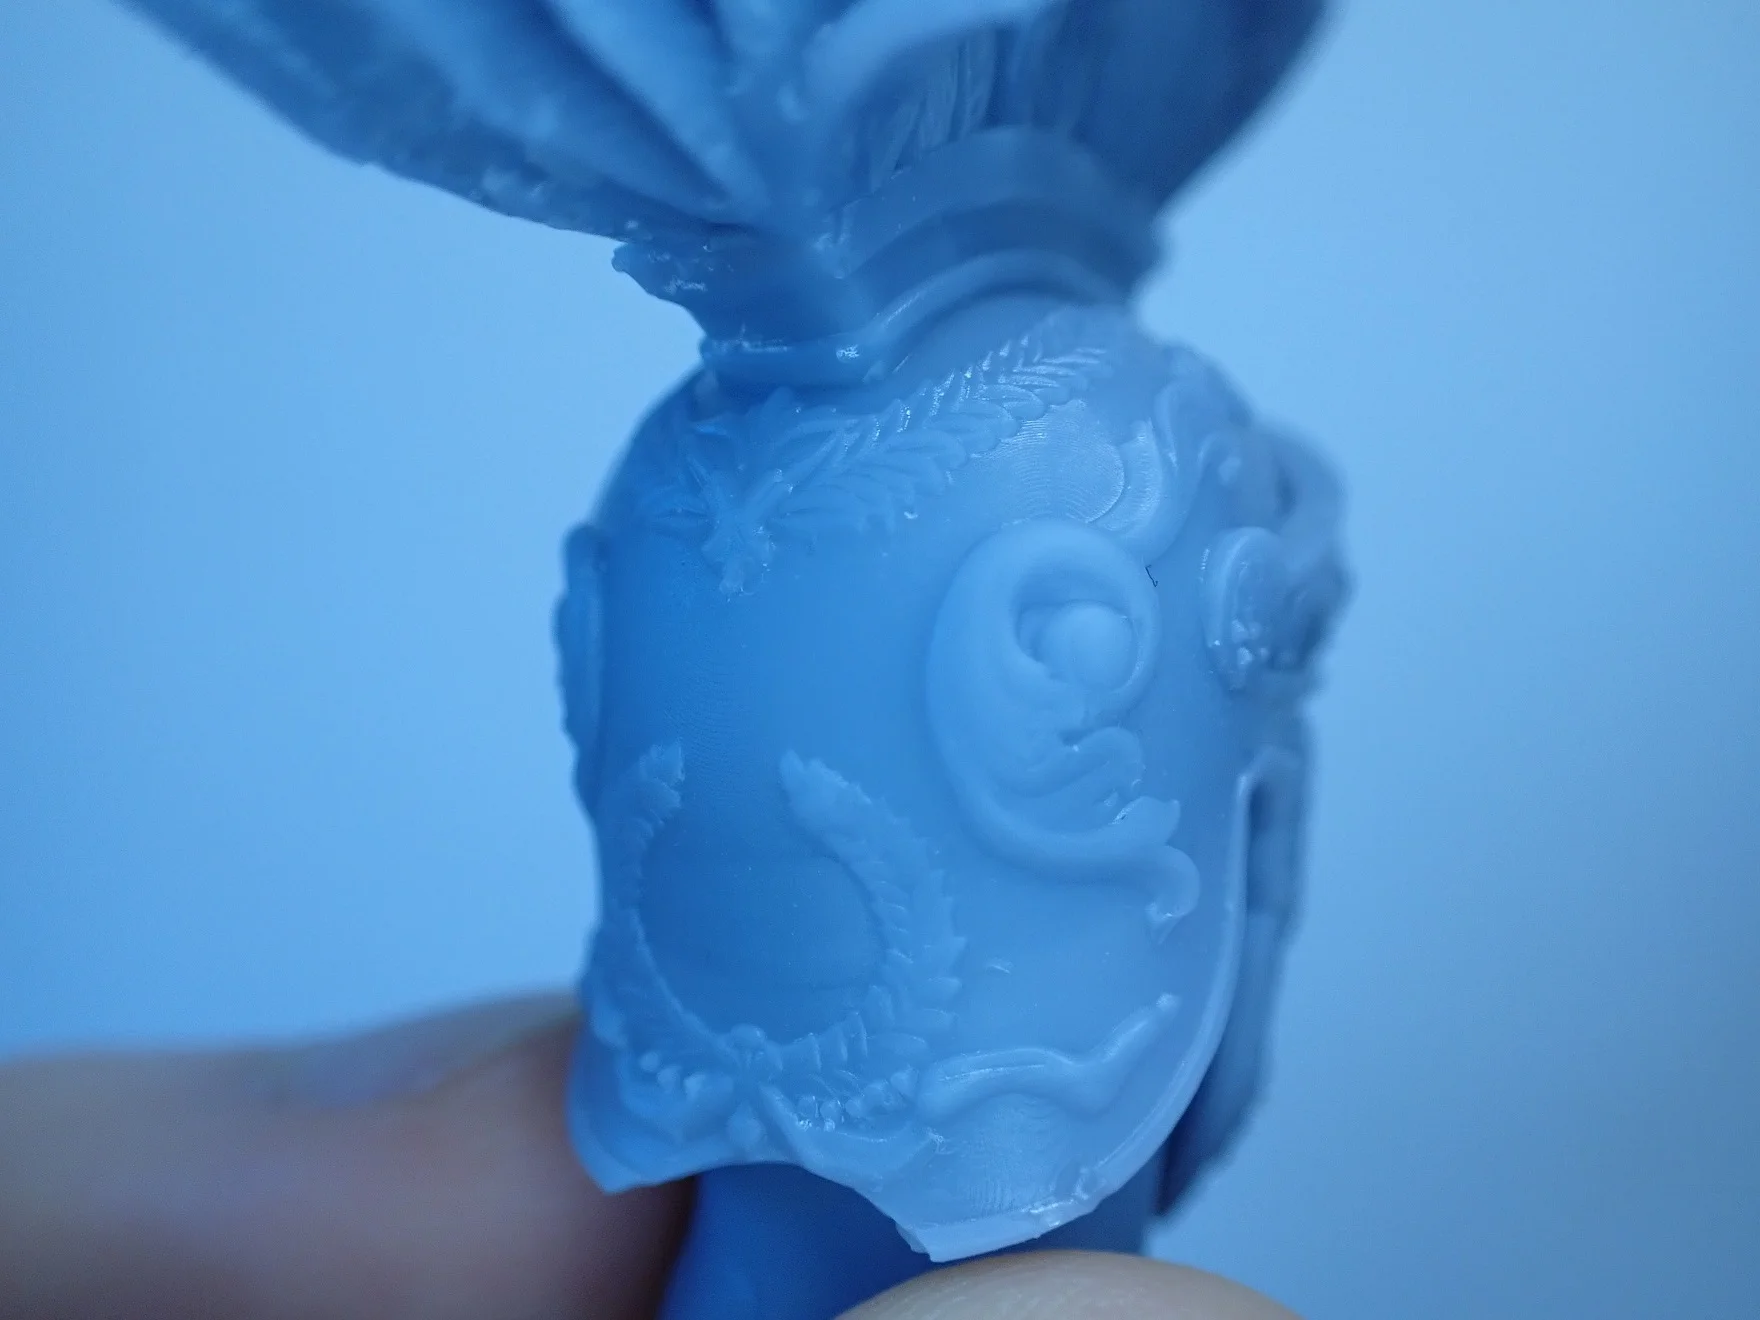
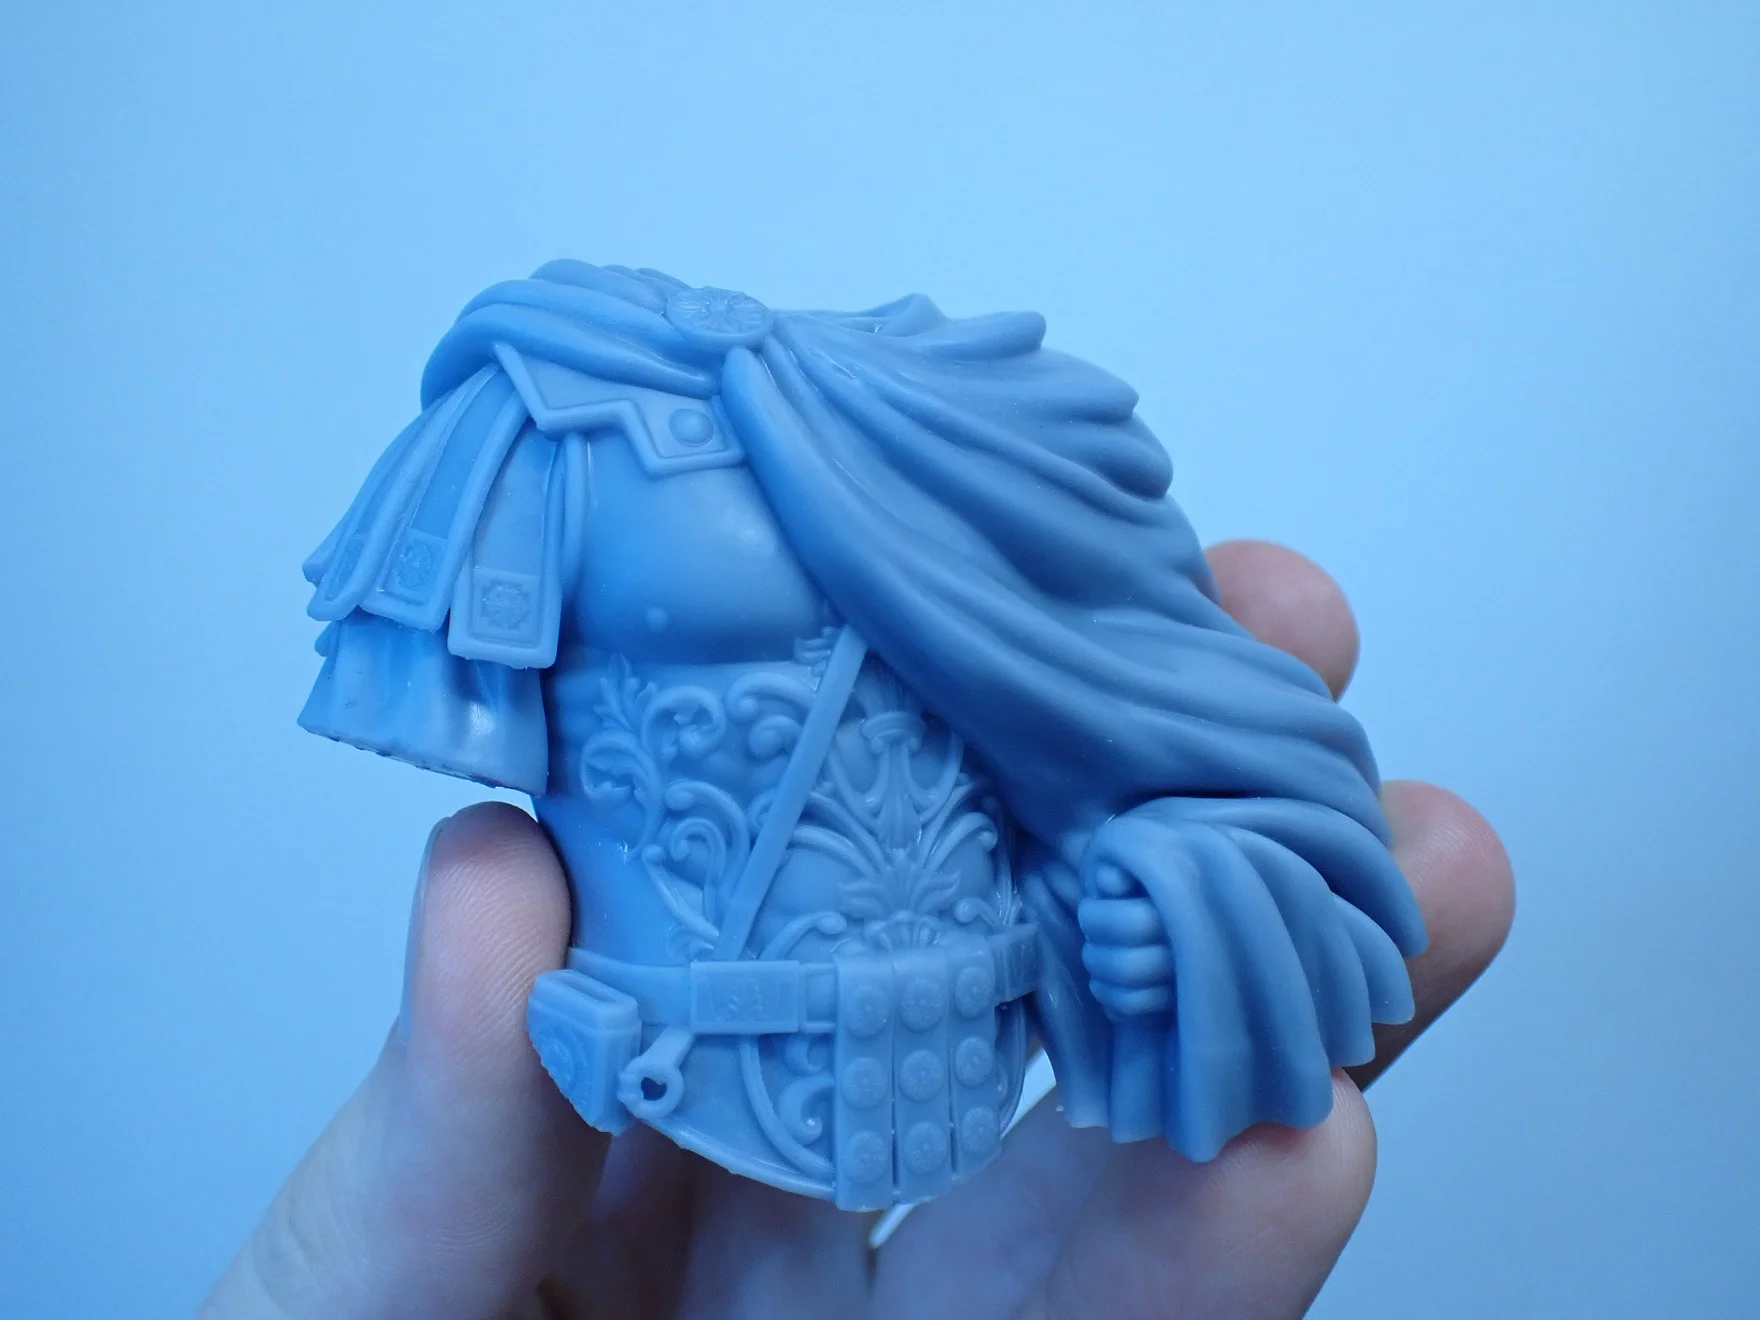
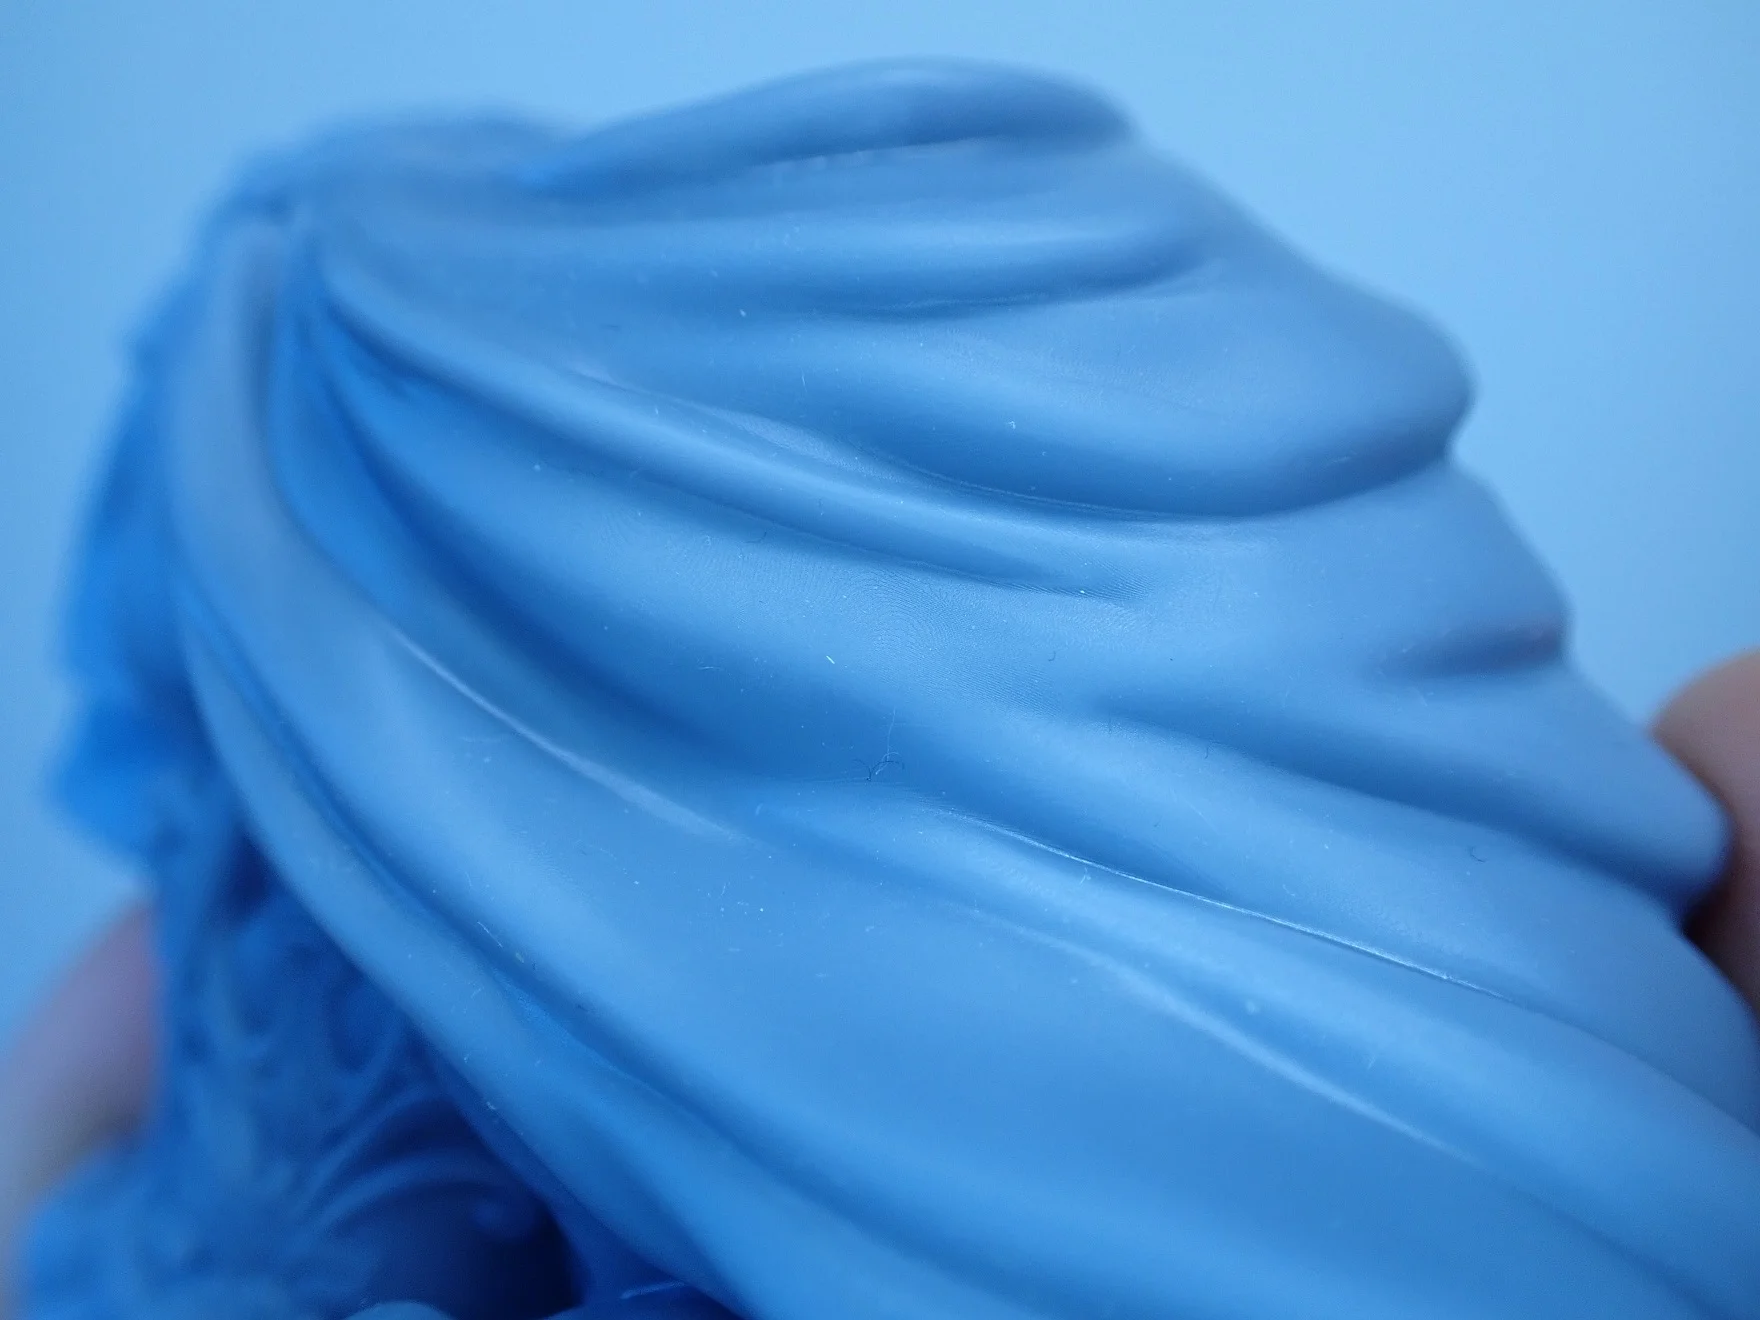
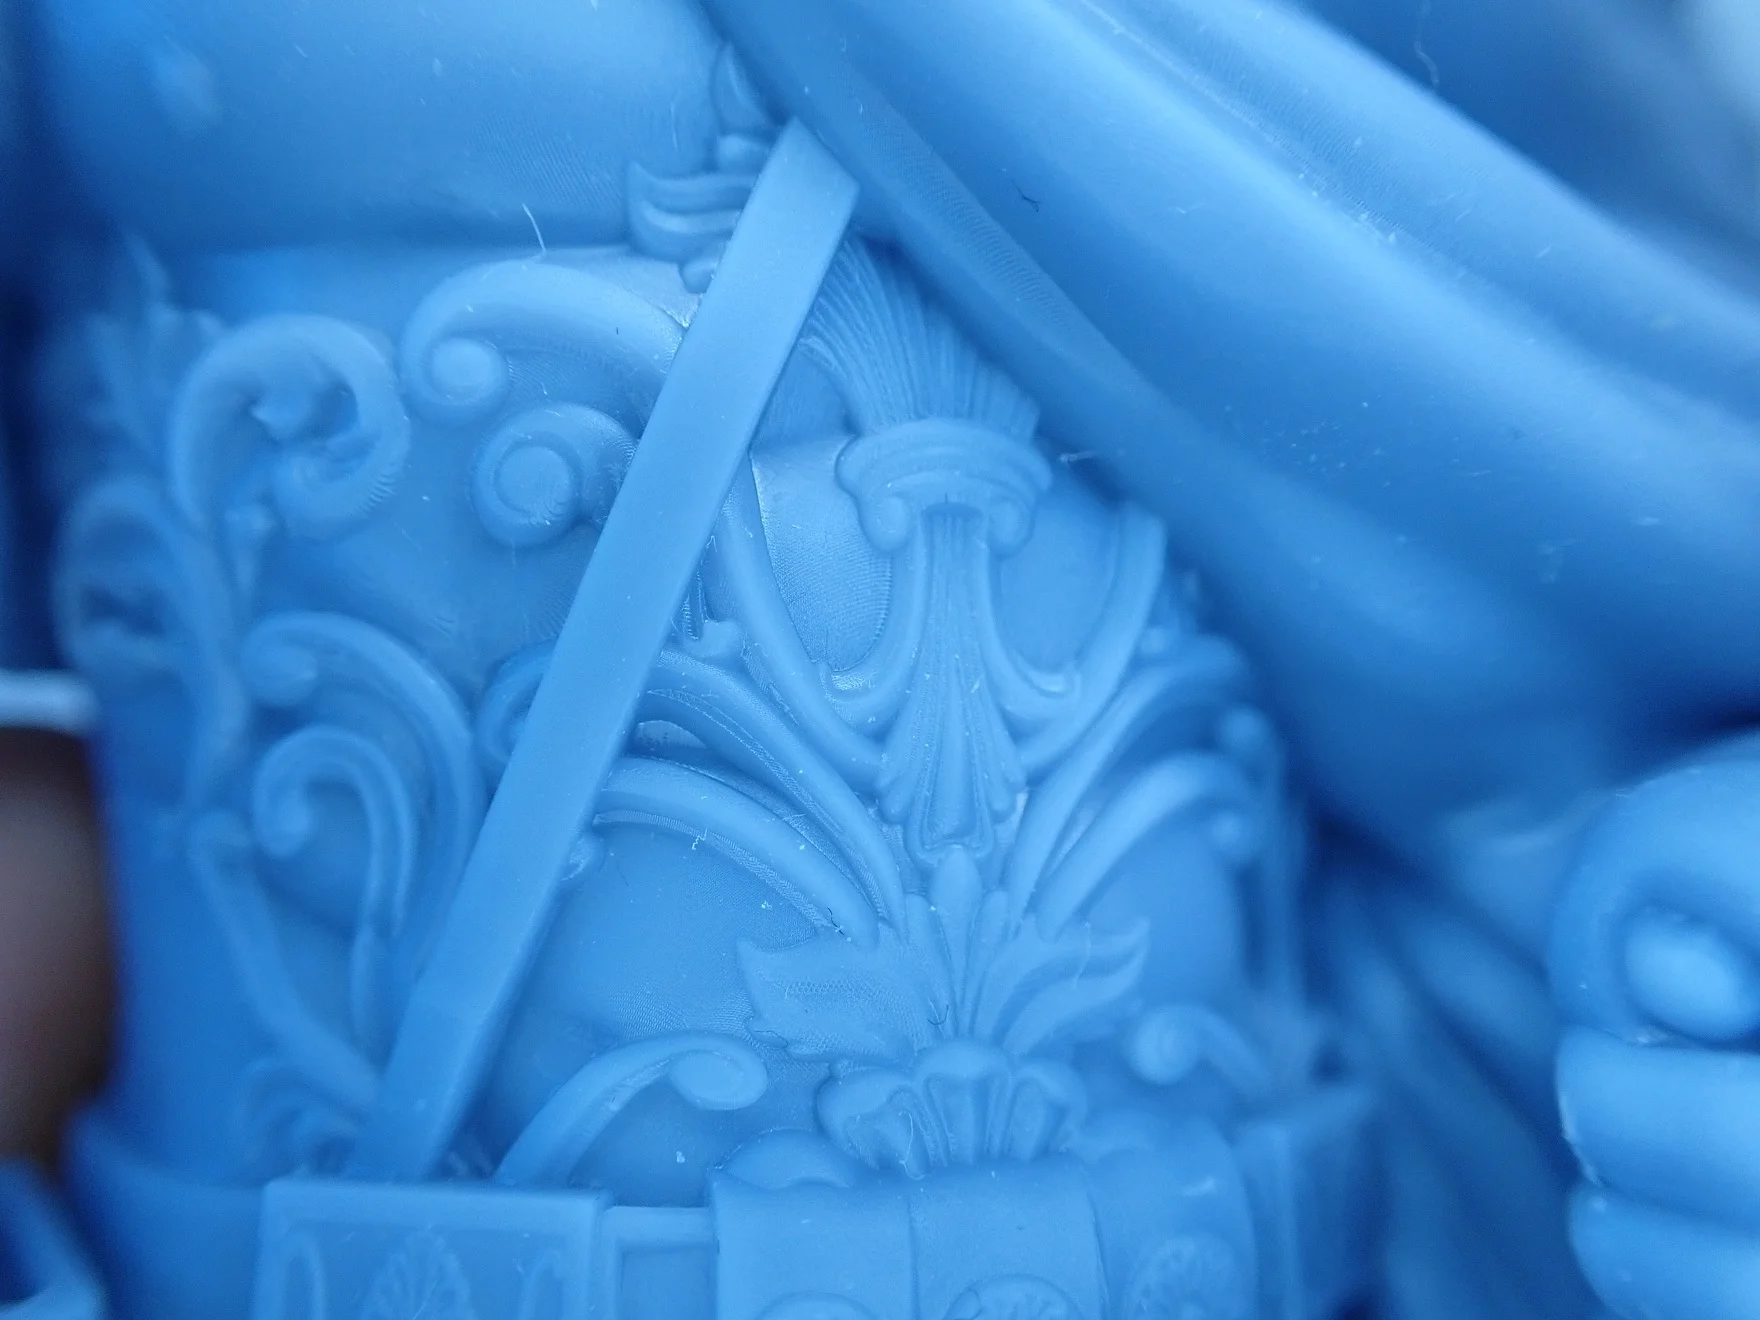
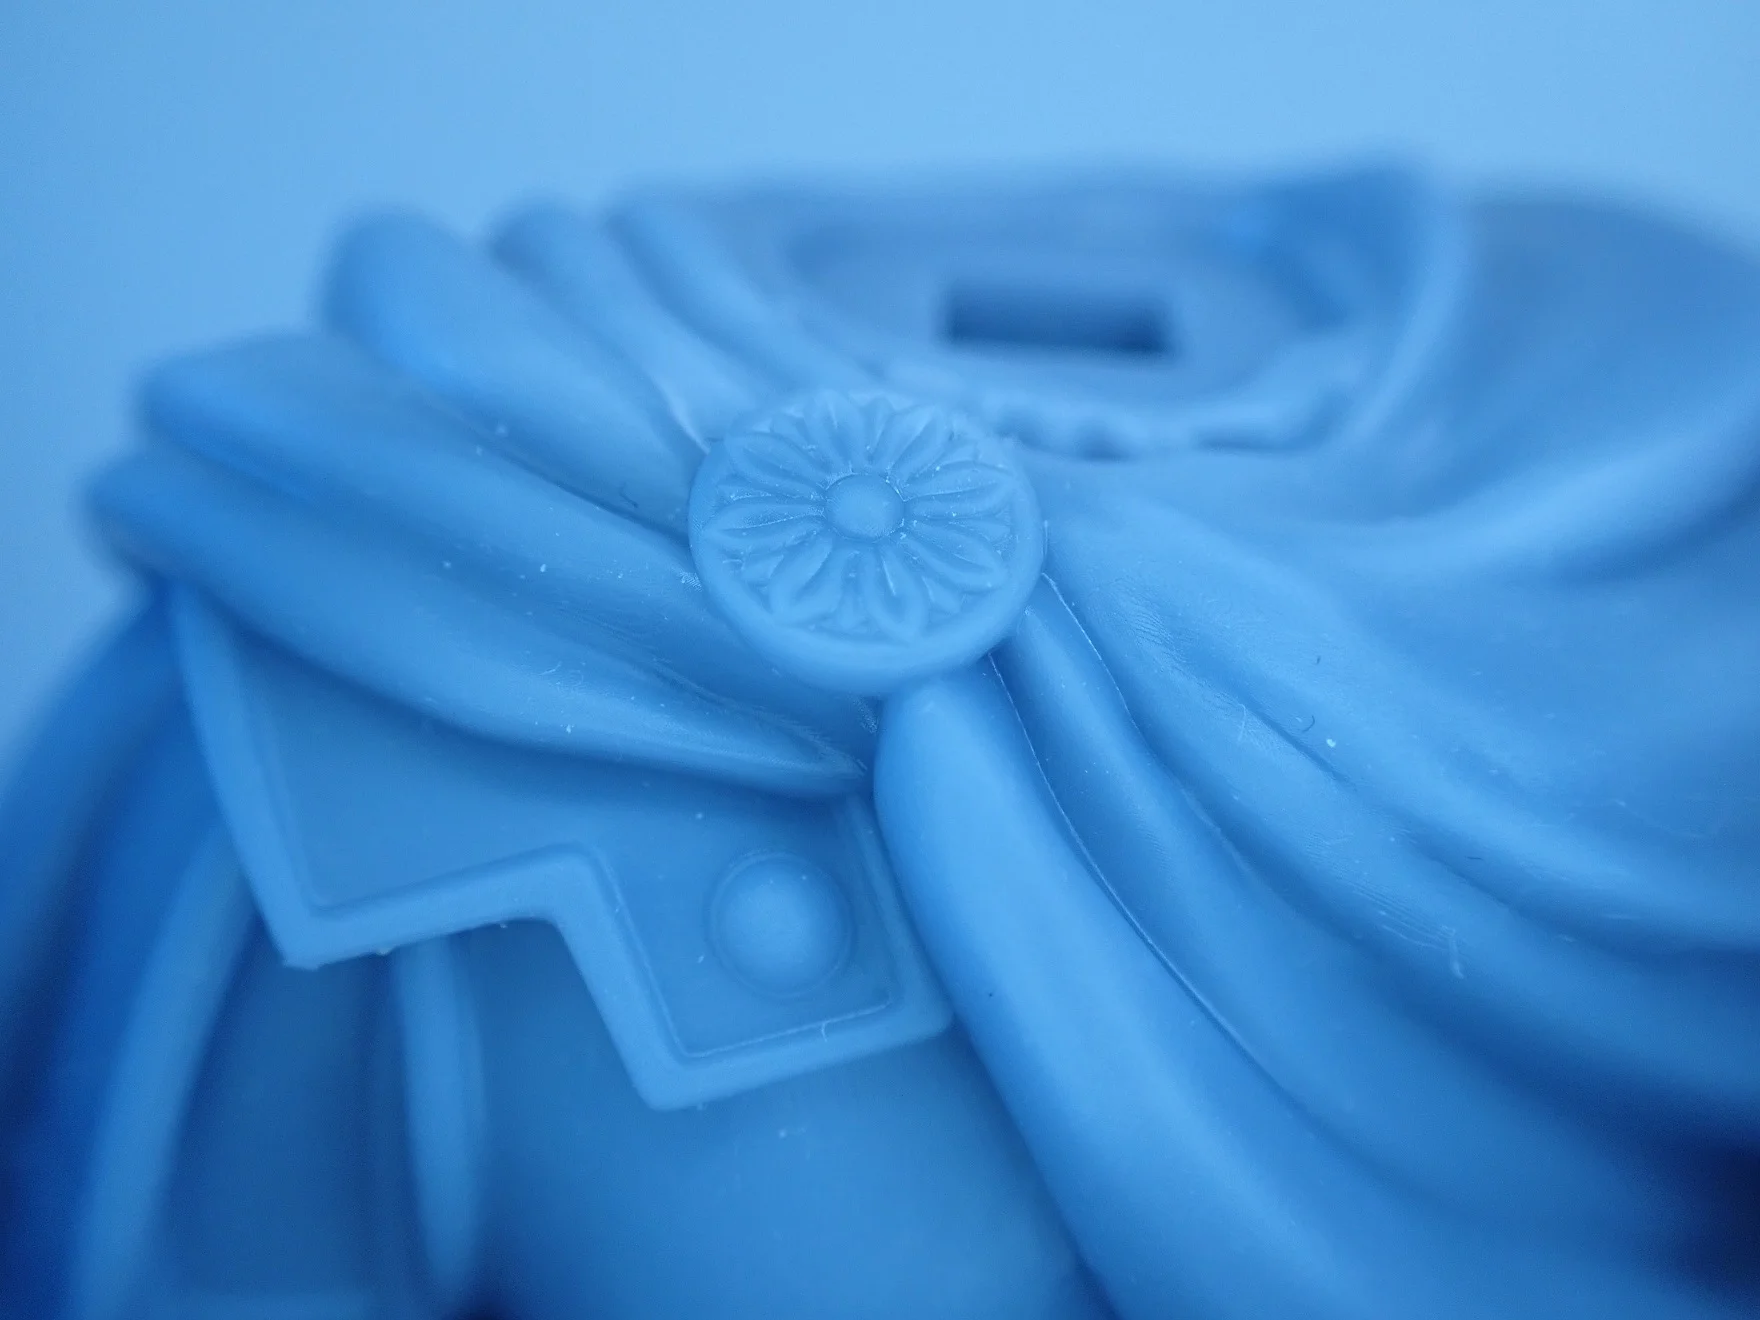
As another example of a detailed figure, I printed the Praetorian bust of Minormous on MyMiniFactory (link to model).
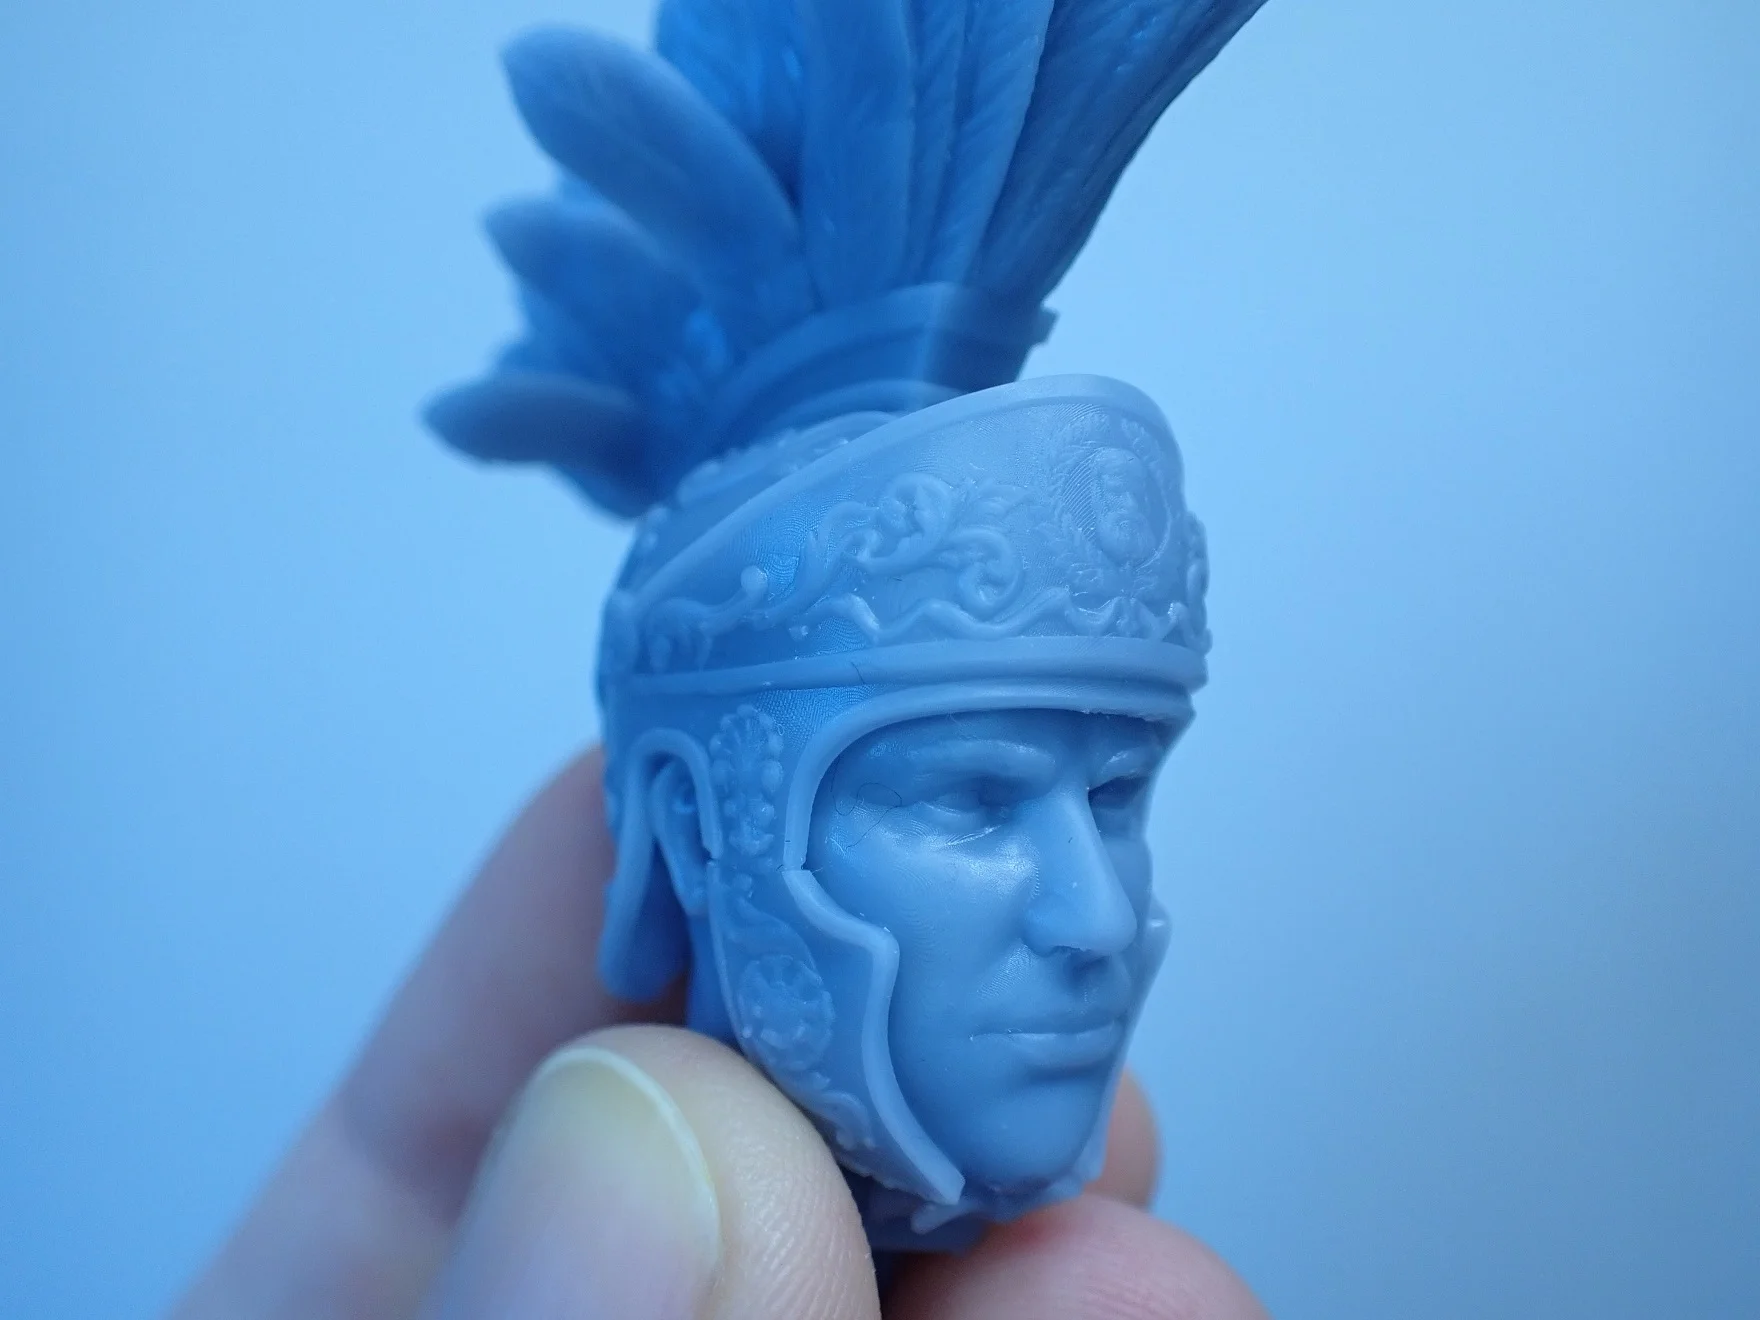
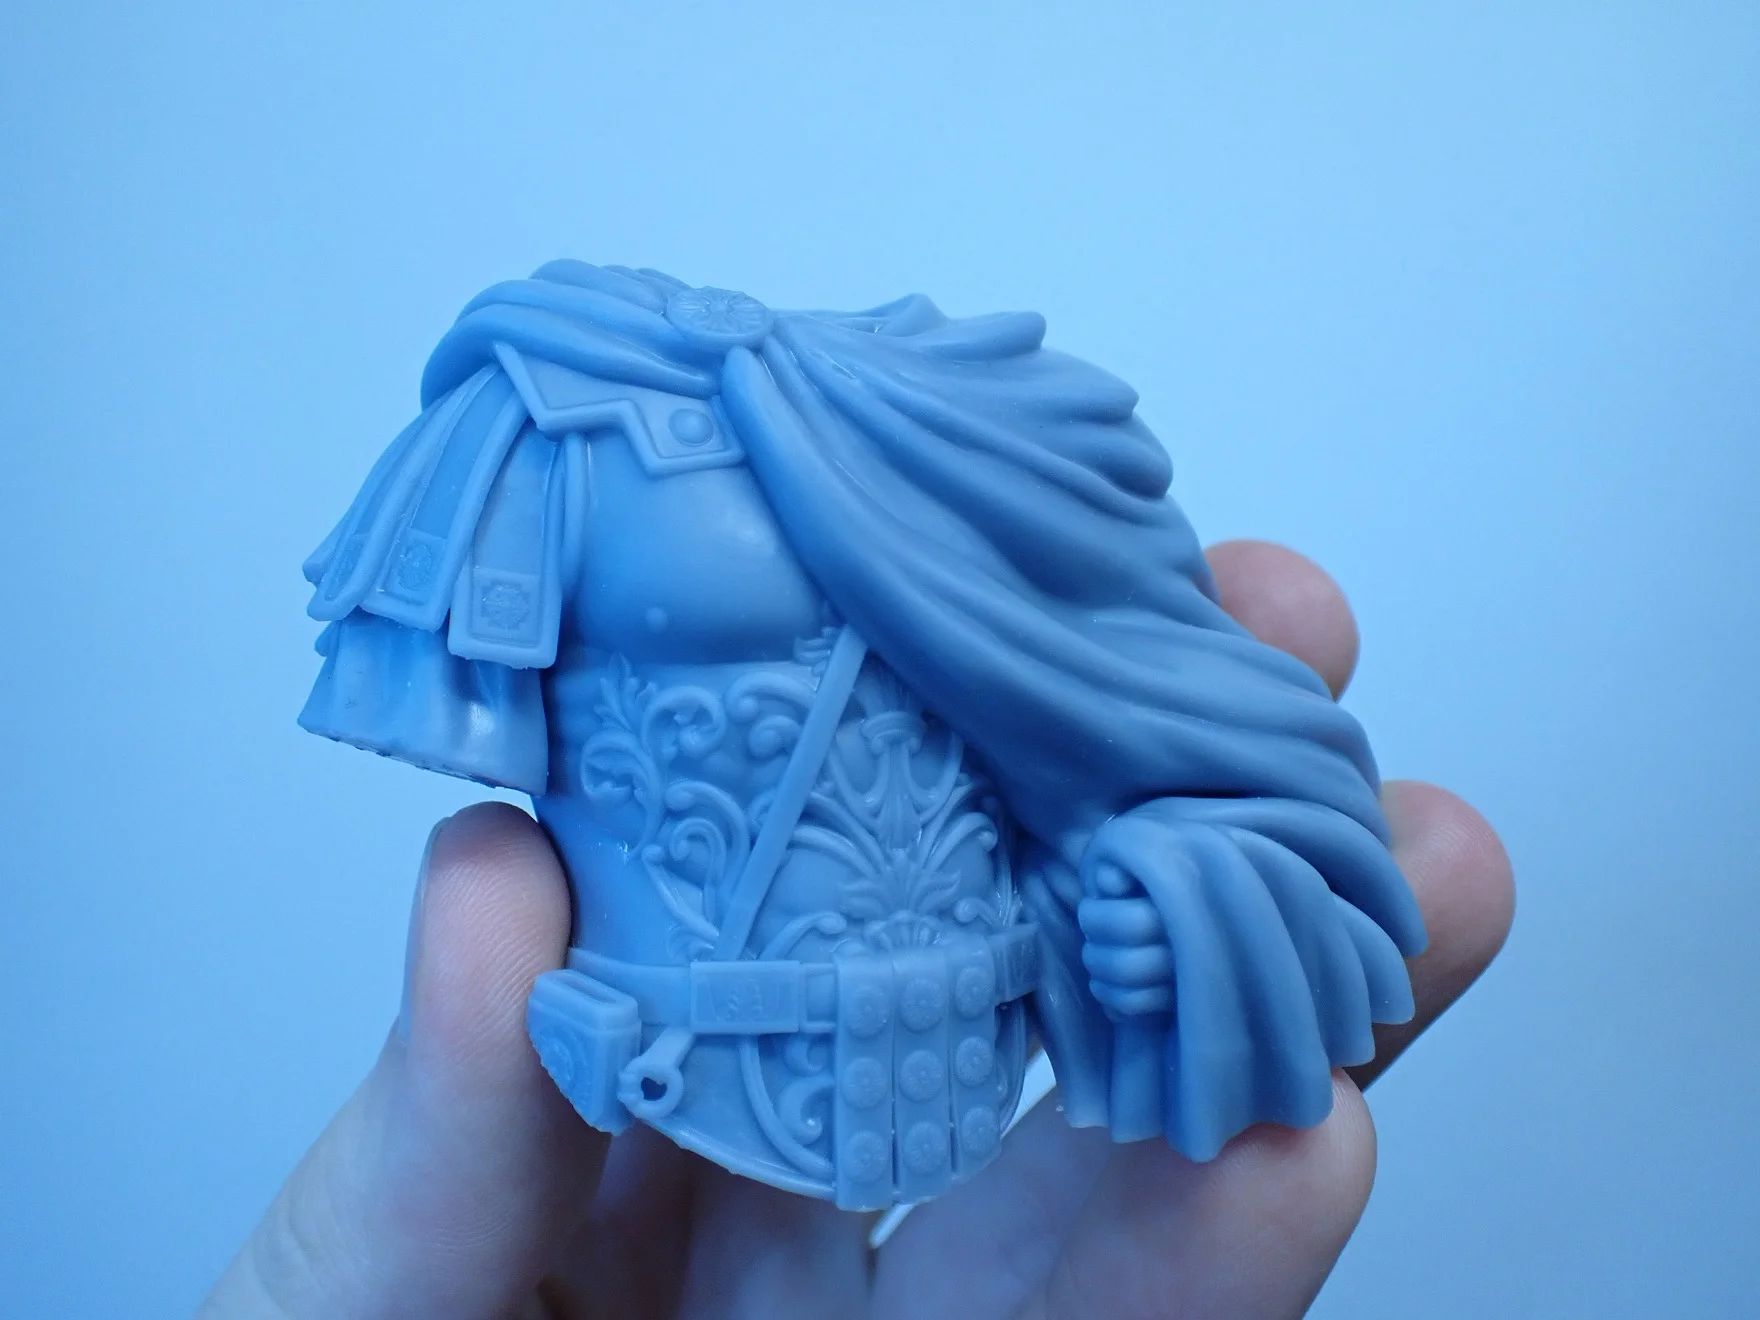
The armor and especially the helmet are extremely detailed. On the helmet are feathers and the helmet has various engravings. I also printed this model with a layer thickness of 0.01 mm. The result is just like the dwarf excellent.
I printed the torso and the head with the helmet at the same time. With the torso, you can’t see individual layers at any point. The head with helmet unfortunately seems to be aligned in the same way that you can see a few steps here and there. Fortunately, these steps are only partially visible on one side of the helmet – and only if you look very closely. When I have painted the figure, you will no longer see these steps.
Slicer
> Elegoo Mars 3 Review
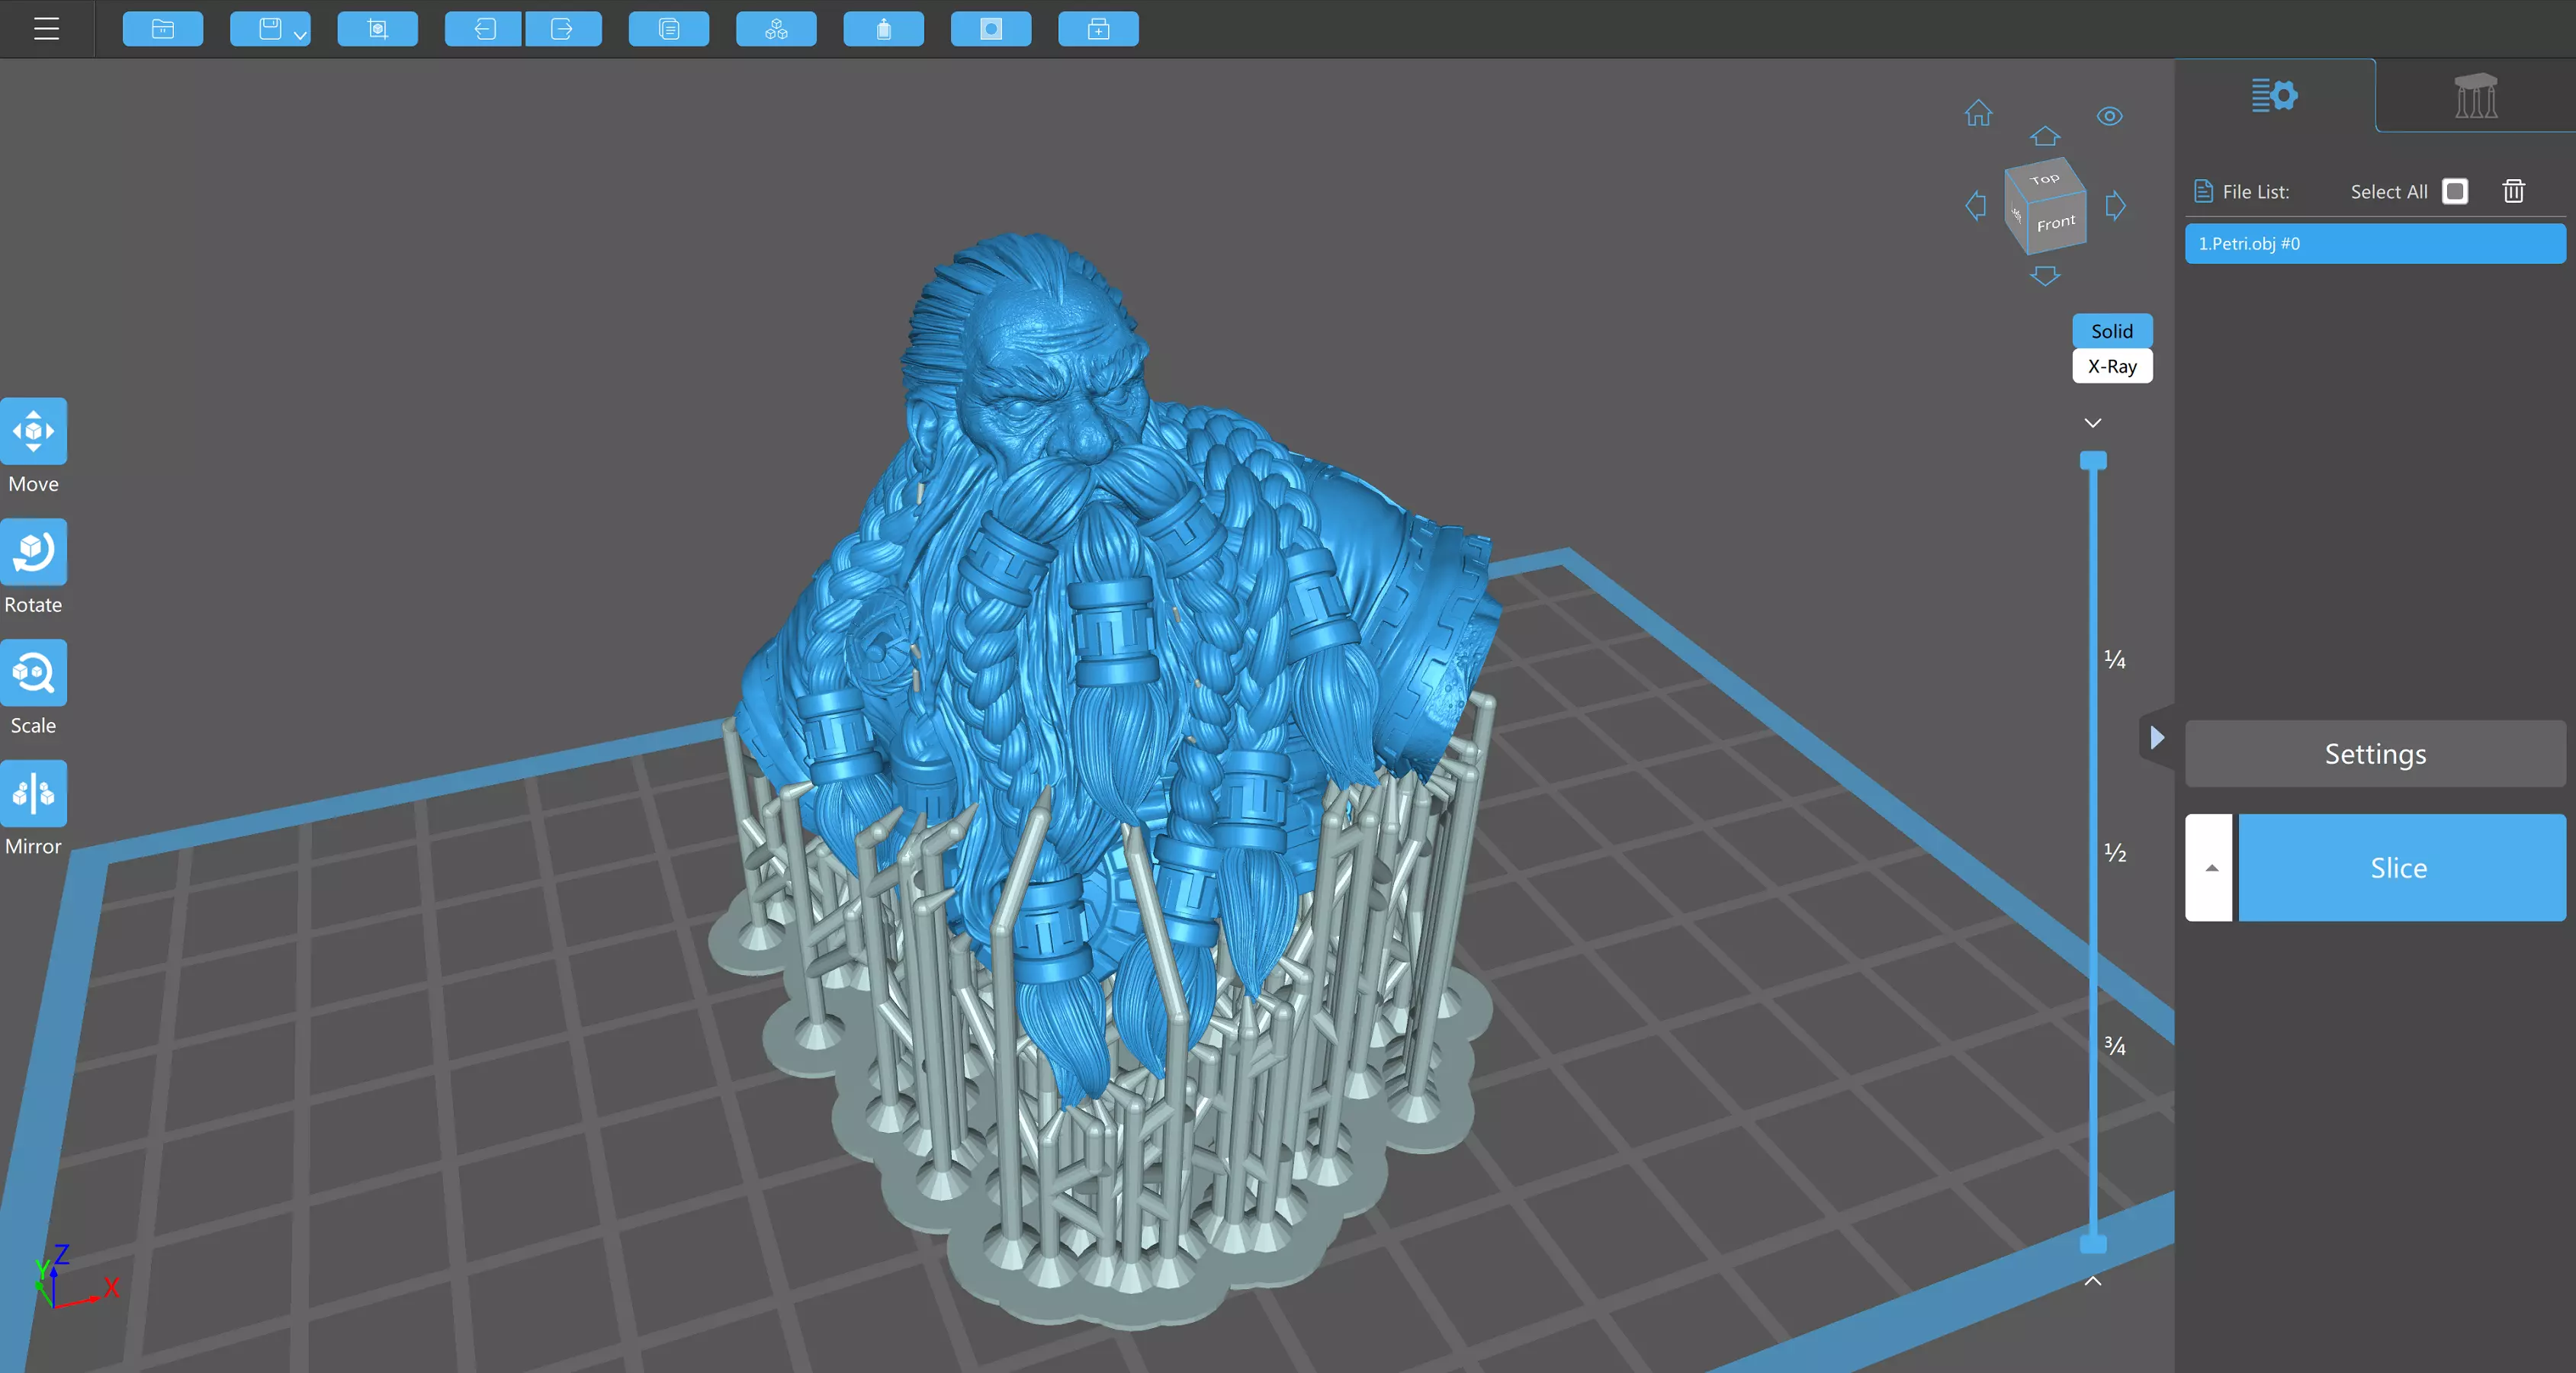
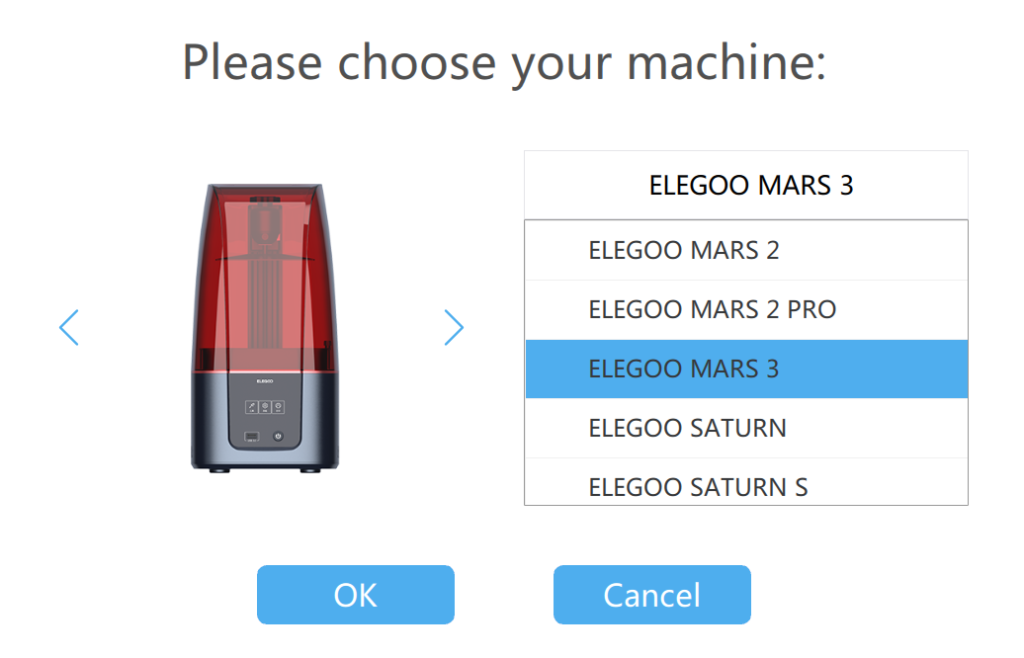
The Elegoo Mars 3 is currently only compatible with the ChiTuBox slicer. There is also a predefined profile for it in the current version. You only have to adjust the settings for the exposure to your resin.
The free version of ChiTuBox is very popular and is compatible with a wide range of resin 3D printers. The slicer has all the standard features you need to create finished STL files for the Mars 3.
Here are the most important functions at a glance:
- Generate support structures automatically and set or remove them manually.
- Specify and adjust the shape of support structures.
- Hollow out 3D models to save resin.
- Punch holes in 3D objects to be able to drain liquid resin.
- Edit multiple objects at the same time.
The Mars 3 also comes with a 1-year license for the Pro version of ChiTuBox. With this Pro version, you can customize the support structures, define multiple profiles in one file for different objects, repair defective surfaces, split models into multiple parts, measure sizes and distances and much more.
If you have never worked with ChiTuBox before, I would recommend the free version first. The Pro version is, as the name suggests, more suitable for professional applications. But even if you want to realize sophisticated technical designs, the Pro version is worth a try.
Learn to print perfect details:
Resin 3D Printer Calibration: Step-by-Step Guide
Useful Accessories
> Elegoo Mars 3 Review
Printing itself is only half the battle with resin 3D printers. After printing, you still need to remove excess liquid resin from the objects and cure them. To wash the models, you need the appropriate solvent for your resin (usually isopropyl alcohol, sometimes water).
After washing, you need to further cure the resin that has already been pre-cured by the 3D printer. You do this with a UV lamp. There are special curing stations, but a nail polish UV lamp* is also sufficient for small objects.
There are also special devices that can wash and cure. Two of them are the Elegoo Mercury Plus* and the Anycubic Wash & Cure 2.0*.
Another useful accessory for the Mars 3 is a reusable resin filter*. The scope of delivery includes disposable filters that provide you with filters for a while. In the long run, however, a reusable filter pays off, as it not only saves you money but is also good for the environment as less waste is produced.
Mars 2 Pro vs. Mars 3
> Elegoo Mars 3 Review
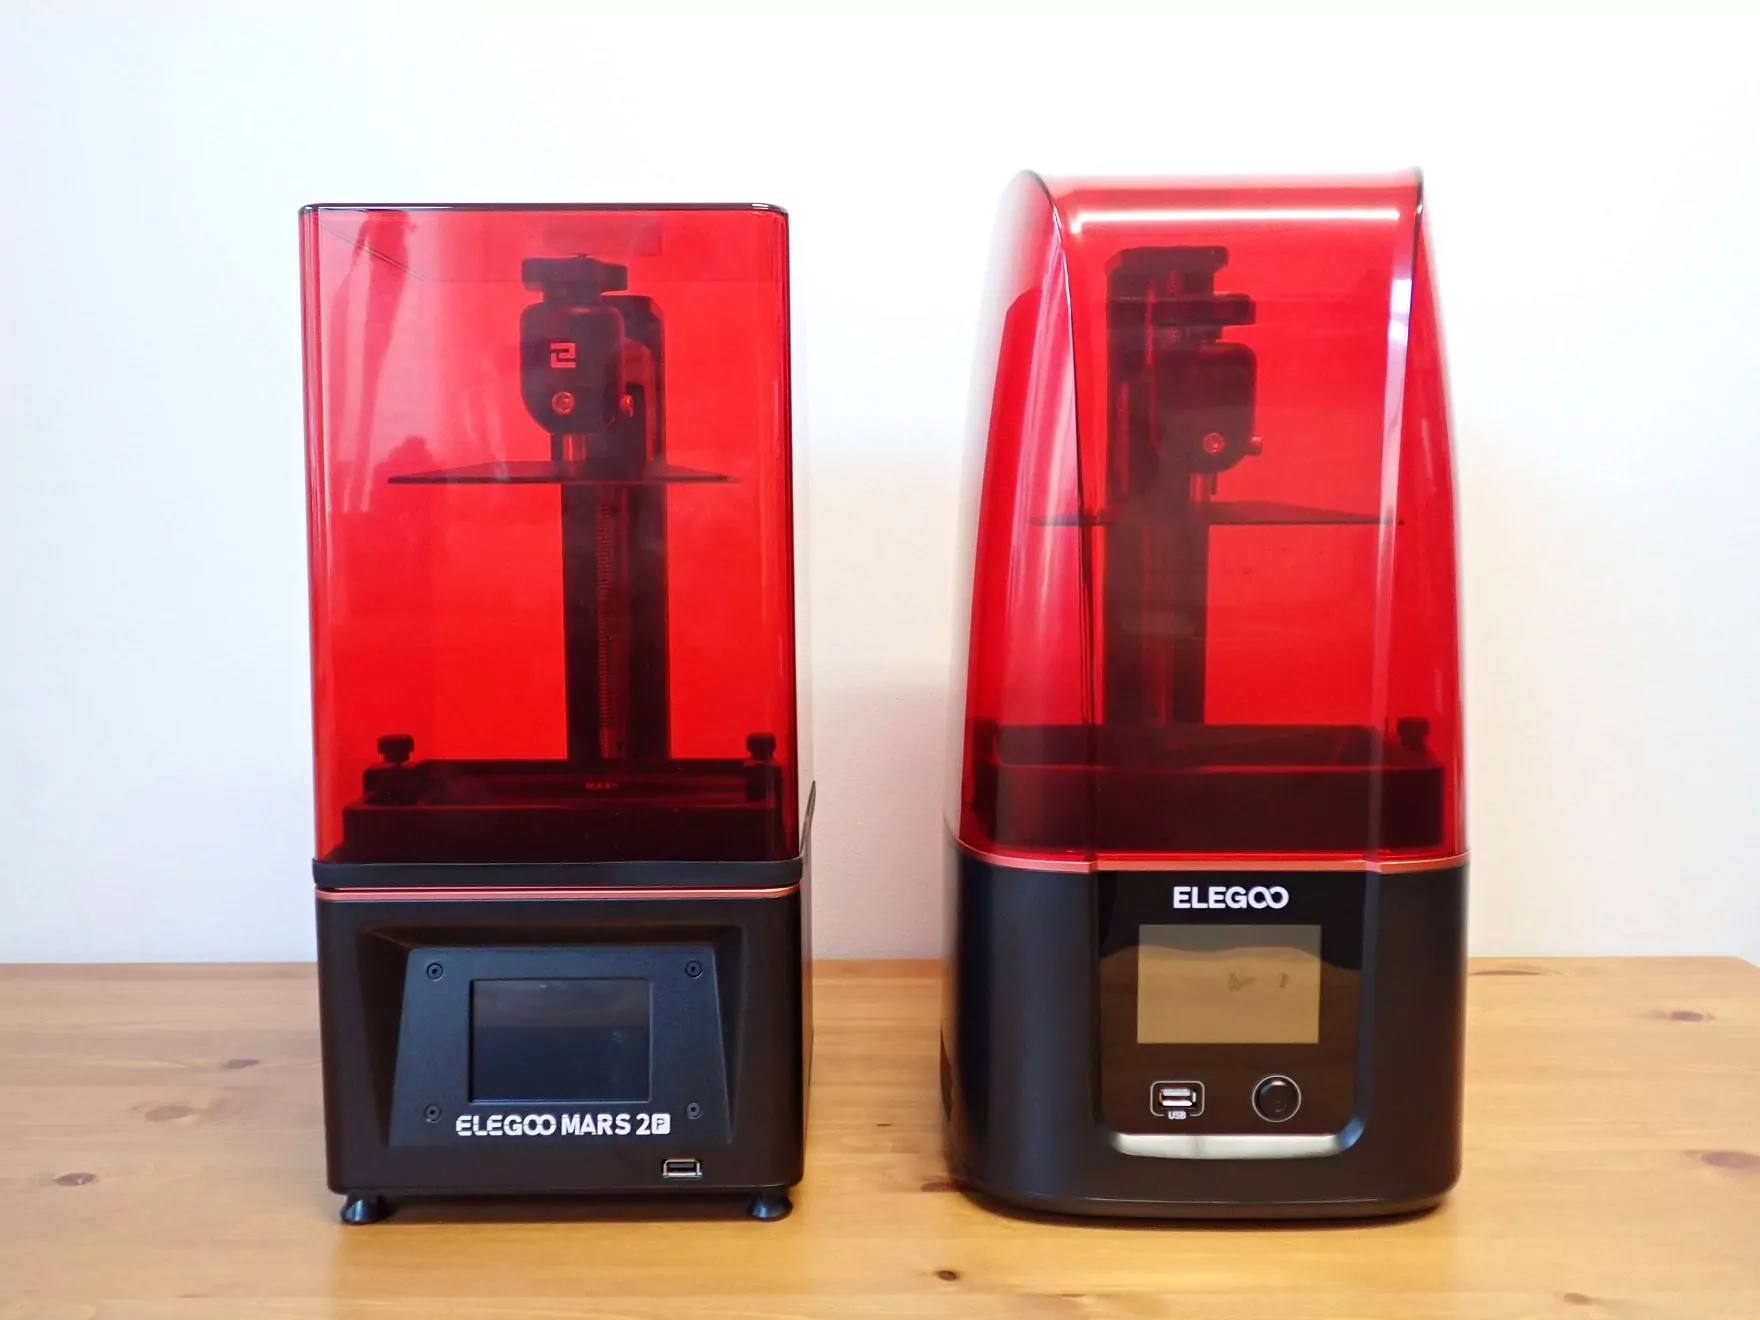
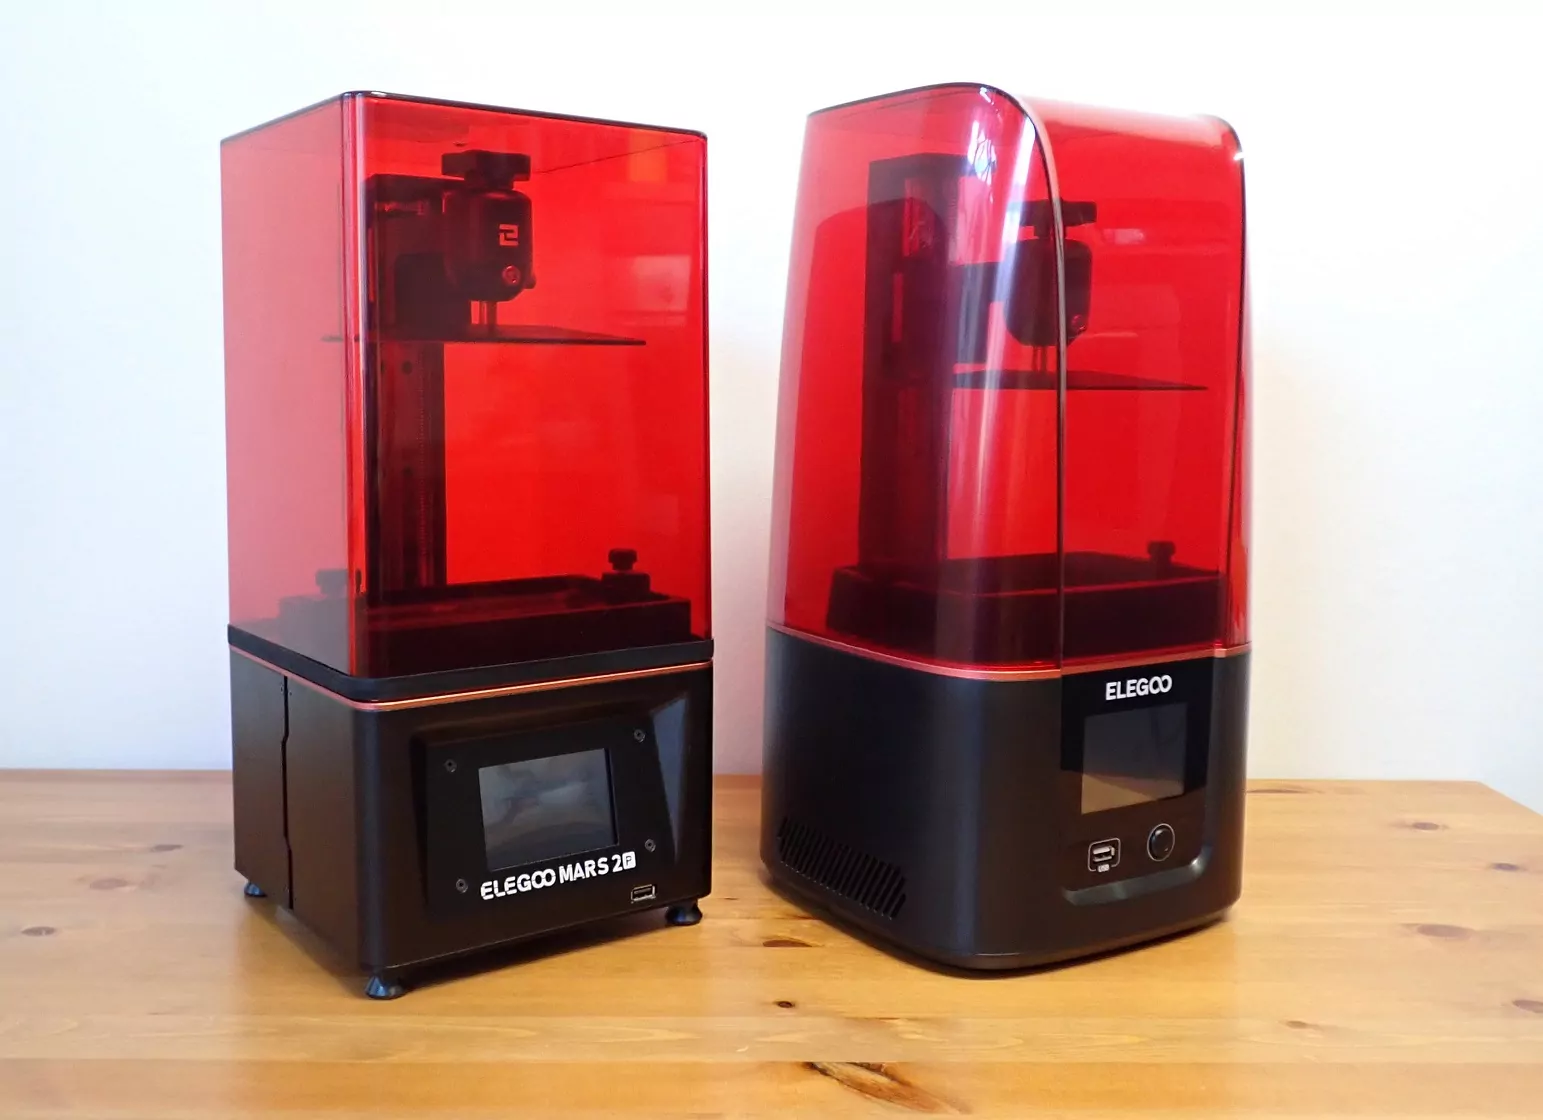
The Elegoo Mars 3 is at first glance the next evolutionary step of the Mars 2 Pro. The most important new features of the Mars 3 are its noticeably larger print volume and the higher XY resolution.
| Model | Mars 2 Pro | Elegoo Mars 3* |
|---|---|---|
| Resolution | 2560 x 1620 | 4098 x 2560 |
| XY pixel size | 0.05 mm (= 50 µm) | 0.035 mm (= 35 µm) |
| Layer thickness | min. 0.01 mm | min. 0.01 mm |
| Print volume | 129 x 80 x 160 mm (= 1.65 l) | 143.36 x 89.6 x 175 mm (= 2.25 l) |
| Size | 200 x 200 x 400 mm | 227 x 227 x 438.5 mm |
Due to the higher resolution of the LCD screen, the Mars 3 has an XY pixel size of only 35 µm. This is a noticeable jump from the 50 µm of the Mars 2 Pro. The high resolution of the LCD screen also allows the print area to be increased by about 25% – without sacrificing much of the XY pixel size.
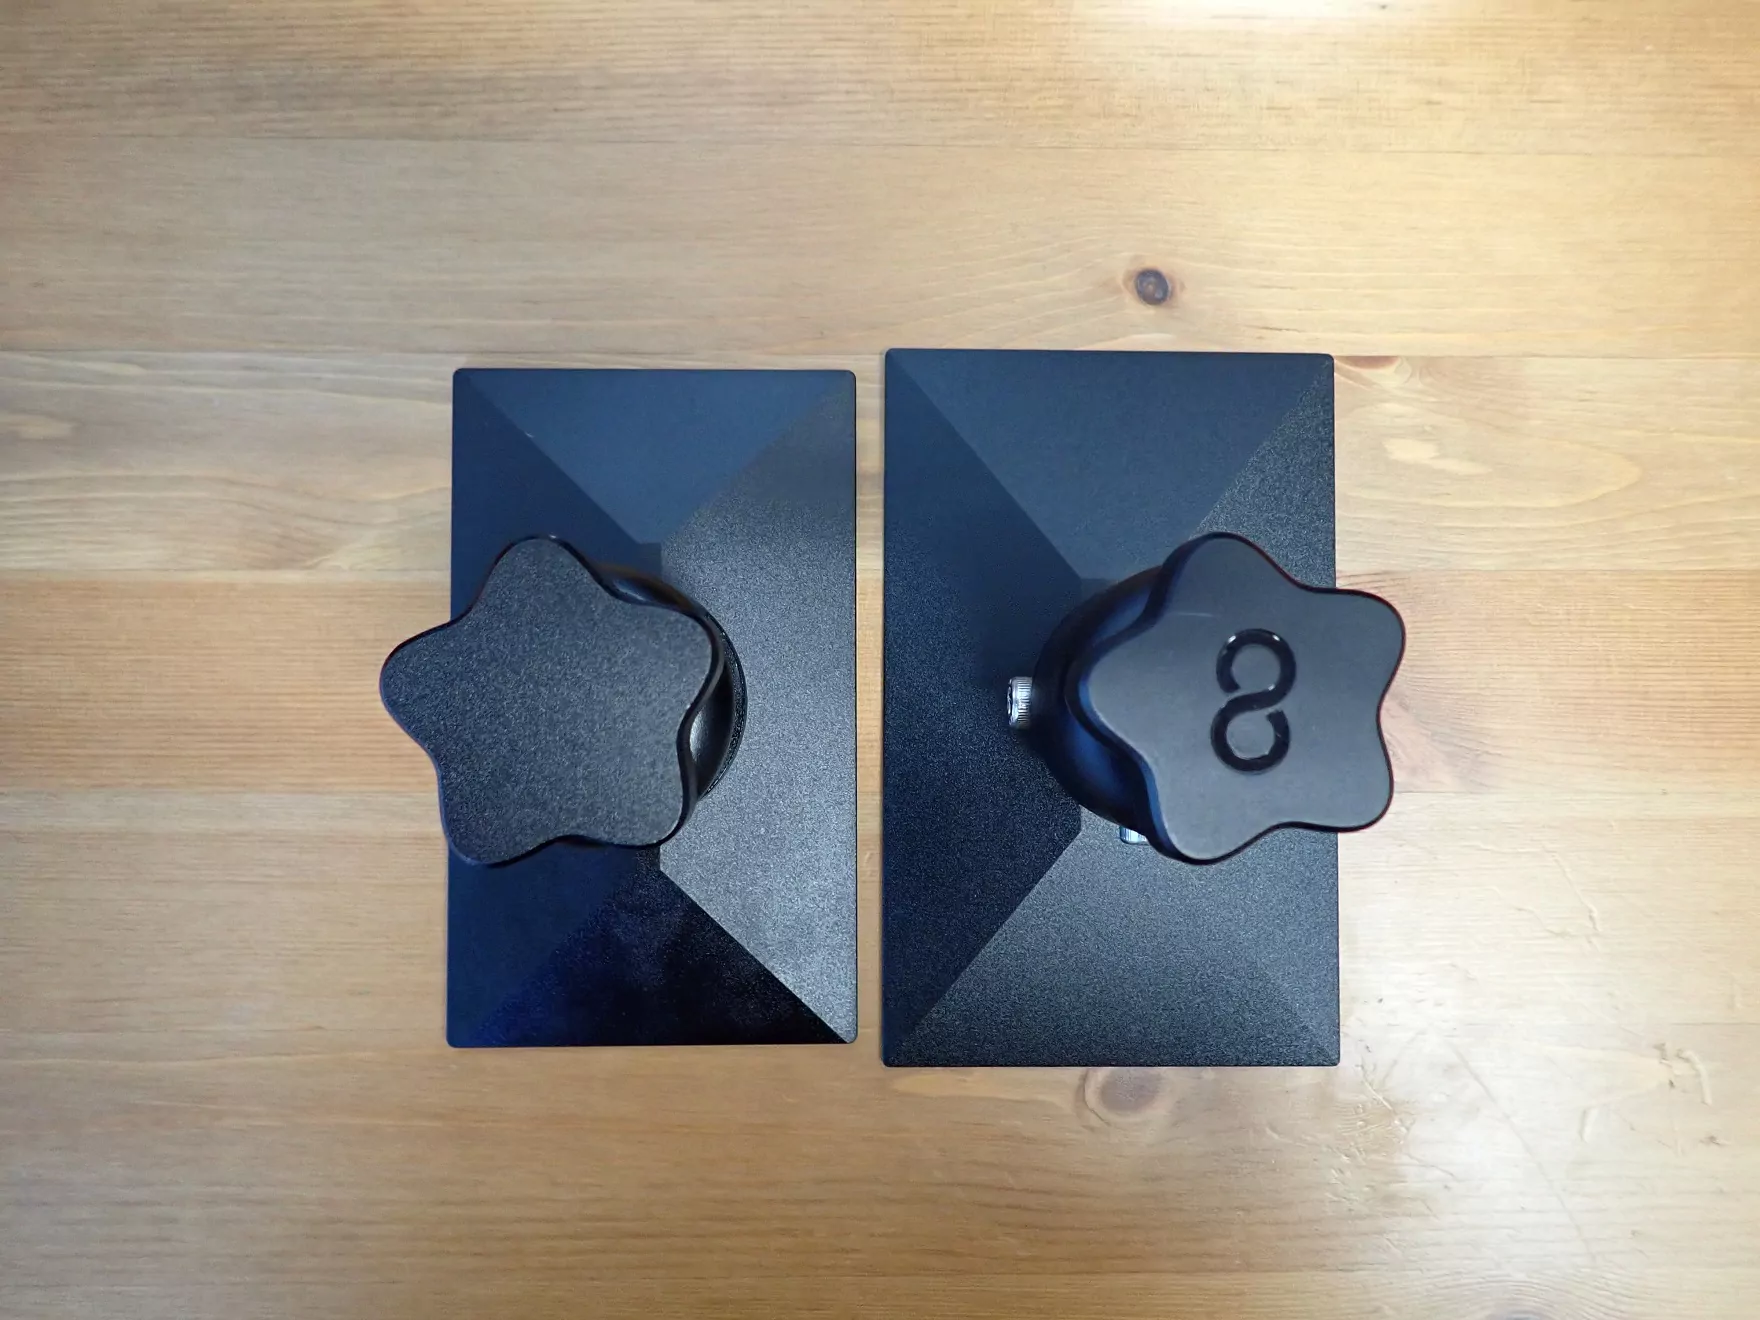
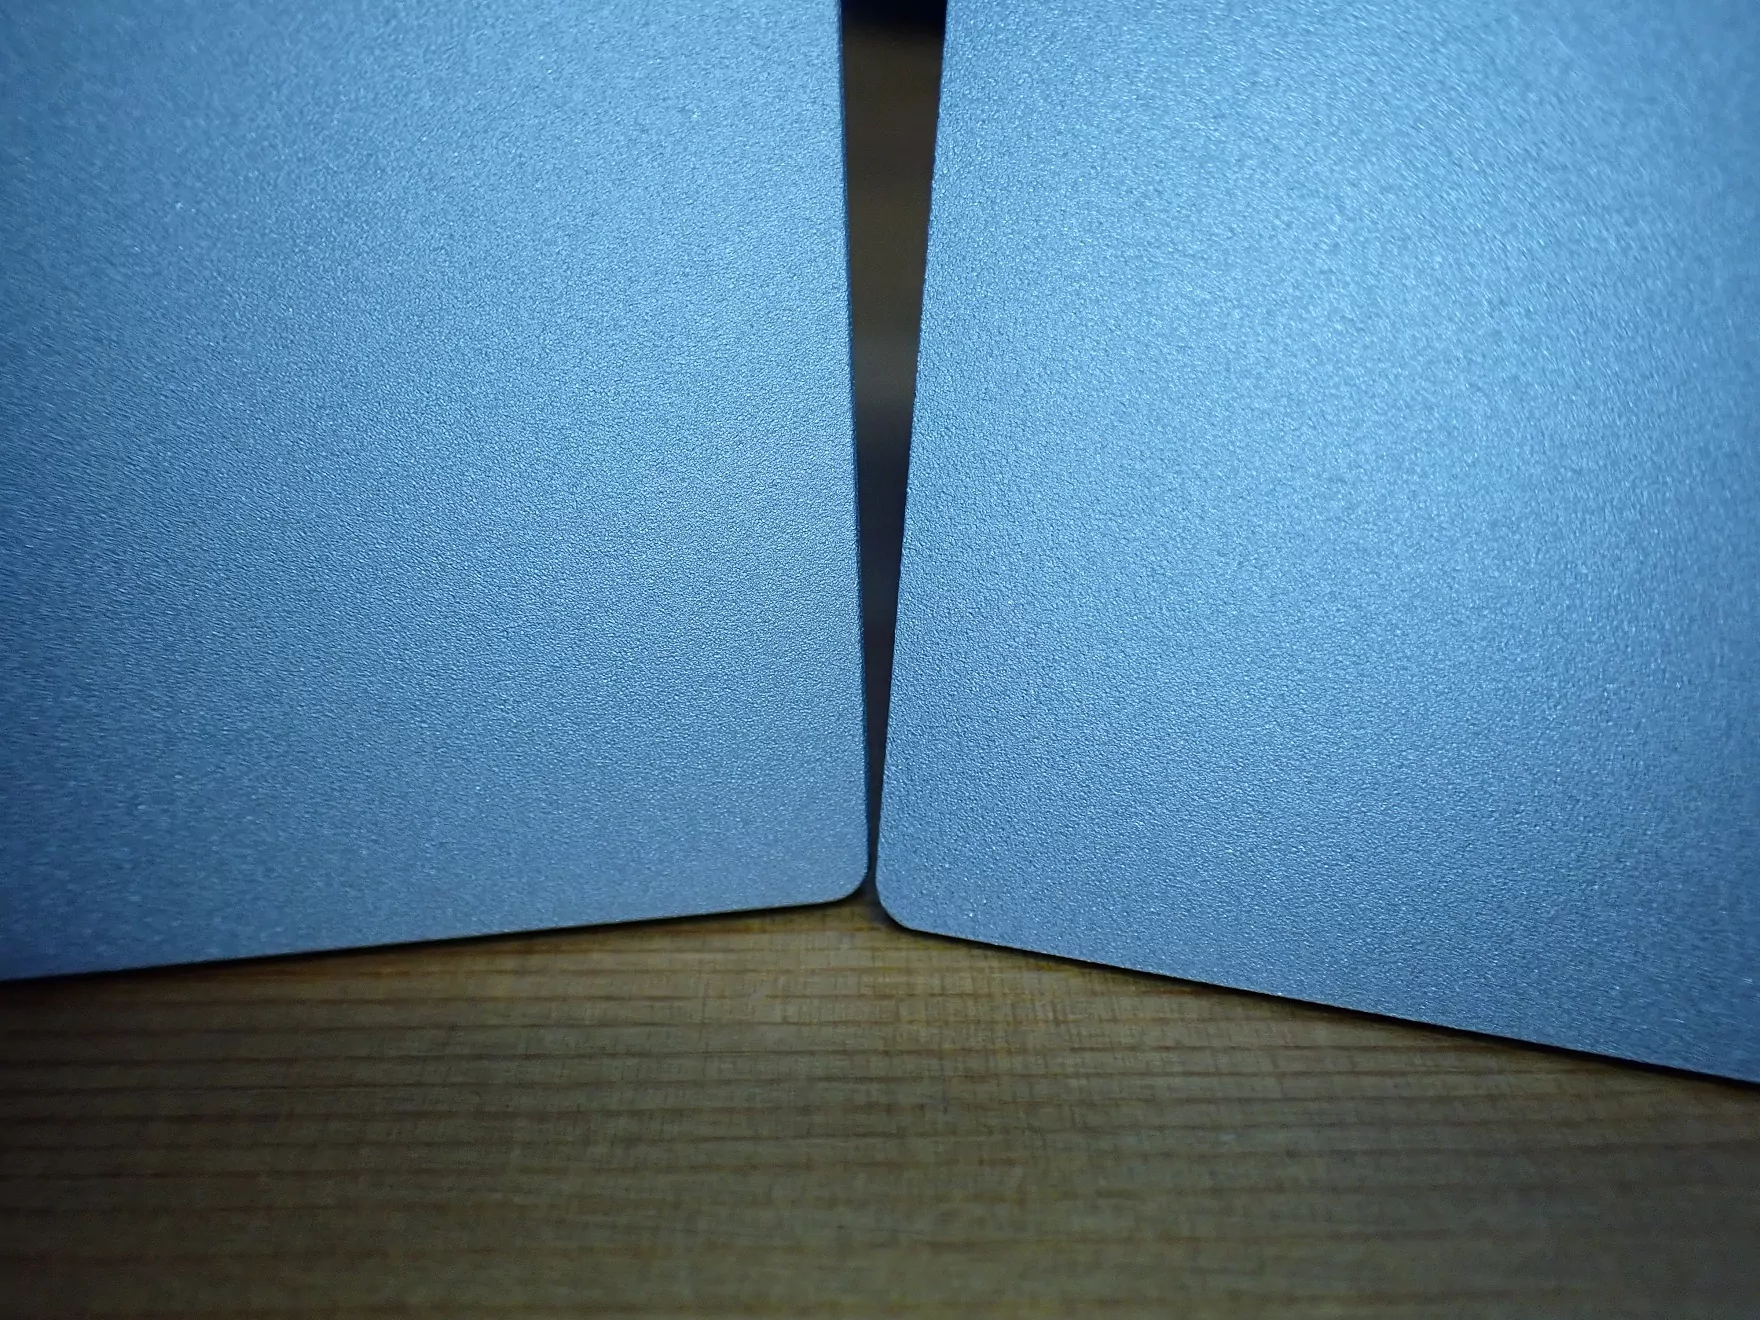
Due to the larger printing plate and the extension of the Z-axis, the printing volume of the Mars 3 of 143.36 x 89.6 x 175 mm (= 2.25 l) is about 36% percent larger than that of the Mars 2 Pro with 129 x 80 x 160 mm (= 1.65 l).
Aside from the better resolution and larger print volume, the Mars 2 Pro still seems to have a few more handy features than the Mars 3, so the release of a “Mars 3 Pro” in the future is very likely.
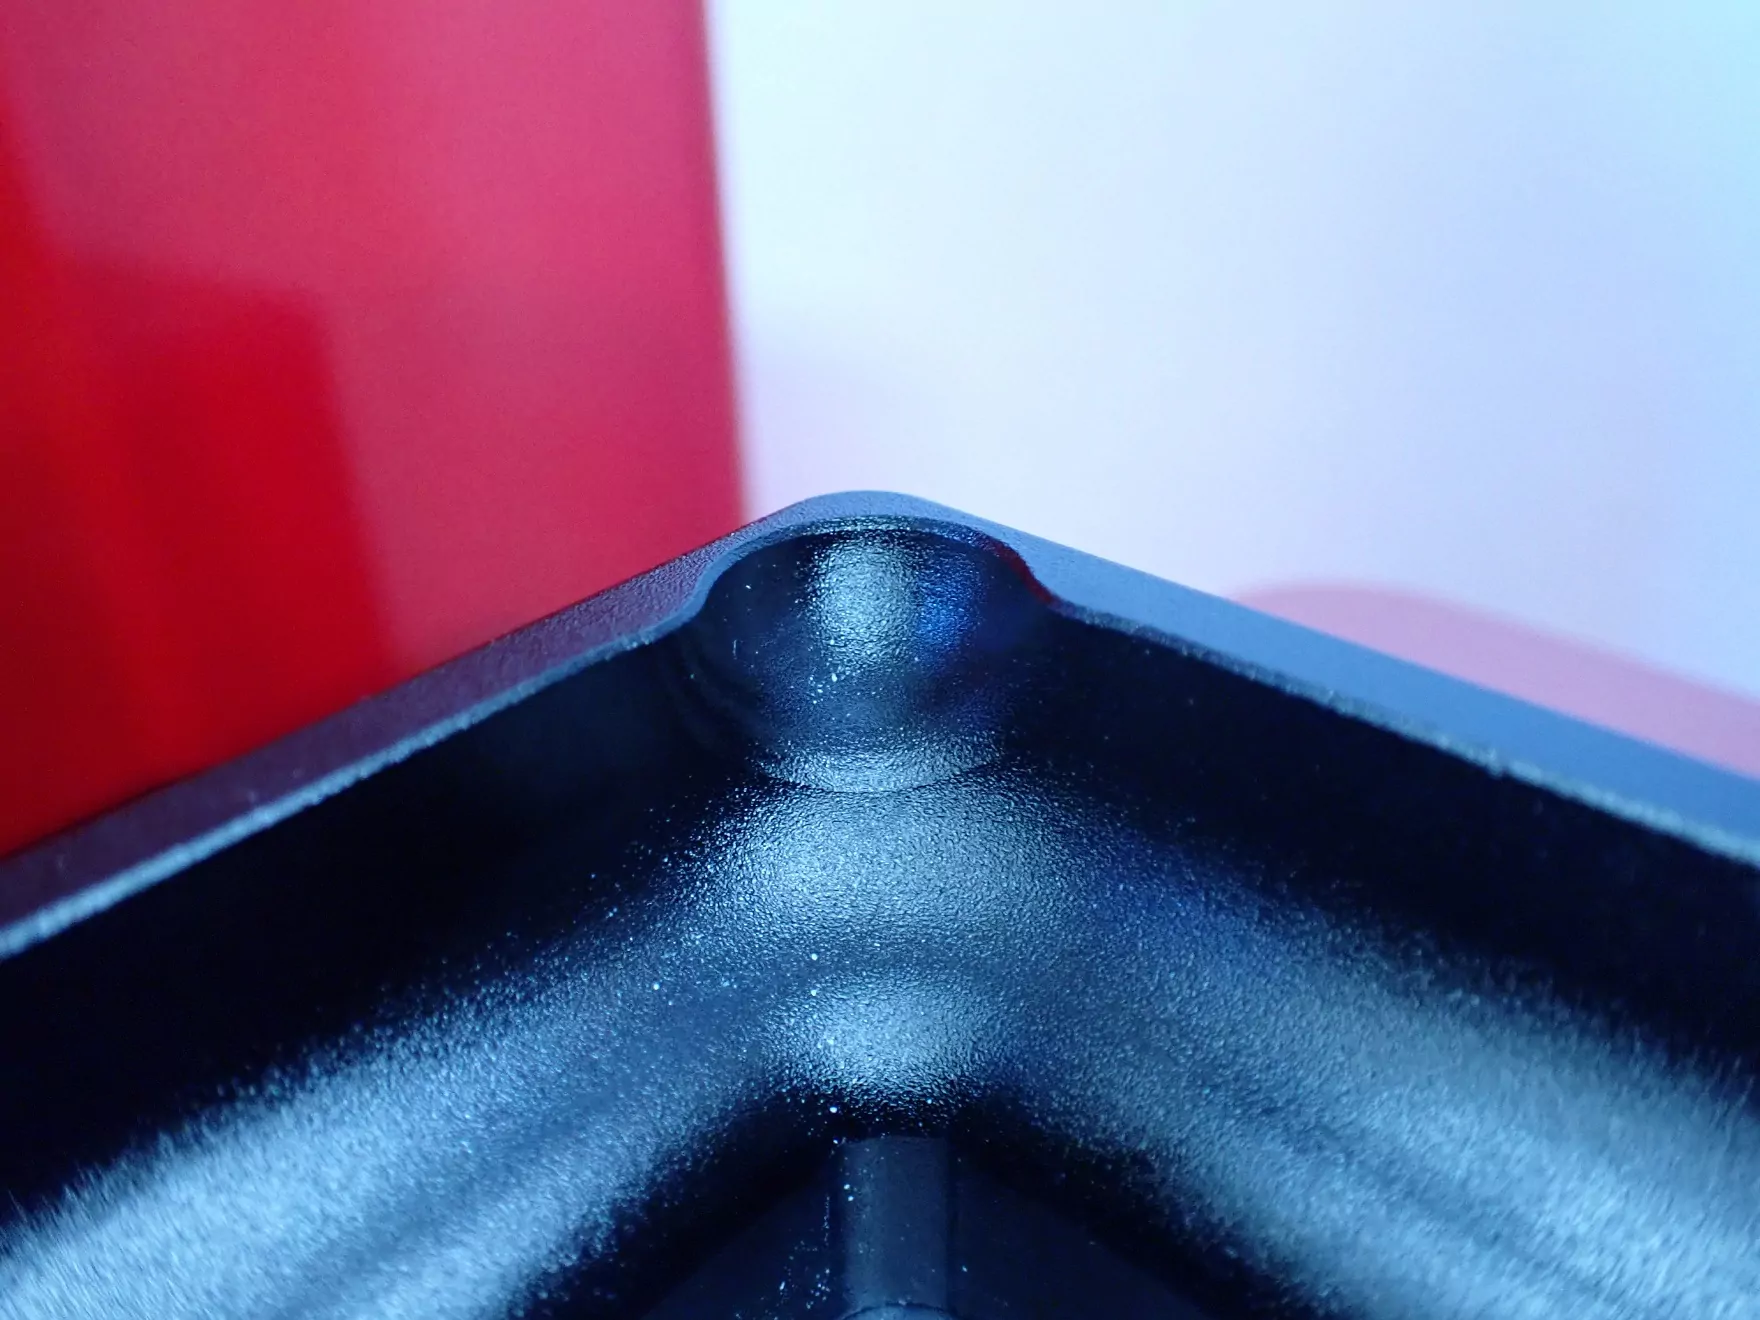
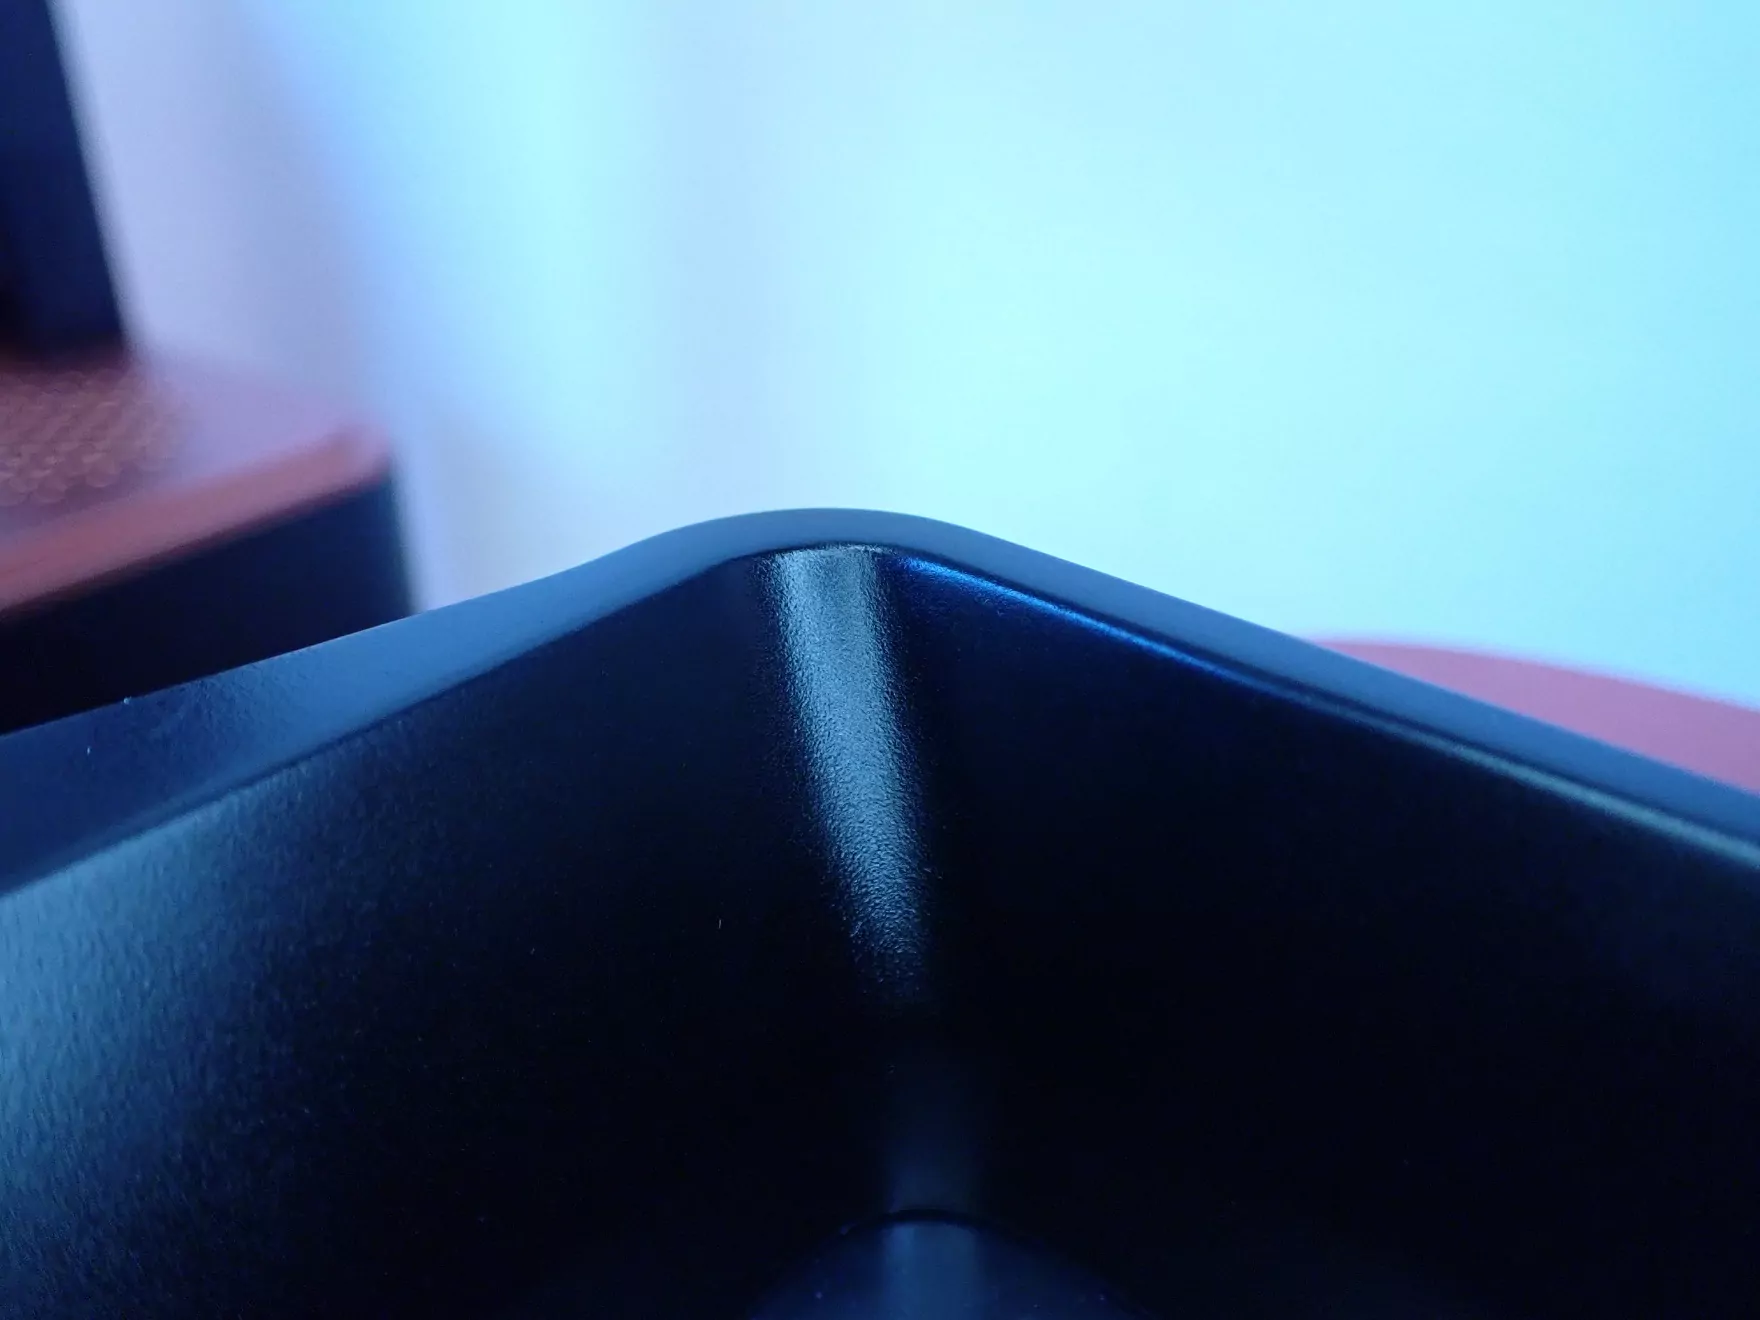
Pouring corner in the resin container: The Mars 2 Pro has a pouring corner on its resin container at one of the four corners. This recess is missing from the Mars 3’s resin container. While this is not exactly the most important feature, it does reduce some of the mess when pouring out excess resin.
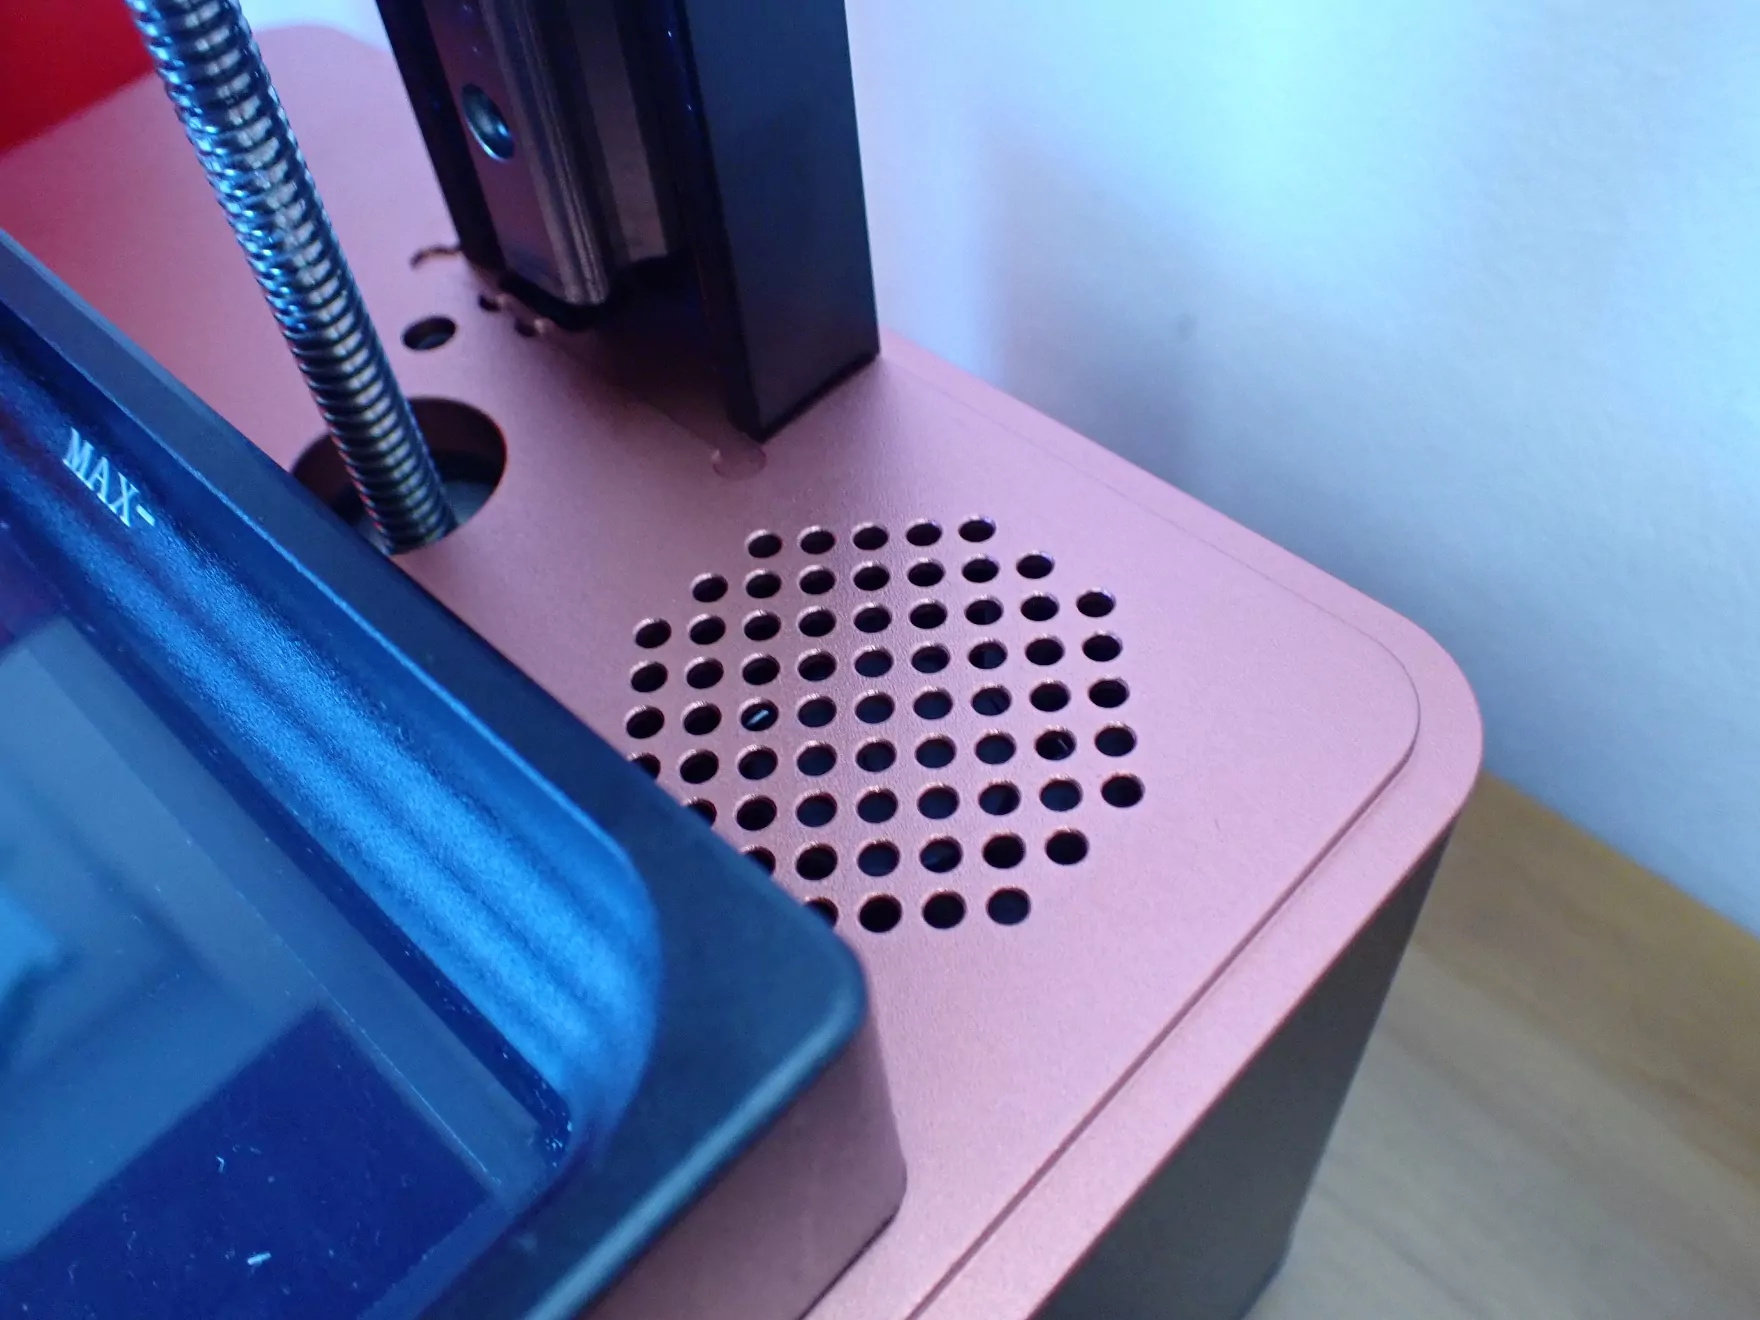
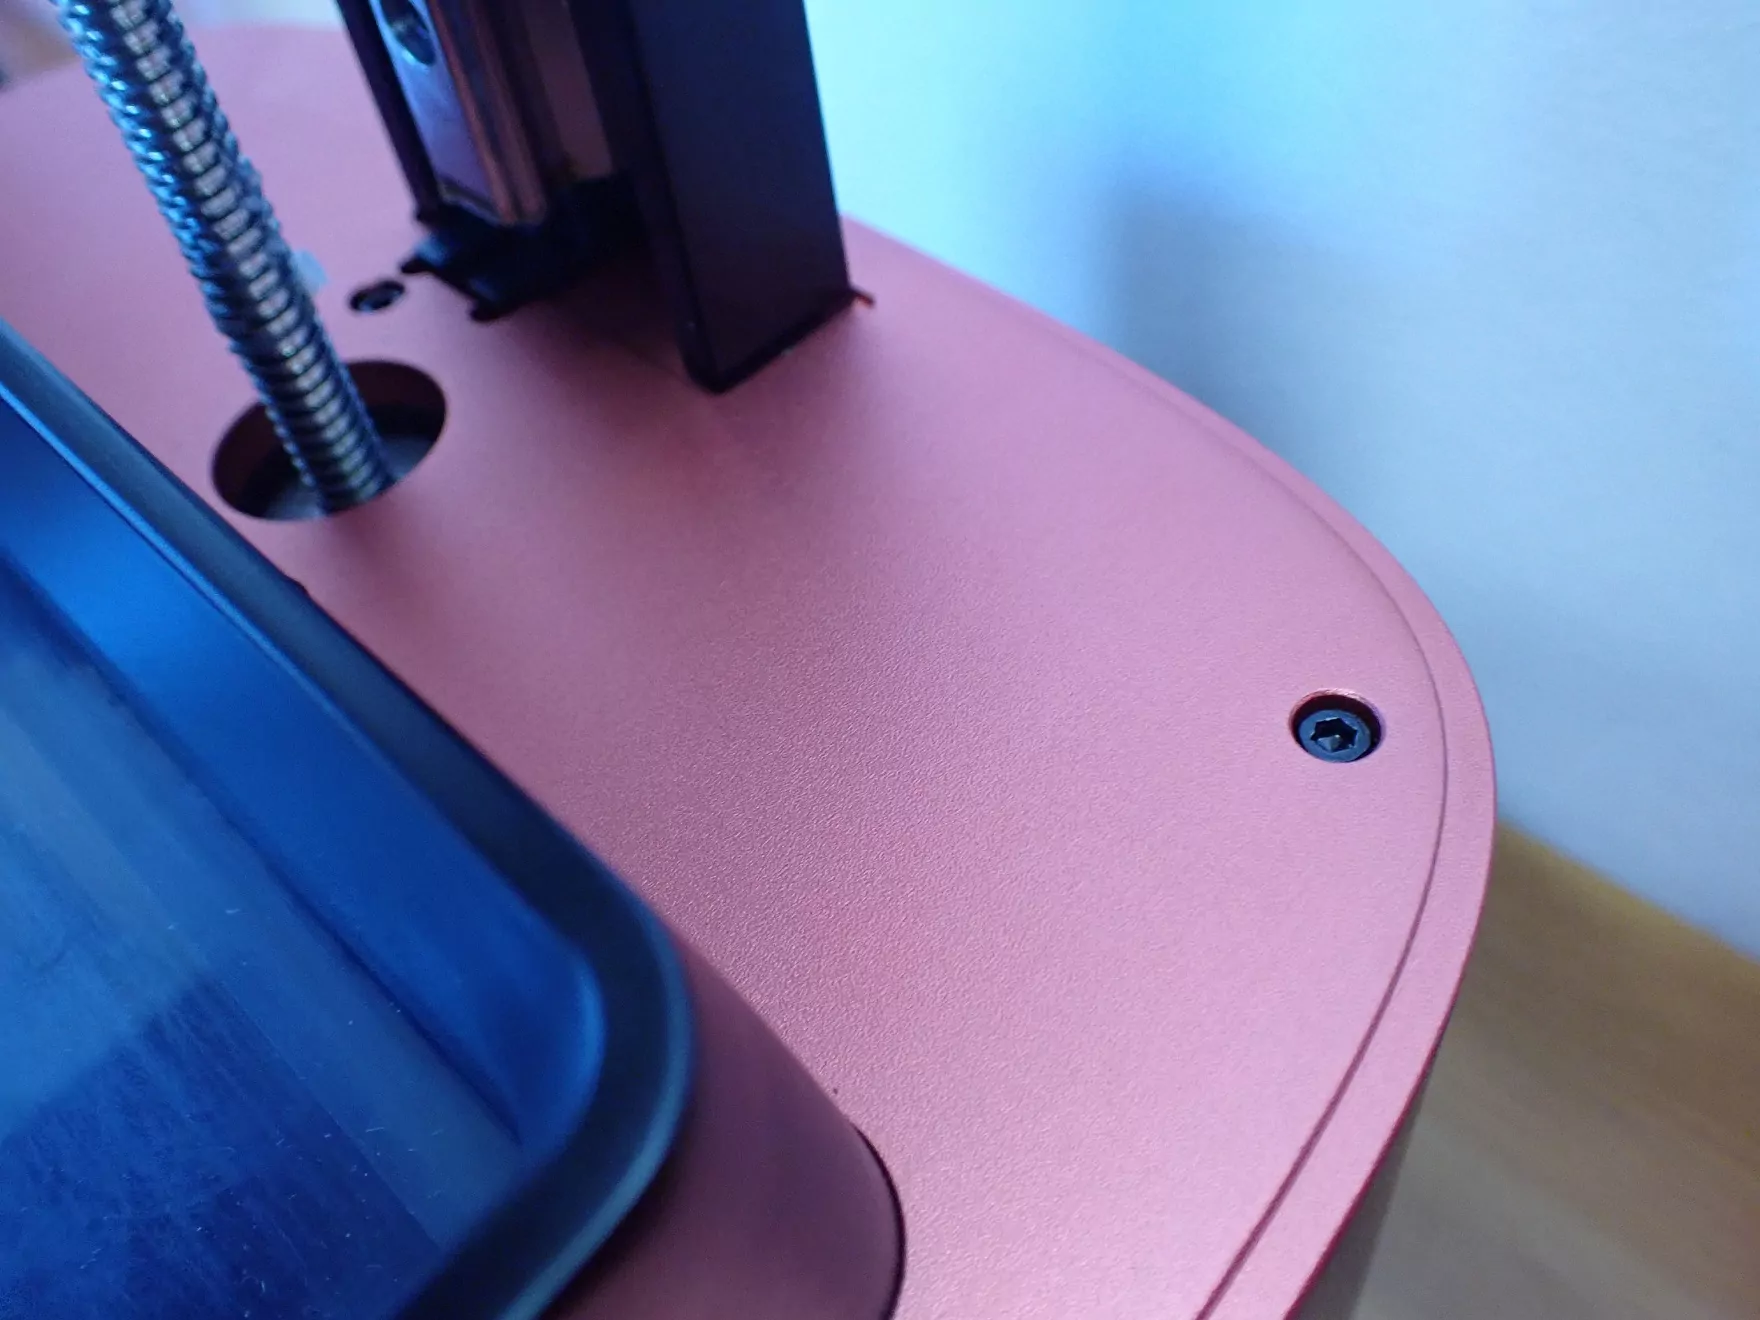
Built-in air filter: Next to the Z-axis of the Mars 2 Pro is the opening for the built-in air filter. Through this opening, the toxic resin fumes are extracted and somewhat mitigated by a built-in filter. The Mars 3 does not have a built-in air filter, but I didn’t notice that with the plant-based Eco Resin from Anycubic*.
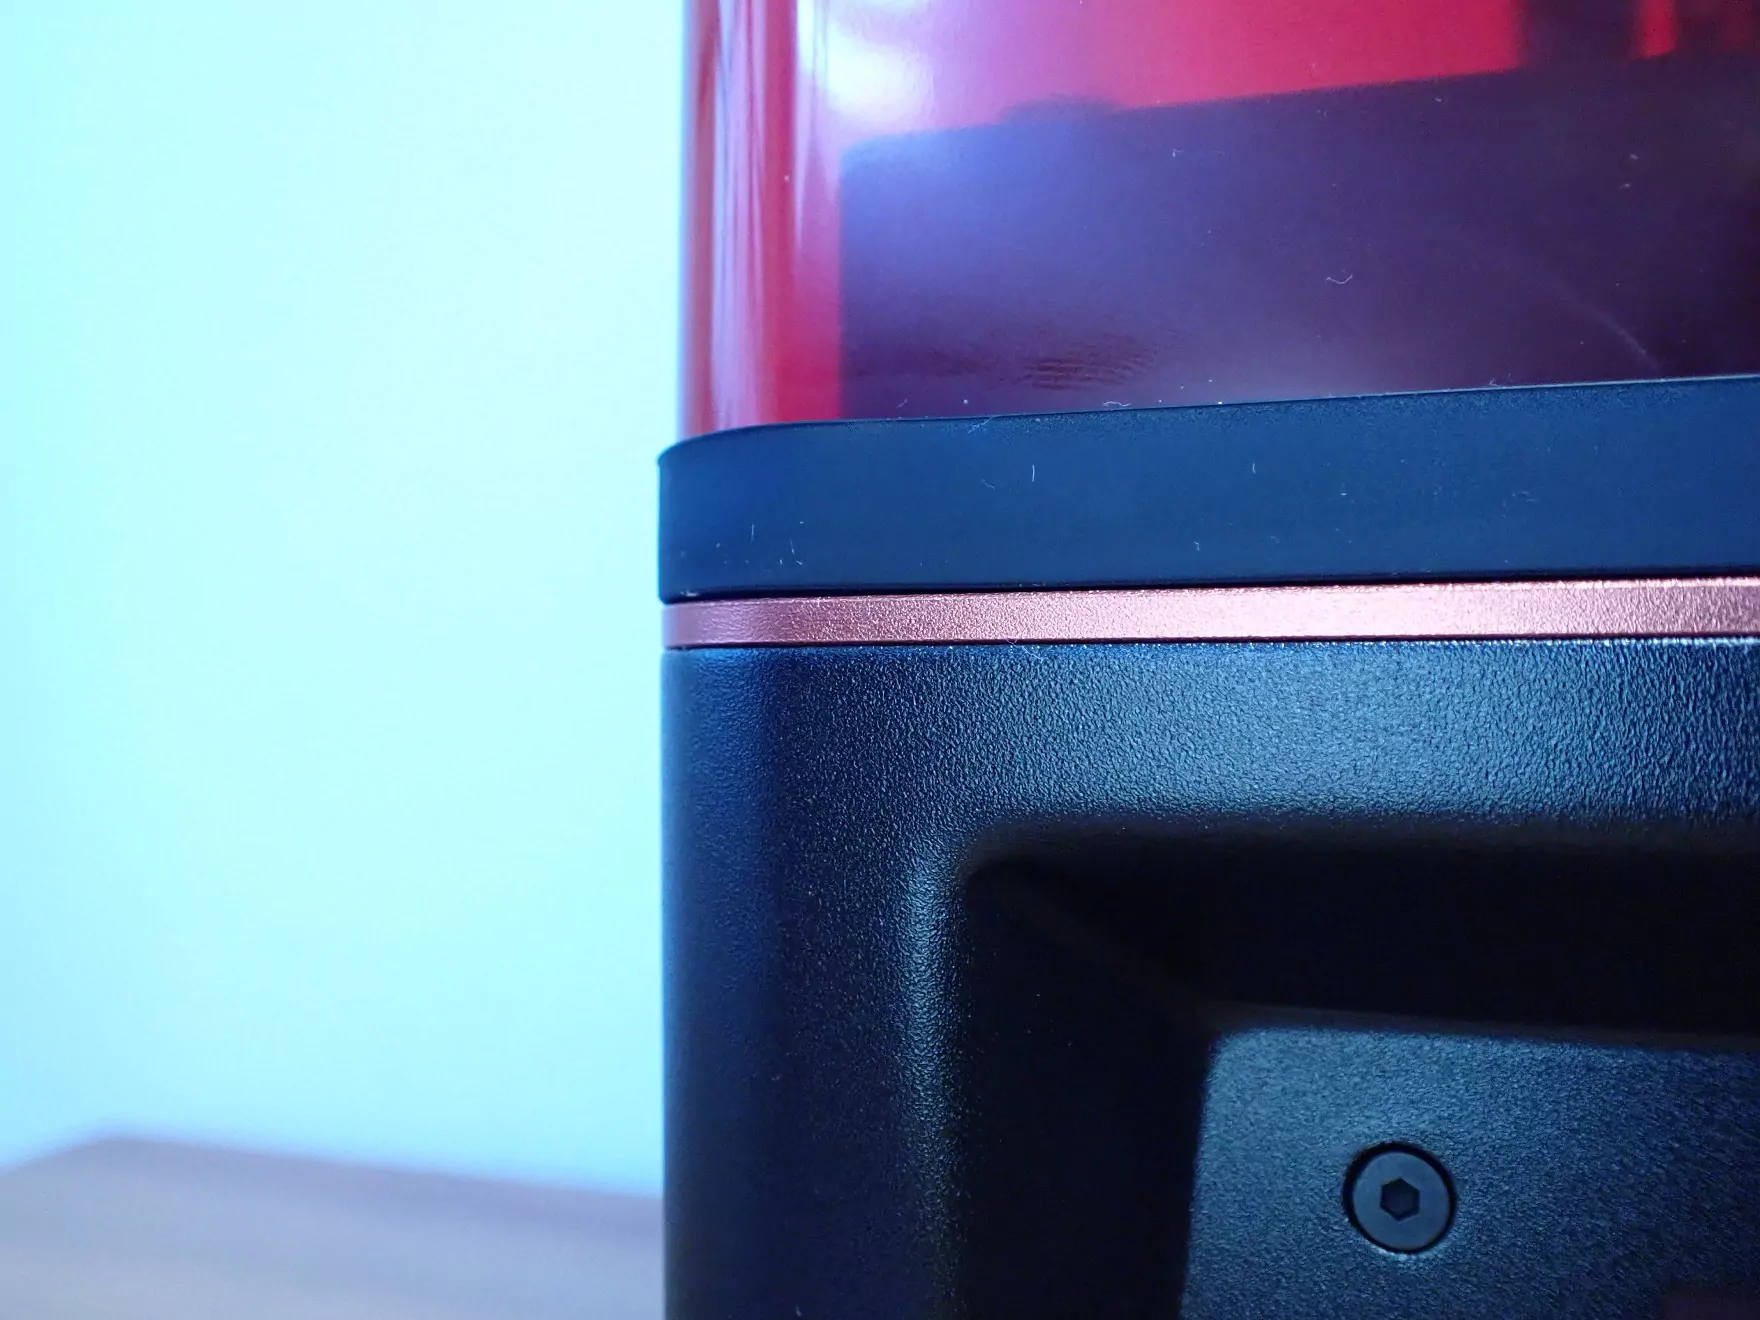
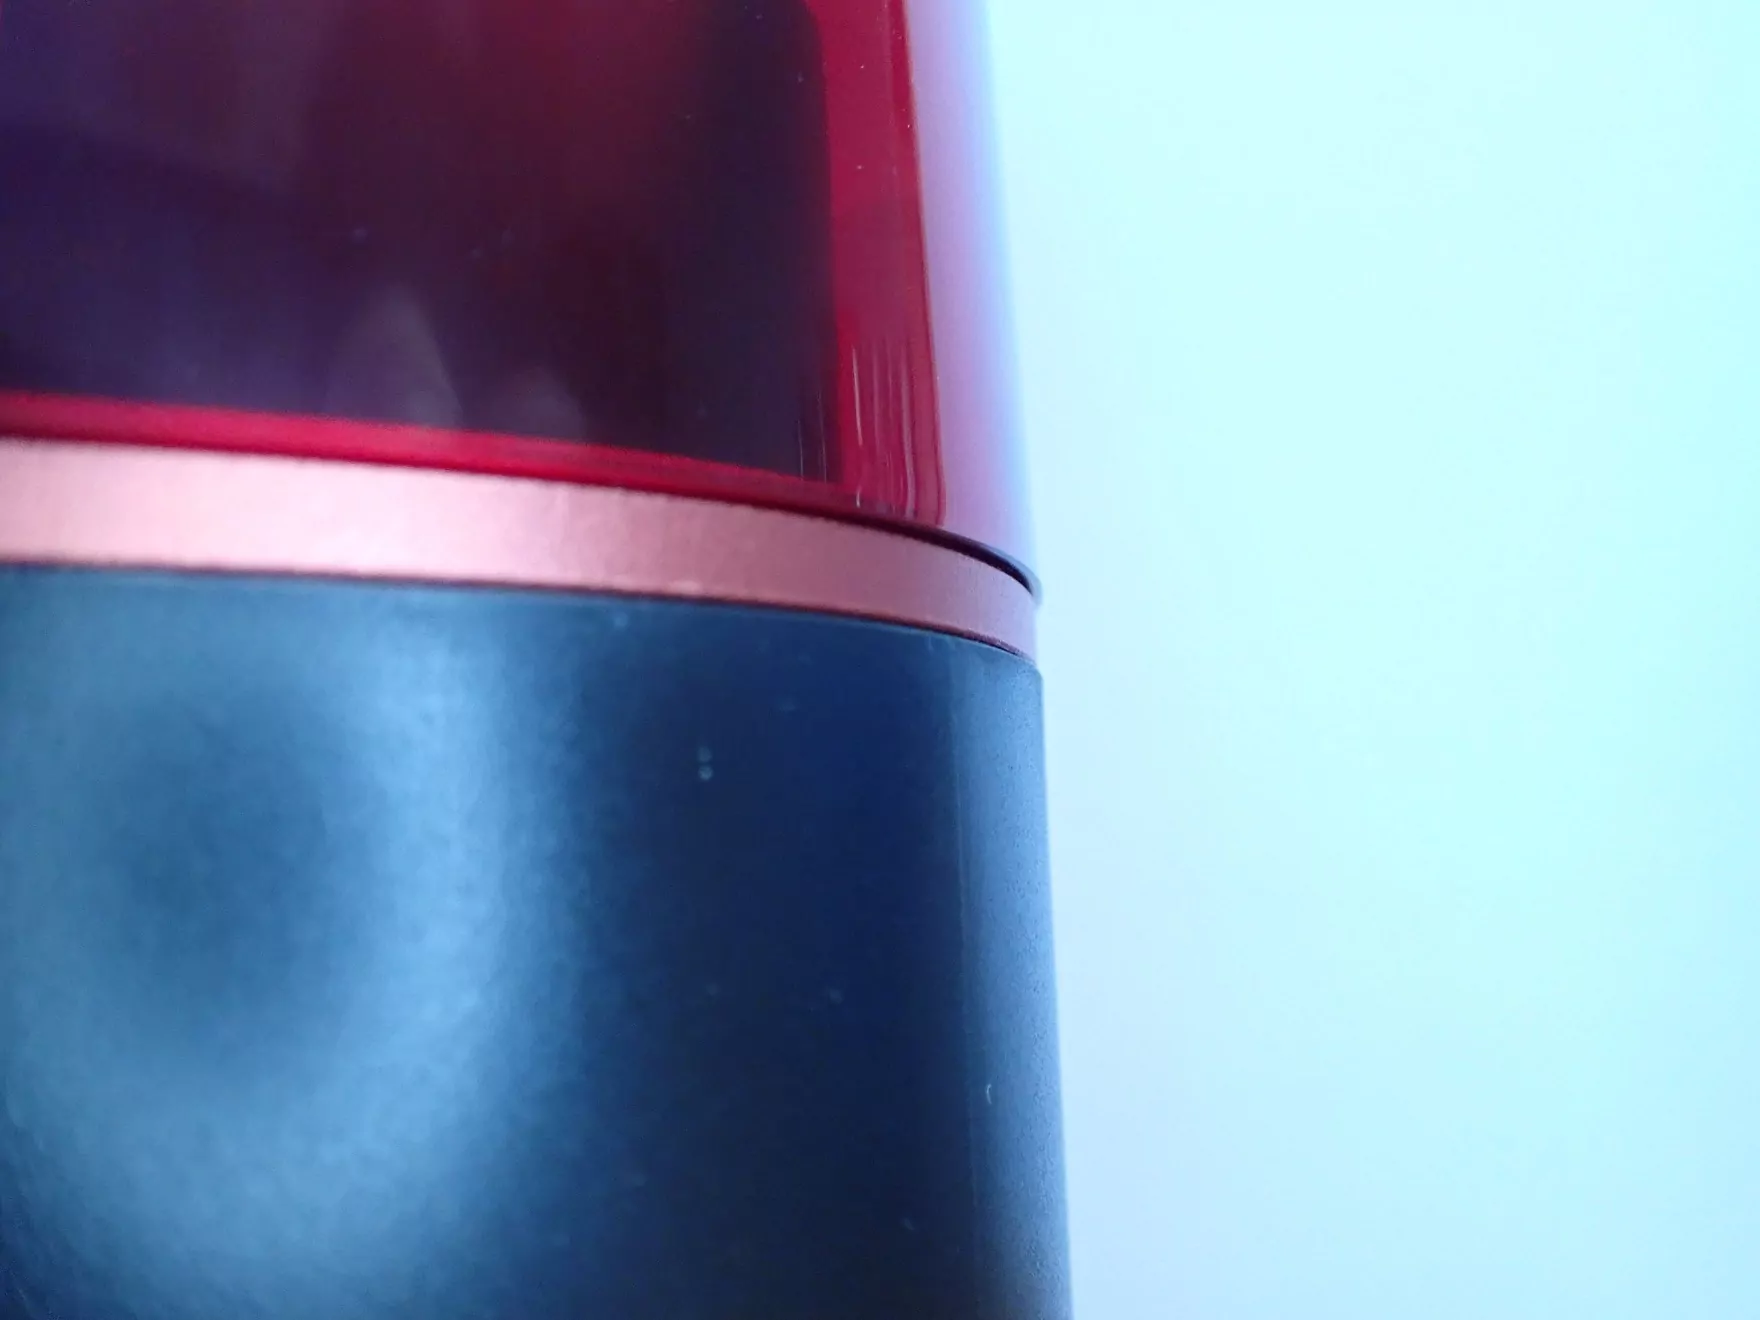
Rubber seal: The protective cover of the Mars 2 Pro has a rubber seal, which encapsulates the inner volume even better from the environment. This allows even fewer gases to escape. The Mars 3 also lacks this feature, which would be handy for more aggressive resins. However, as long as you wear an FFP2 mask when in the same room as the 3D printer, this should not be a problem.
A 3D printer needs to print quickly and accurately – with as much volume as you need at a low price. If accuracy and print volume is more important to you than a few practical features, you should definitely buy the Mars 3!
Is the Mars 3 Worth it?
> Elegoo Mars 3 Review
Due to its high resolution, relatively large print volume and low price, the Elegoo Mars 3* is worthwhile for anyone who wants to print high-quality small and medium-sized objects and does not need a large-format 3D printer such as the Anycubic Photon Mono X 6K.
The Mars 3 is not perfect because it lacks some comfort features (like the missing air filter or a WiFi connection), but convinces with its high resolution and the large print volume at a low price. And that is exactly what is important in a resin 3D printer!
The price-performance ratio is also increased by the 1-year license for ChiTuBox Pro. So if you were already thinking about trying out the Pro version, the bundle of the Pro version and the Mars 3 would be perfect for you.
Overall, I can give the Elegoo Mars 3 a clear buy recommendation!
Check Price at:
Similar 3D Printers
Elegoo Mars 2 Pro
The Mars 2 Pro is the quasi predecessor of the Mars 3 and has a 2K resolution with a pixel size of 50 µm. It has a built-in air filter, a high-quality aluminum housing and fast curing times thanks to its mono LCD screen.
Check Price at:
Phrozen Sonic Mini 4K
The Phrozen Sonic Mini 4K* has a 4K resolution with a pixel size of 35 µm. With a print volume of 135 x 75 x 130 mm, it is much smaller than its competitor, the Elegoo Mars 3, whose print volume is about 70% larger at 143.36 x 89.6 x 175 mm.
Check Price at:
Voxelab Proxima 6.0
The Voxelab Proxima 6.0* has a print volume of 130 x 82 x 155 mm and an XY resolution of 50 µm. Voxelab is a spin-off of FlashForge, which means that their products are produced in the usual high quality.
Check Price at:
Nova3D Bene4 Mono
The Nova3D Bene4 Mono* has an XY pixel size of 50 µm and a print volume of 130 x 80 x 150 mm. It has many convenience features such as wireless connectivity, remote control and a foldable protective cover.
Check Price at:
Disclosure: This website is the property of Martin Lütkemeyer and is operated by Martin Lütkemeyer. Martin Lütkemeyer is a member of the Amazon Services LLC and other Affiliate Programs. These are affiliate advertising programs designed to enable websites to earn advertising revenue through advertising and linking to Amazon.com and others. Links marked with * are affiliate links.


