
- Wet Filament: Prevention, Symptoms & Drying - July 18, 2024
- Sovol SV08 – Best PrusaSlicer Settings & Profile - June 26, 2024
- Sovol SV08 – Best Orca Slicer Settings & Profile - June 26, 2024
Disclosure: Links marked with * are Affiliate Links. I earn from qualifying purchases if you decide to make a purchase through these links – at no additional cost for you!
The Creality CR-10 SE* promises impressive speed and versatility. As a seasoned user of Creality’s range, I was eager to see how this model stacks up against its predecessors and competitors.
This in-depth practical review aims to dissect the features, performance, and overall value of the CR-10 SE, providing insights from my extensive hands-on experience with the machine.
Who should buy the Creality CR-10 SE?
The Creality CR-10 SE is an ideal choice for a wide range of users. Its high speed and precision make it perfect for hobbyists who are keen on experimenting with different projects and need a reliable machine that can keep up with their creativity. The printer’s robust filament compatibility also makes it a great fit for professionals who require versatility in their work, whether it be for prototyping or artistic creations.

The Creality CR-10 SE is an entry-level 3D printer of the “premium class”. It has all the features that make 3D printing easier and prints with amazing speed and quality.
Build Volume: 220 × 220 × 265 mm
Speed: max. 600 mm/s, 150-250 standard
Extruder: “Sprite” Direct Drive
Print Bed: PEI spring steel
Leveling: Fully automatic
Nozzle Temp.: 300 °C
Bed Temp.: 110 °C
Connectivity: USB drive, WiFi
Pros:
✓ Very Fast due to input shaping
✓ Easy to use
✓ Nice print quality
Cons:
× No automatic flow calibration
Table of Contents:
- 1 My Verdict – What Sets the CR-10 SE Apart?
- 2 Unboxing & Initial Impressions
- 3 Setup
- 4 Technical Specifications
- 5 Print Bed & Leveling
- 6 Print Volume & Frame Stability
- 7 Extruder
- 8 Hot End, Nozzle & Filament Compatibility
- 9 Input Shaping
- 10 Touchscreen & Menu
- 11 Slicer
- 12 Print Quality
- 13 Print Speed
- 14 Creality CR-10 SE vs. Ender-3 V3 SE
- 15 Conclusion
My Verdict – What Sets the CR-10 SE Apart?
After spending significant time with the Creality CR-10 SE and testing it hands-on, I think this will be another Bestseller from Creality!
Firstly, its user-friendliness is a standout feature. The intuitive setup and operation make it a fantastic option for beginners in the 3D printing world. You don’t need to be a tech wizard to start printing impressive models right away.
The speed of this printer is really impressive. It manages to maintain high speeds without compromising on print quality, which is a rare feat. Ringing or ghosting was no issue under 300 mm/s, which really surprised me.
The linear rails play a crucial role in this. They provide excellent stability at high speeds. However, it’s important to note that these rails require regular maintenance – cleaning and lubrication – to keep the printer functioning smoothly. This is a small trade-off for the level of performance they offer.
Another feature I found particularly useful is the LED light bar. It’s a simple addition, but it significantly enhances the user experience, especially when monitoring prints in low-light conditions.
Unboxing & Initial Impressions
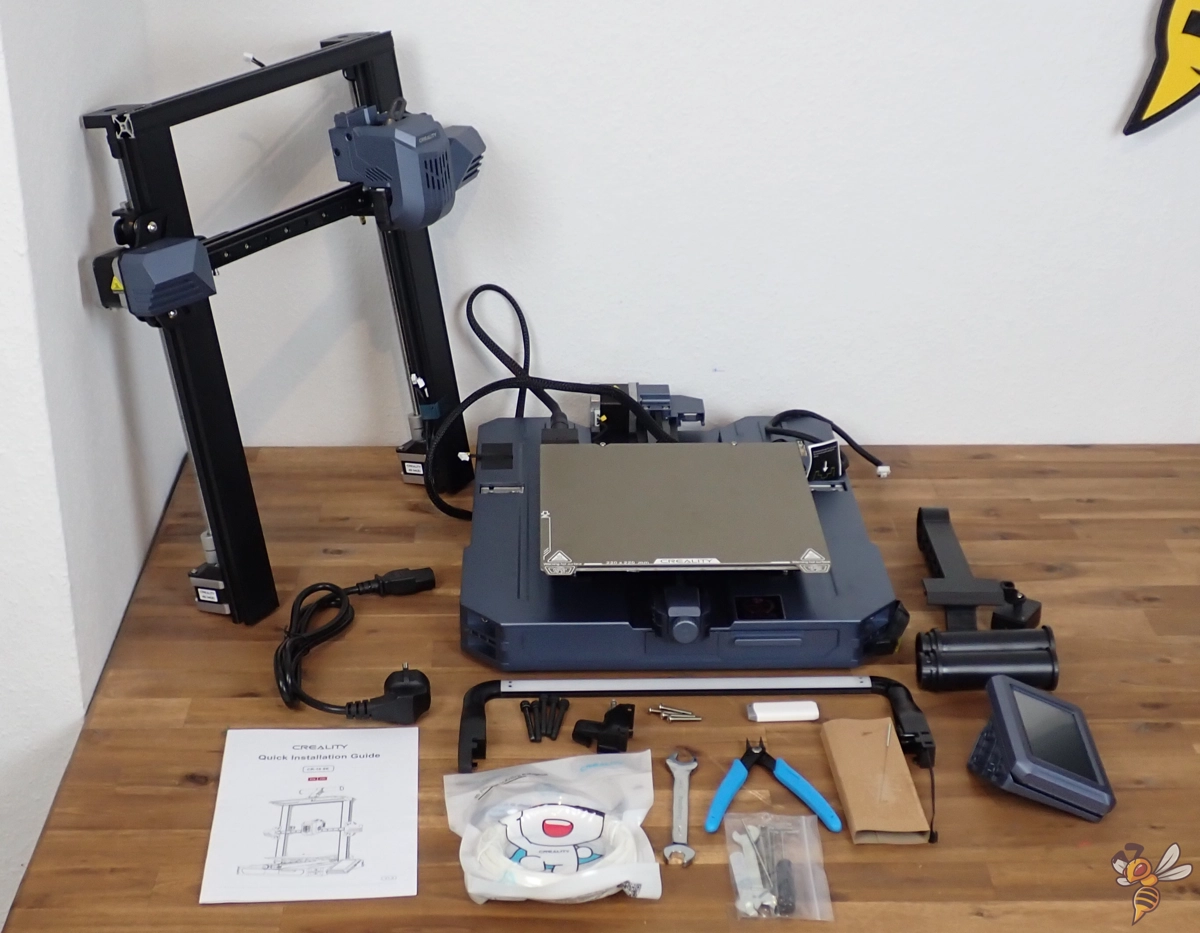
Upon unboxing the Creality CR-10 SE, you’ll see its partially pre-assembled modules, a familiar sight in many Creality printers I’ve tested.
One of the first elements that caught my attention was the LED light bar. This isn’t a standard feature on many models, so its inclusion here is a notable enhancement. It adds both aesthetic value and practicality, especially in terms of print monitoring in poor lighting conditions.
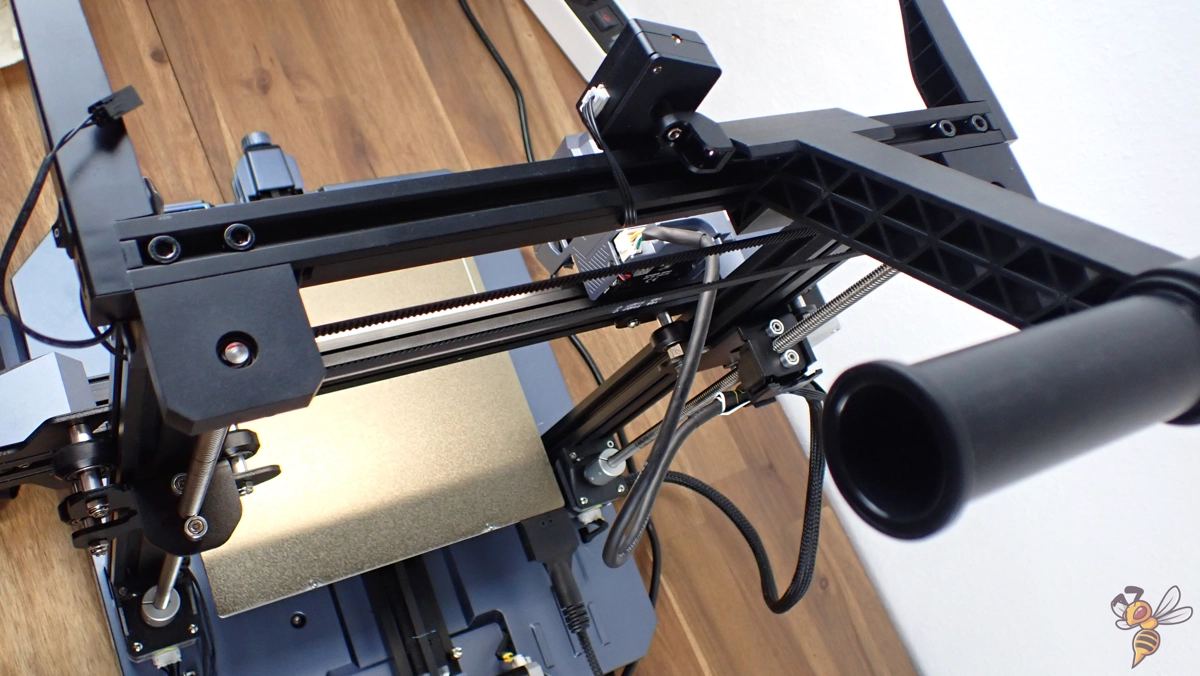
Another aspect that stood out was the use of high-quality linear rails on the X and Y axes. This immediately signaled a commitment to precision and stability in the printer’s design. Knowing that linear rails can significantly improve the prints surface quality and machine stability, especially at high speeds, it was reassuring to see them integrated into this model.
This is the scope of delivery of the Creality CR-10 SE:
- The partially assembled 3D printer itself.
- A set of tools and screws necessary for assembly.
- A pair of side cutters, specifically for trimming filament.
- A bit of PLA filament, sufficient for a test print.
- Two different types of nozzle cleaners, catering to maintenance needs.
- A USB stick that contains a digital manual, preloaded models, and the slicing software required for 3D printing.
Setup
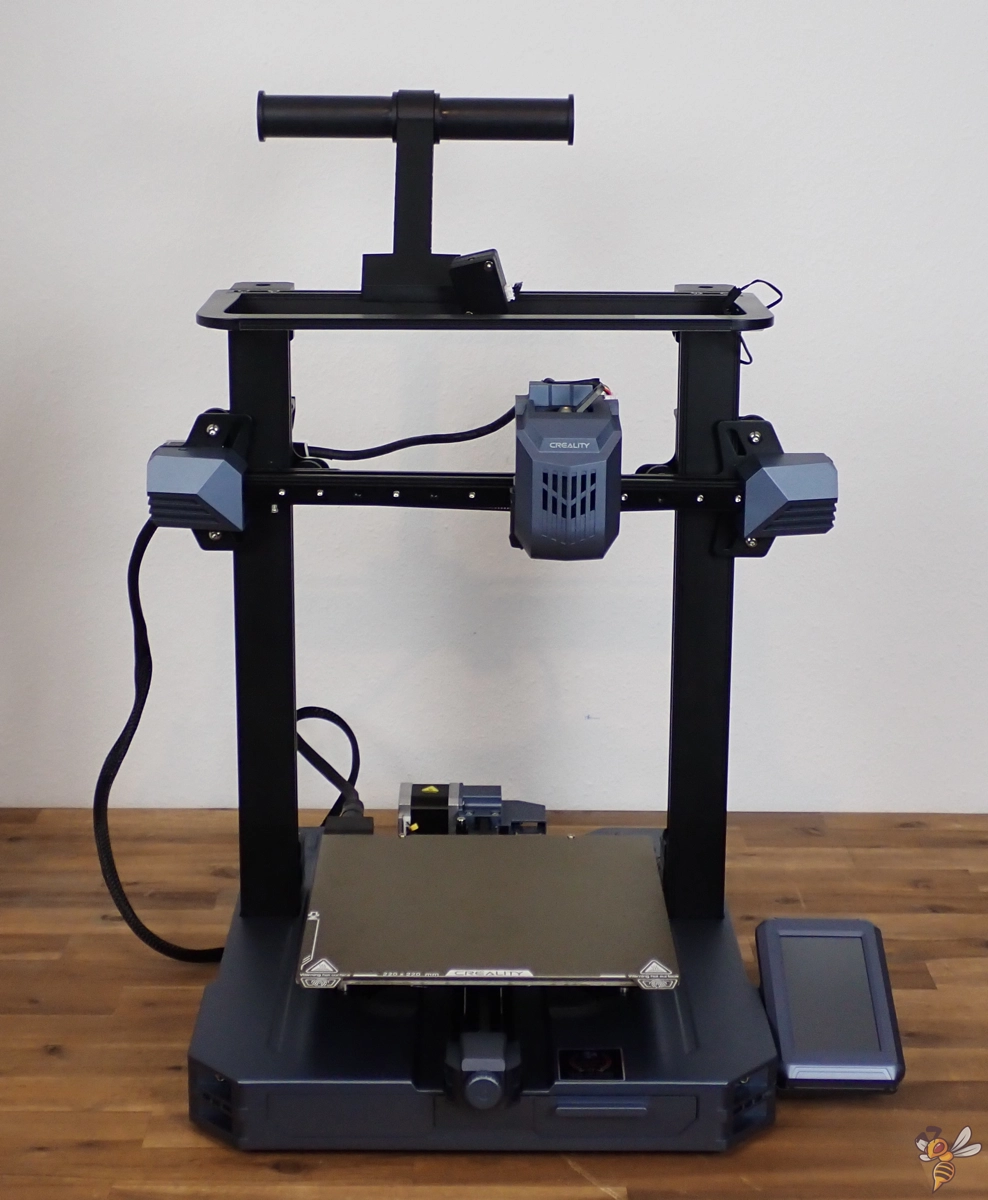
Setting up the Creality CR-10 SE is a straightforward and efficient process, thanks in part to its partial pre-assembly. Right out of the box, the printer is almost ready to go. The complete assembly, from unboxing to preparing for the first print, can be accomplished in about fifteen minutes.
These are the steps involved in the setup:
- Mounting the LED bar.
- Connecting the base to the frame.
- Mount the Touchscreen to the frame on the right side of the 3D printer.
- Attach the filament holder on top of the frame.
- Plug in the cables for the stepper motors, sensors and the print head.
After this user-friendly setup, the 3D printer is ready to go.
Technical Specifications
- Print volume: 220 × 220 × 265 mm
- Extruder type: “Sprite” direct drive extruder with dual gears
- Print bed: PEI spring steel plate
- Max. print temperature: 300 °C
- Max. print bed temperature: 110 °C
- Speed: max. 600 mm/s, 150-250 standard
- Filaments: PLA, PETG, TPU, ABS and more
- Display: 4.3-inch touchscreen
- Connectivity: USB drive, WiFi
- Slicer: Creality Print, Cura, Simplify3D, PrusaSlicer
Print Bed & Leveling
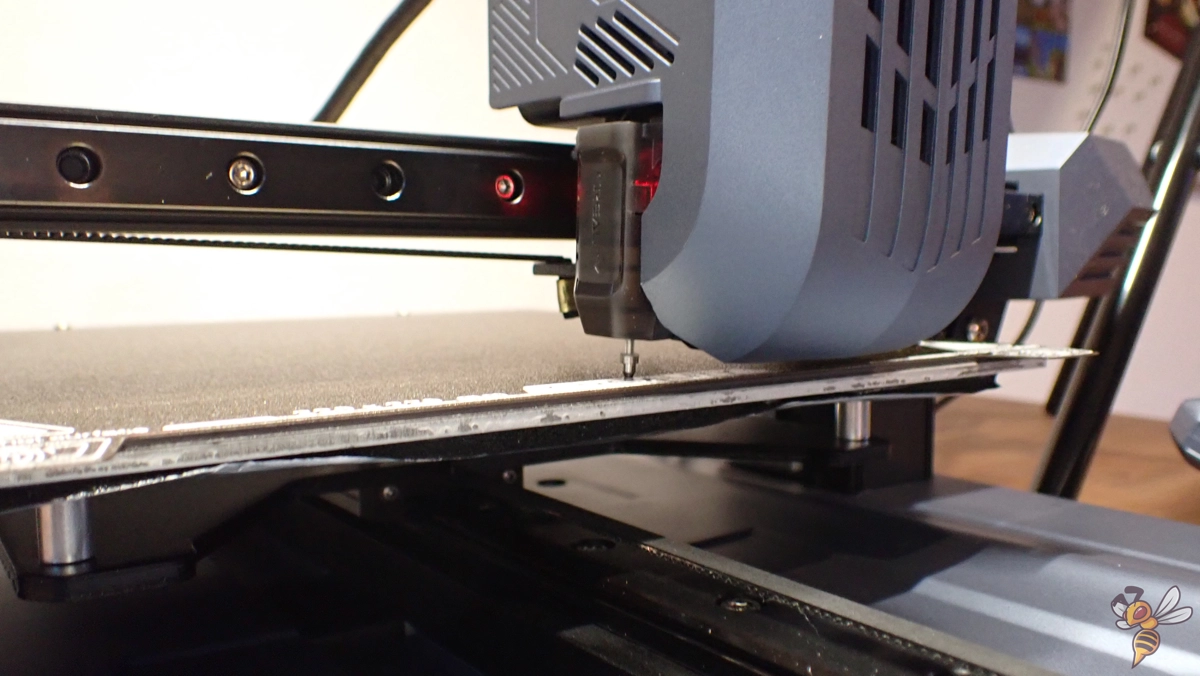
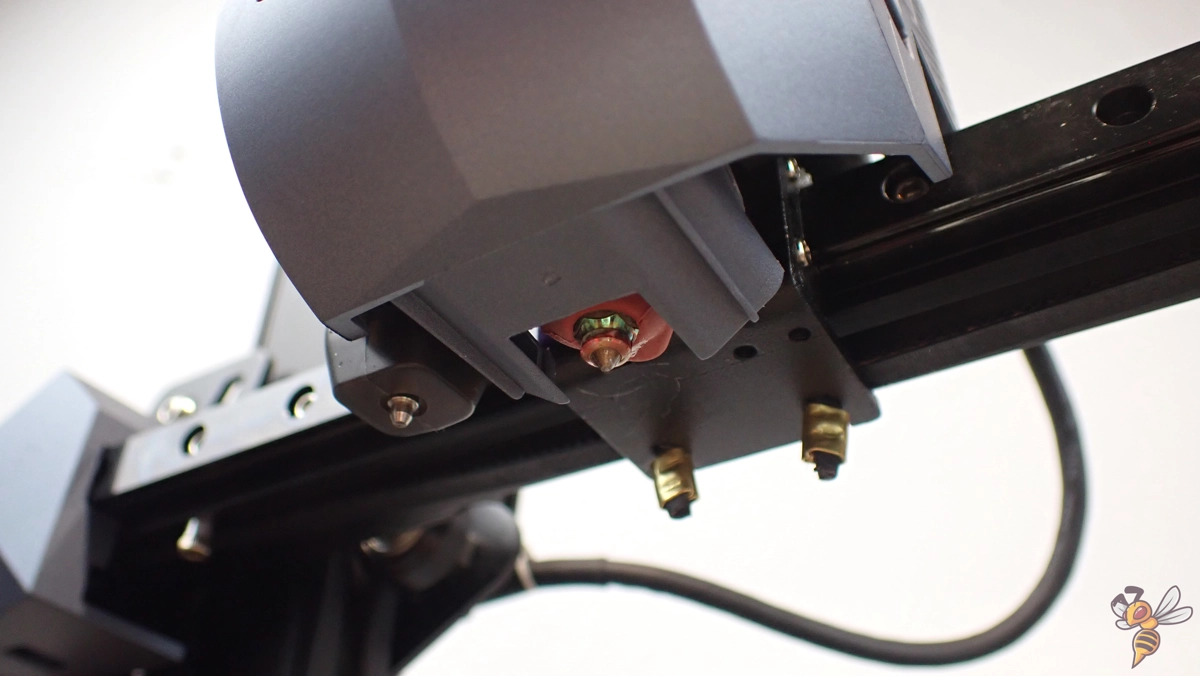
The Creality CR-10 SE comes equipped with a CR-Touch, a bed leveling sensor located on the left side of the print head. With this feature, the 3D printer automatically levels the print bed.
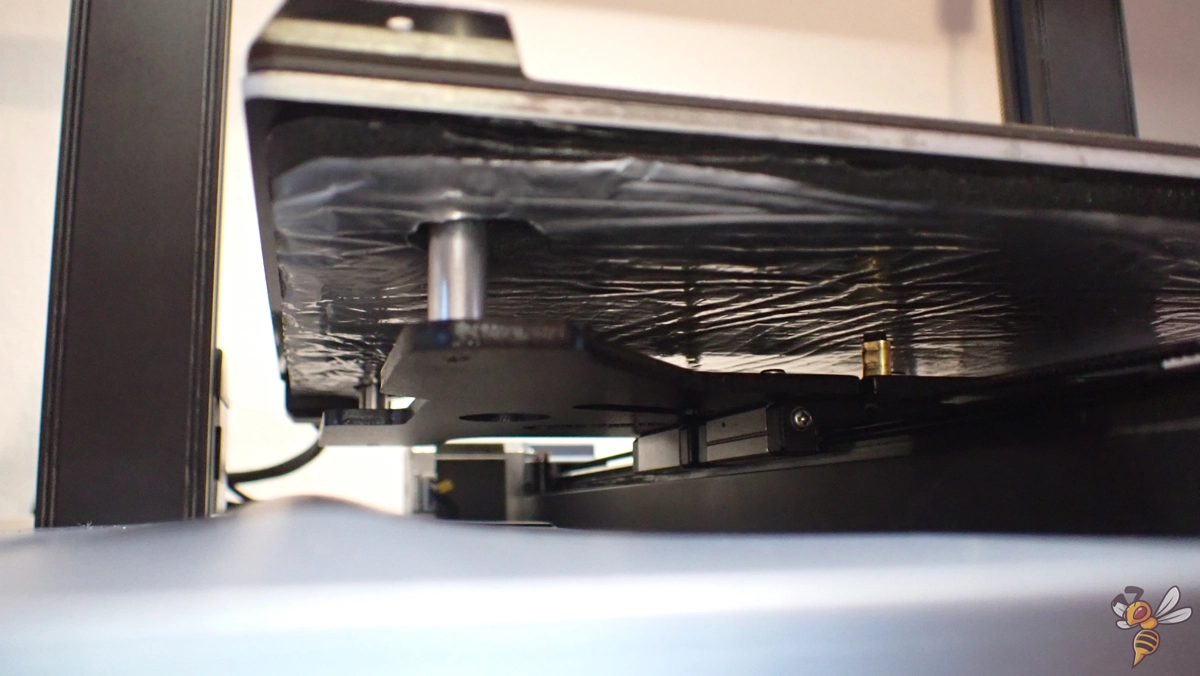
Notably, the print bed lacks manual adjustment screws, which are commonly found in other models. The bed leveling even includes the Z-offset, which is often a manual adjustment in other 3D printers.
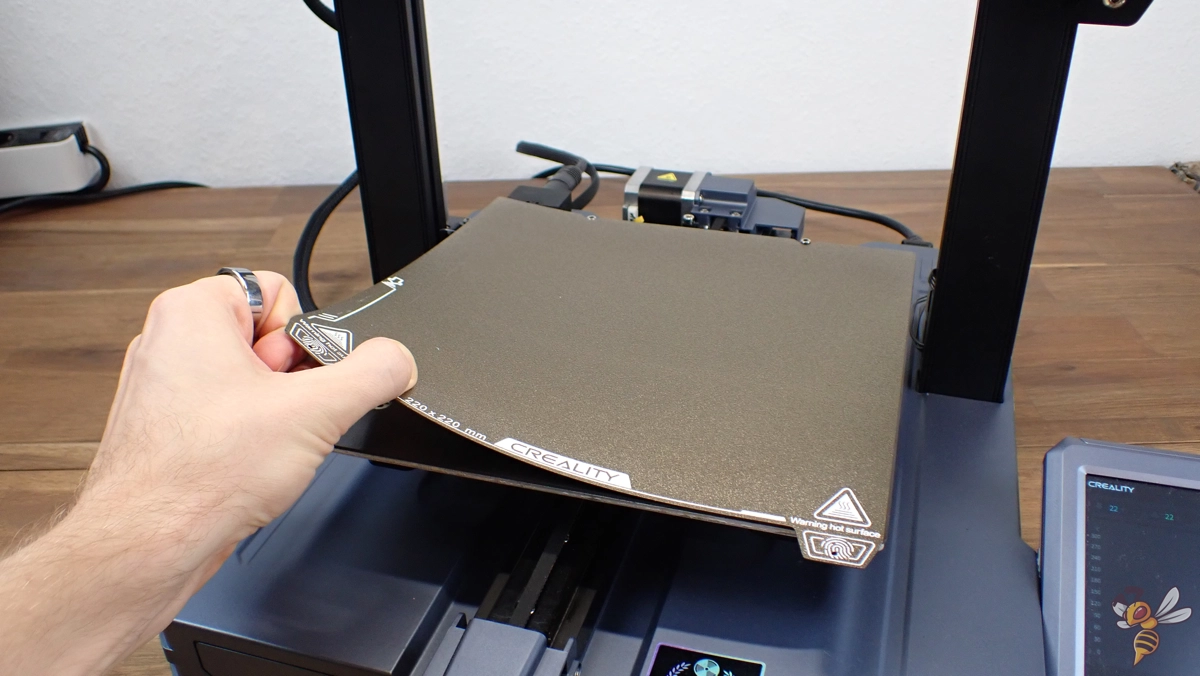
Another significant feature is the flexible print bed with a PEI coating. This bed provides excellent adhesion for a wide range of filaments, ensuring that prints adhere securely during the printing process. Additionally, the flexibility of the bed and its coating greatly aids in the removal of the finished object post-printing. PEI coated print beds are by far my favorite!
This combination of automated bed leveling and an effective print bed surface results in a user-friendly and efficient printing experience, which is perfect for beginners and saves time for professional users.
Print Volume & Frame Stability
The Creality CR-10 SE offers a print volume of 220 × 220 × 265 mm, which is adequately sized for small to medium-sized projects. Despite what might be considered a standard print volume, the frame’s stability is notably high. This stability is enhanced by the printer’s dual Z-axis, synchronized via a timing belt, which ensures consistent movement and accuracy during prints.
A key factor in the CR-10 SE’s stability is the incorporation of linear rails on the X and Y axes. These rails contribute significantly to maintaining stability at higher print speeds, a crucial aspect for achieving high-quality prints. However, it’s important to note that these linear rails require regular maintenance. Cleaning and lubricating them periodically is essential for their longevity and to ensure they continue to perform optimally.
Additionally, the base of the printer is relatively heavy and sits on rubber feet. This design is effective in mitigating vibrations, especially at higher printing speeds. The combination of a synchronized dual Z-axis, linear rails, and a sturdy, well-supported base results in a machine that can handle high-speed printing with minimal vibration and stable and smooth motion.
Extruder
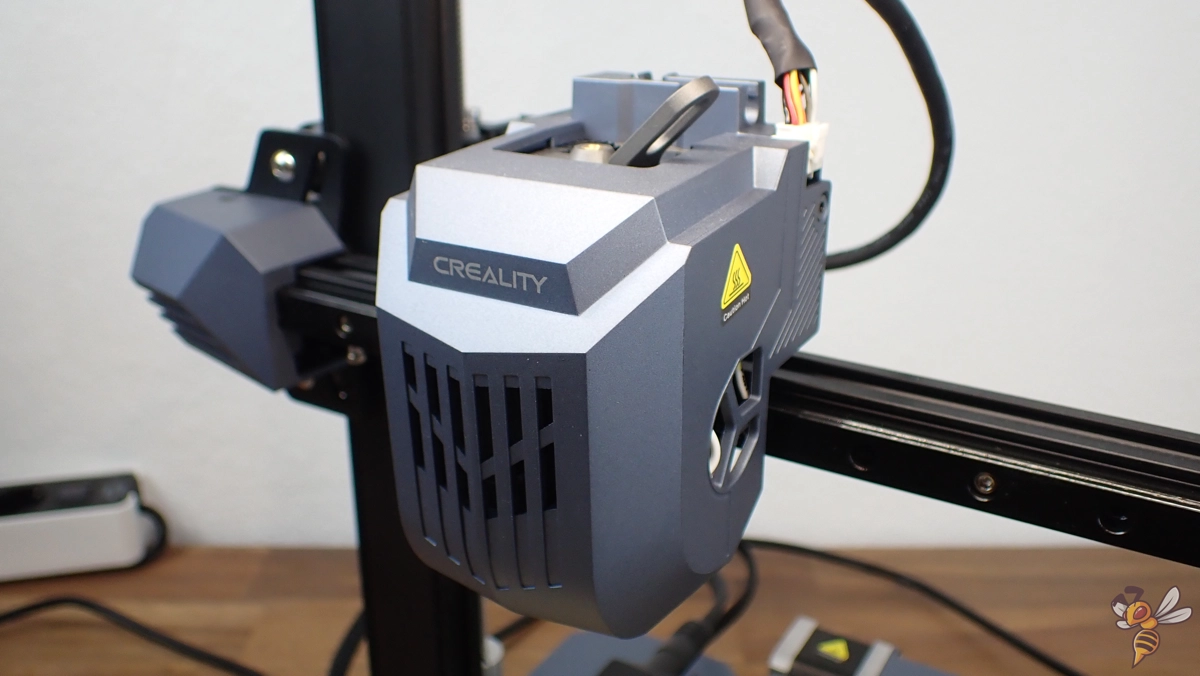
In my use of the Creality CR-10 SE, the Sprite direct-drive dual-gear extruder has proven to be a standout feature. It’s a modular solution that offers tremendous power in a compact form, marked by its 3.5:1 high torque and smooth feeding mechanism. This dual-gear drive ensures stable printing and is adjustable for various tensions.
The lightweight nature of this extruder is particularly beneficial at high printing speeds, maintaining stable and smooth motion without the burden of excessive weight. Its fast and accurate filament feeding capability plays a crucial role in reducing print errors, making it a reliable component for diverse printing needs.
Hot End, Nozzle & Filament Compatibility
The CR-10 SE is equipped with a heavy-duty hot end, featuring a 60W ceramic heating element. It is capable of handling temperatures up to 300 °C, ensuring even melting of various filament materials. Its high-flow design supports rates of up to 32 mm³/s, which is crucial for fast 3D printing.
The printer comes with a hardened steel nozzle, which is a key aspect of its ability to handle high-temperature printing. This nozzle also lets you use abrasive filament materials that would destroy a soft brass nozzle.
So, thanks to its advanced hot end and nozzle design, the CR-10 SE boasts impressive filament compatibility. It can handle not only standard materials like PLA, ABS, TPU or PETG but also more demanding high-performance filaments. This versatility is particularly beneficial for users looking to experiment with different types of projects and applications.
Input Shaping
Input Shaping is a significant feature of the Creality CR-10 SE that enhances its printing capabilities. This feature is particularly useful for managing and optimizing the movement of the printer, especially during high-speed operations.
By effectively reducing vibrations, Input Shaping contributes to smoother prints with fewer artifacts and imperfections (like ringing and ghosting). Input Shaping can be activated through the printer’s menu.
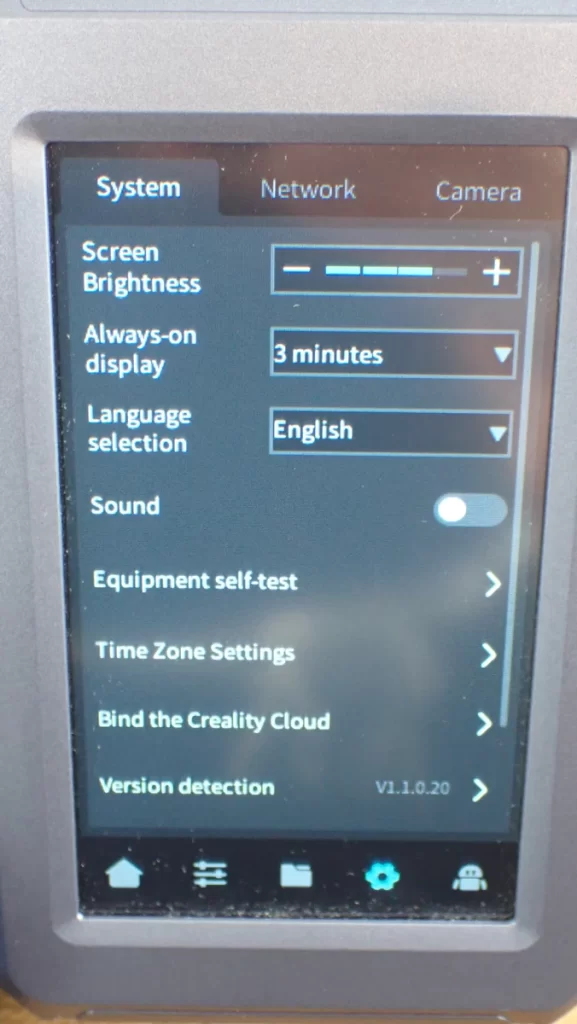
Touchscreen & Menu
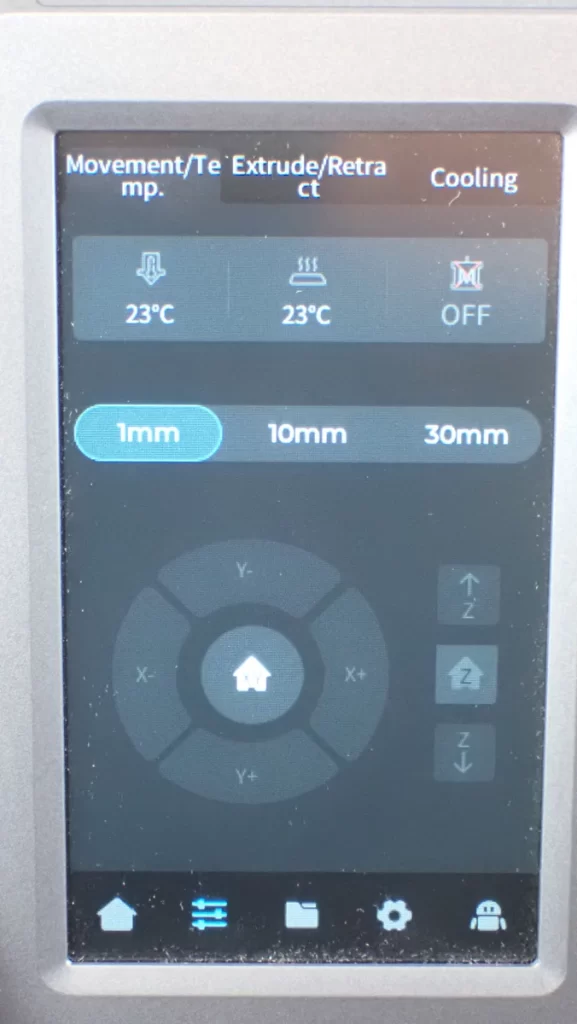
The Creality CR-10 SE is equipped with a 4.3-inch touchscreen. This feature enhances the user experience by providing a clear and intuitive interface. The menu is particularly well-organized, allowing quick and easy access to the most essential settings, which is a boon for both new and experienced users.
From my personal experience, I found the touchscreen highly responsive and user-friendly. The menu layout makes it simple to navigate to key functions. However, one aspect to note is that the Input Shaping feature is somewhat hidden within a submenu. While this doesn’t hinder the overall functionality, this essential feature could be overlooked by some.
Slicer
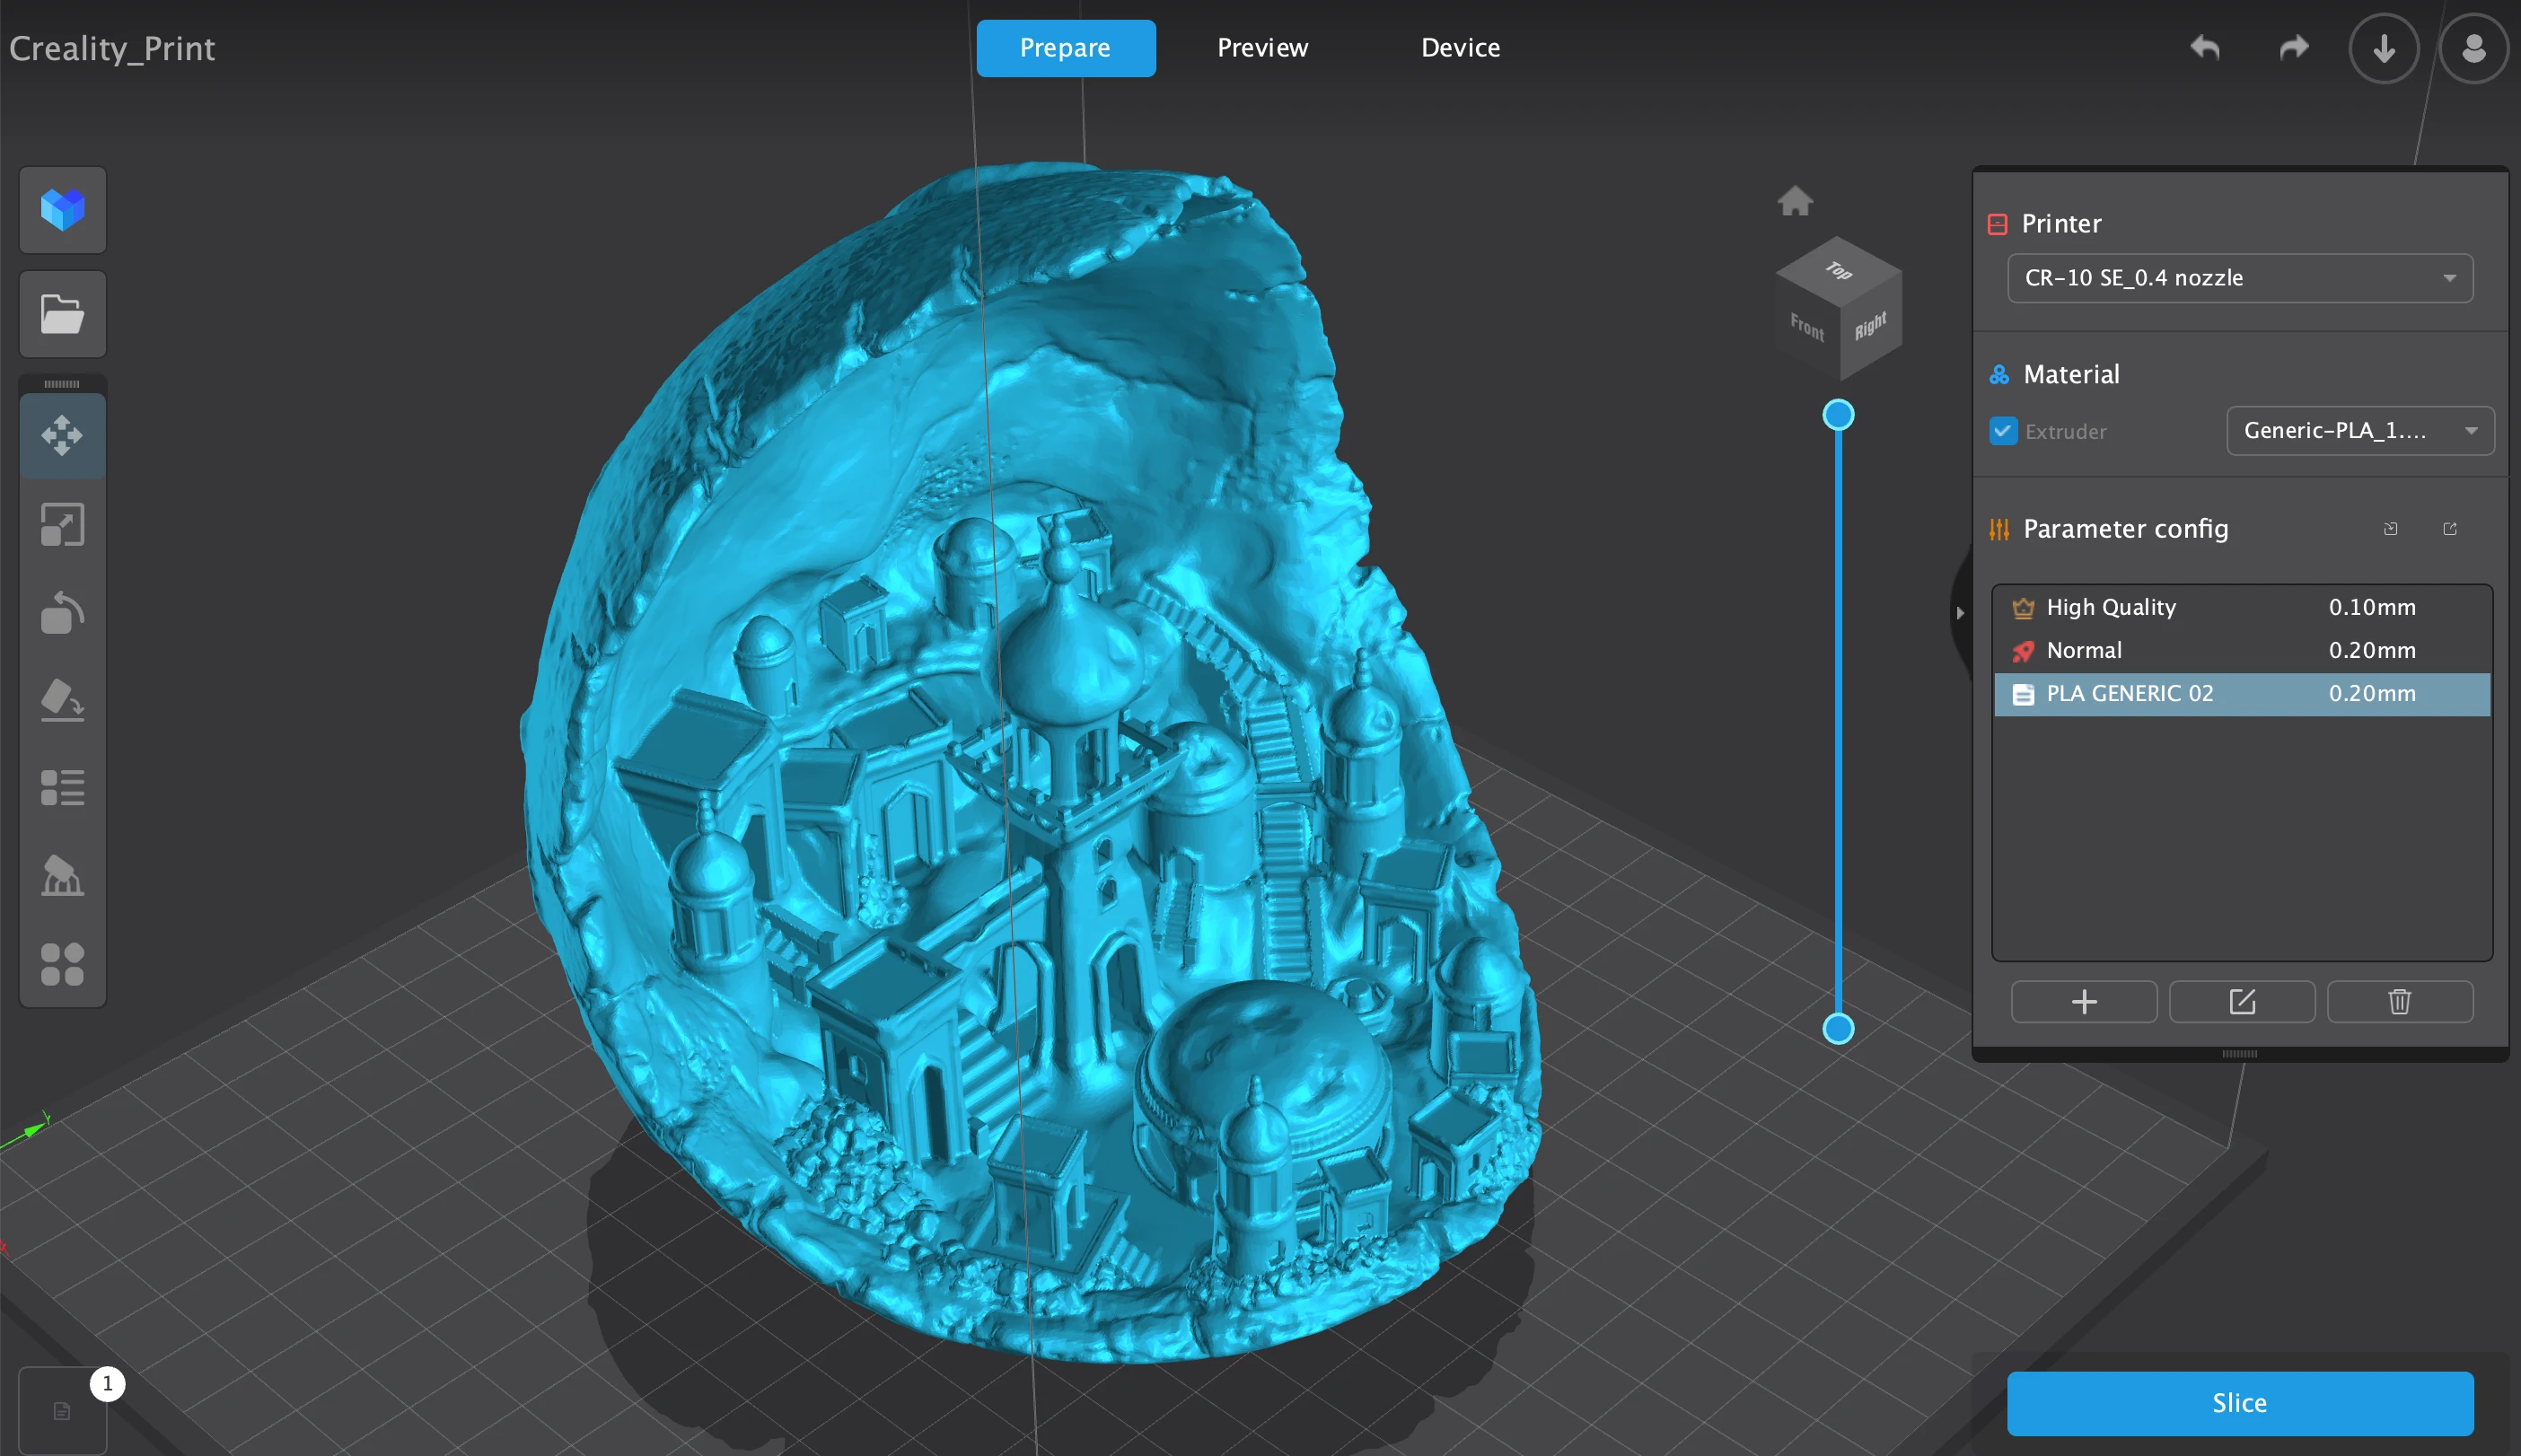
For my practical test of the Creality CR-10 SE, I used Creality Print as the slicing software. This slicer is user-friendly and operates in a manner quite similar to Cura, making it accessible for those familiar with 3D printing software. It provides an intuitive interface that simplifies the process of preparing models for printing.
The pre-set print settings in Creality Print were adequate for achieving relatively good quality right from the start. However, I found it necessary to tweak certain settings, particularly the printing temperature and retraction, to suit the specific filament being used. These adjustments were straightforward and helped optimize the objects quality, demonstrating the slicer’s flexibility and effectiveness in catering to different materials and printing requirements.
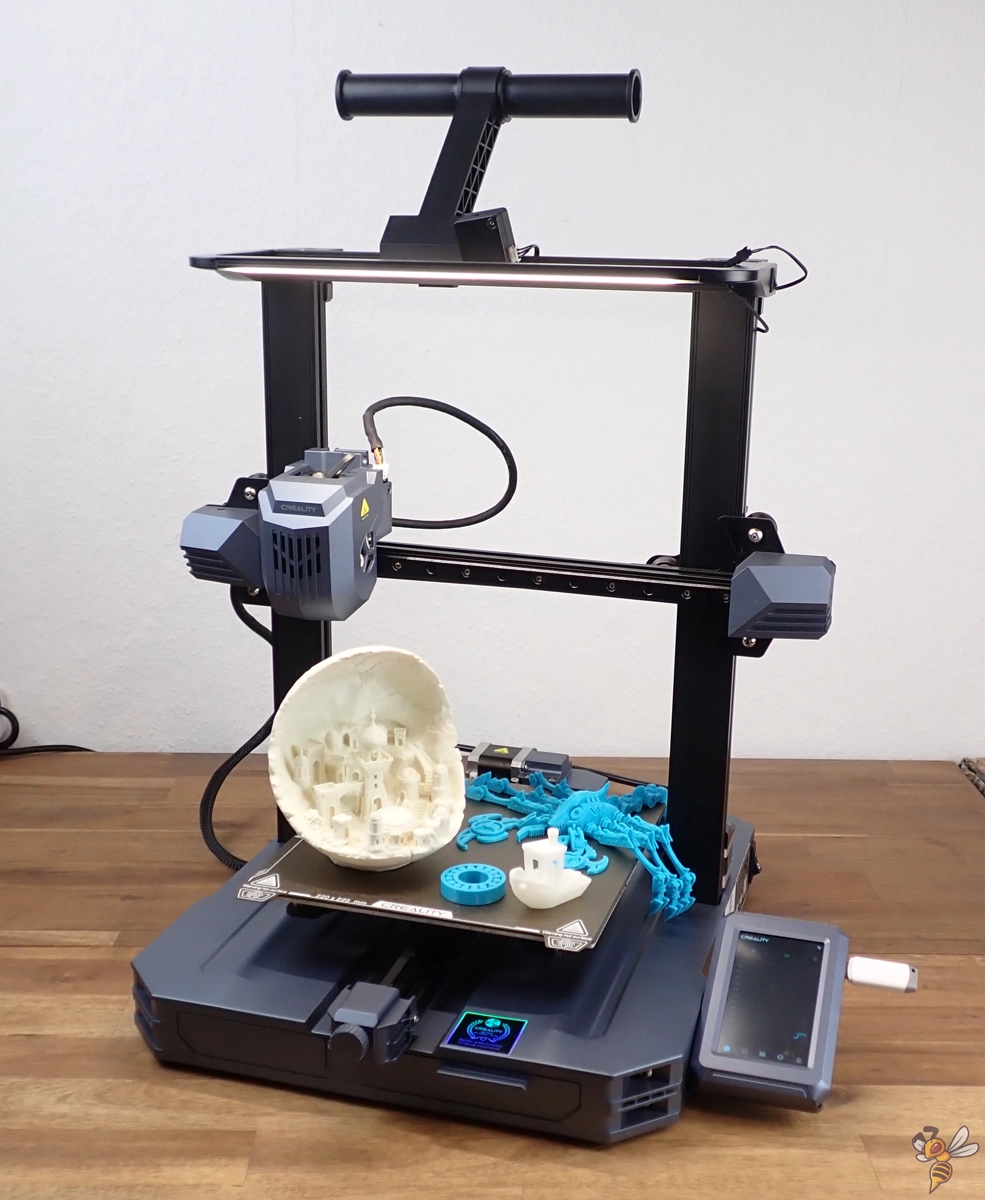
Print Quality
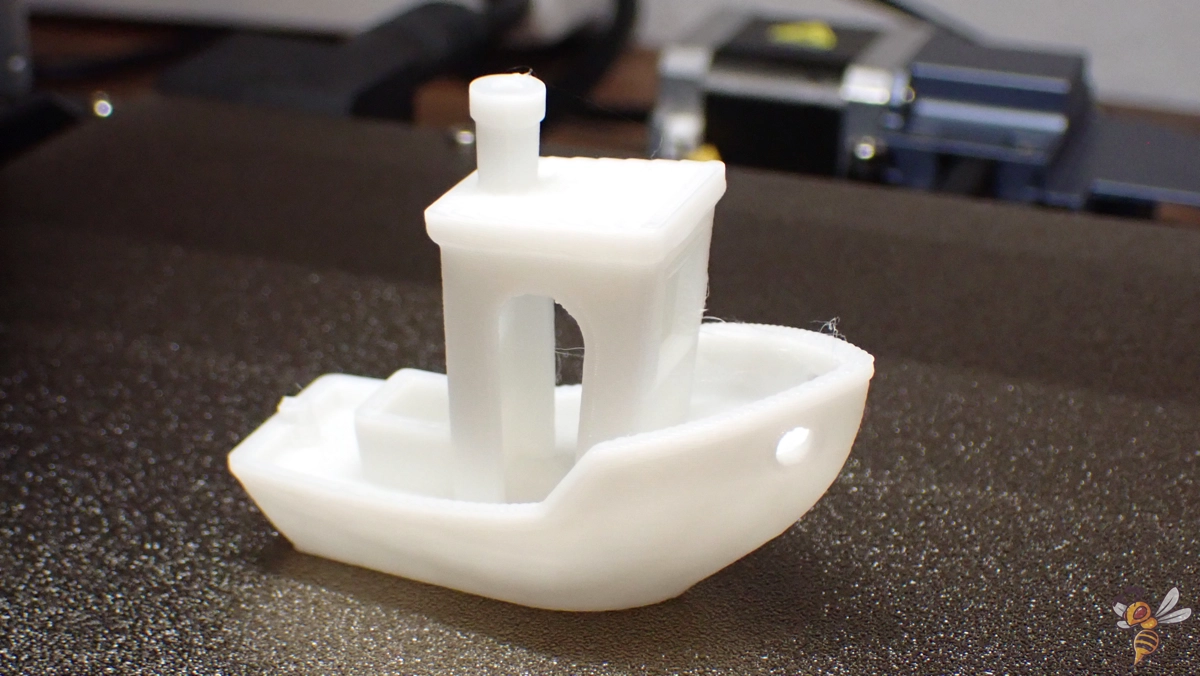
My first test with the Creality CR-10 SE was, of course, printing a 3DBenchy. This is a standard model I use to evaluate new FDM 3D printers. The results were quite impressive, showcasing an exceptional model quality.
There was, however, a minor issue with fine stringing in certain areas of the model. This didn’t significantly detract from the overall appearance, but it was noticeable.
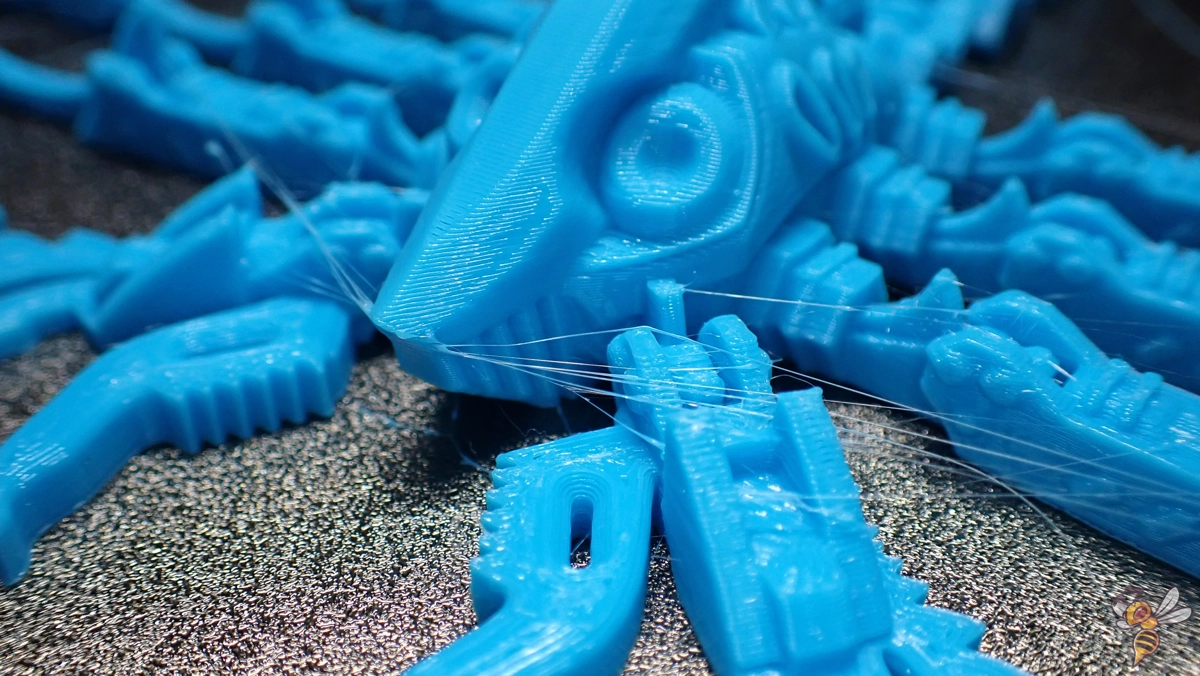
Next, I printed a scorpion without further calibrating the printer settings. The stringing observed in the 3DBenchy was again evident. After this, I decided to calibrate the retraction settings and the printing temperature (see this guide on how to do that).
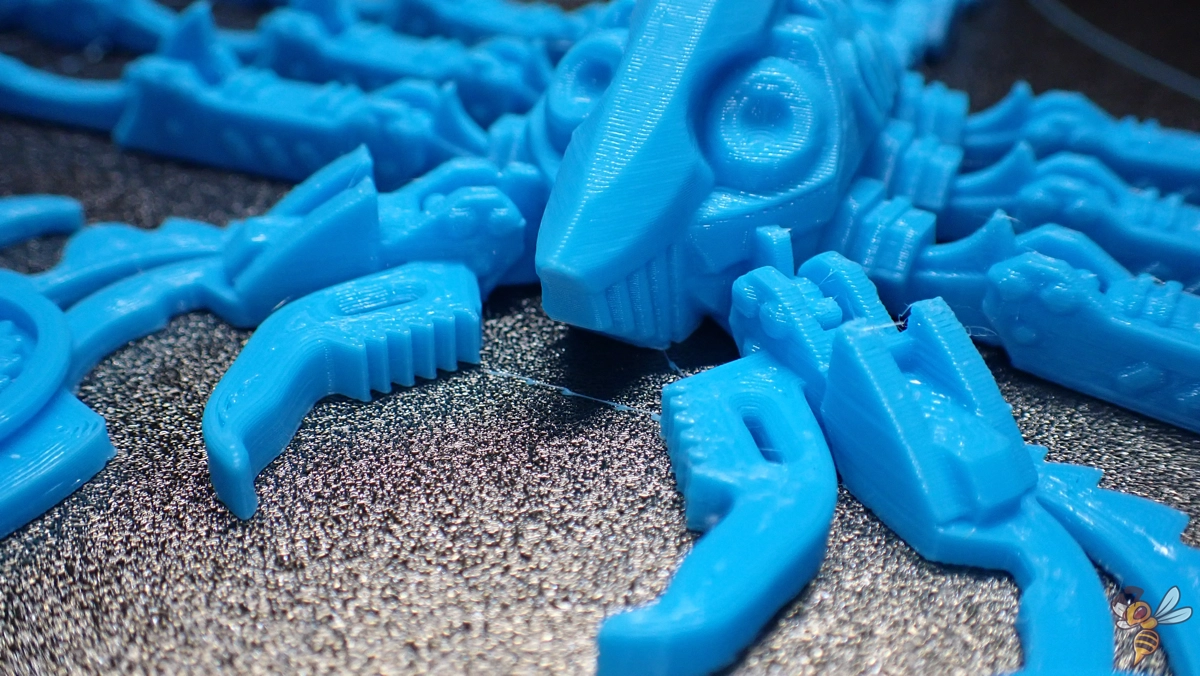
I reprinted the scorpion with these new settings, and the outcome was flawless. The adjustments effectively resolved the stringing issue.
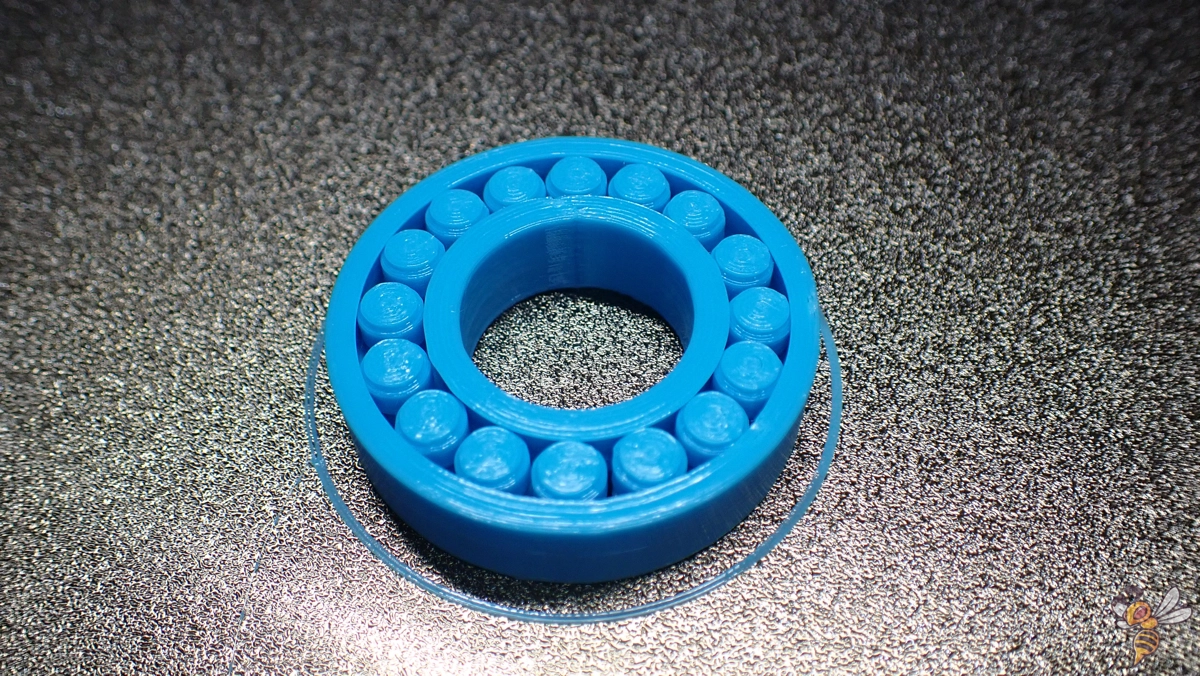
To test dimensional accuracy, I printed a bearing. This object is a great test for any printer because if too much or too little filament is extruded, or if there are other printing errors, the ball bearing won’t function properly.
Remarkably, the ball bearing worked perfectly right off the print bed, demonstrating the CR-10 SE’s impressive precision.
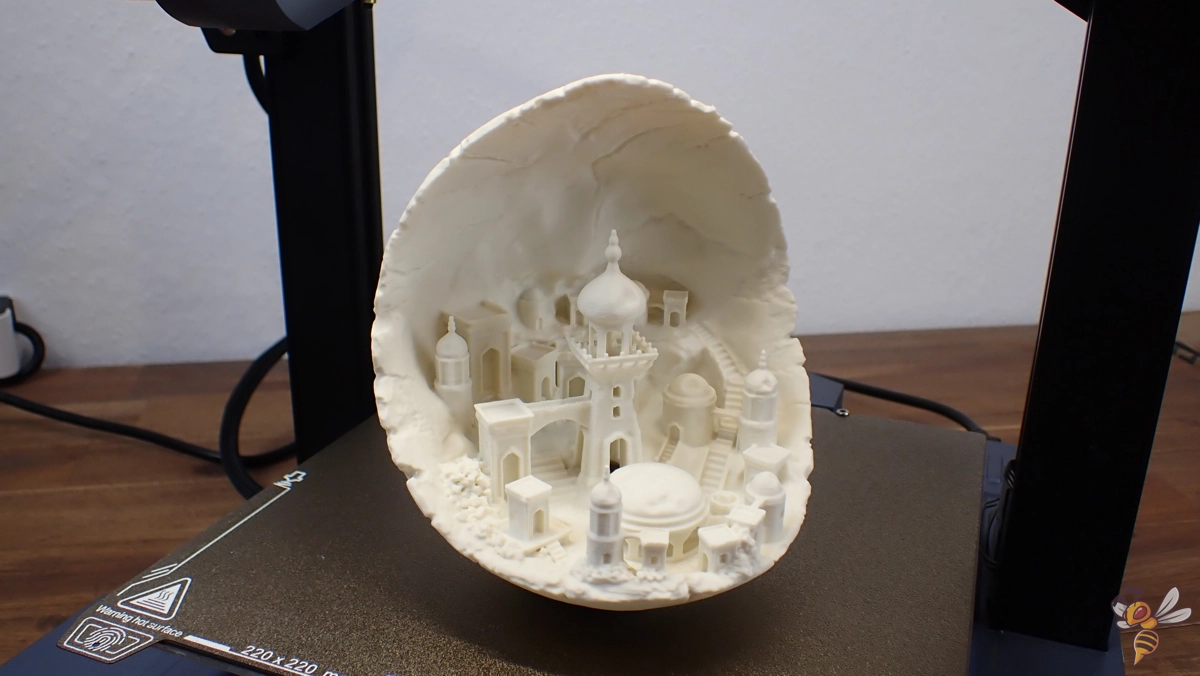
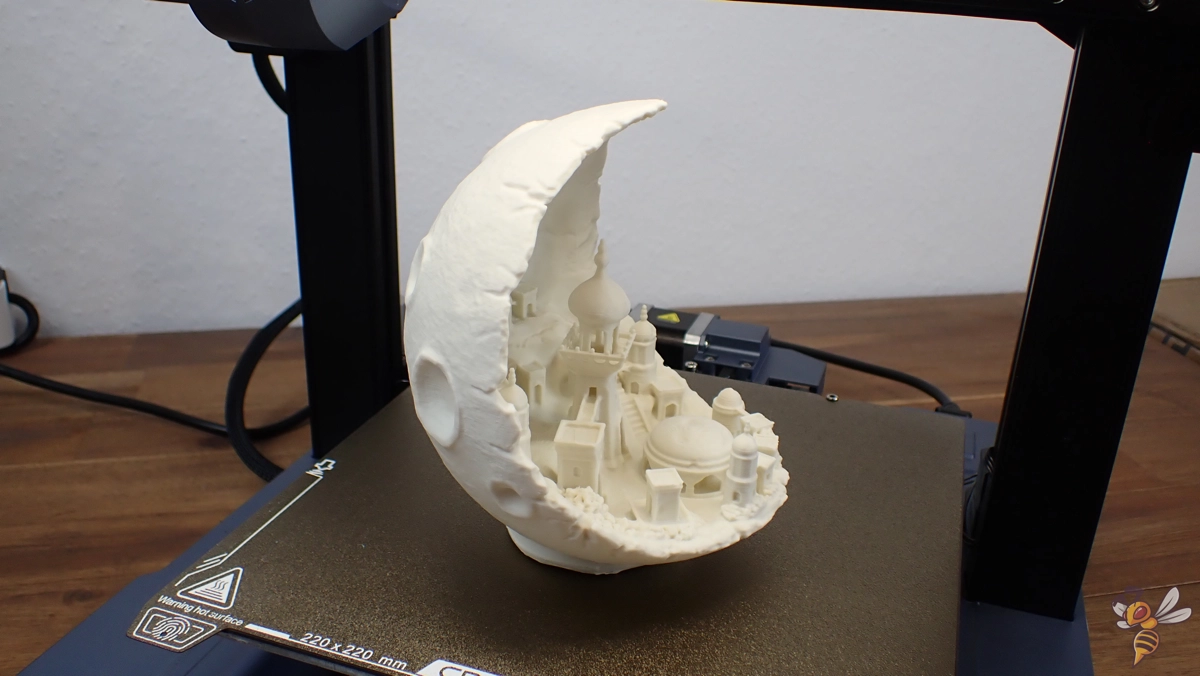
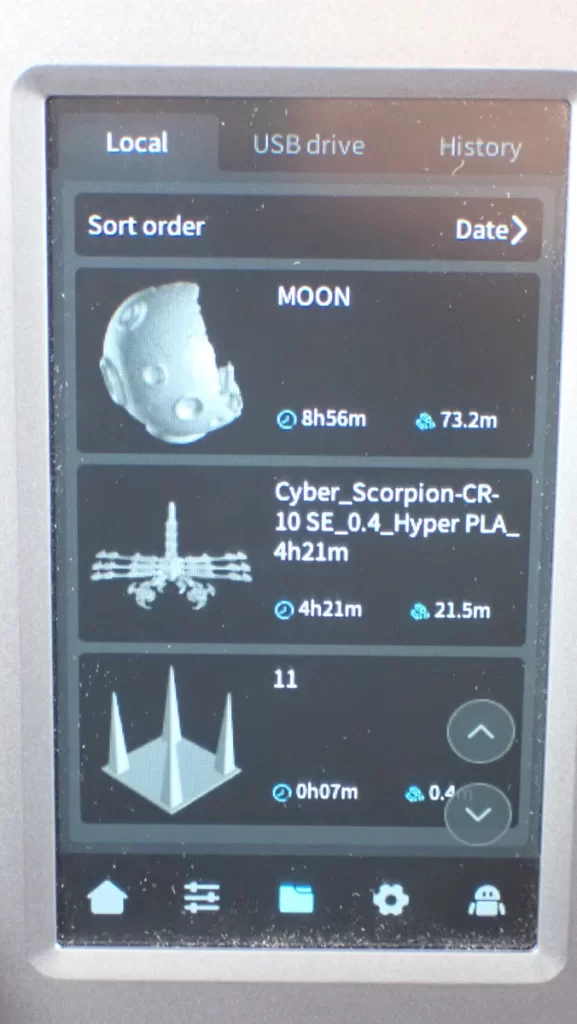
Encouraged by the previous successful prints, I proceeded to print a complex model of a Moon City. The level of detail achieved in this print was extraordinary. It showcased the CR-10 SE’s ability to handle intricate designs with high fidelity.
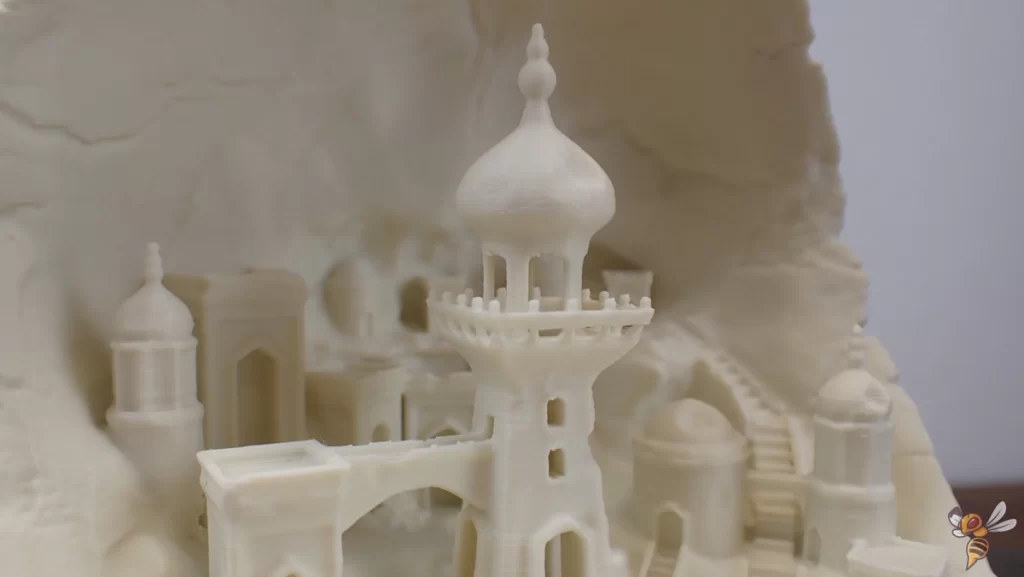
This print, in particular, stood out as a testament to the printer’s capability for producing exceptional model quality at high speeds.
All the objects were printed at a layer height of 0.2 mm, except for the Moon City model, which I printed at 0.1 mm to capture more detail. I used a maximum print speed of 150 mm/s for all the objects. For the filament, I used SUNLU PLA* for all the models except for the 3DBenchy, which was printed with Hyper PLA from Creality*.
Print Speed

The Creality CR-10 SE’s print speed capability is a standout feature, particularly impressive for its class of 3D printers. In my testing, I operated the printer at 150 mm/s, which yielded excellent results in terms of both speed and quality. However, it’s important to note that the CR-10 SE can achieve much higher speeds. With precise calibration, speeds can be pushed significantly higher, even up to a maximum print speed of 600 mm/s.
This remarkable speed is facilitated by the printer’s Input Shaping feature, which allows it to manage the high speeds without compromising print quality and ensuring stable and smooth motion. While reaching these upper limits of speed does require careful adjustment of settings, it’s a testament to the printer’s advanced capabilities.
Creality CR-10 SE vs. Ender-3 V3 SE
| Specification | CR-10 SE | Ender-3 V3 SE |
|---|---|---|
| Construction | DIY- Semi-Assembled | DIY- Semi-Assembled |
| Build Volume | 220 × 220 × 265 mm | 220 × 220 × 250 mm |
| Printer Size | 490 × 470 × 625 mm | 349 × 364 × 490 mm |
| Extruder | Sprite Direct Drive | Sprite Direct Drive |
| Default Print Speed | 150-250 mm/s | 180 mm/s |
| Max Print Speed | 600 mm/s | 250 mm/s |
| Acceleration | 8000 mm/s² | 2500 mm/s² |
| Max. Nozzle Temperature | 300 °C | 260 ℃ |
| Max. Heat Bed Temperature | 110 °C | 100 ℃ |
| Dual Z-axis | Yes | Yes |
| Automatic Leveling | Yes, CR Touch | Yes, CR Touch |
| Interfaces | USB drive, WiFi | SD card |
| Screen | 4.3-inch touchscreen | 3.2-inch color display with a rotary knob |
| Filament Sensor | Yes | No |
| Power Loss Recovery | Yes | Yes |
| Build Plate | PEI spring steel plate | PC spring steel plate |
When comparing the Creality CR-10 SE with the Ender-3 V3 SE*, several key differences emerge. The CR-10 SE boasts a slightly larger build volume, offering more space for larger prints. Its maximum print speed significantly surpasses the Ender-3 V3 SE, reaching up to 600 mm/s, making it ideal for users who prioritize speed. The CR-10 SE can also handle higher nozzle temperatures, thereby accommodating a wider range of filaments, including high-temperature materials.
The CR-10 SE features a more user-friendly 4.3-inch touchscreen, compared to the smaller 3.2-inch display with a rotary knob on the Ender-3 V3 SE. Both printers come with automatic bed leveling, but the CR-10 SE steps ahead with its filament sensor, enhancing its reliability by preventing failures due to filament run-out.
Considering these aspects, the Creality CR-10 SE is my recommendation out of these two if it fits into your price range.
Conclusion
In conclusion, the Creality CR-10 SE* stands out as a robust and versatile 3D printer. Its combination of high-speed printing, automated bed leveling, and advanced features like Input Shaping, makes it an excellent choice for both beginners and experienced users.
The printer’s ability to handle a variety of filaments with its high-temperature capabilities and the hardened steel nozzle adds to its versatility. While it requires some calibration and maintenance, especially for high-speed printing, the effort is well worth it given its overall performance. It’s really easy to get an exceptional model quality with this 3D printer.
The Creality CR-10 SE is an entry-level 3D printer of the “premium class”. It has all the features that make 3D printing easier and prints with amazing speed and quality.
Build Volume: 220 × 220 × 265 mm
Speed: max. 600 mm/s, 150-250 standard
Extruder: “Sprite” Direct Drive
Print Bed: PEI spring steel
Leveling: Fully automatic
Nozzle Temp.: 300 °C
Bed Temp.: 110 °C
Connectivity: USB drive, WiFi
Pros:
✓ Very Fast due to input shaping
✓ Easy to use
✓ Nice print quality
Cons:
× No automatic flow calibration
Disclosure: This website is the property of Martin Lütkemeyer and is operated by Martin Lütkemeyer. Martin Lütkemeyer is a member of the Amazon Services LLC and other Affiliate Programs. These are affiliate advertising programs designed to enable websites to earn advertising revenue through advertising and linking to Amazon.com and others. Links marked with * are affiliate links.
