
- Wet Filament: Prevention, Symptoms & Drying - July 18, 2024
- Sovol SV08 – Best PrusaSlicer Settings & Profile - June 26, 2024
- Sovol SV08 – Best Orca Slicer Settings & Profile - June 26, 2024
Disclosure: Links marked with * are Affiliate Links. I earn from qualifying purchases if you decide to make a purchase through these links – at no additional cost for you!
Are PEO*, PEY* and H1H* print beds just funny gimmicks, or can they keep up with the adhesion of PEI? We’ll try to find out in this article!
Almost all new 3D printers have either a smooth or a rough PEI print bed. Over the past few years, this surface has proven to be the perfect blend of adhesion and ease of use.
But when I was looking for upgrades for my K1C, I came across these print beds and wanted to know if they were any good! And of course, my curiosity won out!
Here is my video for this article:
Table of Contents:
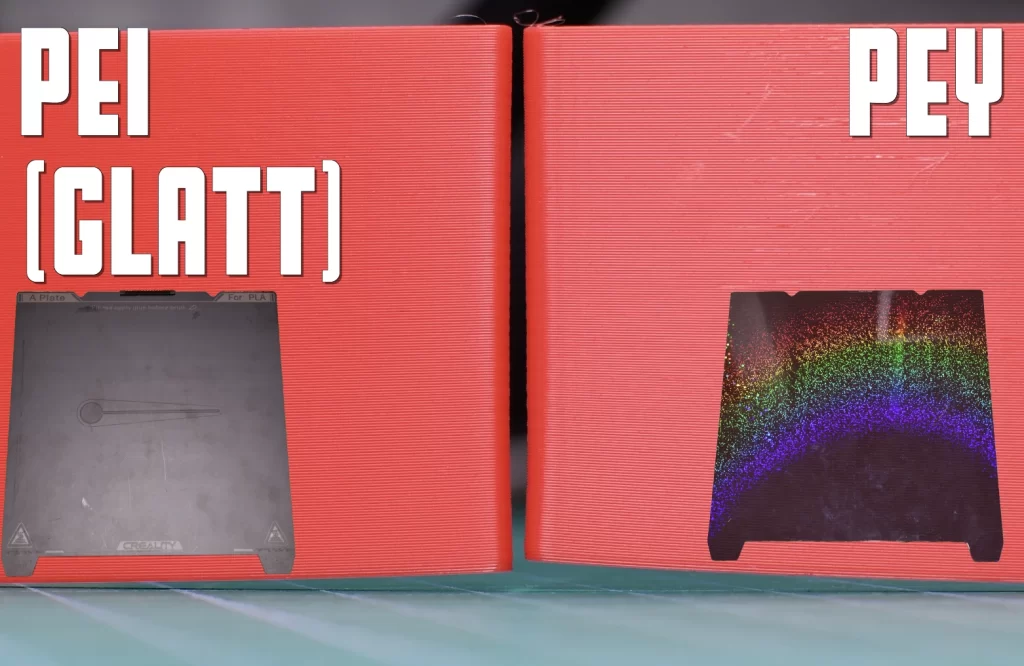
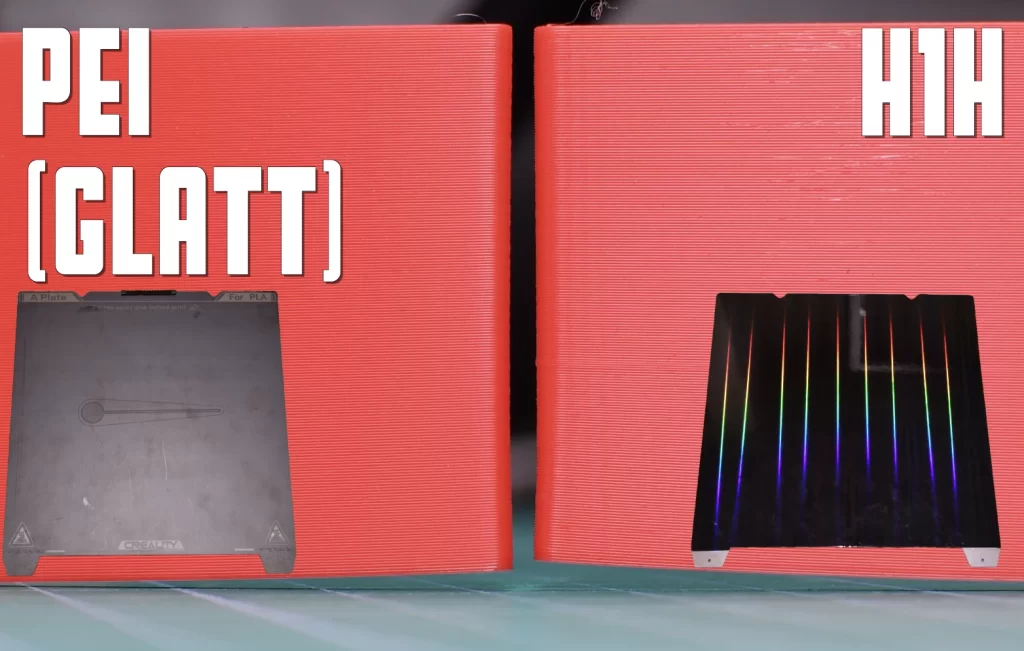
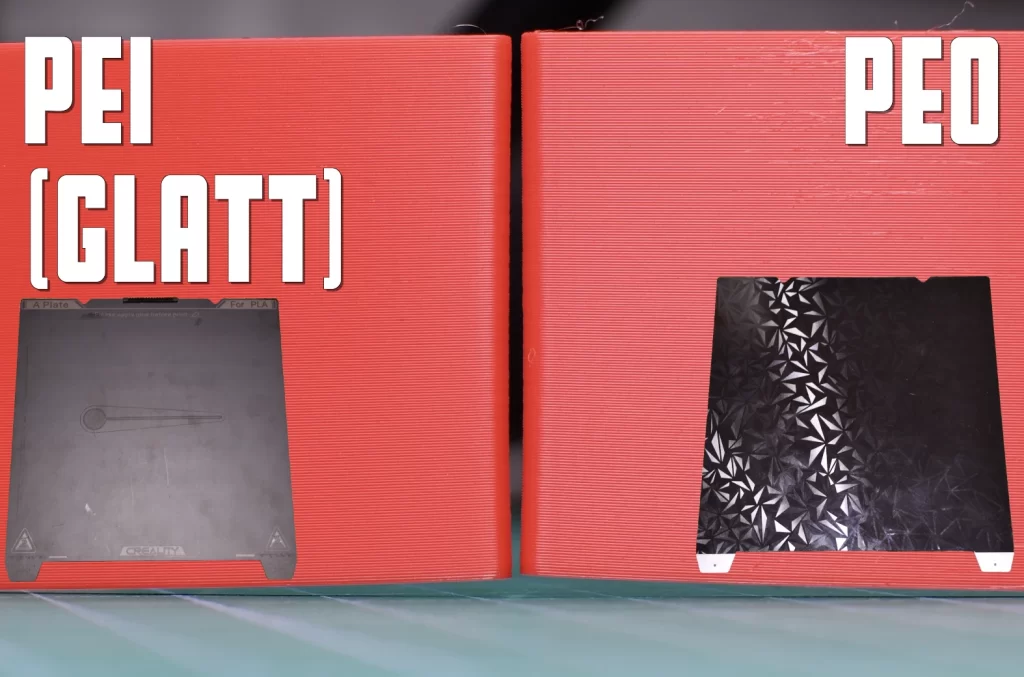
PEY, PEO & H1H
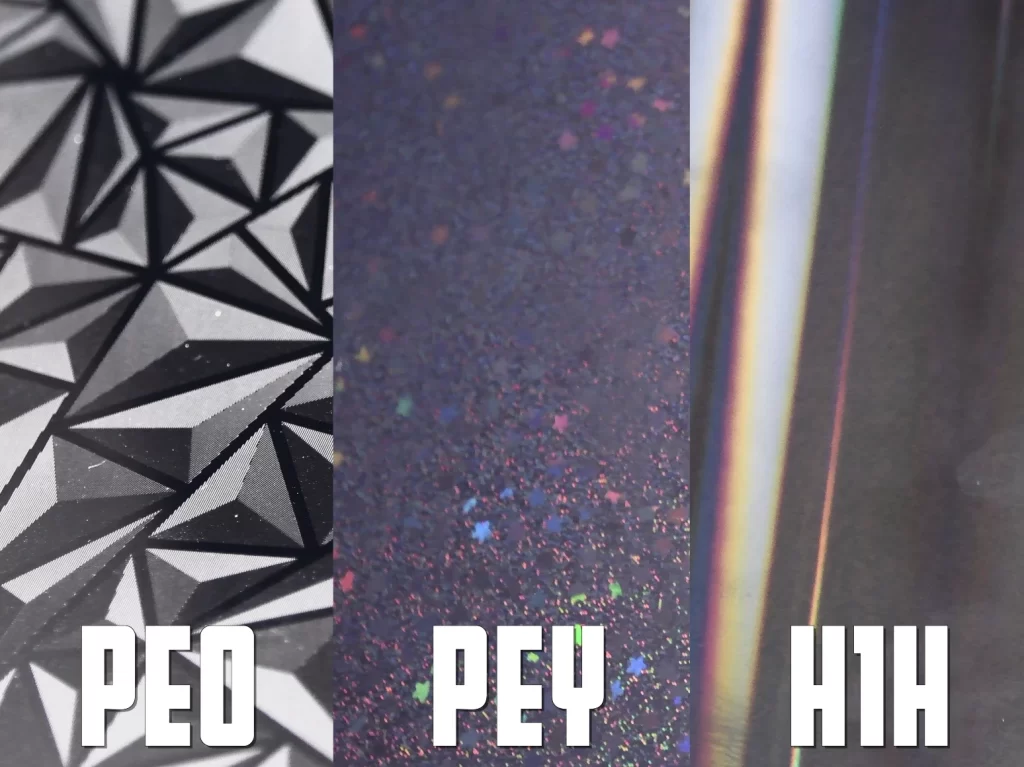
PEY, PEO and H1H print beds are available in different sizes, adapted to the respective 3D printers.
Sometimes a magnetic sticker is also included so that 3D printers without a magnetic printing plate can also be upgraded with it.
I got some that fit perfectly on the print bed of the K1C and the Ender-3 series.
And now it’s time to print!
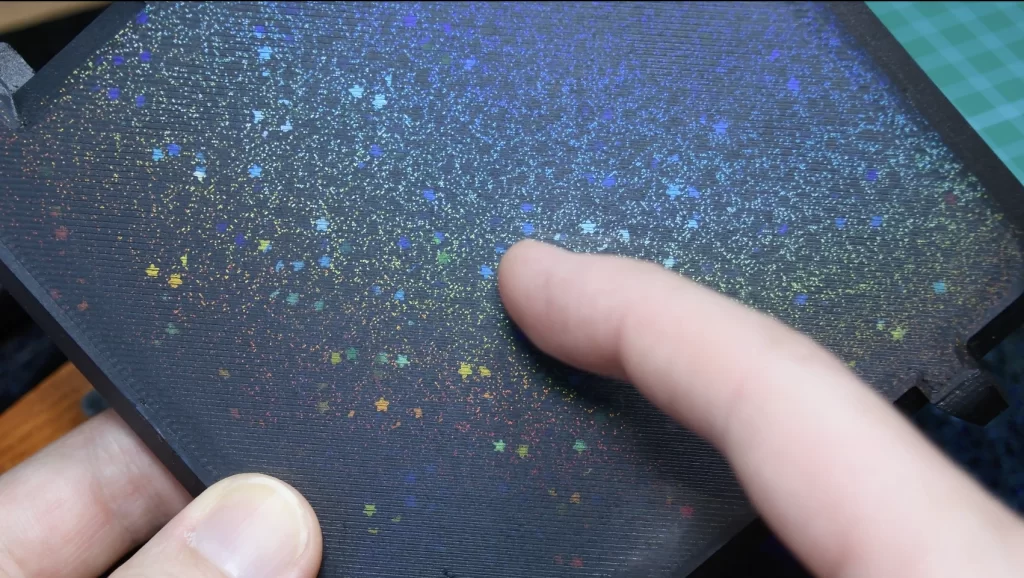
The effect really looks exactly the same as on the print bed! I wouldn’t have thought that the filament would actually flow into all the little crevices on the surface and take over the structural color almost 1:1!
Structural Color

But what is structural color anyway? Because it is obviously not paint or pigments of any kind.
The best and most beautiful example of structural color is the wings of butterflies.
Instead of using pigments, their wings create color through tiny structures that scatter and refract light in specific ways. These microscopic lamellae and lattices create brilliant, iridescent colors that can look different depending on the viewing angle.
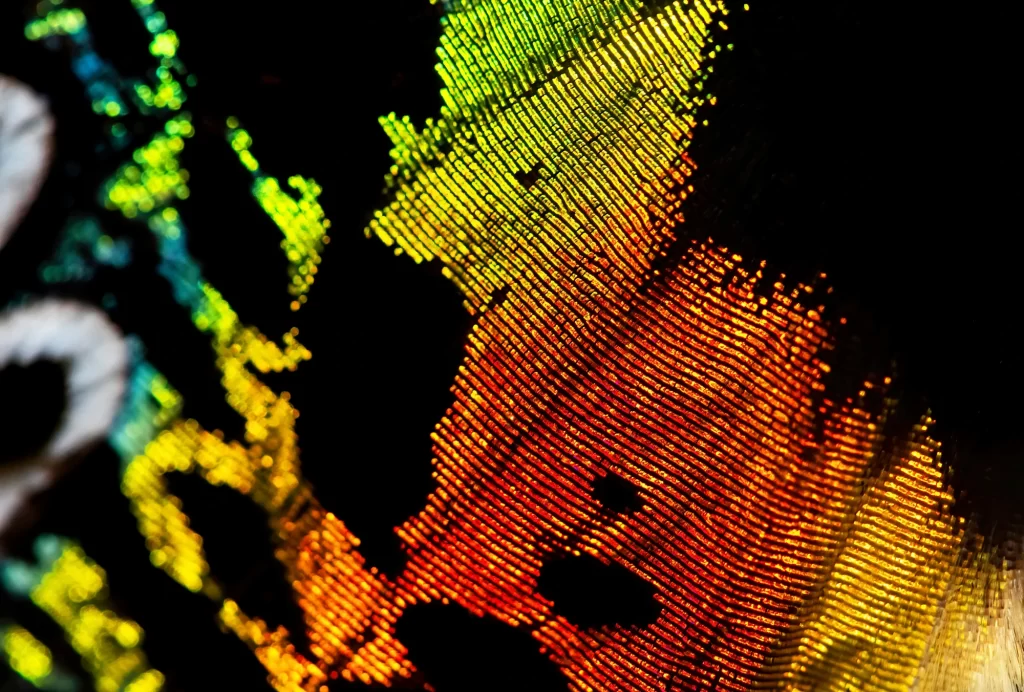
And it is precisely this microscopic structure that is imitated in the holographic print beds, and quite successfully at that!
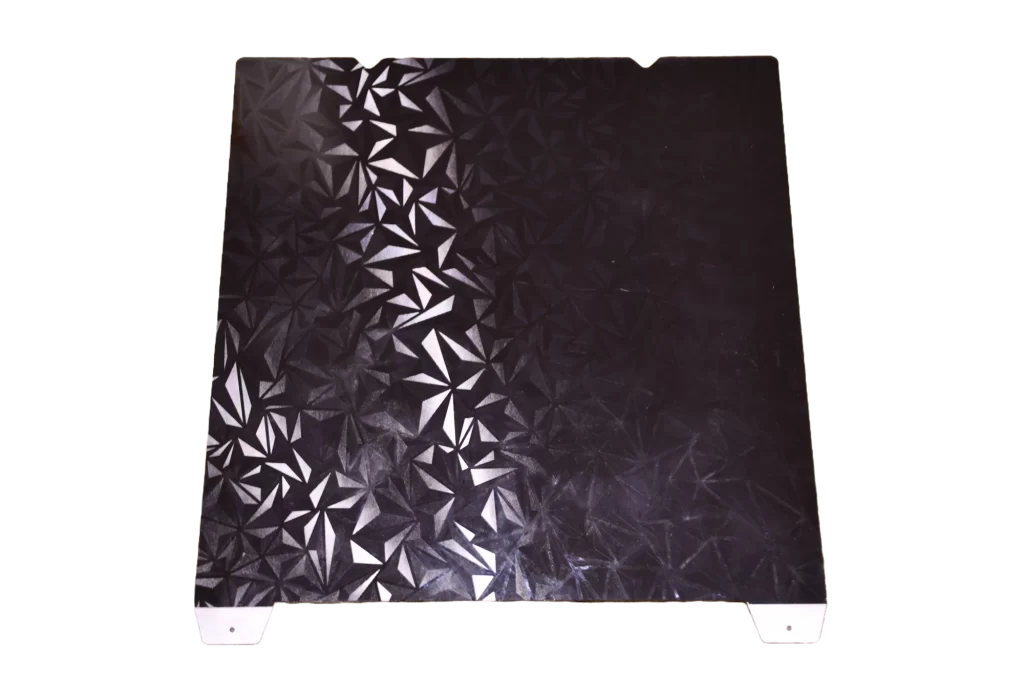
The only surface where you can see this structure with the naked eye and feel it with your finger is the PEO surface.
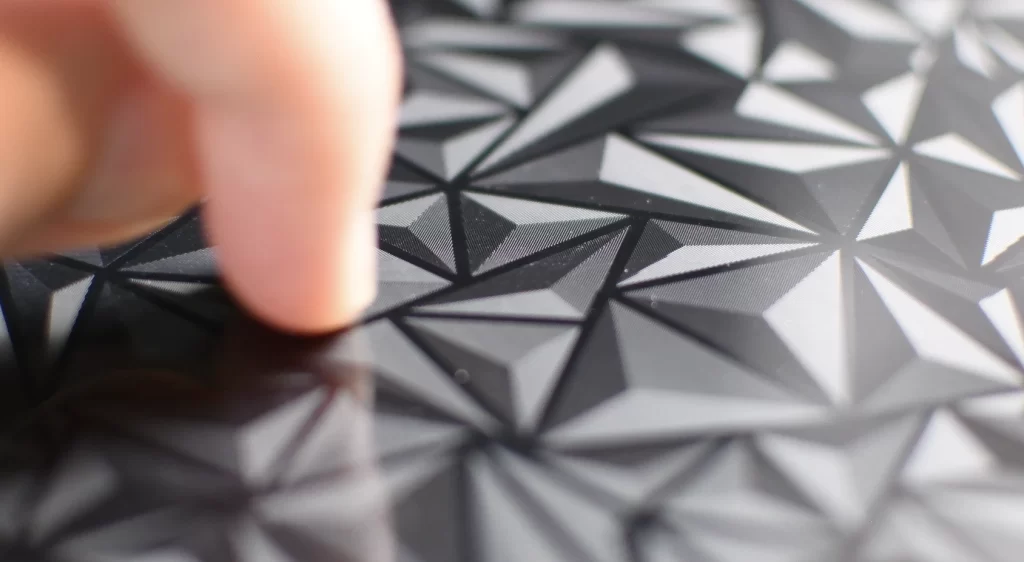
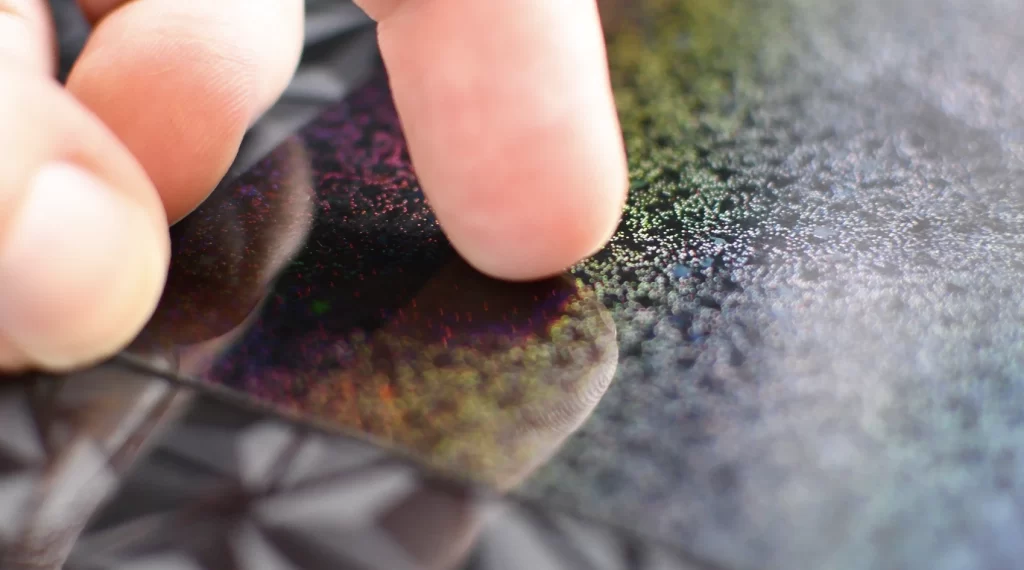
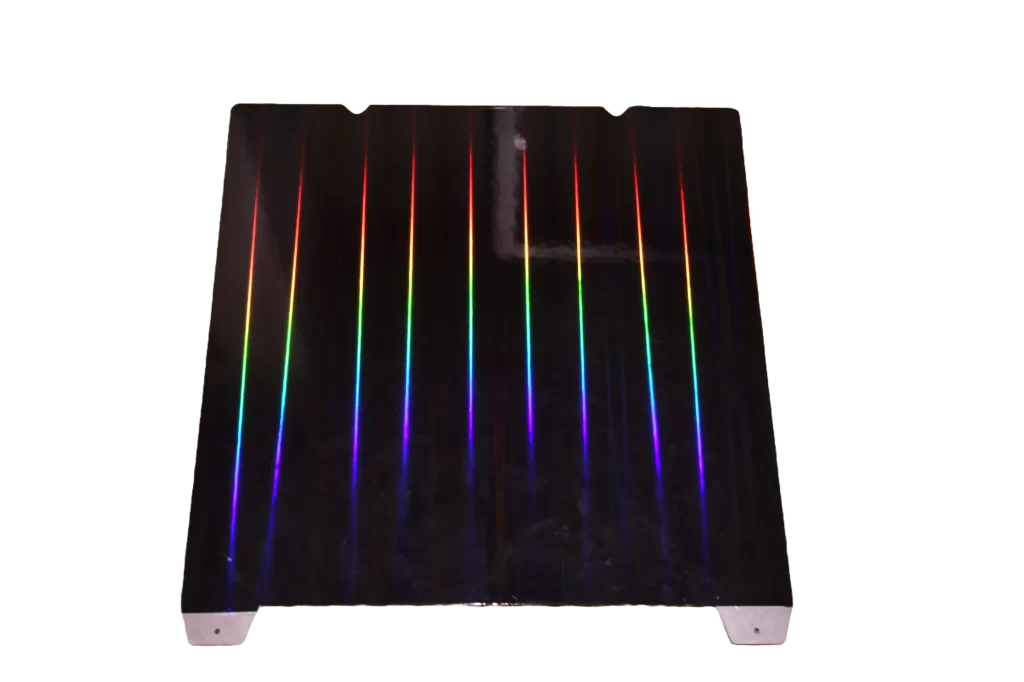
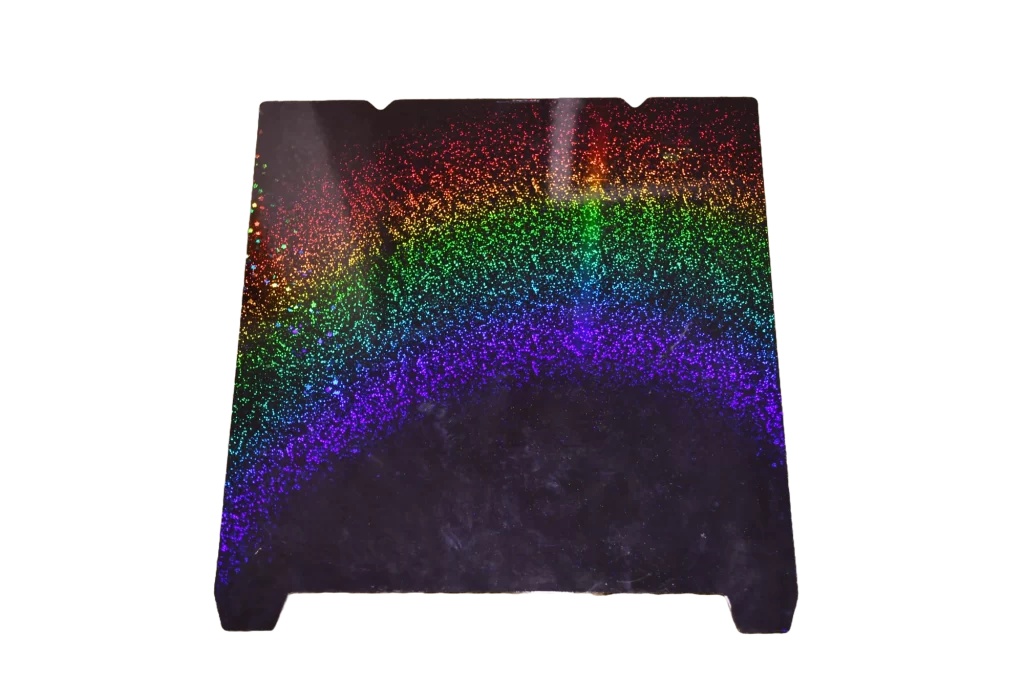
You can neither see nor feel the fine structures on the PEY and H1H print bed. They are as microscopic as butterflies.
But enough theory, now I want to test PEO and H1H!
Print Bed Adhesion
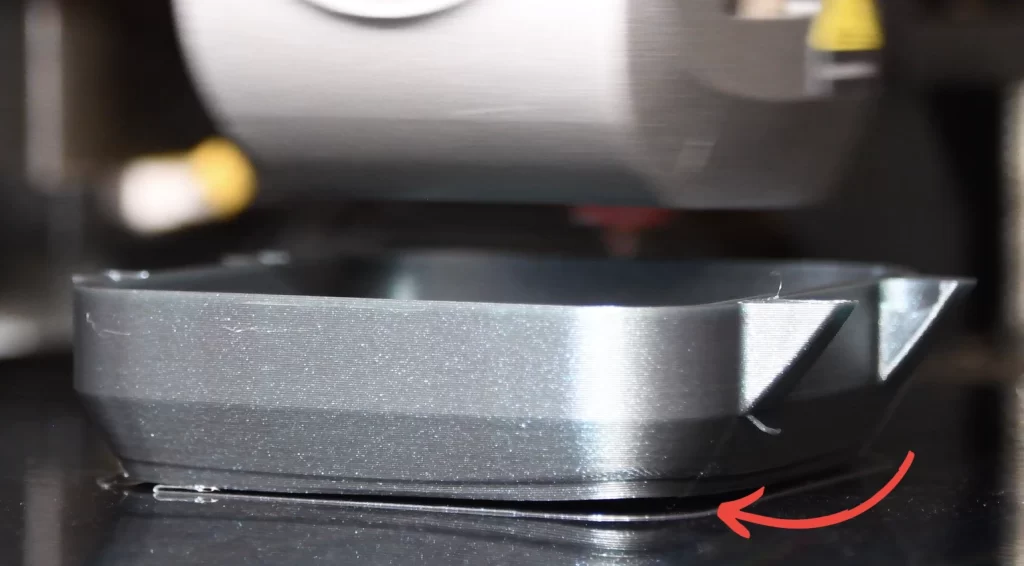
And then exactly what I had feared happened, the print bed adhesion was too weak and the first layer came off. I’m pretty sure that wouldn’t have happened with a PEI print bed.
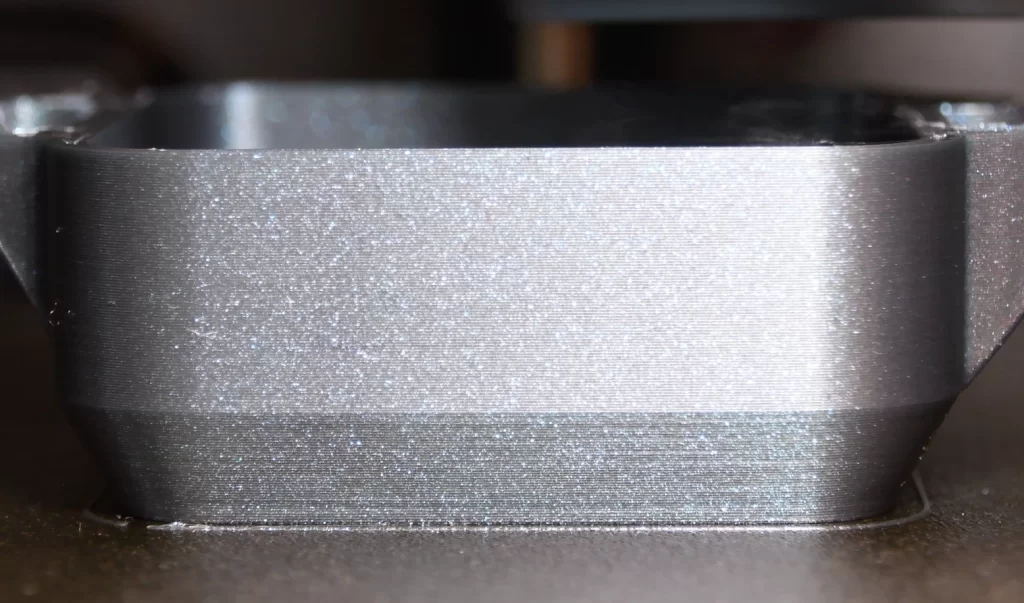
And it really worked! Here you can see no signs of the first layer peeling off. But why is that? And why did I know beforehand that this would happen?
To explain this, let’s take a little physical-chemical detour!
The adhesion between the filament and the PEI print bed is created by these effects:
- Mechanical adhesion: PEI print beds often have a rough surface, which increases the contact area and holds the filament in the recesses, both macroscopically, as with rough PEI, and microscopically, as with smooth PEI. Similar to a Velcro fastener.
- Van der Waals forces: These forces act between all objects in contact with each other and are stronger the larger the contact surface is. Geckos, for example, use these forces with billions of tiny hairs on their feet, which form a huge contact surface.
- Hydrogen bonds: PEI is highly polarized and can therefore form strong hydrogen bonds with polarized filaments such as PLA or ABS. Almost like countless small electrostatic magnets that attract each other.
- High surface energy: A high surface energy ensures that liquids wet the surface well. In the case of molten filament, this means that it can penetrate deep into the recesses of the print bed.
In contrast, PEY, PEO and H1H print beds are likely to be made of polypropylene, or PP for short. Although the mechanical adhesive properties and van der Waals forces are comparable, PP is not polar and cannot form hydrogen bonds. The surface energy is also very low and tends more towards the lotus effect, which makes the hot filament reluctant to flow into the small crevices in the surface.
That’s a pretty big difference!
And I’m now trying to find out exactly how big this difference is!
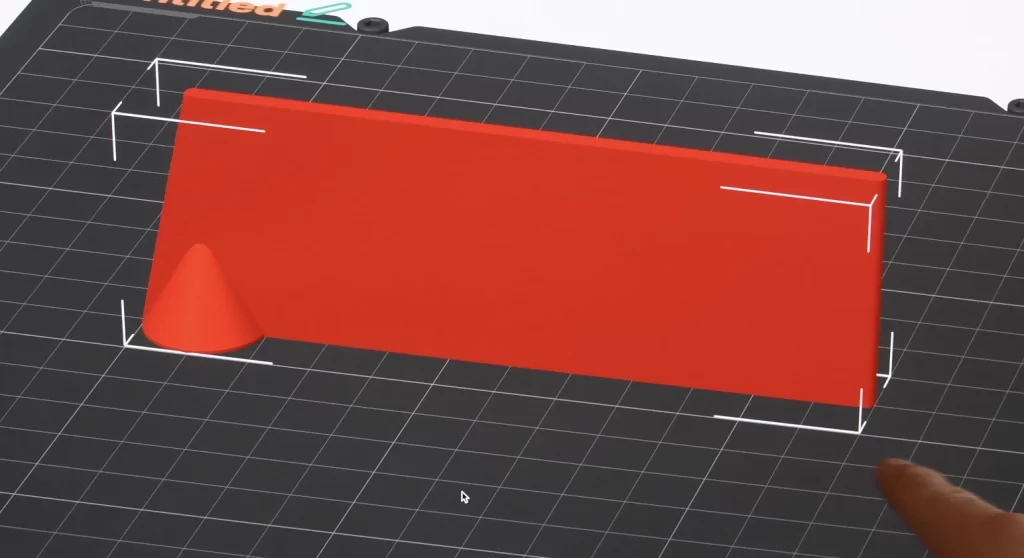
To do this, I’m printing this warping test on the different print beds. It is designed in such a way that the internal mechanical forces during cooling are so great that the pointed corner should detach from the print bed.
And if I’m not completely mistaken, the tip should detach more from the PEY, PEO and H1H than from the PEI.
And speaking of print bed adhesion, in this guide I show you how to make your prints adhere perfectly to any surface. However, for this test I used default settings because I can’t compare warping if everything would adhere perfectly.
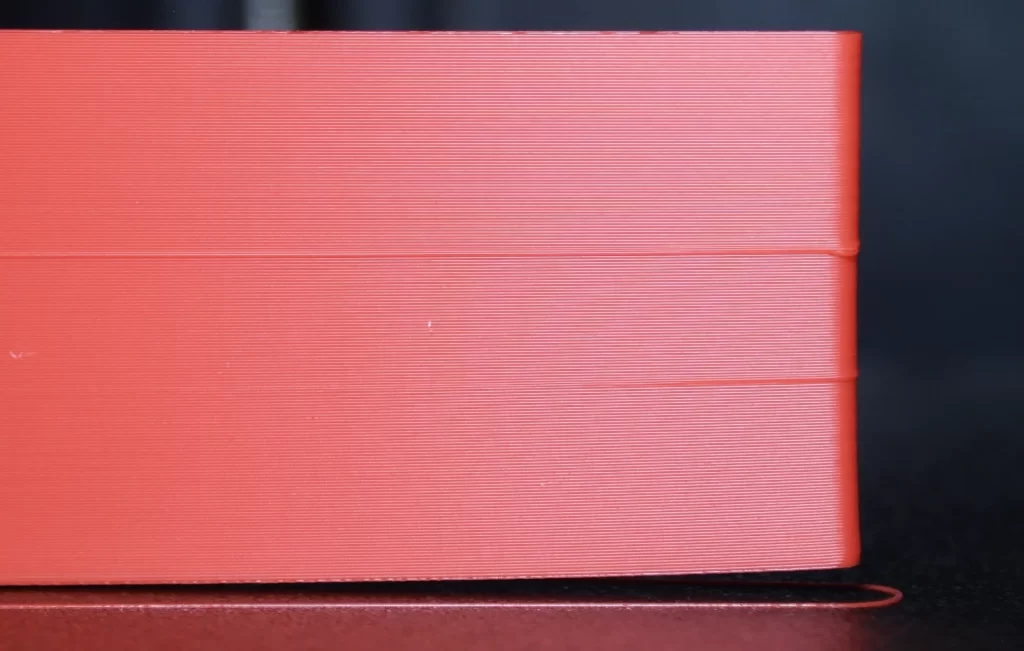
And all my thoughts were confirmed, but with a little surprise. As expected, the print bed adhesion of the two PEI print beds does not differ. The filament adheres much better to PEI than to PEY and H1H.
In comparison with PEO, however, there is not such a huge difference. The very rough surface seems to make up for many of the other material-related disadvantages.
So the answer to the original question is that PEI has won the direct comparison and therefore definitely remains my favorite print bed surface. Nevertheless, the holographic surfaces also have their place, as the effect looks pretty cool!
Disclosure: This website is the property of Martin Lütkemeyer and is operated by Martin Lütkemeyer. Martin Lütkemeyer is a member of the Amazon Services LLC and other Affiliate Programs. These are affiliate advertising programs designed to enable websites to earn advertising revenue through advertising and linking to Amazon.com and others. Links marked with * are affiliate links.
